


Water‑Powered Fire Effect: Arduino UNO + Neopixel Stick Project
Components and supplies
 |
| × | 1 | |||
| × | 1 | ||||
| × | 1 | ||||
| × | 1 | ||||
| × | 1 |
Necessary tools and machines
| ||||
 |
| |||
 |
|
About this project
This is a project I've had on the backburner for almost exactly 1 calendar year. The seed was planted when I toured the Harry Potter Studios last year and saw a fake fireplace effect being used quite extensively.
I am also an avid watcher of the "Fireplace for your Home" Netflix channel, so I eventually realized I needed one of these imitation fires of my own. So here we are now!
Take a look at what I put together, and if that curiosity is still burning keep reading for instructions to reproduce this project yourself.
Materials- Ultrasonic Mist Module
- Computer Fan
- 4 x AA battery holder
- Arduino Uno
- Portable Arduino Power Supply
- NeoPixel Stick
- 3D Printed Motherboard
- Fire Logs (found in local forest)
- Scraps of wood to build a stand (found in local scrap heap)
The instructions for this are actually pretty simple, basically you just need to get the materials, and put them all together. The only technical part is soldering the wires onto the NeoPixel stick, and uploading the code to the Arduino. So let's start with the NeoPixel LEDs.
Step 1: Get the LEDs WorkingStart by downloading and installing the NeoPixel Arduino Library found here. Prepare your NeoPixel stick to plug into the Arduino by soldering wires to the GND, DIN, and VIN leads located at the bottom of the stick.
Now plug GND into the GND pin on your Arduino, VIN into the 5V pin, and DIN to Pin 6 on the Arduino. If you run the example sketches included in the NeoPixel library, you should the lights working as expect.
Now you can upload the fire specific code I wrote found here. If you've plugged the NeoPixel into Pin 6, GND, and +5V, you should now get some bright orange lights.
Step 2: Assemble the "Fire Module"I'm calling the base unit of the fire the Fire Module, which describes the ziplock container with the customized lid that directs mist out of a slot and has places for many of the components.
The most important bit here is this 3d model. Print or order one of those. Once you've got it, cut out a hole in the ziploc lid (close to one edge rcommended), and use your glue gun to seal all the edges.
Once it is sturdy and in place, glue the computer fan in the square hole, and your arduino to the lid anywhere you like.
Glue the NeoPixel to the foremost edge of the 3d model. Once complete it should look something like this:
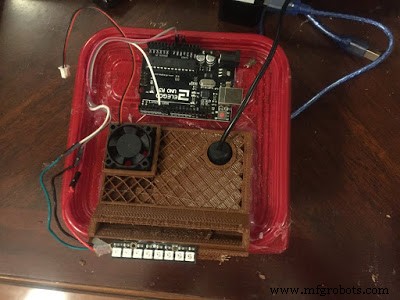
Now you've got the essentials, you just have to put it all together. Run the power chord for the mister through the hole in the motherboard, and close the lid. Be careful to ensure the mister is upright, and submerged in water, or no mist will come out.
Once you've got mist, add power to the Arduino from your power supply, and the computer fan from the pack of 4 AA batteries.
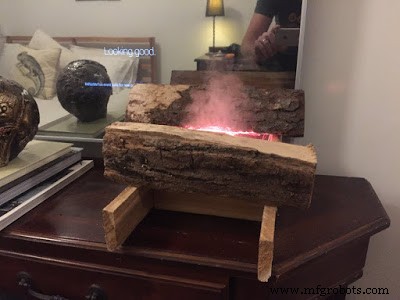
Now you should have something like this (egg nog optional):

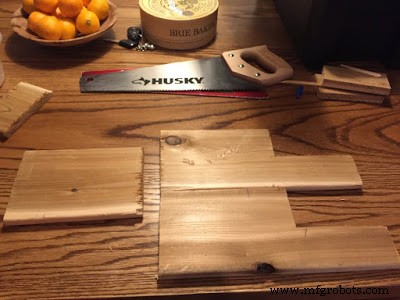
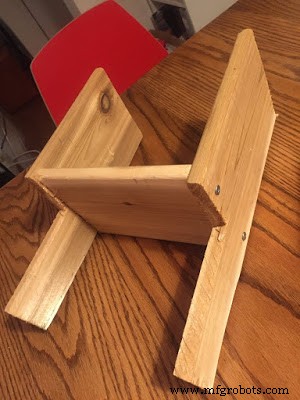
So you've got the guts done, now we've got to work on presentation. I just made a rudimentary frame, with a short shelf in the front, and a higher level in the back allowing me to direct the "flame" between the two logs.
You can see the template of my pieces here, followed by the finished product. I'm going to leave this last bit mostly up to you, as my solution is both pretty simple, and just hack. A shoe box would also probably work too.
And that's all there is! Time to sit by your new fireplace and enjoy.
Code
Arduino NeoPixel Fire Effect
Used to subtly vary the colour of orange produced for the fire effect.Manufacturing process
- How Lawn Sprinklers Work: Design, History, and Modern Manufacturing
- The Evolution of Pump‑Action Water Guns: From Invention to Global Market Leader
- Fire Hydrants: Design, Manufacturing, and Their Role in Urban Fire Safety
- Water: History, Types, and Modern Treatment Processes
- From Flint to Factory: The Evolution, Manufacturing, and Future of Handheld Saws
- Salt: Production, Uses, and Health Impact
- All‑Carbon 3‑D Nanofiltration Membrane Achieves 99 % Antibiotic Removal and Rapid Water Flux
- Water‑Tube vs. Fire‑Tube Boilers: Key Differences Explained
- 5 Key Benefits of IoT Smart Water Meters for Utilities and Consumers
- How to Eliminate Moisture in Compressed Air Systems