Interactive Joystick Game with Arduino and LED Feedback
Components and supplies
 | | × | 1 | |
 | | × | 1 | |
 | | × | 1 | |
 | | × | 1 | |
 | | × | 1 | |
| | Analog joystick (Generic) |
| × | 1 | |
About this project
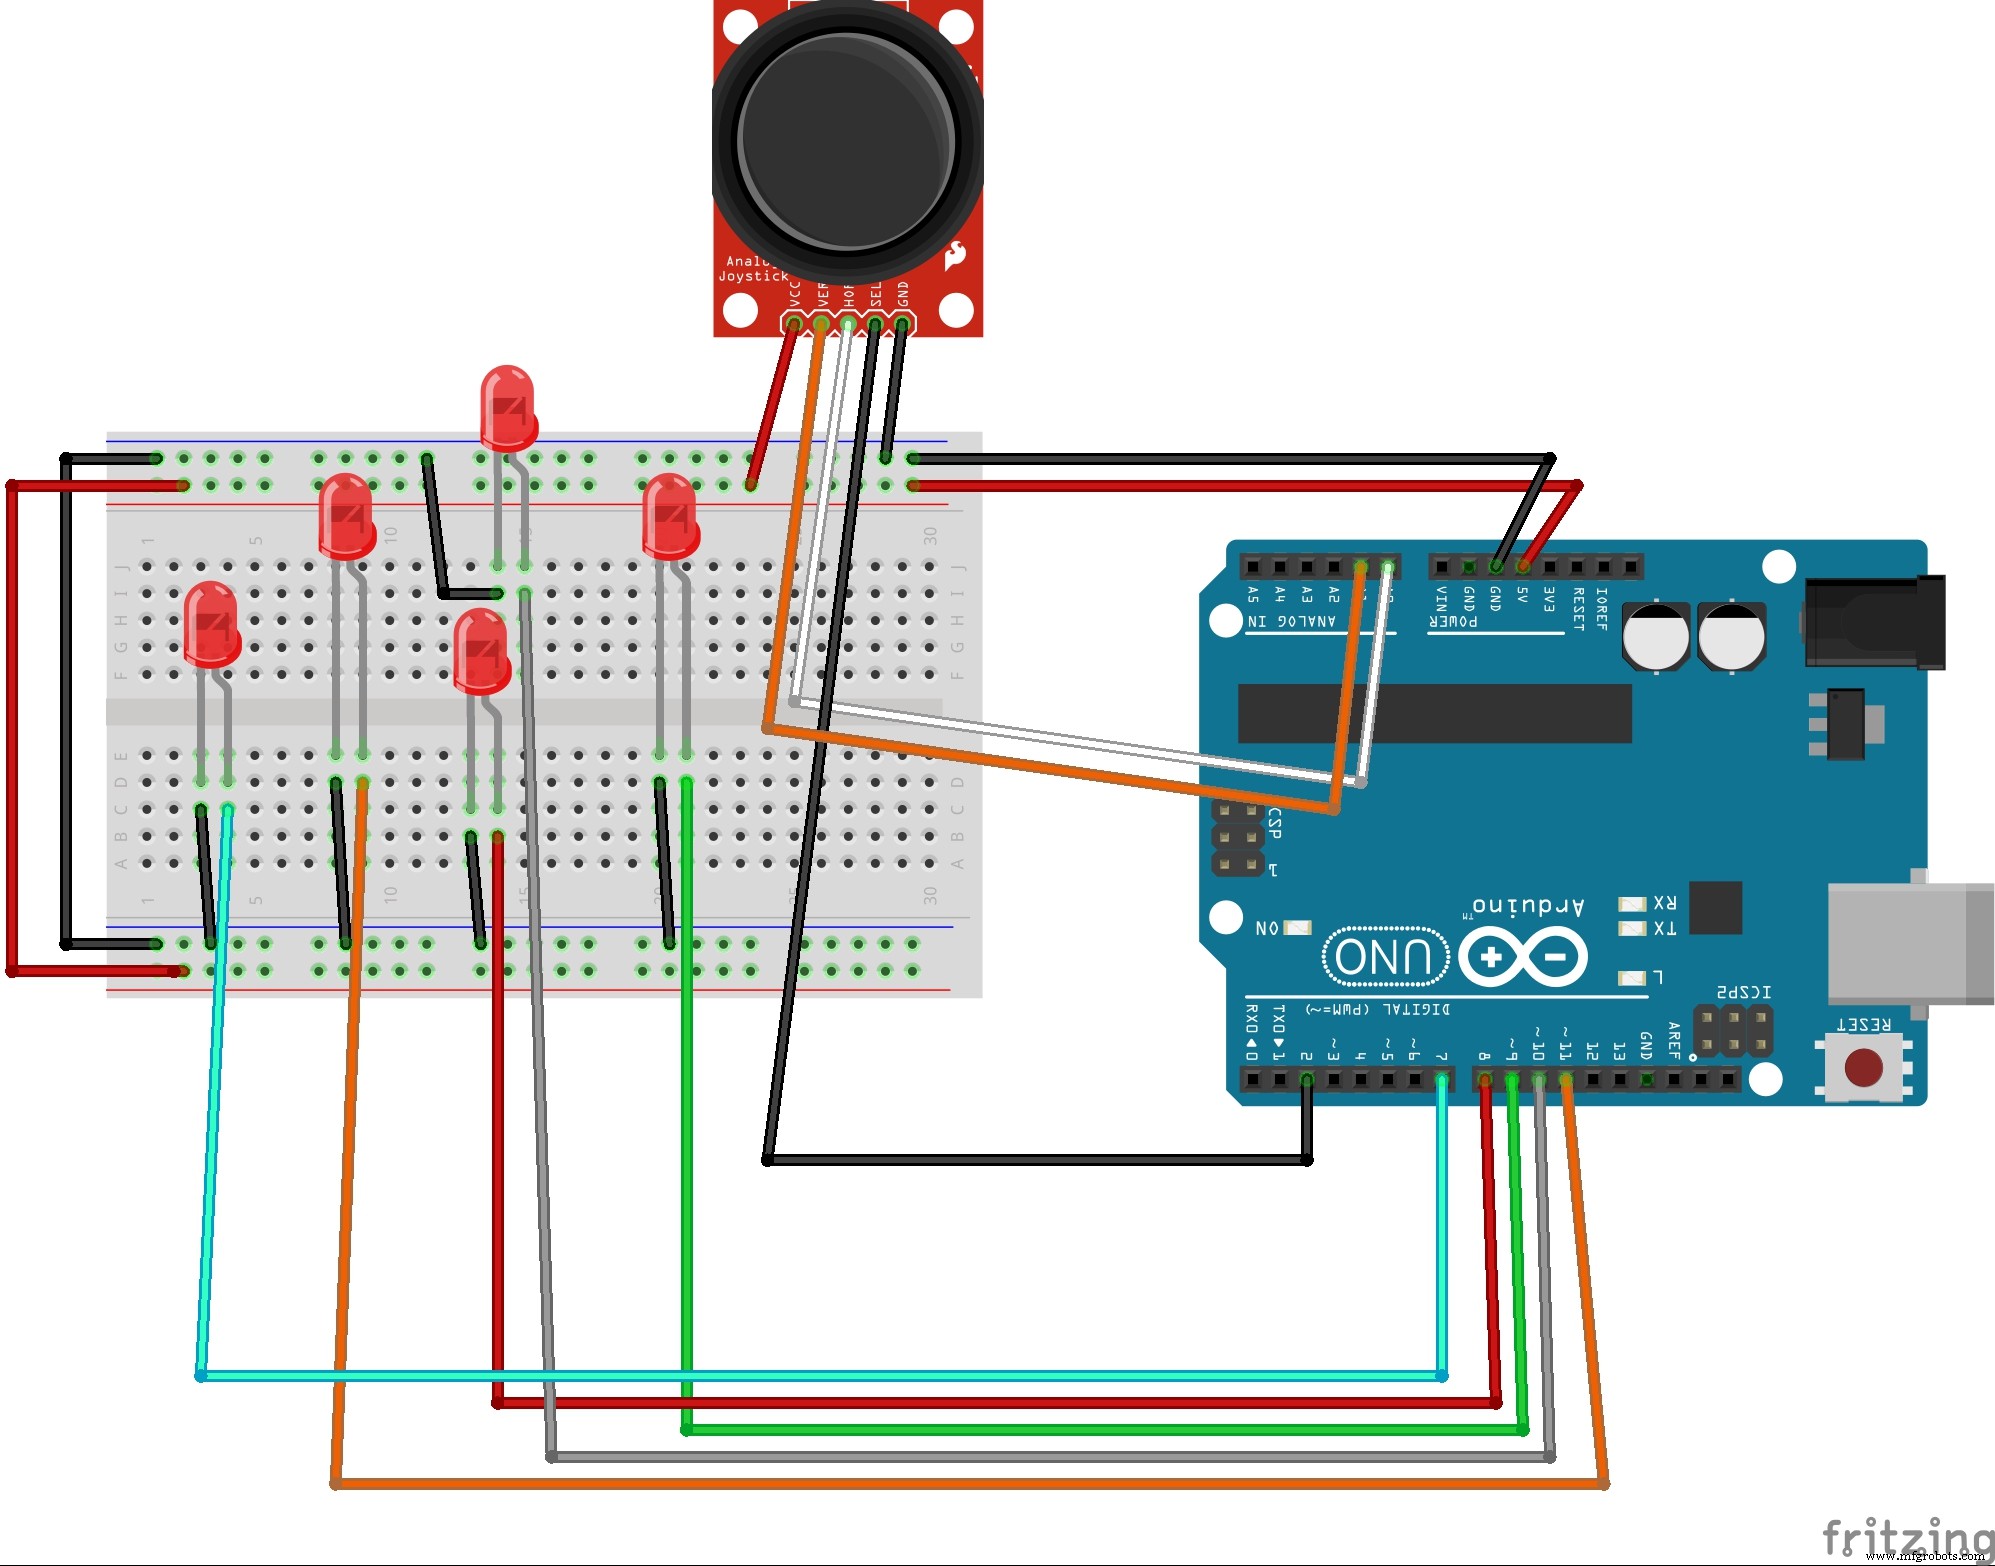
This is a project that uses a generic joystick and using the Arduino reads the +y and -y values and the +x and -x values and using a series of if and else statements will tell the 5 leds which led to turn on for ex: If you rock the joystick to the left your left led will light up. Another feature is that if your joystick has a button (most will) it will light up your button for your press down feature.
Code
The codeArduino
This is the code that you will paste into your editor in order to make this project work.#define joyX A0
#define joyY A1
int button=2;
int buttonState = 0;
int buttonState1 = 0;
void setup() {
pinMode(7,OUTPUT);
pinMode(button,INPUT);
digitalWrite(button, HIGH);
Serial.begin(9600);
pinMode(8,OUTPUT);
pinMode(9,OUTPUT);
pinMode(10,OUTPUT);
pinMode(11,OUTPUT);
}
void loop() {
int xValue = analogRead(joyX);
int yValue = analogRead(joyY);
Serial.print(xValue);
Serial.print("\t");
Serial.println(yValue);
buttonState = digitalRead(button);
Serial.println(buttonState);
if (xValue>=0 && yValue<=10)
{
digitalWrite(10, HIGH);
}
else{digitalWrite(10, LOW);}
if (xValue<=10 && yValue>=500)
{
digitalWrite(11, HIGH);
}
else{digitalWrite(11, LOW);}
if (xValue>=1020 && yValue>=500)
{
digitalWrite(9, HIGH);
}
else{digitalWrite(9, LOW);}
if (xValue>=500 && yValue>=1020)
{
digitalWrite(8, HIGH);
}
else{digitalWrite(8, LOW);}
if (xValue>=1020 && yValue>=1020)
{
digitalWrite(9, LOW);
digitalWrite(8, LOW);
}
if (buttonState == LOW)
{
Serial.println("Switch = High");
digitalWrite(7, HIGH);
}
else{digitalWrite(7, LOW);}
buttonState1 = digitalRead(7);
Serial.println(buttonState1);
delay(100);
}
Schematics
This will help you to connect all your components together as the wiring in my image was a mess.