Build a Ninja Dollar LCD Game with Arduino UNO
Components and supplies
 | | × | 1 | |
 | | Adafruit Standard LCD - 16x2 White on Blue |
| × | 1 | |
 | | × | 2 | |
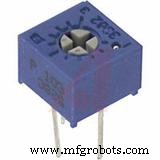 | | Single Turn Potentiometer- 10k ohms |
| × | 1 | |
 | | × | 2 | |
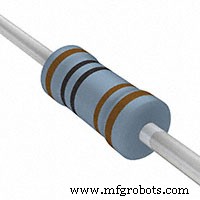 | | × | 4 | |
 | | SparkFun Pushbutton switch 12mm |
| × | 2 | |
 | | × | 1 | |
 | | × | 1 | |
About this project
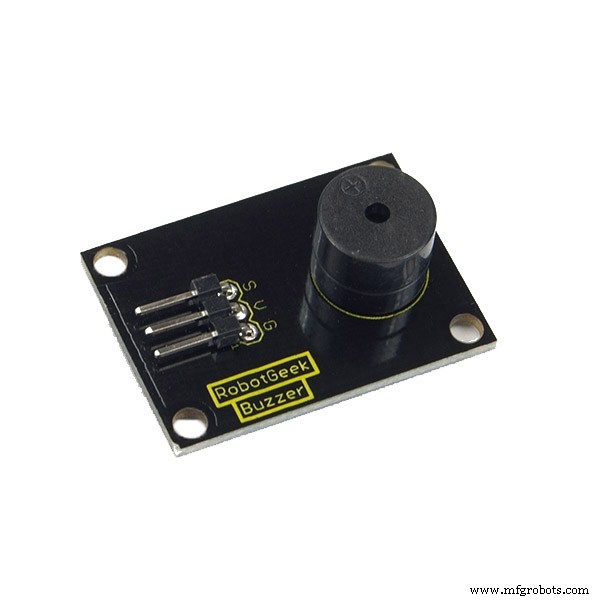
This is a simple LCD game. My inspiration was the Google Chrome's Dinosaur game but I added a few more changes to it. The dollar warrior moves constantly and he can jump to avoid the obstacles and collect the "star" points. If he jumps over the obstacle, he collects one point and if he catches the star, he collects five points. He can also shoot and remove the obstacles in front of him. There are also led diodes which indicate whether he jumps or shoots. When he collects 10, 20 or 30 points he starts moving faster than before. When he collects 50 points, you win. If you hit the obstacle you lose. Of course, you can change these boundaries easily in the code. I also added passive buzzer which makes sound when the warrior jumps or shoots and special melody when you lose or win. This is my first project here and I hope you like it. Give me your comments and reviews.
The video
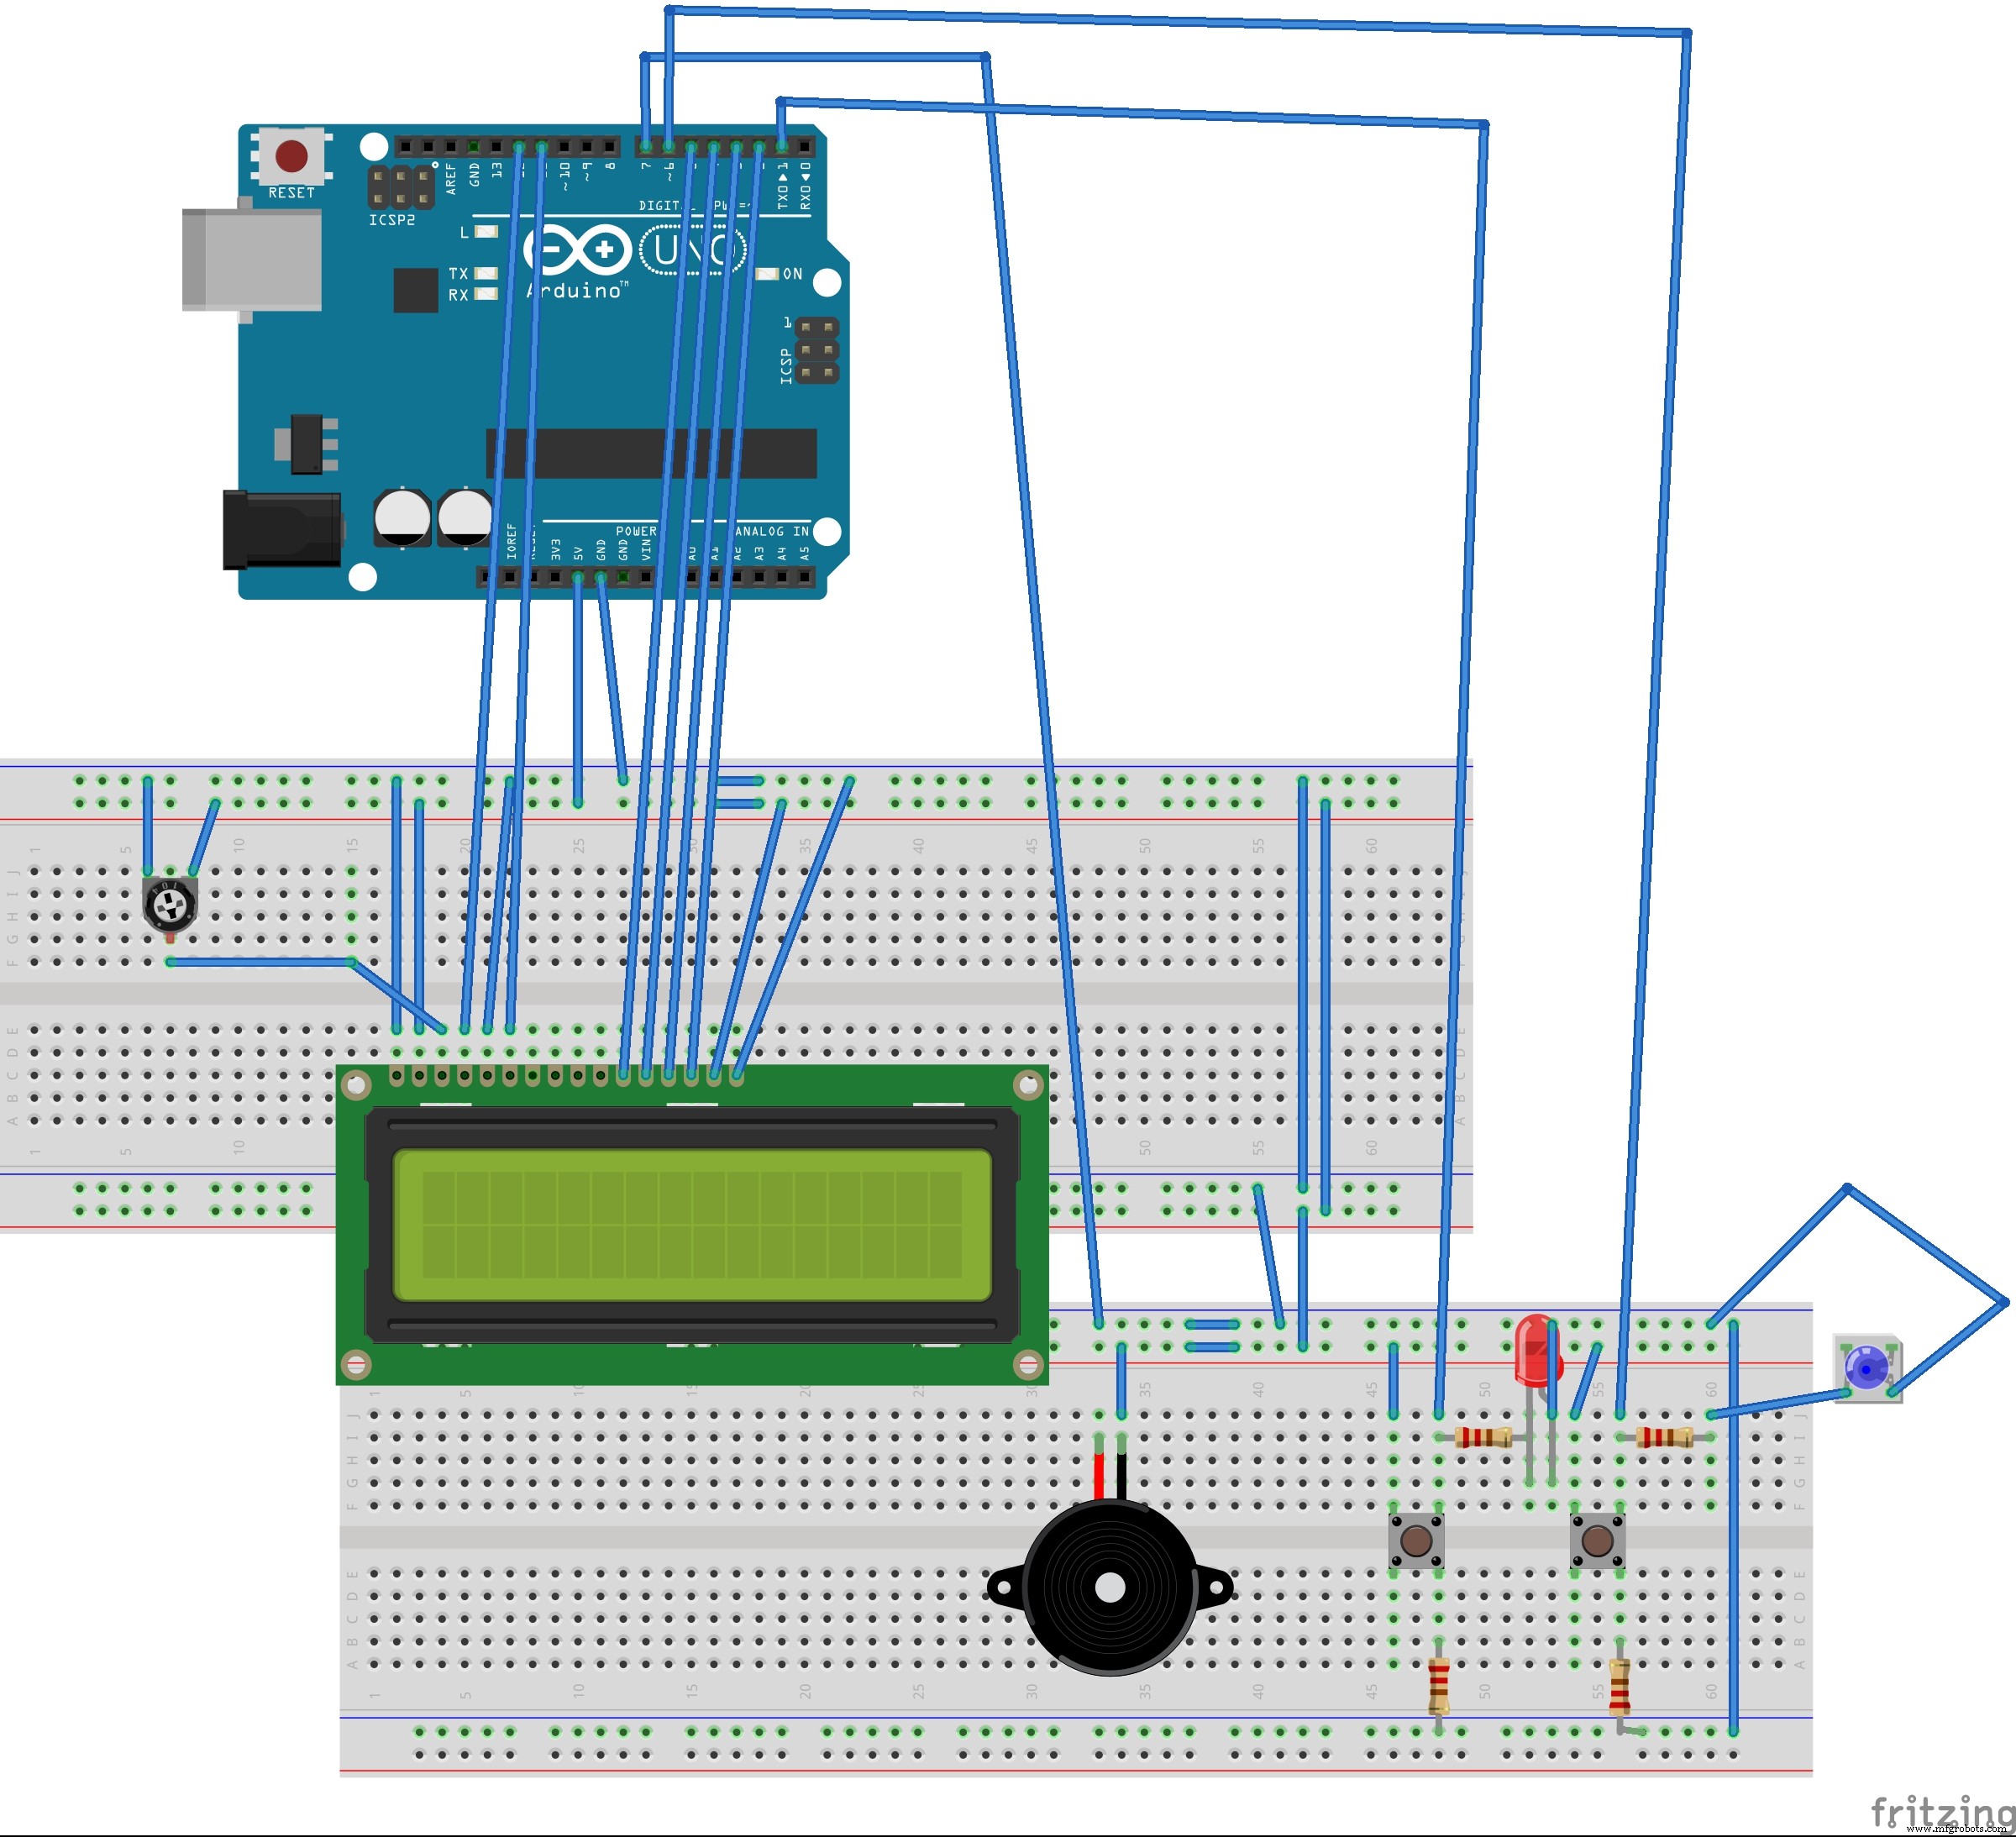
ConnectionsThe LCD (Liquid Crystal Display) module has a 16-pin male header on the underside. Plug this into the breadboard as shown in the picture. All of the electronic signals that power and control the LCD go through this header.
These pins are (from left to right):
- GND - power ground signal
- VCC - positive power signal
- D0 - data bit 0 (not used here)
- D1 - data bit 1 (not used here)
- D2 - data bit 2 (not used here)
- D3 - data bit 3 (not used here)
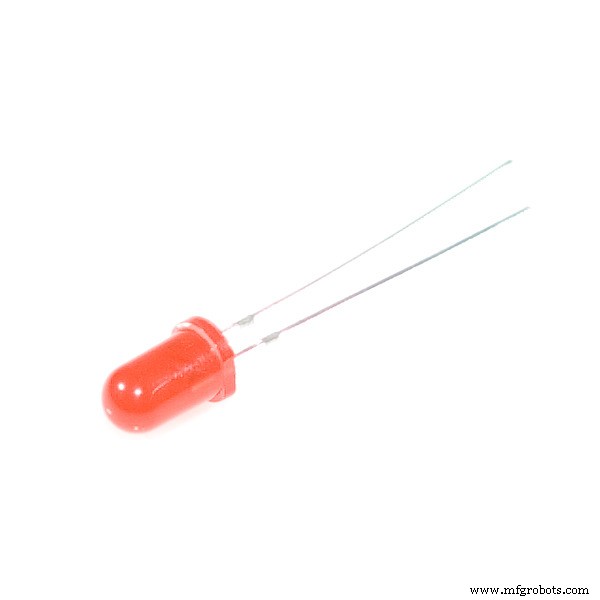
- A - backlight LED positive
- K - backlight LED negative
Use a jumper wire to connect the 5V signal on the Arduino with the red row at the top of the breadboard.
Use a jumper wire to connect the GND signal on the Arduino with the blue row at the top of the breadboard.
- Connect VSS pin to the ground
- Connect VDD pin to the 5V signal
- V0 pin to the potentiometer output pin
Connect remaining potentiometer pins to the 5V signal and the GND signal.
If you have 3 pinned piezo buzzer connect the S pin to the Arduino 7 pin, the '-' pin to the GND and the remaining pin to the 5V signal. If you have 2 pinned piezo buzzer, connect one pin to the GND signal and the other to the Arduino 7 pin.
Connect switch buttons according to the schematics. The first button (jump button) is connected to the Arduino pin 1 and the second(shoot button) is connected to the Arduino pin 6. The leds are controlled only by the buttons and not by Arduino. Anode is connected to the button pin which is connected to the Arduino and cathode is connected to the ground.
Code
dollar_warriorArduino
#include <LiquidCrystal.h>


const int rs = 12, en = 11, d4 = 5, d5 = 4, d6 = 3, d7 = 2;
const int buttonPin1=1;
const int buttonPin2=6;
const int buzzer=7;
unsigned long pts=0;
//set buttonstates
bool buttonState1=0;
bool buttonState2=0;
//random number for position of obstacles
int randomNums[6];
//random number for number of obstacles
int randomNum=0;
//random number for position of pts
int randomNums1[3];
//random number for number of pts
int randomNum1=0;
//start delay time, which decreases gradually
unsigned int myDelay=500;
//made this boolean to check if button2 is pressed because if it's pressed once in the first for loop i want obstacles not to be written until the end of it
bool temp=0;
//this variable stores the positions of the warrior while he shoots. there can be 16 positions because the warrior has 16 positions.
int tempI[16];
//i use this boolean to check if the point is catched
bool temp1=0;

//use this variable to store the position of the catched point. it must be and array to store the position of all the points in one iteration of the first for loop. if it stored just one position, then the "old" point would come back in the new iteration
int tempI1[3];
//use this variable to have a number of shots of the warrior, which is also the length of an array tempI
int button2IsPressed=0;
LiquidCrystal lcd(rs, en, d4, d5, d6, d7);

void setup() {
  // set up the LCD's number of columns and rows:
  lcd.begin(16, 2);
  // set buttonpin mode
  pinMode(buttonPin1,INPUT);
  pinMode(buttonPin2,INPUT);
  pinMode(buzzer,OUTPUT);
  lcd.setCursor(4,0);
  lcd.print("THE GAME");
  lcd.setCursor(2,1);
  lcd.print("STARTS IN ");
  lcd.print("5");
  delay(1000);
  lcd.setCursor(12,1);
  lcd.print("4");
  delay(1000);
  lcd.setCursor(12,1);
  lcd.print("3");
  delay(1000);
  lcd.setCursor(12,1);
  lcd.print("2");
  delay(1000);
  lcd.setCursor(12,1);
  lcd.print("1");
  delay(1000);
  lcd.clear();

}

void loop() {
  here:


  randomNum=random(5);
  for(int i=0; i<randomNum; ++i){
  randomNums[i]=random(16);}
   randomNum1=random(3);
  for(int i=0; i<randomNum1; ++i){
  randomNums1[i]=random(16);
  }
  //i reset temp variable before every new for loop because the cycle of the moving warrior starts again
  temp=0;
  for(int j=0; j<3; ++j){
  tempI1[j]=0;
  }
  button2IsPressed=0;
//loop that writes dollar(warrior) on the lcd which jumps everytime button is pressed
    for(int i=0; i<16; ++i){


          //pts must be written here because of the lcd.clear() below (pts wouldn't be written down the whole time otherwise)
          //i must check if pts is greater than 9 or 99 etc to know how many gaps i should  leave for the number. the more points are collected, the smaller delay time is and the faster is dollar
          if(pts>9 && pts<20)
          {lcd.setCursor(14,0);
           myDelay=400;
          }
          else if(pts>19 && pts<30) {
            lcd.setCursor(14,0);
            myDelay=300;
          }
          else if(pts>29 && pts<50)
          {
            myDelay=200;
            lcd.setCursor(14,0);
          }

          else if(pts>=50){
            pts=0;
            myDelay=500;
            lcd.clear();
            lcd.setCursor(5,0);
            lcd.print("VICTORY");
            tone(buzzer,262);
            delay(200);
            tone(buzzer,330);
            delay(200);
            tone(buzzer,392);
            delay(100);
            tone(buzzer,330);
            delay(100);
            tone(buzzer,392);
            delay(100);
            tone(buzzer,523);
            delay(200);
            noTone(buzzer);
            delay(3000);
            lcd.clear();
            goto here;
            }
          else lcd.setCursor(15,0);
          lcd.print(pts);

         buttonState1=digitalRead(buttonPin1);
         buttonState2=digitalRead(buttonPin2);
 //setting obstacles if the warrior didn't shoot or he shot but he also jumped
 if(!temp){
          for(int j=0; j<randomNum; ++j){
          lcd.setCursor(randomNums[j],1);
          lcd.print("#");
       }
 }
 //checking if the warrior  had shot but there were obstacles before him, we want those obstacles to stay
 else{
  for(int j=0; j<randomNum; ++j){
 //i check only the tempI[0] position because that's the when the warrior shot for the first time and he removed all the remaining obstacles
    if(tempI[0]>randomNums[j]){
      lcd.setCursor(randomNums[j],1);
      lcd.print("#");

      }

      }
  }


//setting pts
if(!temp1){
          for(int j=0; j<randomNum1; ++j){
          lcd.setCursor(randomNums1[j],0);

          lcd.print("*");

          }
}
else{
  for(int j=0; j<randomNum1; ++j){

   if(randomNums1[j]!=tempI1[j]){
    lcd.setCursor(randomNums1[j],0);
    lcd.print("*");
    }
  }
  }


          //if the button is pressed we set the cursor up (so that our warrior jumps)
          if(buttonState1==HIGH)
          {lcd.setCursor(i,0);
          tone(buzzer,131);
          delay(200);
          noTone(buzzer);
          }
          else lcd.setCursor(i,1);

          lcd.print("$");

          //if button2 is pressed our warrior shoots. i had to put this loop here so that warrior shoots from his current spot and then continues to move. that's why delay time is 5 so that this loop finishes as soon as possible
           if (buttonState2==HIGH)
         {
          tone(buzzer,175);
         delay(100);
         noTone(buzzer);

          temp=1;
          //if the button1 is low then we remove all the obstacles. that's why the state if temp variable is changed
          if(buttonState1==LOW)
          {

            tempI[button2IsPressed]=i;
          }
          ++button2IsPressed;
          for(int k=i+1; k<16; ++k){
          //if the buton1 is low then warrior shoots in the second row. otherwise it shoots in the first row
          if(buttonState1==LOW)
          lcd.setCursor(k,1);
          else lcd.setCursor(k,0);
          lcd.print("~");
          delay(5);
          if(buttonState1==LOW)
          lcd.setCursor(k-1,1);
          else lcd.setCursor(k-1,0);
          lcd.print(" ");
          delay(5);


          }
         }

           delay(myDelay);
          lcd.clear();
           //checking if the positions of the pts and the warrior are the same and if the button is pressed because then they collide and we gain 5 extra points
           for(int j=0; j<randomNum1; ++j){
          if(i==randomNums1[j] && buttonState1==HIGH){
           temp1=1;
           tempI1[j]=i;
           pts+=5;
           }
           }


          //checking if the positions of the obstacle and the warrior are the same and if the button1 is not pressed, then they collide and it is the end of the game
          for(int j=0; j<randomNum; ++j){
         if(i==randomNums[j] && buttonState1==LOW && temp==0) {

         pts=0;
         myDelay=500;
         lcd.clear();
         lcd.setCursor(6,0);
         lcd.print("GAME");
         lcd.setCursor(6,1);
         lcd.print("OVER");
         tone(buzzer,349);
         delay(200);
         tone(buzzer, 277);
         delay(200);
         tone(buzzer,220);
         delay(100);
         tone(buzzer,277);
         delay(100);
         tone(buzzer,220);
         delay(200);
         noTone(buzzer);
         delay(3000);
         lcd.clear();
         //i must skip the for loop because otherwise the game would continue where it ended
          goto here;

         }
         //counting number of skipped obstacles and that would be our points
         else if(i==randomNums[j] && buttonState1==HIGH) ++pts;
          }


      }


}
Schematics
game_aUIjA6VZxX.fzz