


Musical Board Books: Boosting Mood & Memory for All Ages
Components and supplies
 |
| × | 1 |
Necessary tools and machines
 |
|
About this project
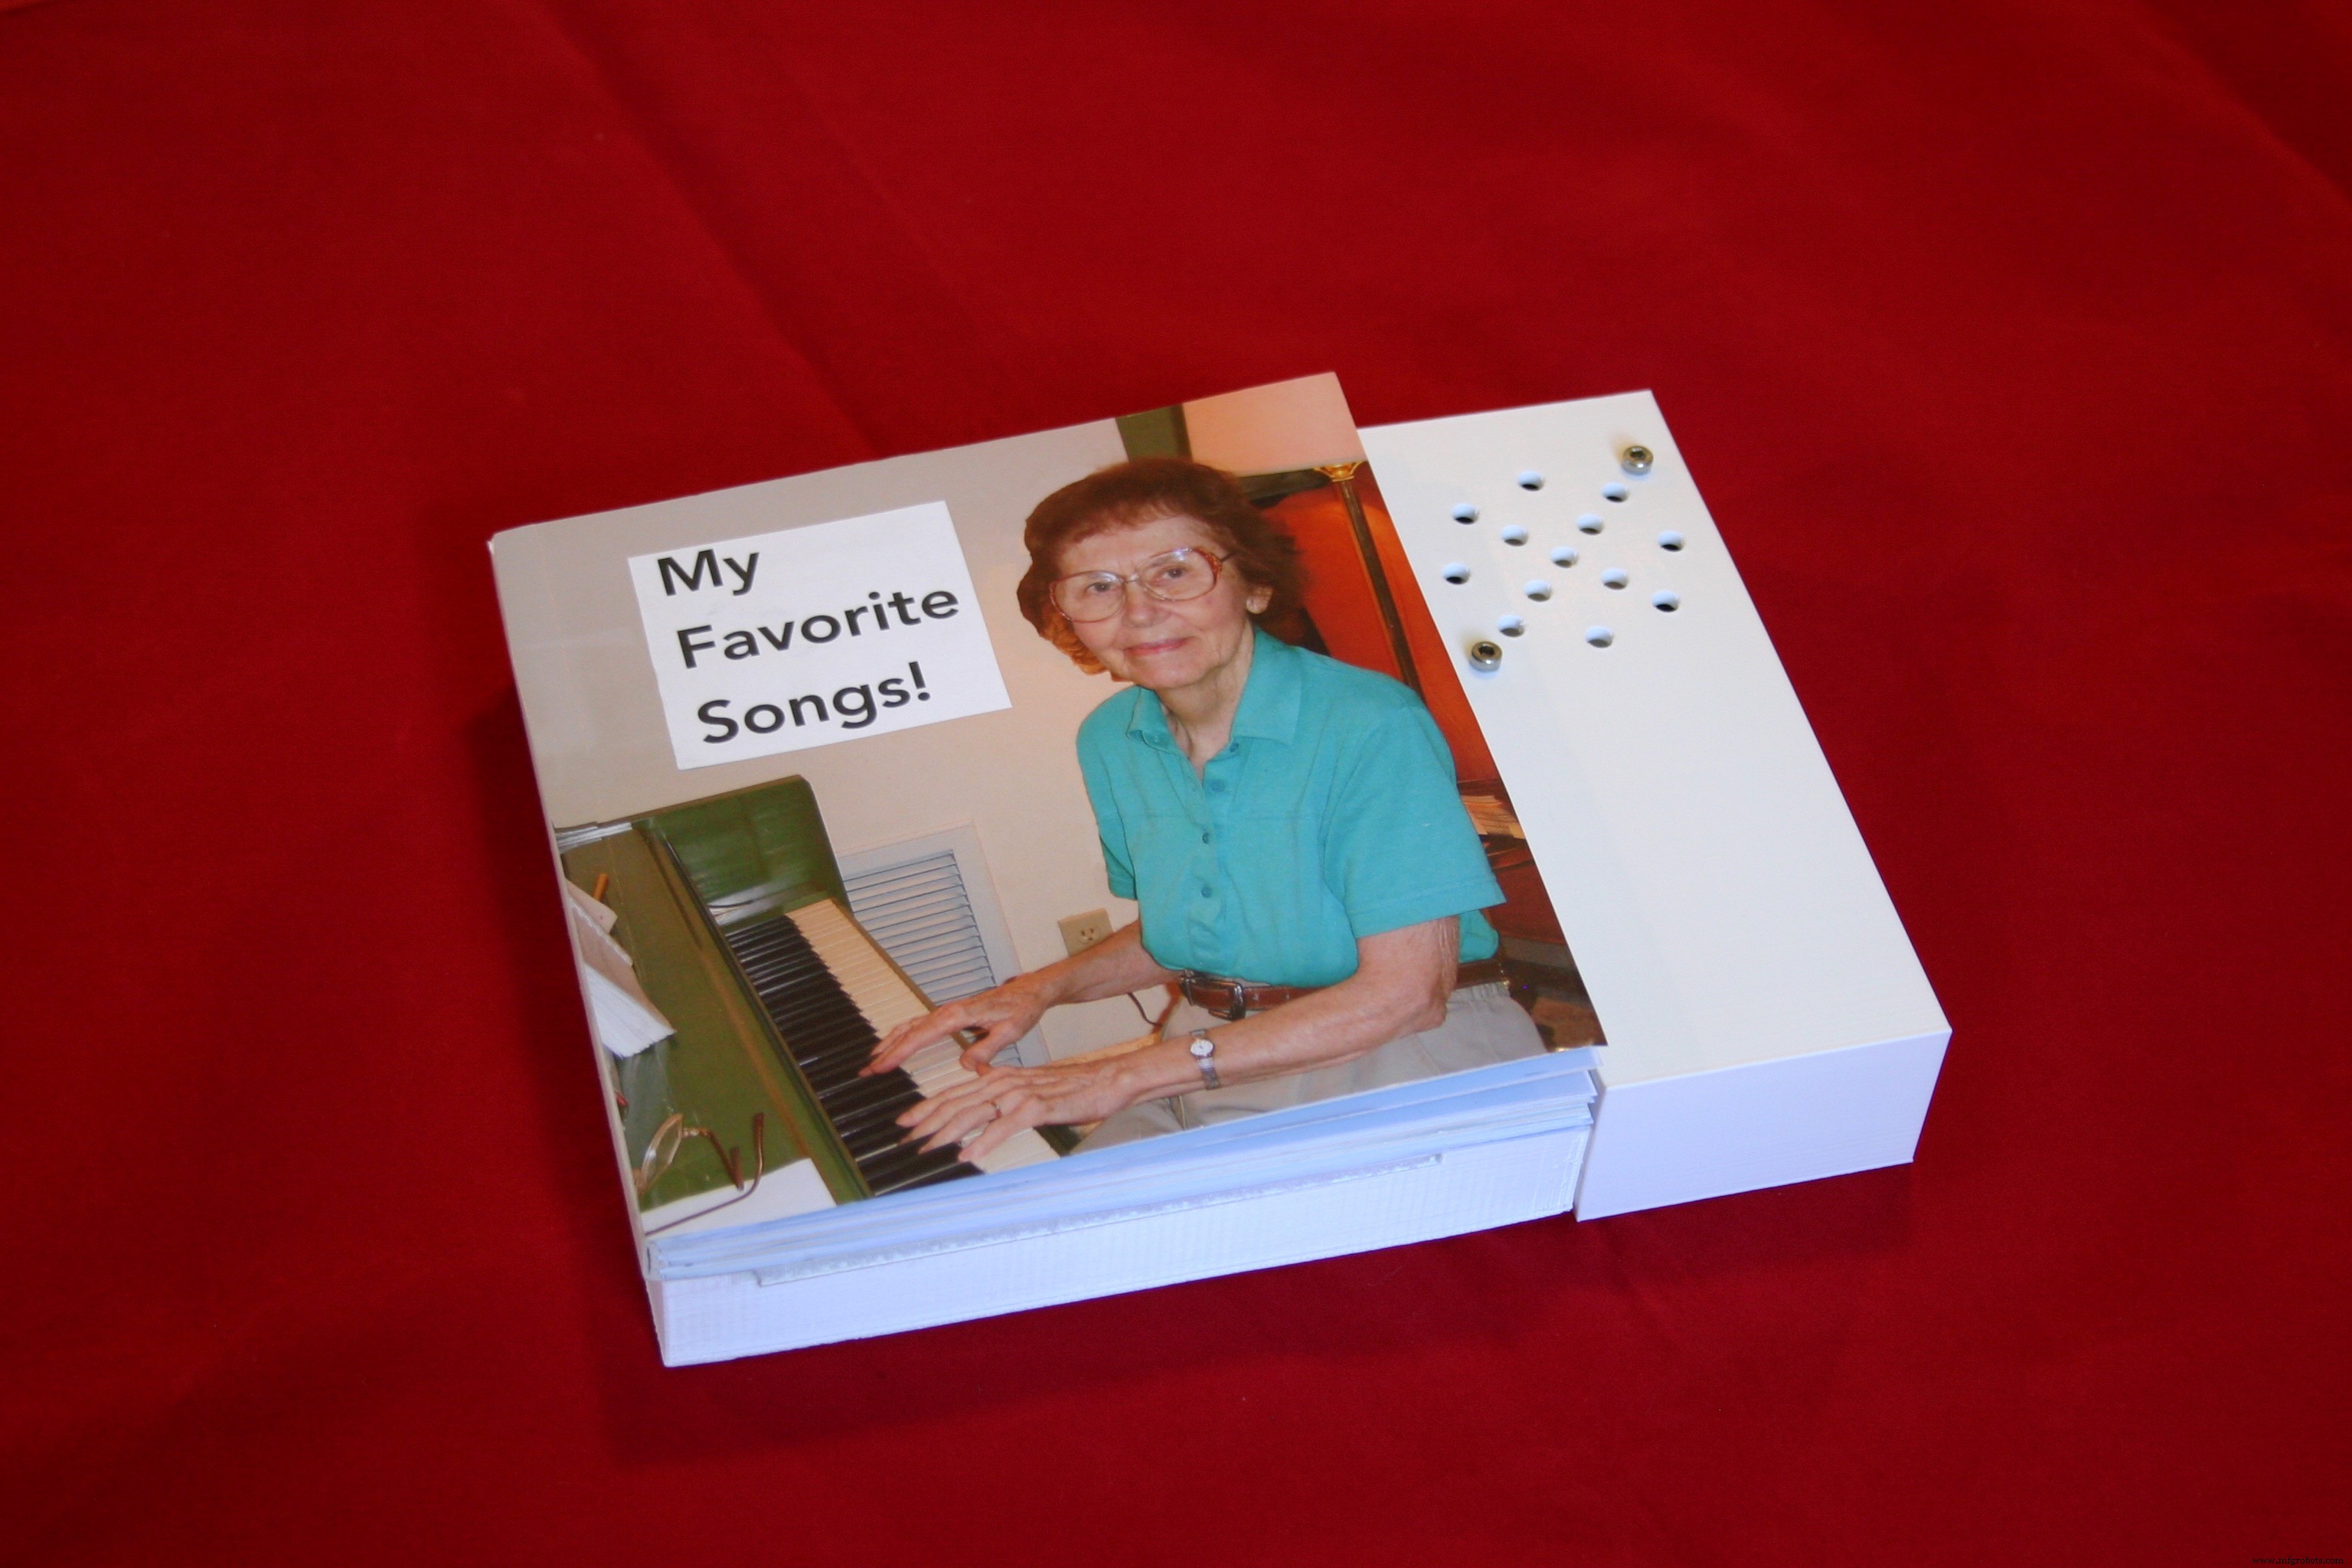
Music benefits people. From toddlers to seniors, music enhances moods, promotes health, and stimulates memory. Recently we shared a children’s musical board book with Annelle's mother who has Alzheimer’s. We were amazed at how alert and happy she became when she heard the familiar songs. Wouldn’t it be wonderful if Mom could have her own book with age appropriate music? Notable Board Books are customizable, interactive books containing personalized music and pictures. To encourage sing-alongs, Notable Board Books include an audible track with instrumental and vocal music. We are trying to eliminate all buttons and switches. The book will go into "ready" mode when picked up and will play the page that is selected by the user.
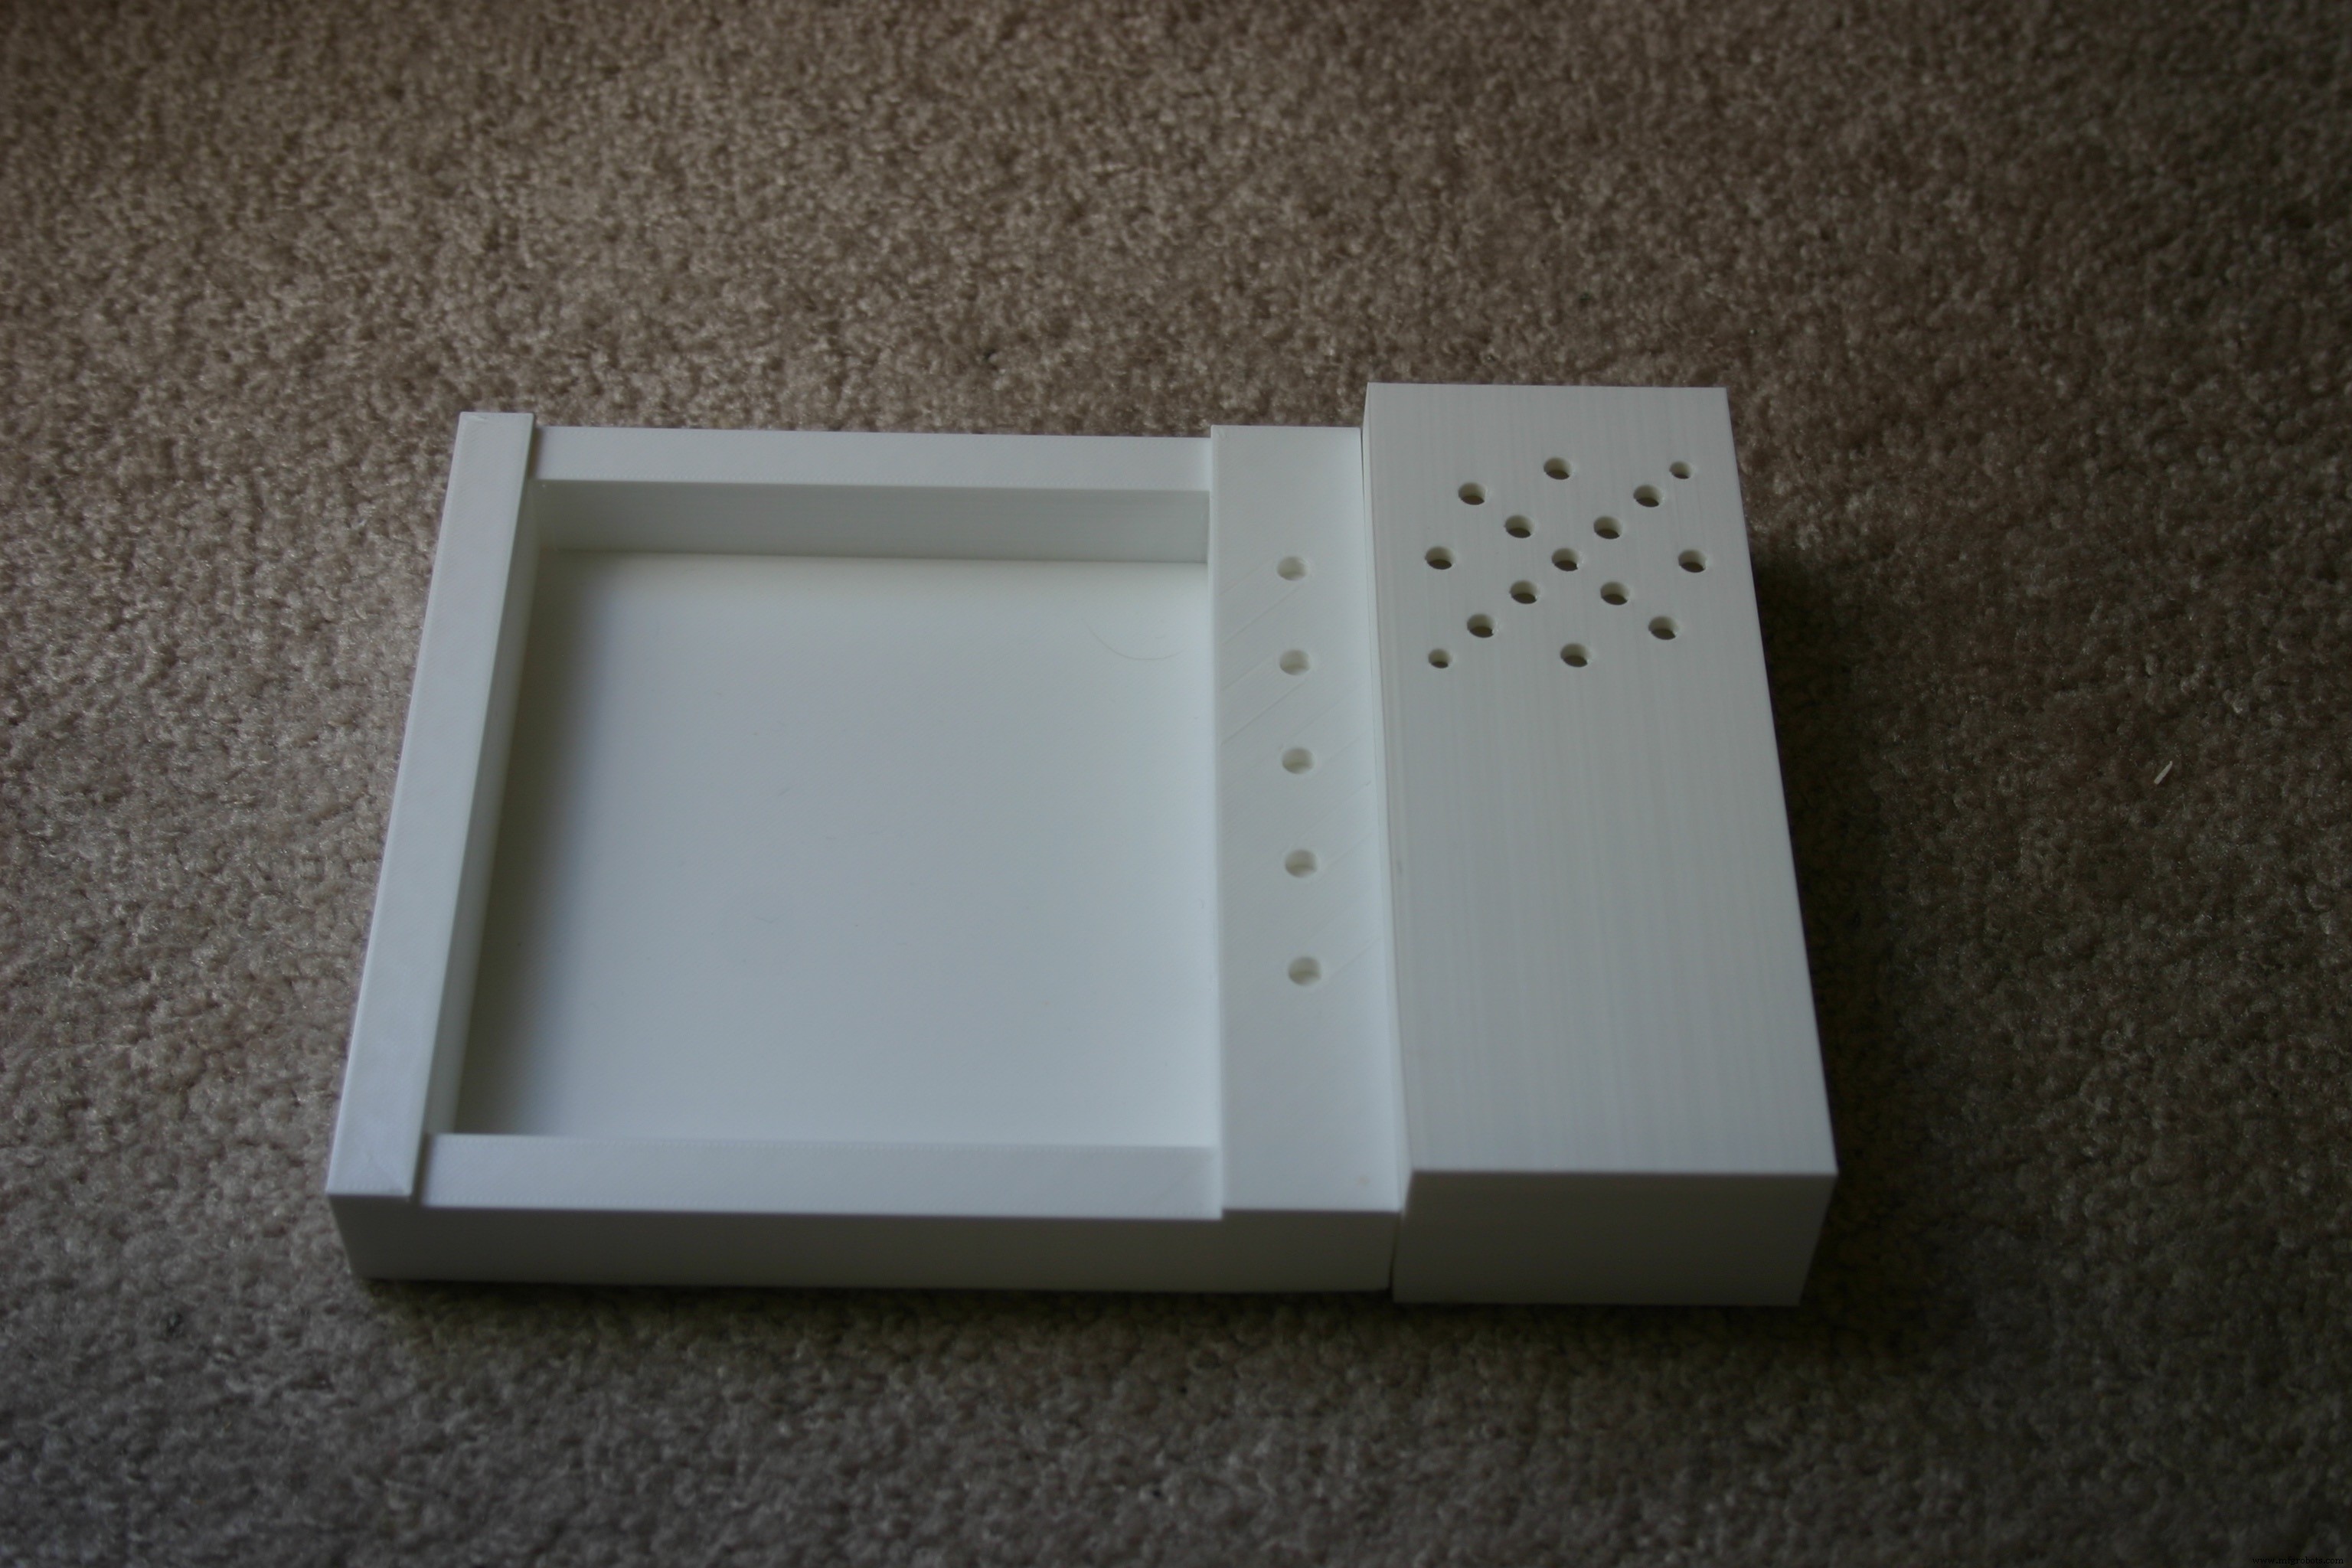
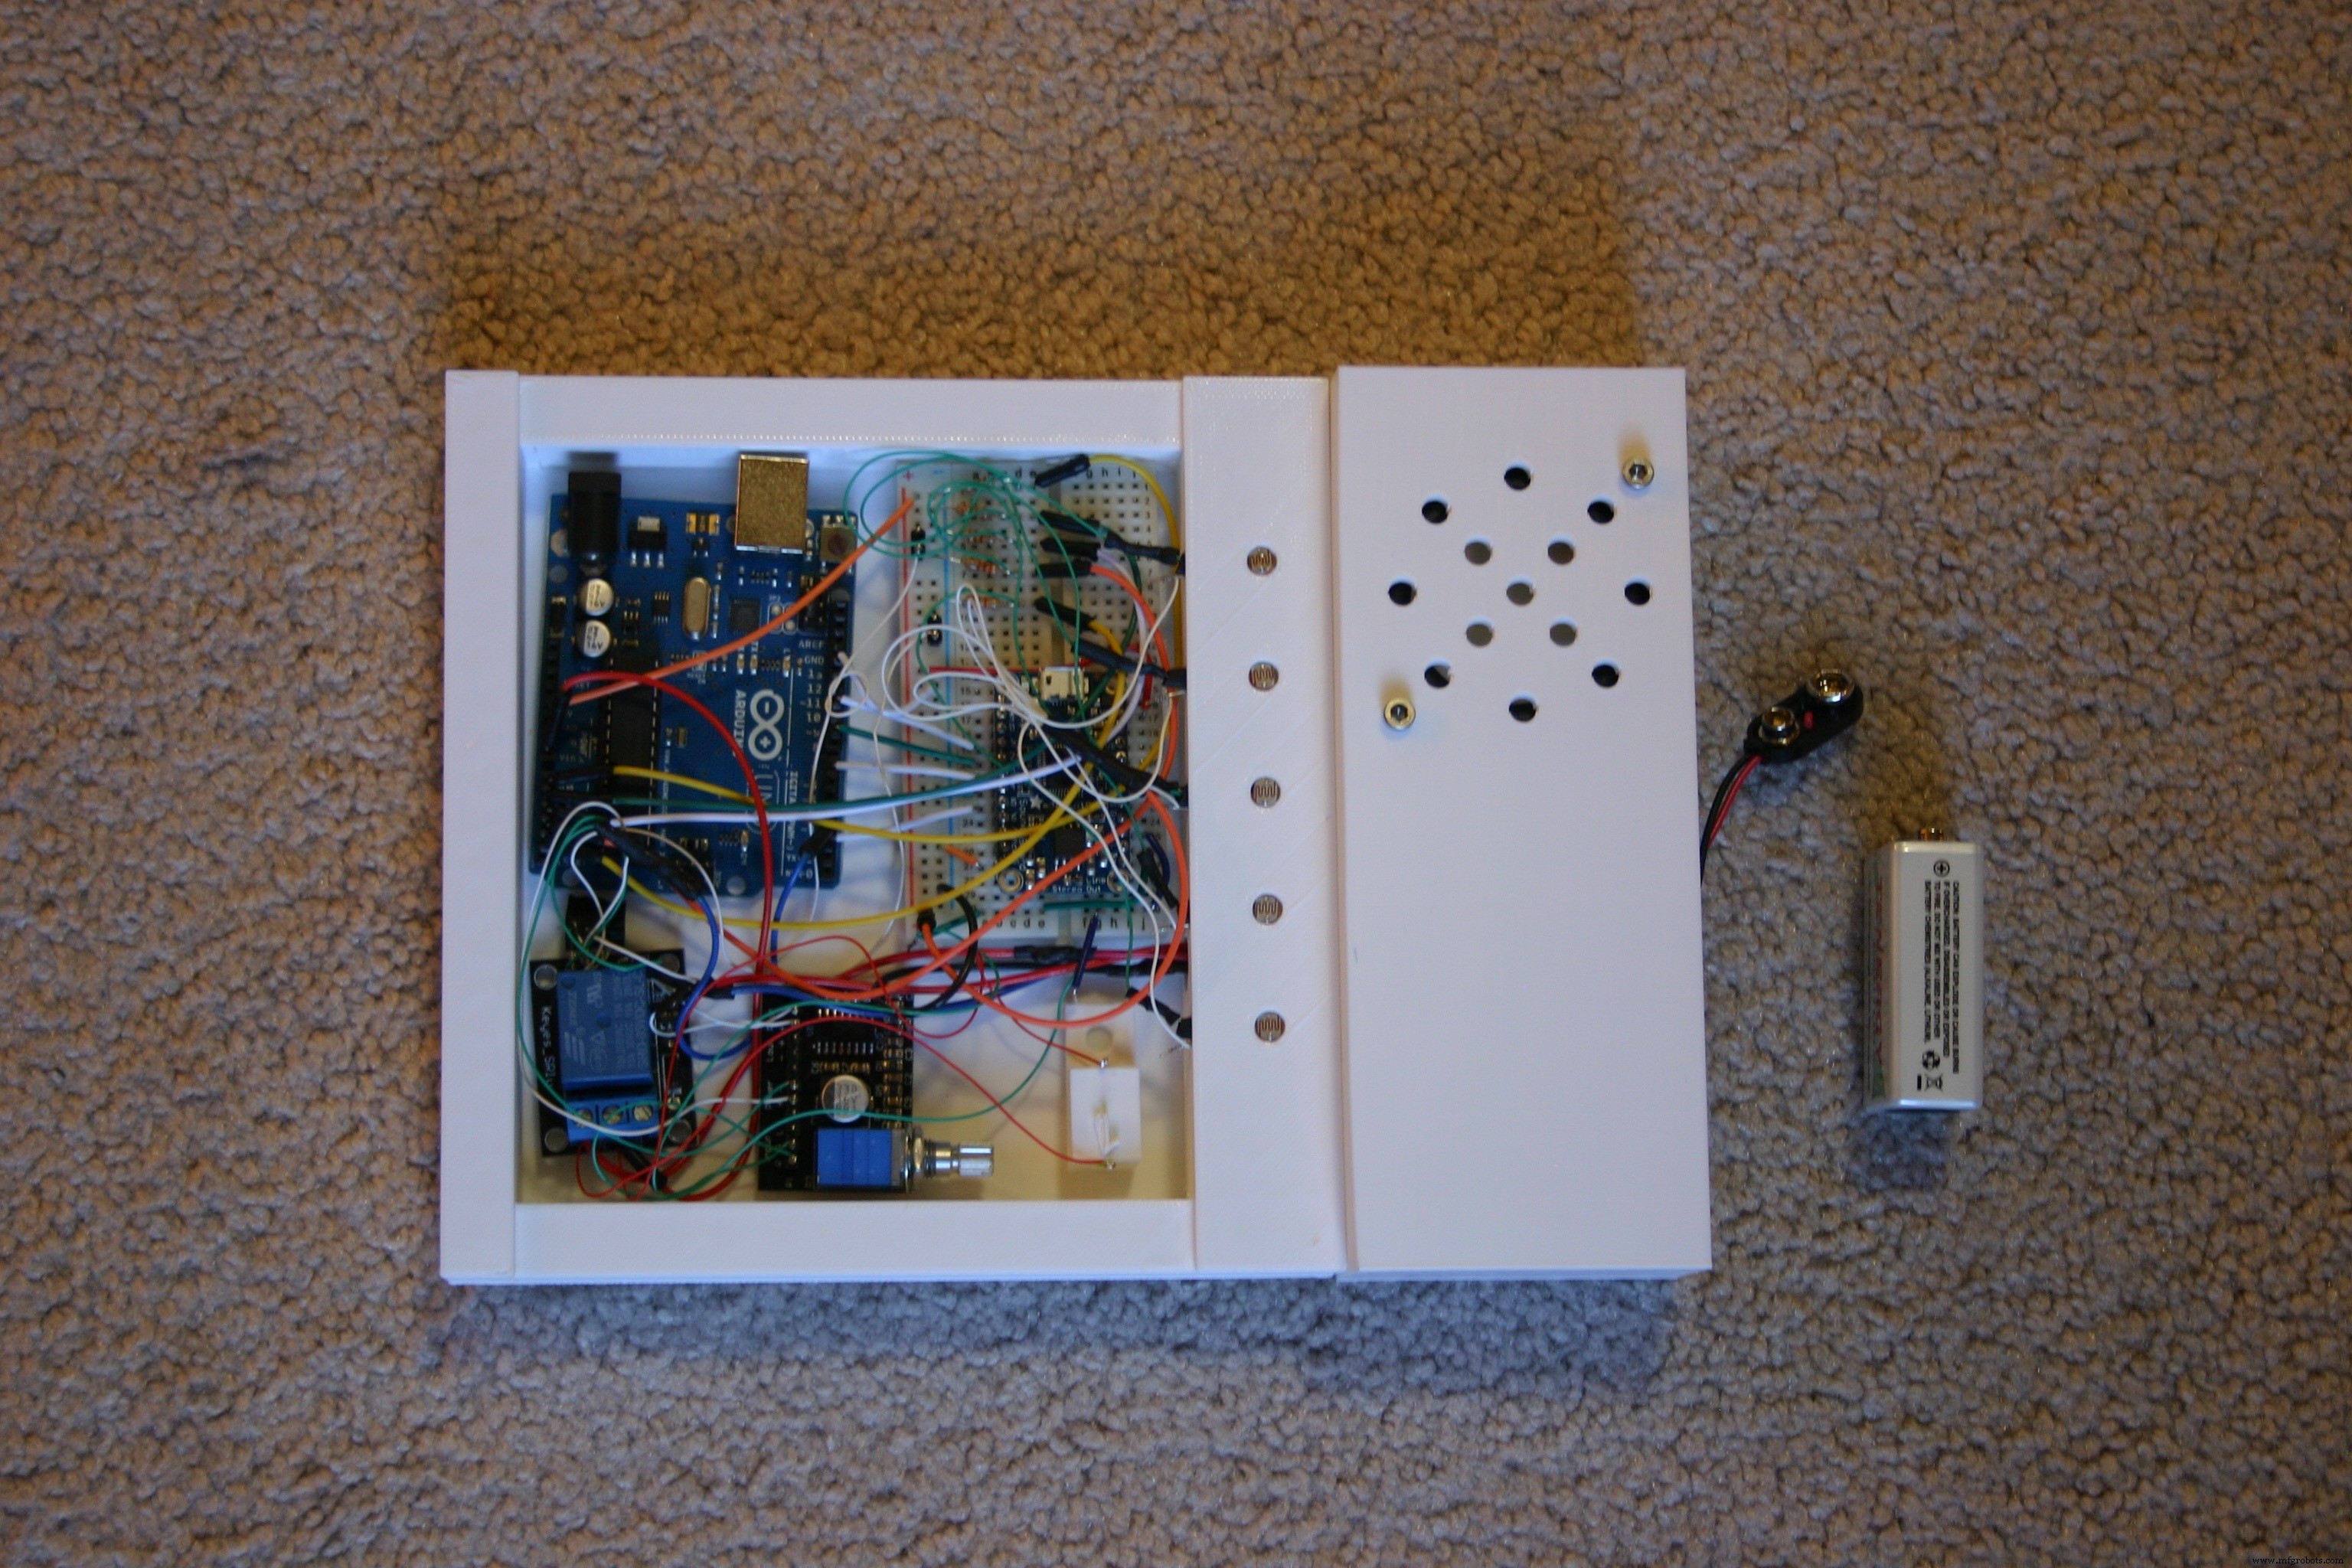
Start by assembling the case for the electronics and speaker. Take the 3D-printed "backbase" and "speakerhousingb."
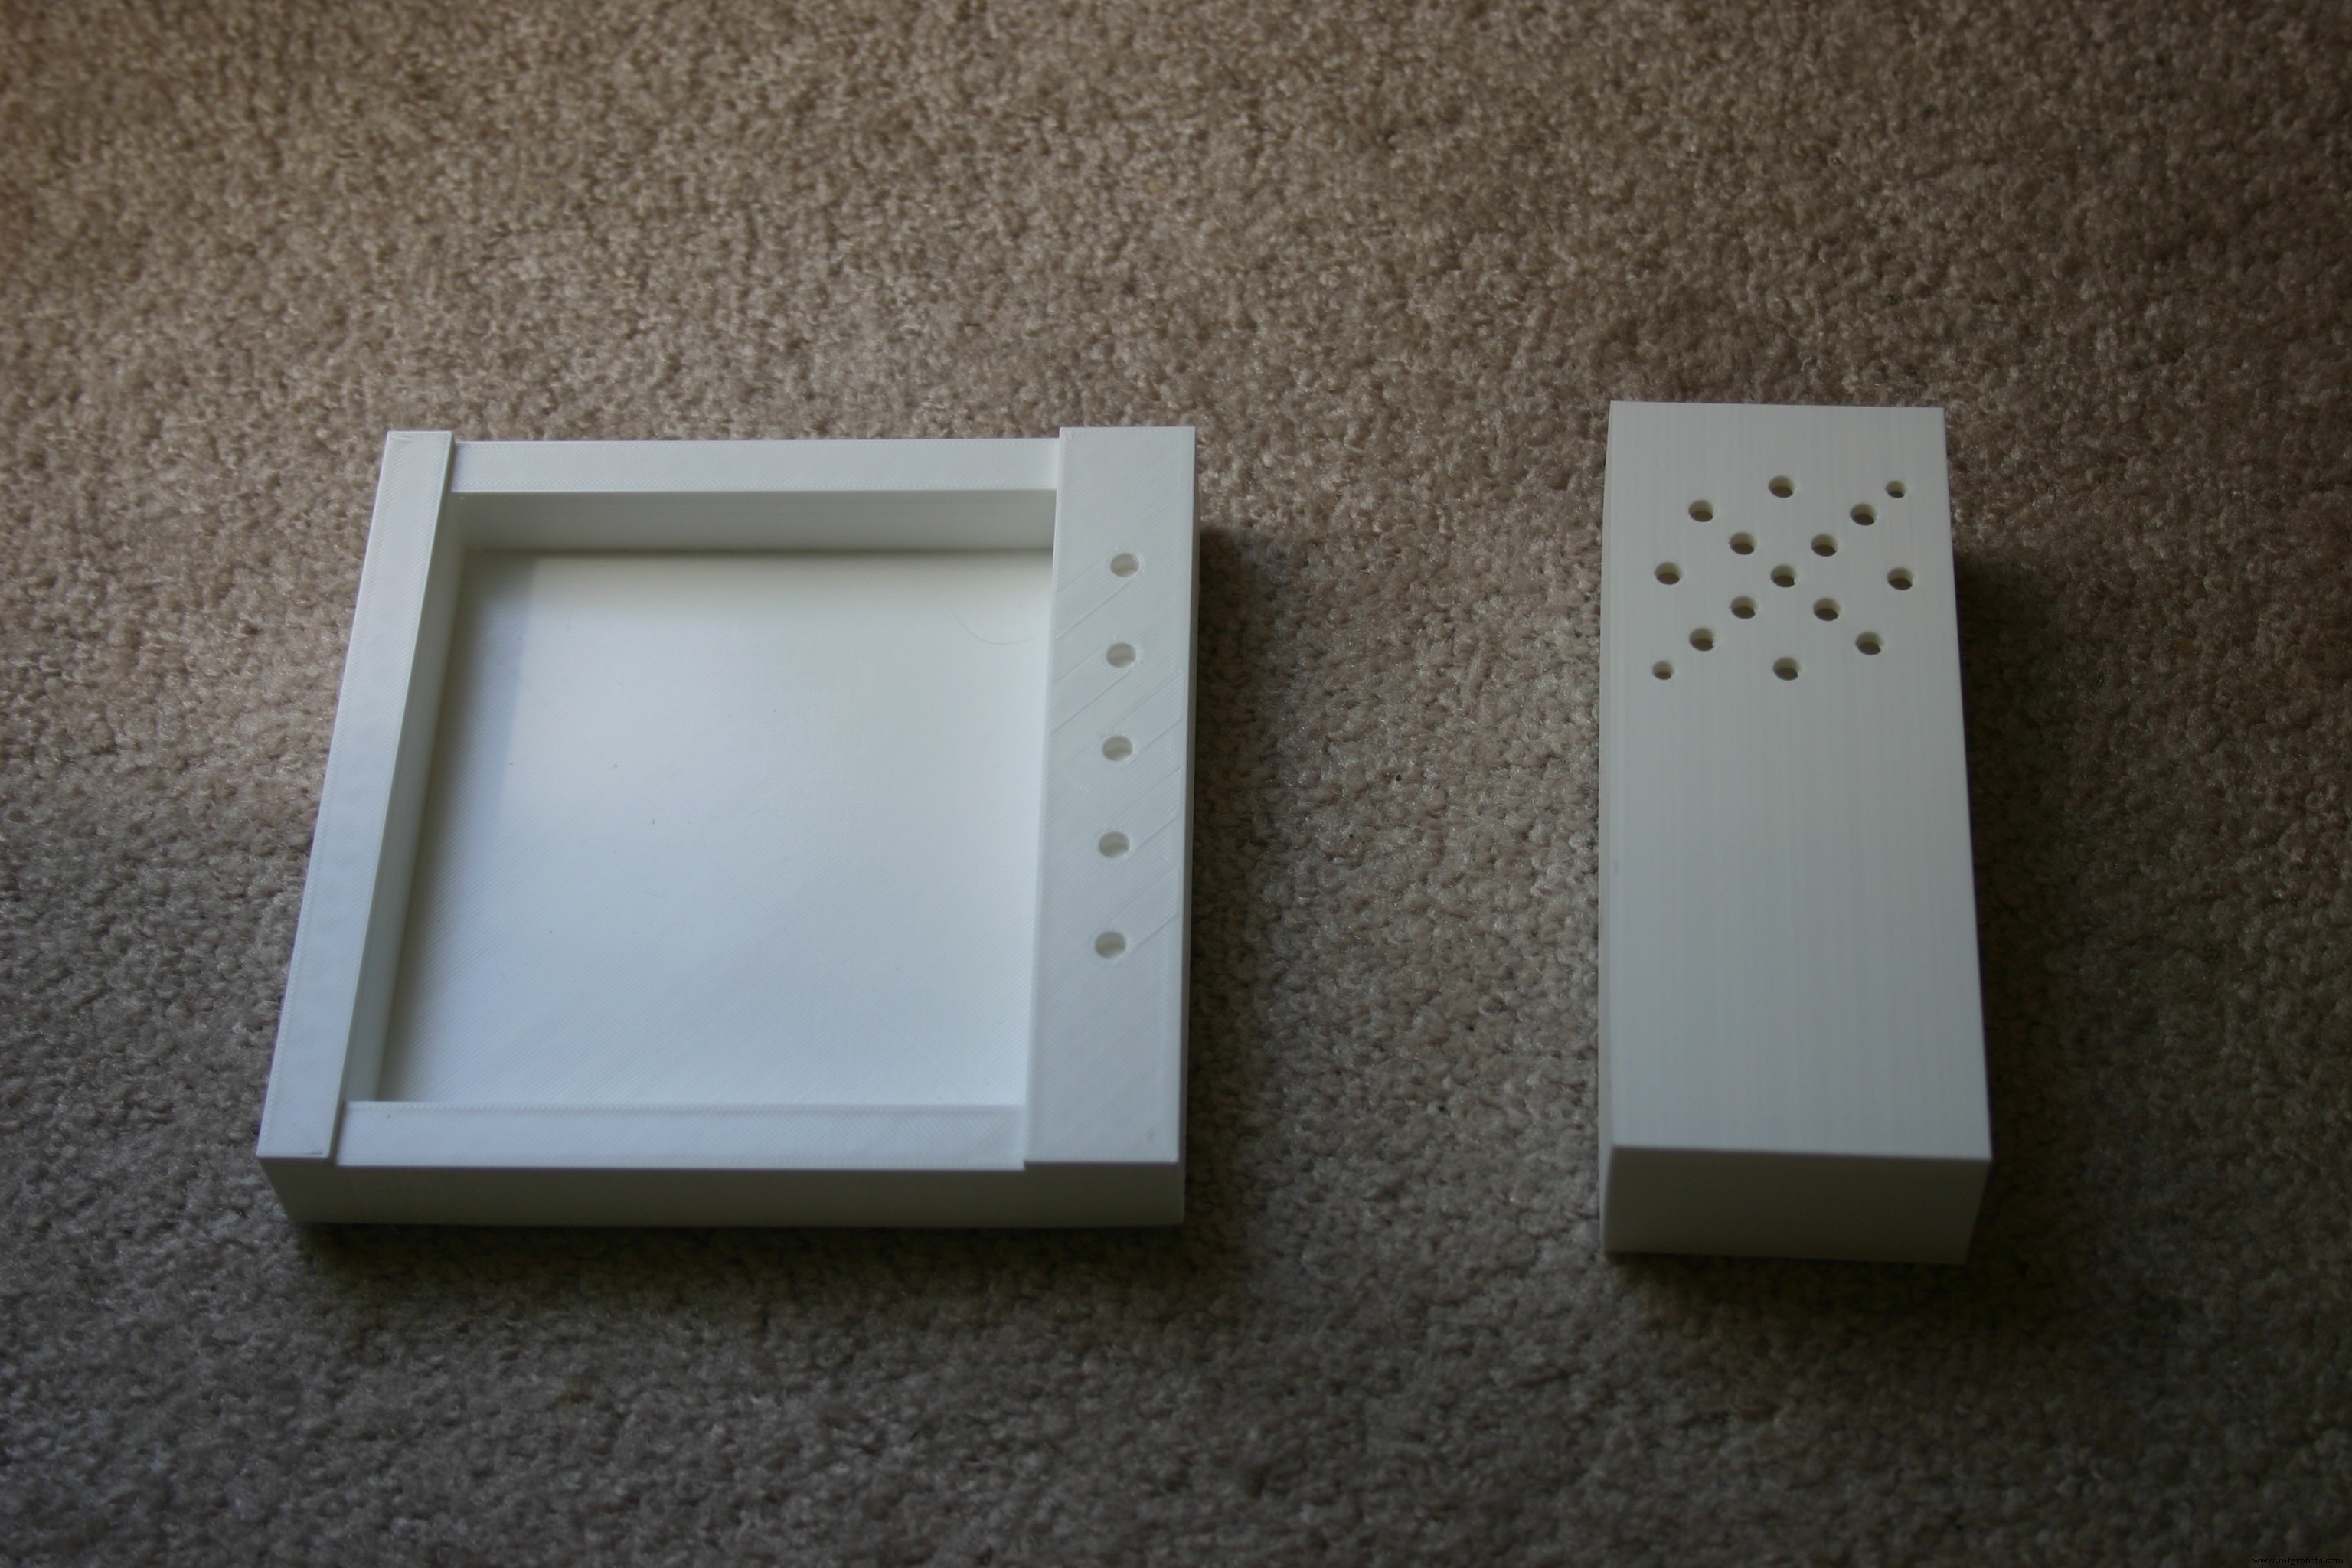
Examine the two pieces from the end and match the holes.
Using two M3 screws, connect the speaker housing to the electronic housing.
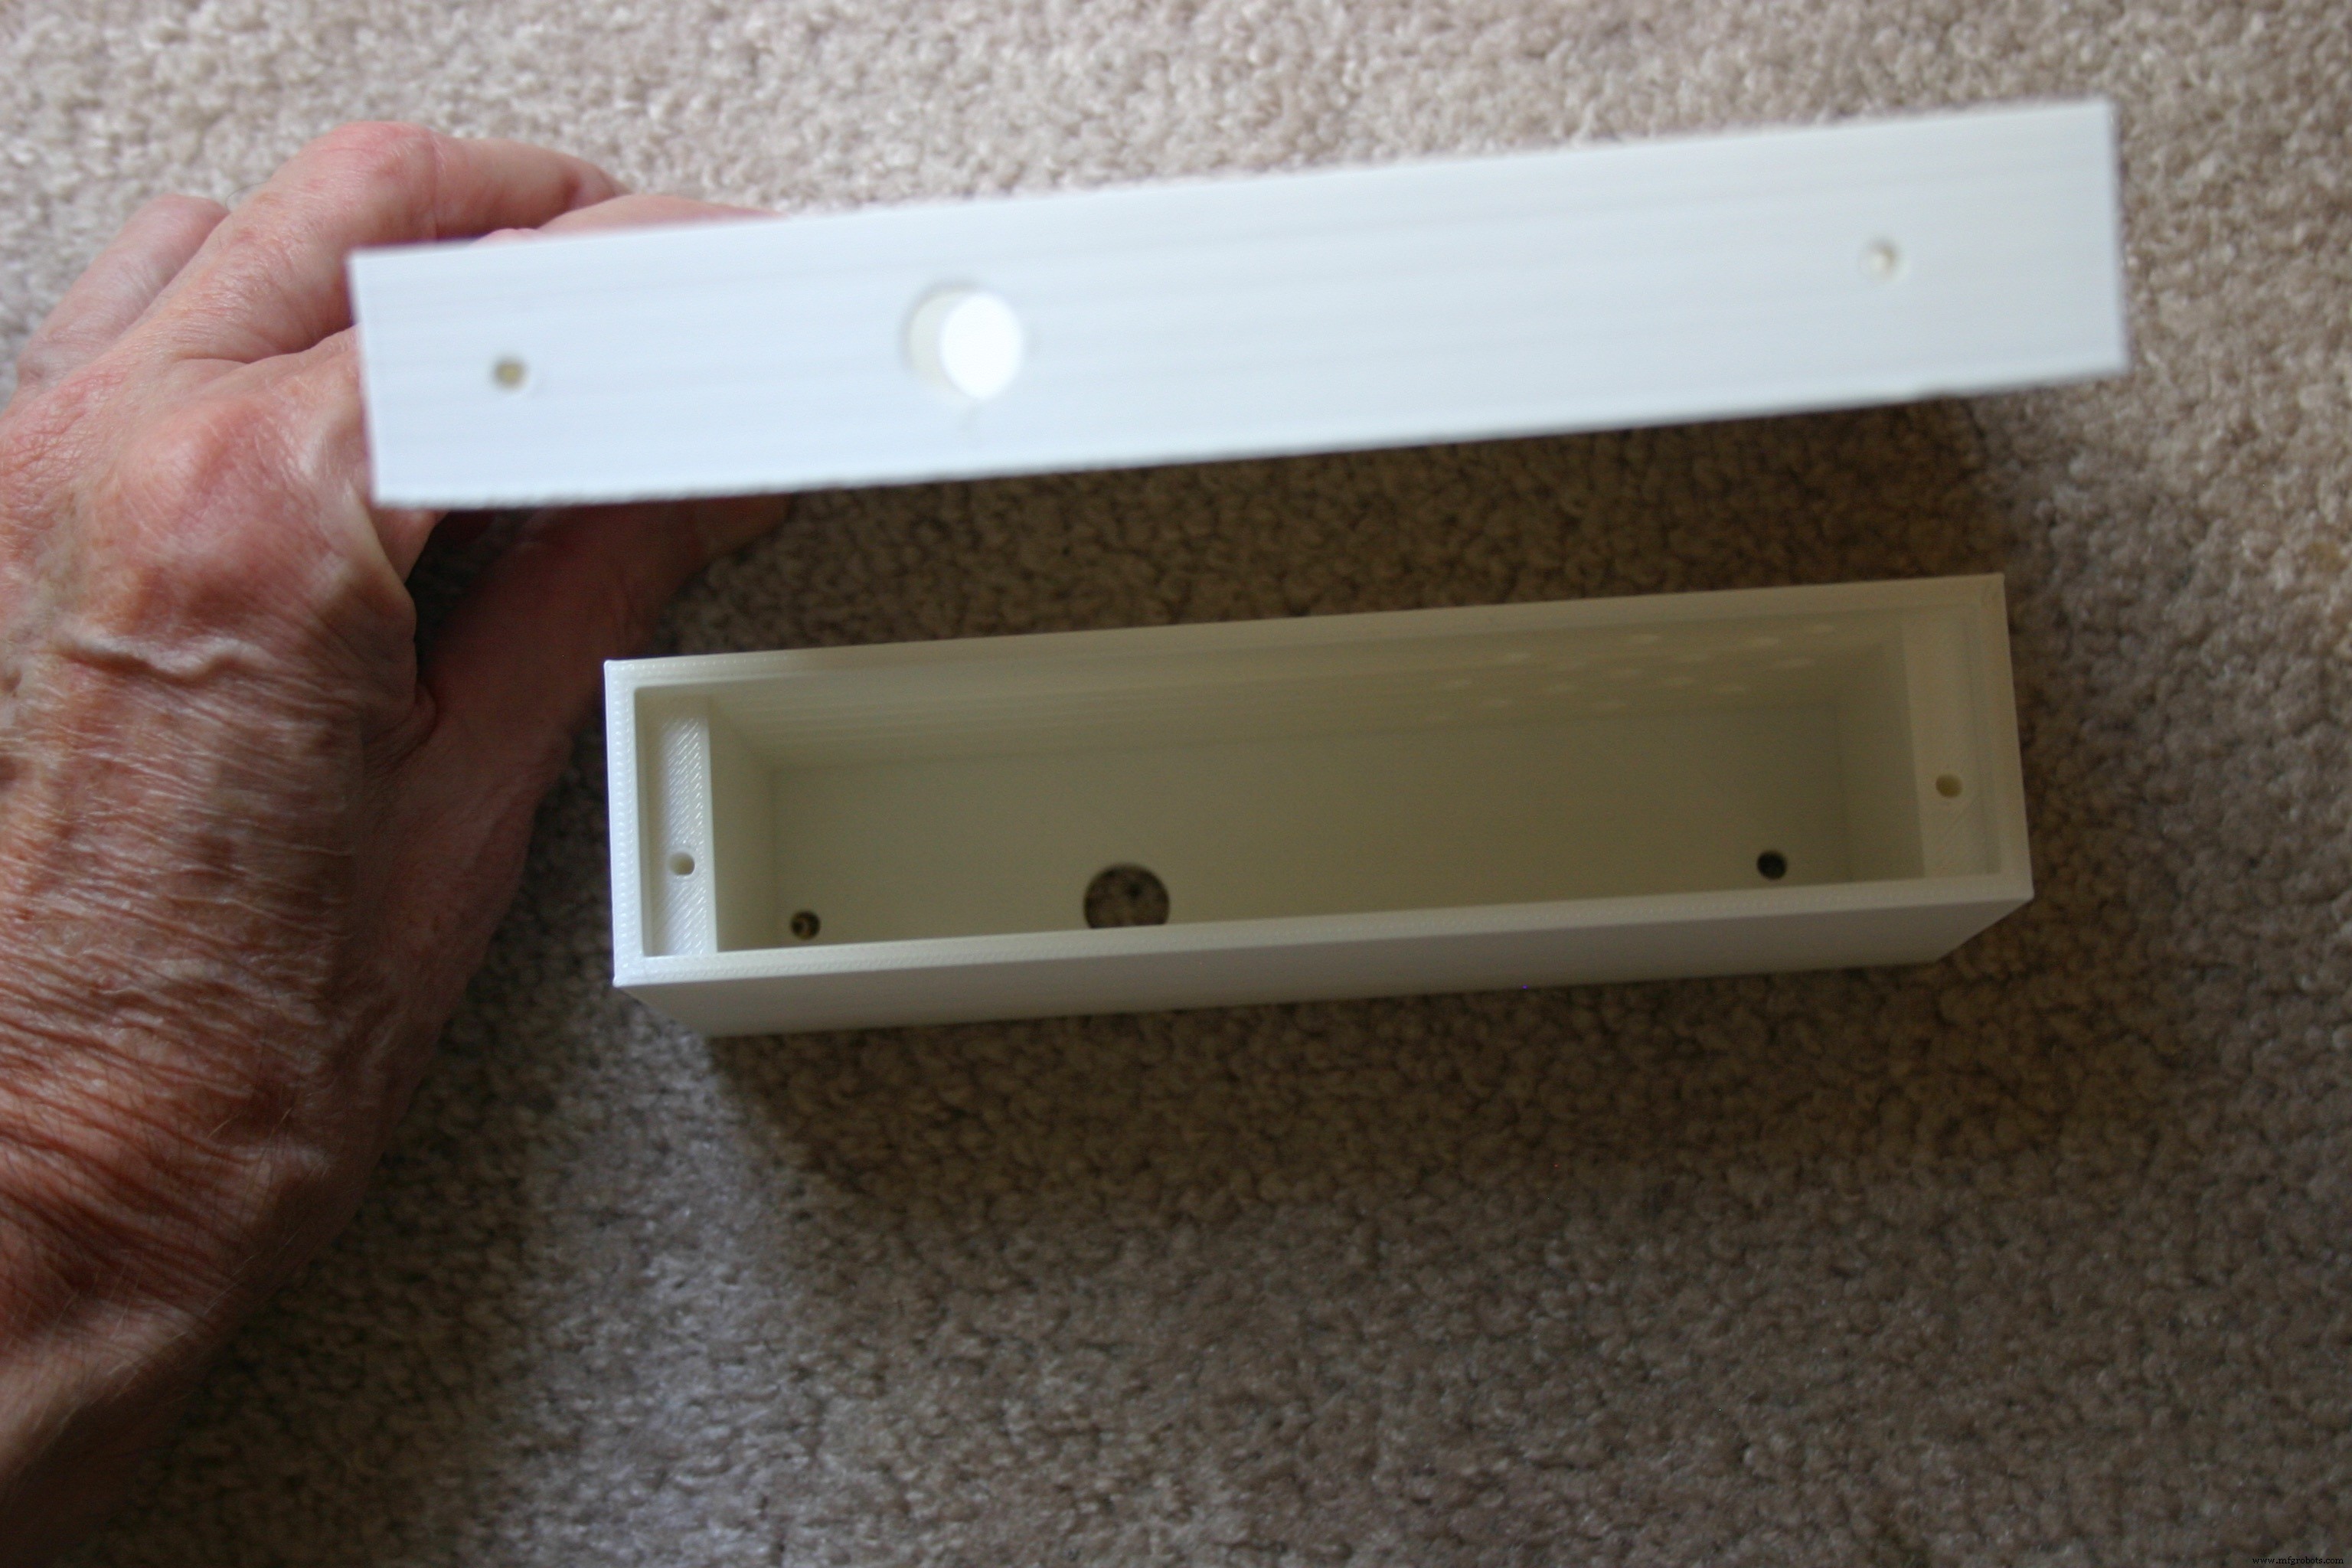
Solder wires (about 9 inches long) to the 4 ohm speaker.
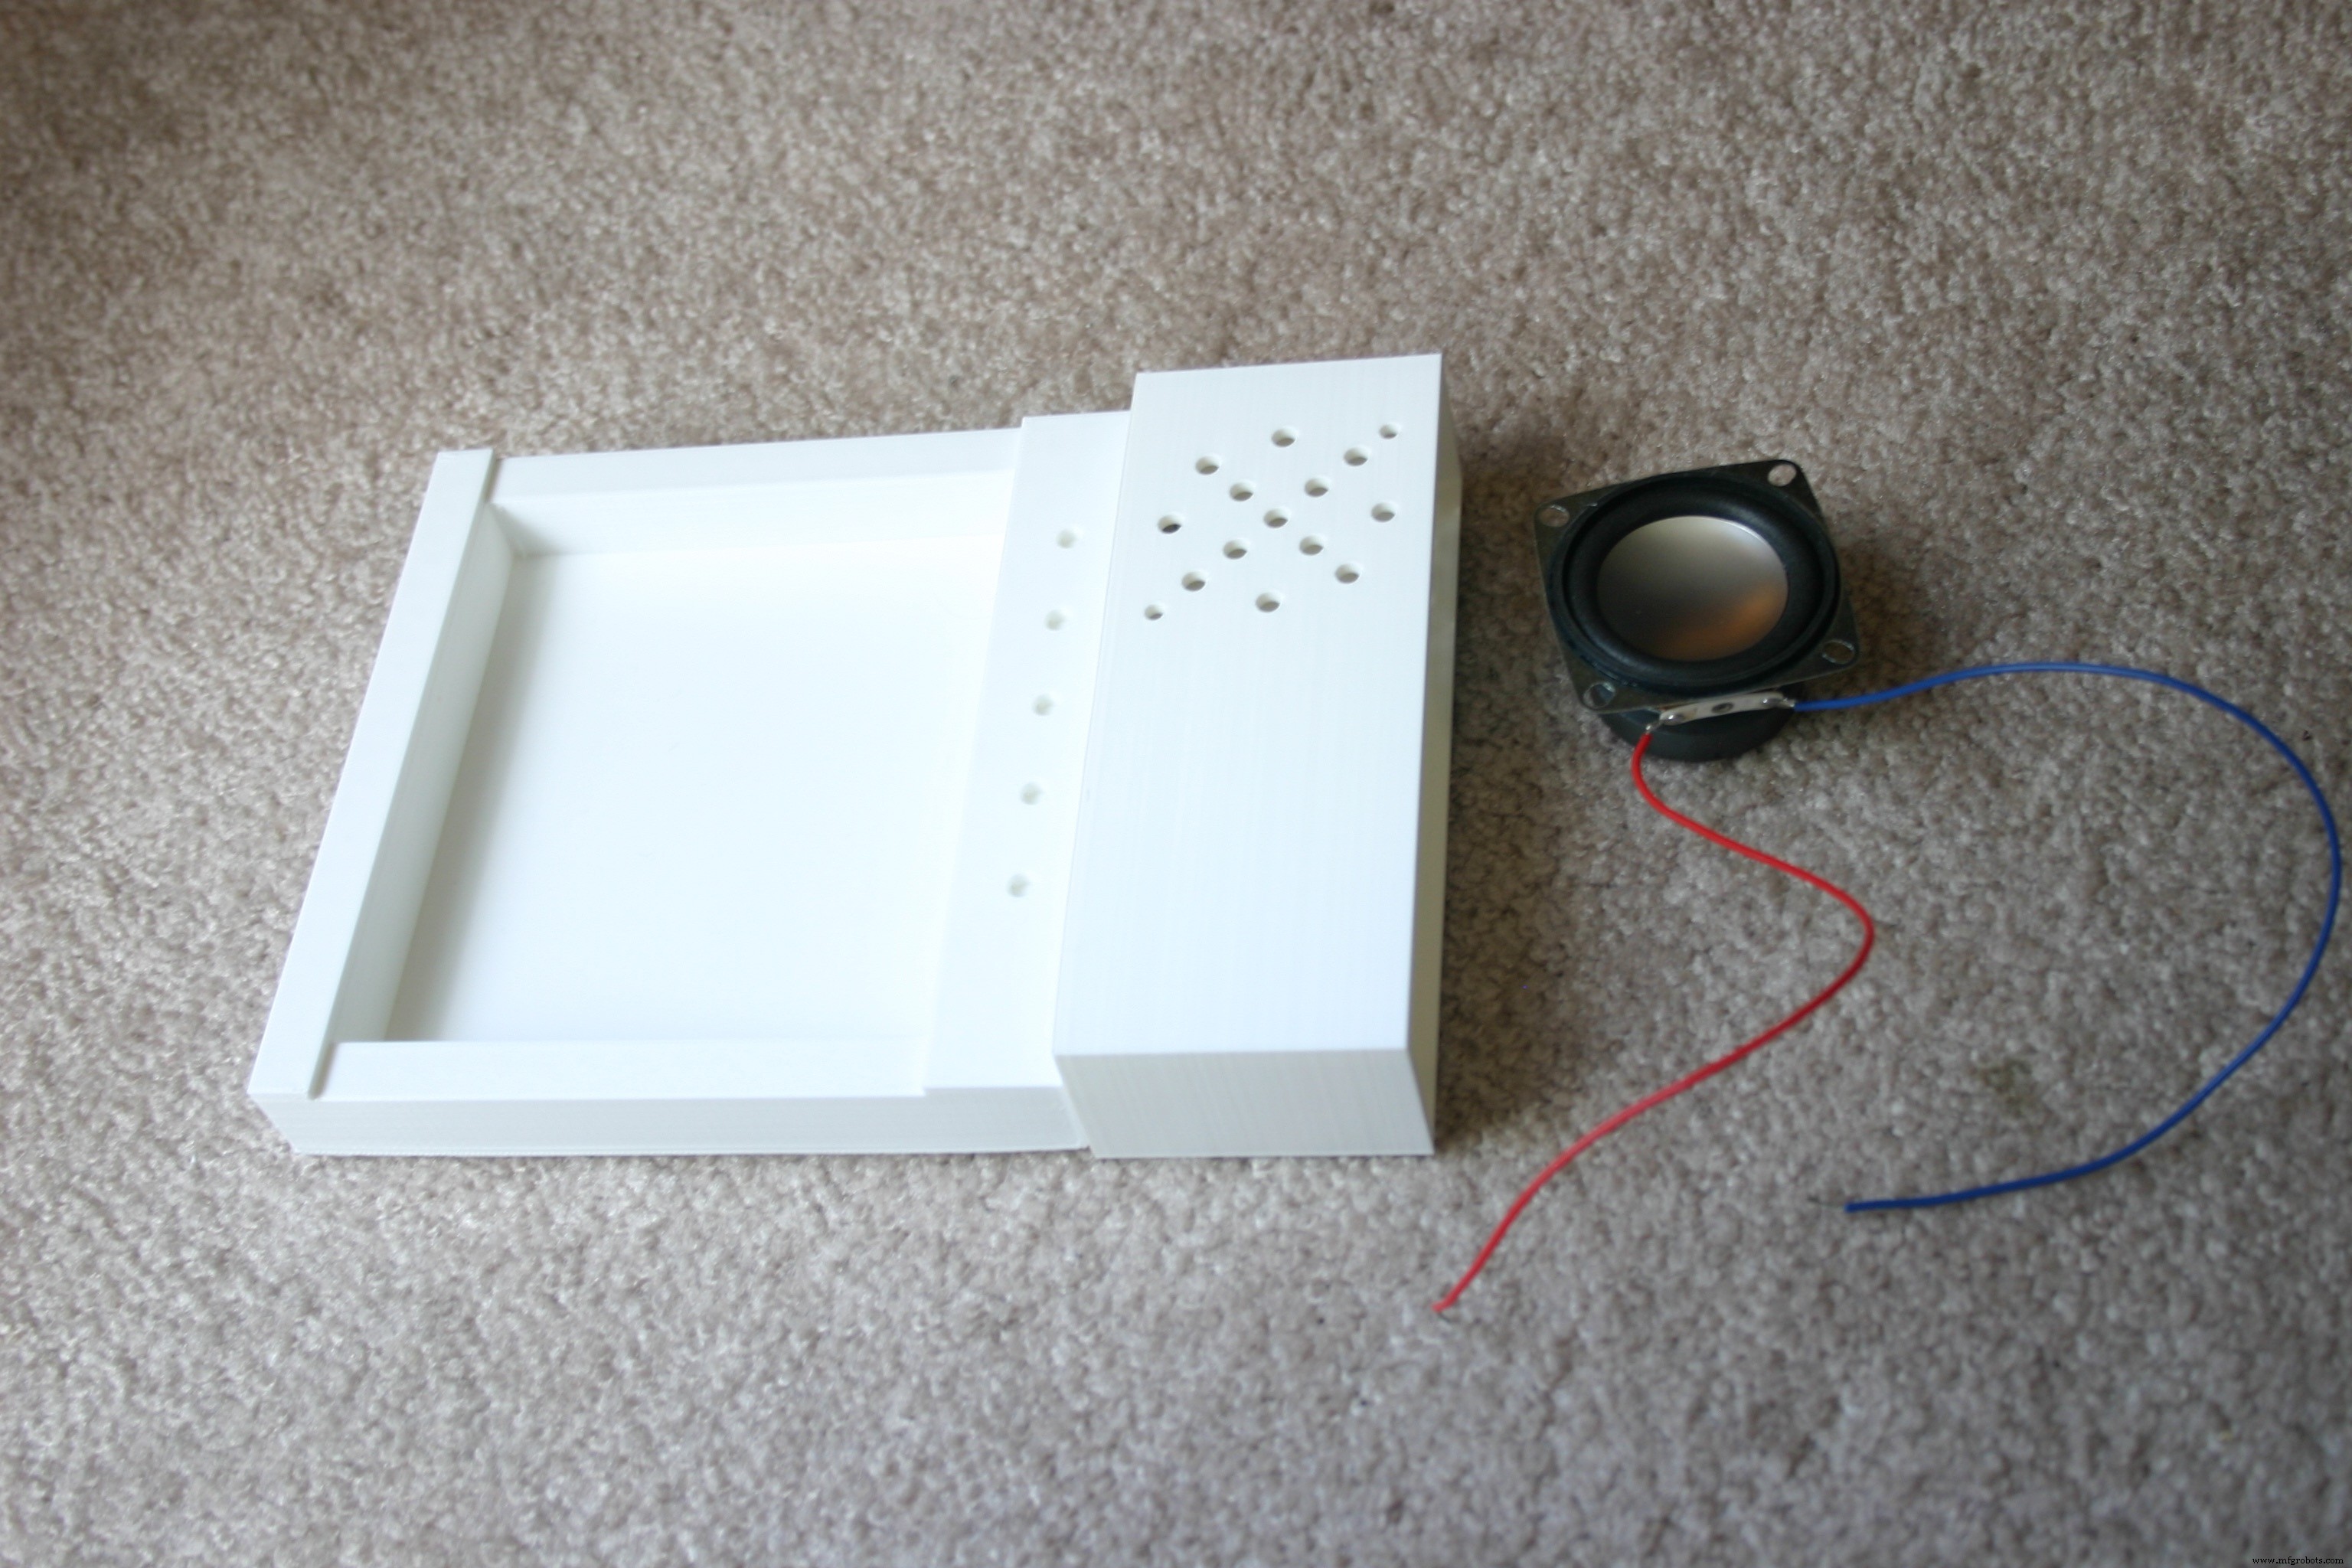
Attach the speaker to the speaker housing using two M3 screws and nuts.
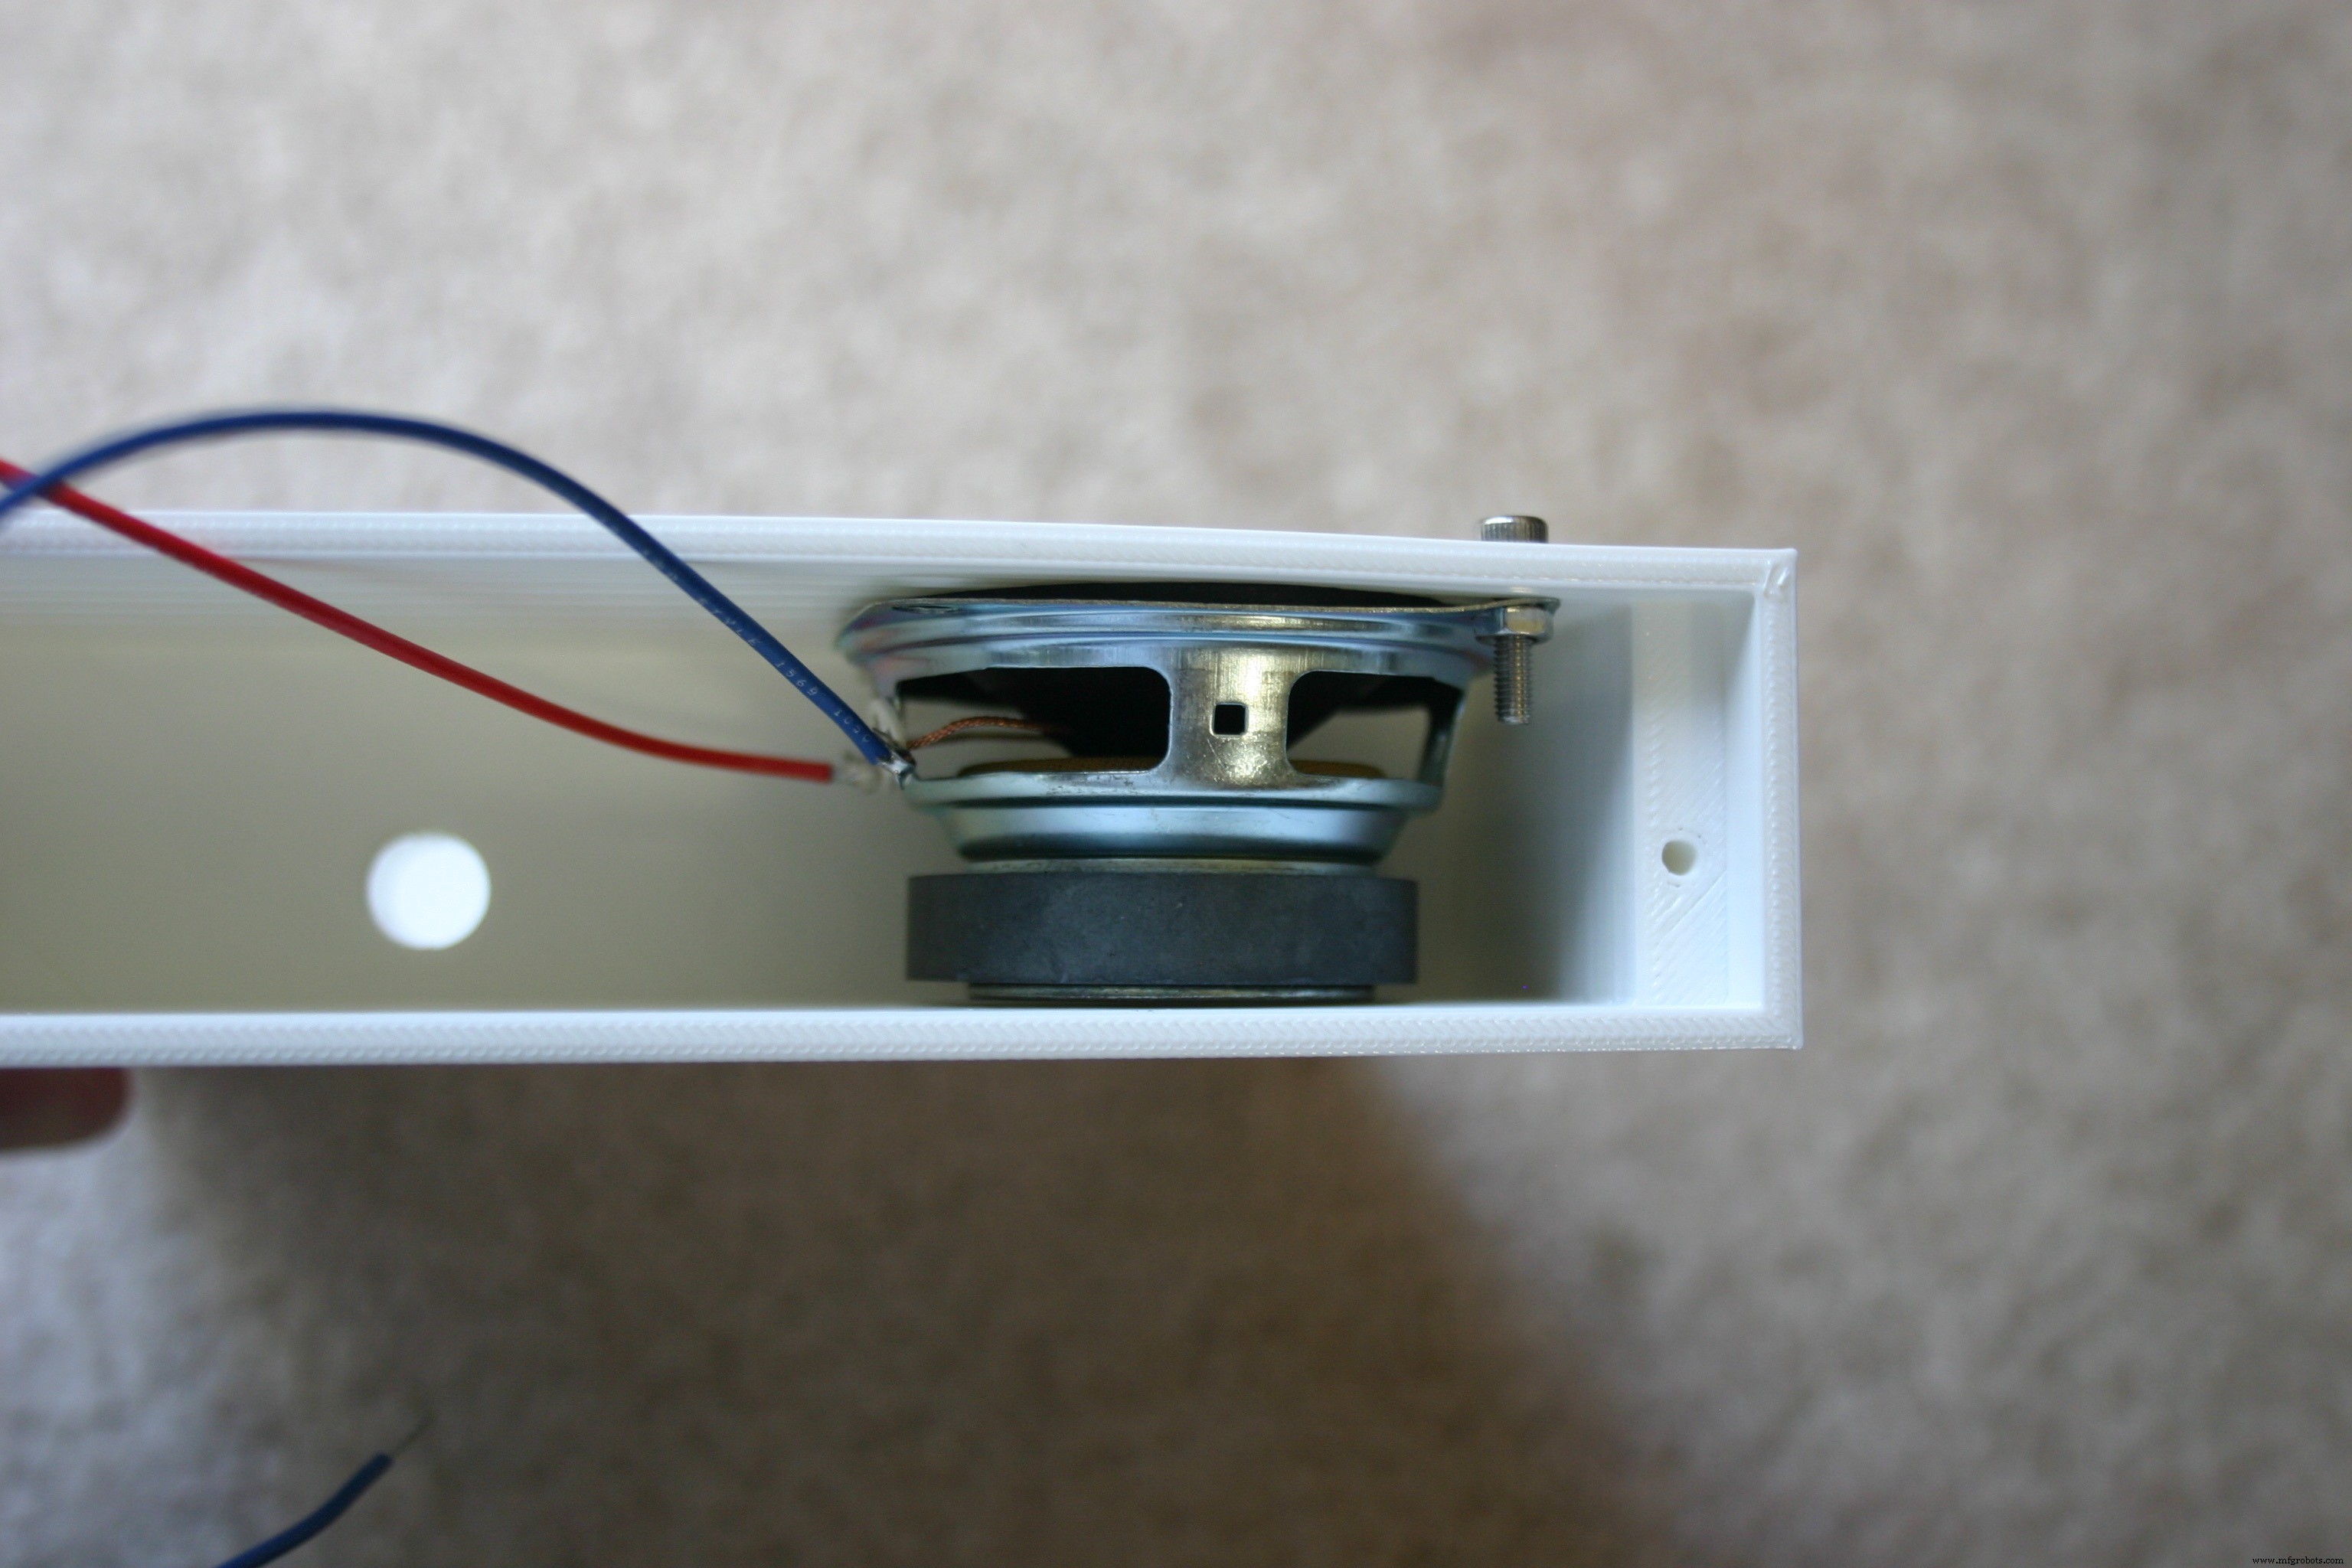
Insert the speaker wires through the large hole into the electronic housing.
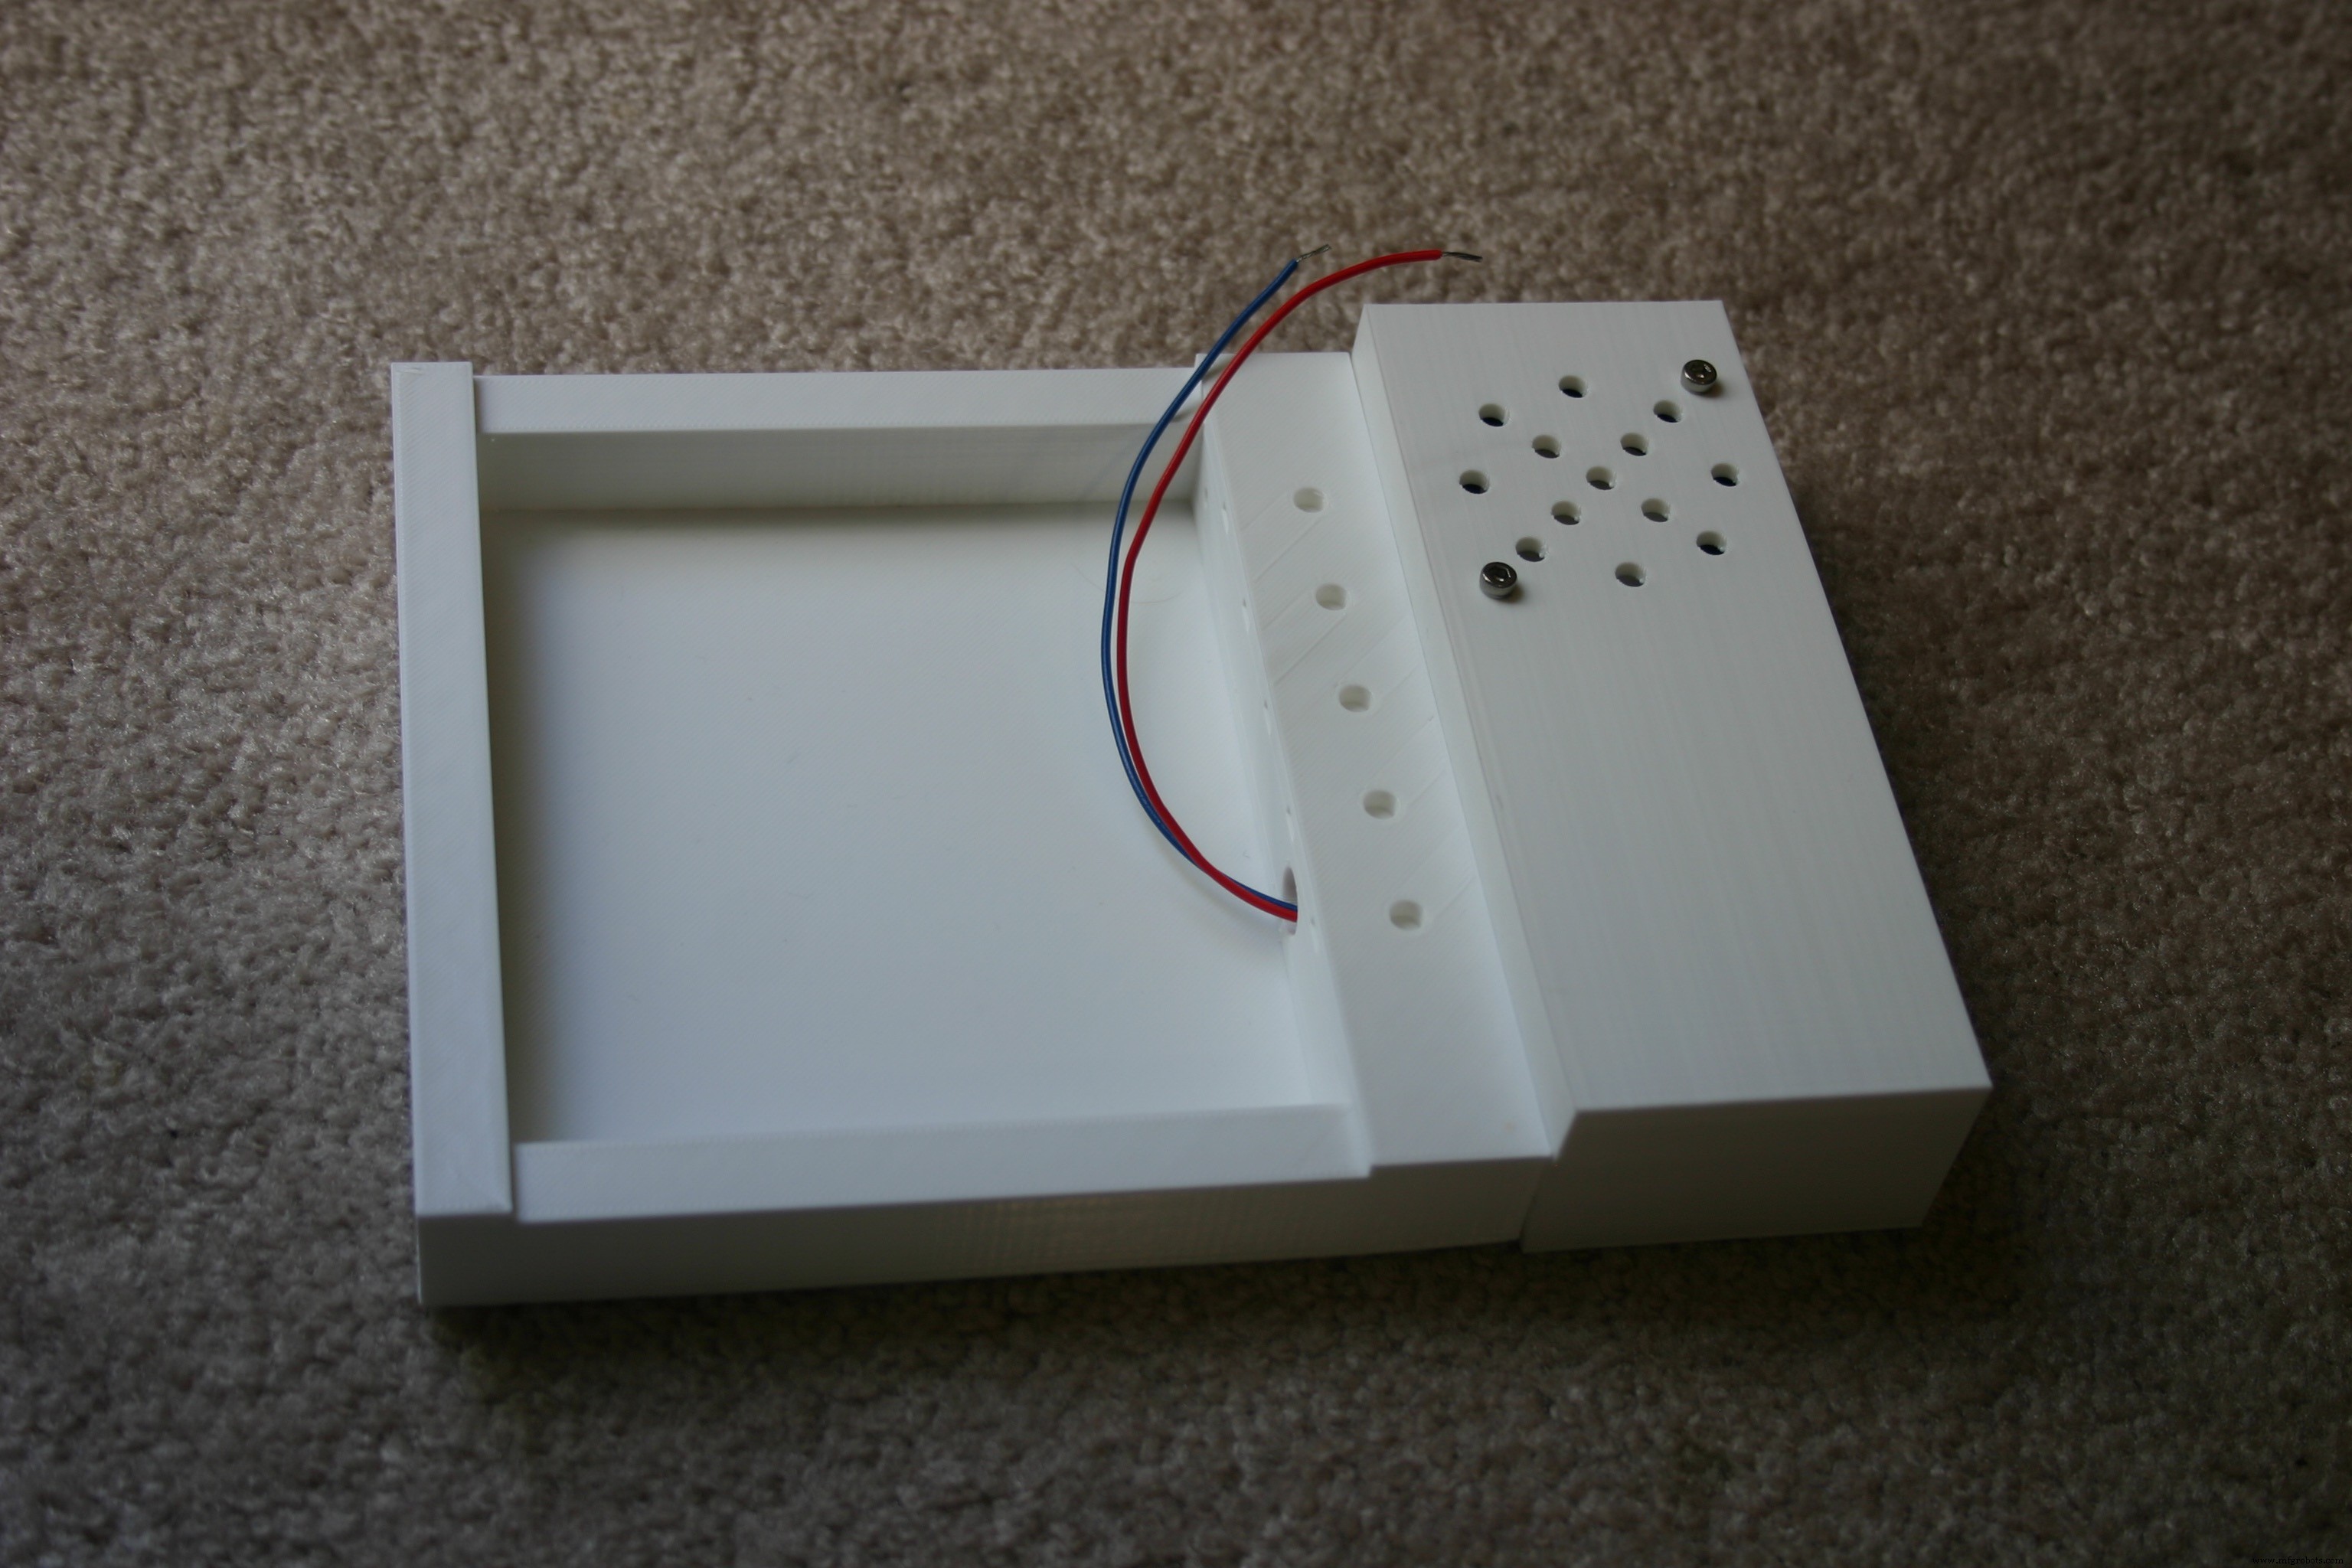
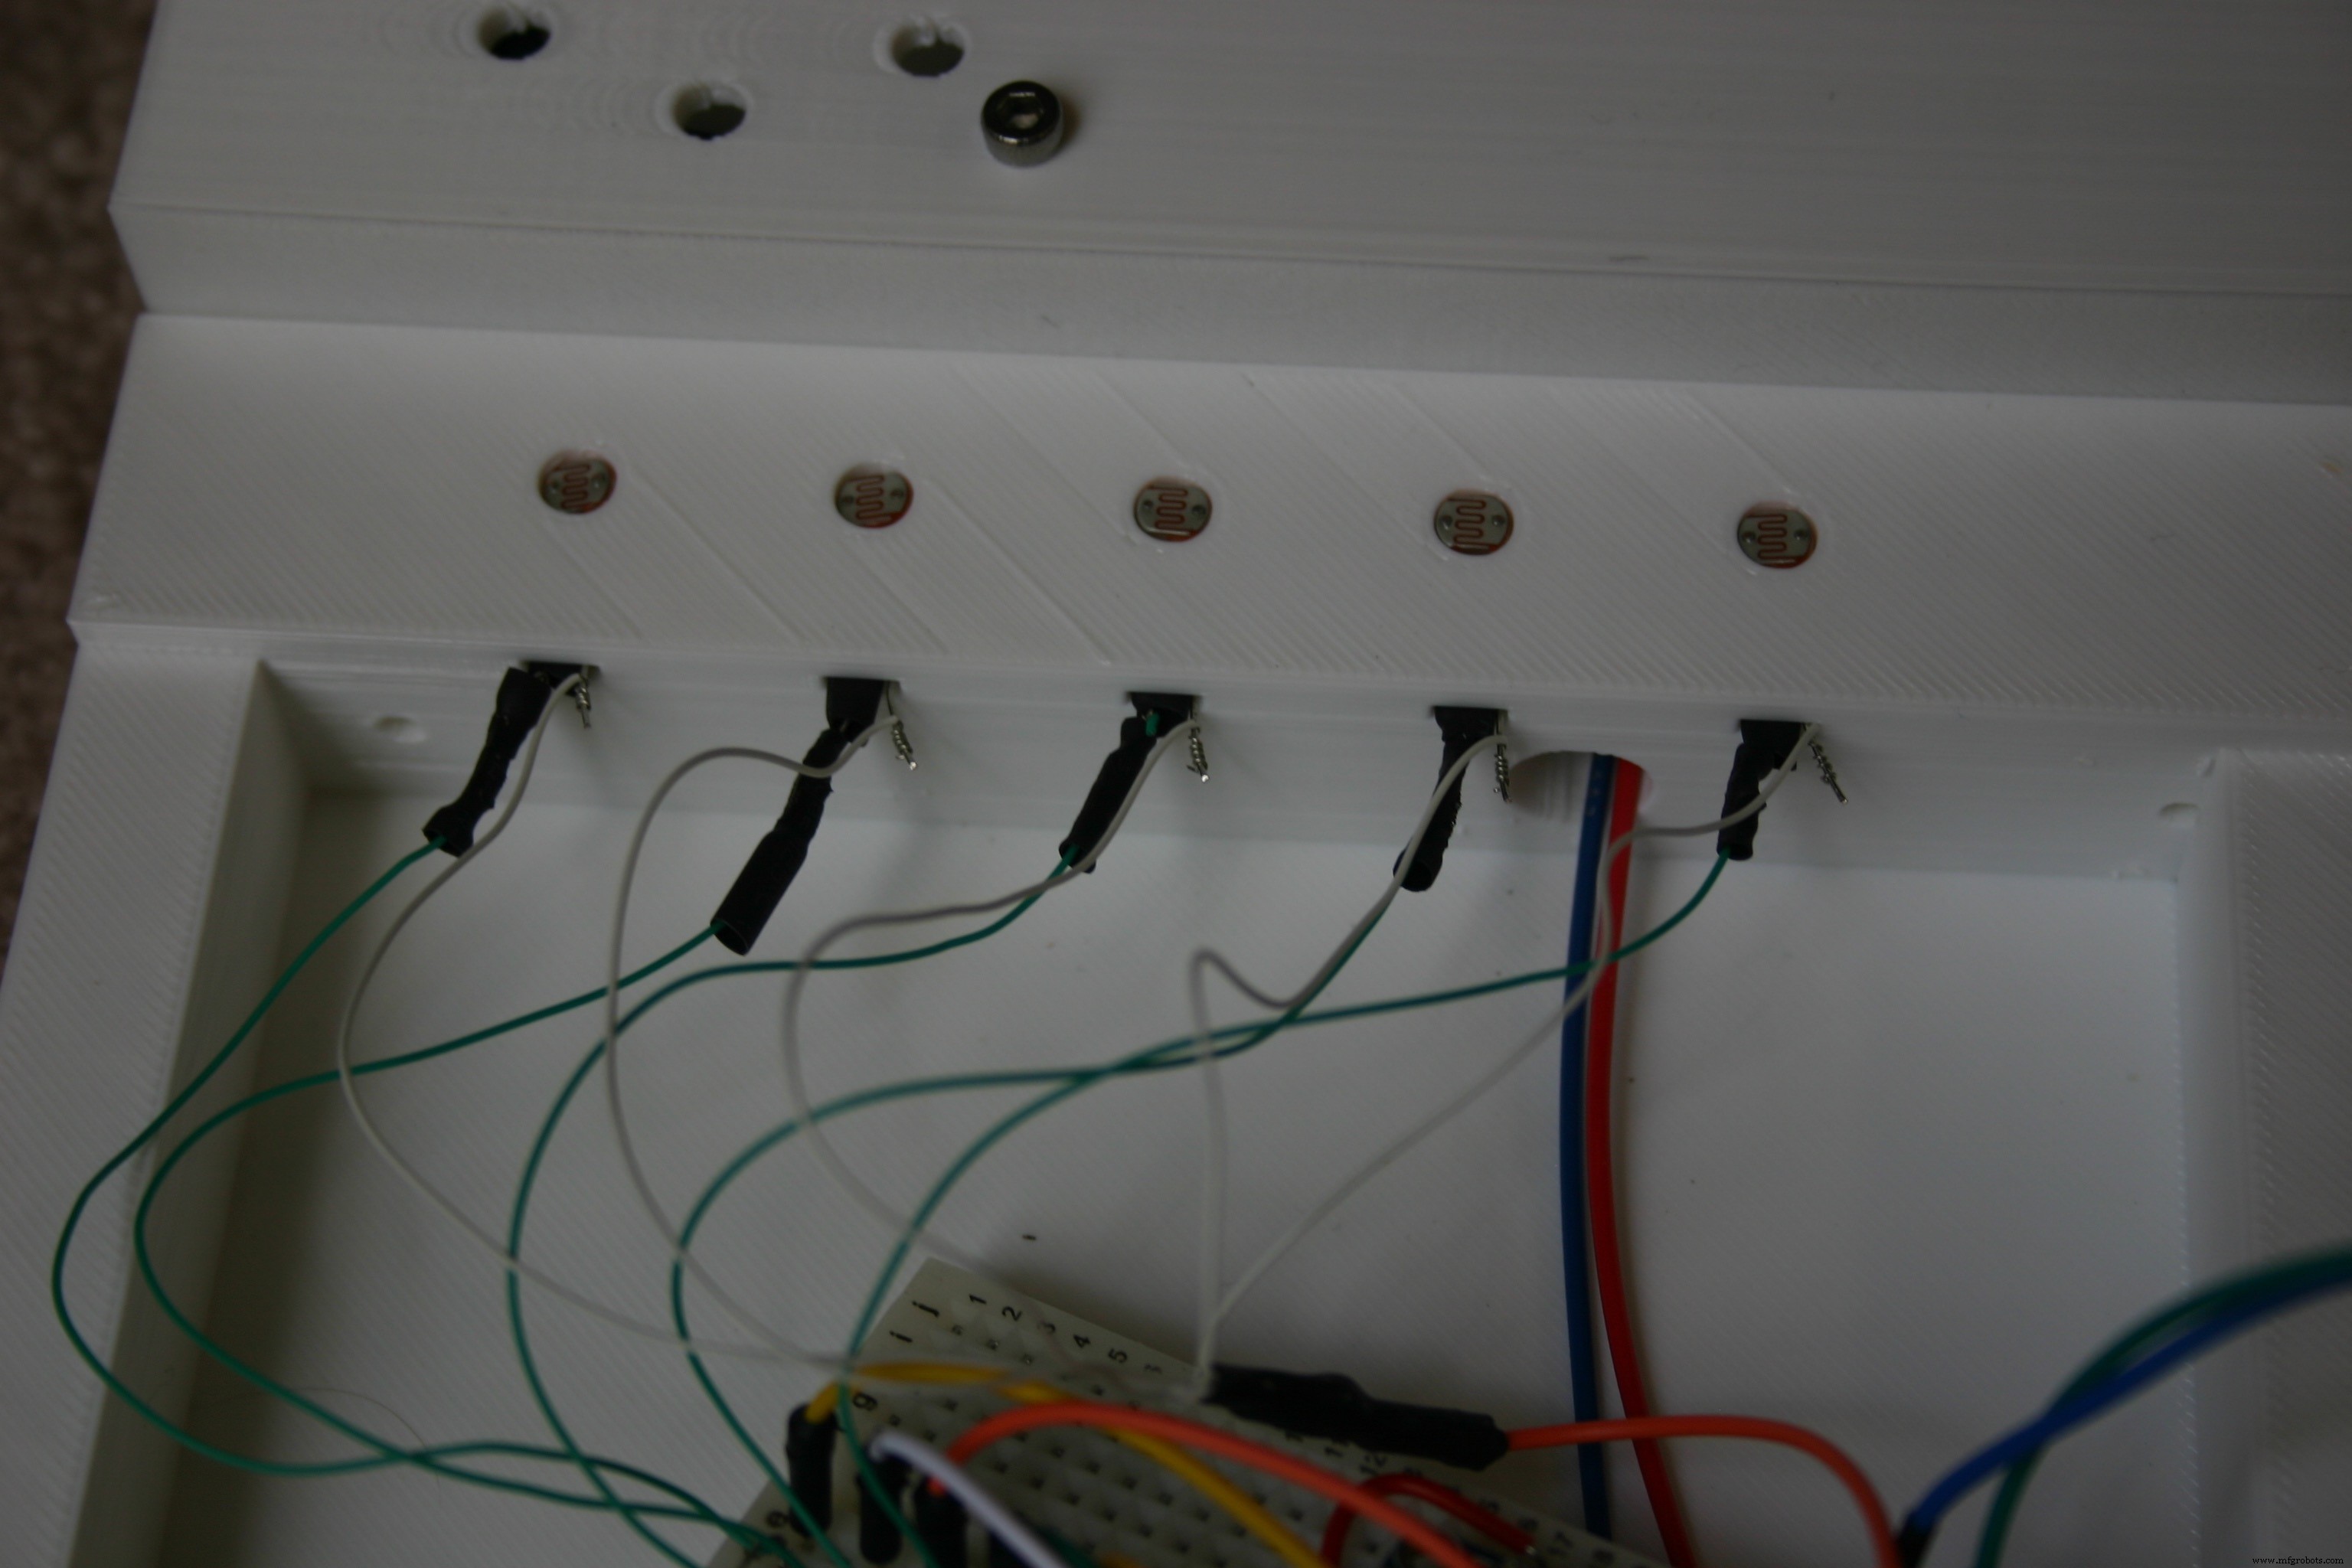
Bend the leads of the photo resistors close to the resistor body.

Insert the photo resistors into the round holes in the electronic enclosure. A small rectangular opening is provided for the leads.
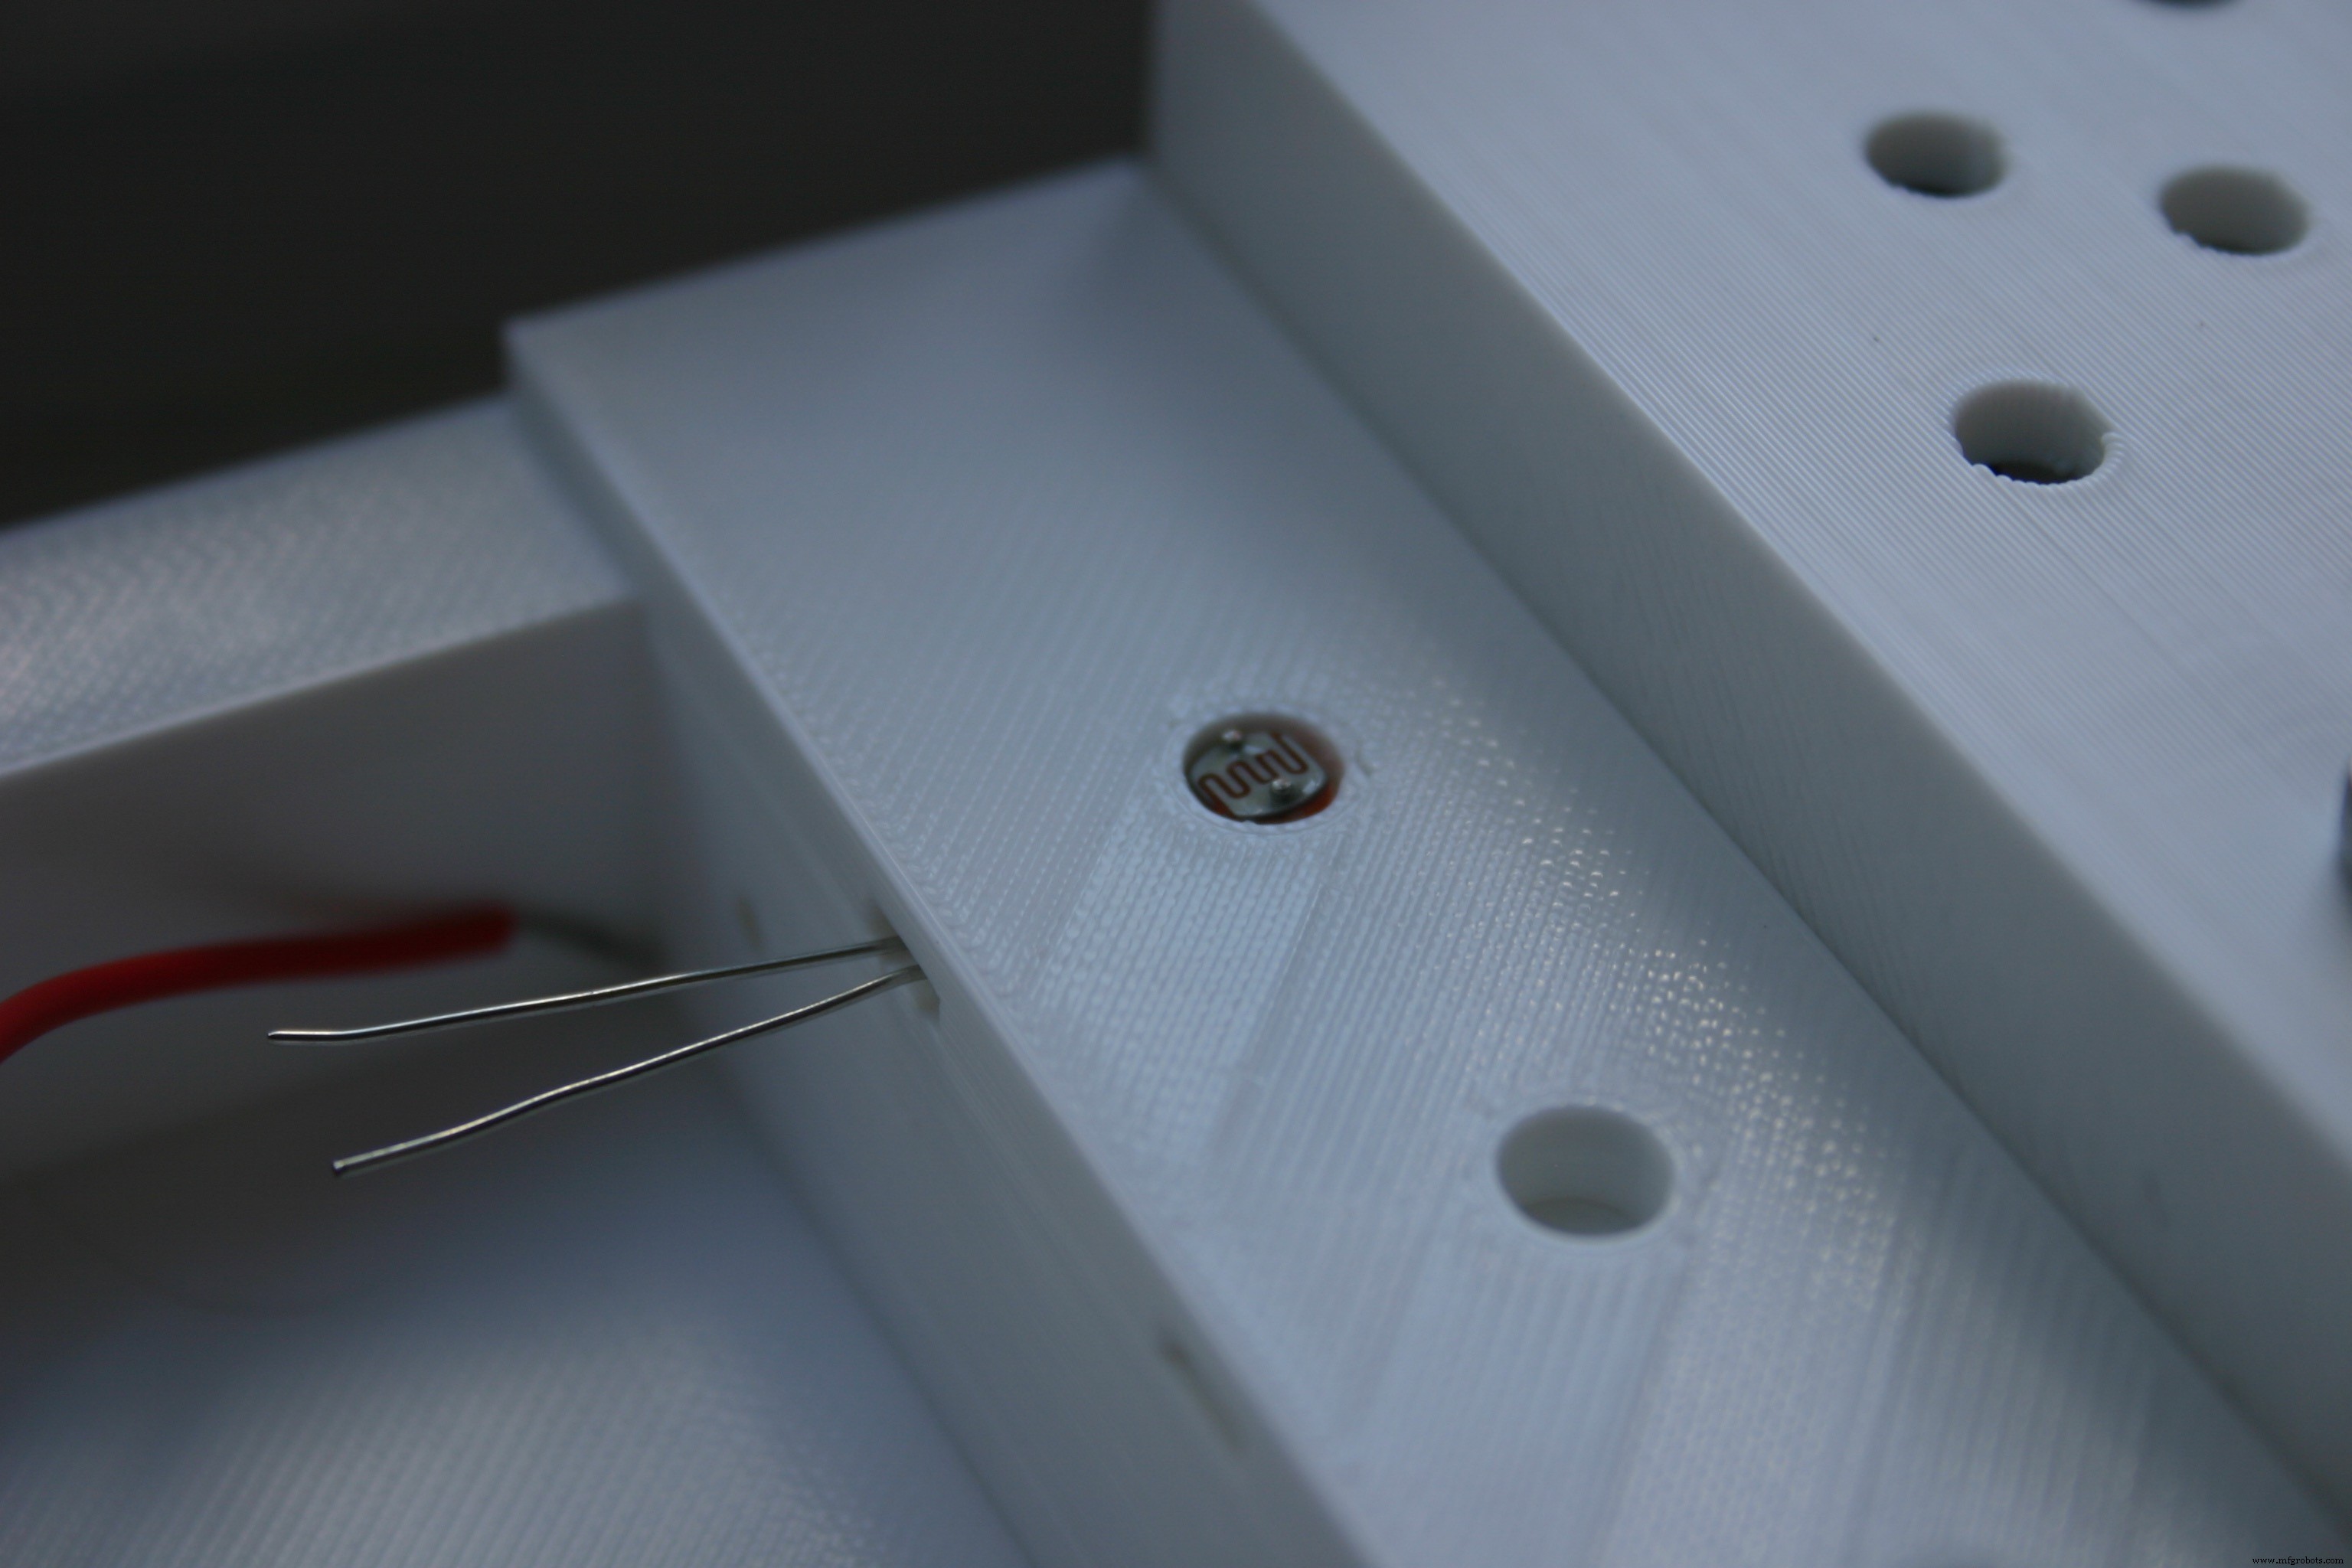
Prepare a short piece of heat shrinkable tubing (about 1/2 inch long) for the photo resistor.
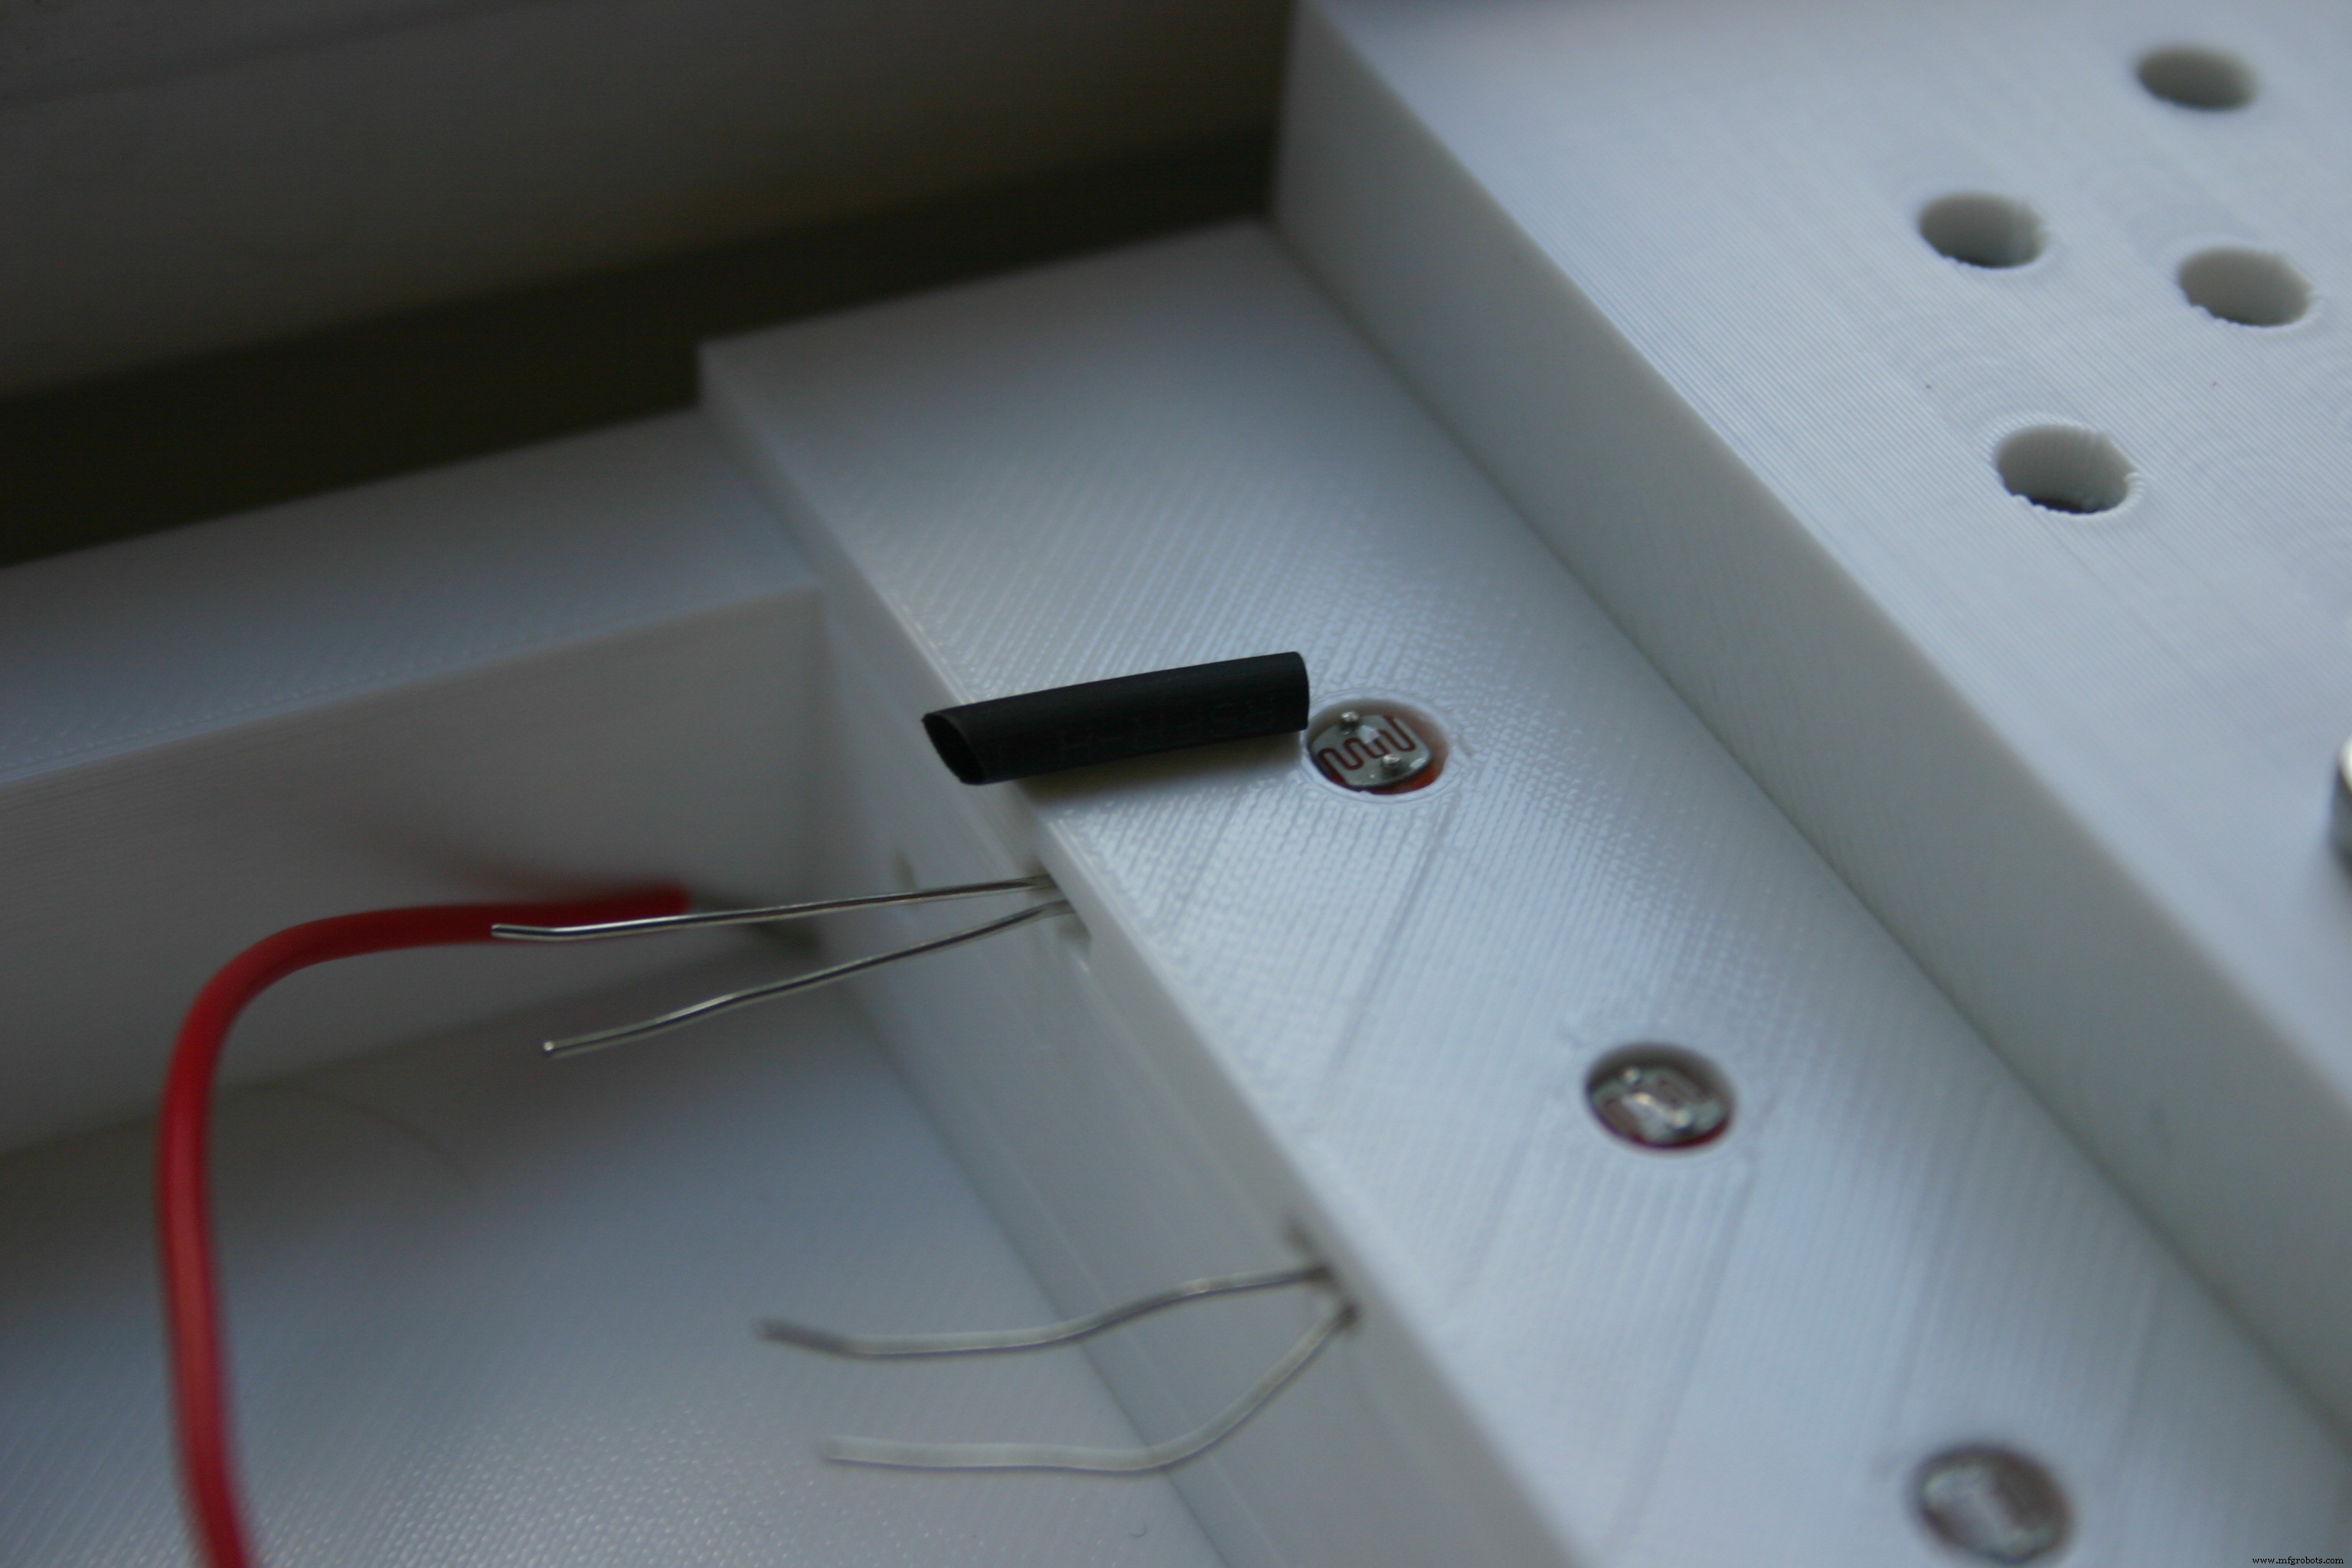
Slide this over one lead of the photo resistor into the plastic. This is done to prevent the two leads from accidentally touching and creating a short circuit.
Do this for all the photo resistors.
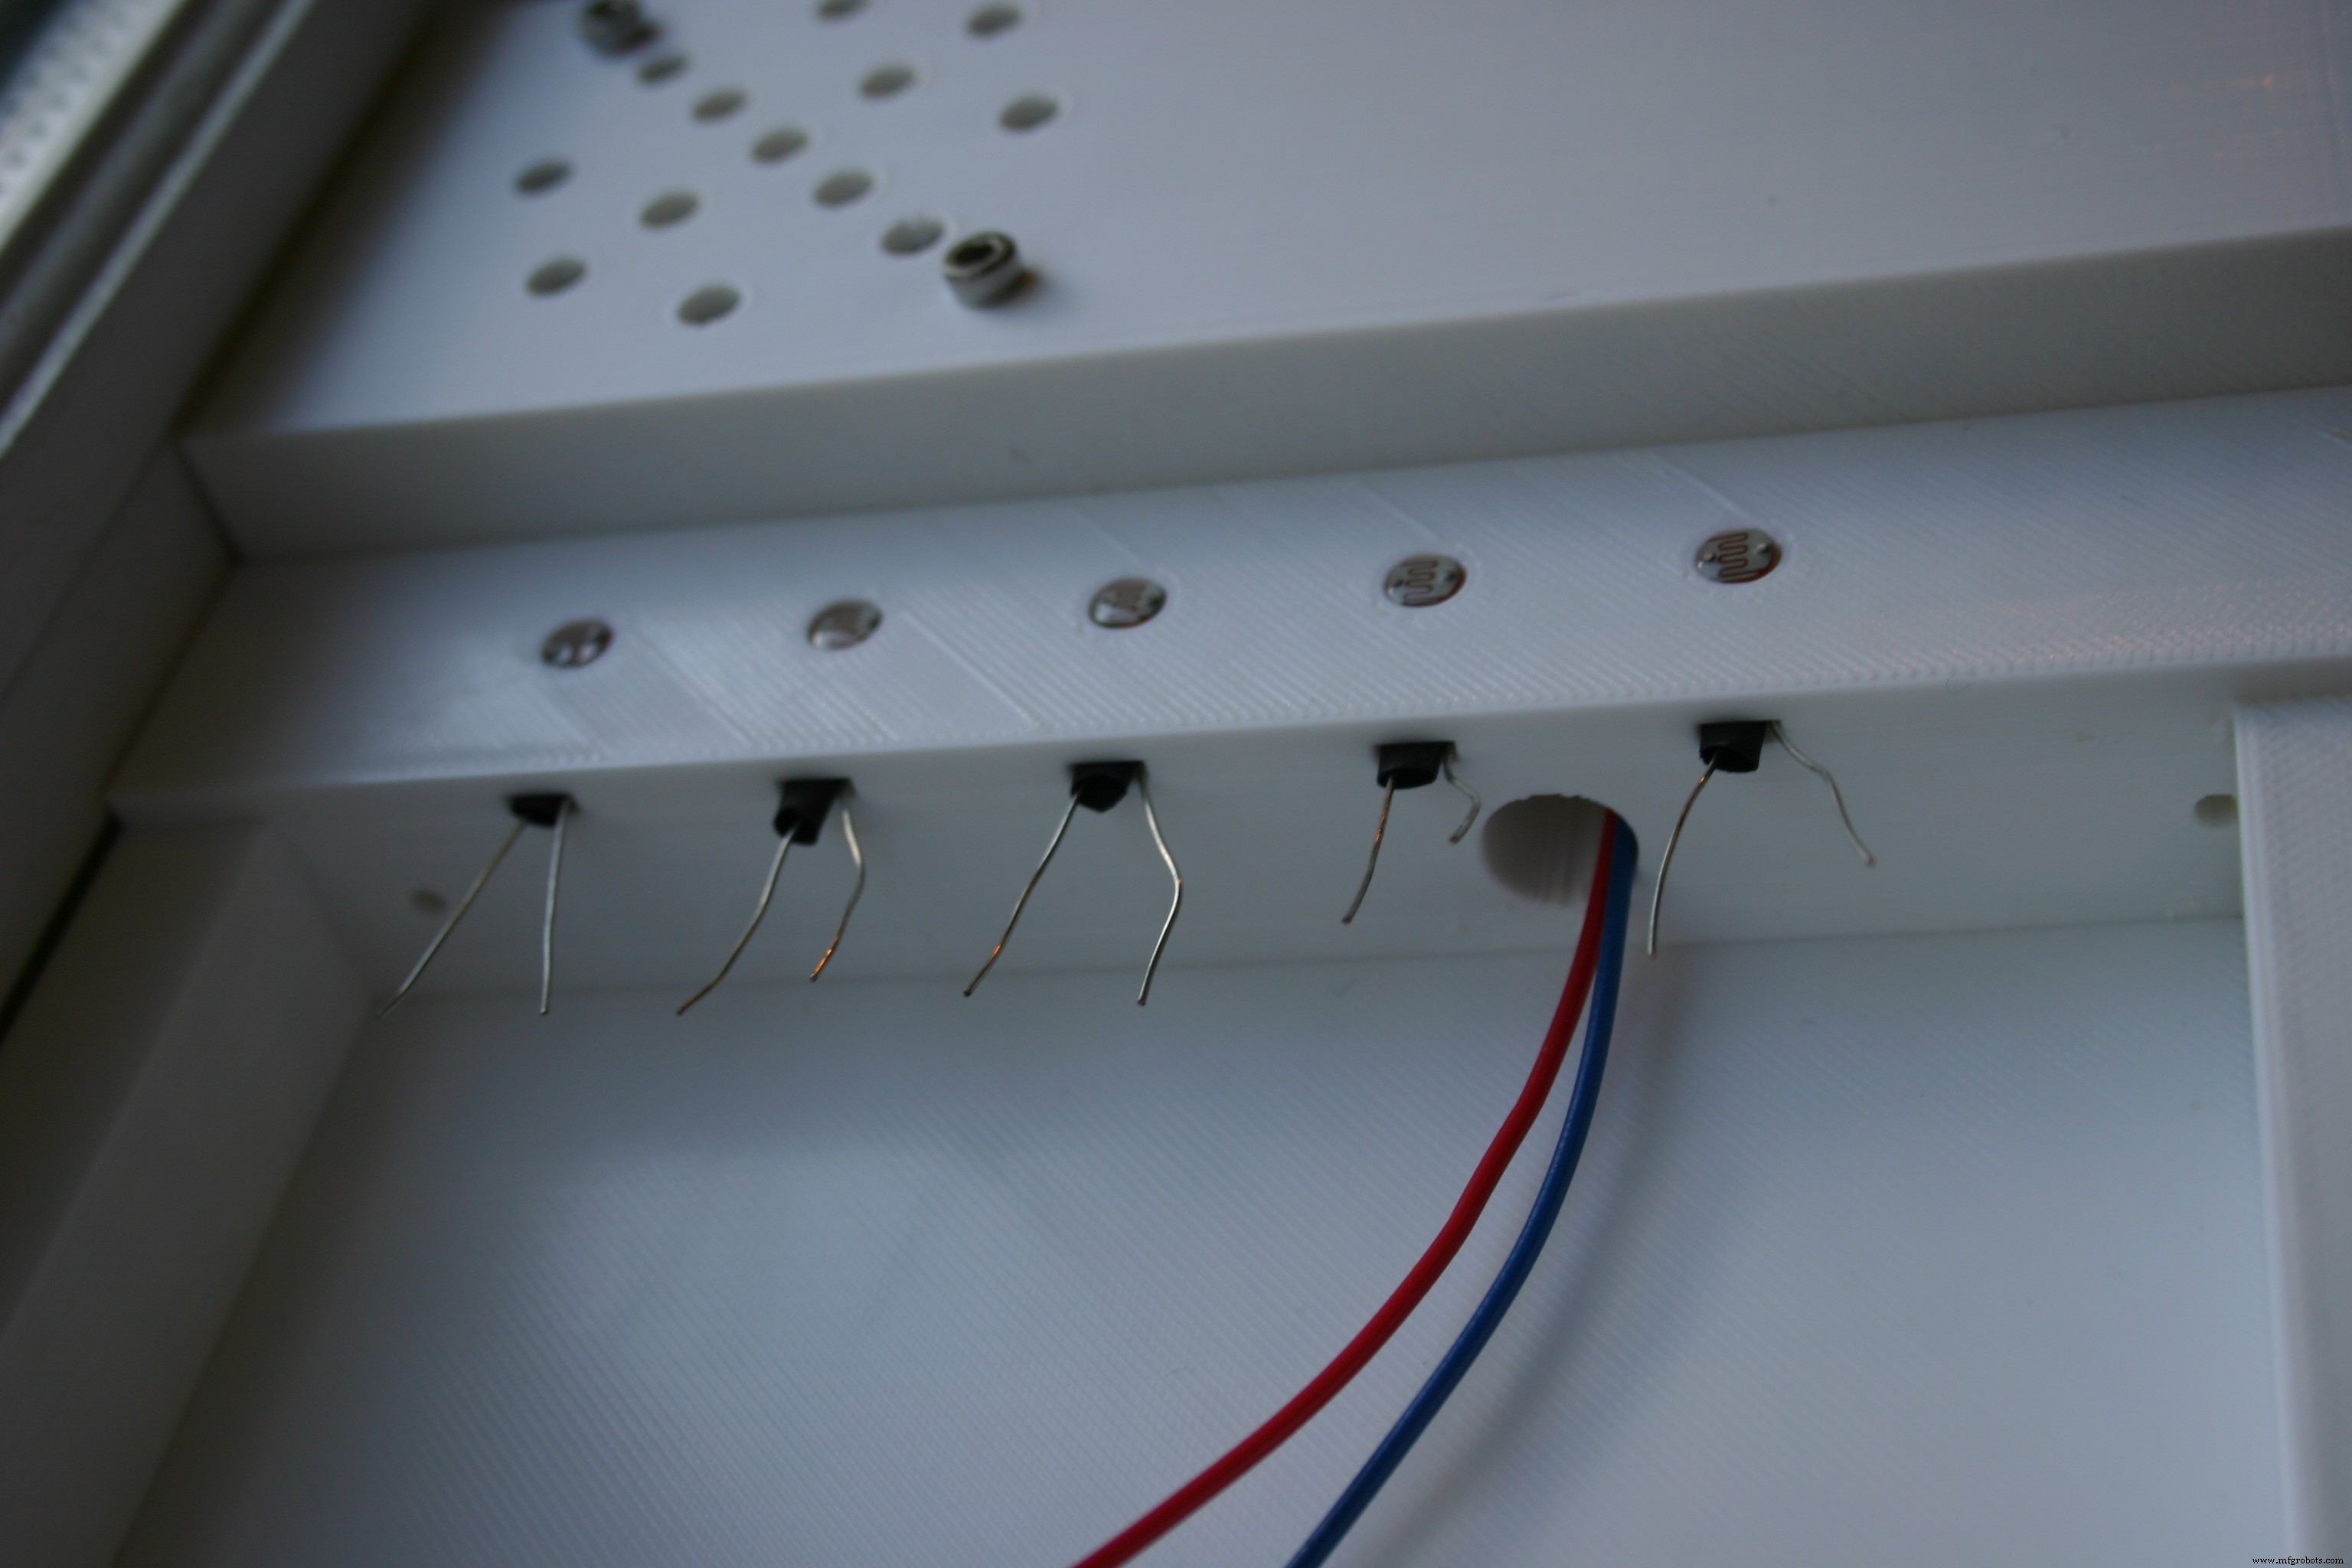
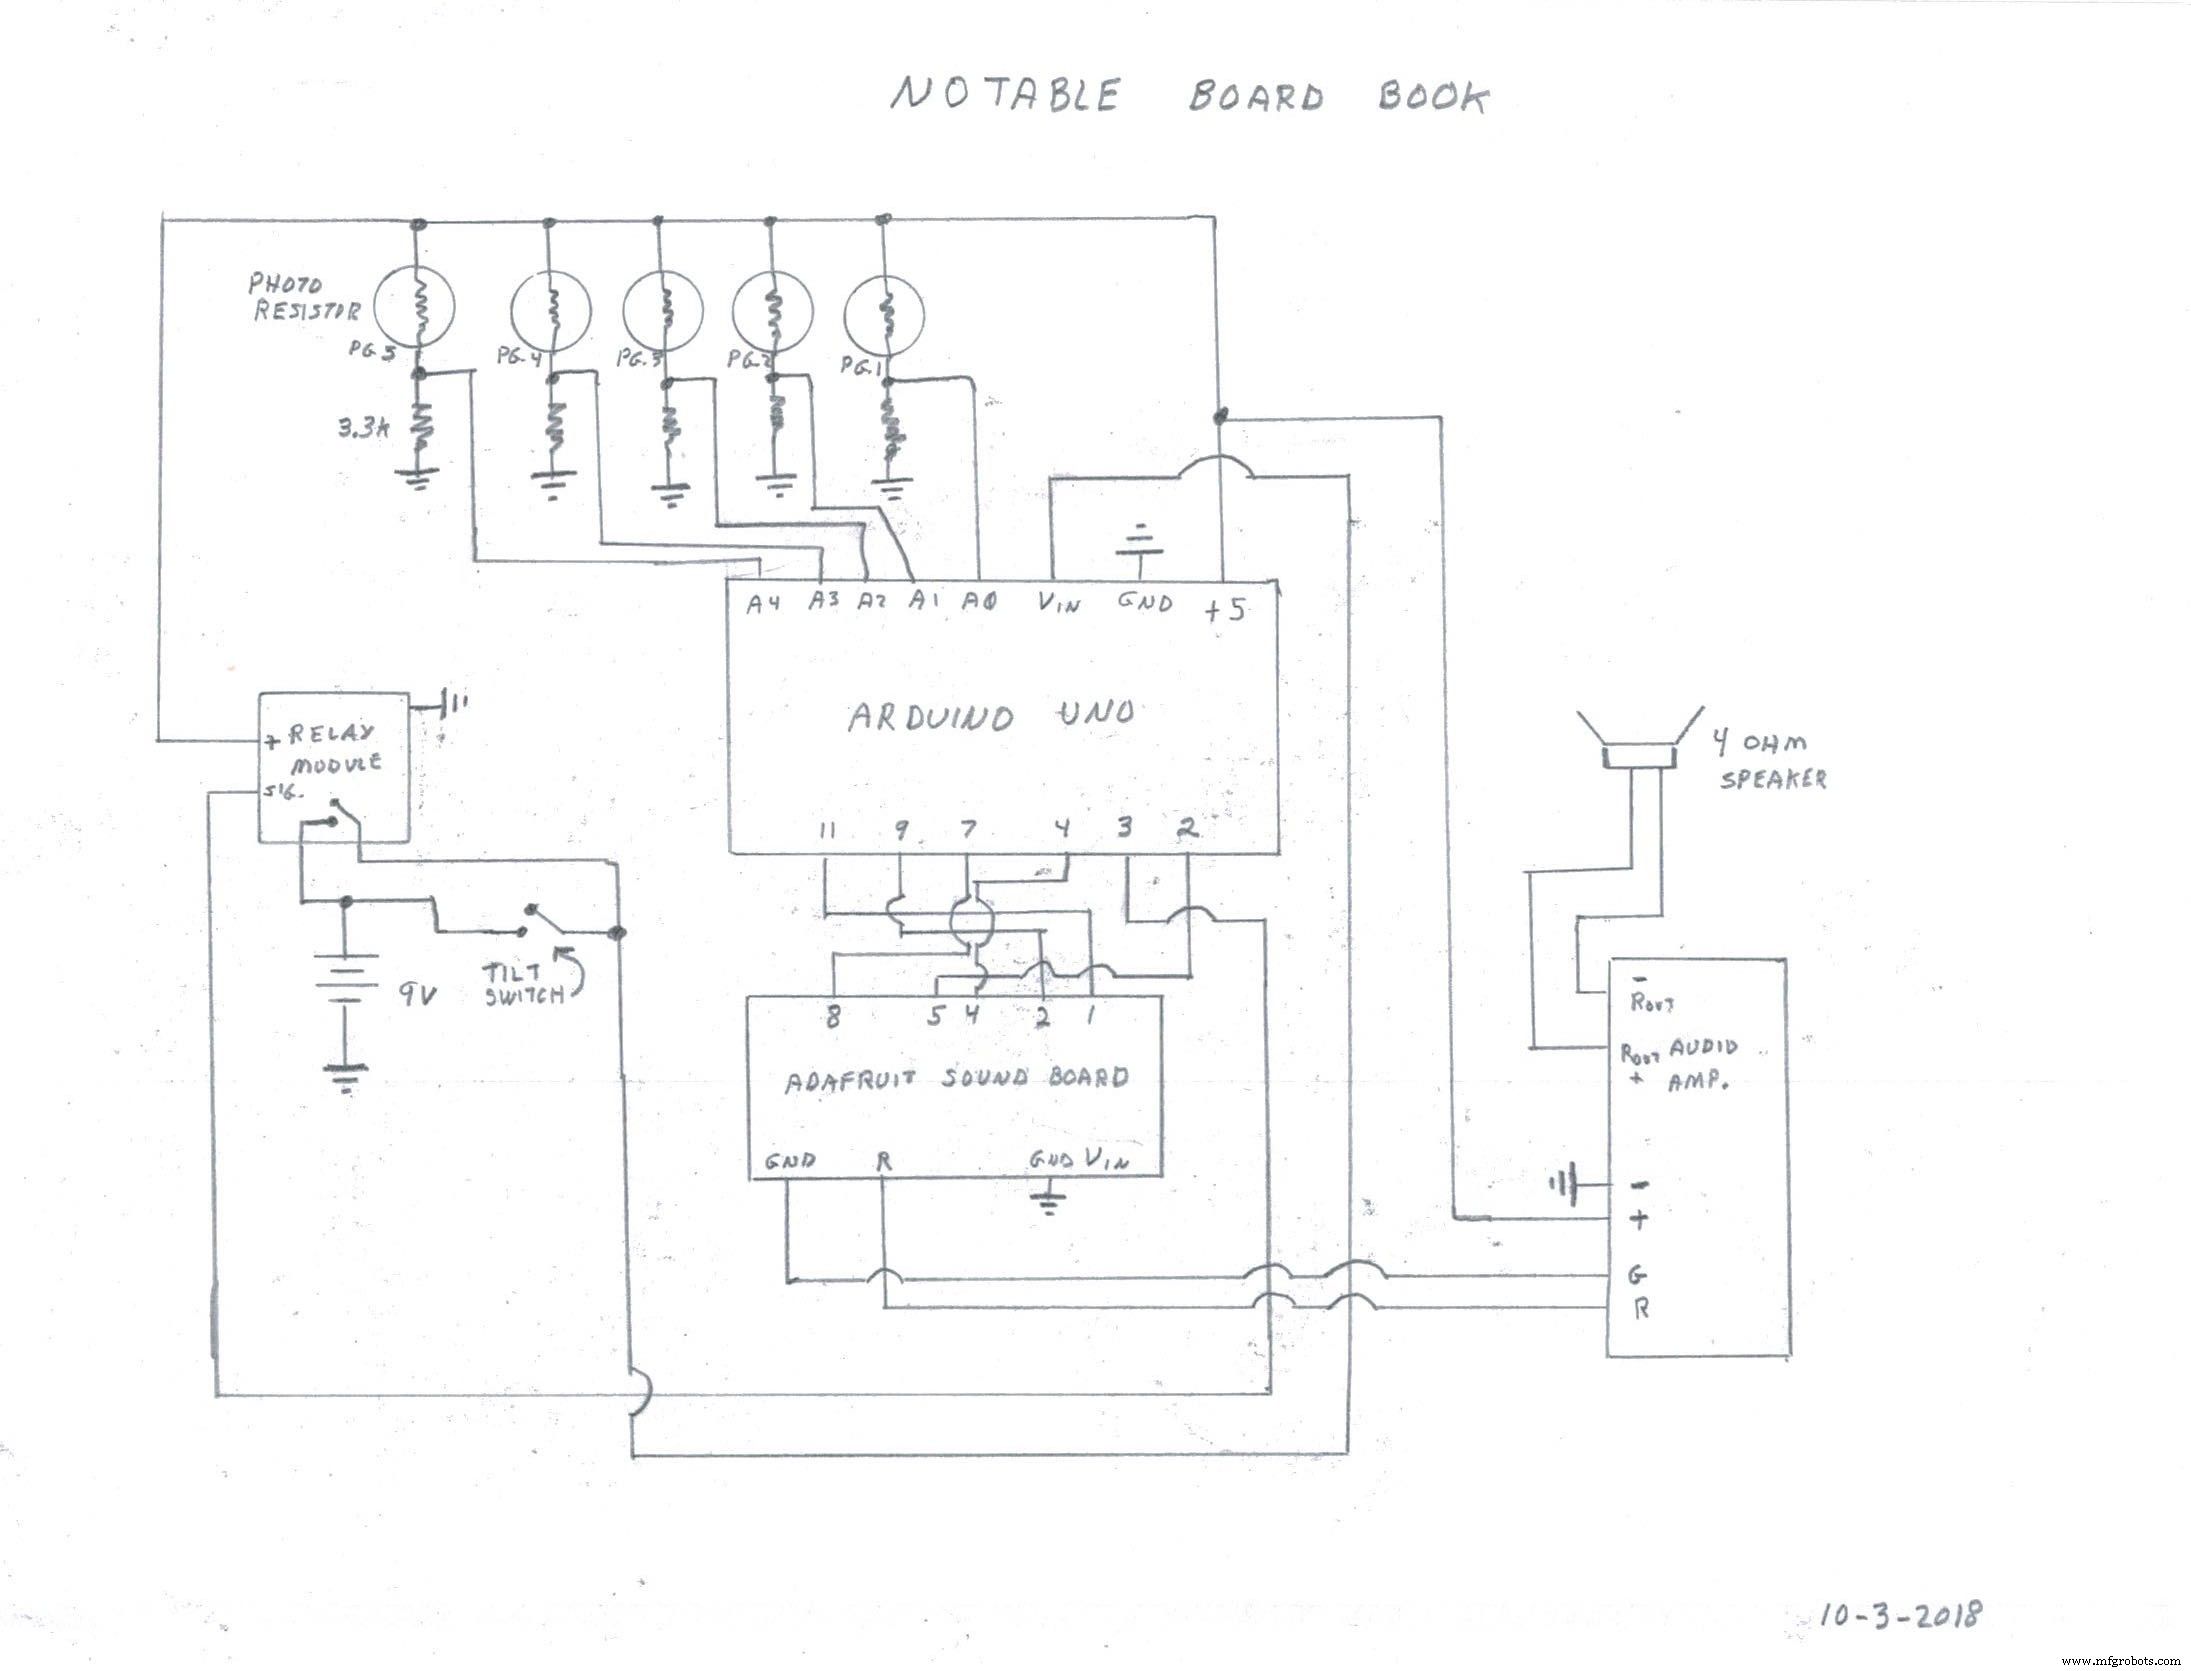
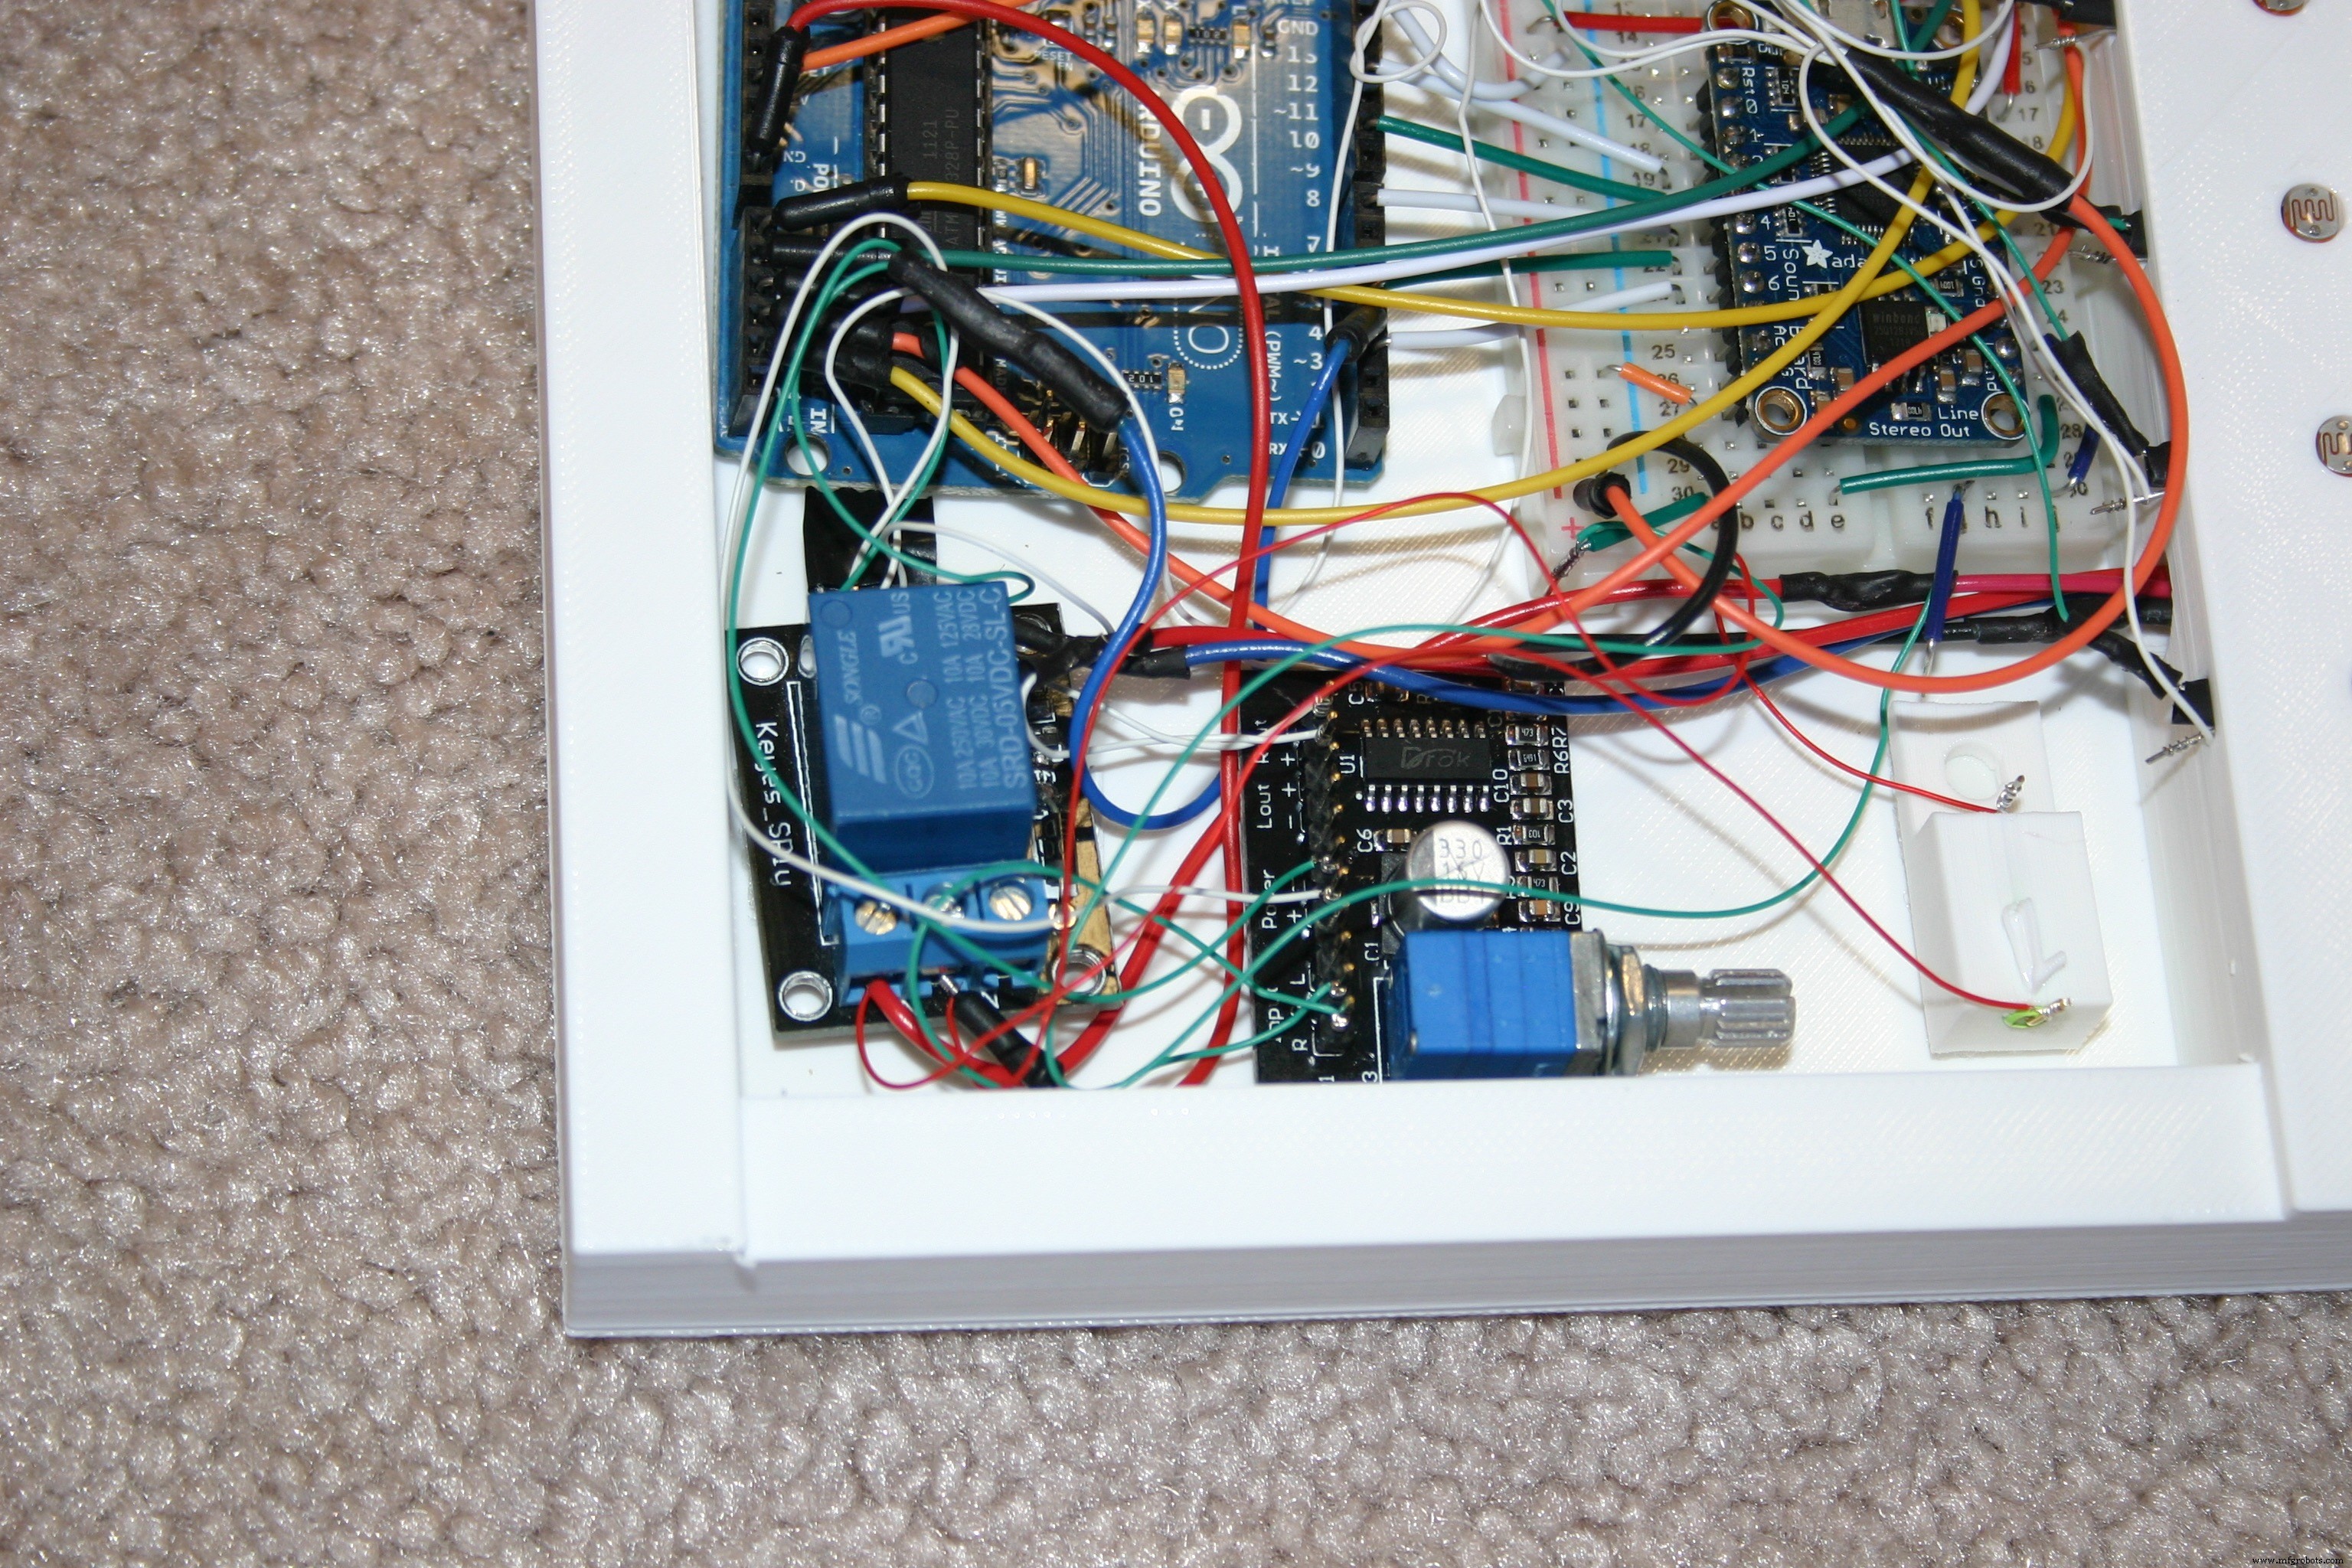
Now, we will start connecting things together using the schematic diagram.
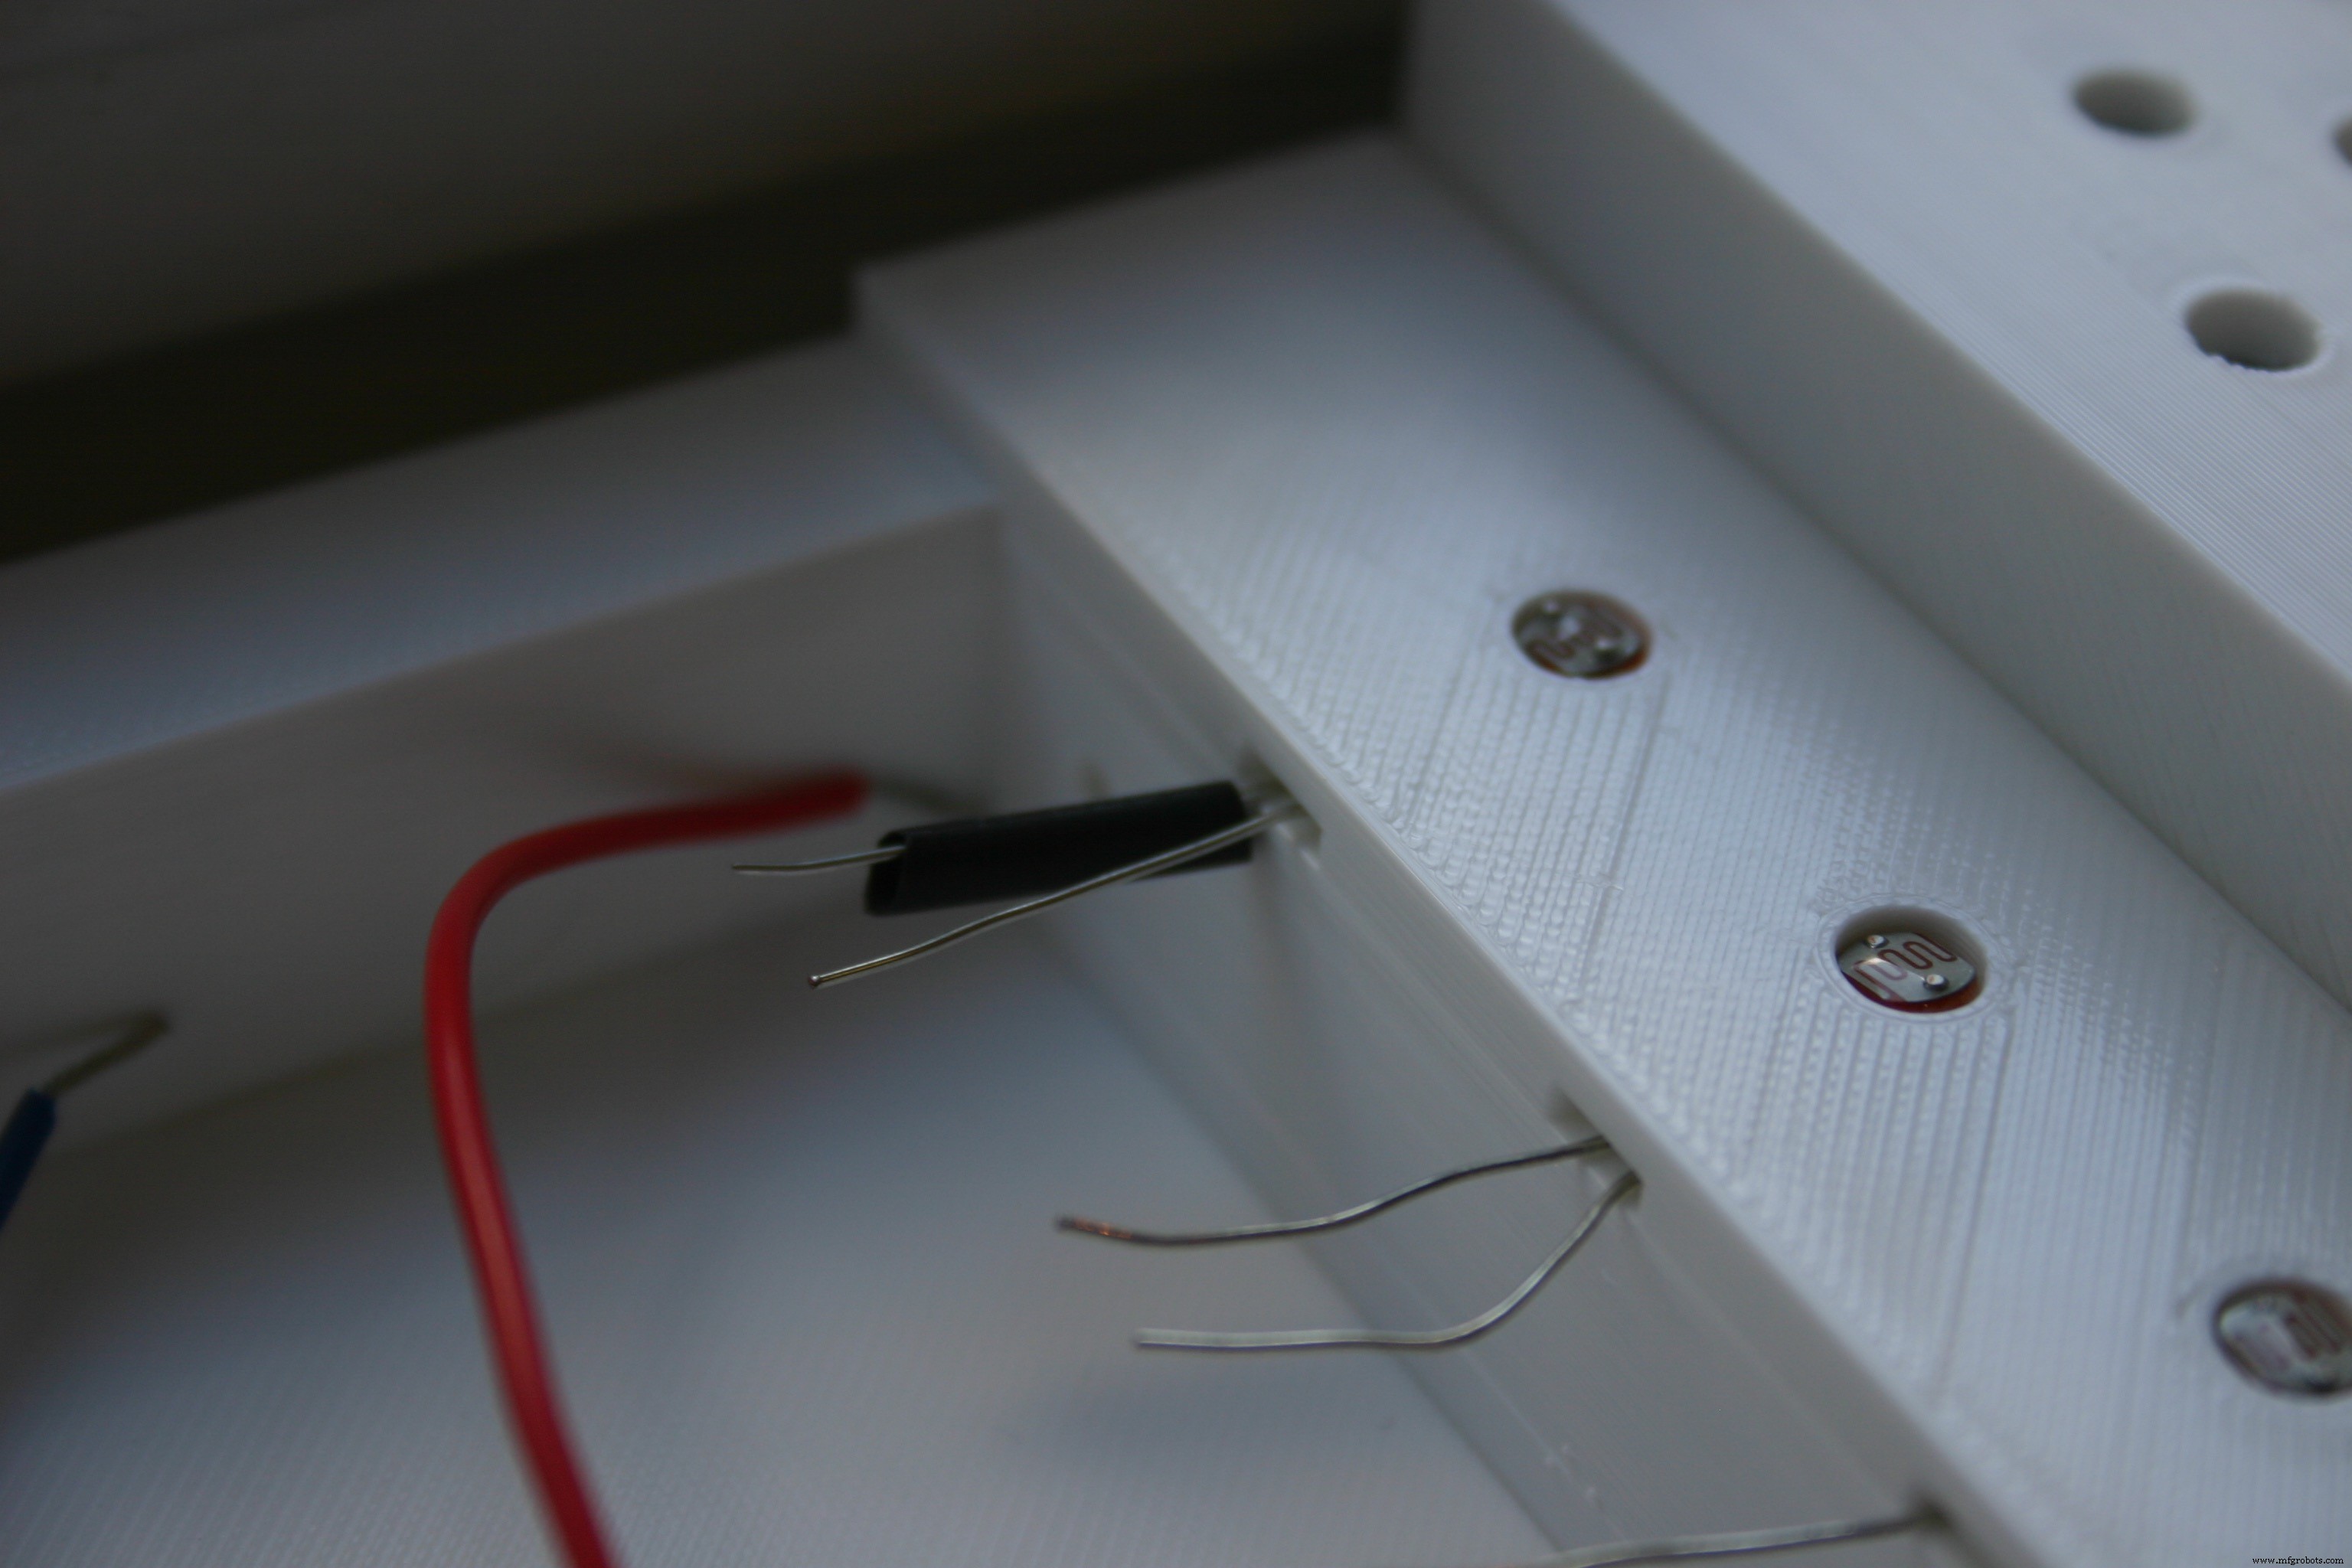
Solder a piece of wire wrap wire to one lead of a photo resistor. Cut off the excess lead.
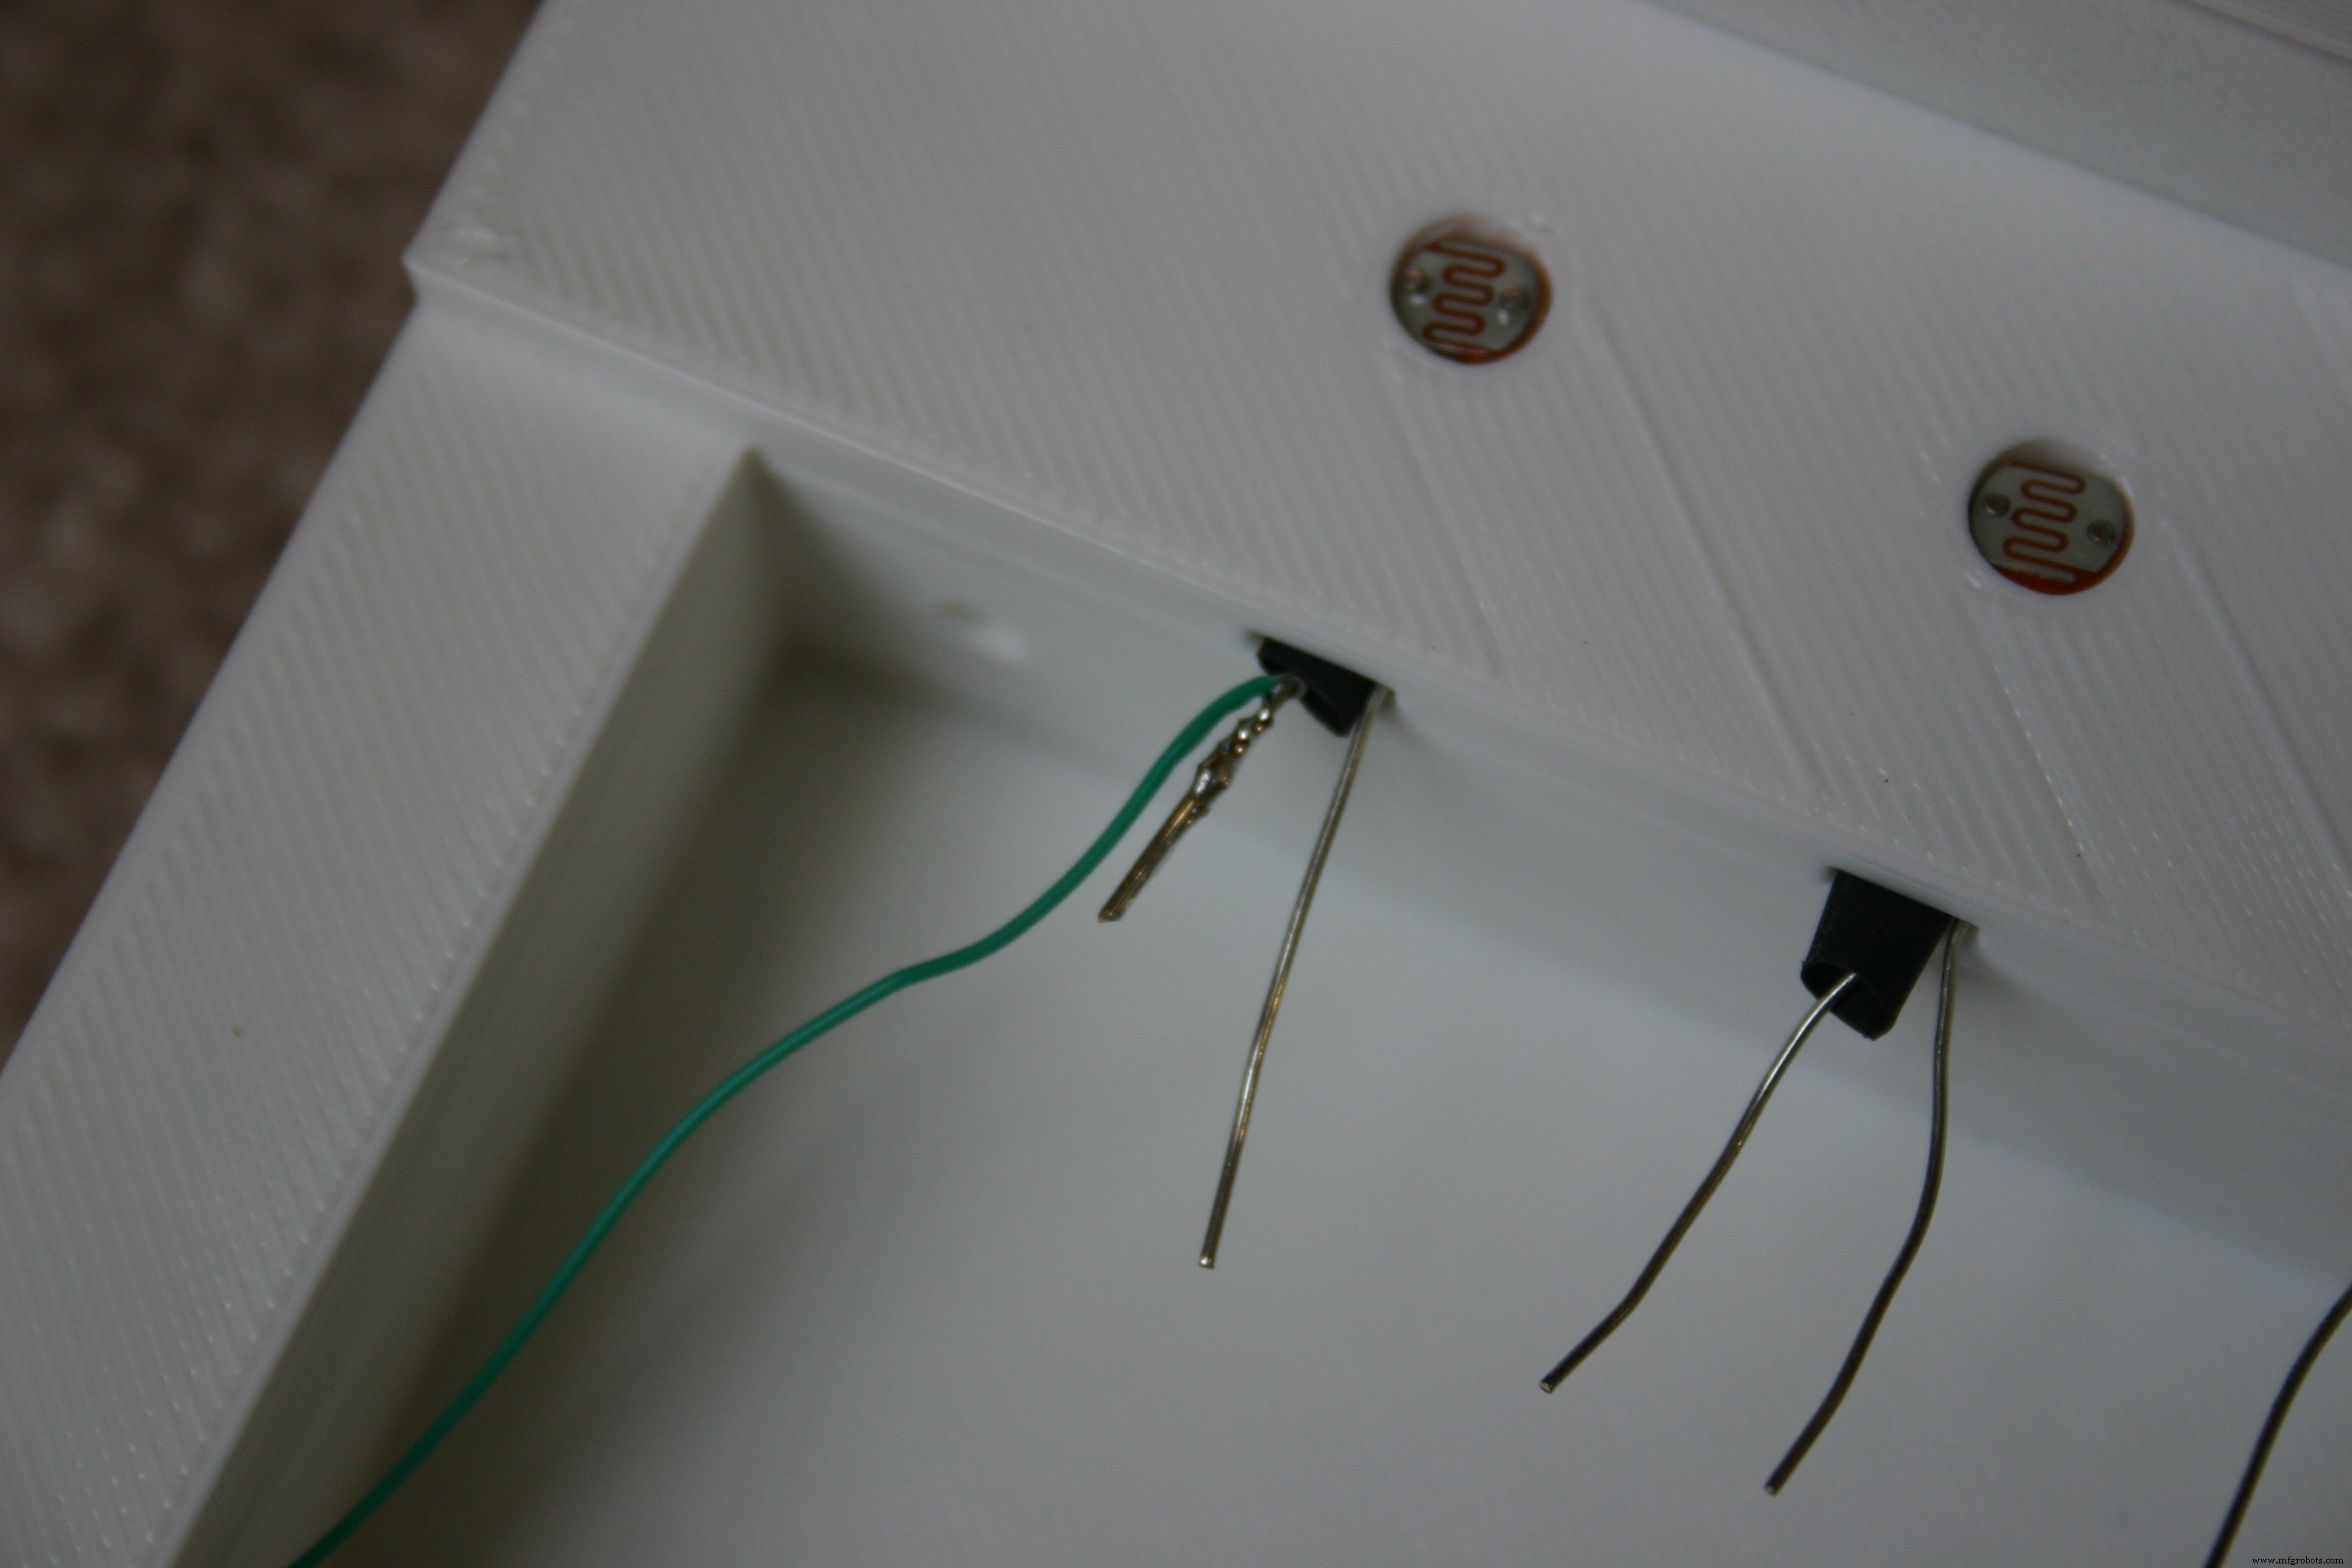
Add heat shrink tubing over the soldered connection.
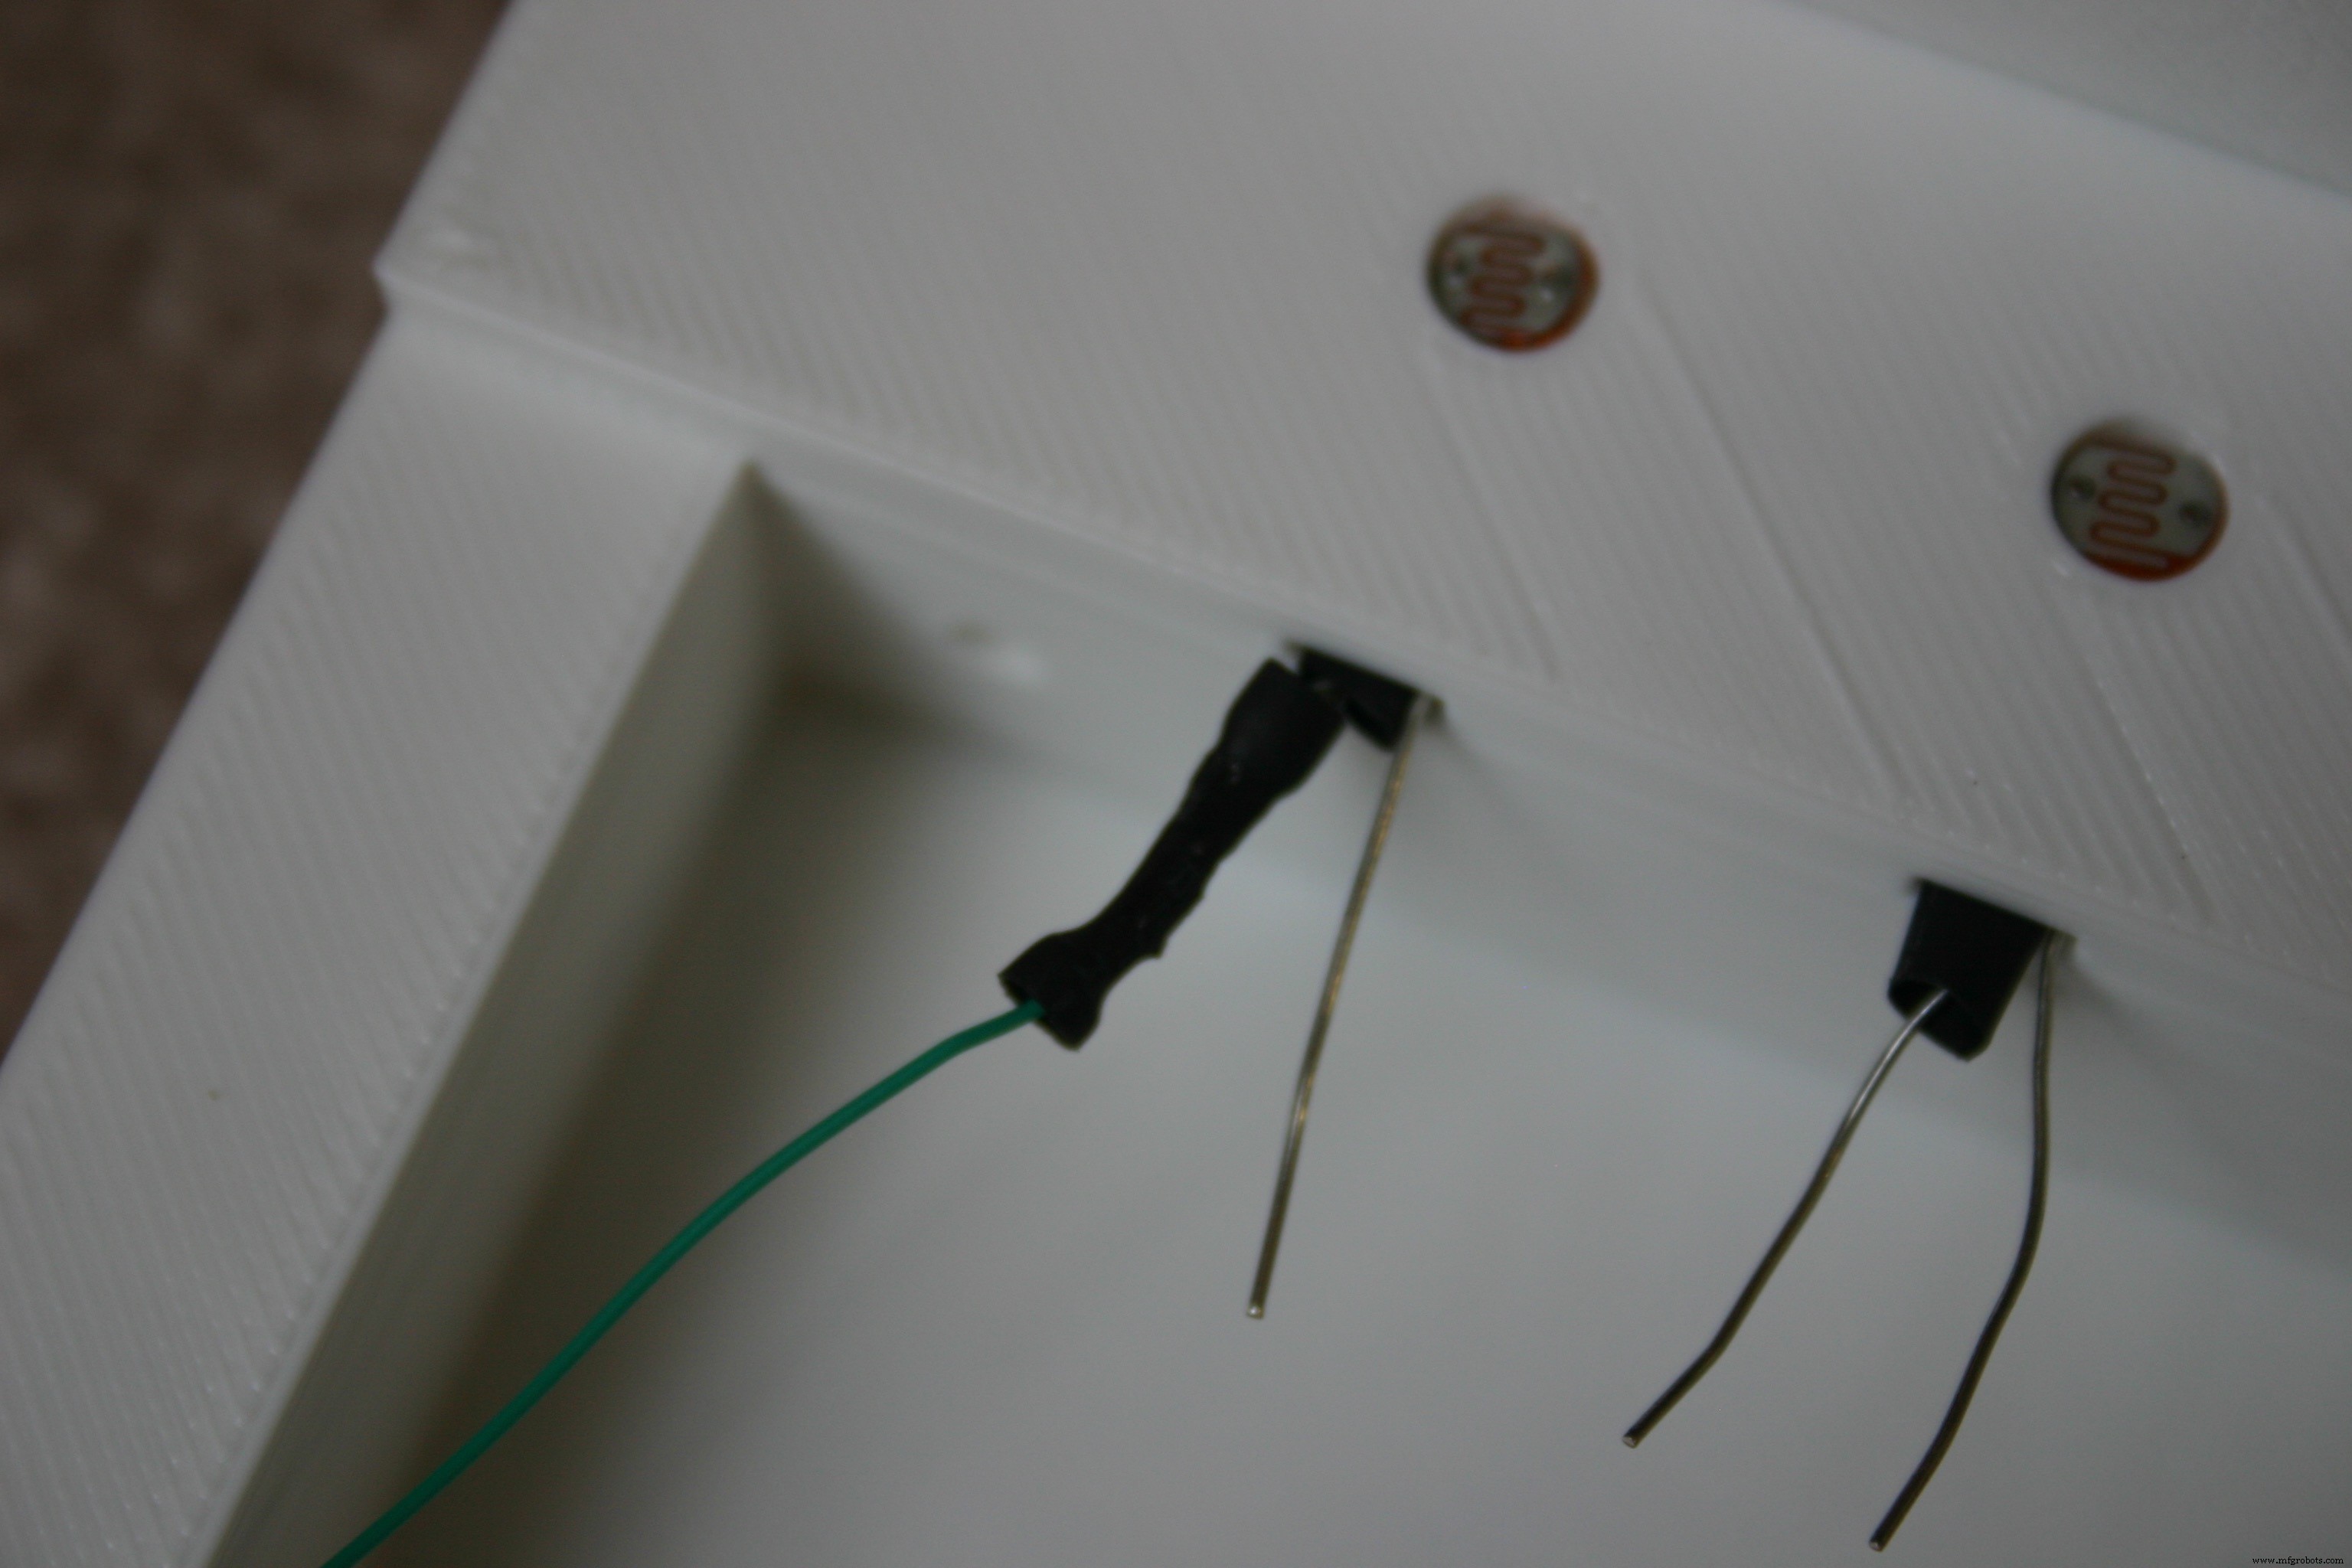
Do this for all the photo resistors.
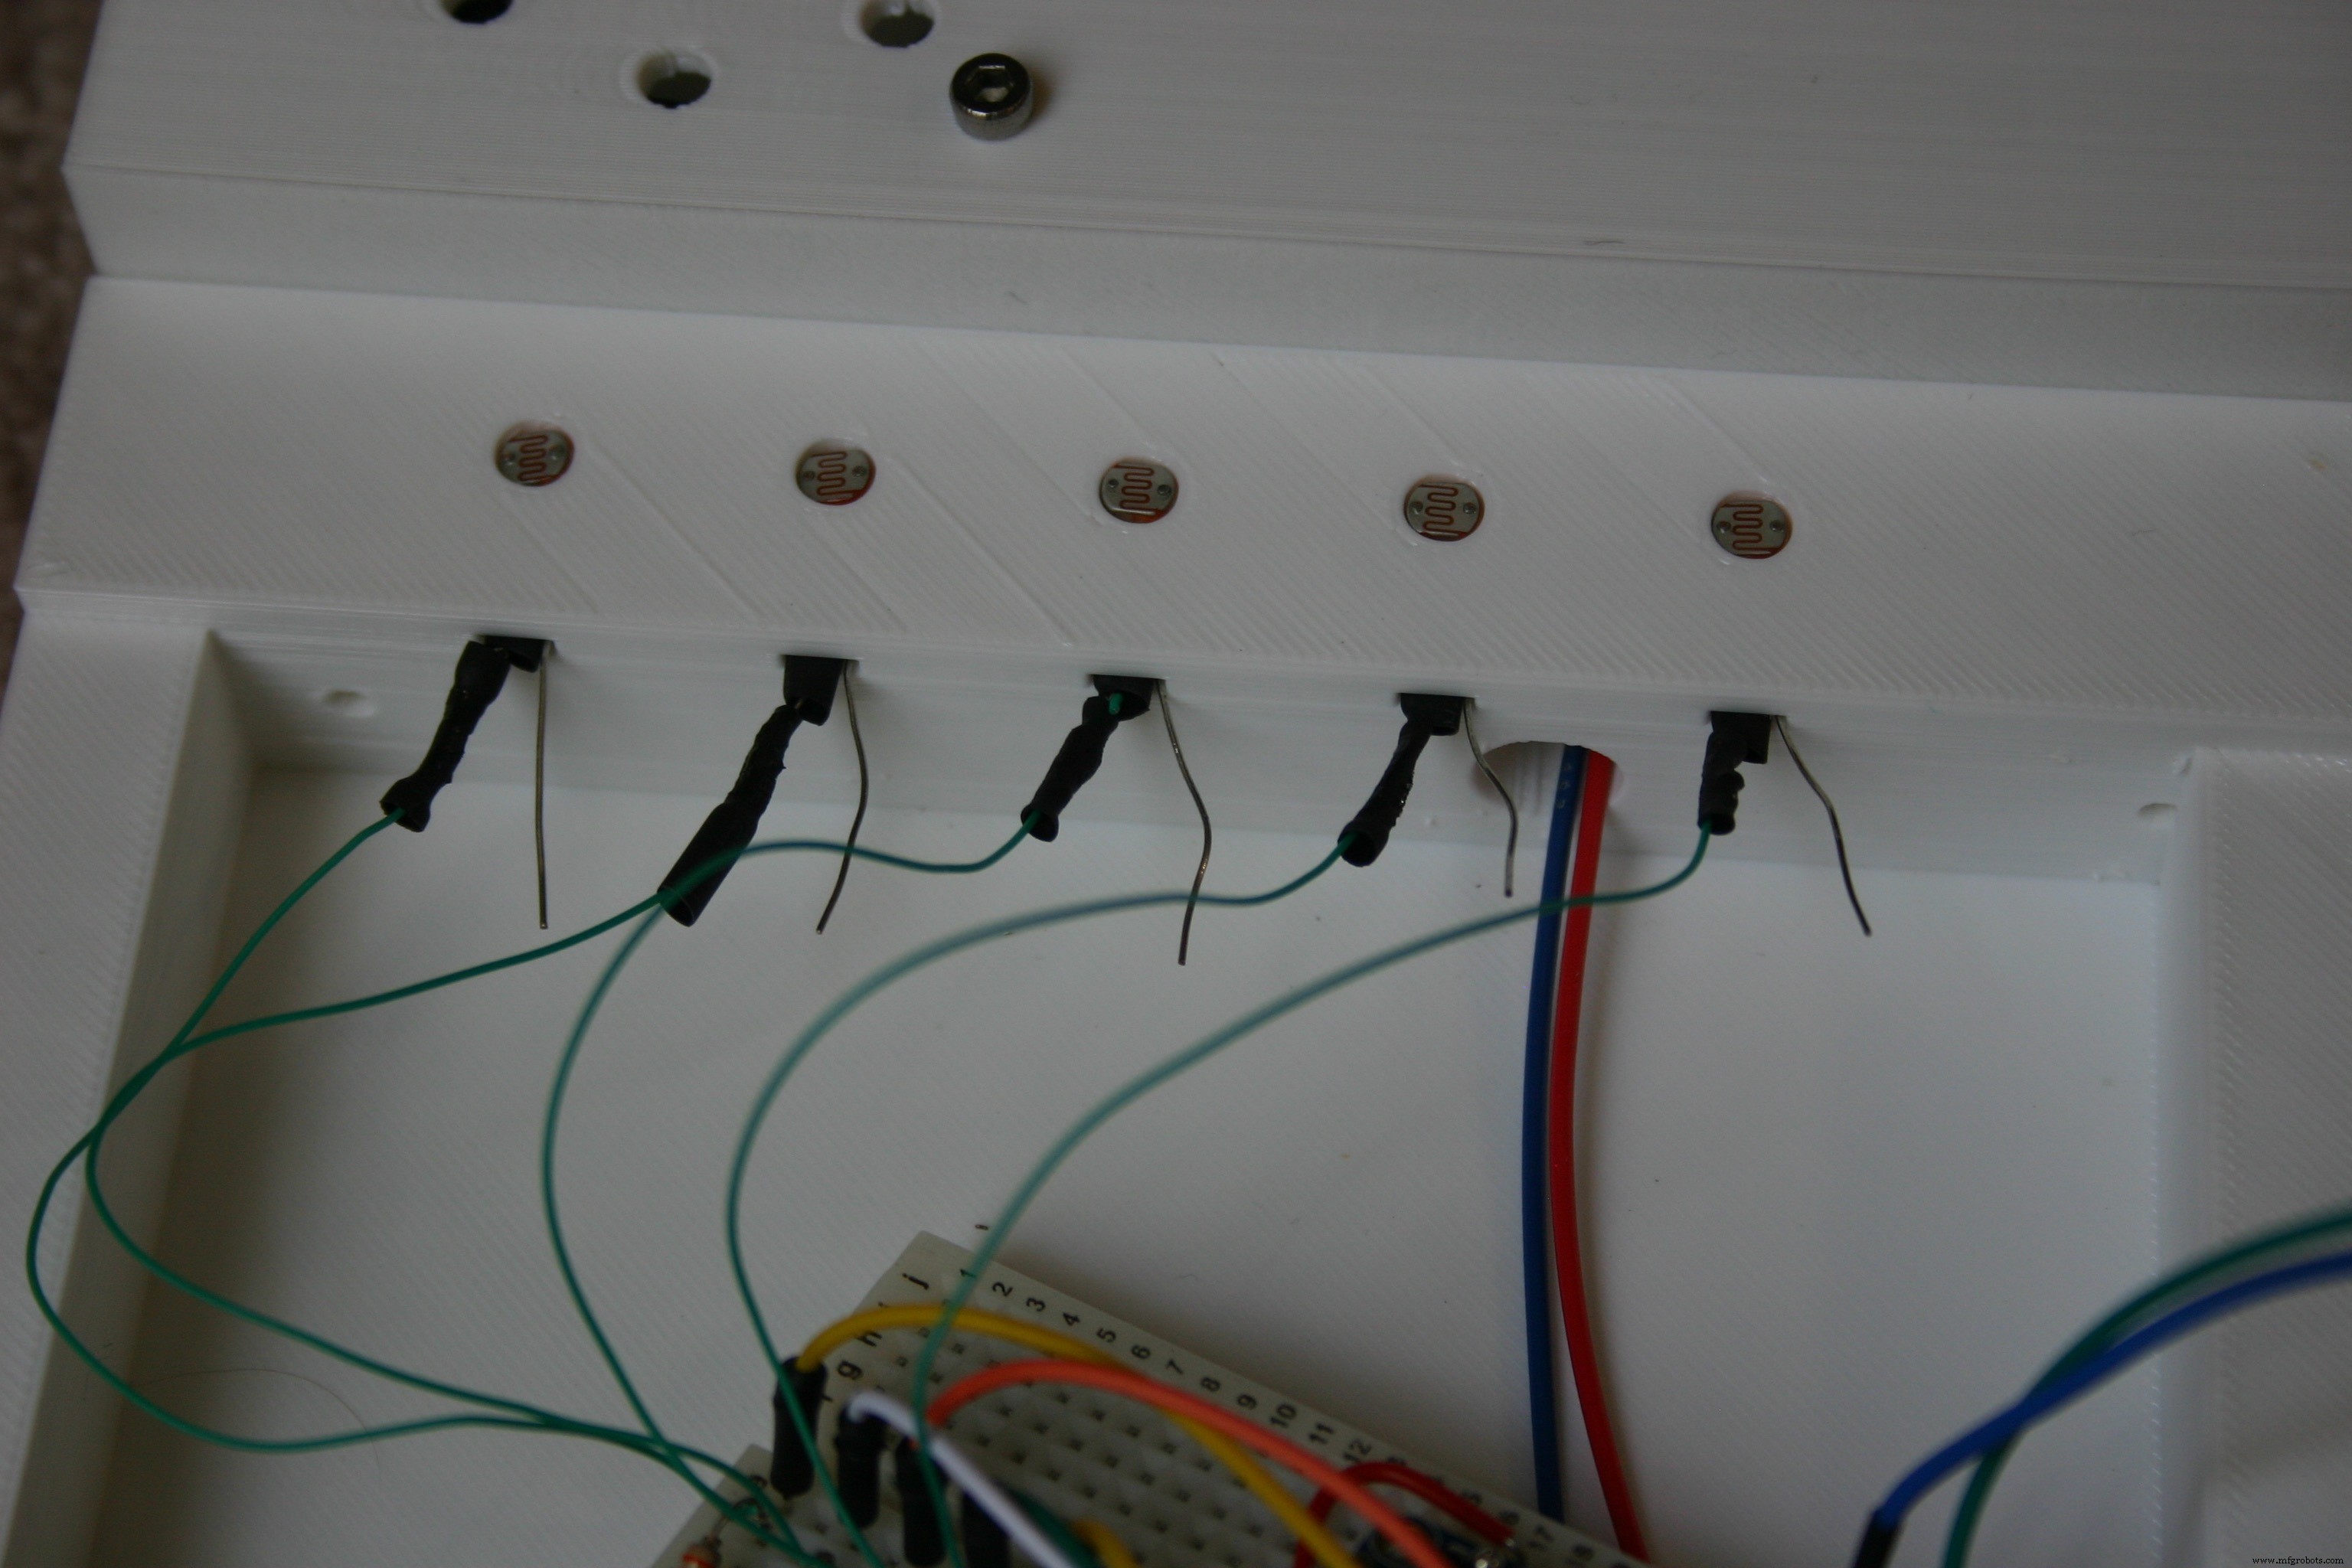
Connect wire to the other leg of the photo resistors. These legs will all go to the same place, +5 volts.
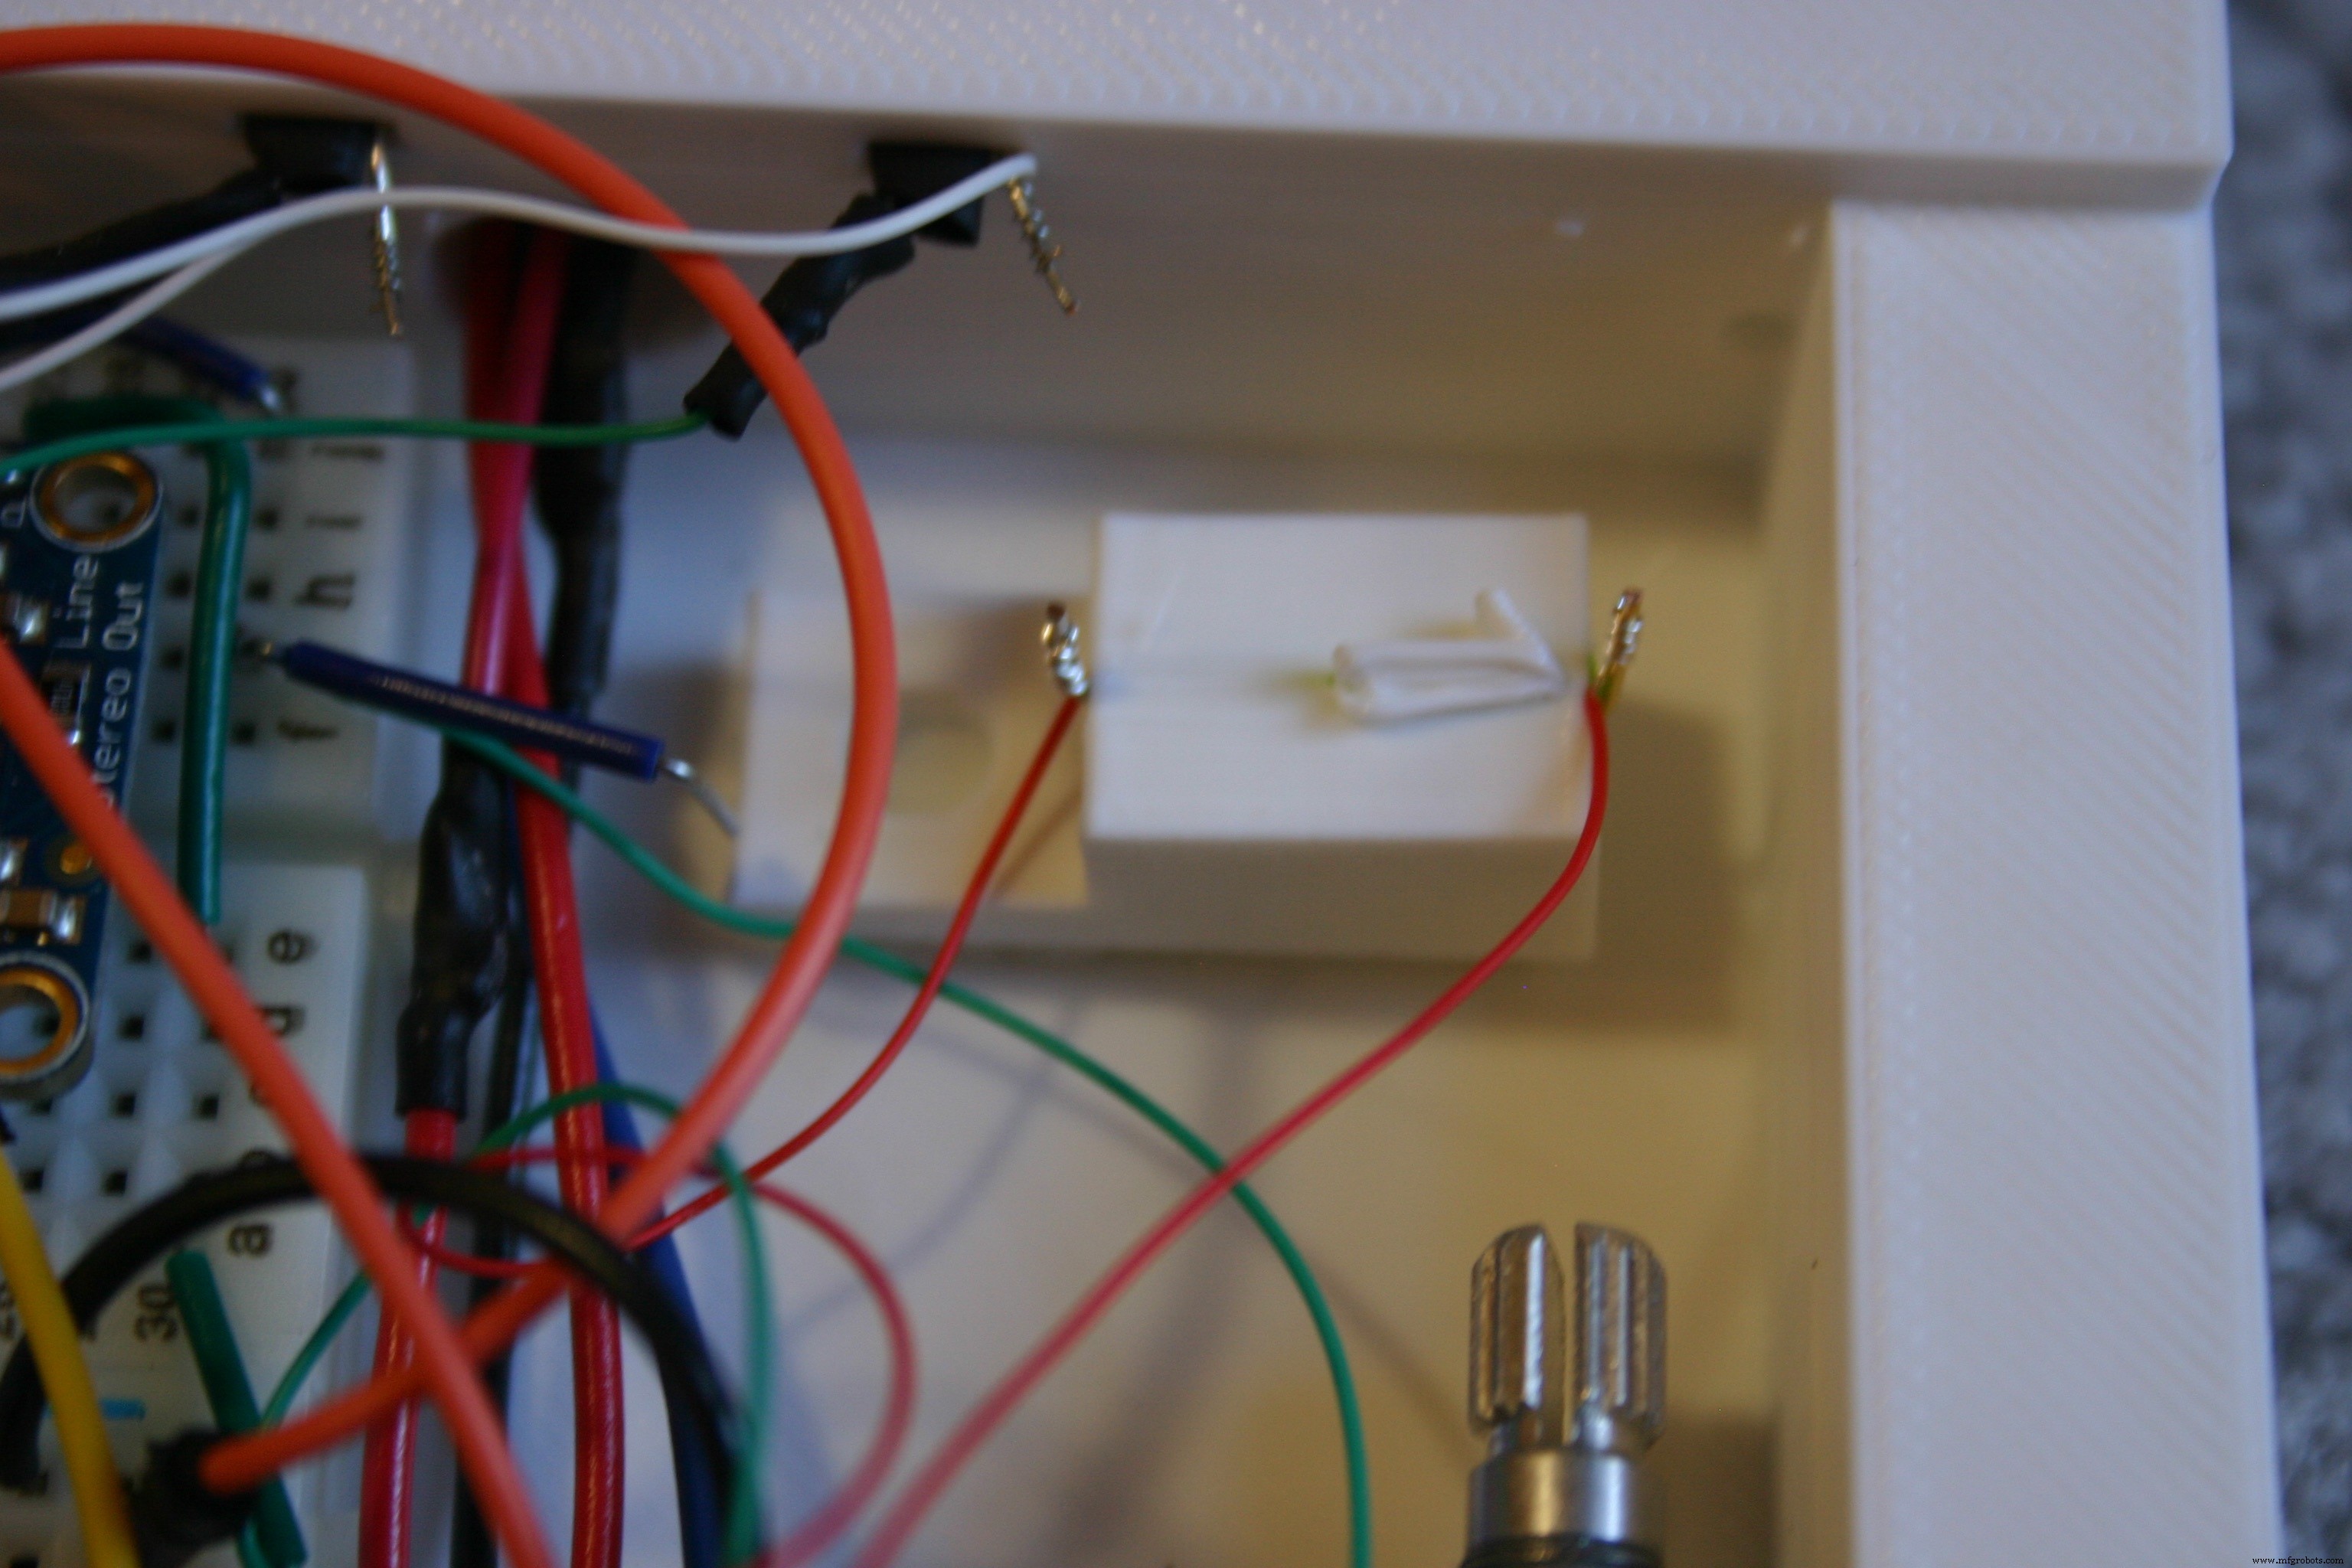
Take a roller ball tilt switch and insert it into the 3D-printed "tilt1." The brass end should be higher than the silver end.

Solder wires to each end of the switch and place the assembly in the electronic container--secure using Velcro.
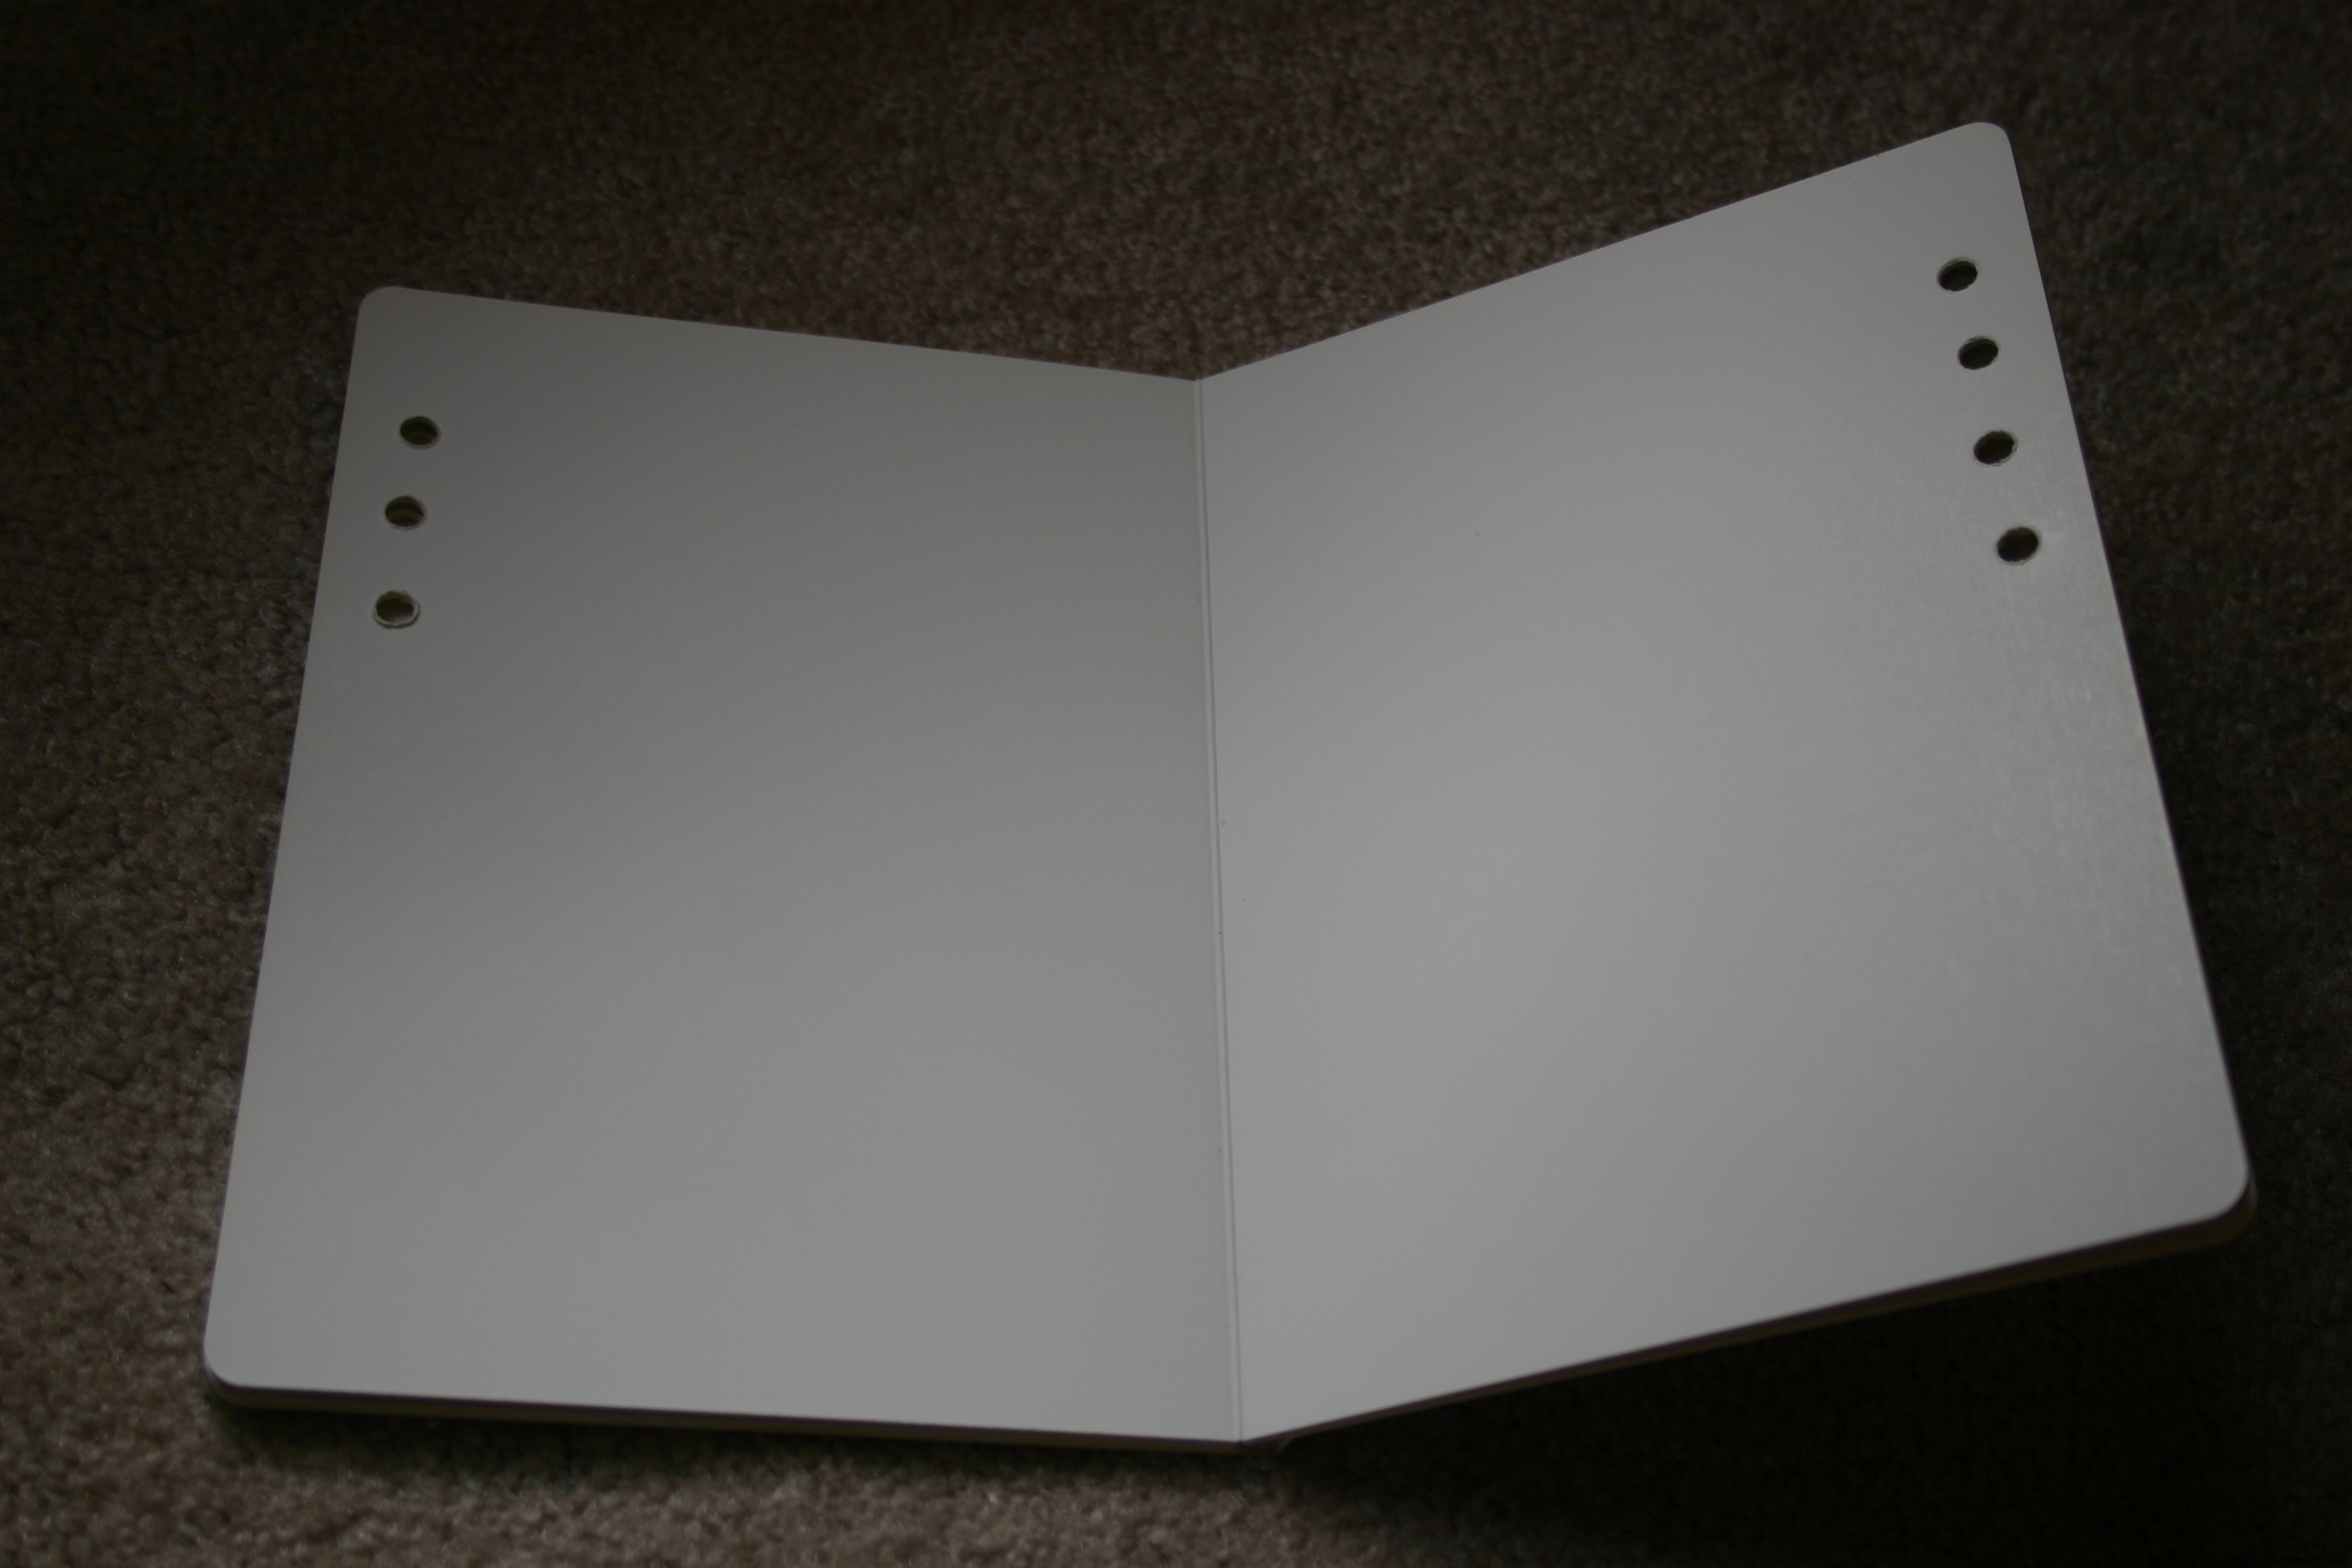
Take the 3D-printed "punch jig" and align it with the upper right hand corner of the blank board book.
Use a drill punch to mark the place for the holes.
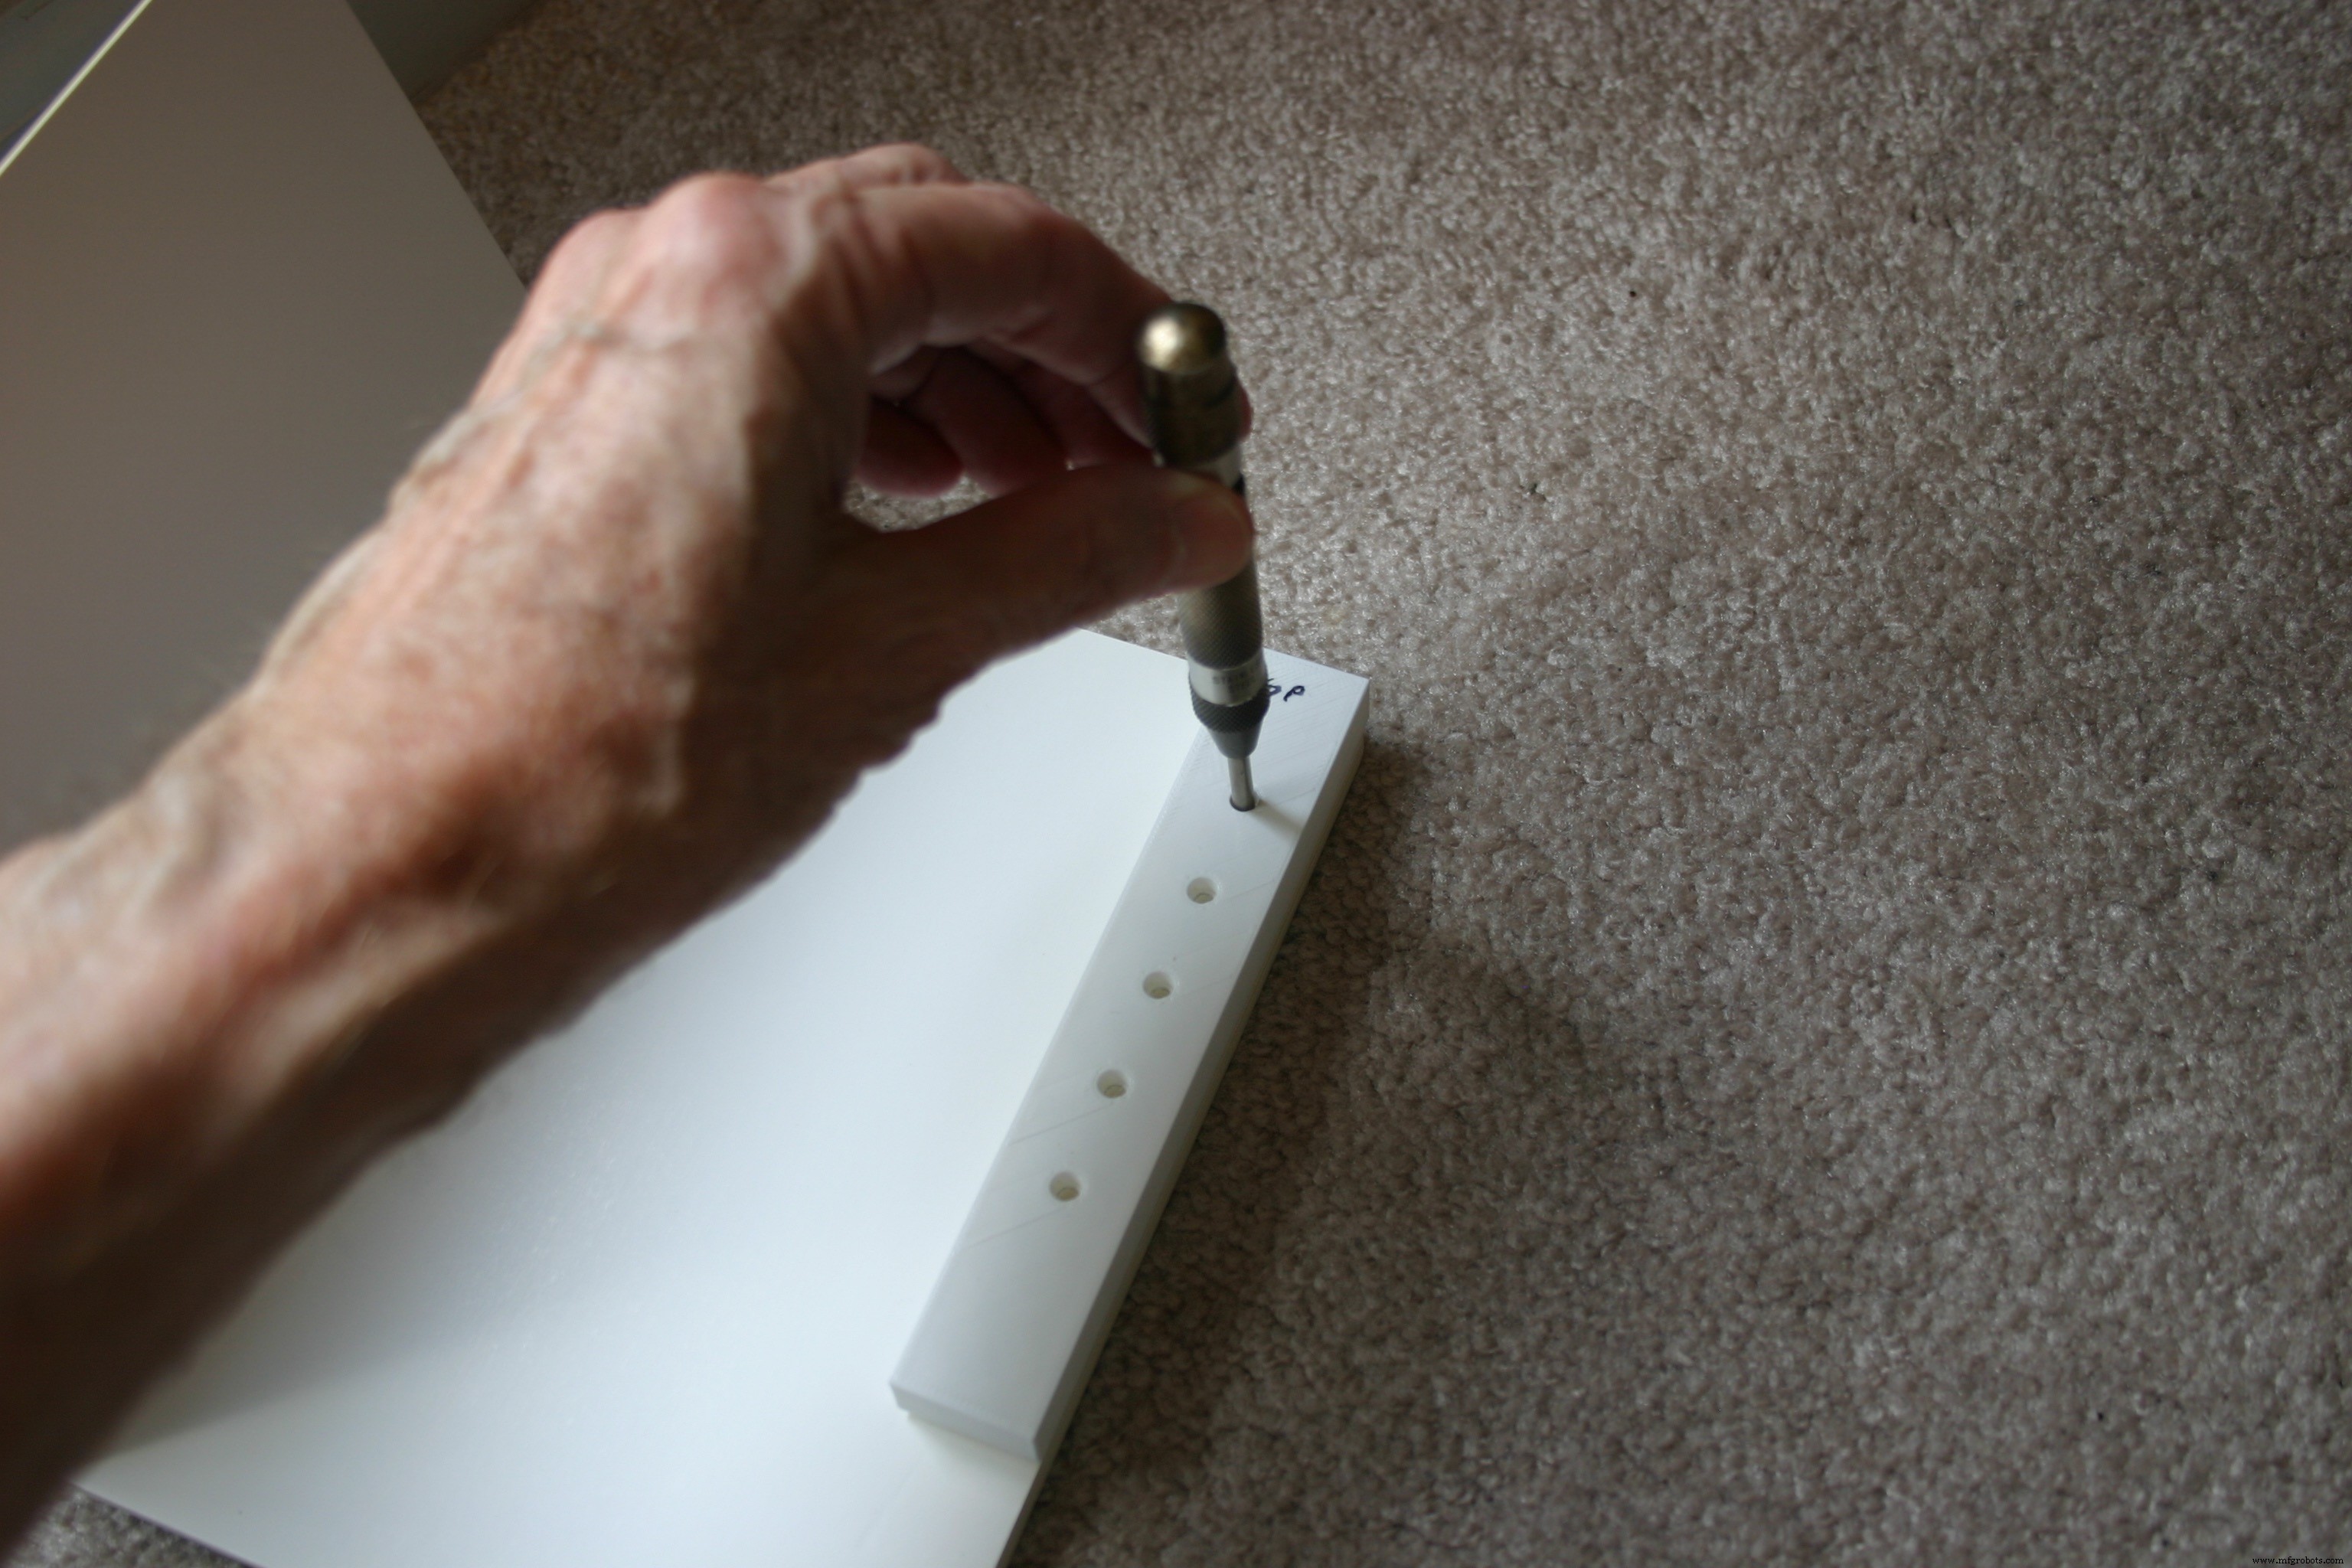
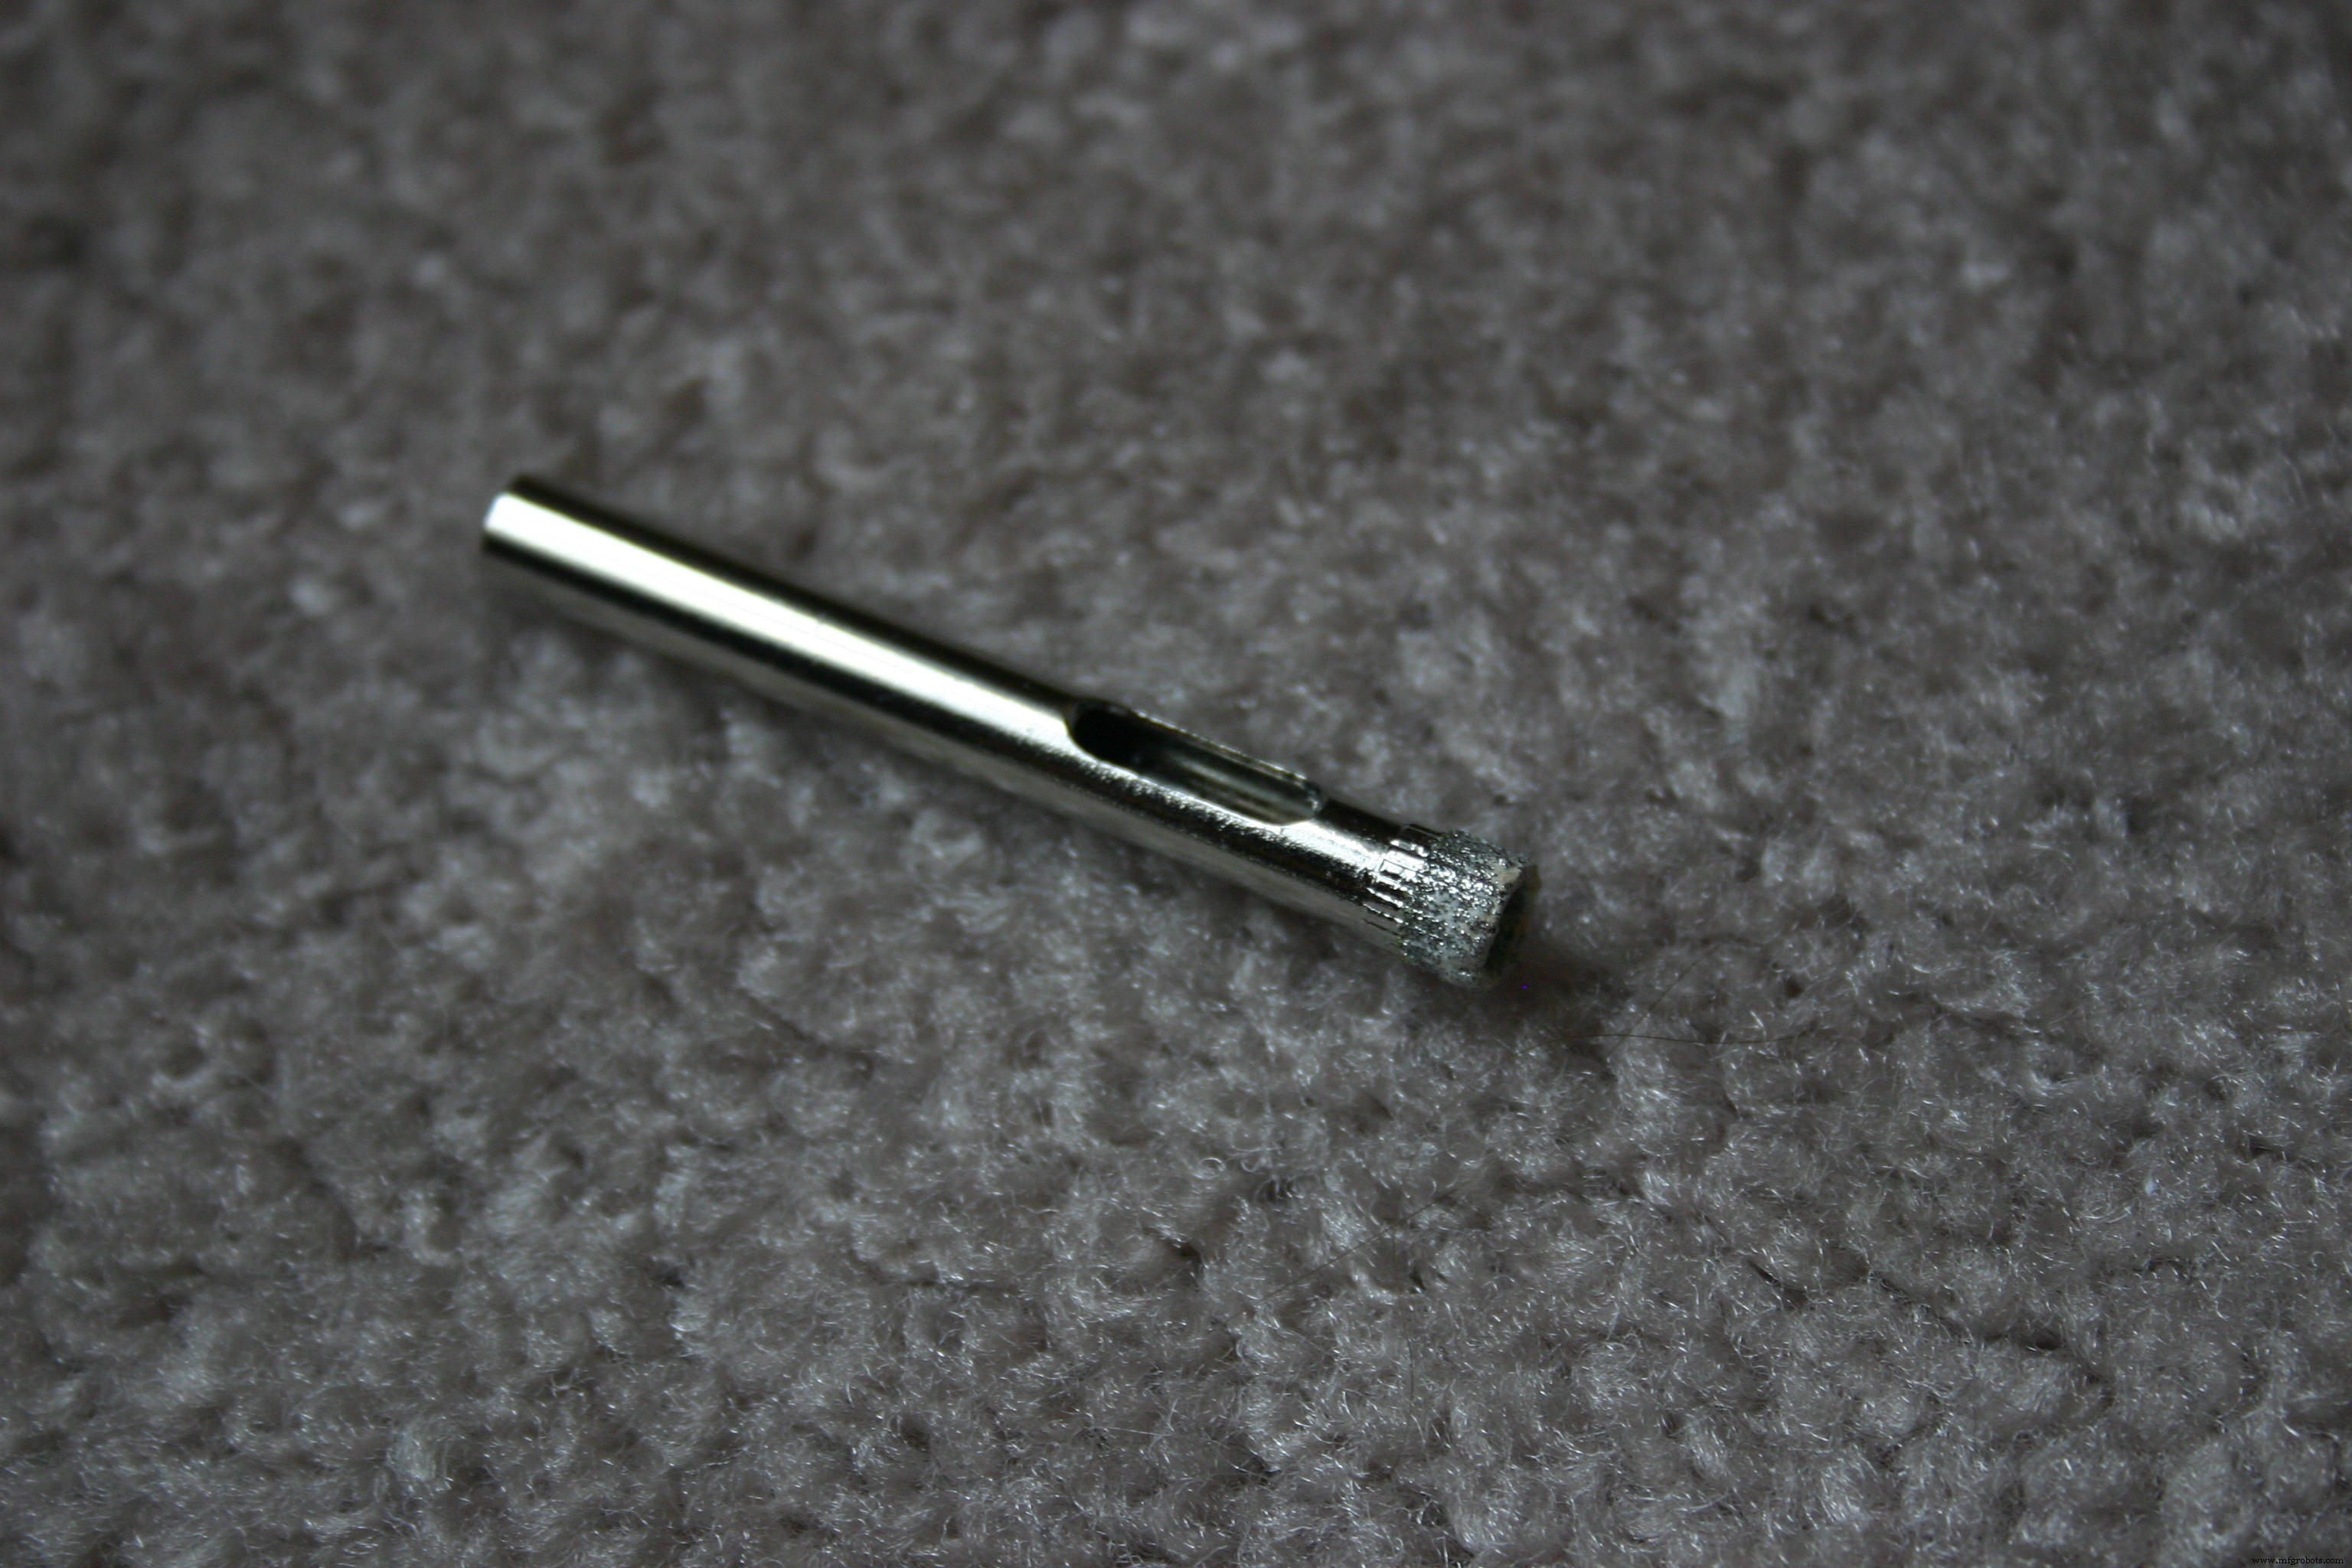
Use a hollow core drill bit (I used 7mm) to drill the holes. I found it necessary to pre drill slightly using a normal drill bit--to keep the hollow bit from wandering. A drill press could be used to avoid this problem.

The first hole goes through five pages, the second through four, etc.
After selecting and sizing the text and photos for the book, the pages should be printed using photo paper (the photo paper should be stiff and durable to prevent wrinkling during the glue process). I use ordinary white glue for this phase.
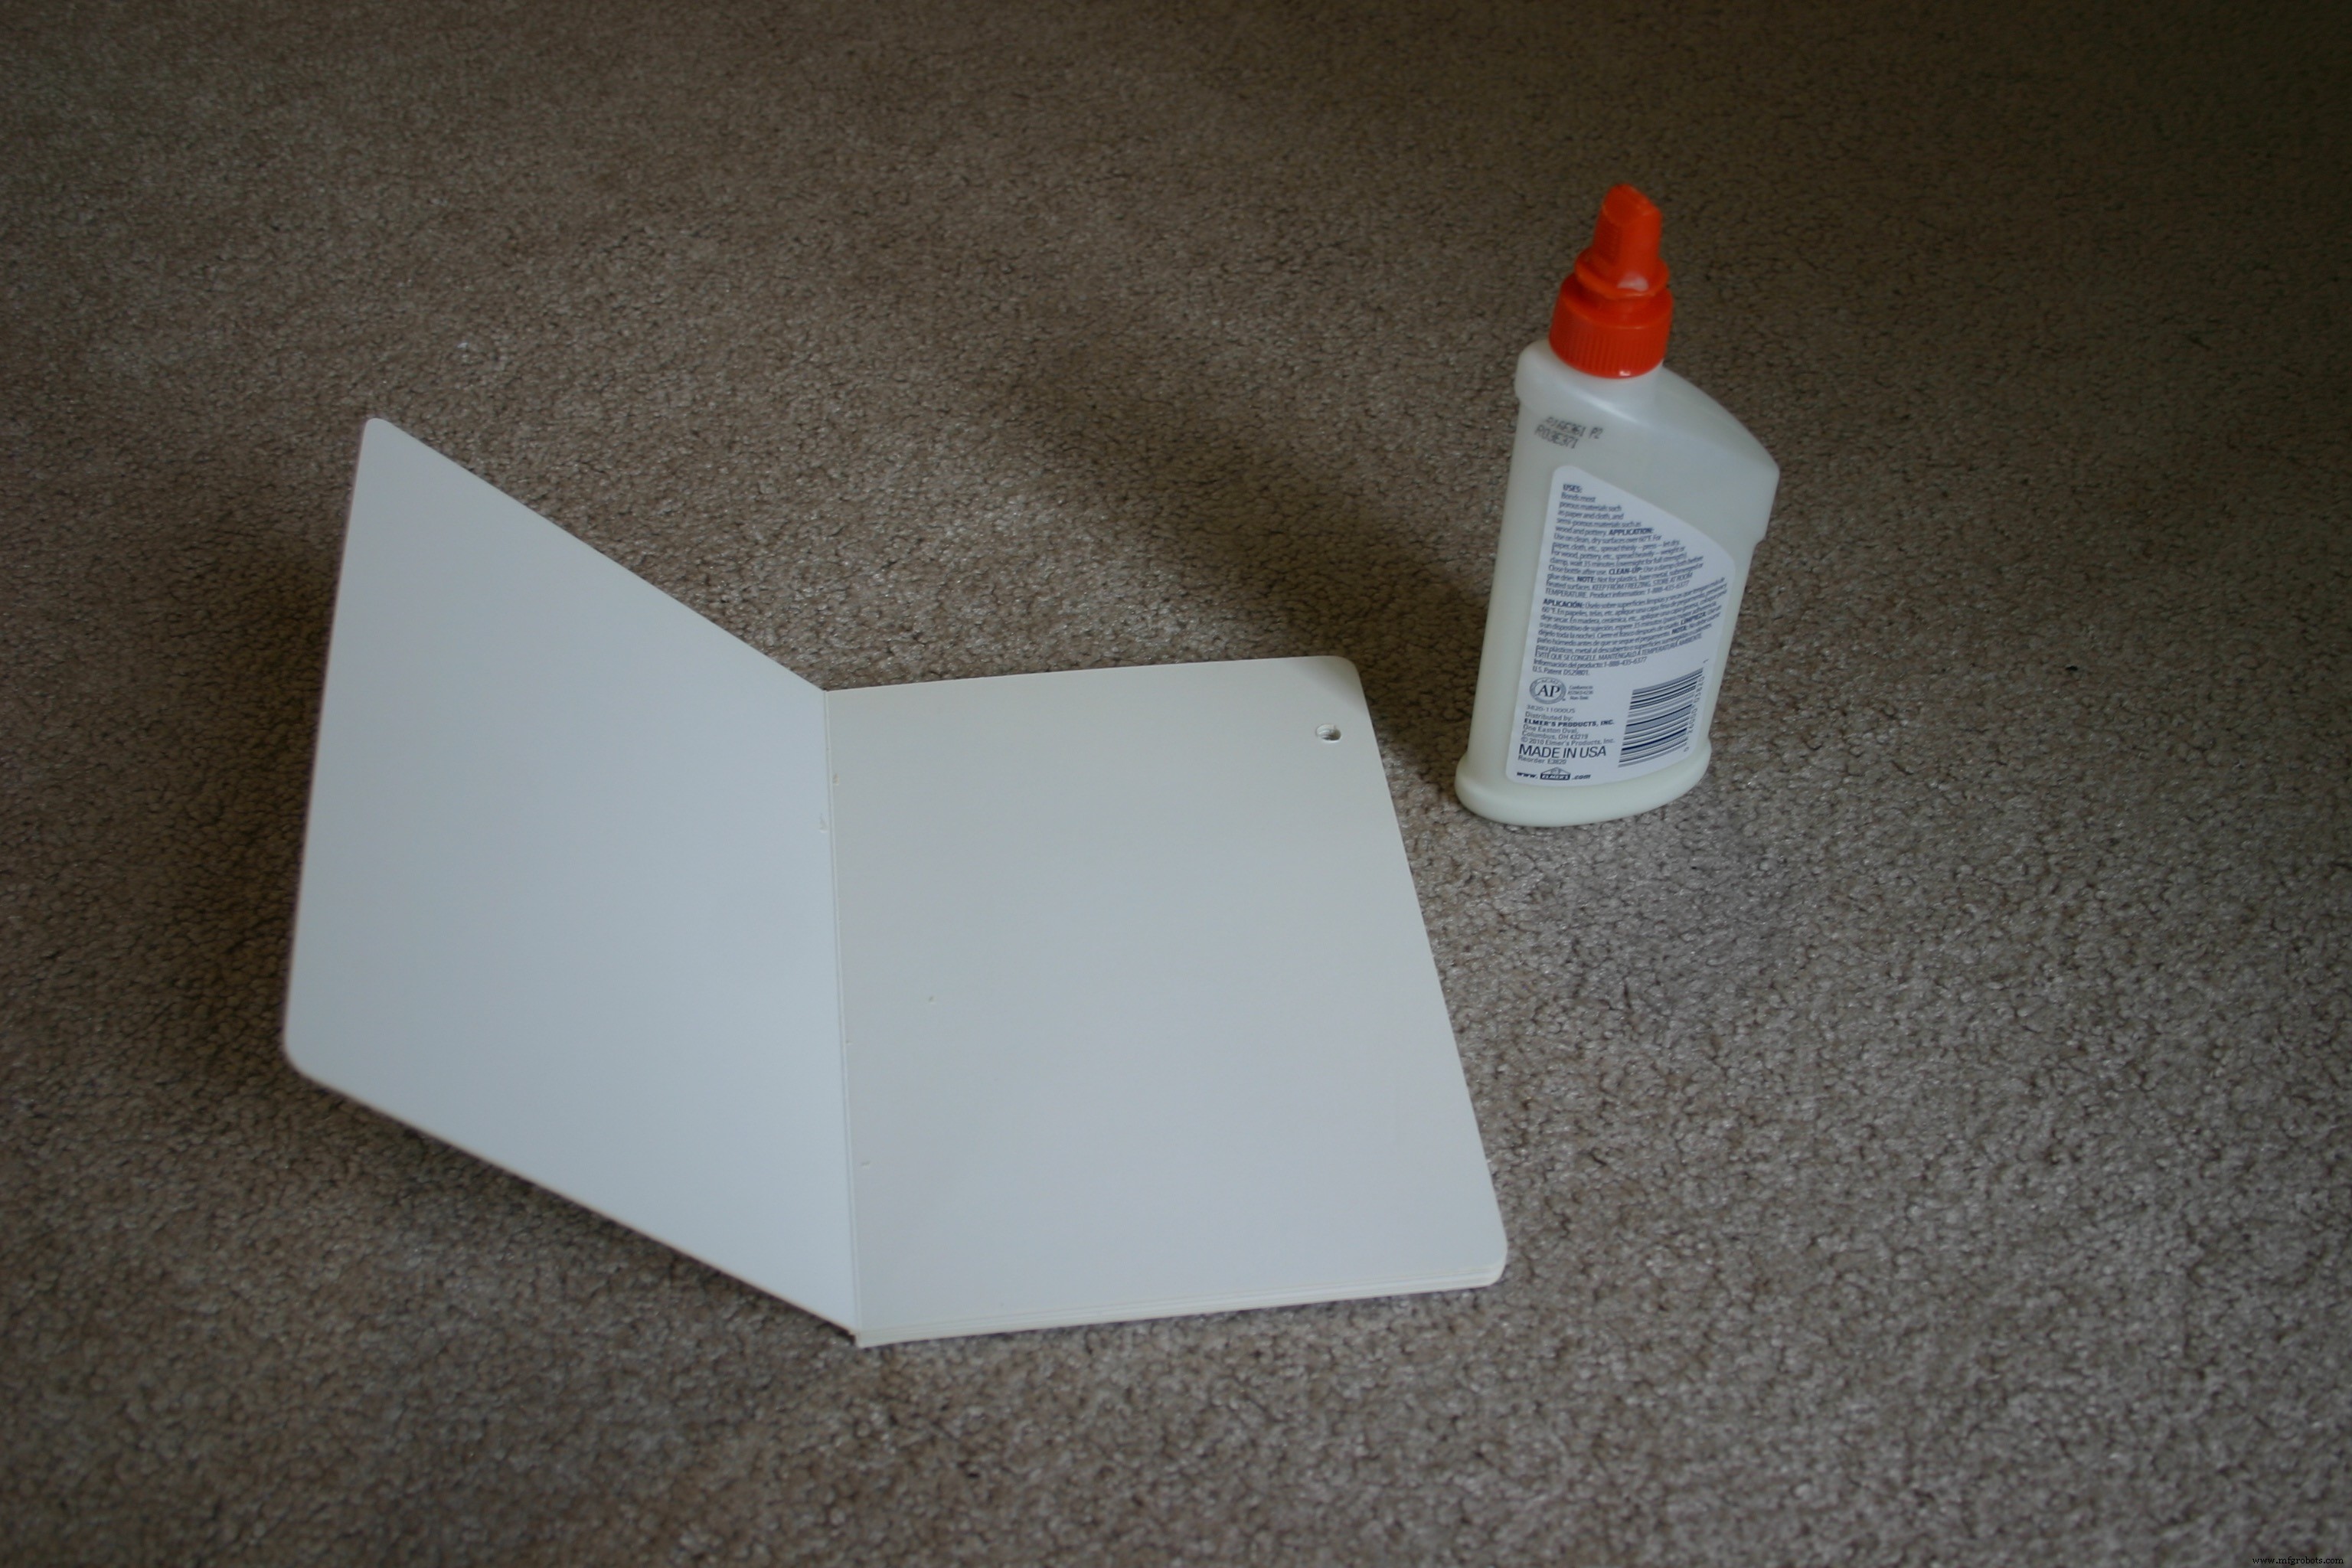
Spread the glue liberally.
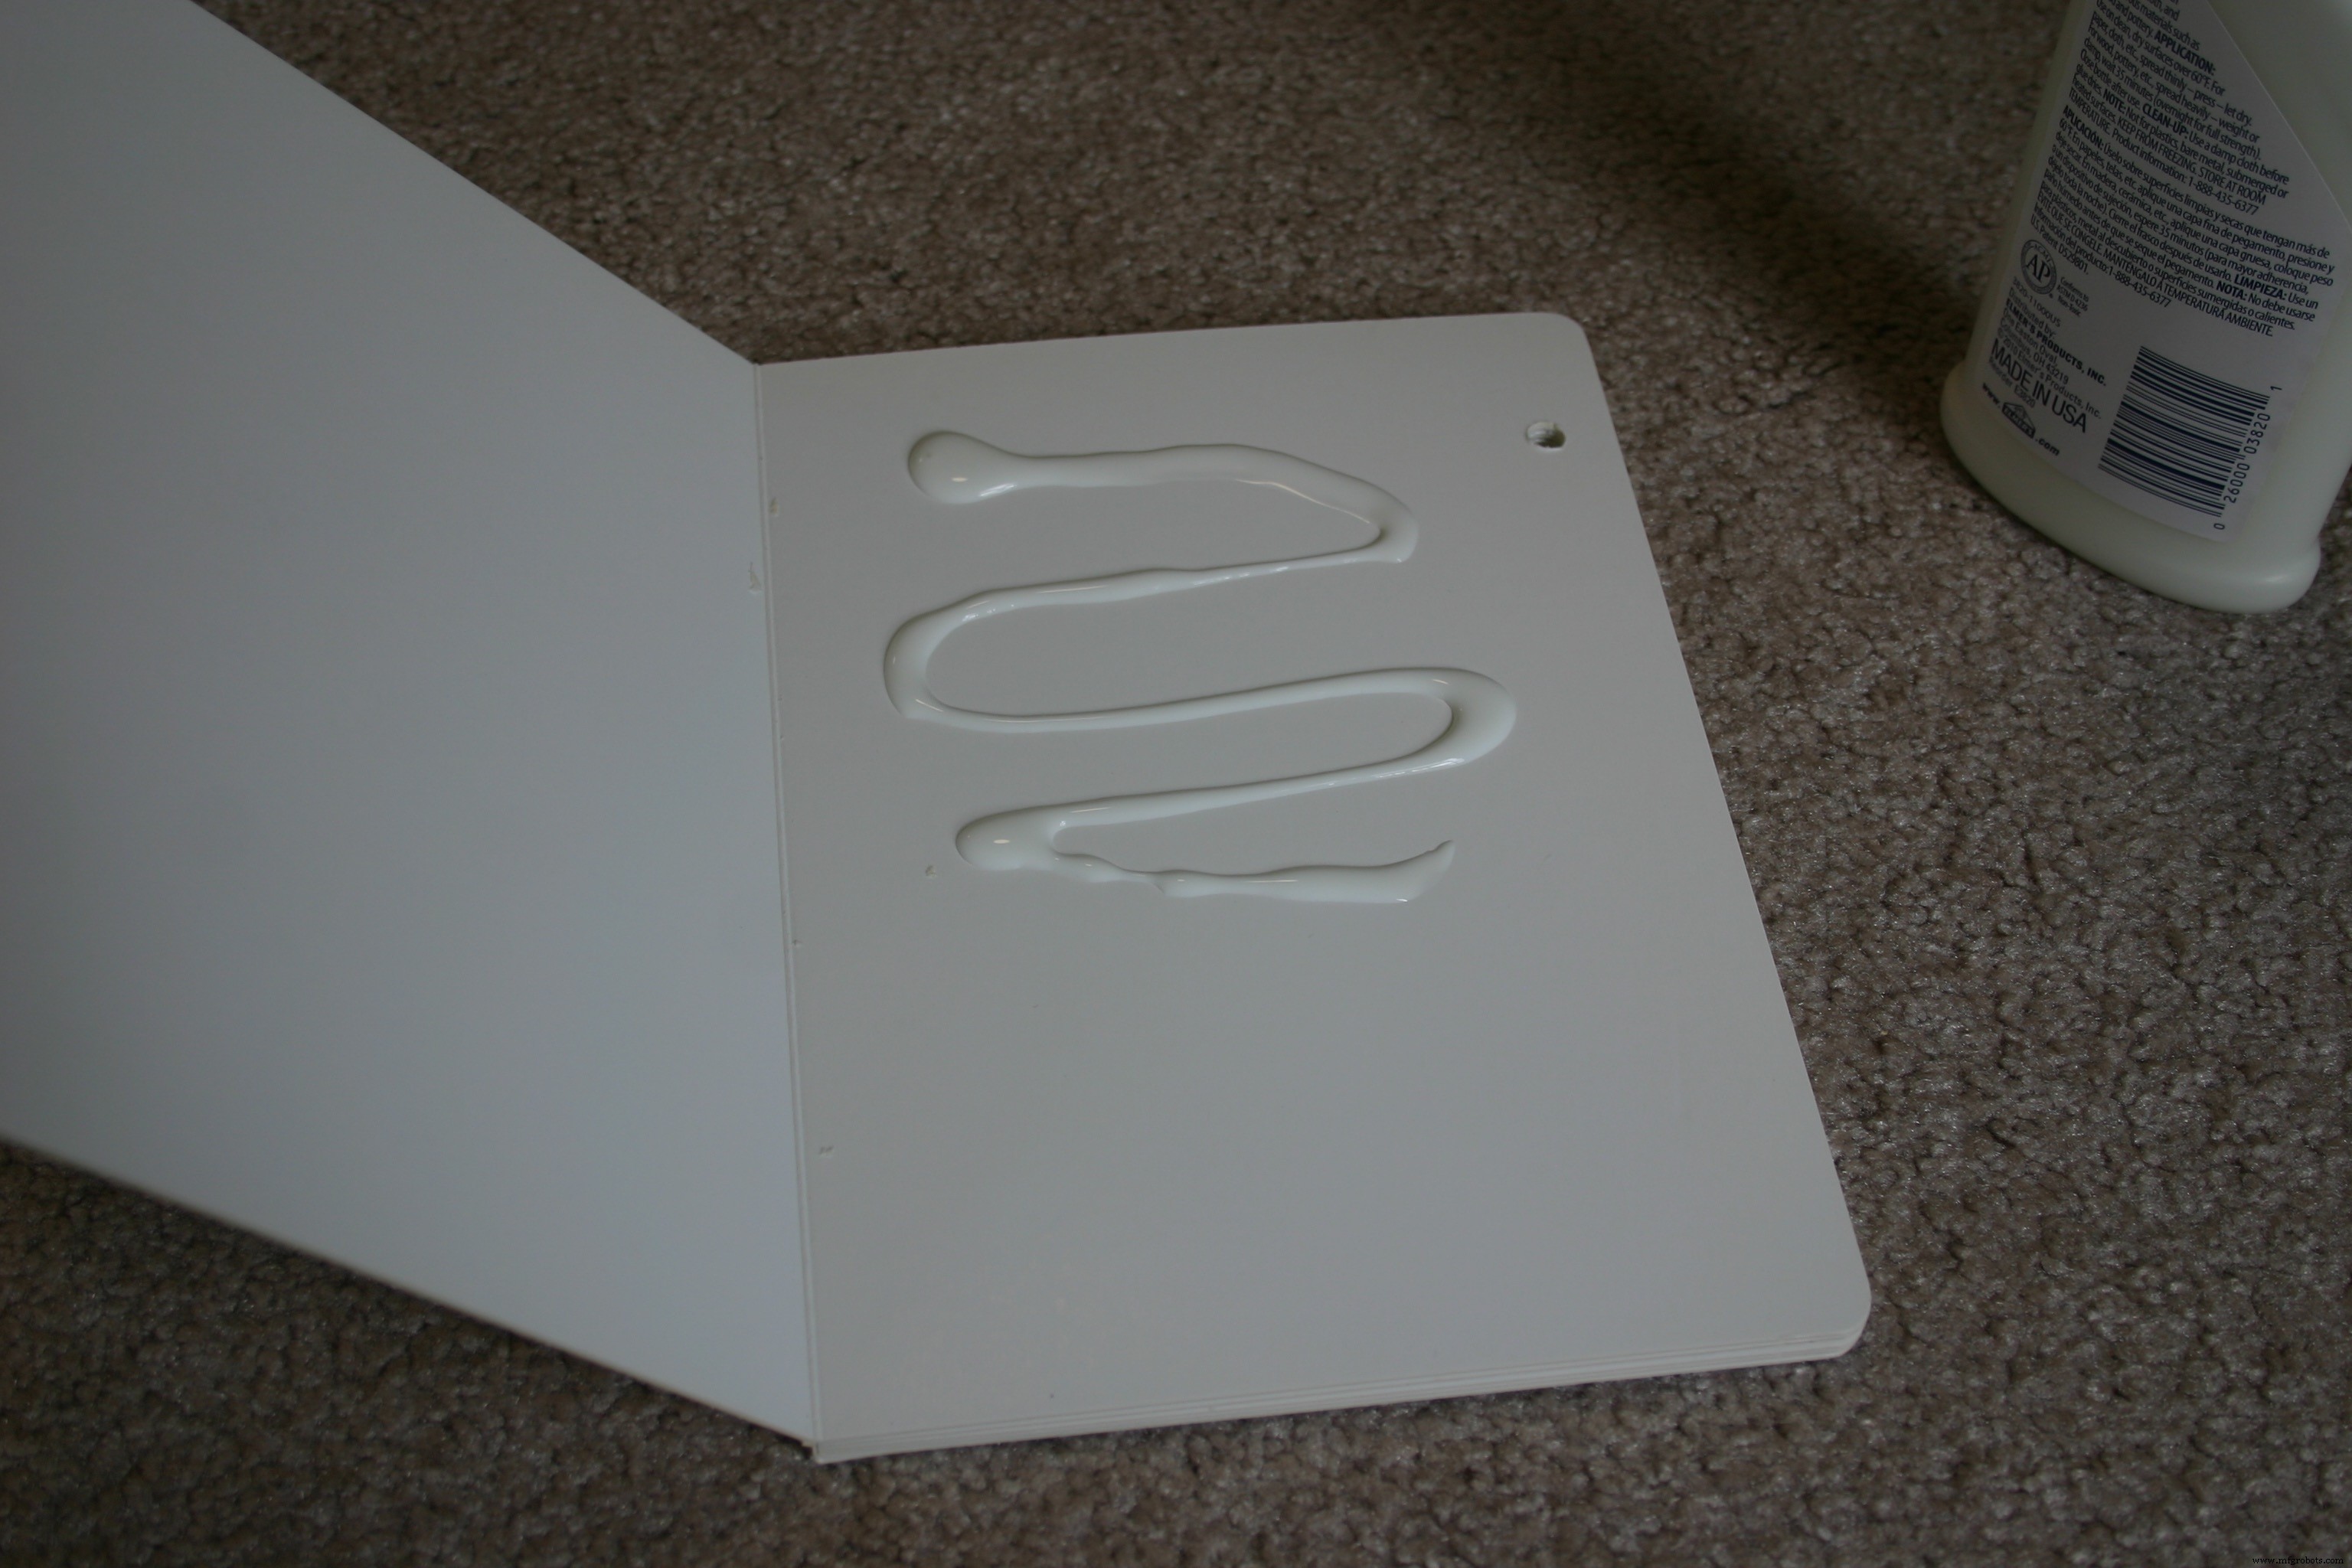
Using a paper towel or brush, spread the glue evenly. Attach the photo or text and wait for it to dry before working on another page (we don't want pages to stick together).
Music has to be moved from a source to the Notable Board Book. For this example, and to be as open sourced as possible, I selected songs where the copyright had expired, then Annelle played the keyboard and our daughter, Tia, provided the vocal accompaniment. Mike recorded our efforts and transferred the music using the process shown below.
I'm not a legal advisor, but commercially produced music could probably be used if (a) you purchased the music AND (b) you are using it for one individual AND (c) it is not played publicly AND (d) it is not distributed or sold.
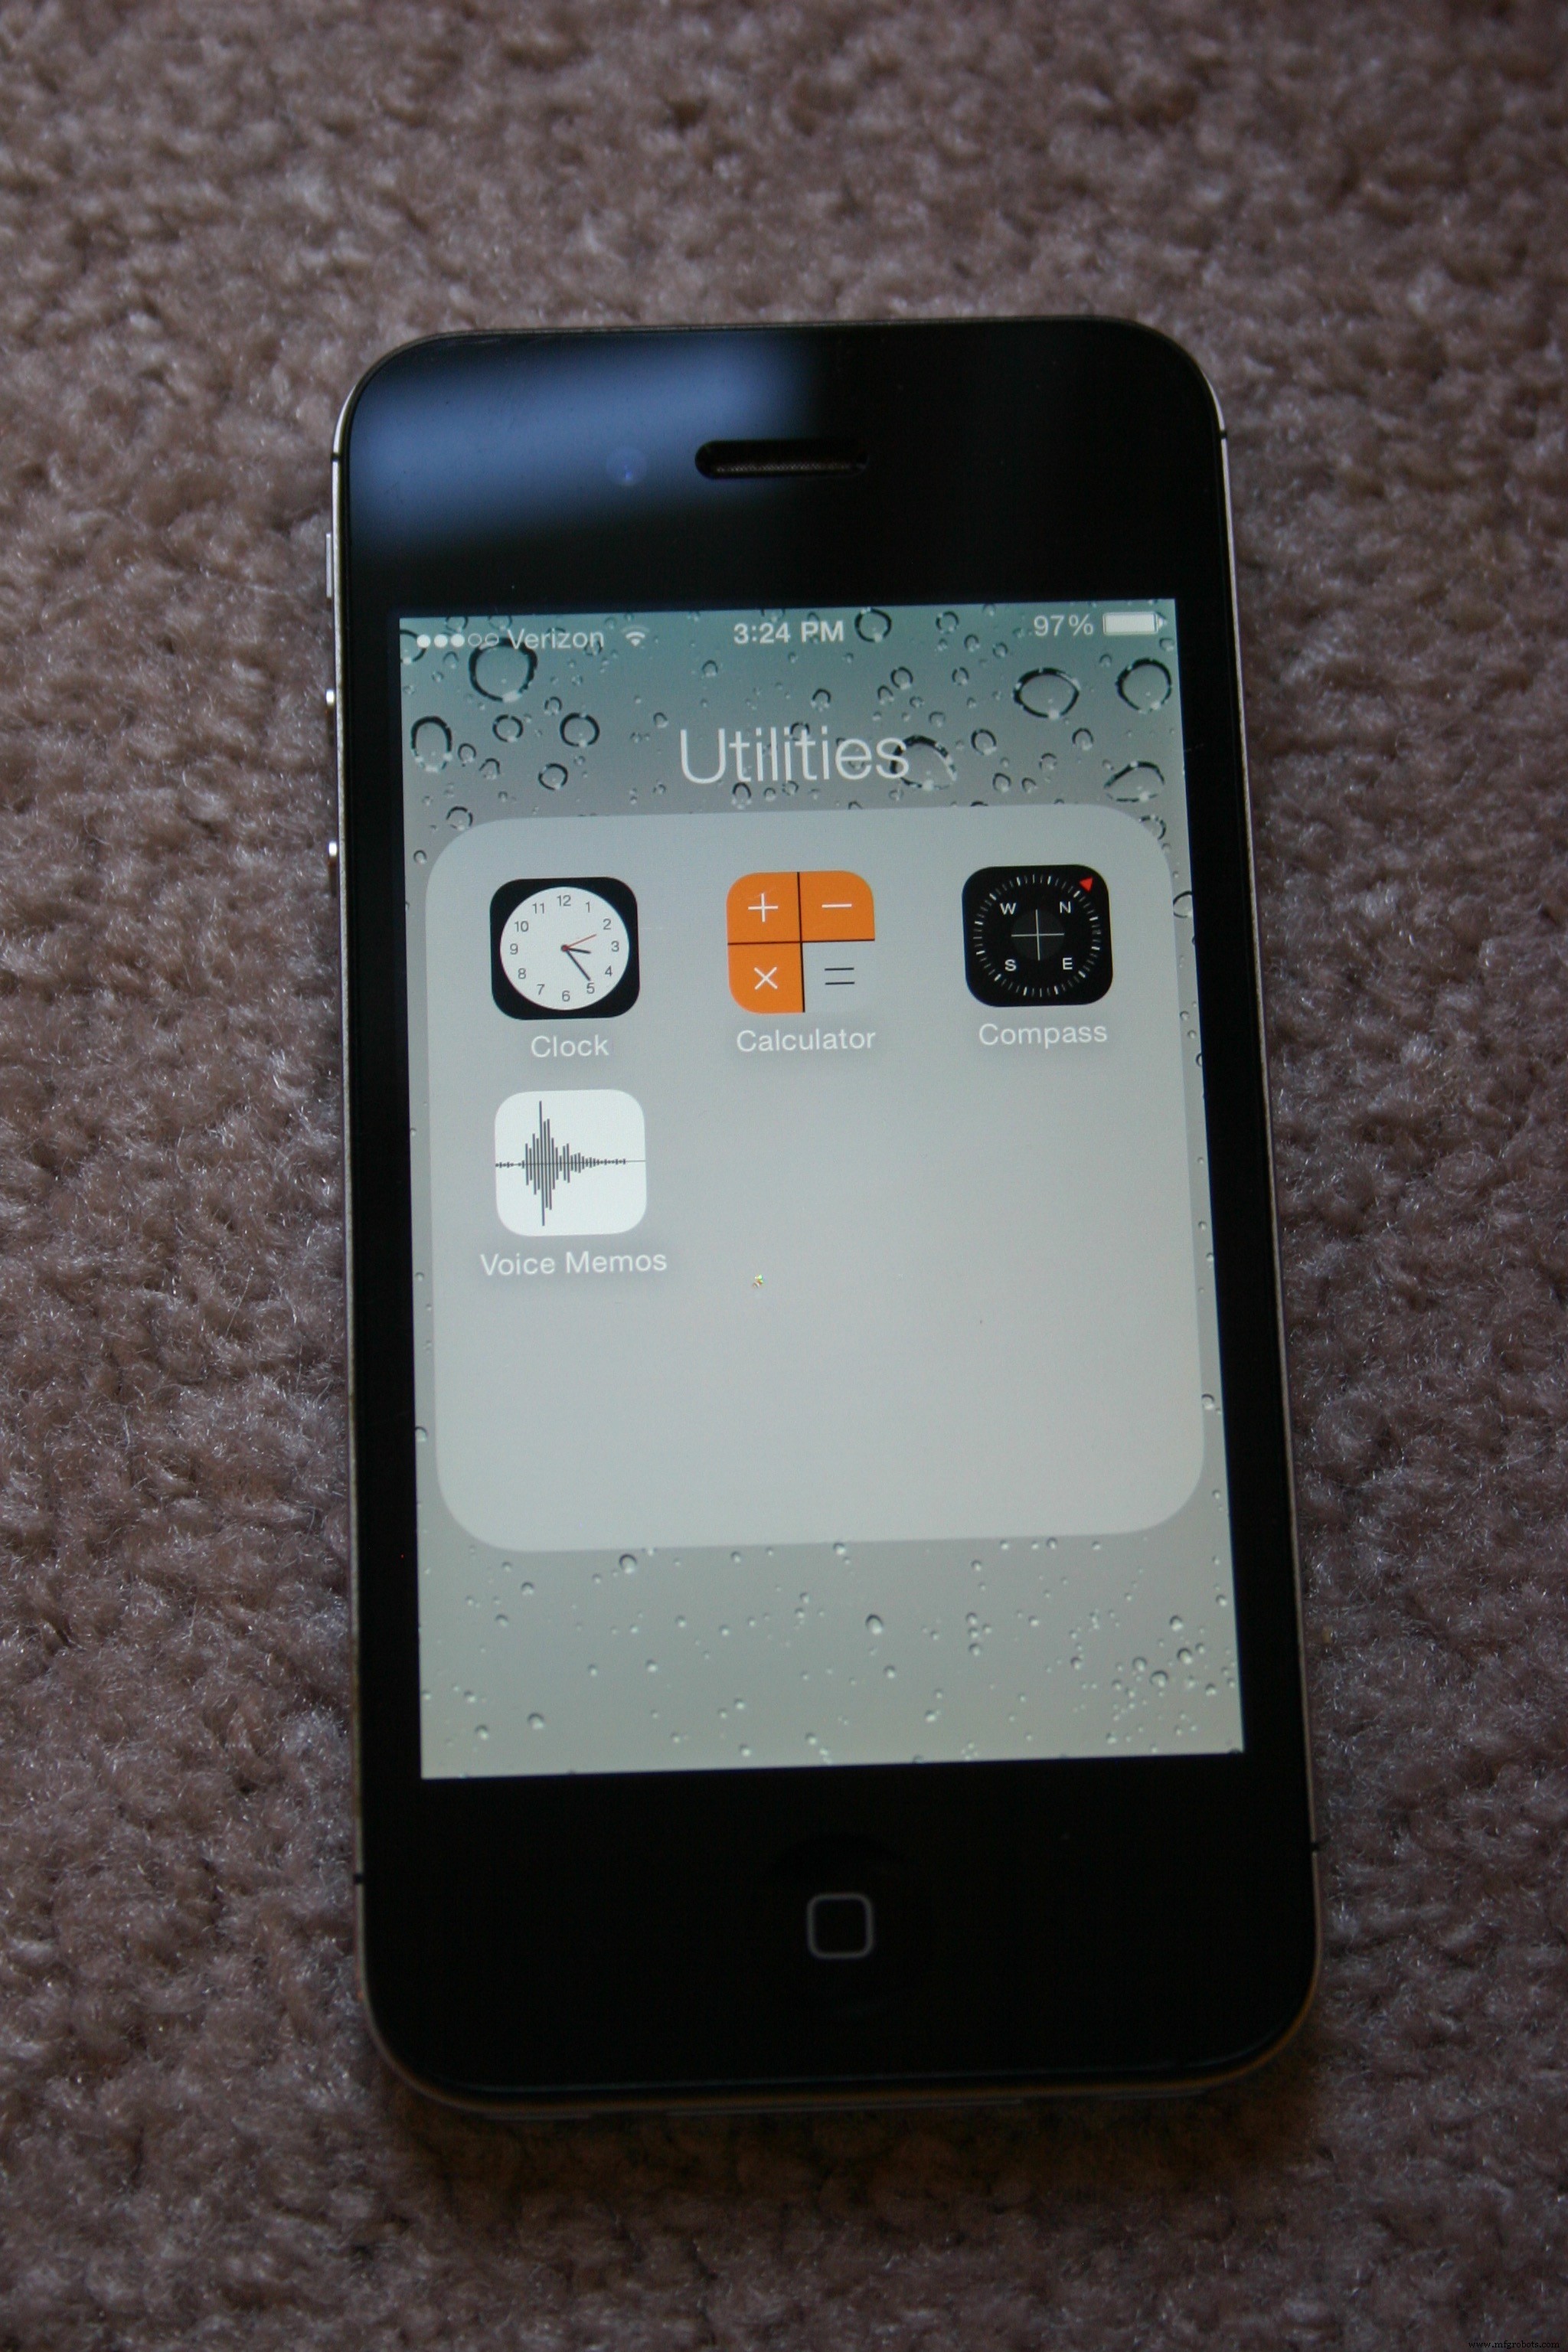
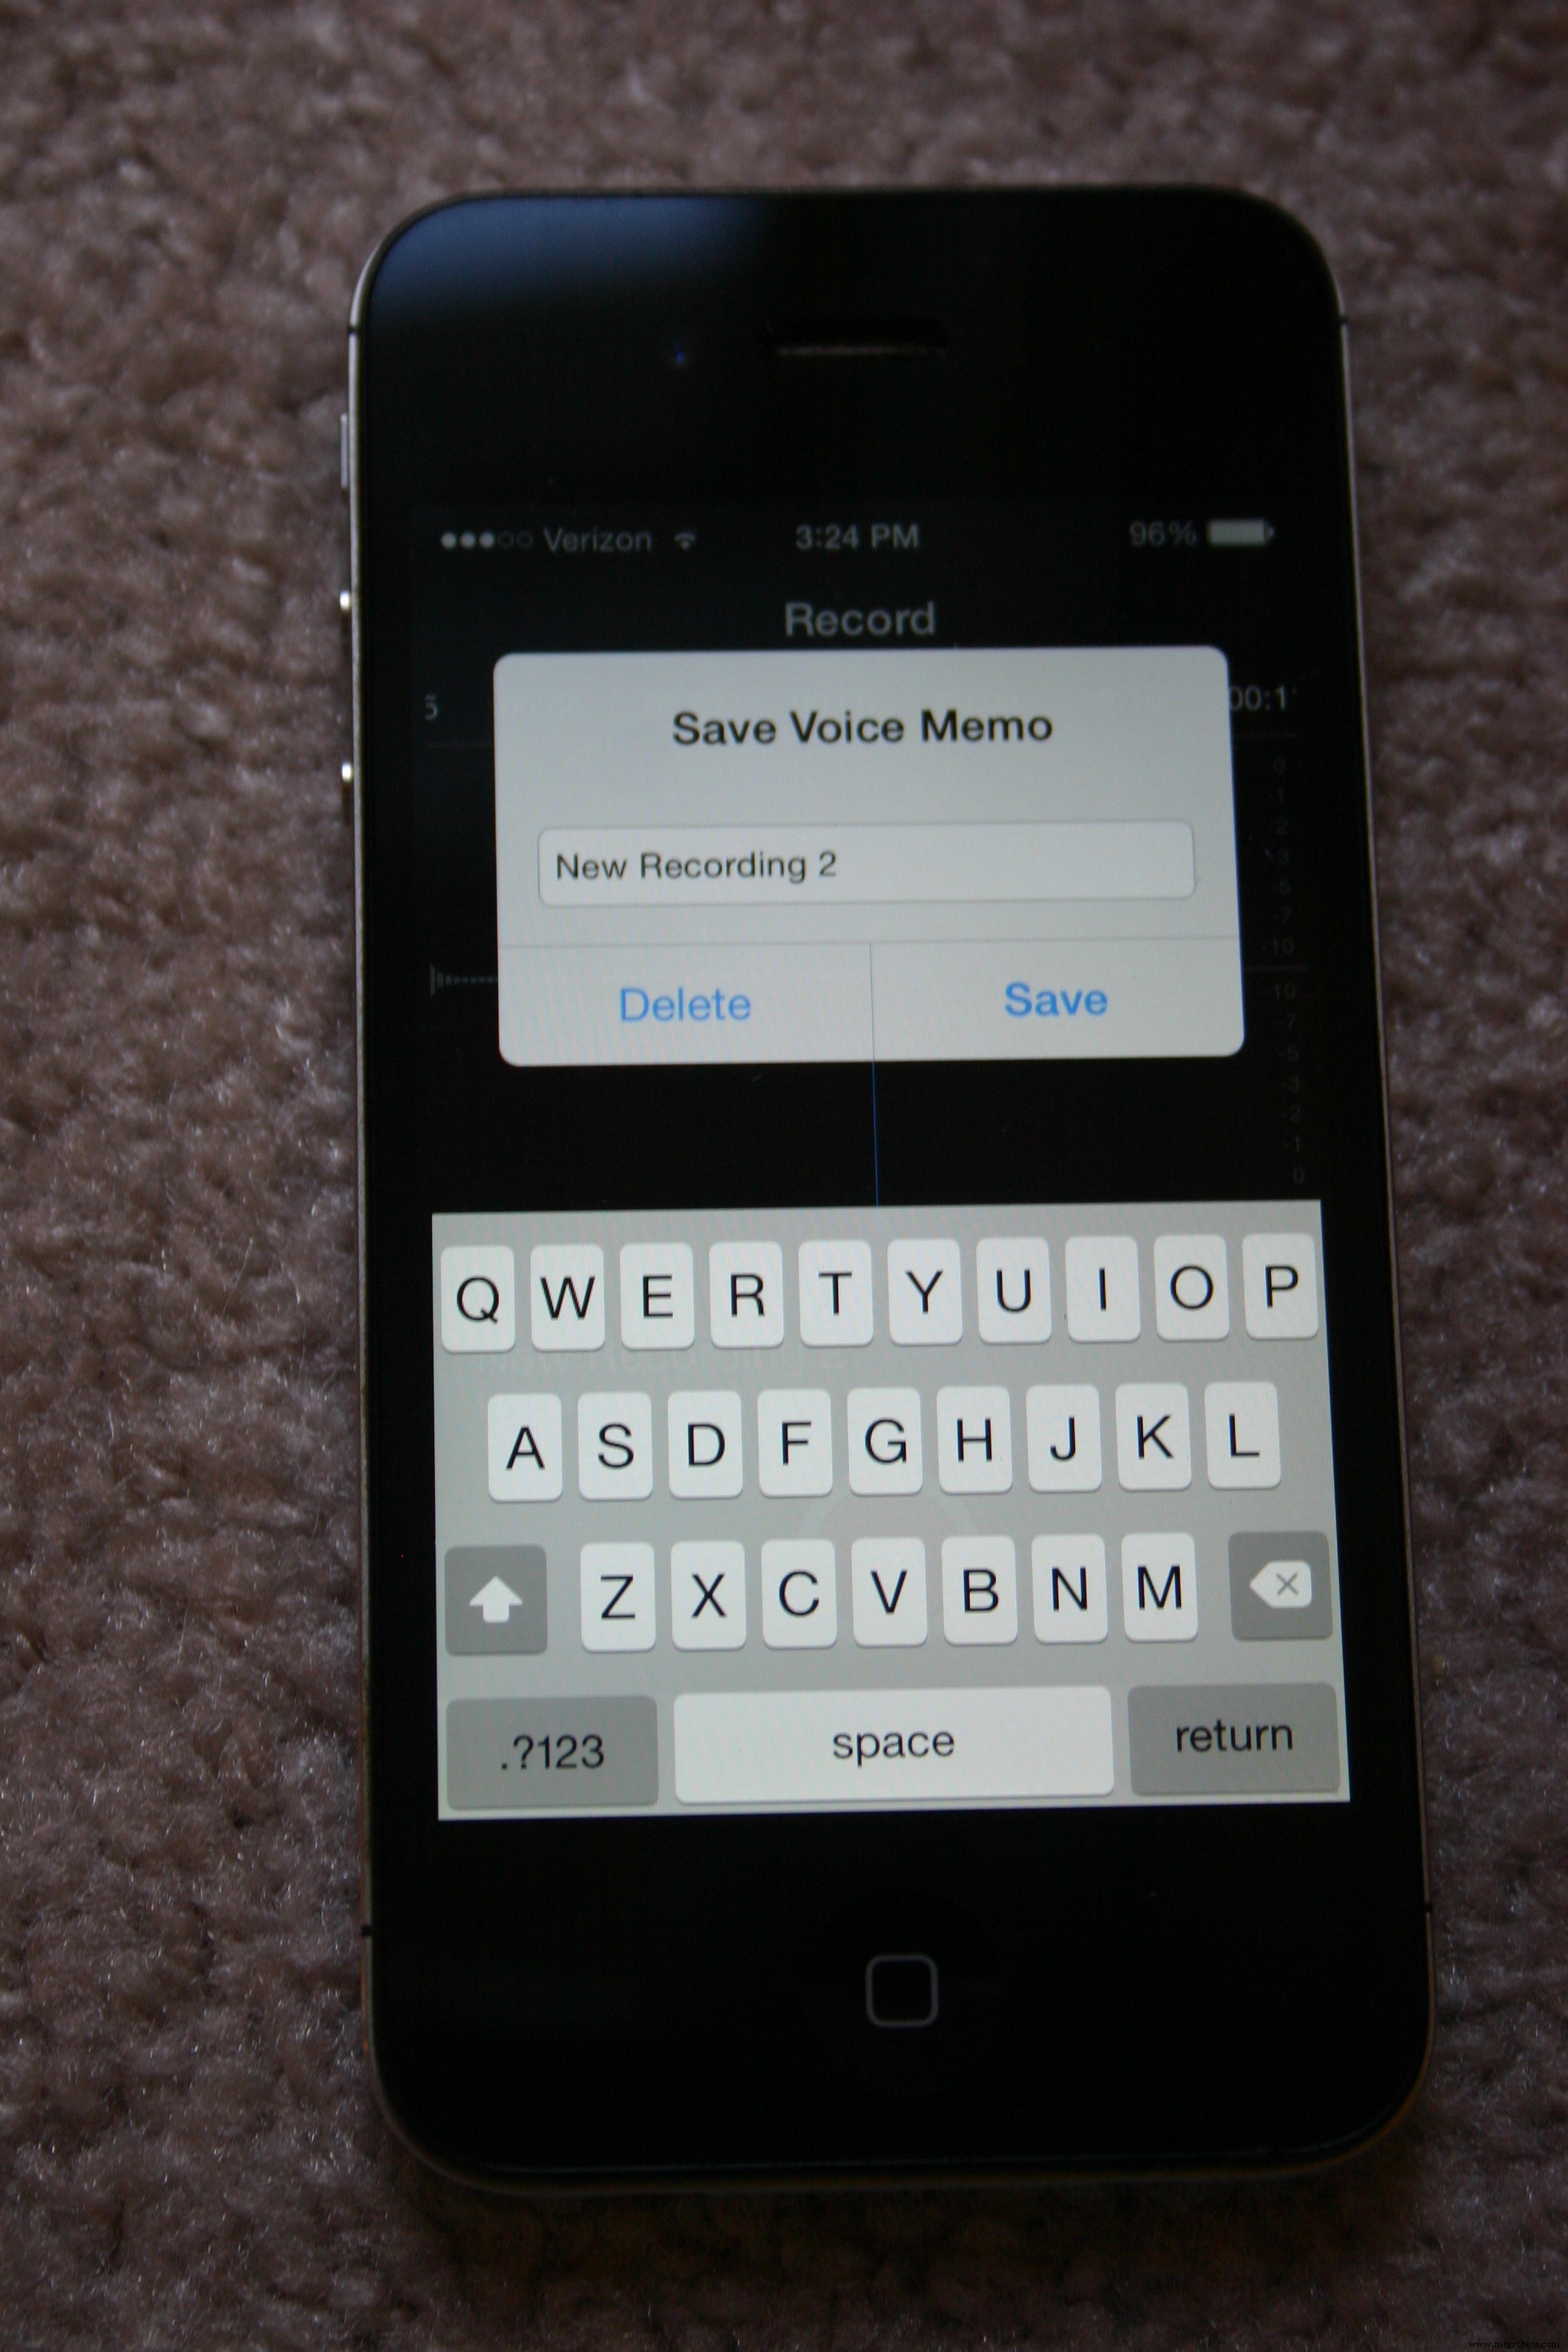
Not having access to serious recording equipment, we used an iPhone. Under "Utilities, " select "Voice Memos."
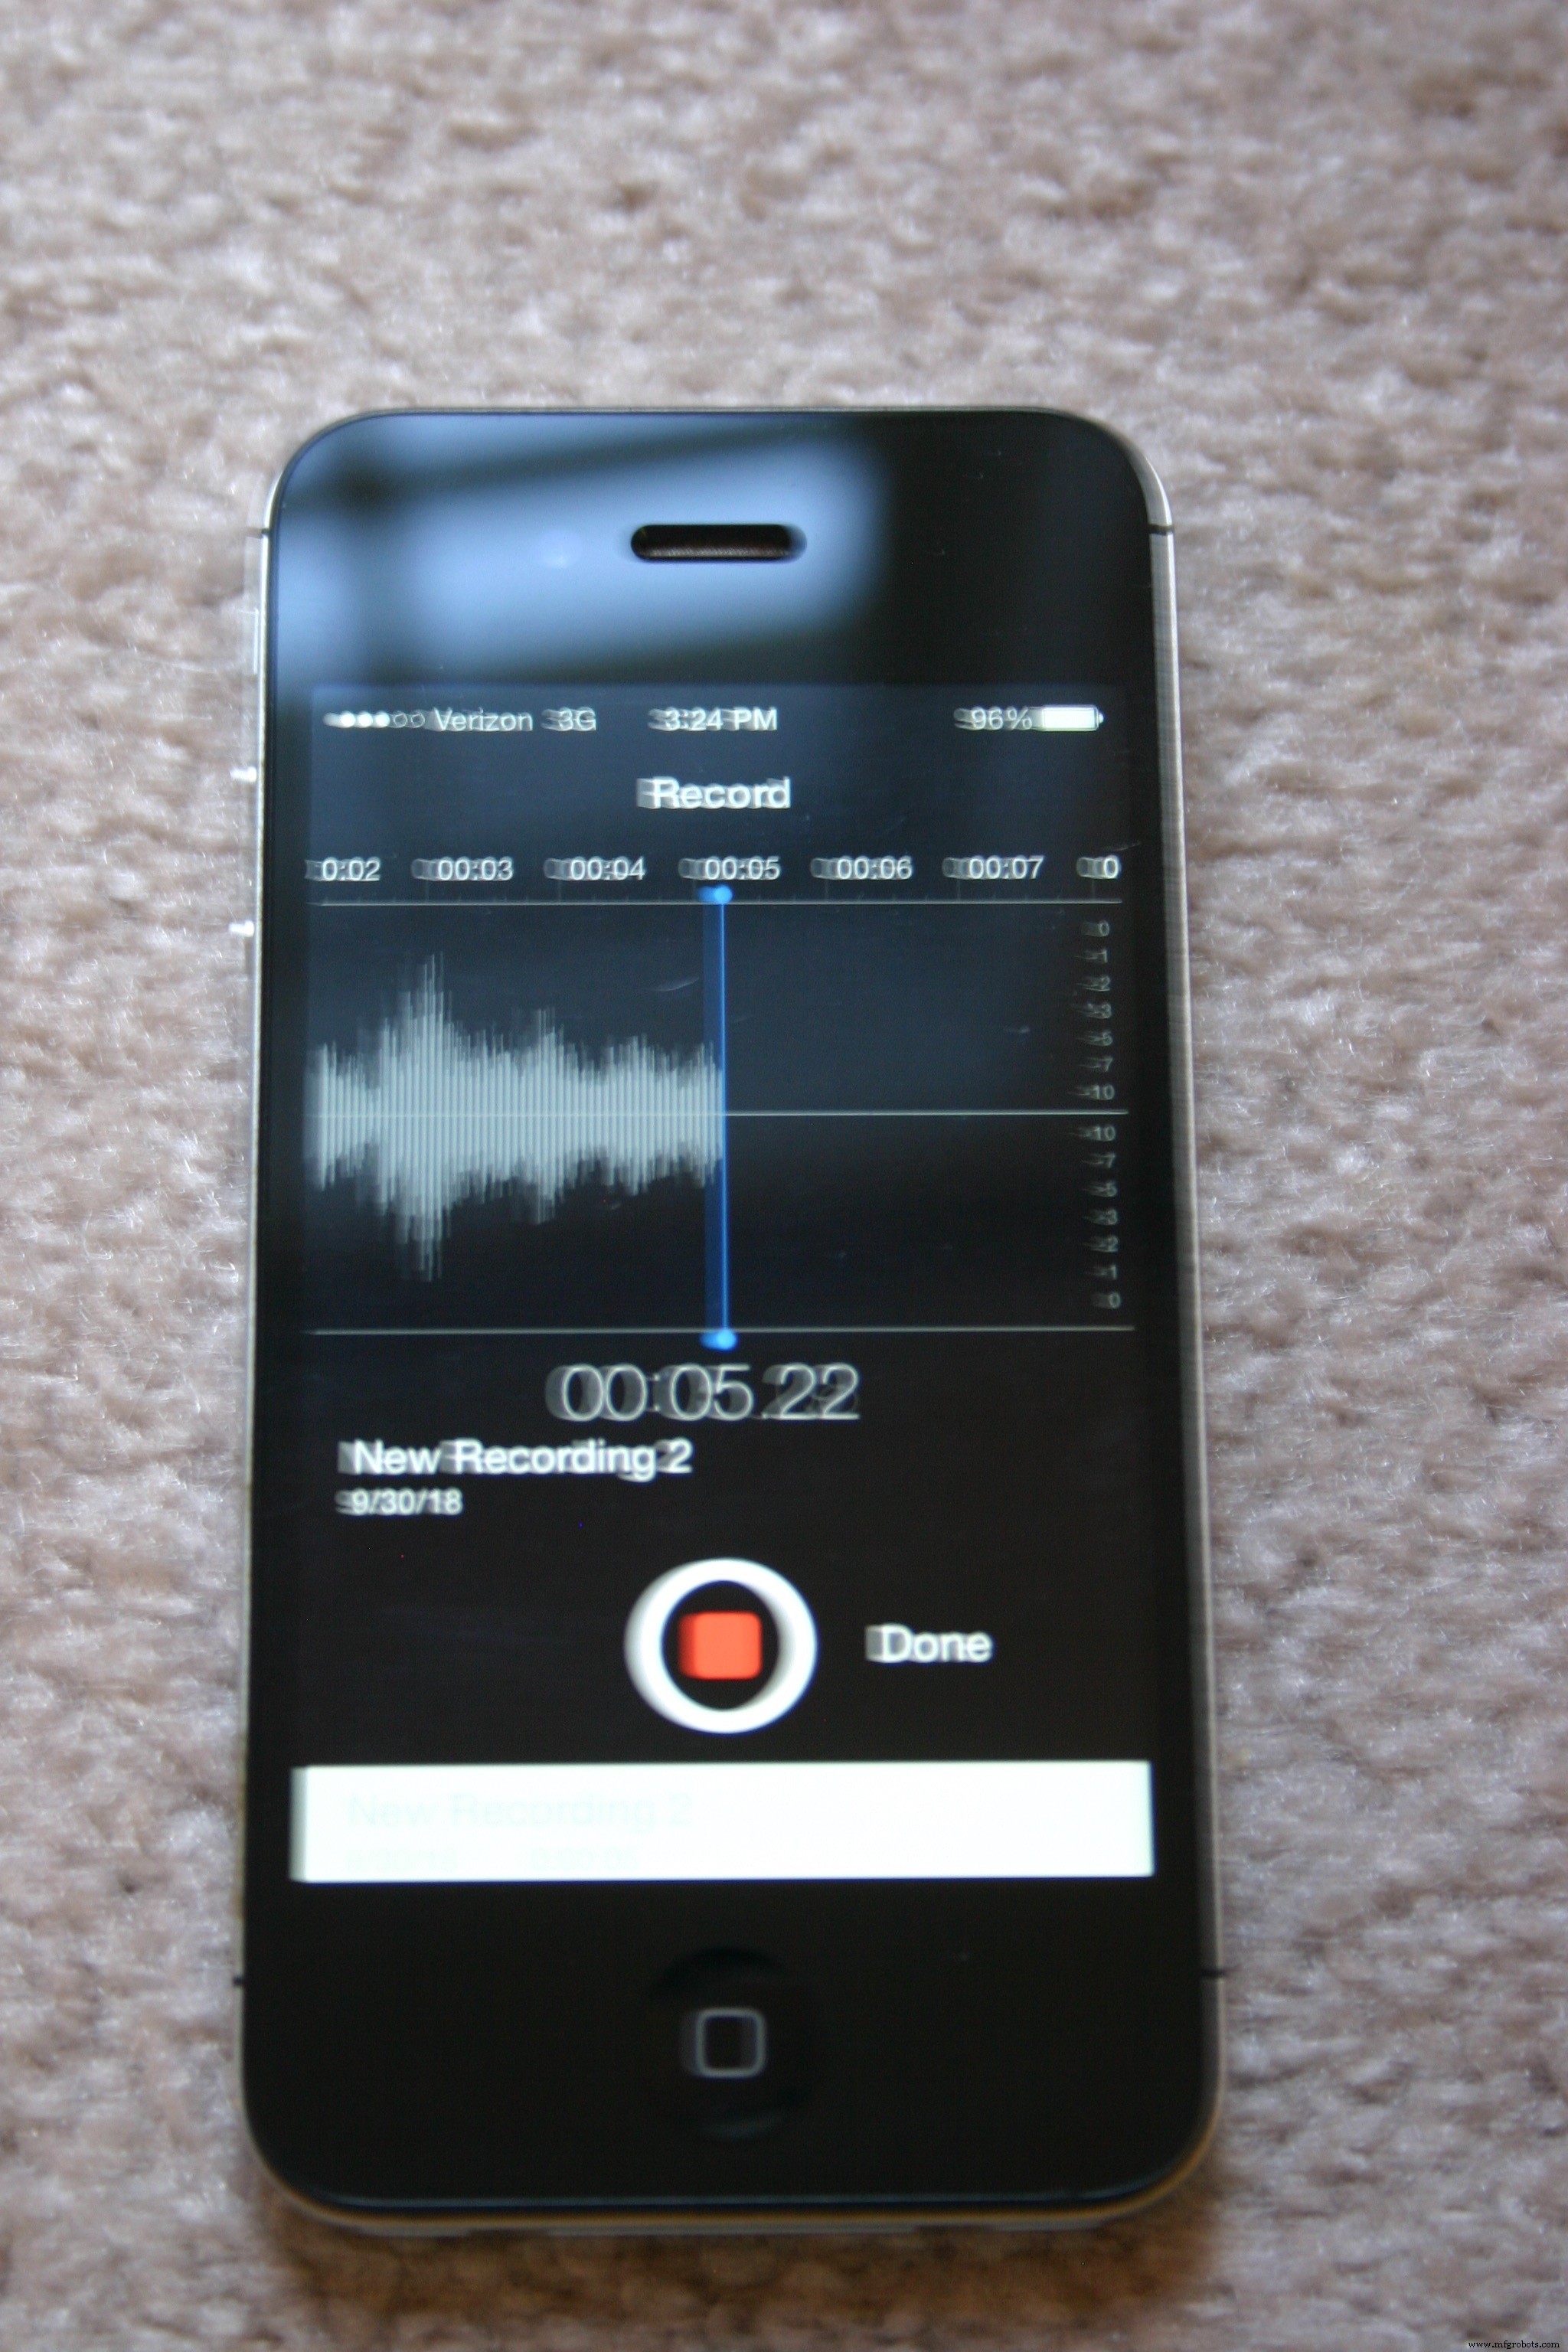
When ready to record, press the red record button.
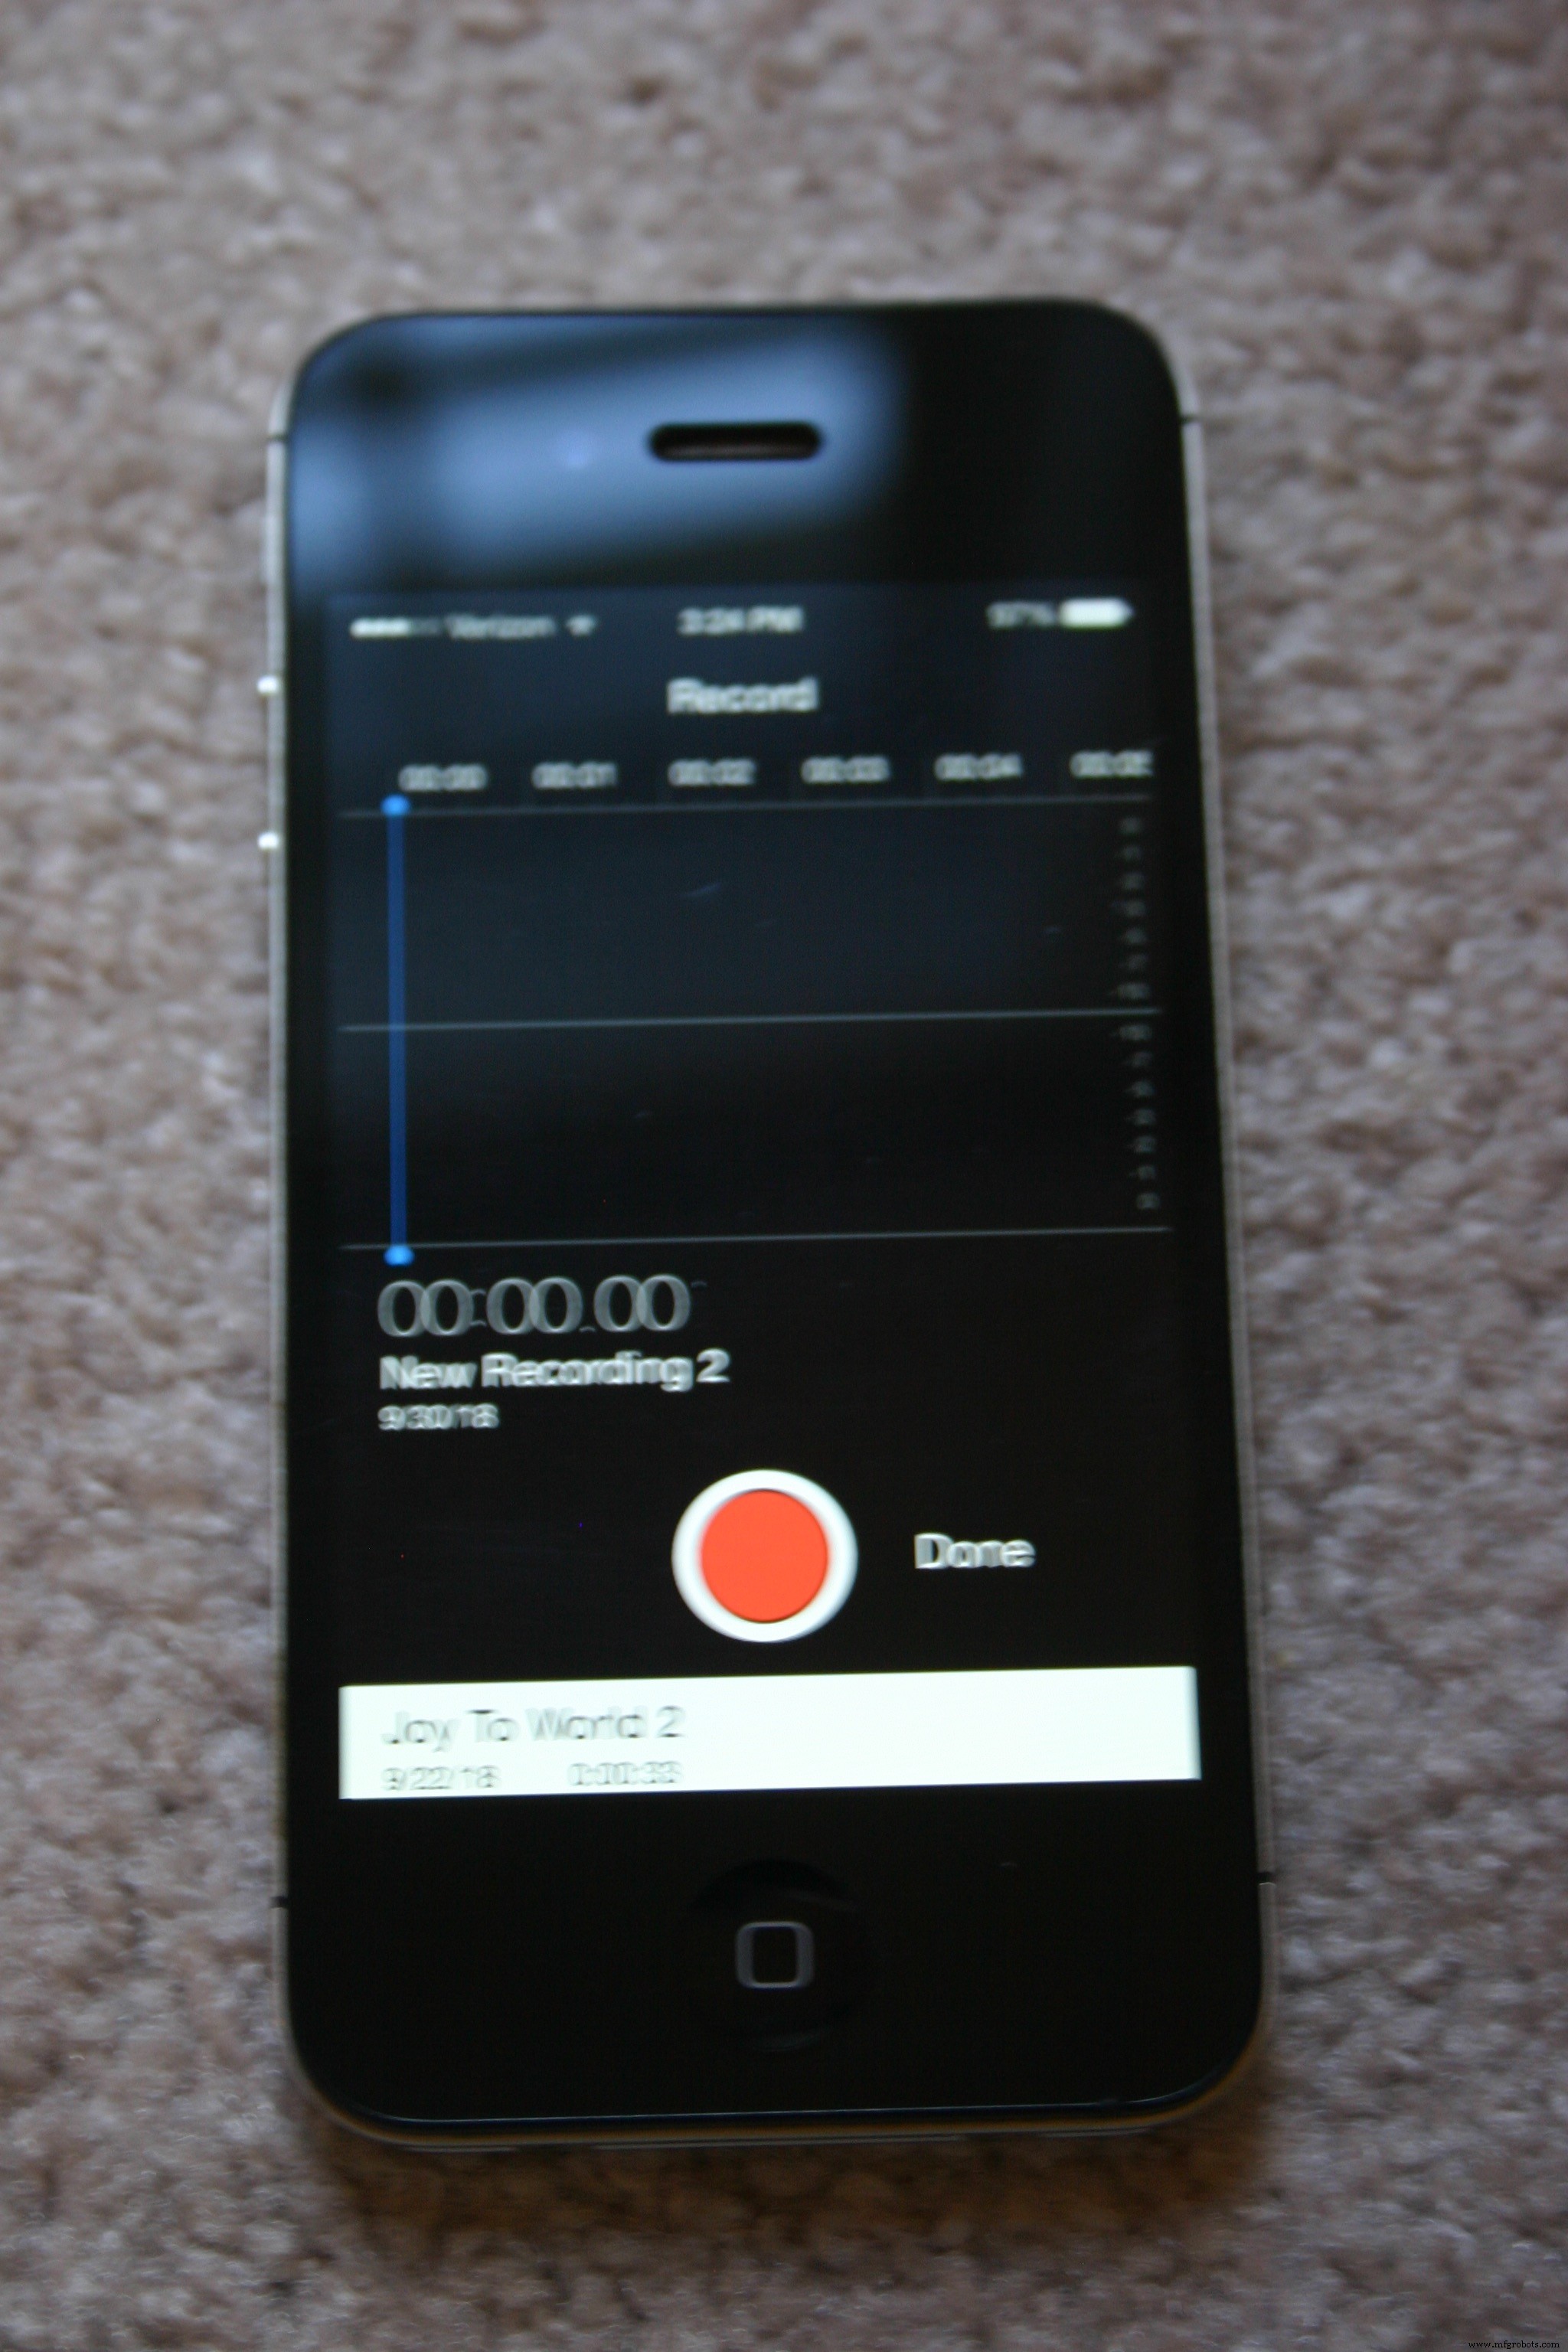
Press the red button again when the song is complete. Press "Done."
Press "Save, " then open the file you just saved.
On the left side of the word "Edit" there is a small box with an arrow pointing upward. Select that box.
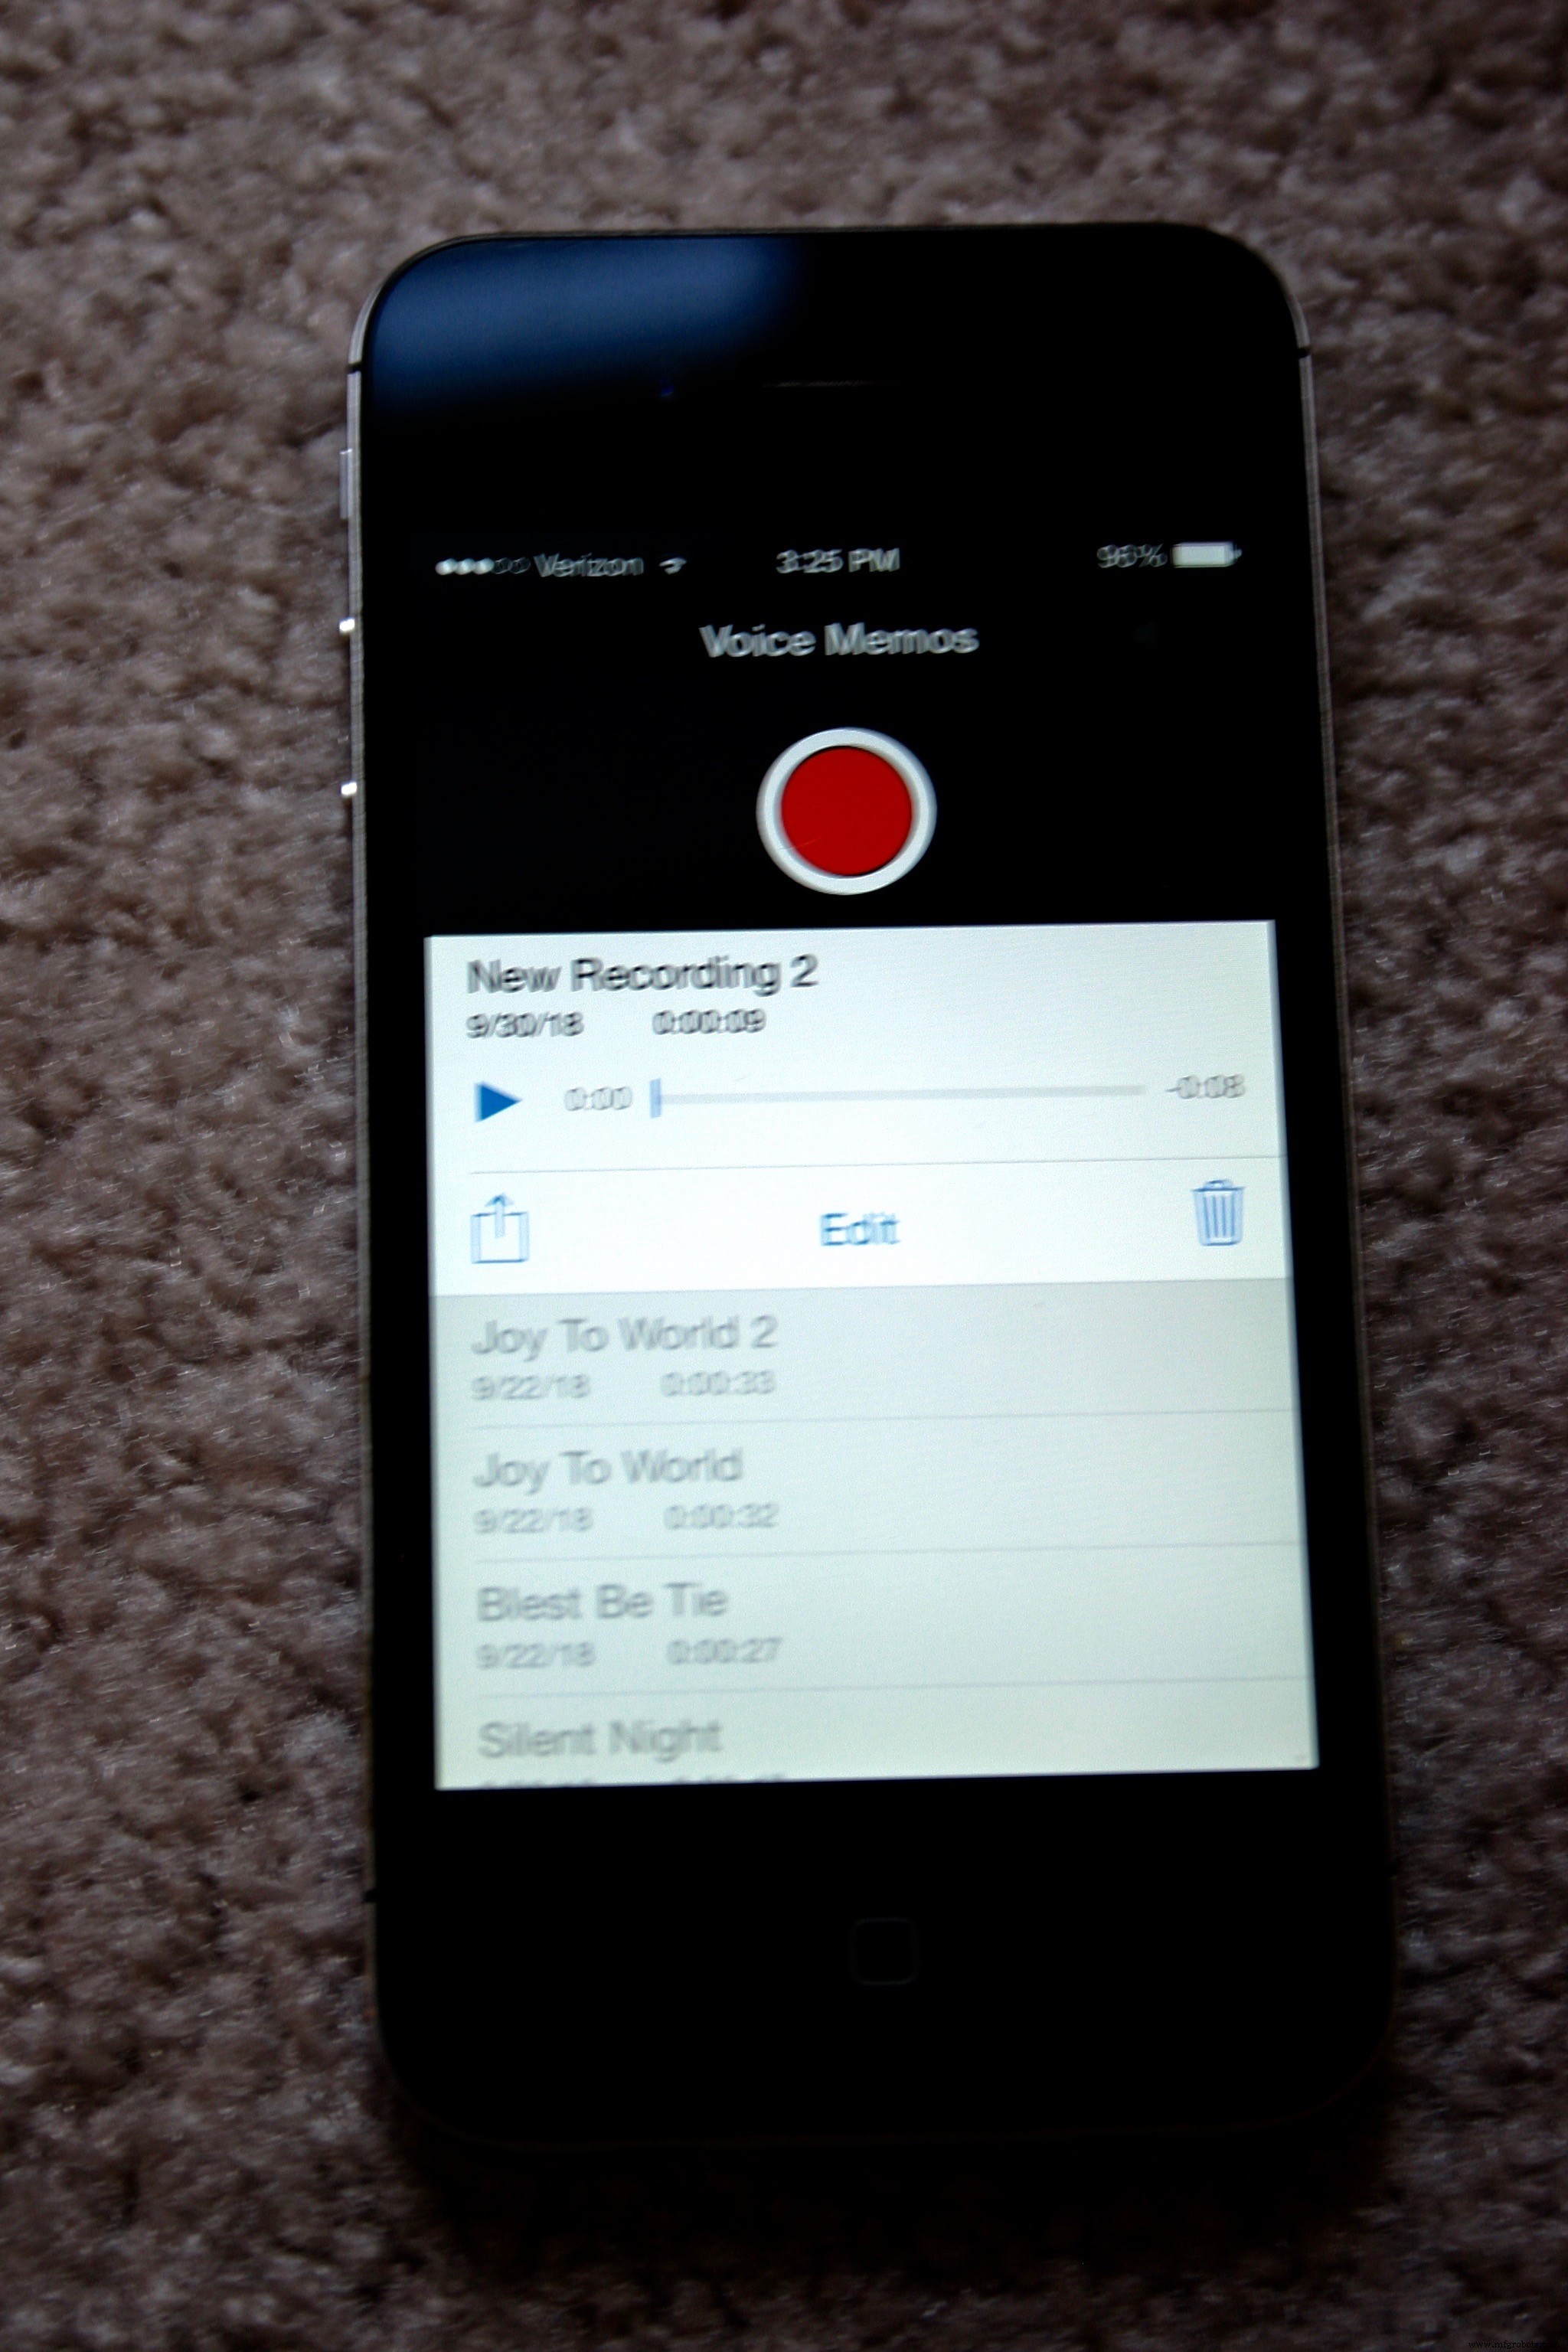
Select "Mail" and email the file to yourself.
The file will arrive as a type "m4a." Use your favorite search engine and search for "convert m4a to ogg." Numerous free converters are available.
The Adafruit sound board has eleven control pins that correspond to eleven "slots" in memory. If the sound just recorded is to be played when the pin for slot #5 is pulled low, the sound file should be labeled "T05.ogg"
Plug the Adafruit sound board into your computer (via a microUSB cable) and it will show up as a new USB key. Copy the.ogg files to the sound board. Eject the board and it is ready to play.
Let's examine the schematic again.

Bring the 9 volt battery wire through the large hole from the speaker enclosure into the electronic housing. Connect everything according to the schematic and load the software sketch (included in files for this project) into the Arduino.
Power the system on (tilt the enclosure) and adjust the sound (using the knob on the audio amplifier) for the level desired. Louder (not distorted) is probably better.
Holes in the board book that are misaligned or not clean can impact the output of the photo resistors. To verify the voltage received on the analog input of the Arduino, I attached wire wrap wire to the resistor junction that connects to the analog input pins. I labeled the wires (1 through 5) as shown below. I brought these wires out (as well as a ground) and loosely placed the board book on the electronic housing. In normal room lighting, I opened the book to each page and recorded the voltage on each input pin. The "dark" readings were about two volts. The "page open" readings were 3.5 volts or higher. Pages deeper in (less tunnel for light to travel through) were a bit higher. If the room is lighter, the readings will be higher.
Because zero to five volts on the Arduino results in readings of 0 to 1023, the open page readings correspond to a value of about 700. Not wanting to cut it too close, I used "600" as the number to indicate a page was receiving light.
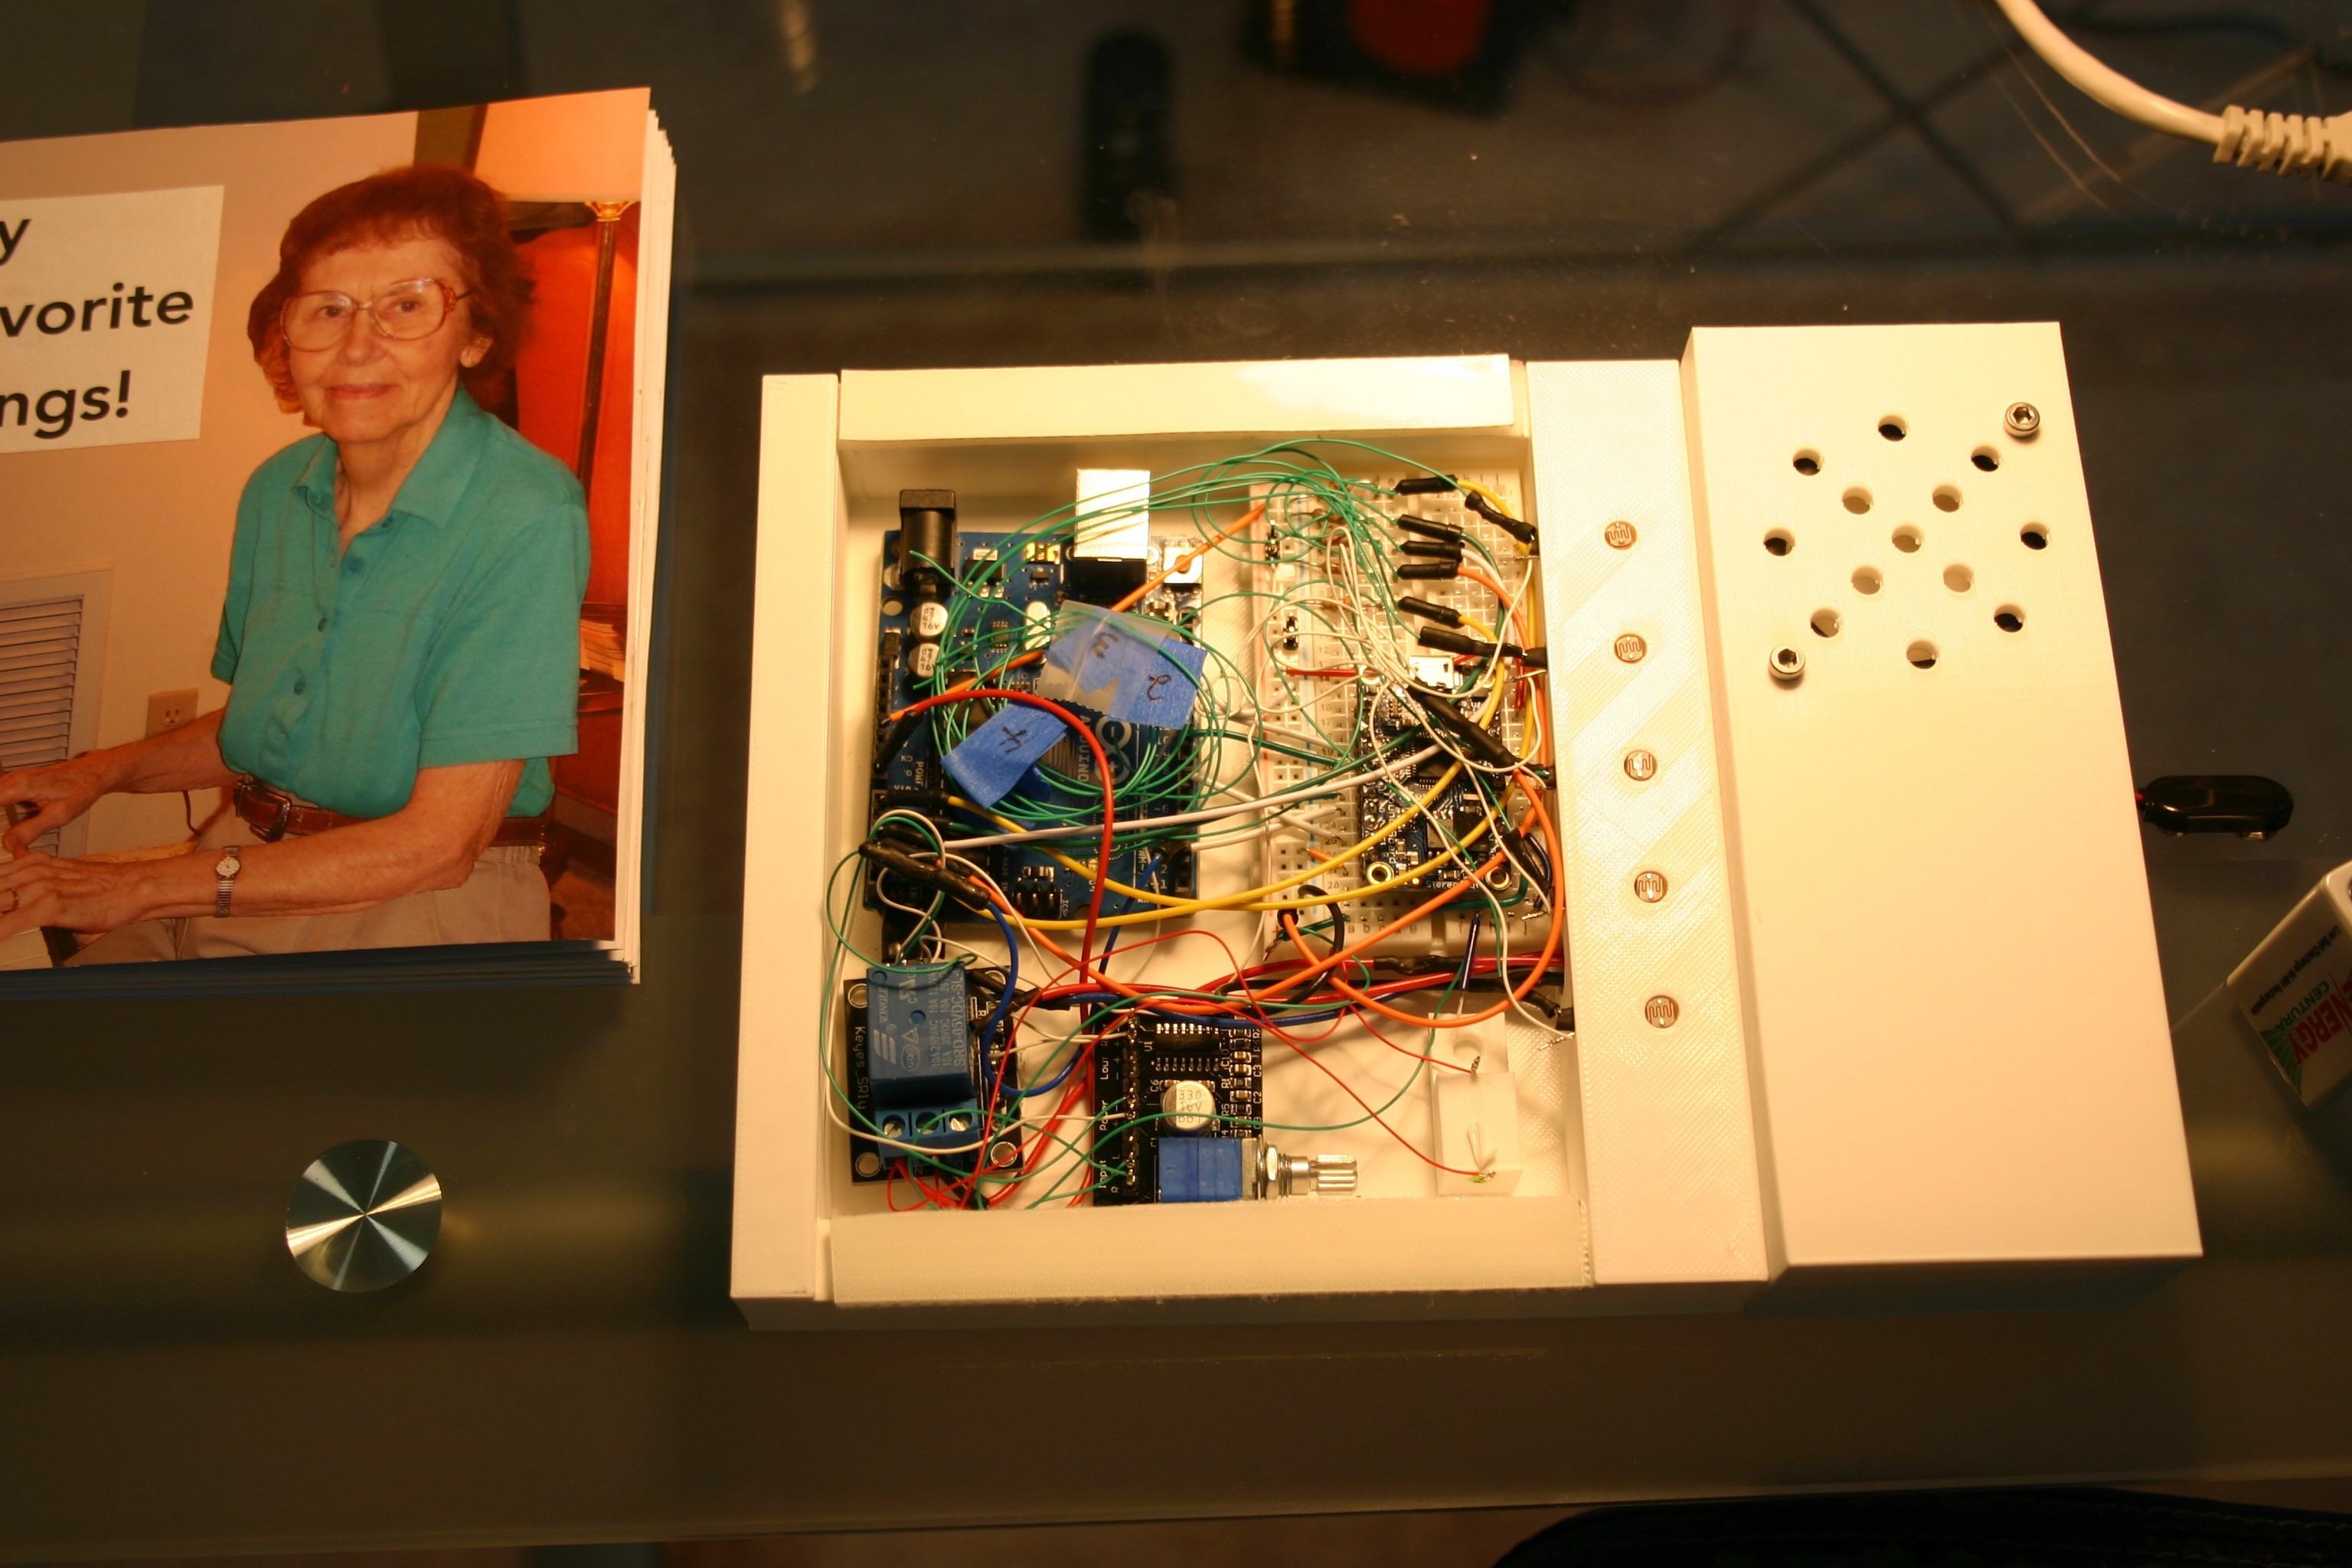
I cut the one inch wide Velcro into 1/2 inch wide strips. These are attached to the indentions provided on the electronic enclosure.
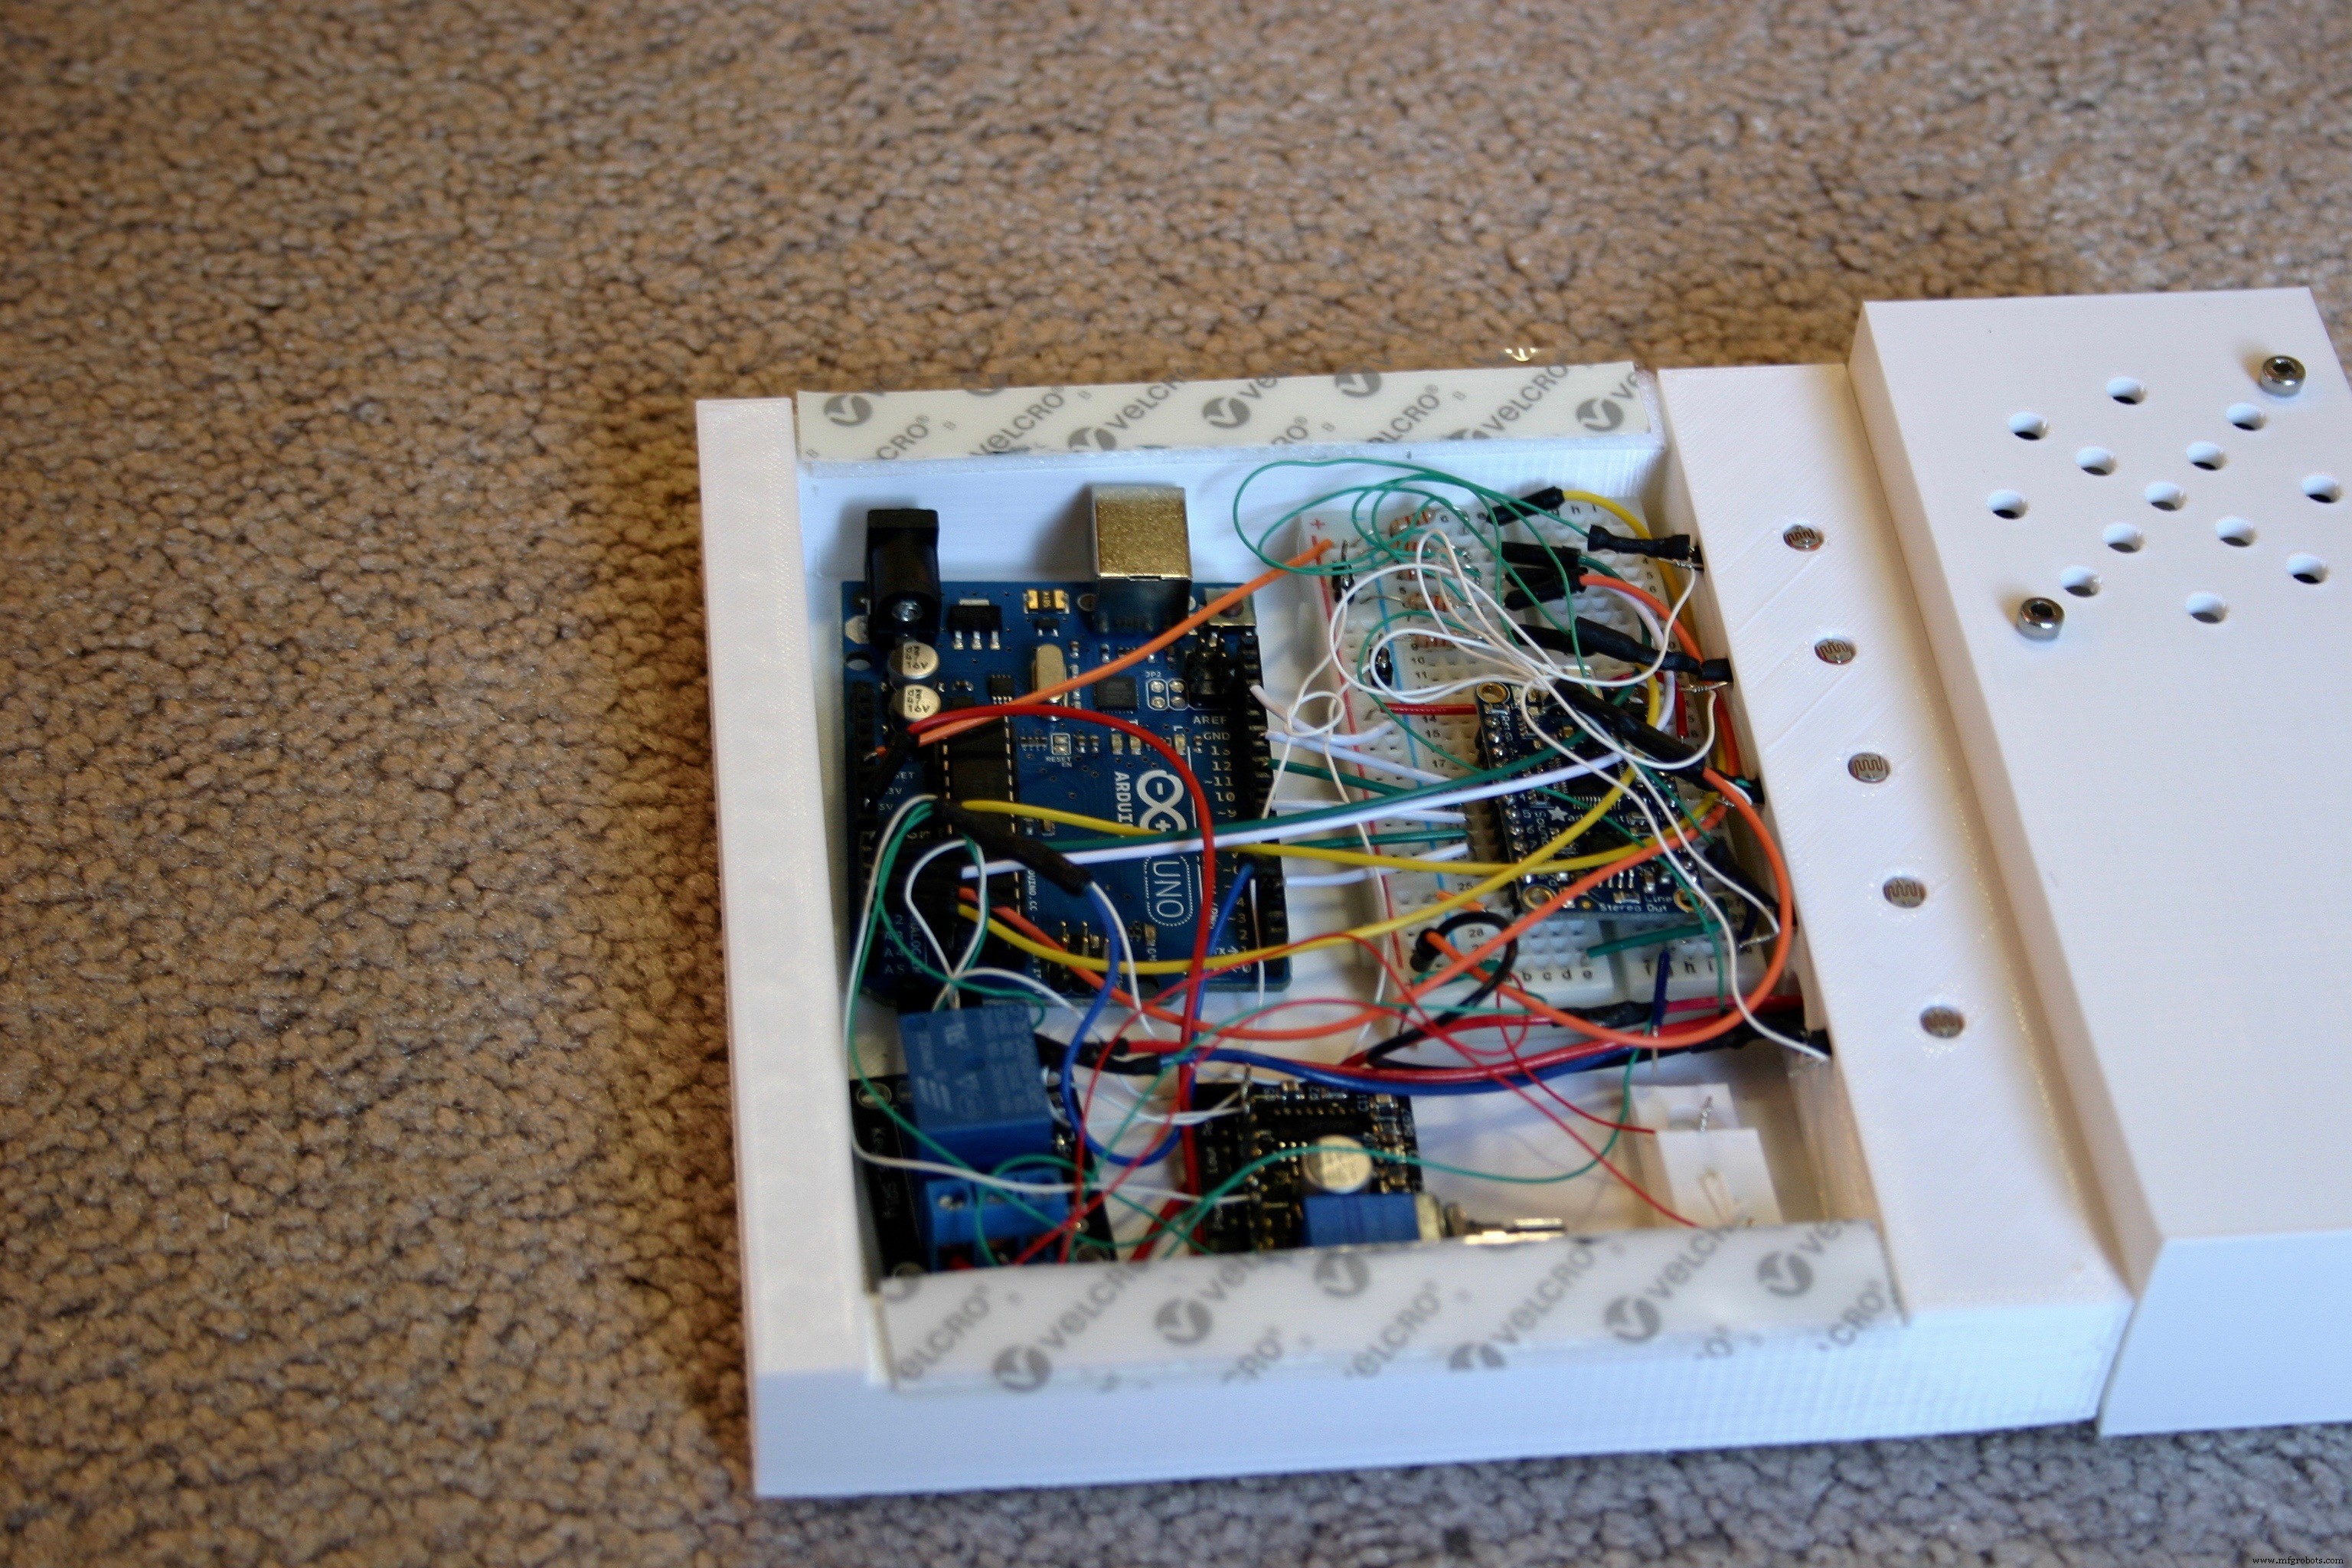
Peel the plastic from the Velcro and carefully place the book so that the holes in the book page align with the photo resistors. Fasten the battery/speaker cover to the end using M3 screws.
The book is now ready for use!
(1) Arduino Uno
(1) Adafruit Audio FX Sound Board WAV/OGG trigger with 16MB Flash
(1) 2” 4 ohm 3 watt full range audio speaker (Gikfun EK1725 on Amazon.com)
(1) 3W DC 5 volt audio amplifier (DROK super small 3w+3w.. on Amazon.com)
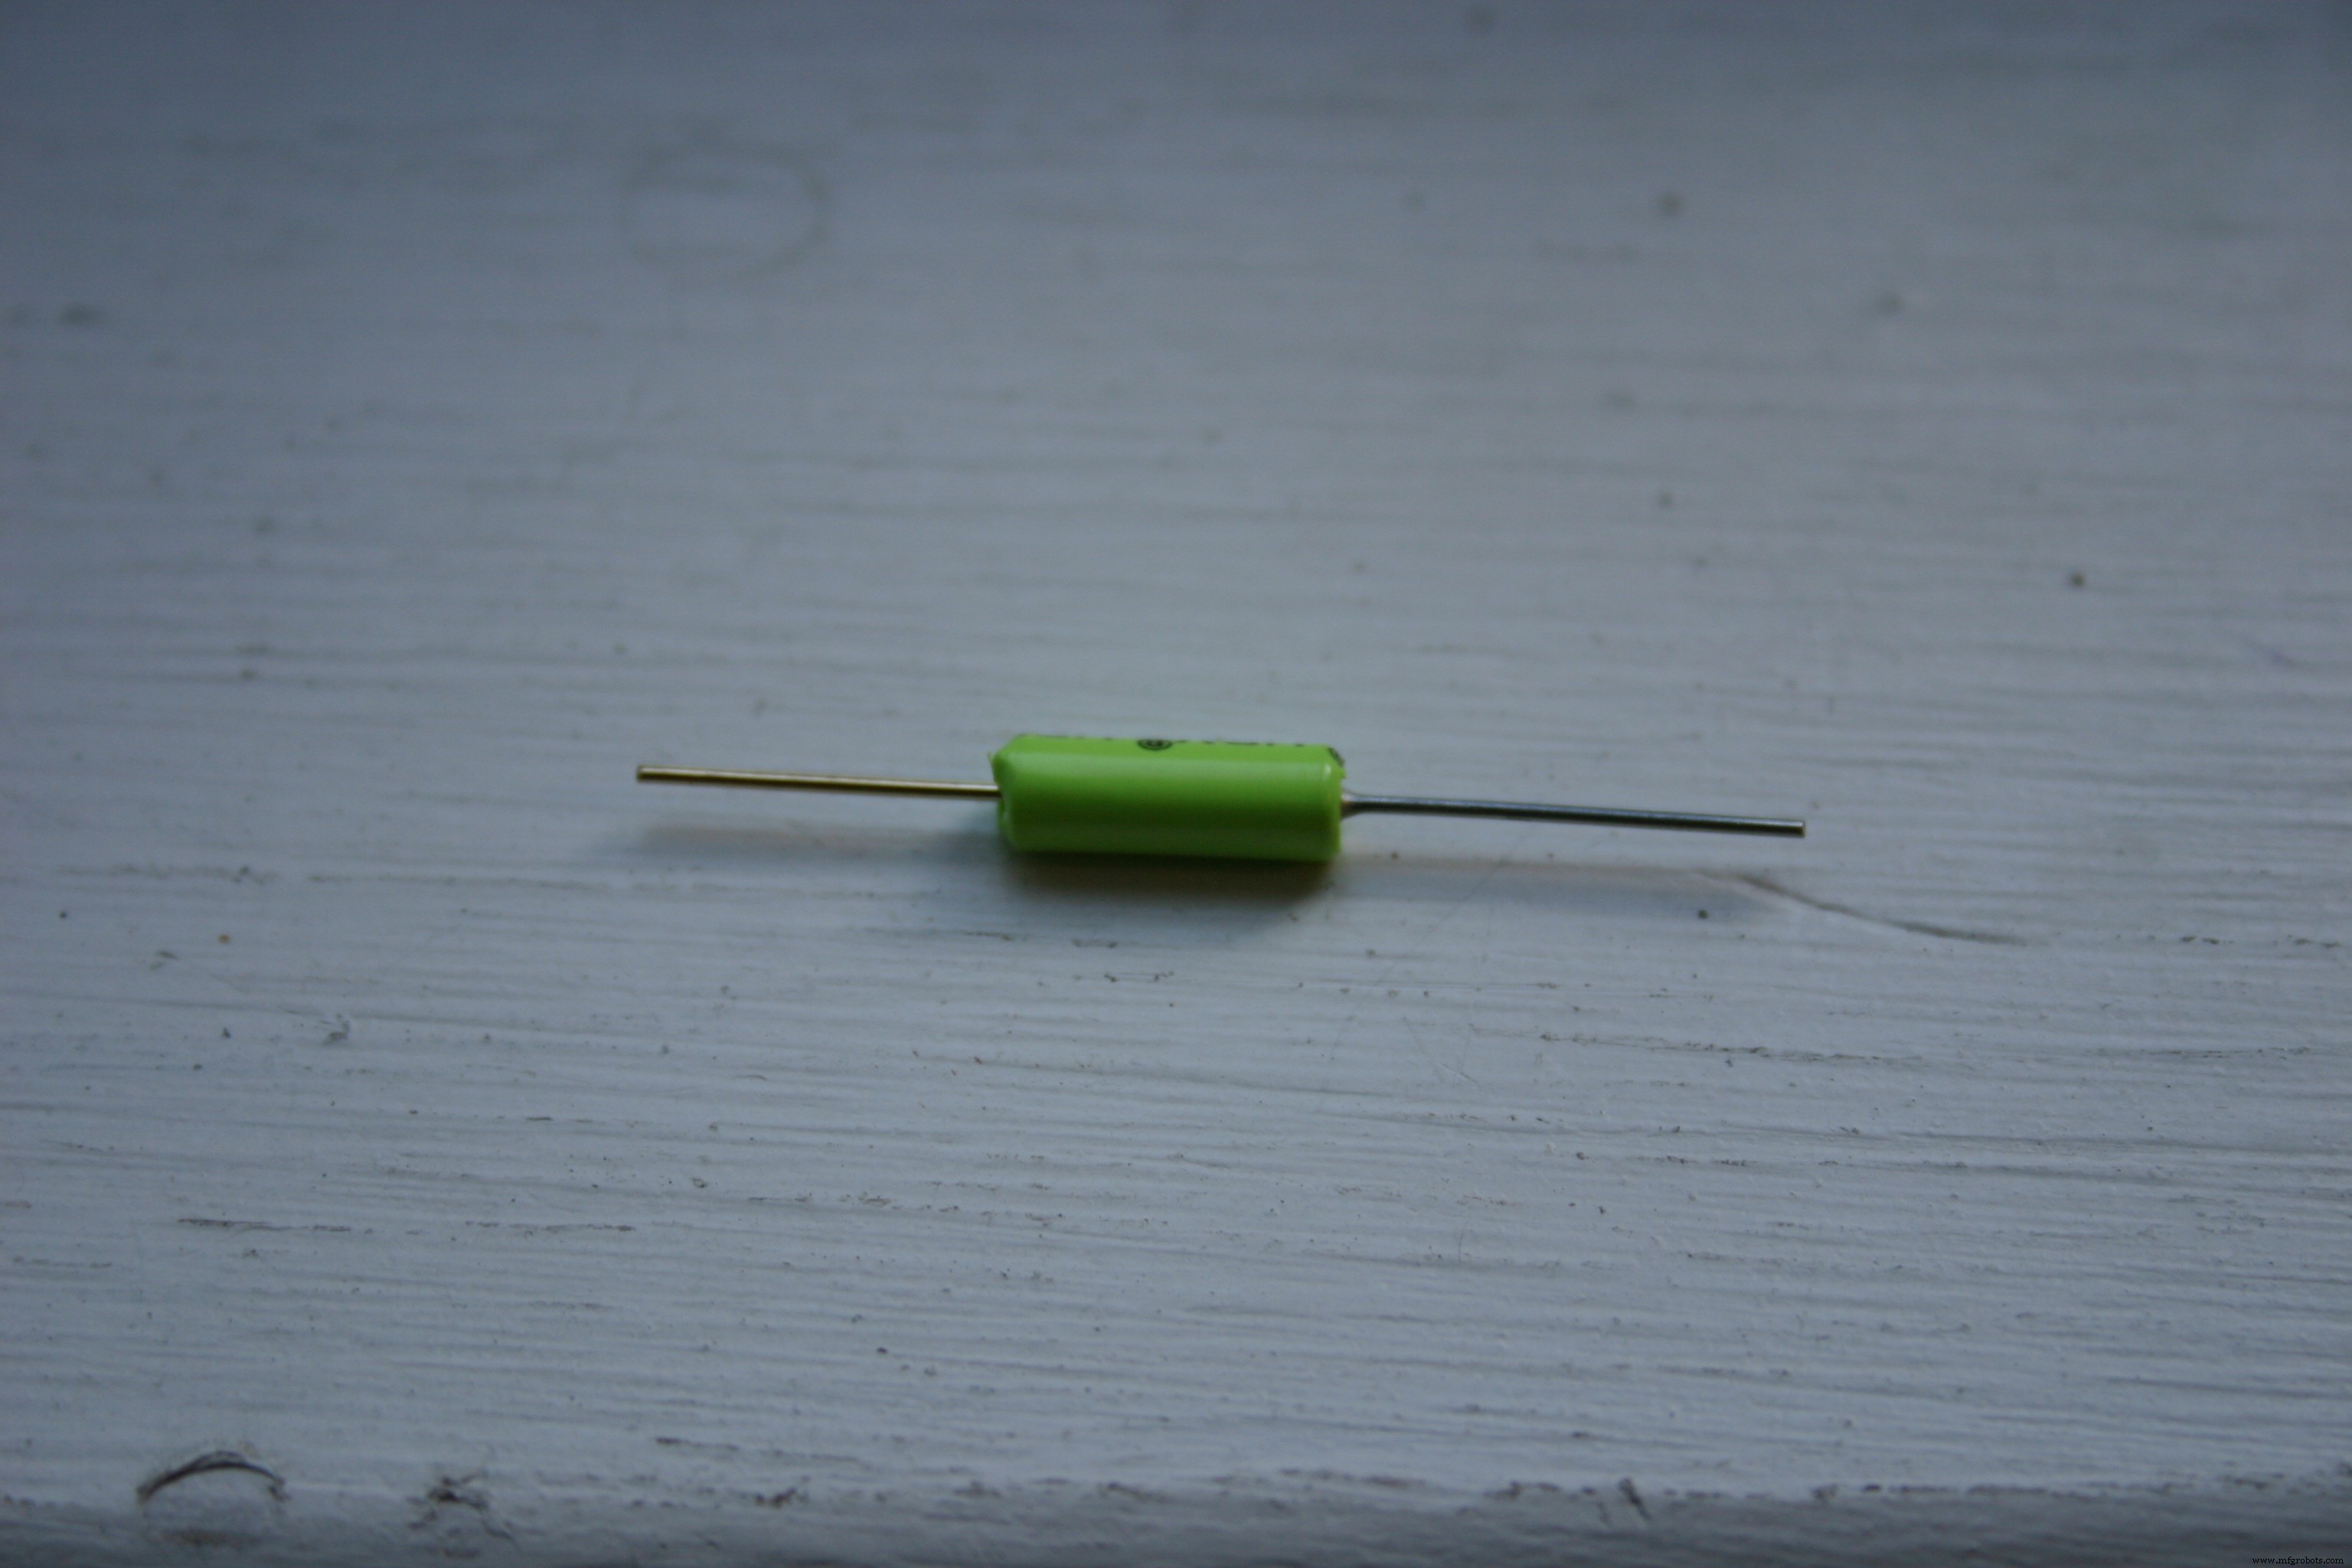
(5) photo light sensitive resistor 5mm
(1) 5 volt relay module for Arduino
(1) Tilt switch, roller ball
(5) 3.3K ohm resistor, ¼ watt
(1) 9 volt battery connector
(1) 9 volt battery
(6) M3 x 12 mm screws
(2) M3 nuts
(1) Breadboard (2” x 3.5”)
(1) Blank Board Book (6” x 6”)
(1) Velcro, 1” wide, 10” long
Misc: Solder, shrink wrap tubing, wire
3D-printed parts
(1) Back Base
(1) Speaker housingb
(1) Speaker lidb
(1) tilt1
Fileshttps://hackaday.io/project/96972/files
Code
- Notable Board Books Control (Arduino)
Notable Board Books Control (Arduino)C/C++
int r=200;
int r1=200;
int r2=200;
int r3=200;
int r4=200;

int a=0;//first read
int b=0;
int c=0;
int d=0;
int e=0;

int t1=0;//tally one
int t2=0;//tally two

int on=0;
int td=500;//time delay

void setup() {
  pinMode (2,OUTPUT);
  pinMode (4,OUTPUT);
  pinMode (7,OUTPUT);
  pinMode (9,OUTPUT);
  pinMode (11,OUTPUT);

  pinMode (3,OUTPUT);//set bypass relay
  digitalWrite(3,HIGH);//hold system on

  digitalWrite (2,HIGH);
  digitalWrite(4,HIGH);
  digitalWrite(7,HIGH);
  digitalWrite(9,HIGH);
  digitalWrite(11,HIGH);

  delay(1000);//wait while book is being picked up

}

void loop() {


  r4=analogRead(A4);
  r3=analogRead(A3);
  r2=analogRead(A2);
  r1=analogRead(A1);
  r=analogRead(A0);

  if (r4>600) {
    a=1;
  }
  if (r3>600) {
    b=2;
  }
  if (r2>600) {
    c=4;
  }
  if (r1>600) {
    d=8;
  }
  if (r>600) {
    e=16;
  }
  t1= a+b+c+d+e;

  delay(600);//time between reads

   r4=analogRead(A4);
  r3=analogRead(A3);
  r2=analogRead(A2);
  r1=analogRead(A1);
  r=analogRead(A0);

if (r4>600) {
    a=1;
  }
  if (r3>600) {
    b=2;
  }
  if (r2>600) {
    c=4;
  }
  if (r1>600) {
    d=8;
  }
  if (r>600) {
    e=16;
  }
  t2= a+b+c+d+e;

  if (t1==t2) {//valid read twice in a row

    if (a==1) {
 digitalWrite(2,LOW);
    on=1;
    digitalWrite(4,HIGH);
    digitalWrite(7,HIGH);
    digitalWrite(9,HIGH);
    digitalWrite(11,HIGH);

    digitalWrite(3,HIGH);
    delay(150);//keep pin low for sound fx board

    }
    if ((b==2) && (on==0)){
      digitalWrite(4,LOW);

    digitalWrite(2,HIGH);
    digitalWrite(7,HIGH);
    digitalWrite(9,HIGH);
    digitalWrite(11,HIGH);

    digitalWrite(3,HIGH);
    on=1;
    delay(150);

    }
    if ((c==4) && (on==0)) {
digitalWrite(7,LOW);
    digitalWrite(4,HIGH);
    digitalWrite(2,HIGH);
    digitalWrite(9,HIGH);
    digitalWrite(11,HIGH);

    digitalWrite(3,HIGH);
    on=1;
    delay(150);

    }

    if ((d==8) && (on==0)){

      digitalWrite(9,LOW);
    digitalWrite(4,HIGH);
    digitalWrite(7,HIGH);
    digitalWrite(2,HIGH);
    digitalWrite(11,HIGH);

    digitalWrite(3,HIGH);
    on=1;
    delay(150);


    }
    if ((e==16) && (on==0)) {
      digitalWrite(11,LOW);
    digitalWrite(4,HIGH);
    digitalWrite(7,HIGH);
    digitalWrite(9,HIGH);
    digitalWrite(2,HIGH);

     digitalWrite(3,HIGH);
     delay(150);
    }


  if(t2==0) {
    digitalWrite(11,HIGH);
    digitalWrite(4,HIGH);
    digitalWrite(7,HIGH);
    digitalWrite(9,HIGH);
    digitalWrite(1,HIGH);
    digitalWrite(3,LOW);//turn off bypass relay
  }}

on=0;
a=0;
b=0;
c=0;
d=0;
e=0;


}
Schematics
sketch_sept29_XTJbNYODZA.ino
Manufacturing process
- Ironing Board Manufacturing: Design, Materials, and Production Process
- The Legacy and Evolution of the Classic Jukebox
- Sheet Music: From Medieval Manuscripts to Modern Publishing – An Industry Overview
- Printed Circuit Boards: Design, Manufacture, and Future Trends
- Surfboard Construction and Design: From Polynesian Roots to Modern Innovation
- The Evolution and Production Process of Modern Books
- RasPiRobot Board V2: Expand Your Raspberry Pi Into a Powerful Robot Controller
- Transforming a Human Head into a Robot Head: An Arduino-Driven DIY Project
- EL Tape Music Visualizer – Illuminate Your Sound with Arduino
- Master Your Audio: Step‑by‑Step Guide to Building a Speaker Volume Control Circuit