


Precise Stepper Motor Control: 28BYJ-48 with Arduino UNO & Joystick
Components and supplies
 |
| × | 1 | |||
| × | 1 | ||||
| × | 1 | ||||
 |
| × | 1 | |||
 |
| × | 1 | |||
| × | 1 |
About this project
Hardware Required:
- Arduino UNO board
- 28BYJ-48 stepper motor (with ULN2003A driver board)
- Joystick
- 5V power source
- Bread board
- Jumper wires
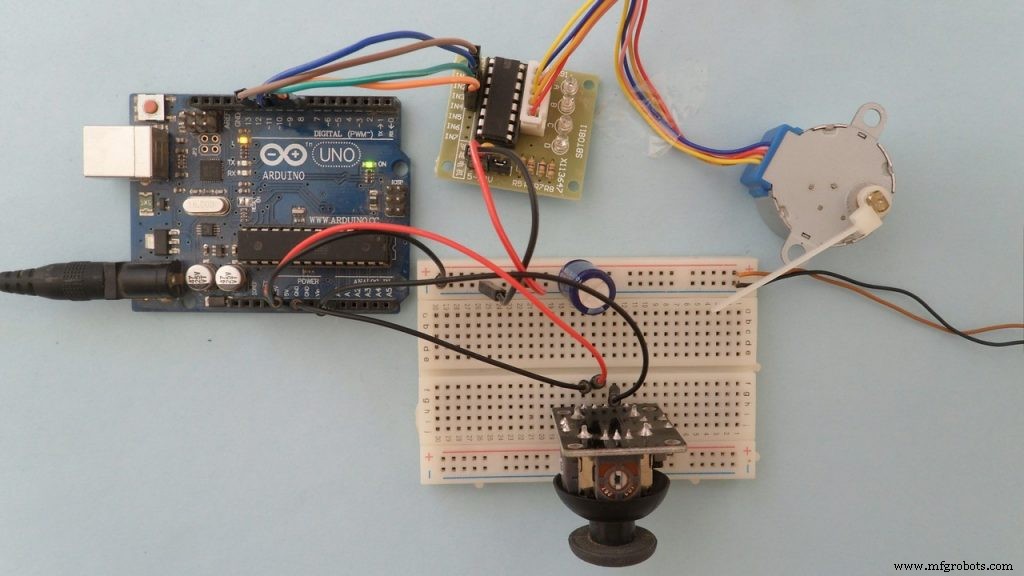
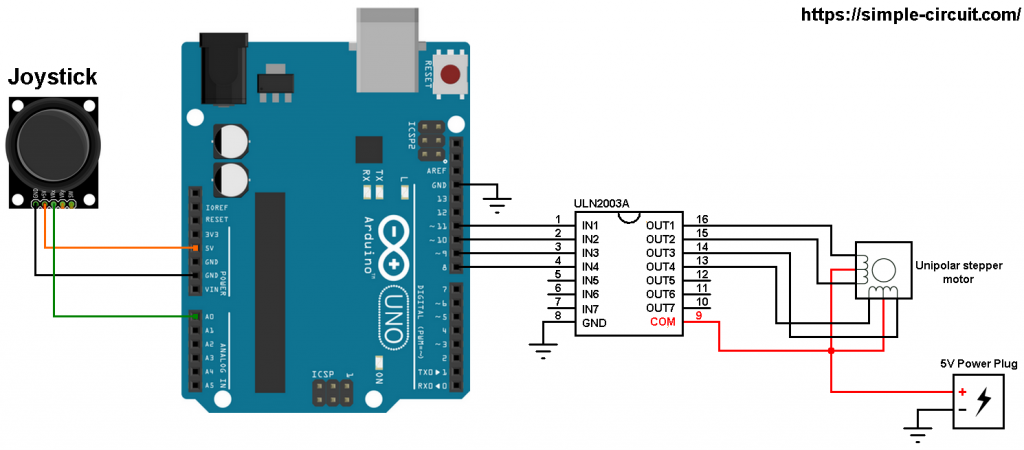
Stepper motor control with Arduino and joystick circuit:Project circuit schematic diagram is shown below (all grounded terminals are connected together).
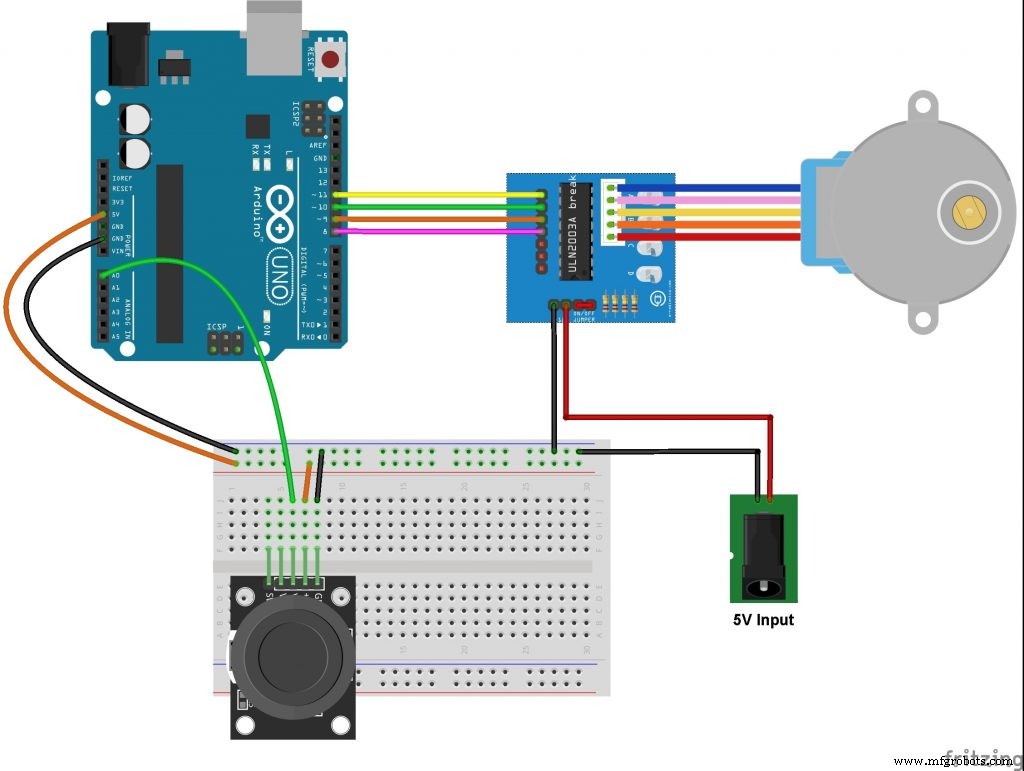
and the following image shows fritzing circuit:
The stepper motor is connected to the ULN2003A board which is supplied with external power source of 5V. The control lines (IN1, IN2, IN3 and IN4) of this board are connected to the Arduino as follows:IN1 to Arduino pin 11IN2 to Arduino pin 10IN3 to Arduino pin 9IN4 to Arduino pin 8
The joystick board has 5 pins: GND, +5V, VRX, VRY and SW where:GND and +5V are power supply pinsVRX is the X-axis potentiometer outputVRY is the Y-axis potentiometer outputSW is the push button terminal (the other terminal is connected to GND).The output of the X-axis potentiometer (VRX) is connected to Arduino analog pin A0, Y-axis potentiometer output (VRY) can also be used. The switch pin (SW) is not used in this example.Using the X-axis and the Y-axis potentiometers we can control two stepper motors independently.
"So guys if you like the project so don't forget to follow and like it"
Code
- CODE:
CODE:C/C++
please make sure to add all libraries that is include in this code//this project is made by BEASTIDREES62 https://id.arduino.cc/?code=MTxqeHweG6vL2cur&state=amxEcTB2bnNiYjluTUxmRExWaWZnOXIzUk1BLWRqZTZYUGtJNGtxODB%2Bdg%3D%3D
// include Arduino stepper motor library
#include <Stepper.h>
// define number of steps per revolution
#define STEPS 32
// define stepper motor control pins
#define IN1 11
#define IN2 10
#define IN3 9
#define IN4 8
// initialize stepper library
Stepper stepper(STEPS, IN4, IN2, IN3, IN1);
// joystick pot output is connected to Arduino A0
#define joystick A0
void setup()
{
}
void loop()
{
// read analog value from the potentiometer
int val = analogRead(joystick);
// if the joystic is in the middle ===> stop the motor
if( (val > 500) && (val < 523) )
{
digitalWrite(IN1, LOW);
digitalWrite(IN2, LOW);
digitalWrite(IN3, LOW);
digitalWrite(IN4, LOW);
}
else
{
// move the motor in the first direction
while (val >= 523)
{
// map the speed between 5 and 500 rpm
int speed_ = map(val, 523, 1023, 5, 500);
// set motor speed
stepper.setSpeed(speed_);
// move the motor (1 step)
stepper.step(1);
val = analogRead(joystick);
}
// move the motor in the other direction
while (val <= 500)
{
// map the speed between 5 and 500 rpm
int speed_ = map(val, 500, 0, 5, 500);
// set motor speed
stepper.setSpeed(speed_);
// move the motor (1 step)
stepper.step(-1);
val = analogRead(joystick);
}
}
}
Schematics

Manufacturing process
- Stepper Motors: Types, Characteristics, and Practical Applications
- Field‑Oriented Control: The Key to Smooth, Efficient EV Motor Performance
- Build a Smart Piggy Bank: Control a Coin Acceptor with Arduino Nano
- Comprehensive Bipolar Stepper Motor Library for Arduino
- Control an LED via Bluetooth with Arduino – Simple DIY Guide
- Control Two Stepper Motors with Arduino Nano & Joystick – Simple Tutorial
- Custom 3D‑Printed Stepper Motor: Build Your Own Precision Drive
- DIY Dual‑Axis FPV Camera Cradle: Arduino‑Controlled Joystick Tutorial
- Master Stepper Motor Control with Arduino & A4988 Driver – Step-by-Step Guide
- Master the 28BYJ-48 Stepper Motor: A Complete Arduino Integration Guide