


Smart Motion‑Activated Alarm Clock: Wake Up for Good
Components and supplies
 |
|
× | 1 | |||
|
× | 1 | ||||
|
× | 1 | ||||
 |
|
× | 1 |
Apps and online services
 |
|
About this project
Getting out of bed can be a real challenge. This motion‑activated alarm clock ensures you stay up by detecting movement after you hit snooze. If you return to bed, the alarm resets, forcing you to remain awake for a set period before the alarm stops.
Assembly
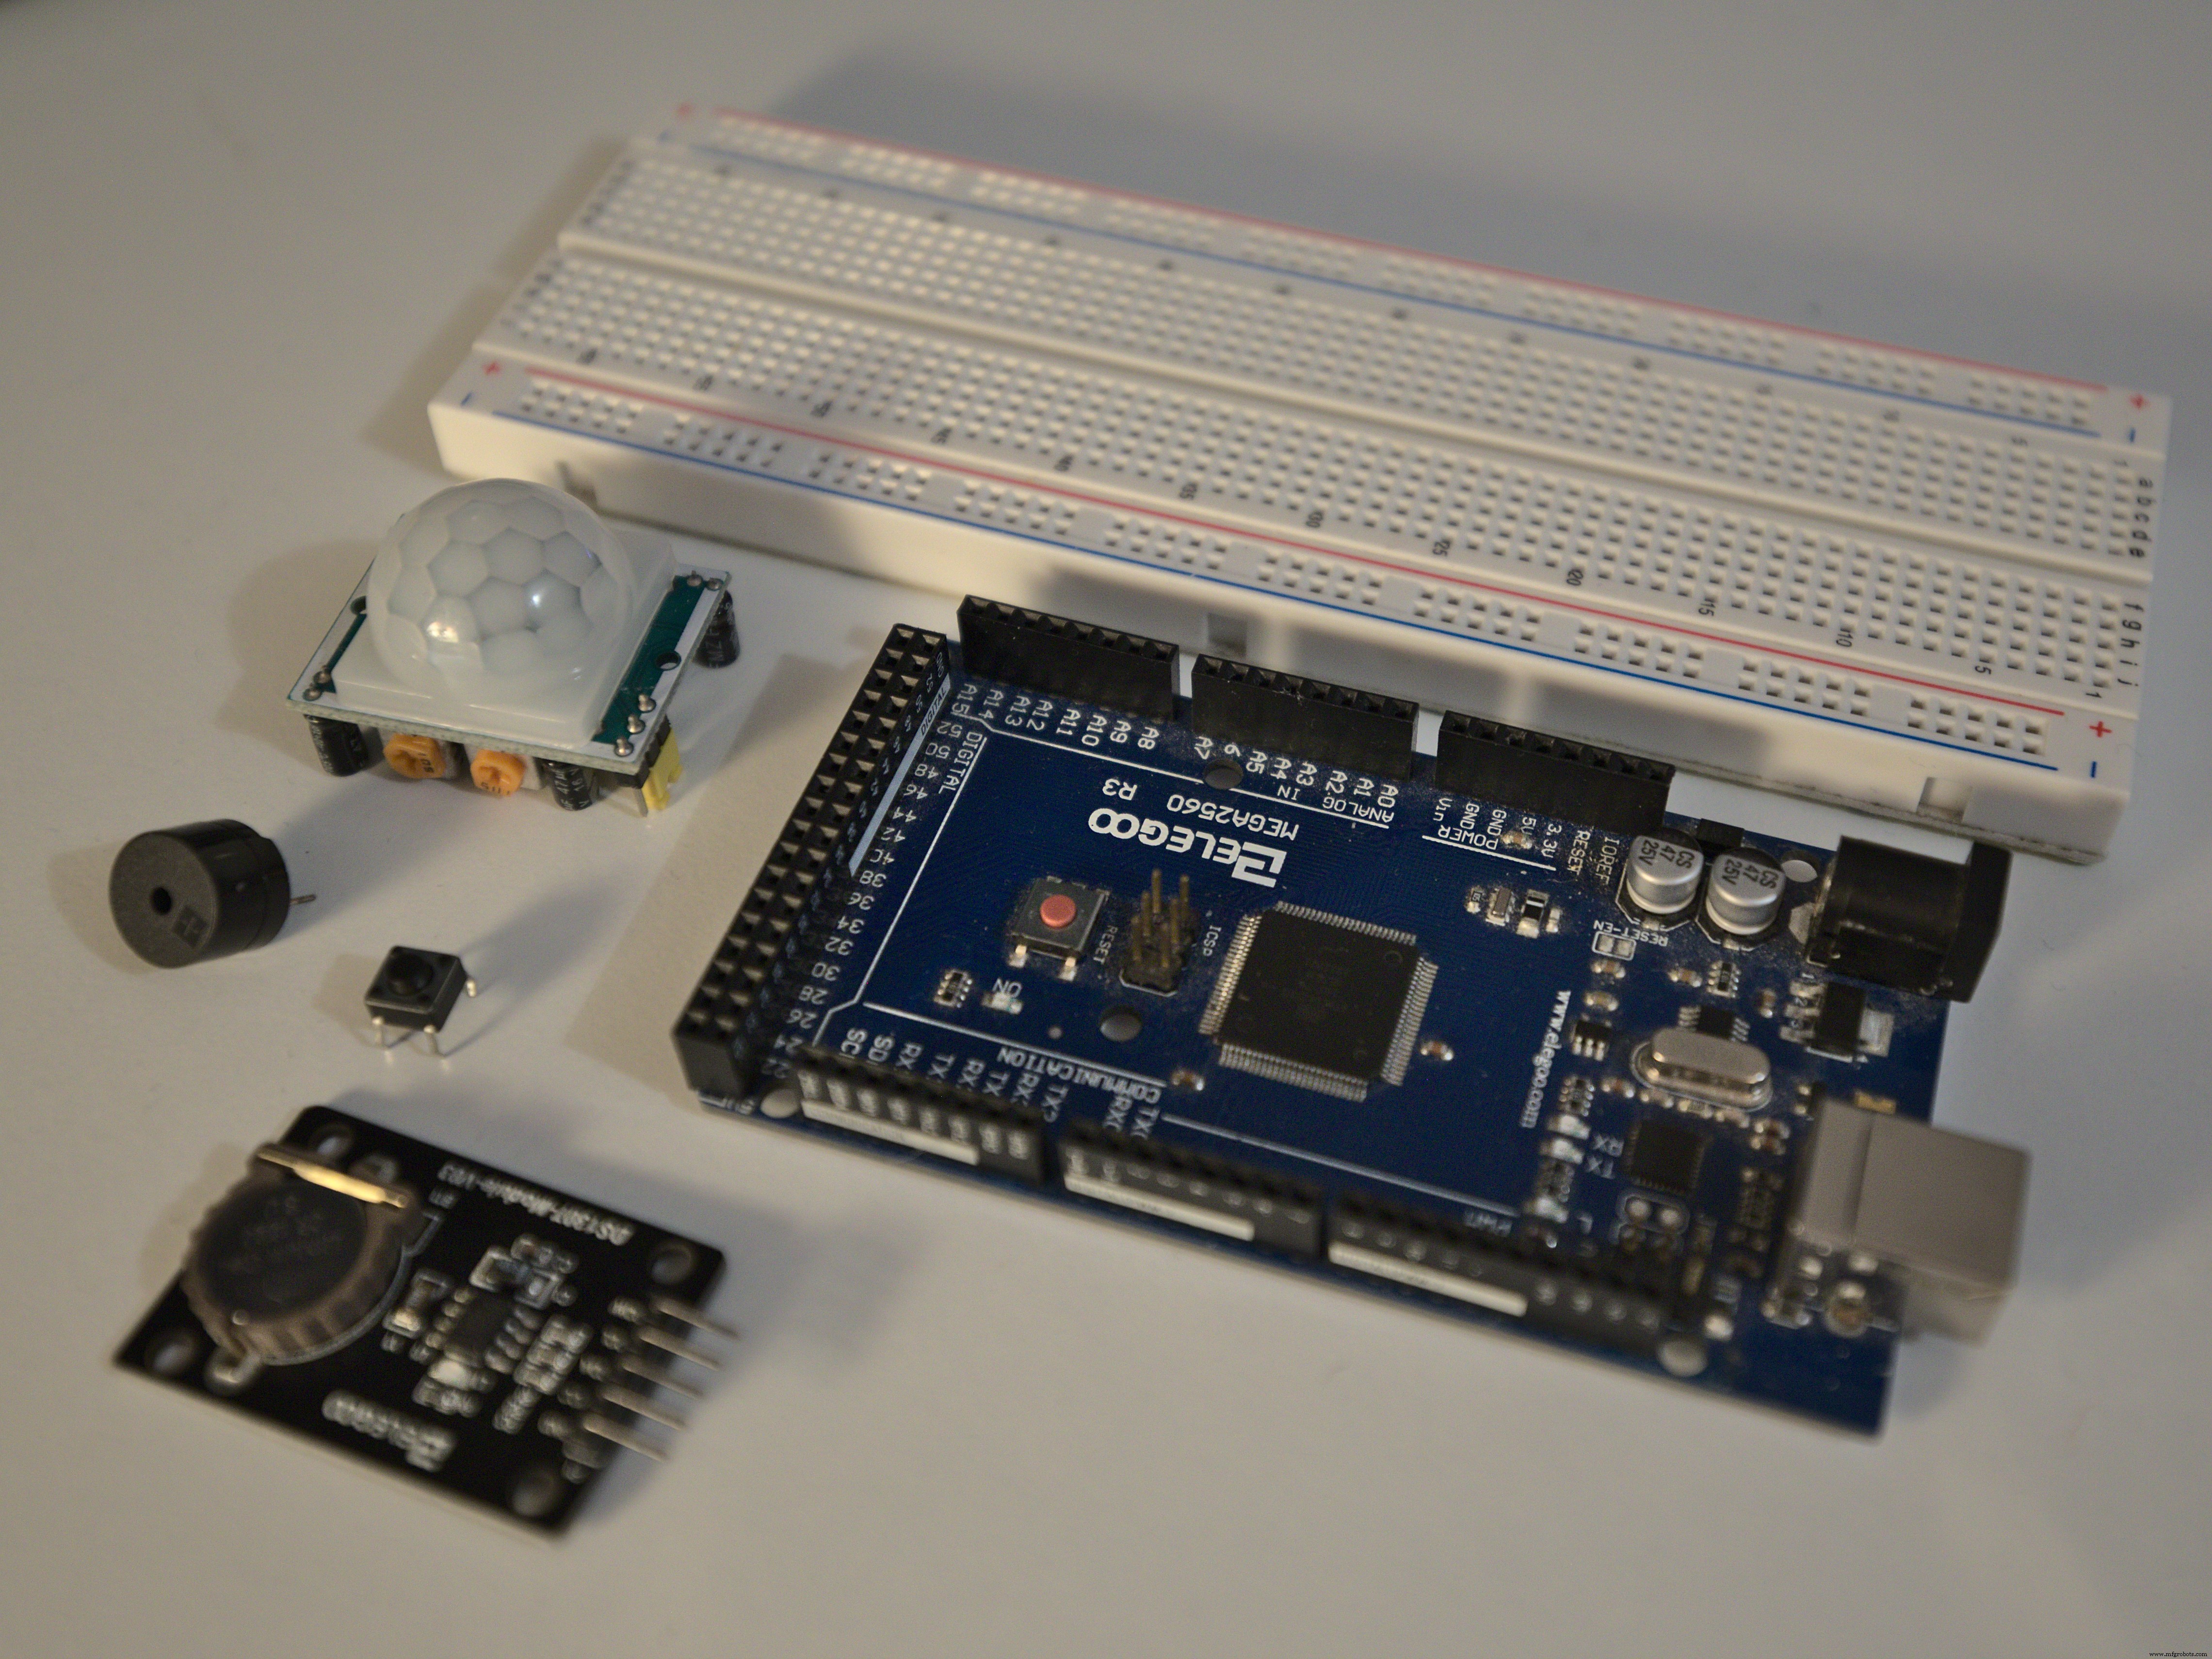
Gather the following components:
- DS3231 real‑time clock module
- HC‑SR501 PIR motion sensor
- Buzzer (any 5V piezo)
- Momentary push button
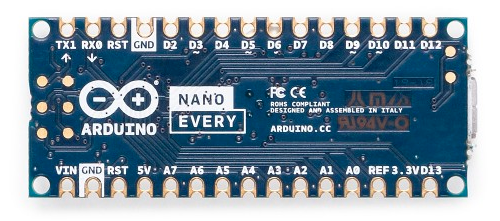
- Arduino Nano Every (or any Arduino compatible board)
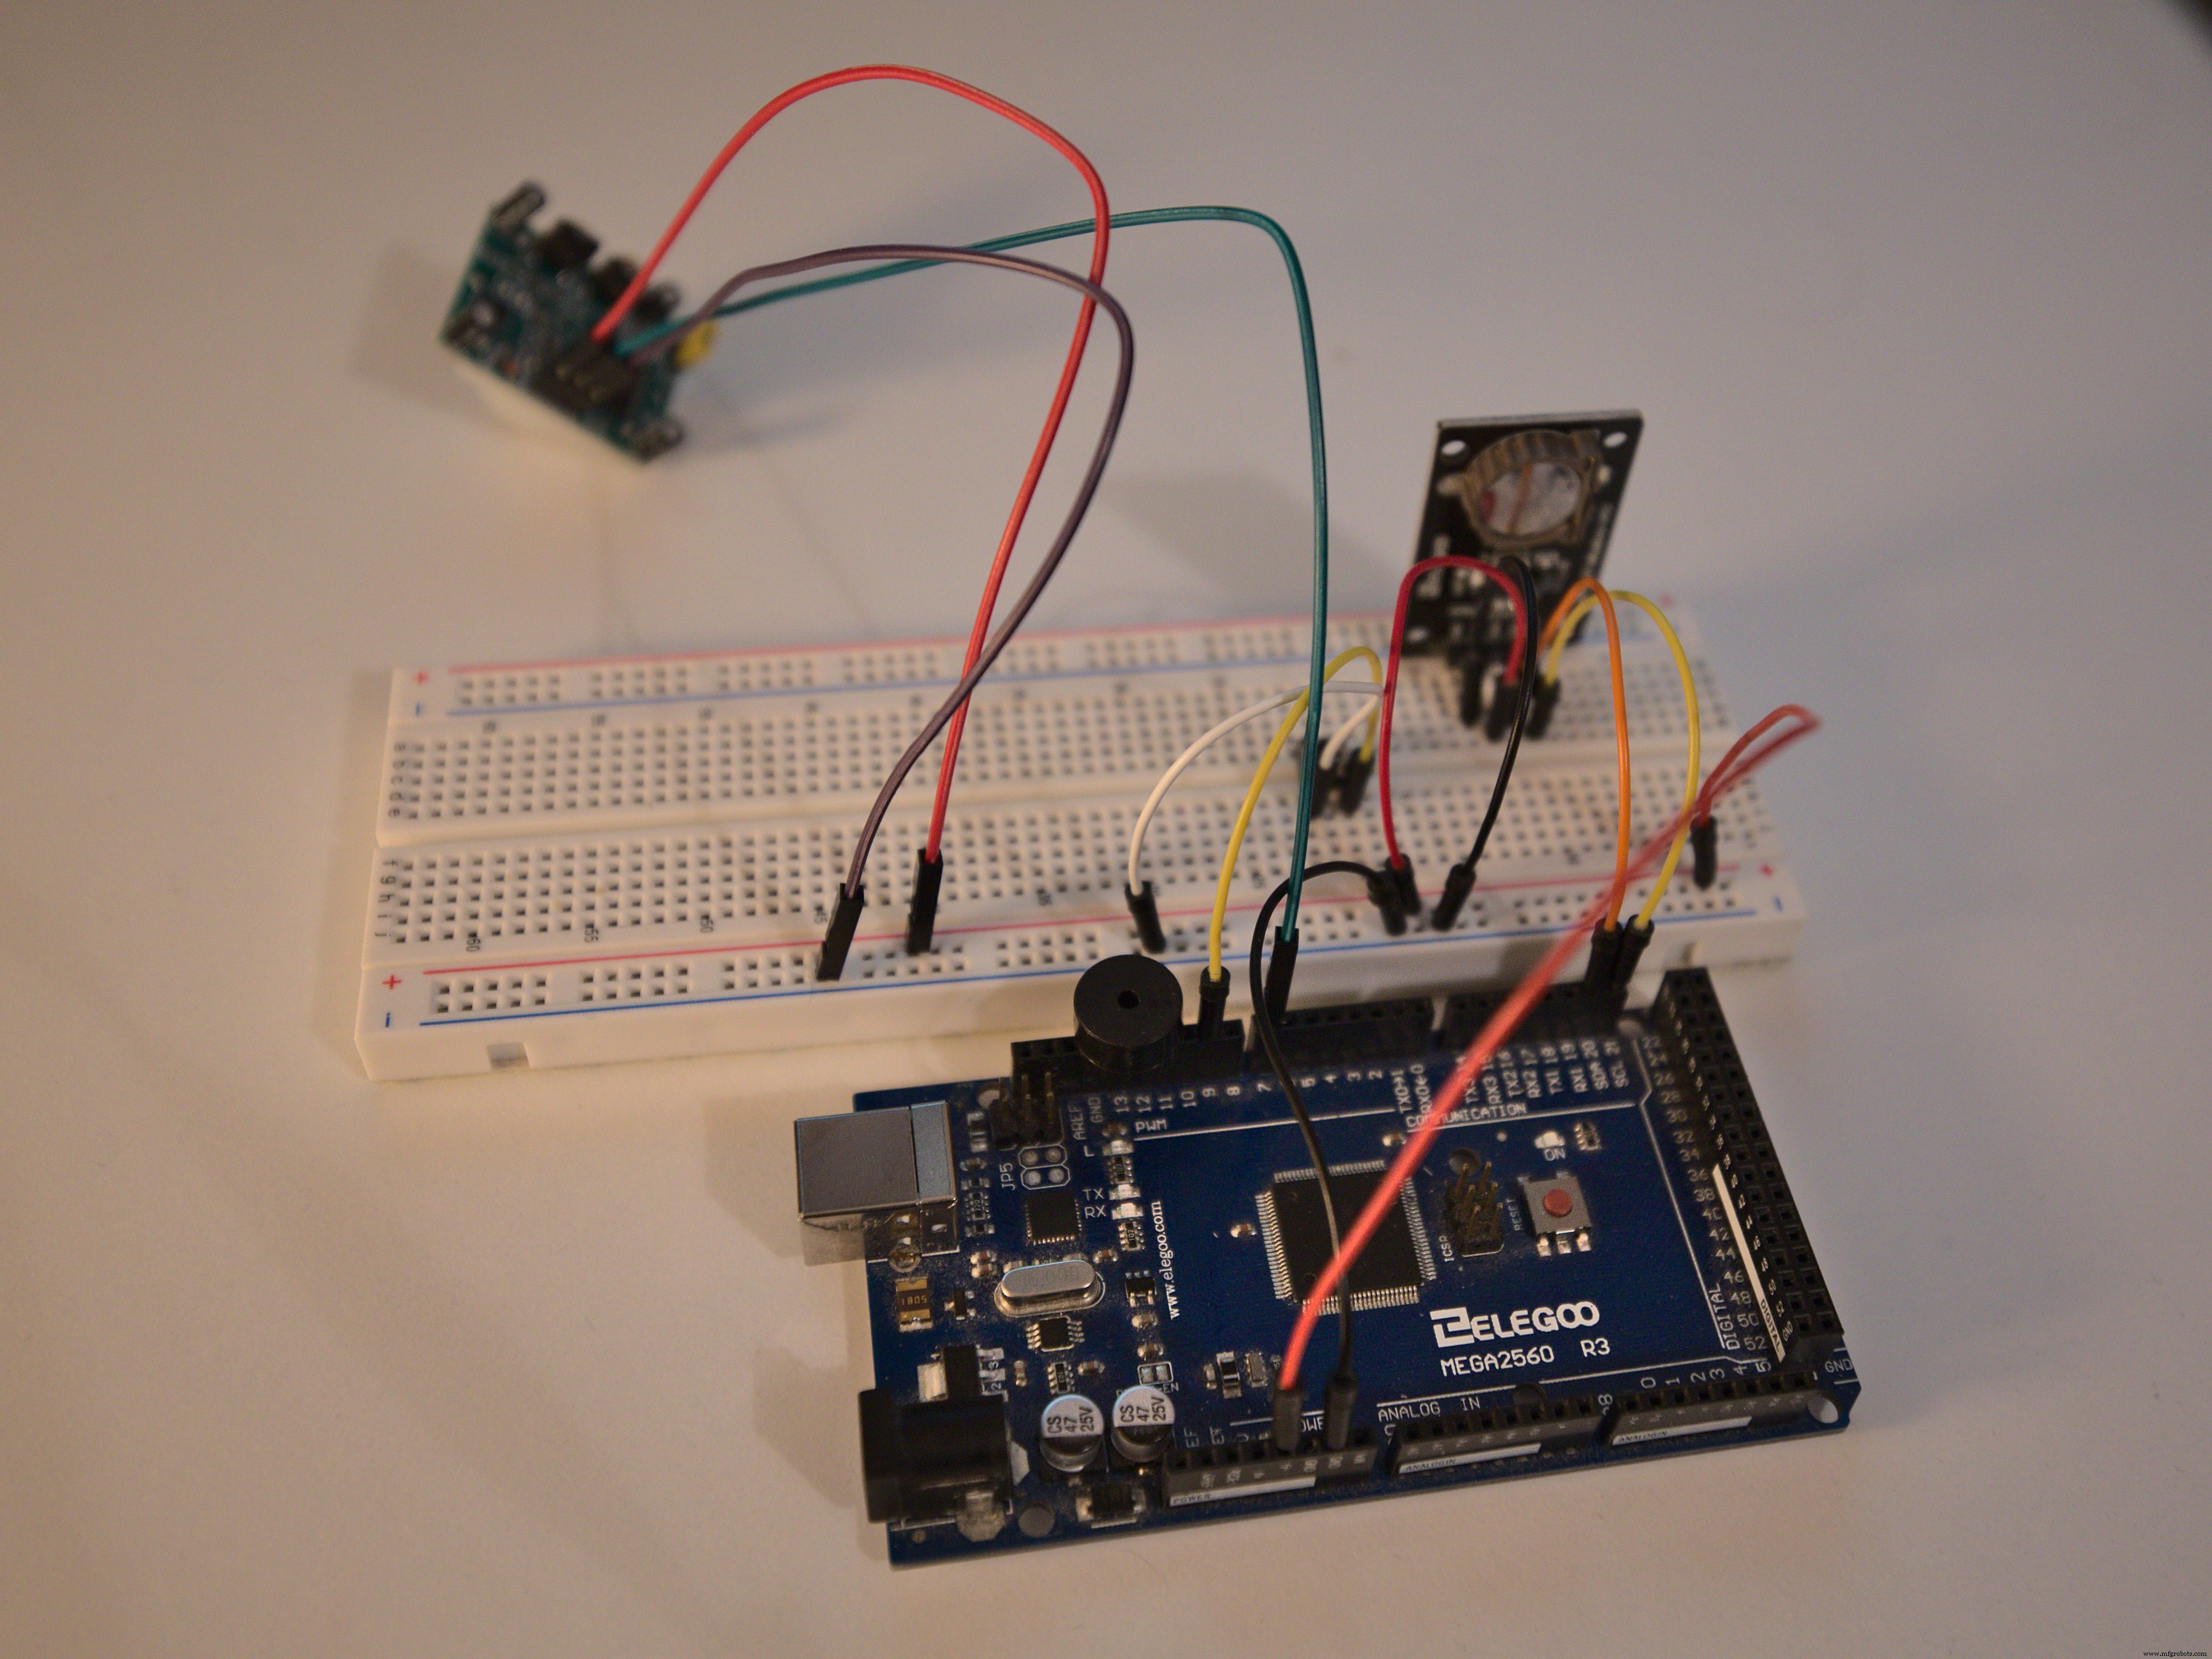
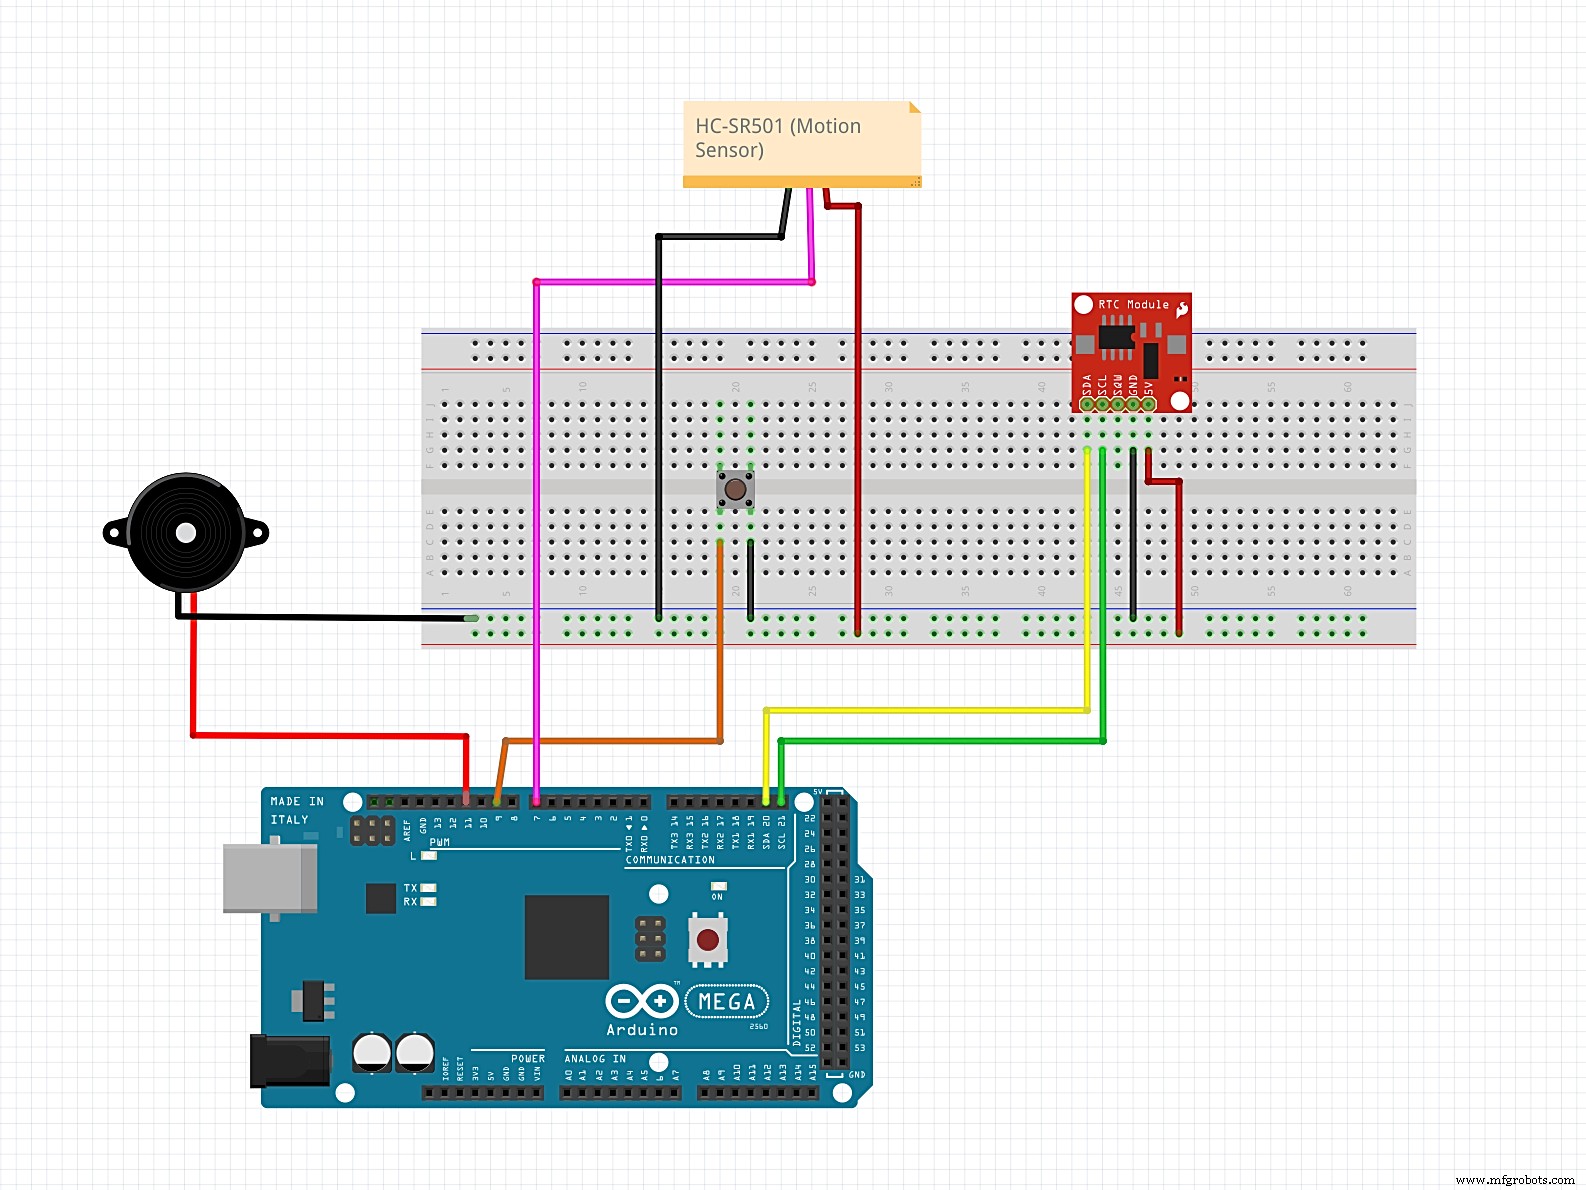
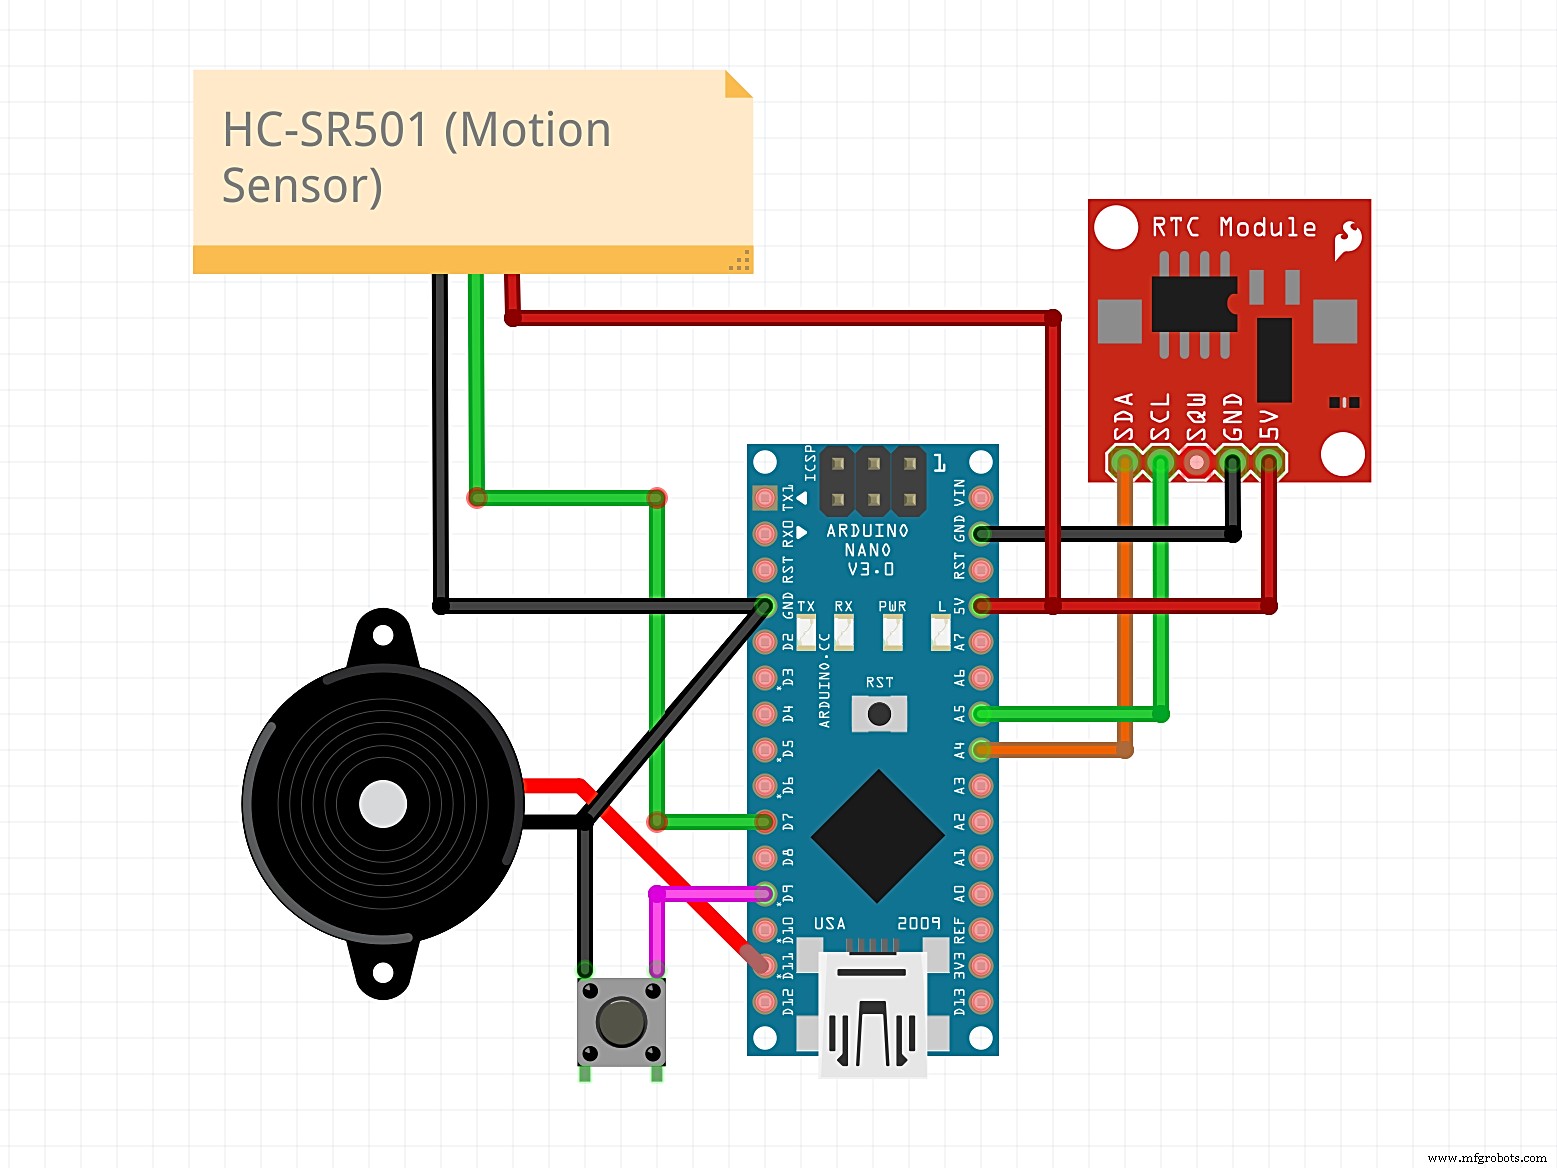
Wire the components as follows:
- Connect the buzzer negative pin to GND.
- Connect the buzzer positive pin to D11.
- Connect the button ground pin to GND.
- Connect the button signal pin to D9.
- Connect HC‑SR501 VCC to 5V.
- Connect HC‑SR501 output to D7.
- Connect HC‑SR501 GND to GND.
- Connect DS3231 GND to GND.
- Connect DS3231 VCC to 5V.
- Connect DS3231 SDA to SDA (pin A4 on Nano).
- Connect DS3231 SCL to SCL (pin A5 on Nano).
Code
Download the DS3231 library ZIP from the Code section and add it to the Arduino IDE via Sketch > Include Library > Add .ZIP Library.
Upload the following sketch. After the first upload, comment out the line that sets the date and time so the RTC retains the correct time on resets.
#include <Wire.h>
#include <DS3231.h>

DS3231 clock;
RTCDateTime dt;

int button = 9;
int pirPin = 7; // Input for HC‑SR501
int pirValue;

//--------------------------------------
int set_hour = 7;
int set_minute = 0;
//--------------------------------------

void setup() {
  clock.begin();
  pinMode(button, INPUT_PULLUP);
  pinMode(LED_BUILTIN, OUTPUT);
  //clock.setDateTime(__DATE__, __TIME__); // comment after first upload
  pinMode(pirPin, INPUT);
}

void alarm(int minute){
  bool button_pressed = false;
  bool awake = false;
  bool movement = false;

  while(!button_pressed){
    for(int i = 0; i < 4; i++){
      tone(11, 523, 100);
      delay(100);
      tone(11, 784, 50);
      for(int i = 0; i < 20; i++){
        if(digitalRead(button) == LOW){
          button_pressed = true;
          awake = true;
          dt = clock.getDateTime();
          minute = dt.minute;
        }
        delay(65);
      }
    }
  }

  dt = clock.getDateTime();
  minute = dt.minute;

  while(awake){
    movement = false;
    dt = clock.getDateTime();
    for(int i = 0; i < 30; i++){
      if(digitalRead(pirPin)){movement = true;}
    }
    digitalWrite(LED_BUILTIN, movement);
    if(!pirValue){
      delay(5000);
      for(int i = 0; i < 40; i++){
        if(digitalRead(pirPin)){movement = true;}
      }
      if(!movement){
        alarm(minute);
      }
    }

    if(abs(dt.minute - minute) >= 1){
      tone(11, 698, 50);
      delay(100);
      tone(11, 698, 50);
      digitalWrite(LED_BUILTIN, 0);
      awake = false;
    }

    delay(100);
  }
}

void loop() {
  dt = clock.getDateTime();
  if(set_minute == dt.minute && set_hour == dt.hour){
    alarm(set_minute);
  }
  delay(10000);
}
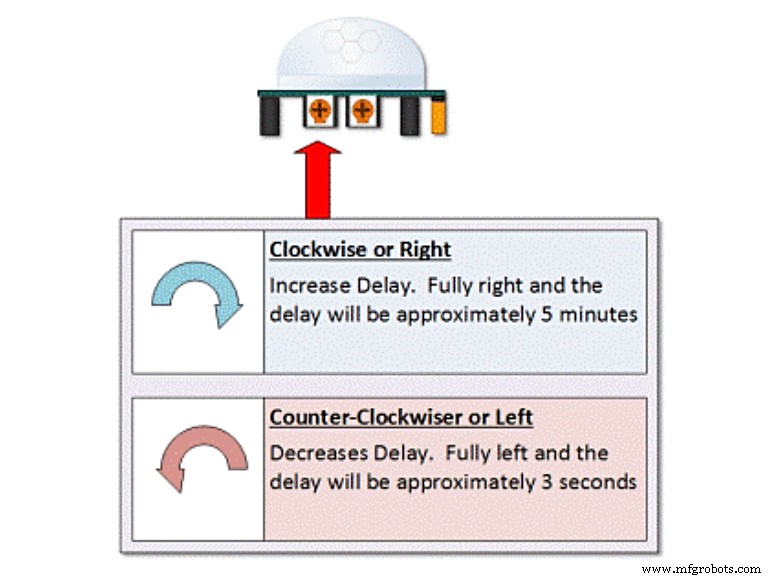
Sensor Adjustment
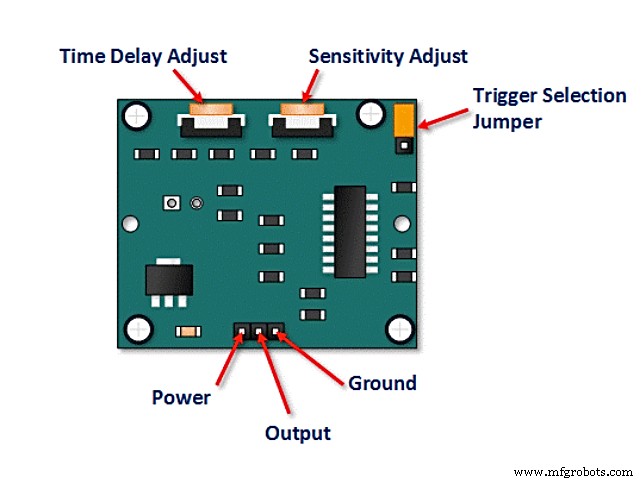
Set the HC‑SR501 to repeatable trigger mode by placing the trigger selection jumper accordingly.

Fine‑tune the delay and sensitivity. Maximum sensitivity with a minimal delay works best: it ensures the sensor stays active long enough to detect you, but not so long that it ignores a return to bed.
Compact Build
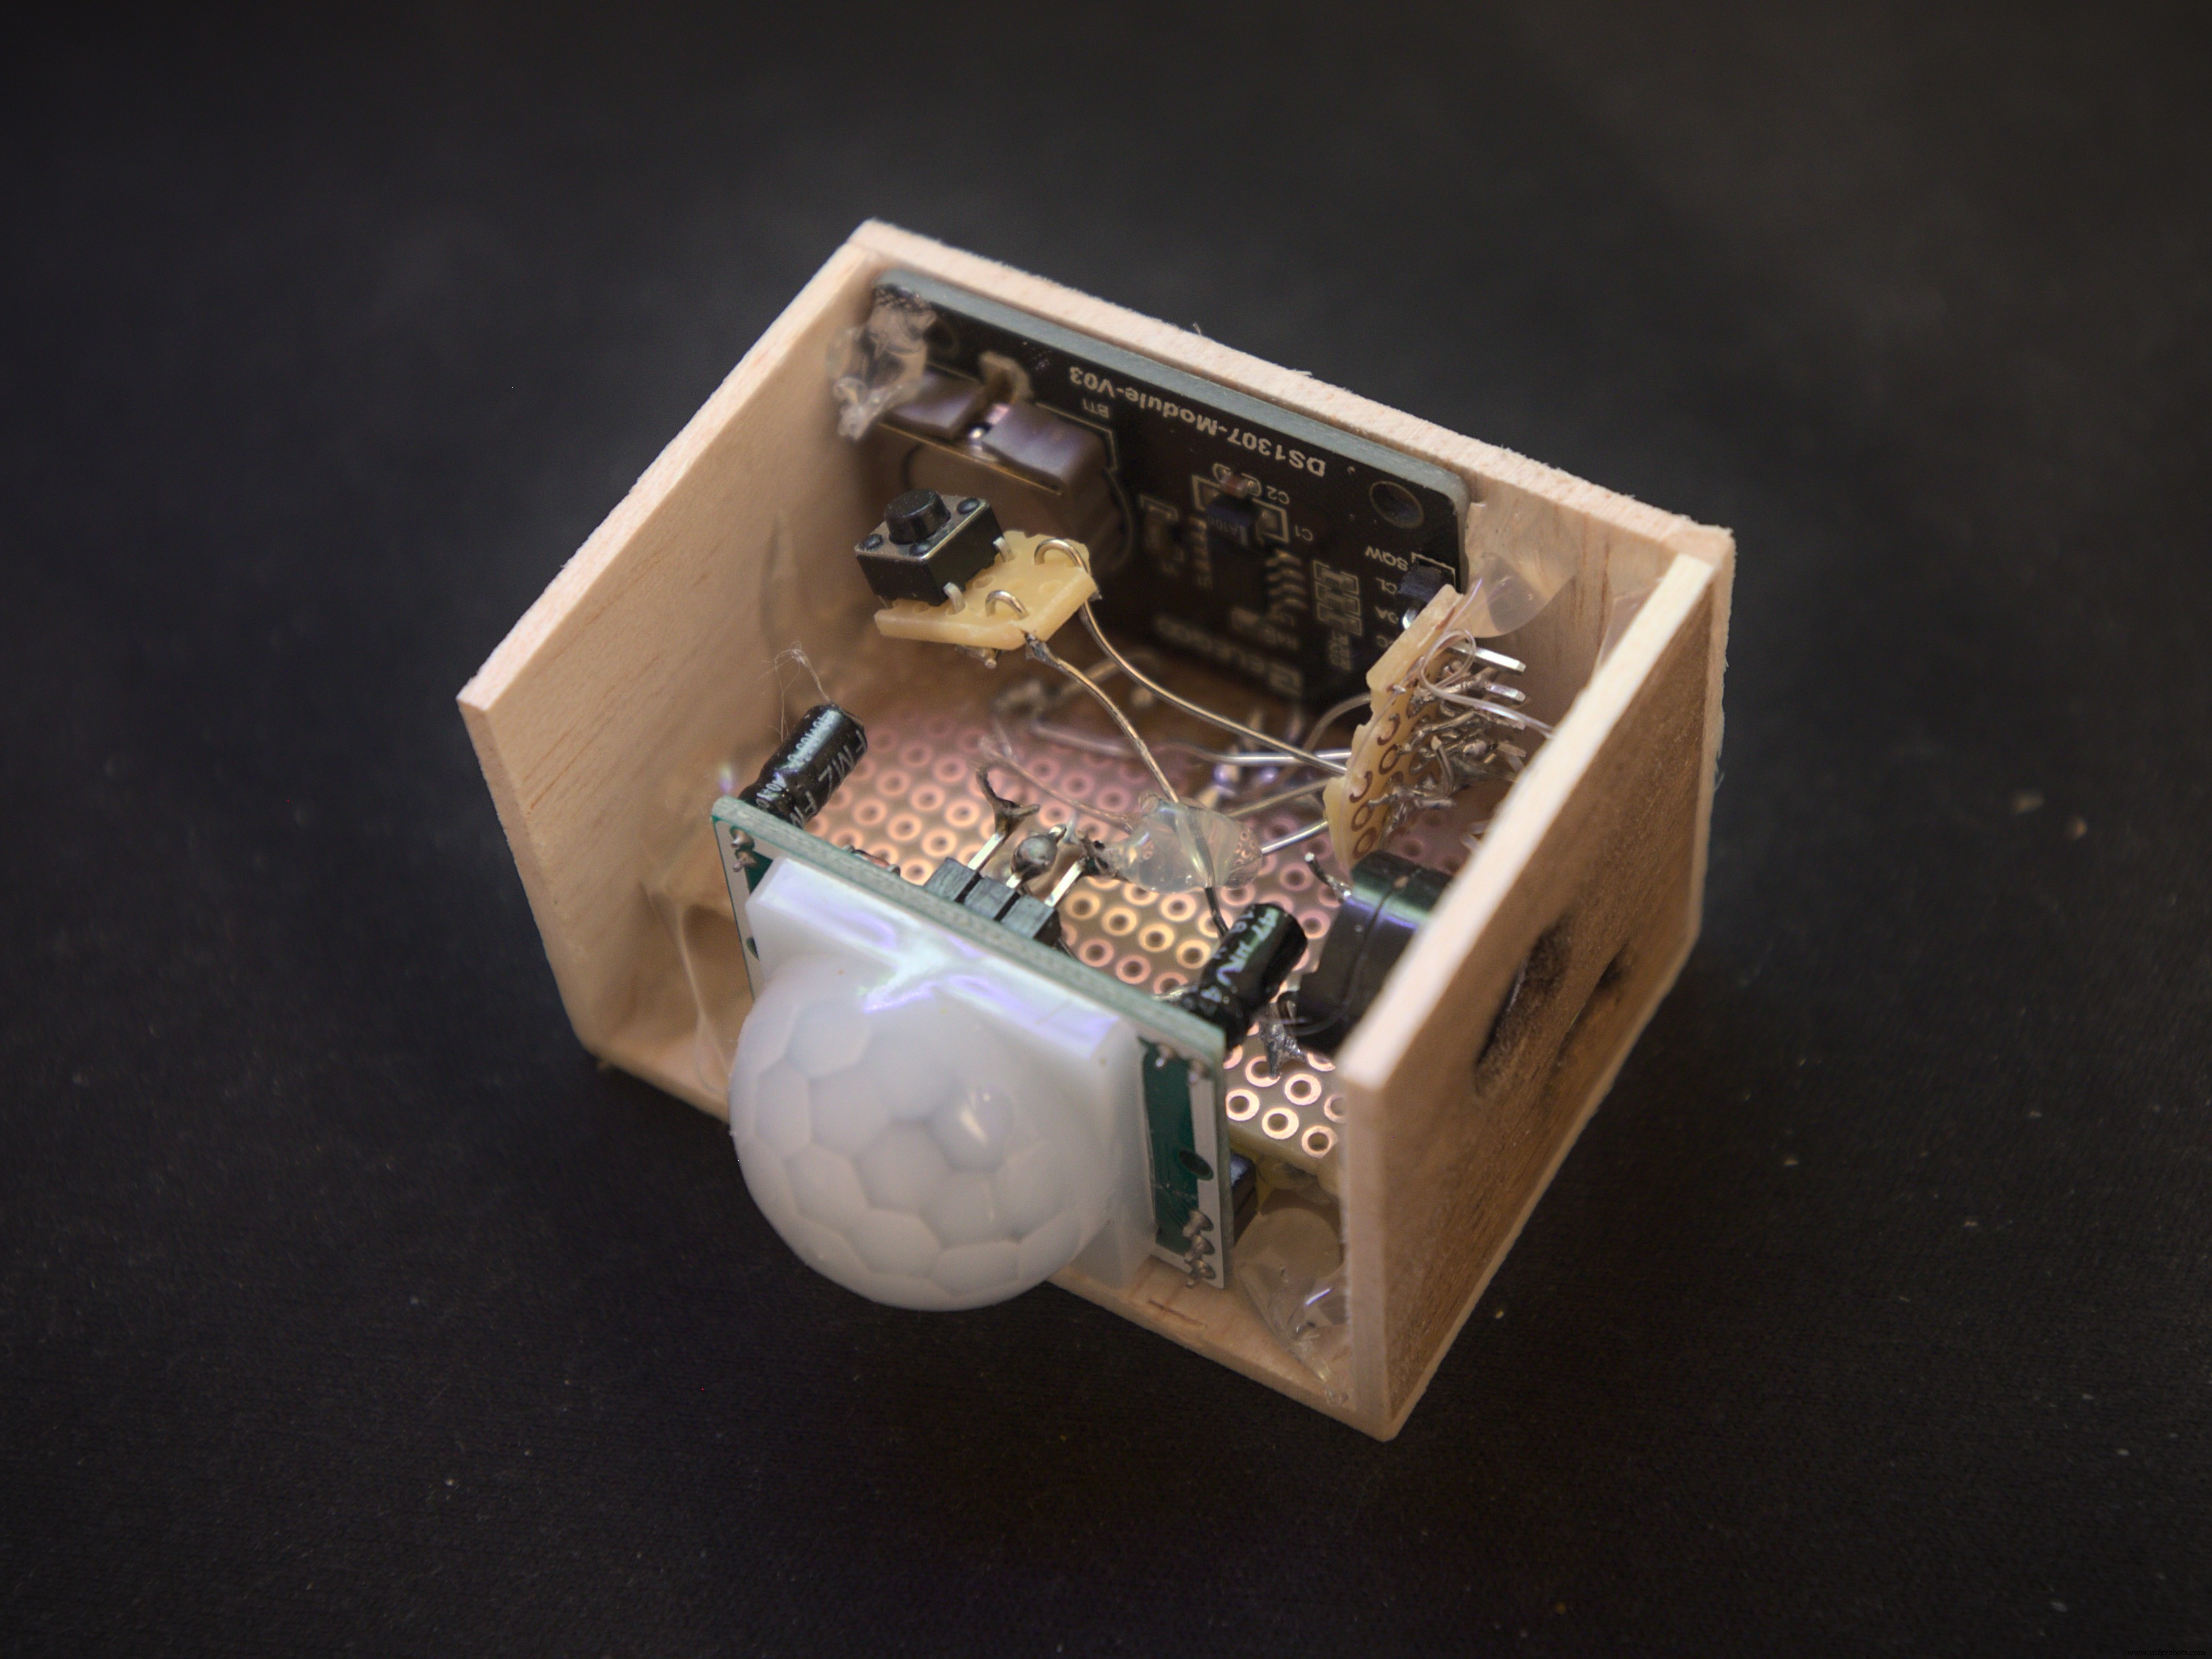
After testing the breadboard prototype, solder the components directly to the Arduino Nano Every to create a pocket‑sized alarm.
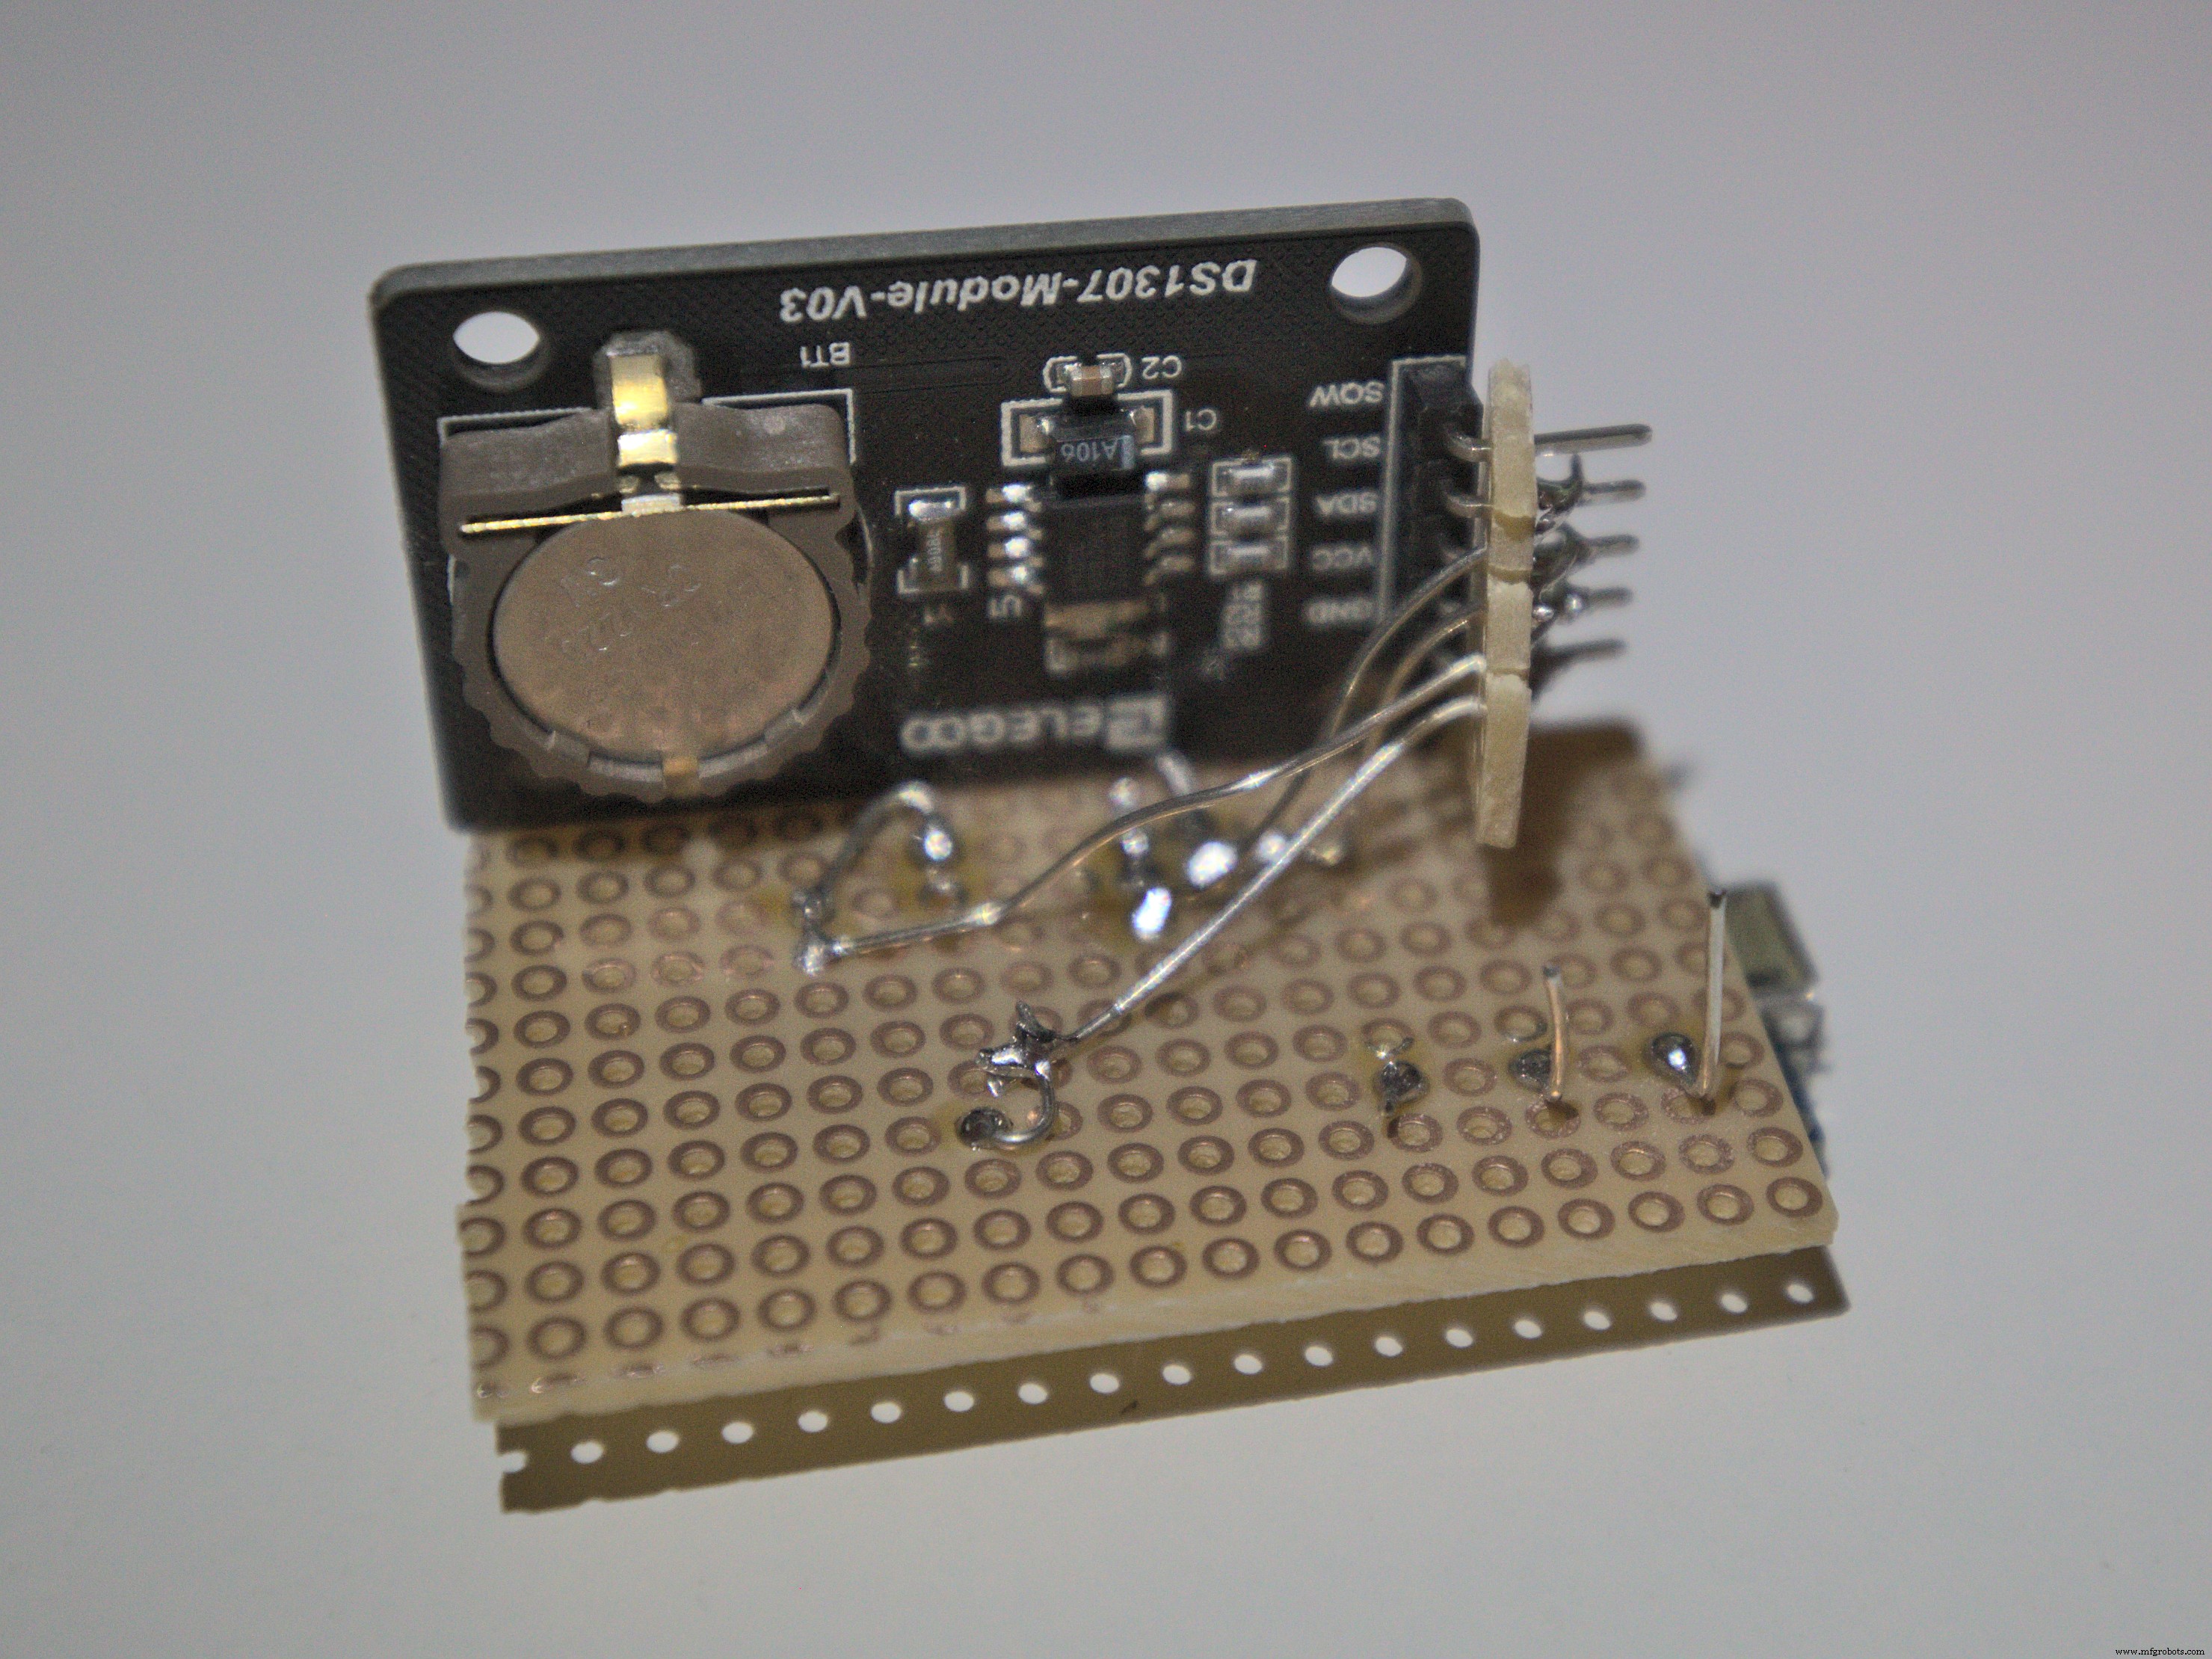
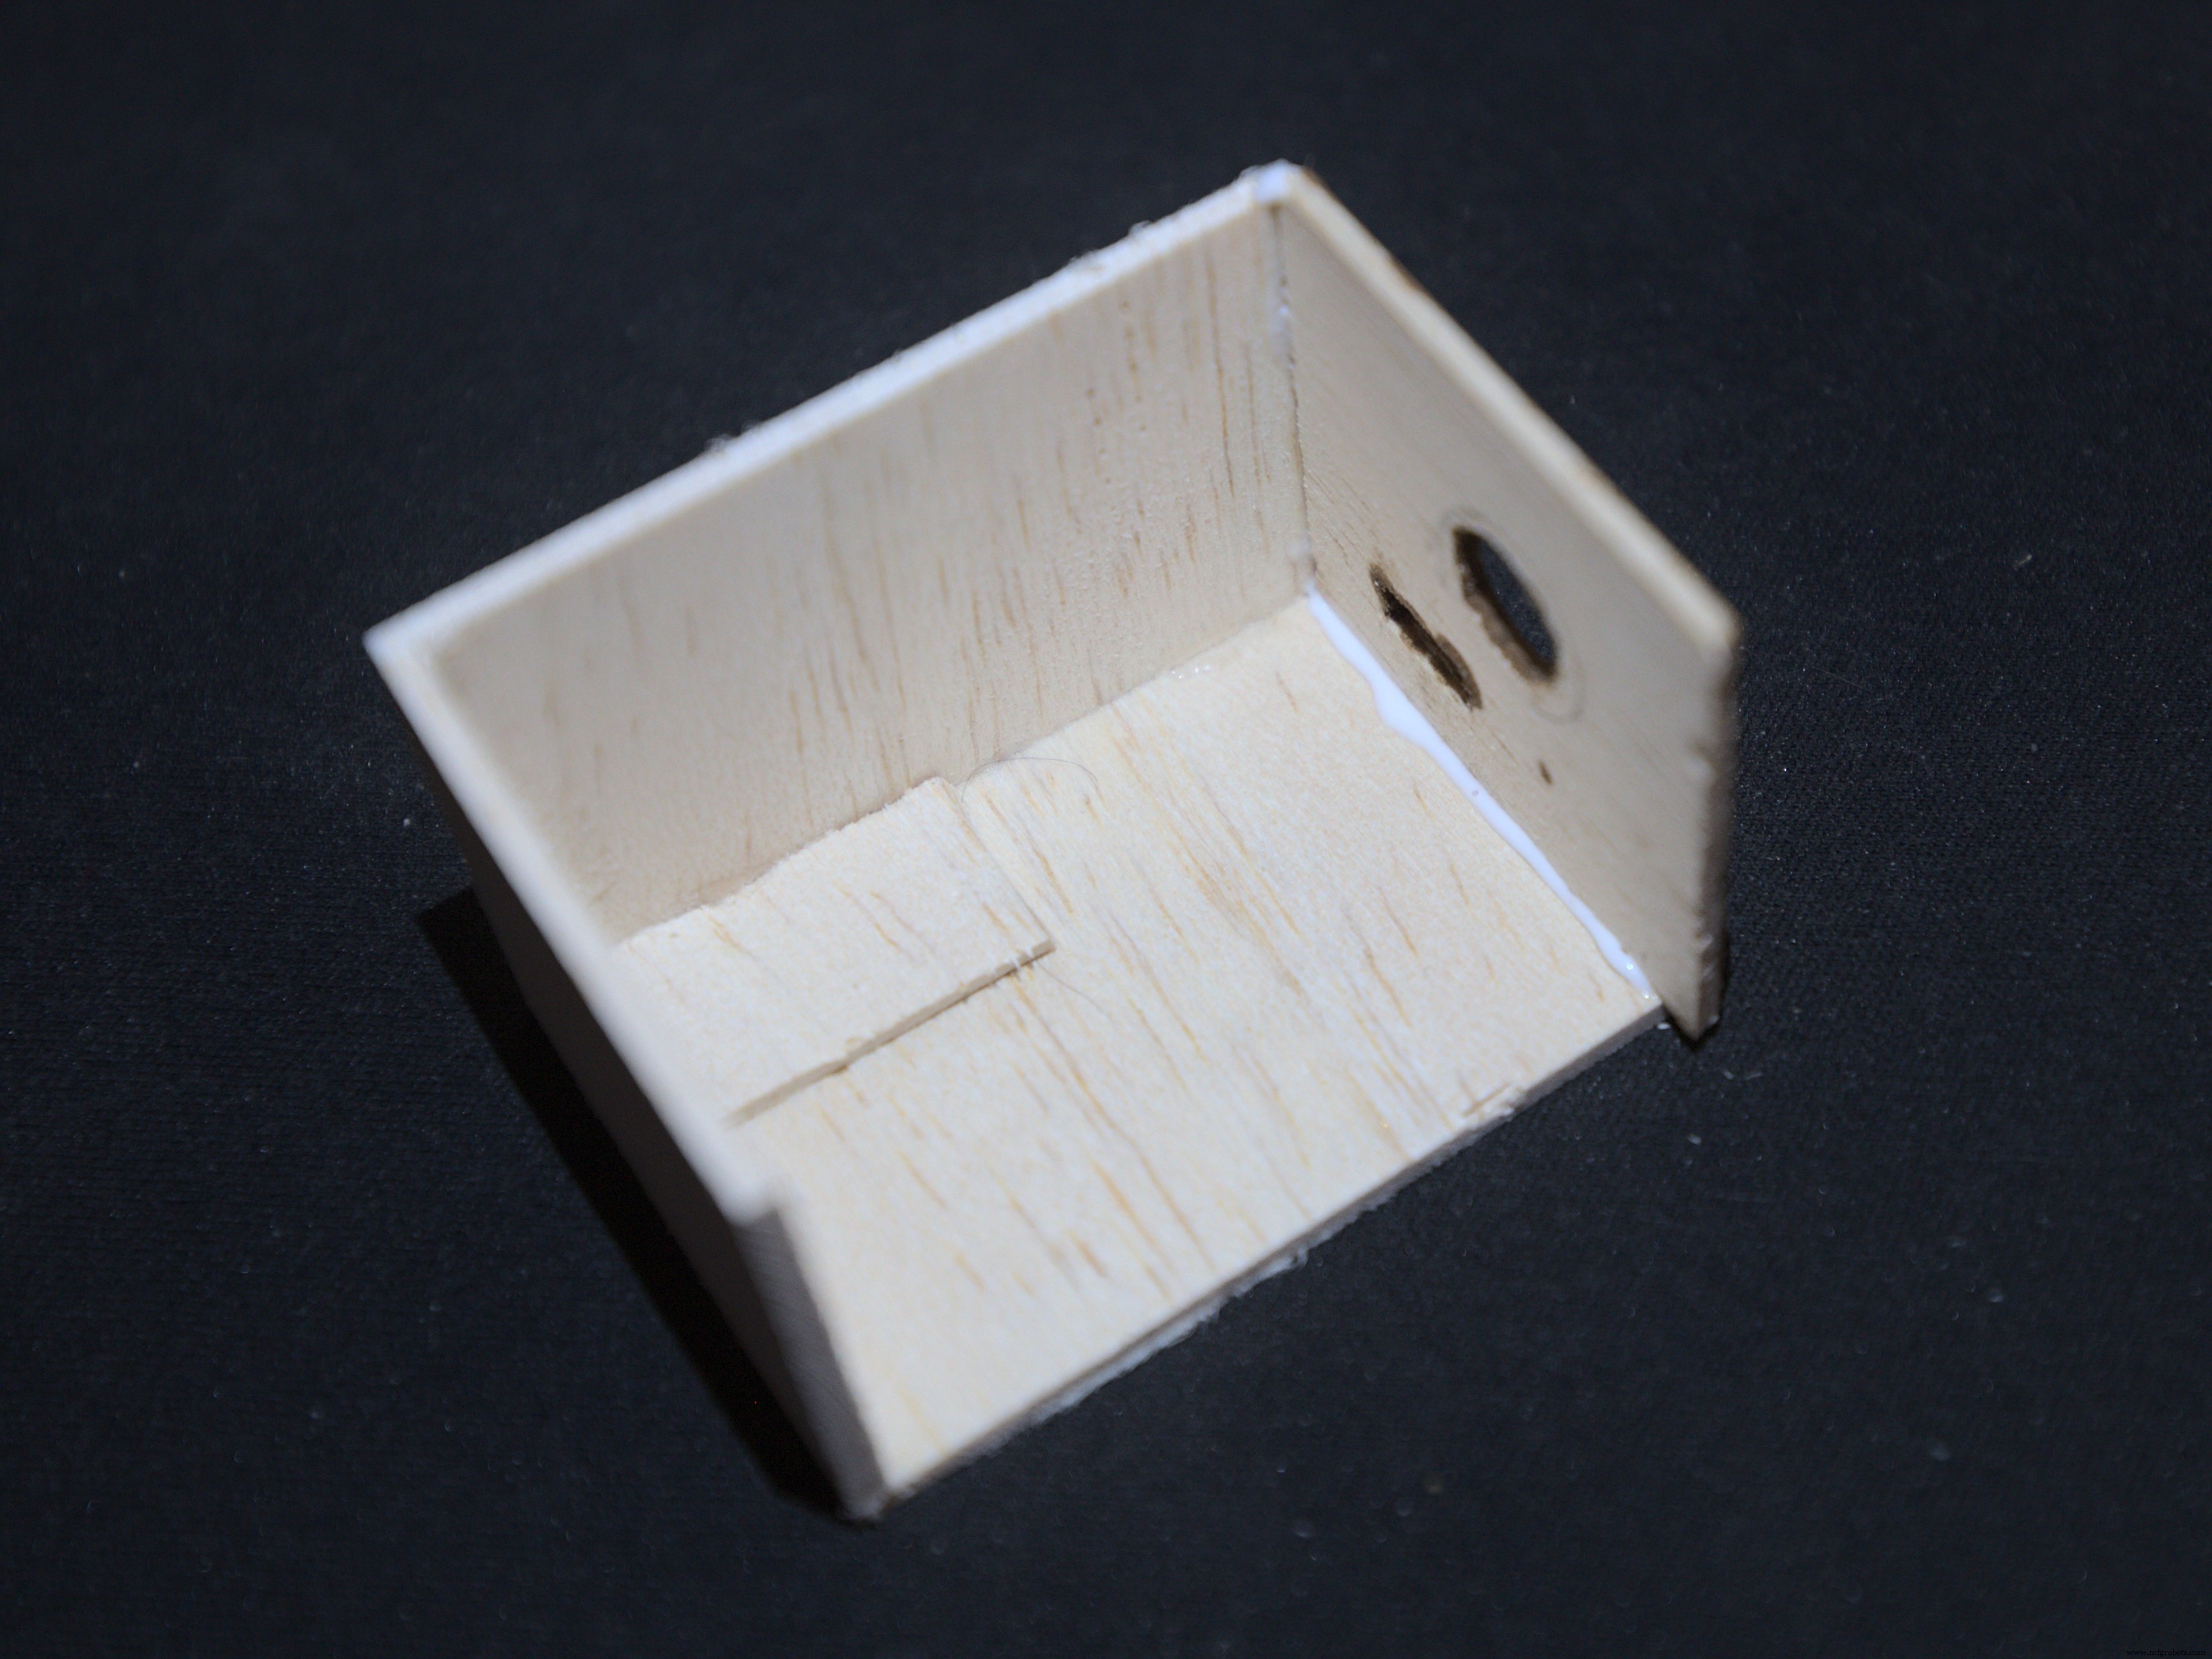
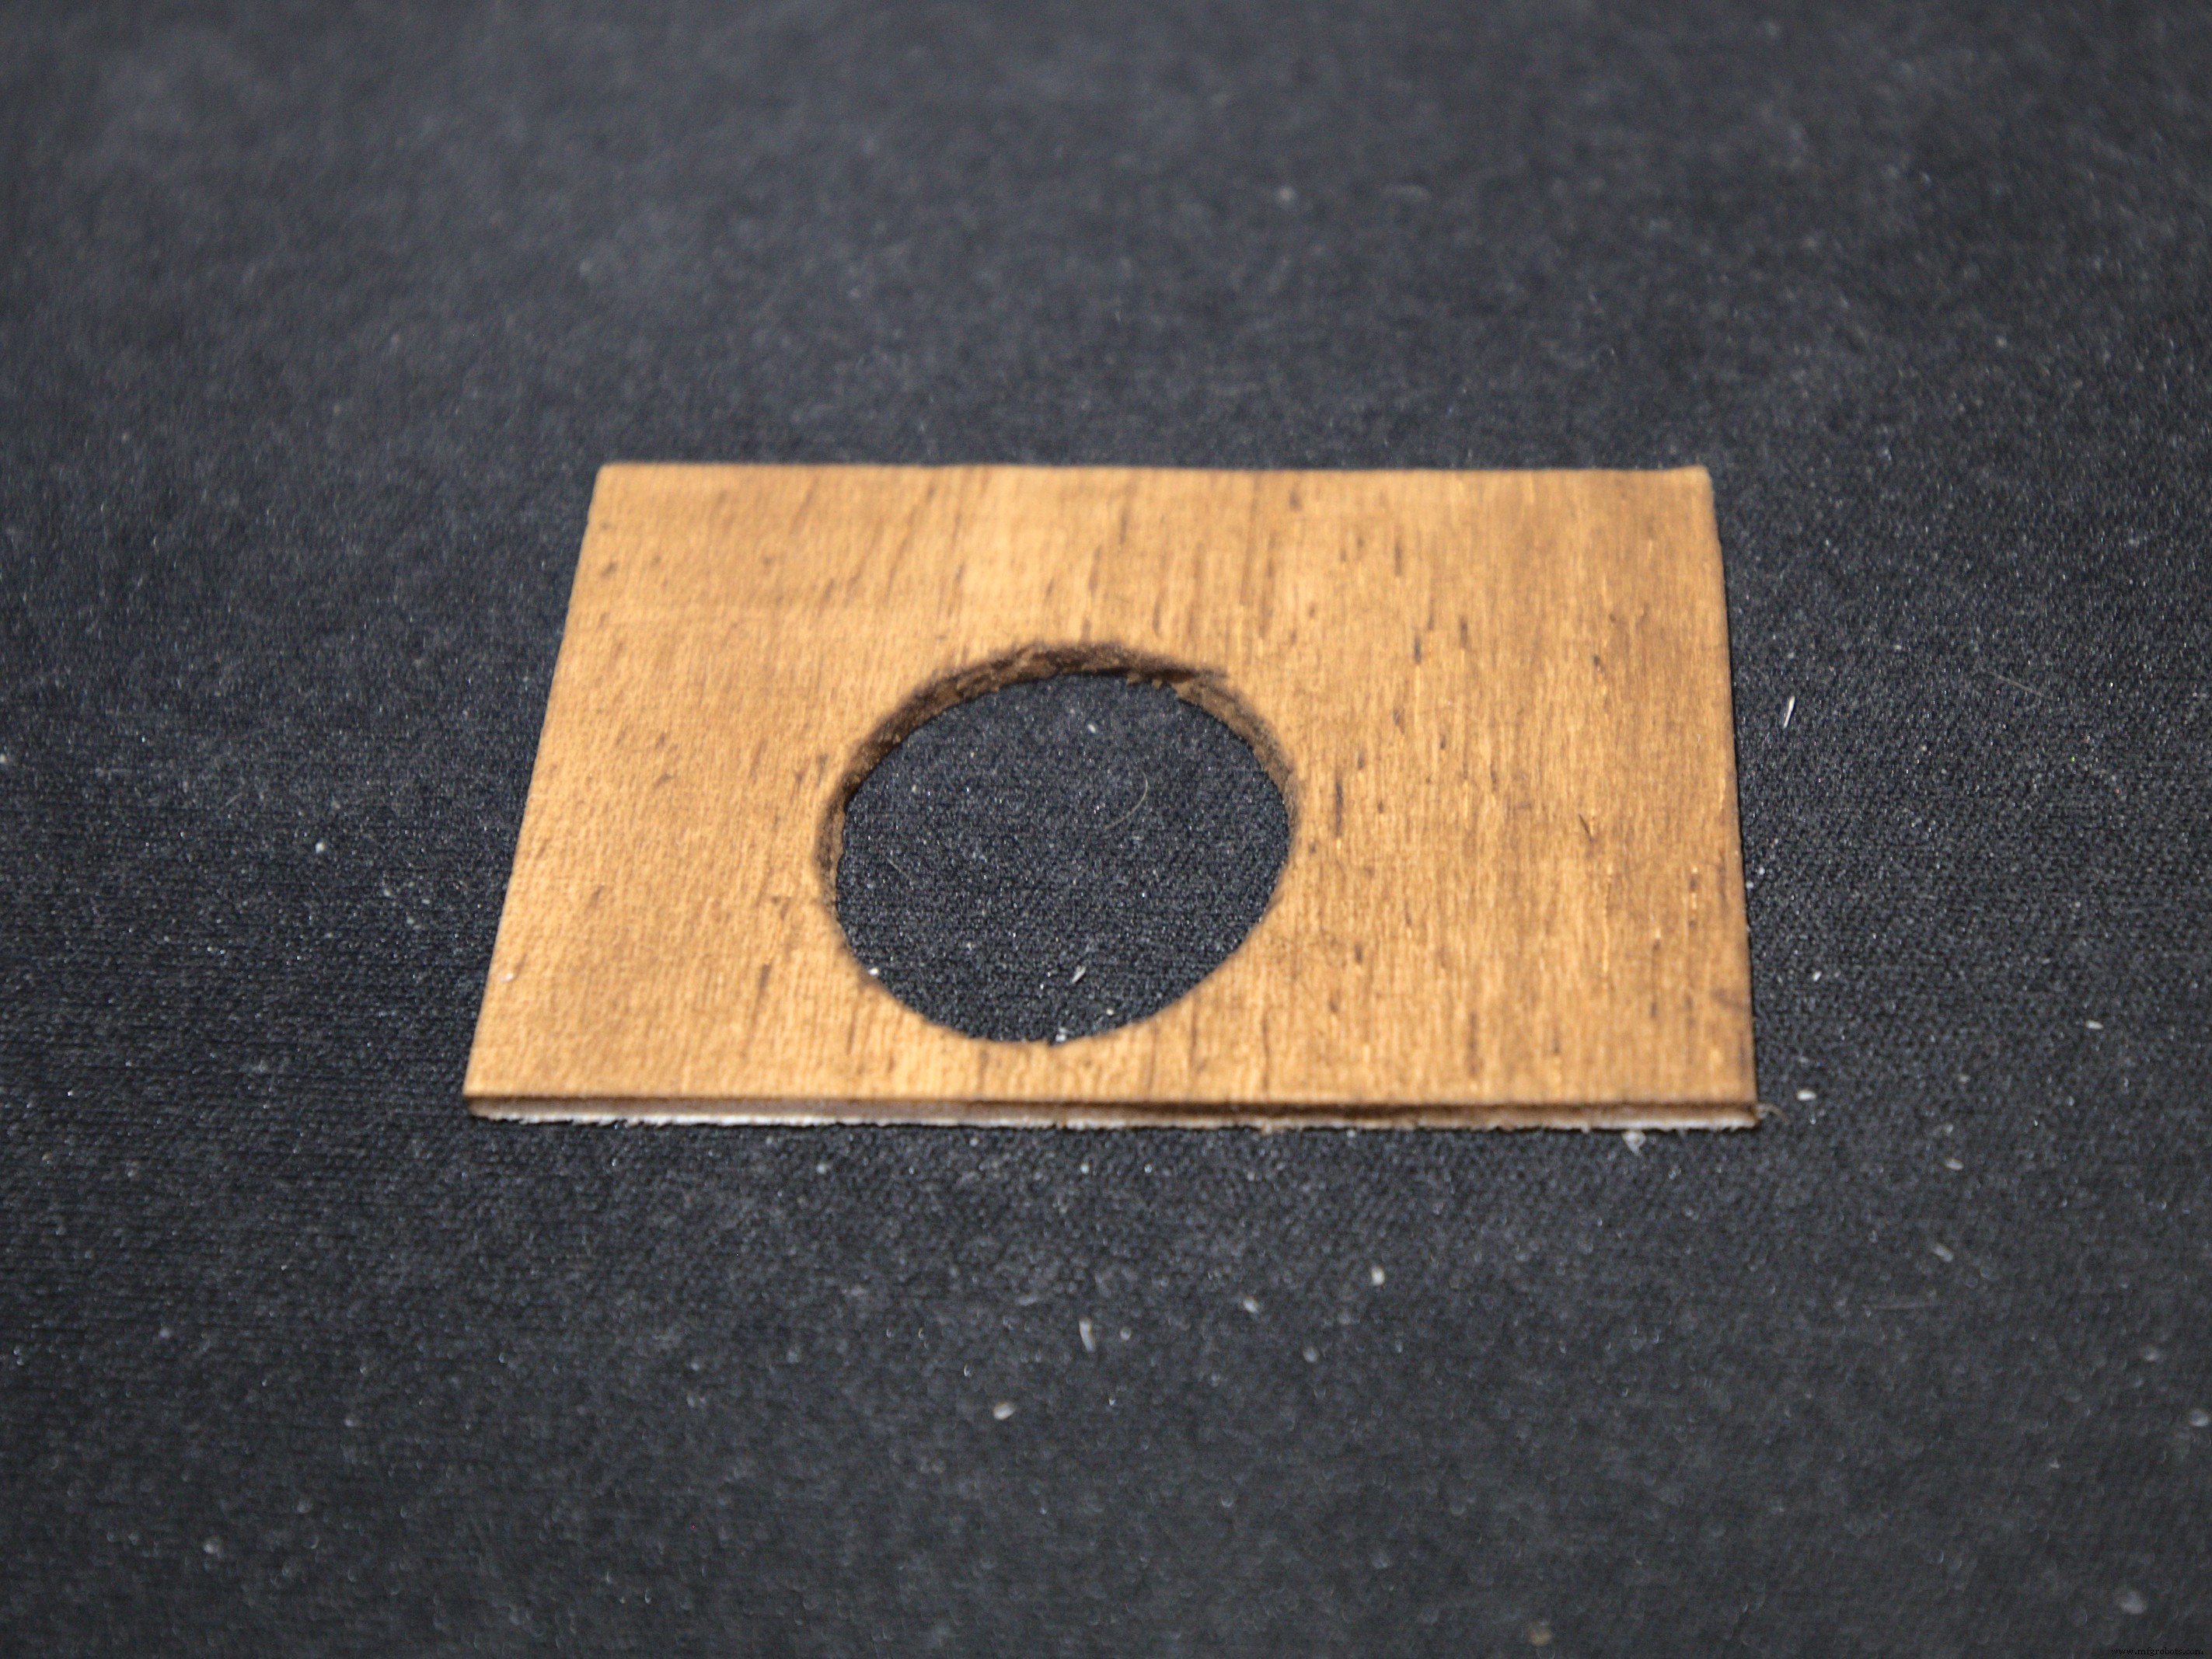
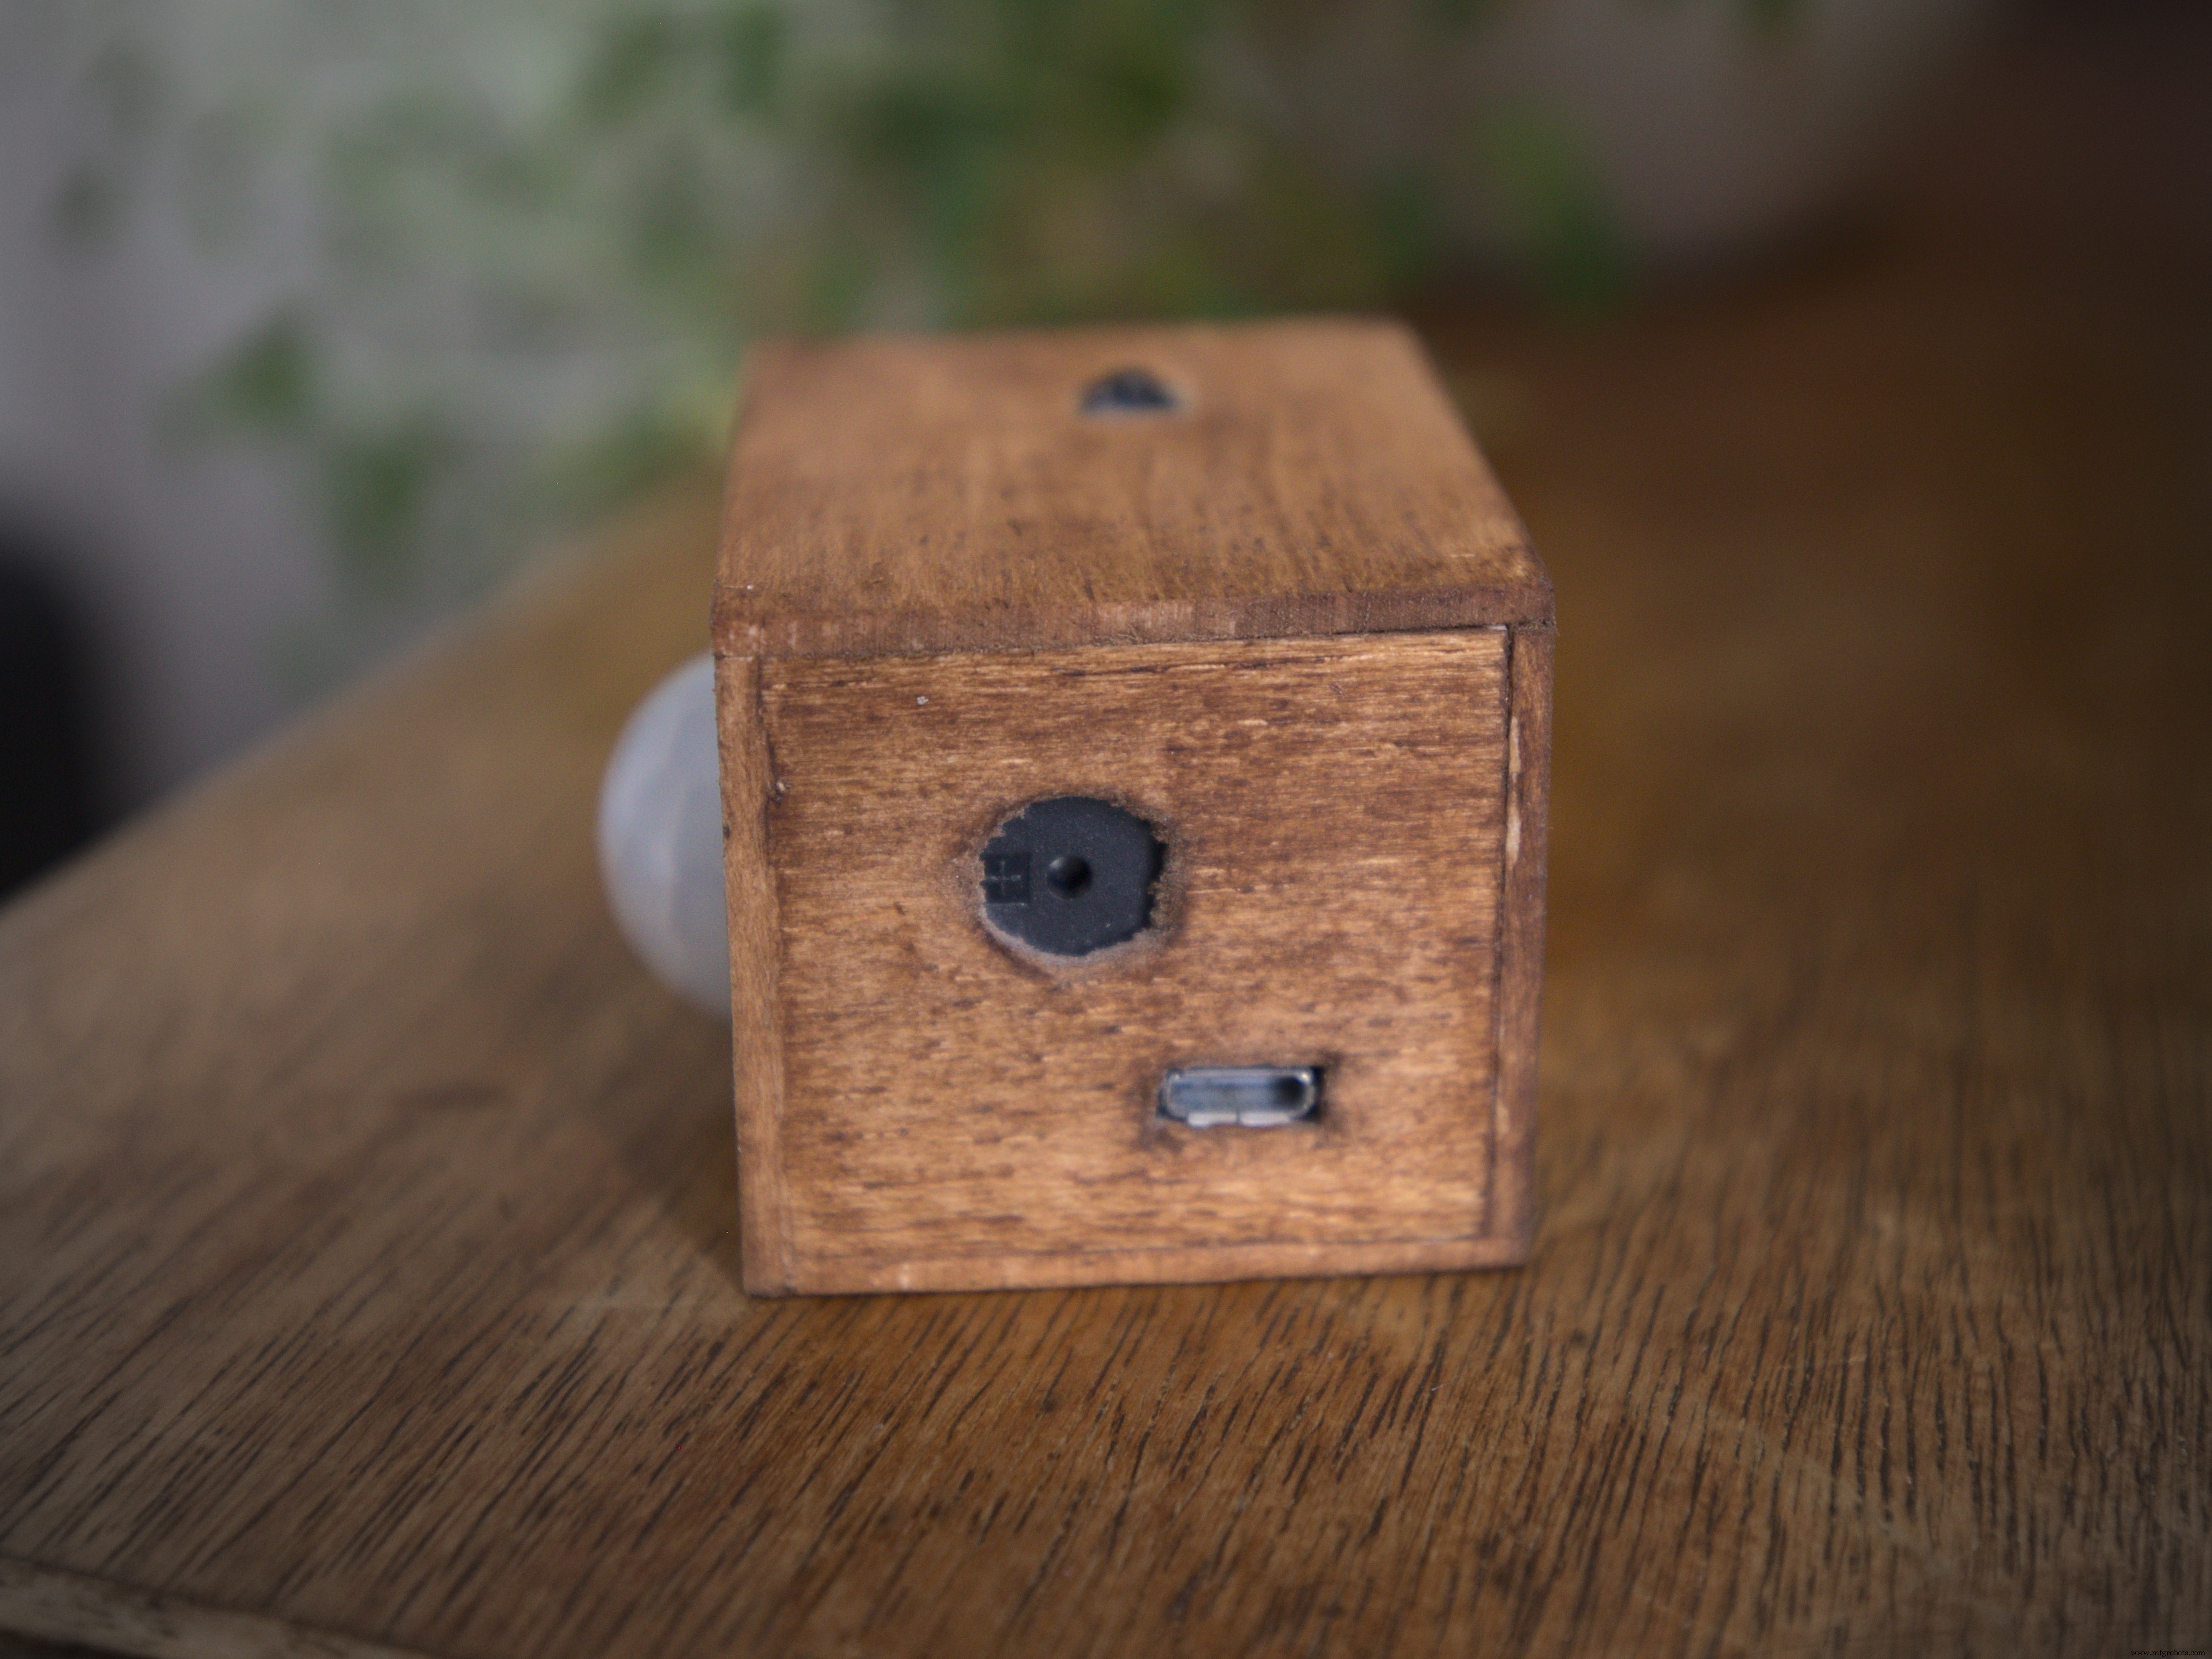
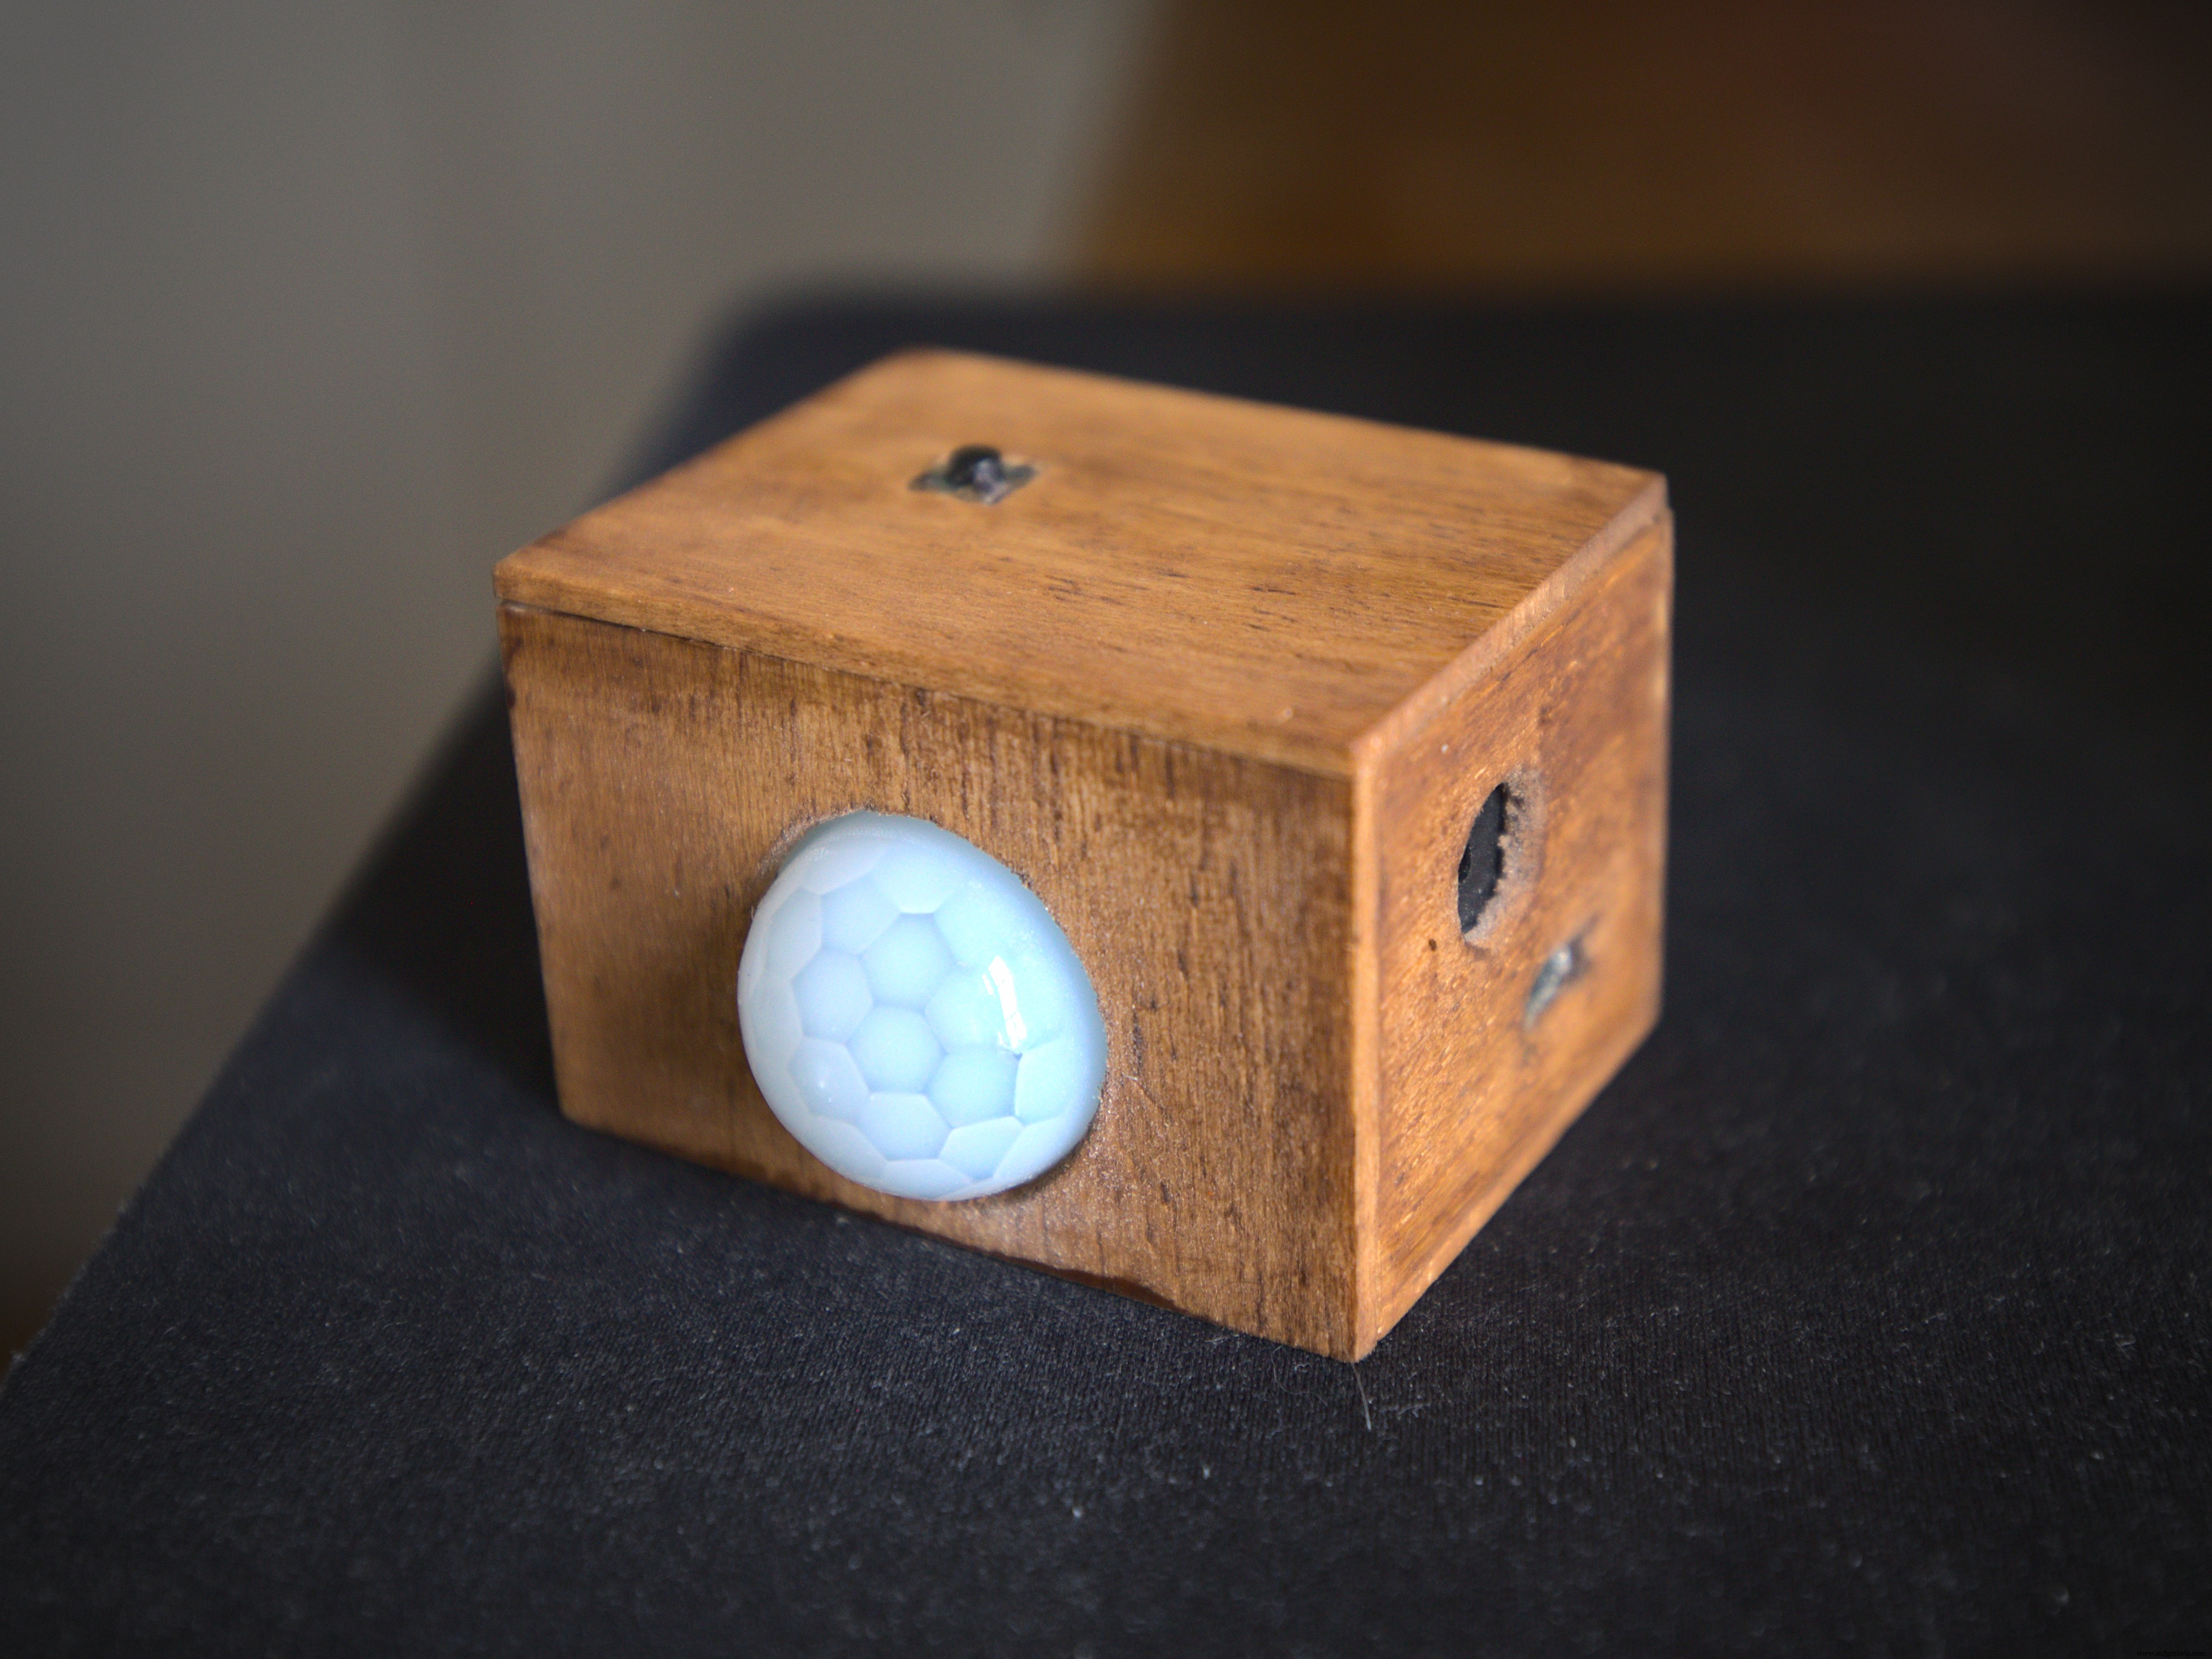
Construct a lightweight case from 3 mm balsa wood (dimensions 55 mm × 35 mm × 40 mm). The case includes a large opening for the PIR sensor, a slot for the micro‑USB cable, and an aperture for the buzzer.

Final product:

Code
- Alarm Clock Arduino Code
- Clock Library (DS3231)
Alarm Clock Arduino CodeArduino
#include <Wire.h>
#include <DS3231.h>

DS3231 clock;
RTCDateTime dt;

int button = 9;
int pirPin = 7; // Input for HC‑SR501
int pirValue; // Place to store read PIR Value

//--------------------------------------
int set_hour = 7;
int set_minute = 0;
//--------------------------------------

void setup() {
  clock.begin();
  pinMode(button, INPUT_PULLUP);
  pinMode(LED_BUILTIN, OUTPUT);
  //clock.setDateTime(__DATE__, __TIME__); // !!AFTER THE FIRST UPLOAD YOU HAVE TO COMMENT OUT THIS LINE. OTHERWISE YOU WILL GET A WRONG TIME!!
  pinMode(pirPin, INPUT);
}

void alarm(int minute){
  bool button_pressed = false;
  bool awake = false;
  bool movement = false;

  while(!button_pressed){     //the alarm is on as long the button isn't pressed
    for(int i = 0; i < 4; i++){
      tone(11, 523, 100);
      delay(100);
      tone(11, 784, 50);

      for(int i = 0; i < 20; i++){
        if(digitalRead(button) == LOW){
        button_pressed = true;
        awake = true;
        dt = clock.getDateTime();
        minute = dt.minute;
        }
        delay(65);
      }
    }
  }

  dt = clock.getDateTime();
  minute = dt.minute;

  while(awake){
    movement = false;
    dt = clock.getDateTime();
    for(int i = 0; i < 30; i++){
      if(digitalRead(pirPin)){movement = true;}
    }
    digitalWrite(LED_BUILTIN, movement);
    if(!pirValue){
      delay(5000);
      for(int i = 0; i < 40; i++){
        if(digitalRead(pirPin)){movement = true;}
      }
      if(!movement){
        alarm(minute); //if no motion is detected for too long the alarm resets
      }
    }

    if(abs(dt.minute - minute) >= 1){ //set the time period where you must be in front of the sensor
      tone(11, 698, 50);
      delay(100);
      tone(11, 698, 50);
      digitalWrite(LED_BUILTIN, 0);
      awake = false;
    }

    delay(100);
  }

}

void loop() {
  dt = clock.getDateTime();
  if(set_minute == dt.minute && set_hour == dt.hour){
    alarm(set_minute);
  }

  delay(10000);
}
Clock LibraryArduino
This is a ZIP file for the DS3231 library. Download it and add to your libraries via Arduino → Sketch → Include Library → Add .ZIP Library.
No preview (download only).
Schematics
Connect 5V on the Arduino to the positive rail and GND to the negative rail on the breadboard.
Manufacturing process
- Evaluating Alarm System Security with Arduino and RF Modules
- Multi-Display LCD Alarm Clock with Customizable Faces
- Build a Reliable Alarm Clock with DS1302 RTC and Arduino UNO
- Kickstart Your Industry 4.0 Journey: Master IO‑Link on PLCs with SICK Training
- 14 Insightful Quotes to Transform Your Understanding of Intelligent Automation
- Transform Manufacturing Workflows with Innovative Mobile Apps
- CNC Lathe Machines: Your All-In-One Precision Tool
- Essential Horizontal Machining Centers for High-Precision Manufacturing
- Choosing the Ideal Short Bar Feeder for Your Lathe
- Top Benefits of Boring Machines for Precision Machining