



Optimal PrusaSlicer Support Settings for Reliable 3D Prints
In PrusaSlicer, the right support settings are essential for successful prints, especially when a model contains overhangs or mid‑air structures. Properly configured supports keep the part stable during printing, reduce filament waste, and make post‑processing painless.
In contrast, poorly generated supports can become difficult to remove, leaving dents or even causing fractures in delicate models.
Below is a detailed guide that draws on real‑world experience and expert best practices to help you configure PrusaSlicer for optimal support generation.
Because the ideal settings depend on your printer, material, and model geometry, the recommendations below serve as a starting point that you may need to tweak for your specific setup.
Here are the core PrusaSlicer support options you’ll want to review:
- Generate Support Material
- Overhang Threshold
- Style
- Raft Layers
- Raft Contact Z Distance
- Top and Bottom Contact Z Distance
- Pattern
- Pattern Spacing
- Interface Layers
- Interface Pattern
- Interface Pattern Spacing
- XY Separation between an Object and Support
- Maximum Branch Angle
- Branch Diameter
- Branch Distance
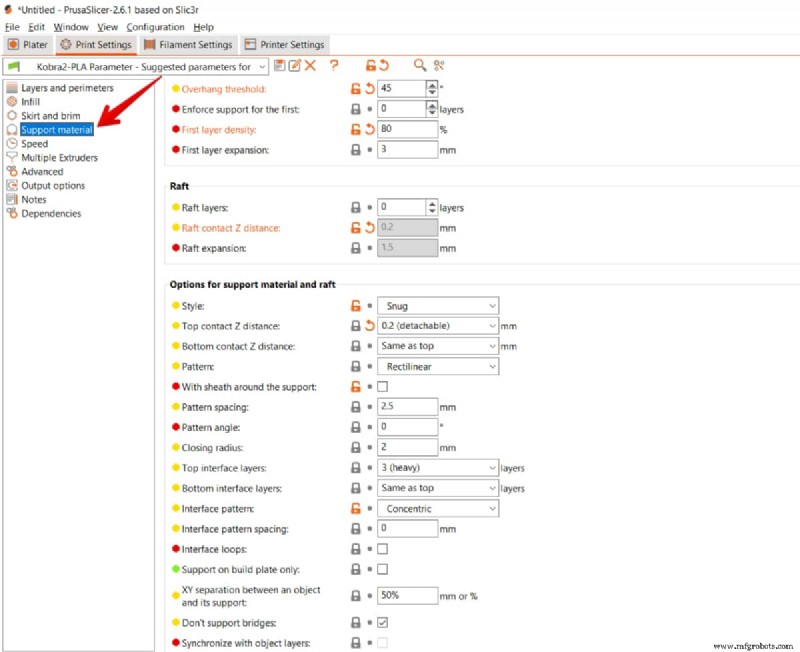
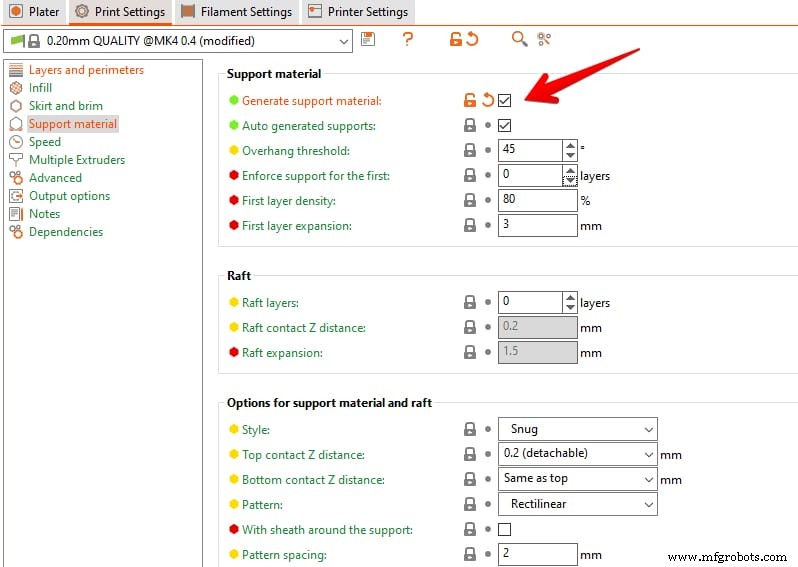
Generate Support Material
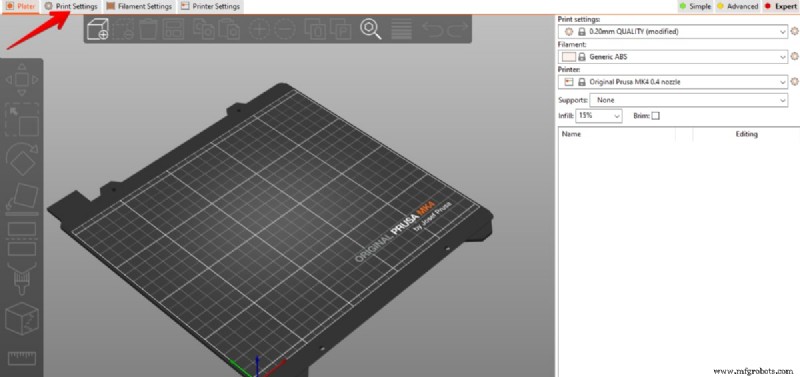
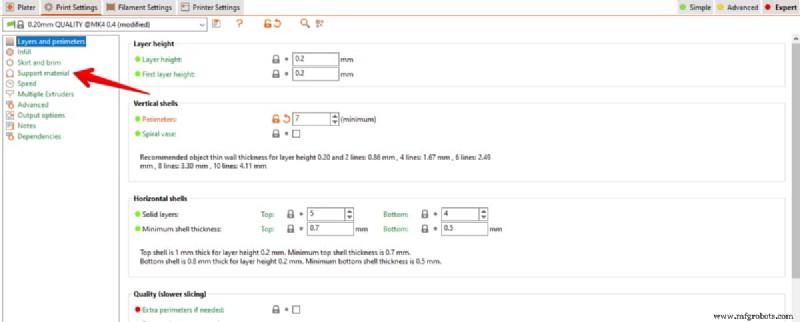
To enable supports, open the Print Settings panel from the top menu and navigate to the Support Material section. The Generate Support Material checkbox is disabled by default; tick it if your model contains overhangs that would otherwise collapse.
Once enabled, you can fine‑tune the remaining support parameters. Remember that each support consumes filament and adds to total print time.
Reducing support quantity is possible by reorienting or splitting the model to minimize overhangs before slicing.
You can opt for fully automated support generation or apply supports manually, depending on your workflow.
Auto‑Generated Supports
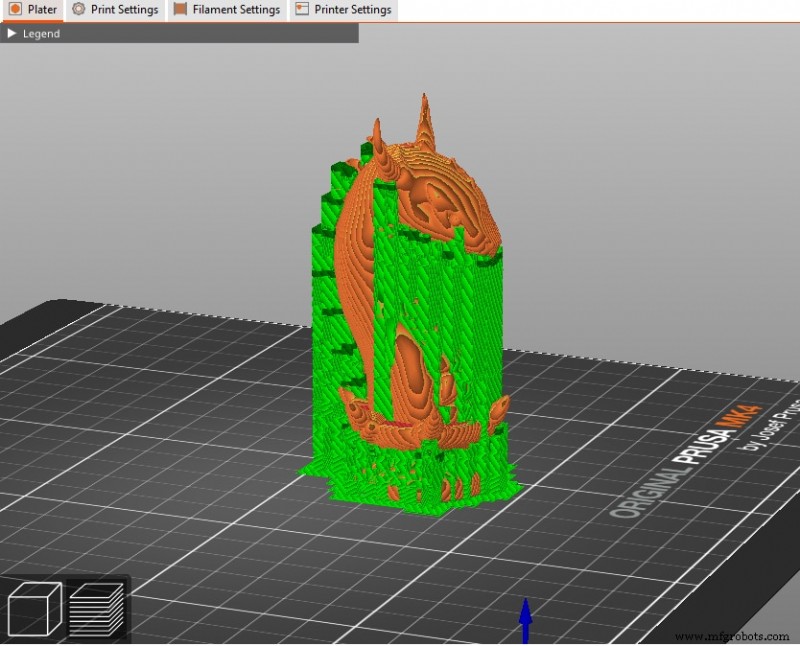
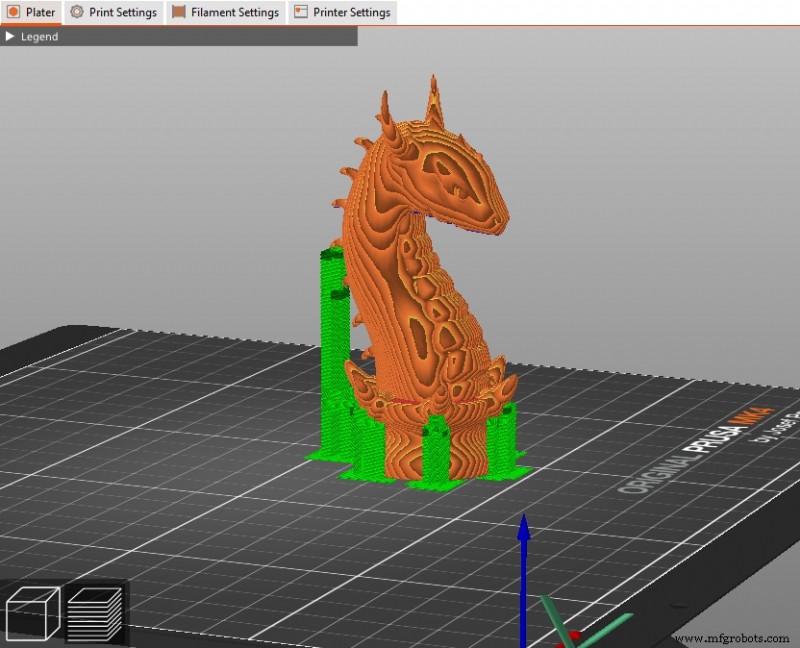
When Auto‑Generated Supports is checked, PrusaSlicer automatically places supports wherever the overhang threshold is exceeded. The default threshold is 45°, but you can adjust it to control the density of supports.

Automatic supports are ideal for beginners or when you’re unsure of optimal placement. They can be configured to generate supports Everywhere (from the build plate and any overhanging section) or Only on the build plate (which can reduce contact with delicate features but may leave unsupported overhangs).
Manual Supports
Manual supports give you full control over where support material appears. This can save filament and print time if you’re confident in placing them strategically.
PrusaSlicer offers two manual modes:
- Paint on Supports – Highlight areas that need support.
- Support Enforcers & Blockers – Add or remove support points on a per‑model basis.
Paint on Supports
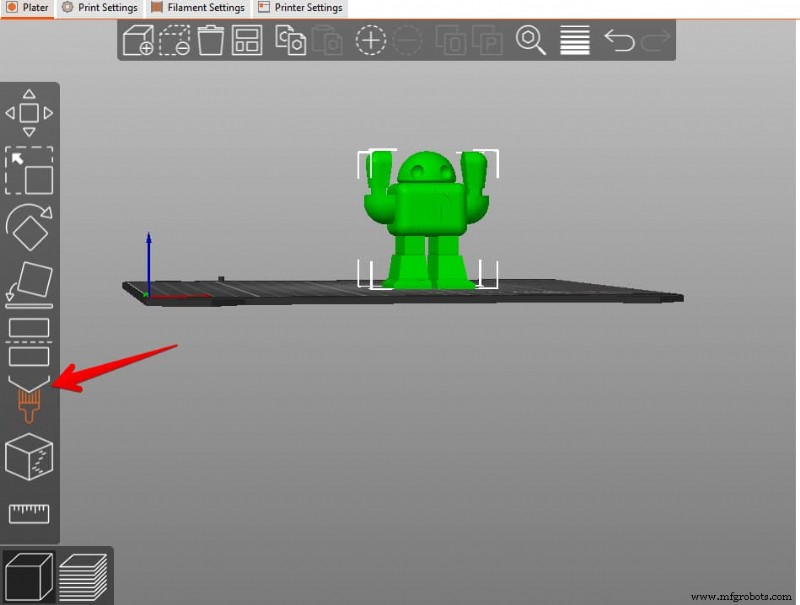
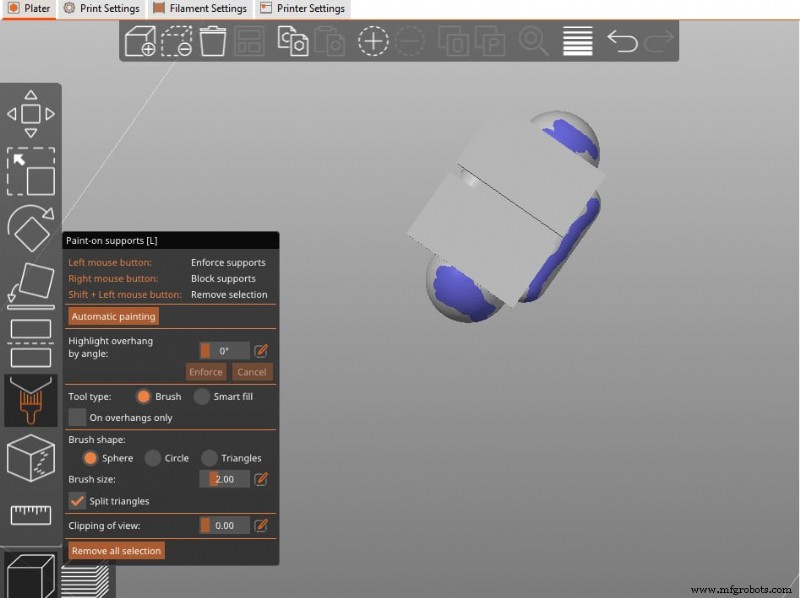
With the brush icon in the left panel, paint the desired regions. After painting, switch the support mode to For support enforcers only and slice to see the results.
See this video from ModBot for a visual walkthrough.
Support Enforcers & Blockers
Right‑click on the model surface to place blockers (to prevent supports where detail is critical) or enforcers (to force support at a specific point).
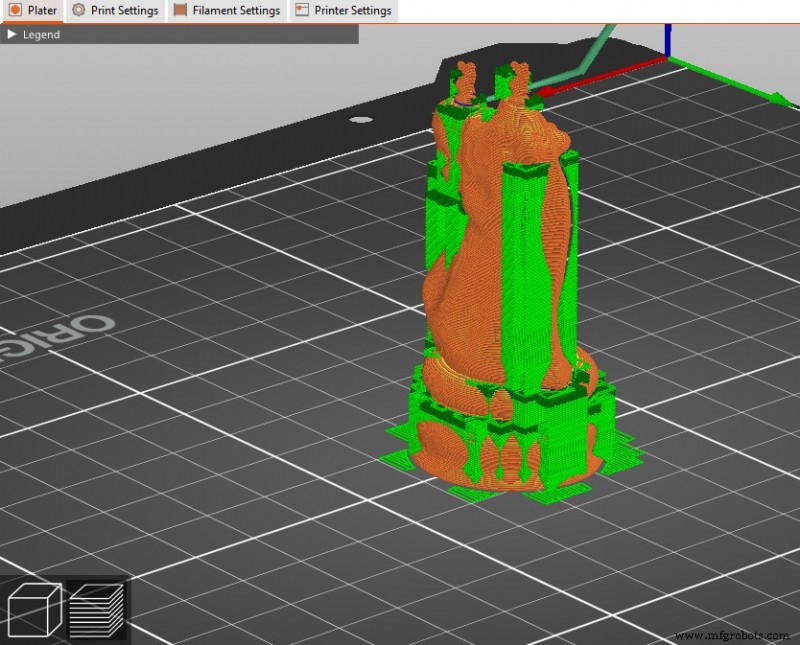
After adding a blocker, it turns red. Slice again to confirm the updated support layout.
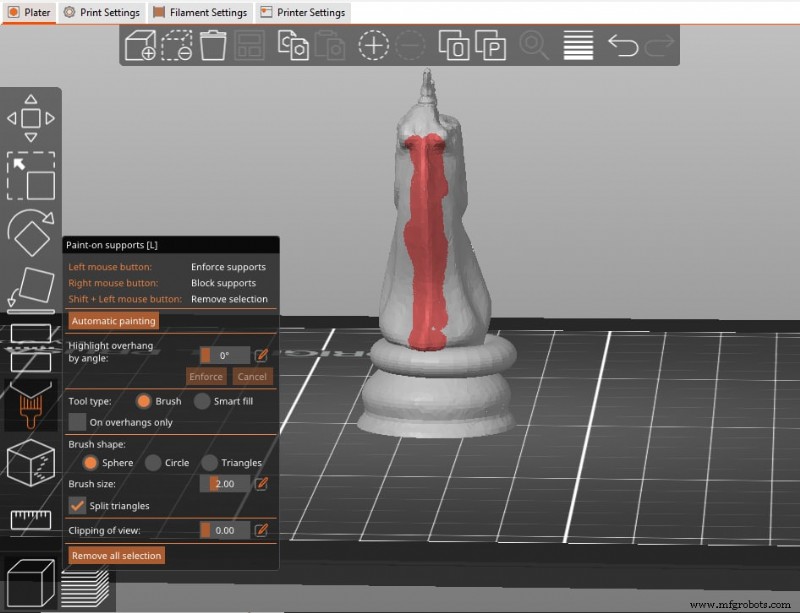
Support enforcers are handy when only a few isolated supports are needed. They can also split long bridges into shorter, more reliable segments.
Overhang Threshold
The overhang threshold defines the minimum angle (from the horizontal plane) at which the slicer will decide a feature requires support. PrusaSlicer’s default is 45°, adjustable between 0° and 90°.

Lowering the threshold reduces support count but may risk overhang failure; raising it increases support density and filament usage.
Color‑coded blue shading in the preview indicates the areas slated for support.
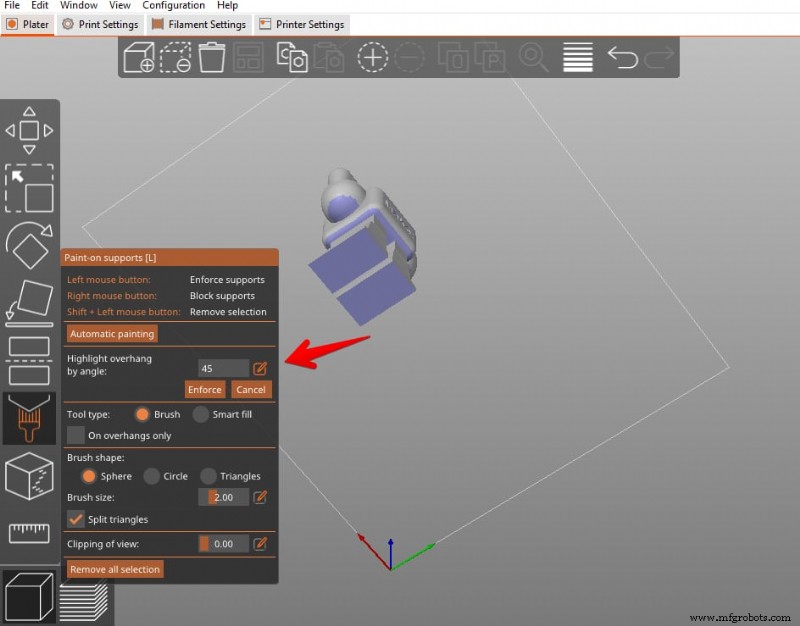
Style
PrusaSlicer offers three support styles, each balancing print speed, filament usage, and post‑processing ease.
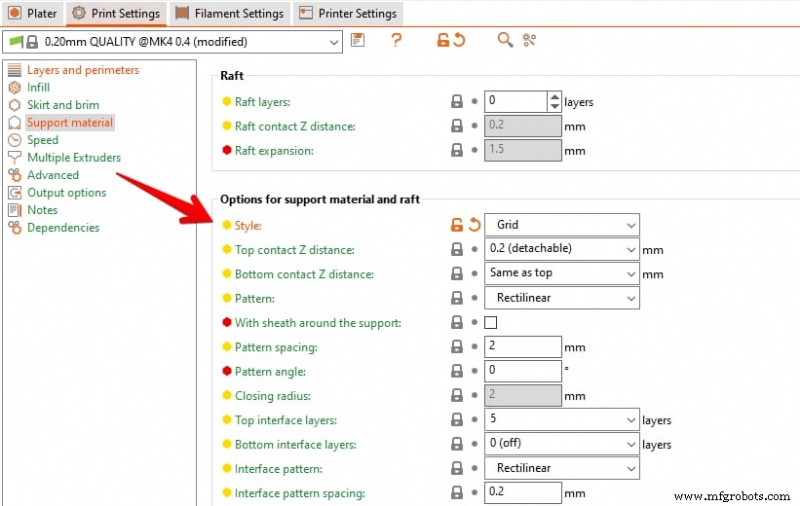
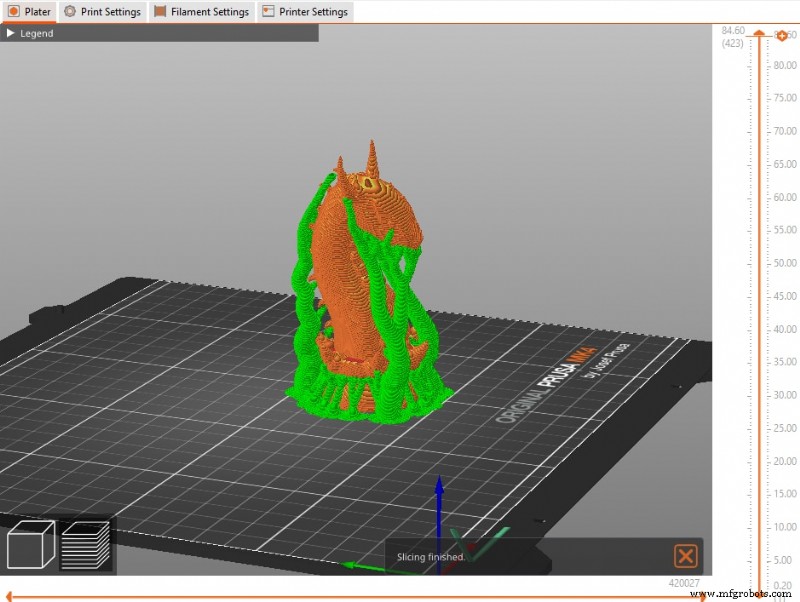
- Grid – The default. Sturdy, easy to remove, but can extend beyond the model’s perimeter.
- Snug – Minimizes contact with the model, saving filament, but can scar the surface and is harder to remove.
- Organic – Newest style. Branches grow only where needed, resulting in lightweight, easily removable supports that rarely touch non‑critical surfaces.
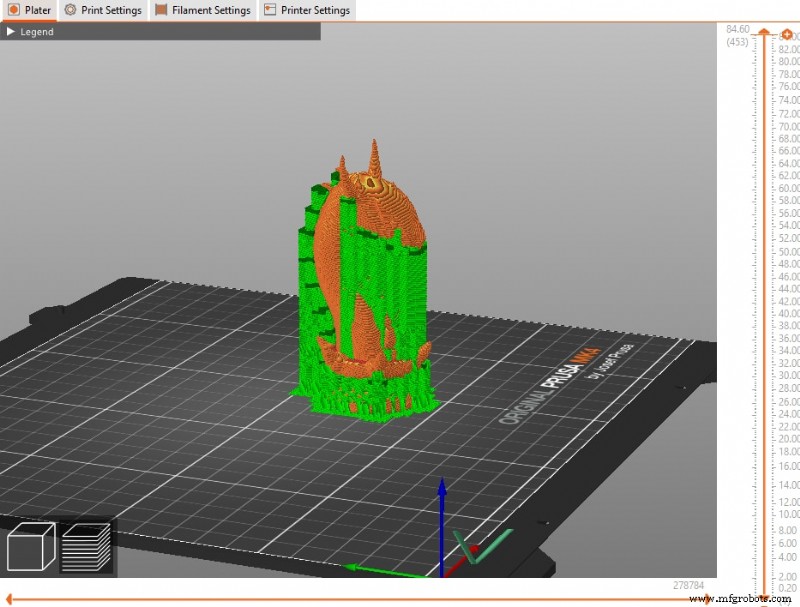
For complex or delicate geometries, Organic is often the best choice. If you experience adhesion issues, increase the First Layer Expansion value to broaden the base contact area.
Raft Layers
Adding raft layers can improve bed adhesion and surface quality for models with poor adhesion or thin bases. Typically 1–3 layers are sufficient; the default is zero.

Raft Contact Z Distance
This vertical gap between the raft and the model is usually minimal. A 1 mm gap works well for most soluble interfaces, balancing ease of separation and adhesion.

Top and Bottom Contact Z Distance
The contact distance between the support interface and the model’s top/bottom surfaces determines how securely the support holds while still allowing easy removal.

Prusa recommends setting this to 50–75 % of the layer height. Users often double the layer height for a clean, detachable interface.
Pattern
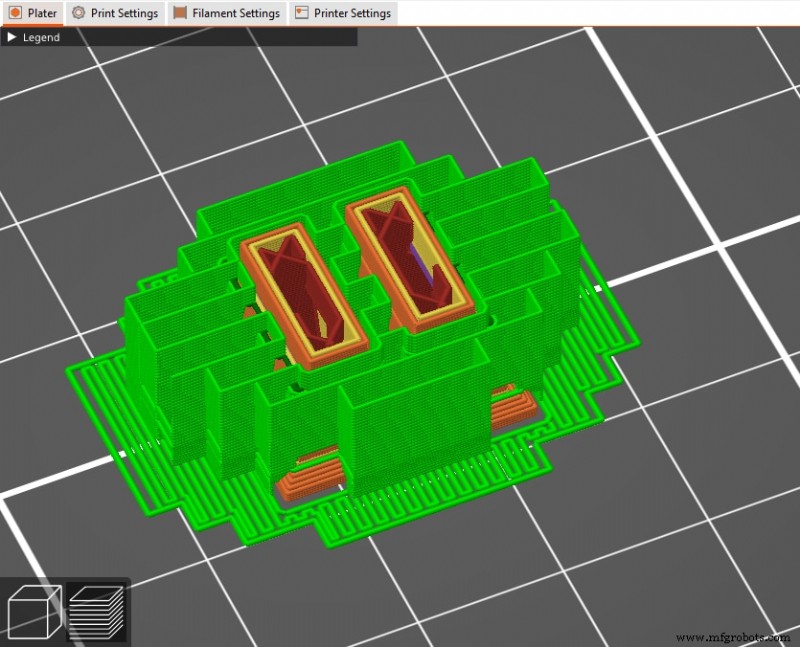
Support infill patterns influence both strength and ease of removal. PrusaSlicer offers:
- Rectilinear – Straight lines; lightest and easiest to remove.
- Rectilinear Grid – Adds interlocking lines for added strength; harder to remove.
- Honeycomb – Hexagonal cells; maximum rigidity but also hardest to remove and most filament‑intensive.
Pattern Spacing
Spacing controls how densely the support lines are packed. The default 2 mm works for most cases, but 3–6 mm can save material and reduce print time at the cost of weaker support.

Interface Layers
Interface layers form the direct contact with the model and are denser than the rest of the support. Fewer layers (1–4) provide a strong connection while remaining removable.

Interface Pattern
Choose between Rectilinear (for non‑soluble supports) and Concentric (for soluble supports) to match your material.

Interface Pattern Spacing
Typical spacing is 0.2 mm. Adjust only if you notice difficulty removing supports.

XY Separation between an Object and Support
Gap width between the model and support influences contact area and ease of removal. Expressed in mm or as a percentage of the external perimeter width.

Maximum Branch Angle
For organic supports, this defines how steep the branches grow relative to the model. Lower angles yield vertical, stable branches; higher angles allow branches to span larger gaps but reduce stability.

Branch Diameter
Thinner branches are lightweight but less sturdy; a 2 mm diameter is a good compromise for most prints. Increase diameter for heavy or large‑scale models.

Branch Distance
Defines spacing between branches when they contact the model. Smaller distances improve support but make removal harder. A 0.25 mm Z distance and 75 % XY distance worked well for PLA at both 0.25 mm and 0.4 mm nozzles in a user’s experience.

One community member recommends:
- Contact Z Distance: 0.2 mm
- Rectilinear Pattern
- Sheath around the support: disabled
- Pattern spacing: 3 mm
- Pattern angle: 0
- Interface layers: 4
- Interface pattern spacing: 0.24 mm
- Interface loops: disabled
- Support on build plate only: enabled
- XY separation: 75 %
- Don’t support bridges: enabled
These settings often yield clean, removable supports while keeping filament usage low.

— Michael Dwamena
Michael Dwamena is the founder of 3D Printerly, a platform dedicated to simplifying 3D printing for hobbyists and professionals alike. With over 20 filament and resin printers, he has amassed extensive real‑world experience and has authored more than 900 articles that guide millions through the intricacies of 3D printing.
3D printing
- Electron Beam Melting (EBM): A Comprehensive Guide for Industry Professionals
- 12 Strategic Takeaways from AMFG’s 2020 Additive Manufacturing Landscape Digital Conference – Part 2
- How 3D Printing Is Transforming Manufacturing, Healthcare, Aerospace, and Education
- Tony Nutile’s Nylon Spool & Carbon‑Fiber Tool Rack for Mark One Printers
- Debunking 3D Printing Myths: What the Technology Truly Can Do
- 30 Years of Materialise: Advancing Medical 3D Printing for Safer, Predictable Patient Outcomes
- Avi Reichental Interview: From 3D Systems CEO to XponentialWorks Founder
- The Five Essential Books Every 3D Printing Enthusiast Should Read
- Five Essential Commandments for Flawless 3D Printing on the Markforged Mark One
- Is It Safe to 3D Print at Home? Risks, Precautions, and Best Practices