


Injection Mold Design – Part 2: Understanding and Eliminating Sink Marks
In product development, flawless injection‑molded parts are essential for both aesthetic appeal and efficient production. A prominent sink mark on the front A surface of an early article can jeopardize a shiny finish and delay the launch. Rather than masking the defect with a logo badge, a more effective solution lies in the mold design and part geometry.
Sink marks result from differential cooling in thick sections of the part, such as where an interior rib or boss meets the wall. The core of the thick region cools last, drawing material inward and creating a dimple on the opposing side. The effect is most visible on smooth, shiny surfaces and darker plastic colors.
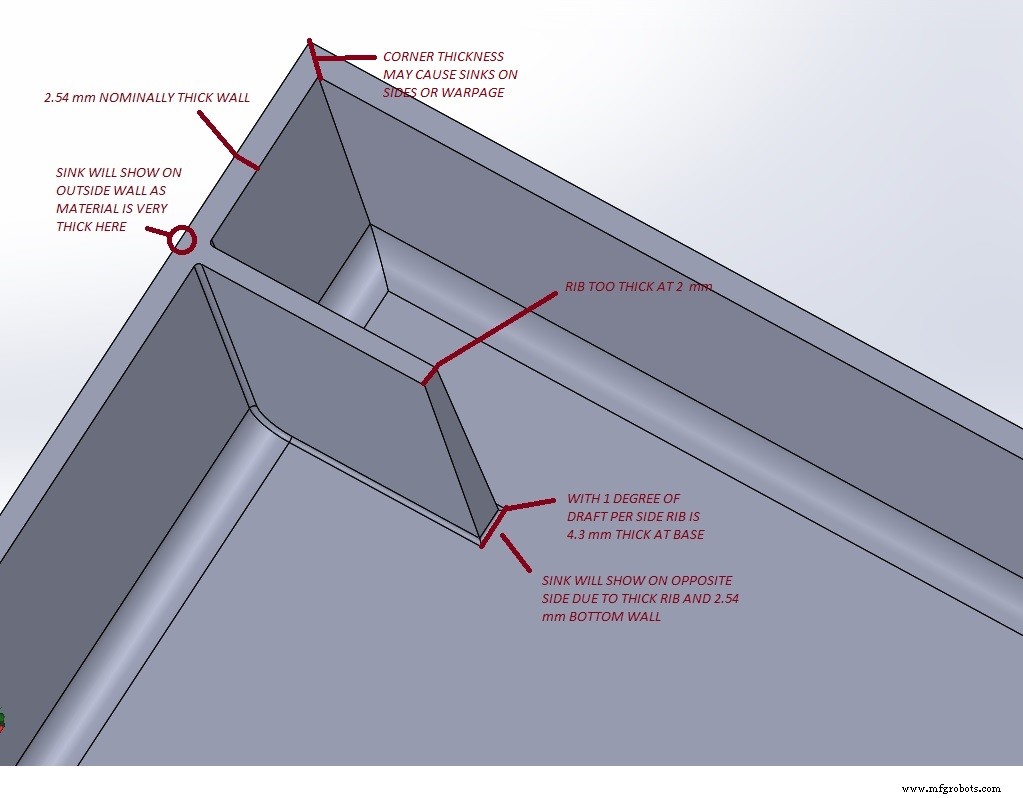
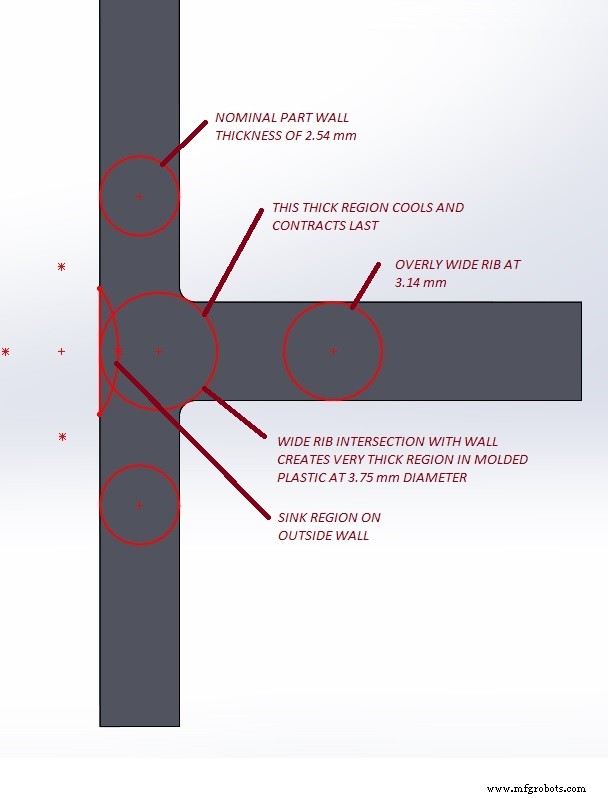
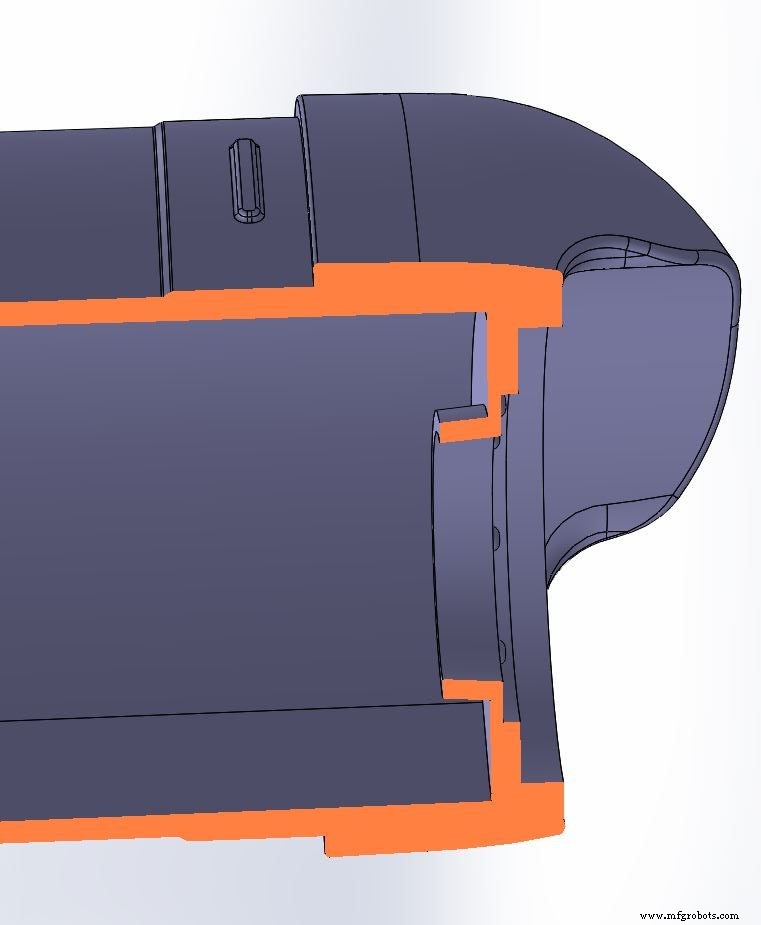
Intersections between two external walls or an angled surface can also induce sinks, especially when a rib meets the wall at a sharp angle. A general rule of thumb is to keep internal wall and rib thickness at 50‑60 % of the nominal outer wall thickness. This reduces the likelihood of thick spots and the resulting sink flaws.

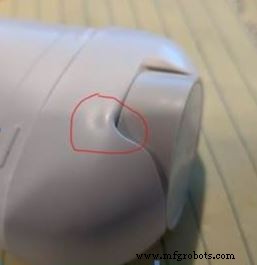
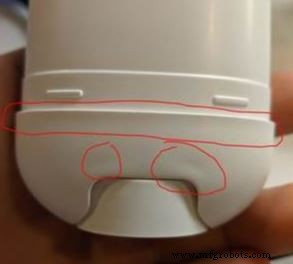
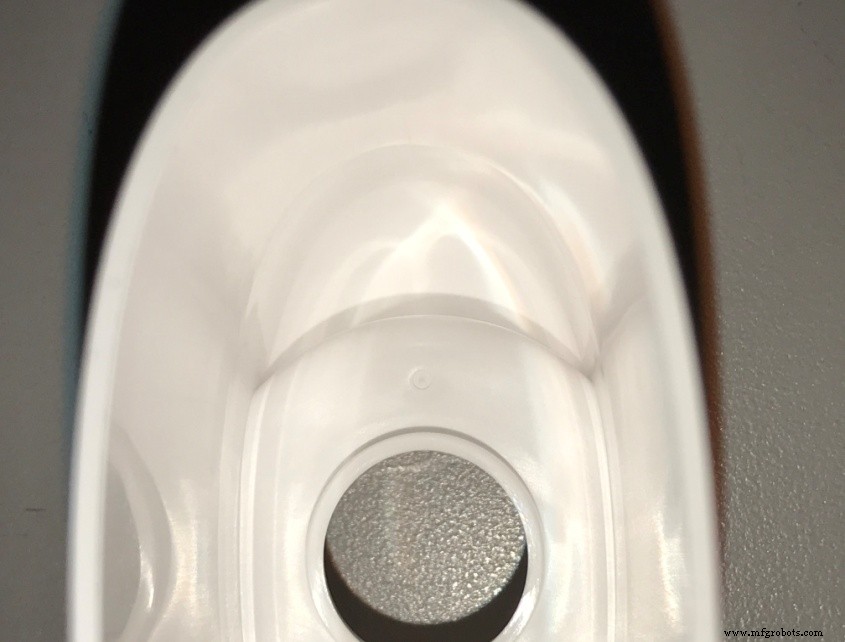
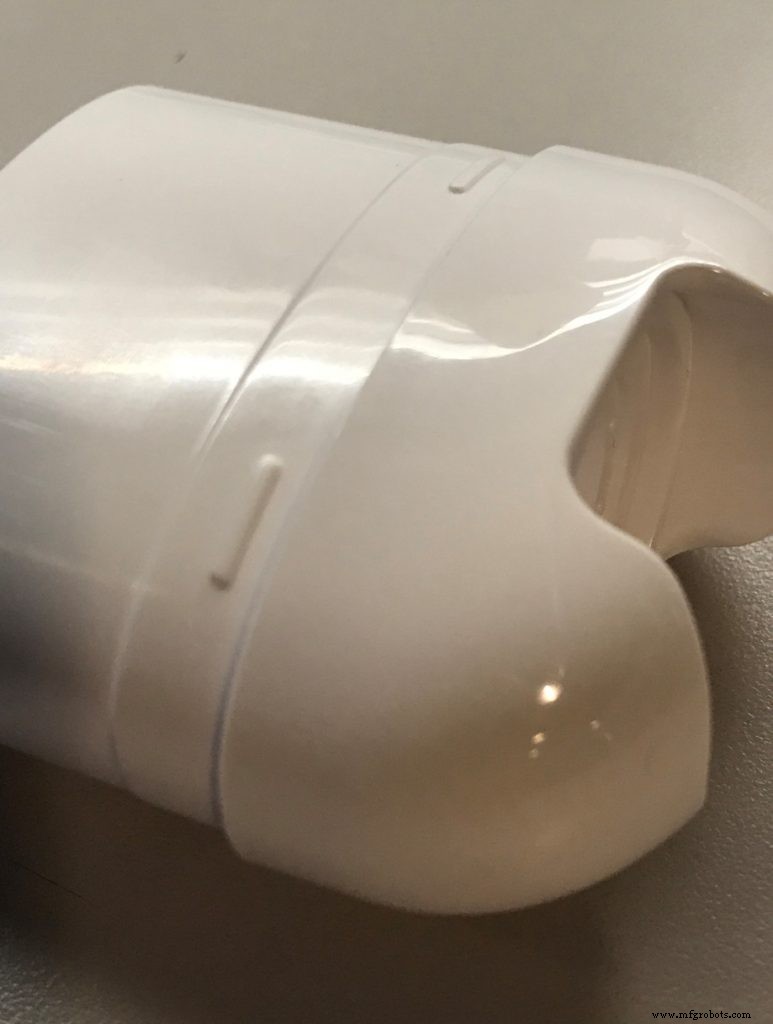
Complex shapes often hide critical transitions, making thick sections hard to detect early. In the case of a white dispensing canister base, the design appeared simple, but the lower counterbore for the thumb screw introduced angled wall intersections that produced visible sink marks. Cross‑section analysis revealed a convergence of features that increased the local wall thickness.
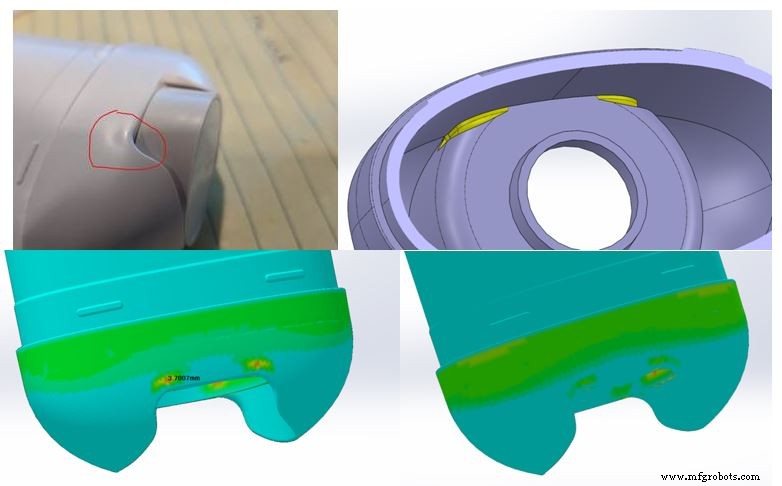
These features were difficult to modify without compromising the product’s compact size and functionality. However, adding subtle core features—light coring—relieved material at the wall junctions and reduced the sink.
Before coring was added. 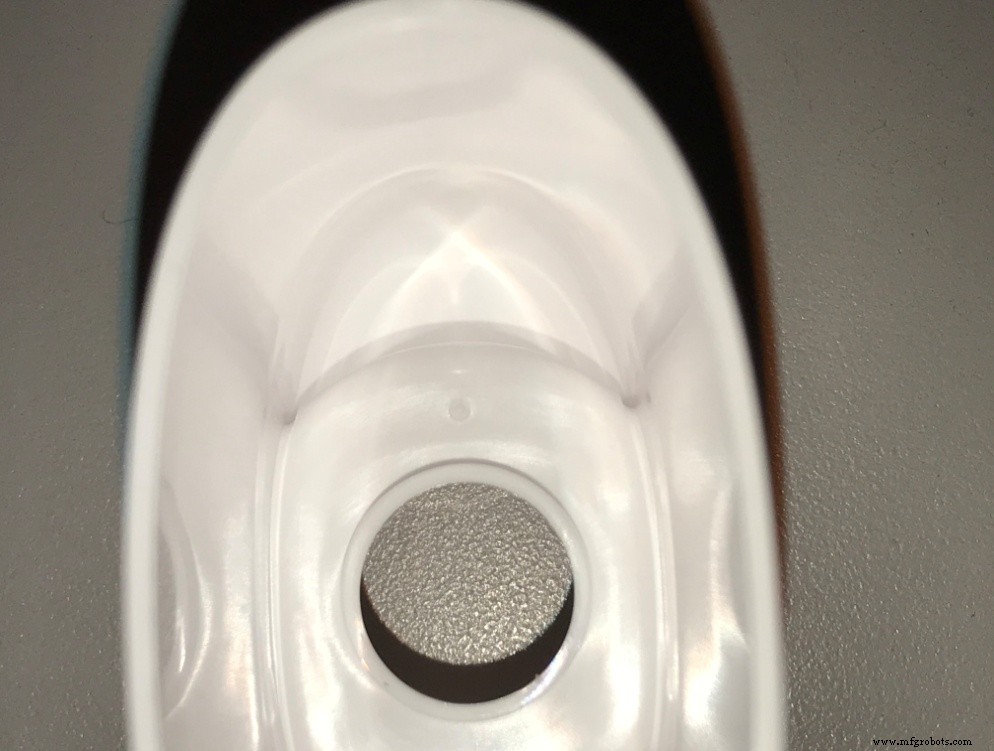
After: Material reduction at wall junctions.
Coupled with a longer cycle time to allow thorough cooling and process tweaks, the result was a flawless, functional part. Close collaboration between design engineers and mold makers proved essential to resolve these issues swiftly.
Bodies (or bosses) present another challenge. As conical ribs, they must balance strength, fit with threaded fasteners, and minimal thickness to avoid sinks. We’ll explore boss design in a future post.
By employing sound injection‑mold engineering practices and advanced 3D CAD tools, designers can minimize the risk of sink marks and other cosmetic defects. Working hand‑in‑hand with mold makers ensures high‑quality, visually appealing parts that meet functional requirements, shortening time to market.
Key takeaways: keep internal walls and ribs within 50‑60 % of the nominal thickness, minimize sharp intersections, consider slight draft changes to reduce thickness variation, and use CAD thickness‑analysis tools. Collaborate with molders early and iterate on the first two article runs to refine the design and process.
Links to: Part 1, Part 3, Part 4
Manufacturing process
- Part 6: Managing Teams & Contract Manufacturers in Injection Molded Part Design
- Injection Molding Part Design: Mastering Draft Angles for Seamless Ejection
- Preventing Warpage in Injection‑Molded Parts: Design Strategies
- Designing Injection Molded Bosses: Balancing Strength and Molding Success
- The Critical Role of Draft Angles in Injection Molding Success
- How to Prevent and Repair Sink Marks in Injection Molded Parts
- 6 Proven SLA Design Tips for Flawless 3D Print Quality
- Expert Guide: Eliminating Undercuts in Injection Molding for Seamless Part Release
- Avoid These 4 Common Design Pitfalls in Injection Molding
- Enhance Your Parts with Custom Injection Molding Features