


How We Created an Edge‑Lit LED Ping‑Pong Paddle
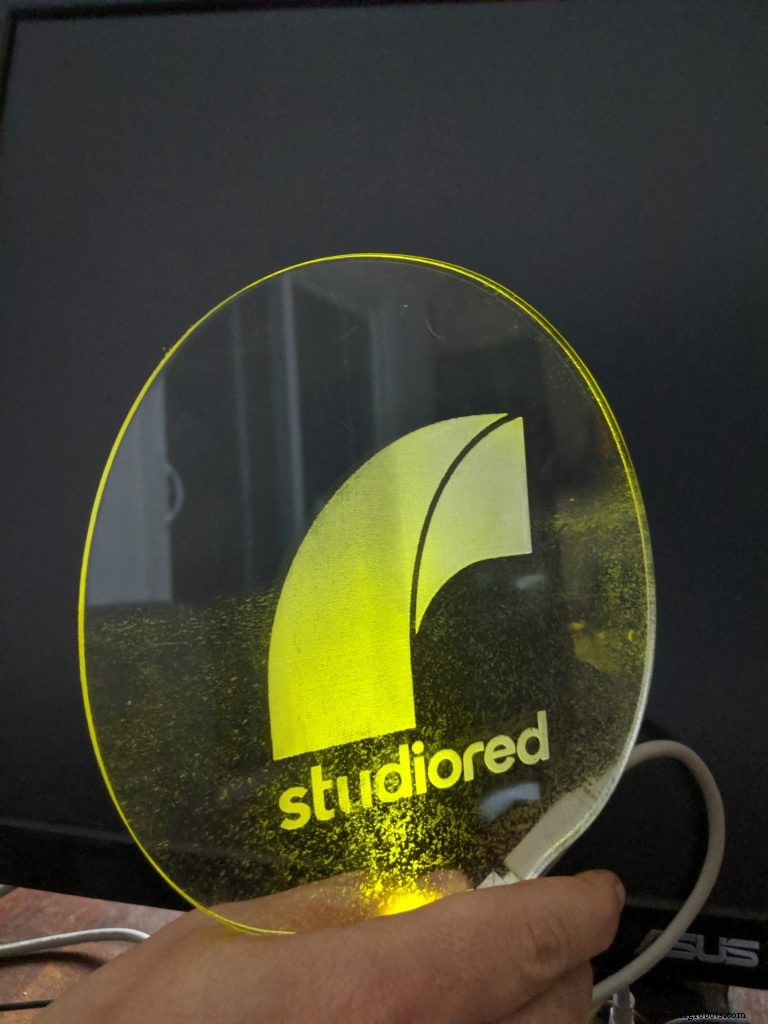
At Studiored, we’ve been passionate about ping‑pong for almost four years, playing nearly a thousand games. When a ¼‑inch acrylic scrap lay on our bench, the idea of crafting an edge‑lit LED paddle instantly sparked.
Laser‑cutting edge‑lit acrylic is a proven technique for signage—smooth cuts let light enter, while rough etched surfaces scatter it beautifully. We started by downloading a paddle outline, importing it into CAD, and overlaying our logo. (Watch our tutorial video to see how we scale images.)
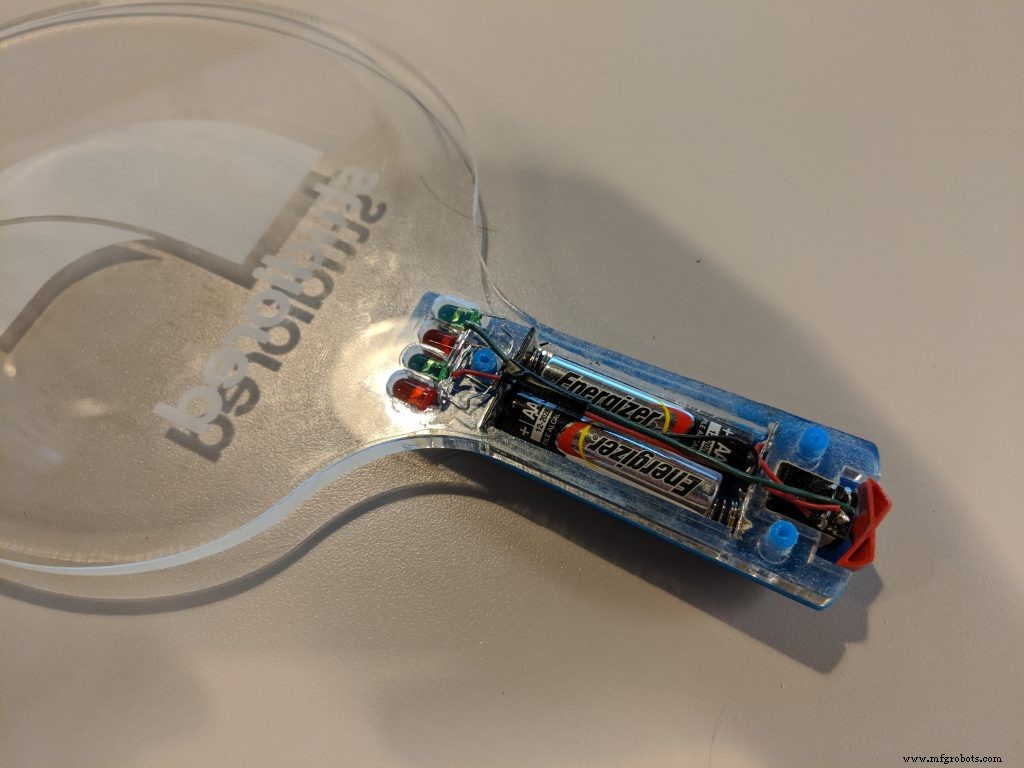
Unlike large signs, a handheld paddle offers limited space for LEDs and wiring. A compact Li‑Po cell and SMD LEDs would be typical, but we opted for standard AAA batteries to avoid a charging port and keep the design simple. Our inventory of battery clips allowed us to design 3D‑printed handles that act as retention stops, while the laser‑cut acrylic keeps the rest of the assembly robust.

The finished paddle feels slightly heavier than a standard one, but its dimensions are spot‑on. A two‑color toggle switch lets us play “Star Wars”‑style night matches once we produce a second paddle. We considered adding transparent grip tape, but the illumination already provides excellent traction in the dark.
Download the files in our download section and build your own illuminated paddle today!
Manufacturing process
- Designing Baby Products: Ensuring Safety, Compliance, and Market Success
- Paddles: Design, History, and Modern Innovations
- Four Key Challenges in IoT Hardware Design
- Build a Classic Pong Game on Arduino UNO with OLED Display – Step‑by‑Step Tutorial
- Build a 24×16 LED Pong Console with Arduino Nano & MAX7219
- NeoPixel Matrix Pong on Arduino Nano: Build a Neon Pong Game
- Build a 1‑D Pong Game with Arduino and WS2812 LED Strip – Step‑by‑Step DIY Tutorial
- DIY Grow LED Light: Build a Custom LED System for Optimal Plant Growth
- Designing a 3D‑Printed Shoe: Expert Guidance from Fast Radius
- Mastering Machined Part Design: A Comprehensive Guide