


Build a WiFi Weather Station with ESP8266 and DHT22 Temperature Sensor
Components and supplies
 |
| × | 1 | |||
 |
| × | 1 | |||
 |
| × | 1 | |||
 |
| × | 1 | |||
 |
| × | 1 | |||
 |
| × | 1 |
About this project
I wanted to design a small weather station and use it for tracking for long periods of time the outdoor weather variables automatically and recording into a spreadsheet. It was really just for fun, to understand how is the behavior of these weather factors in my county and at home. My county has very good condition for farmers and produce vegetables and others green food. In excess. To sell food for our main city.
Step 1
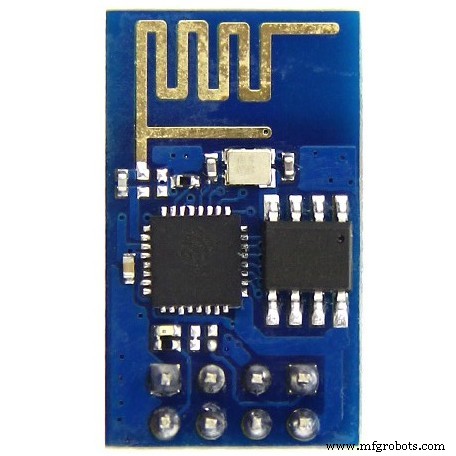
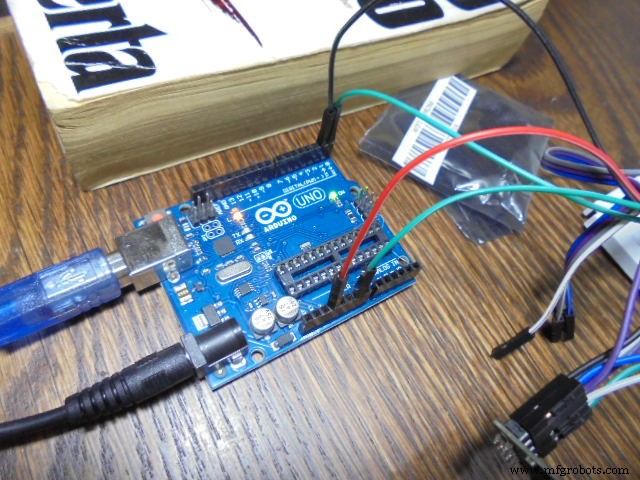
Connect ESP8266 with Arduino and upload the code from IDE.
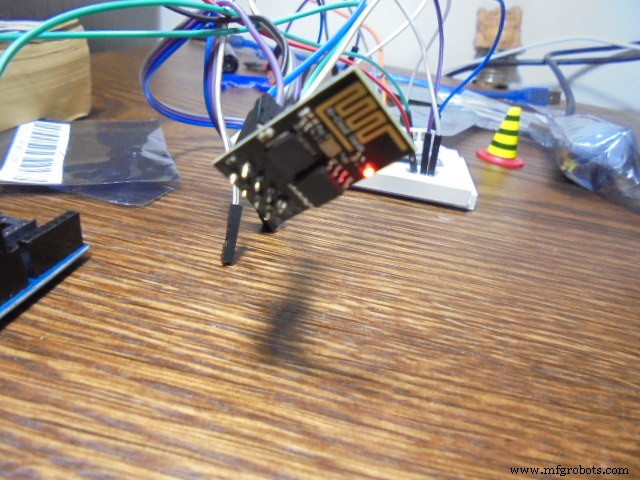
Using the serial port upload the code directly to the ESP8266 module. Remember that once you do this the original firmware is erased. If you want the original firmware again in your ESP8266 you will need a long process to do that. Check this video which can give you a shortcut about it.
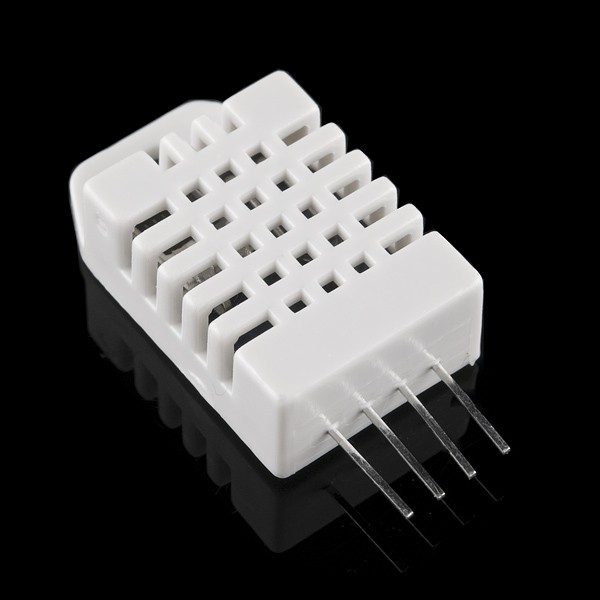
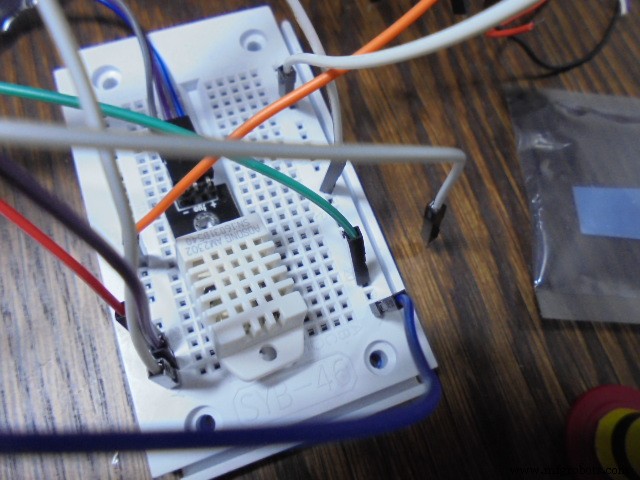
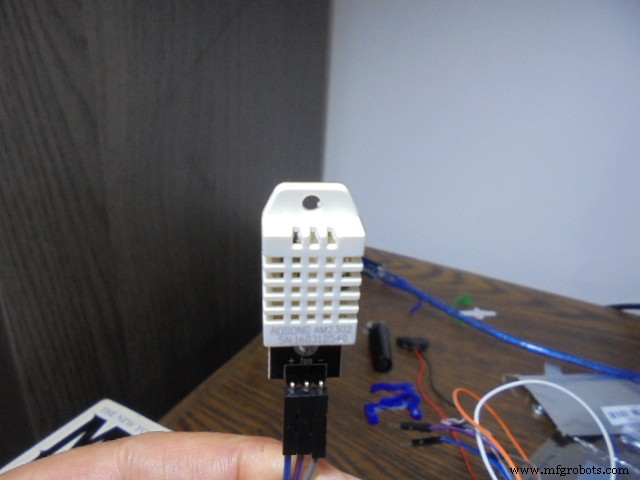
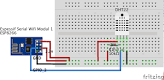
Step 3Connect DHT22 sensor:

Check your communication with the Thingspeak channel you previously had configured:
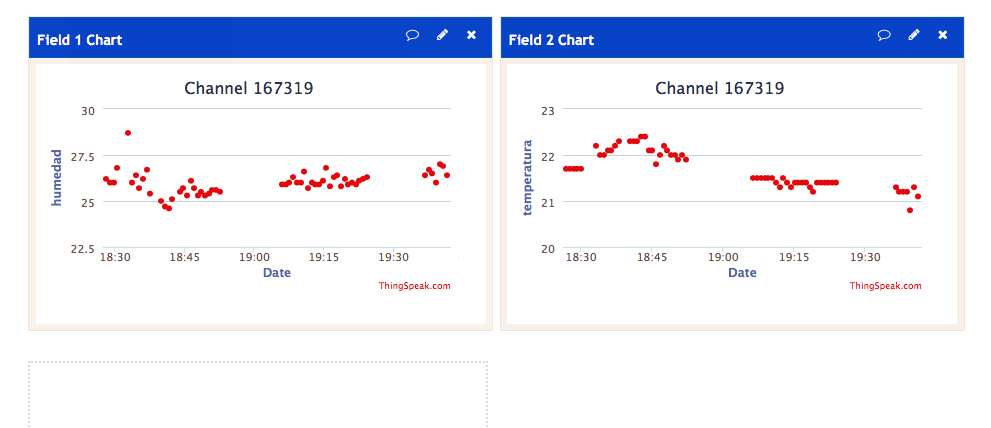
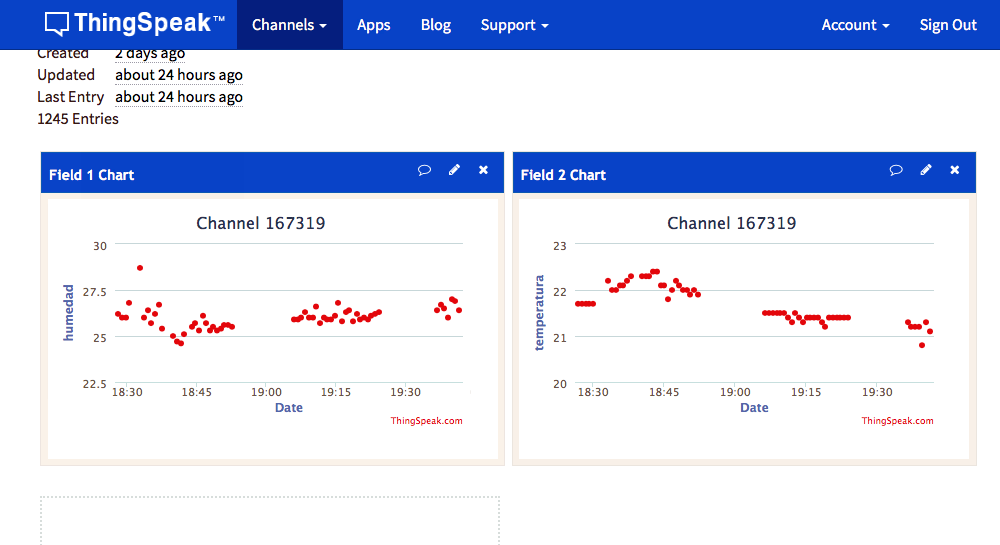
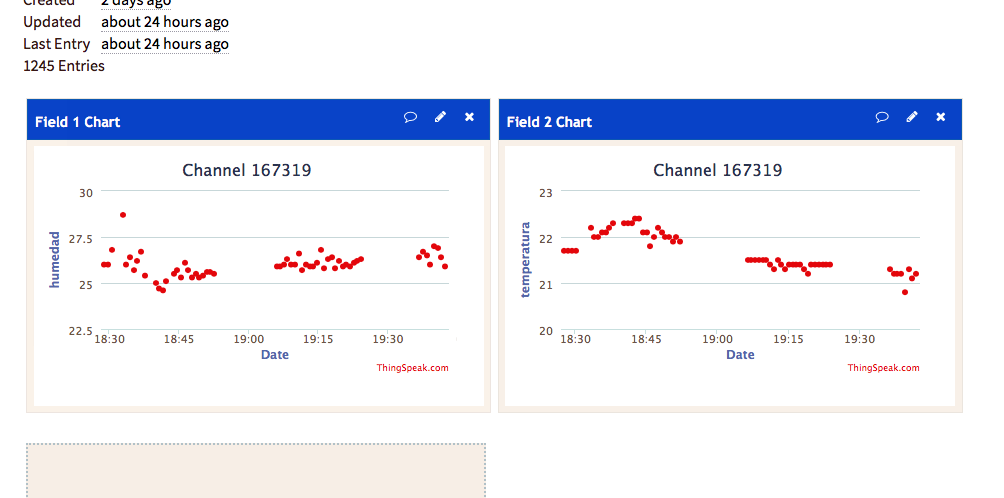
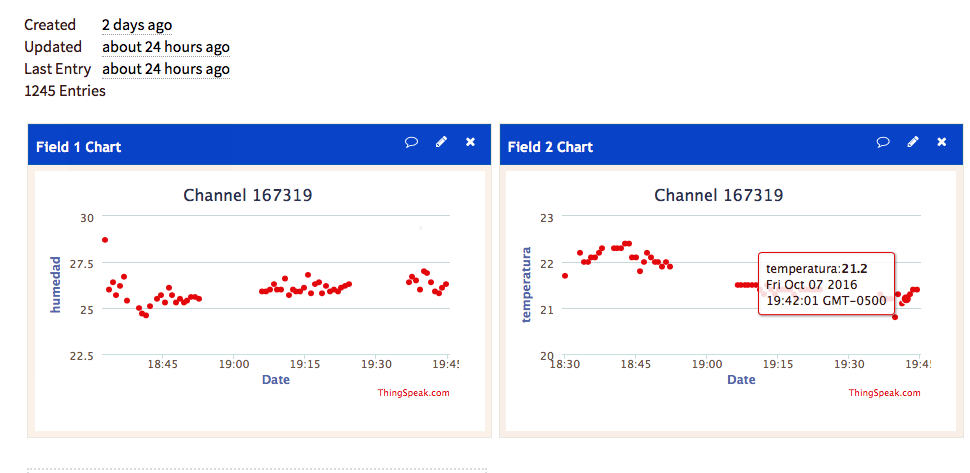
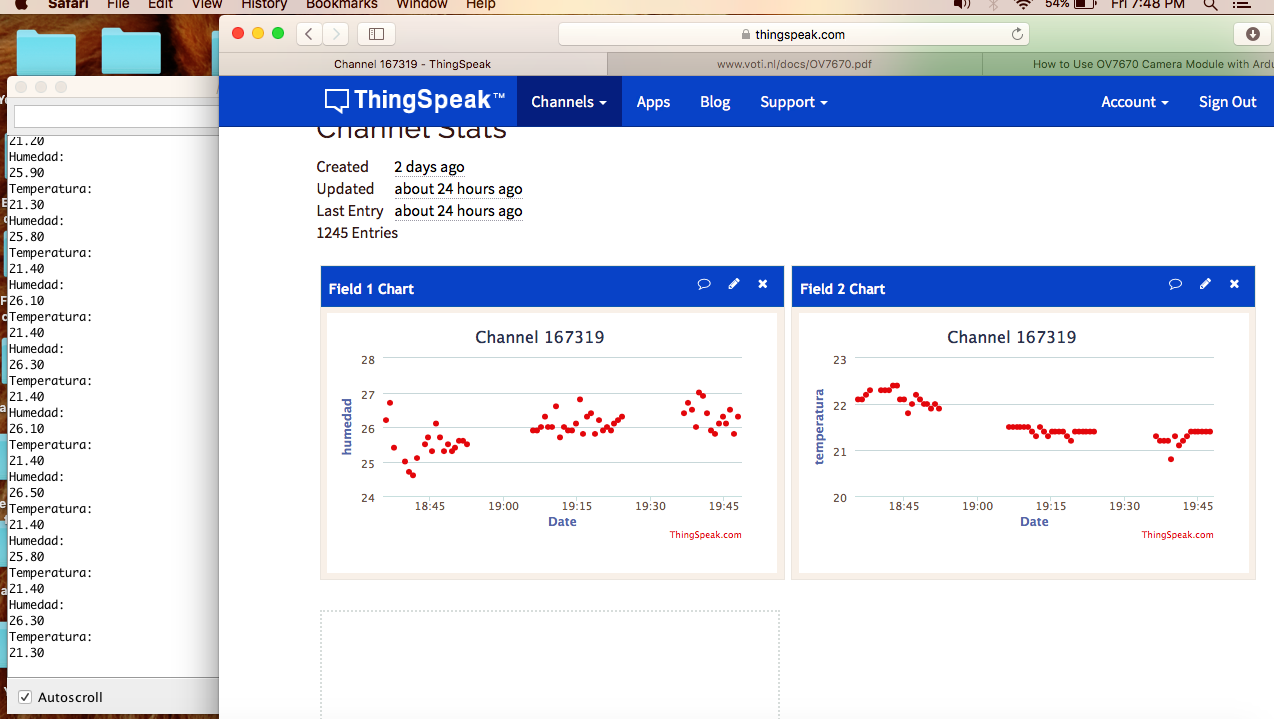
These are mandatory code lines to communicate with your channel:
#include <ThingSpeak.h>
unsigned long myChannelNumber = 167x1x;
const char * myWriteAPIKey = "VXXXXV86RWRXX9Y";
ThingSpeak.writeField(myChannelNumber, 1, h, myWriteAPIKey);
delay(20000);
ThingSpeak.writeField(myChannelNumber, 2, t, myWriteAPIKey);
delay(20000);
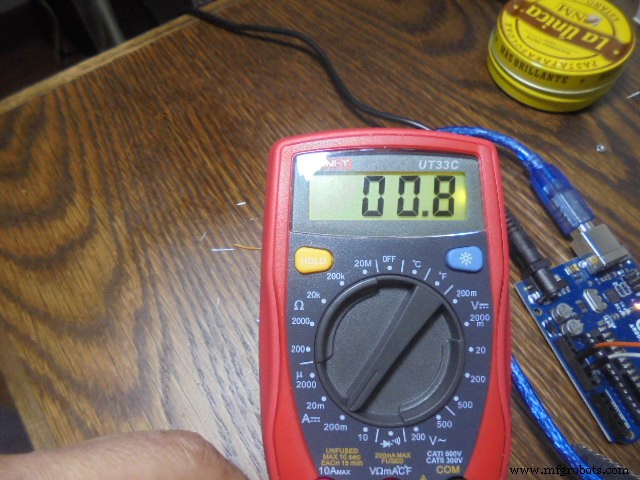
Remember your ESP8266 needs a big amount of current, so a cause of failure is that you need to feed it from your PC USB port and from an external power source.
If you can record 8 fields in a channel please start to thinking what other weather sensors you can add to your station - barometric pressure? Maybe!
Code
- temphumwifi.ino
temphumwifi.inoArduino
#include <ThingSpeak.h>

/* DEVELOPER: hernando Bolanos - Colaborations - original code and libraries for wifi modules and code uploaded in GITHUB for send information to Thinhspeak-Libraries according to each author
 *
 *  This code send to  Thingspeak DHT22 data each 20 seconds -using wifi
 *  This program do not use arduino just use the GPIO2 to receive DHT22 sensor information and demux it. How to load directly to de esp8266 from arduino IDE is a chellenge- take a look to the "el profe garcia videos on youtube"
 */
#include <DHT.h> //cargamos la librera DHT
#define DHTPIN 2 //Seleccionamos el pin en el que se conectar el sensor
#define DHTTYPE DHT22 //Se selecciona el DHT22(hay otros DHT)
DHT dht(DHTPIN, DHTTYPE); //Se inicia una variable que ser usada por Arduino para comunicarse con el sensor
#include <ESP8266WiFi.h>

unsigned long myChannelNumber = 167319;
const char * myWriteAPIKey = "XXXP9V86RWR7R9Y";

const char* ssid = "XXXX ";
const char* password = "XXXX";

 WiFiClient  client;
// Create an instance of the server
// specify the port to listen on as an argument
WiFiServer server(80);

void setup() {
  Serial.begin(115200);
  delay(10);
   dht.begin(); //Se inicia el sensor


  // Connect to WiFi network
  Serial.println();
  Serial.println();
  Serial.print("Connecting to ");
  Serial.println(ssid);

  WiFi.begin(ssid, password);

  while (WiFi.status() != WL_CONNECTED) {
    delay(500);
    Serial.print(".");
  }
  Serial.println("");
  Serial.println("WiFi connected");

  // Start the server
 // server.begin();
 // Serial.println("Server started");


  // Print the IP address
  Serial.println(WiFi.localIP());

ThingSpeak.begin(client);

}

void loop() {

float h = dht.readHumidity(); //Se lee la humedad
  float t = dht.readTemperature(); //Se lee la temperatura
  //Se imprimen las variables
  Serial.println("Humedad: ");
  Serial.println(h);
  Serial.println("Temperatura: ");
  Serial.println(t);
  delay(2000); //Se espera 2 segundos para seguir leyendo //datos


ThingSpeak.writeField(myChannelNumber, 1, h, myWriteAPIKey);
  delay(20000);


ThingSpeak.writeField(myChannelNumber, 2, t, myWriteAPIKey);
  delay(20000);


   }
Schematics
Manufacturing process
- Build a Raspberry Pi Weather Station that Emails Daily Weather Data
- Build a Multi‑Sensor Temperature & Light Monitoring System with Raspberry Pi & DS18B20
- Mastering Raspberry Pi Sensor & Actuator Control: Accelerometer, Servo, and Data Streaming
- DHT11 Temperature & Humidity Sensor Project with LED Indicators and Piezo Speaker
- Build a Smart IoT Jar with ESP8266, Arduino & Ultrasonic Sensor – Real‑Time Monitoring
- River Health Monitor: Arduino-Based Water Quality System
- High‑Speed Arduino RPM Counter Using a Novel Algorithm
- Arduino Nano Weather Station: Sensor Kit & OLED Display
- Premium Walnut‑Case Humidity & Temperature Sensor Kit – Arduino + NeoPixel + TFT Display
- WiFi‑Enabled IR Blaster: DIY Project with ESP8266 and Arduino