Create a Remote-Controlled Battle Bot Using a PS2 Controller
Components and supplies
Arduino UNO
×
1
Connector Adapter, DC Power - 2.1mm
×
1
UNO R3 Sensor Shield V5.0
×
1
Motor Driver Module Shield
×
1
PS2 Controller
×
1
Motors & Back Wheels
You can use other motors and wheels but we used these because they were easy to assemble and hook up
×
1
Swivel Caster Wheel
For front wheel
×
1
18650 Battery Storage Case
×
1
18650 Rechargeable Batteries 3.7v
×
1
Coroplast
We used this for the body, flippers, etc.
×
1
Jumper Wires
×
1
Necessary tools and machines
SKIL Cordless Screwdriver
Canary Cardboard Scissors
Apps and online services
Arduino Web Editor
About this project
We created battle bots using the Arduino UNO and other affordable parts. These battle bots were made in a robotics club for 5th to 8th graders at Trivium Personalized Learning Public Charter School. It was a fun way for the kids to learn about the Arduino and robotics.
View "SCHEMATICS" to see visual diagrams on how everything is wired up. There are diagrams for the motor board, sensor shield, PS2 controller and also an additional motor connected to a bread board for a flipper/spinner. The flipper/spinner is programmed to activate when the X button is pressed on the PS2 controller.
We tried to use affordable supplies and gave the kids creative freedom on how to design their battle bots. We used parts that didn't require soldering, making it easier to assemble for beginners.
Coroplast
Coroplast was used to build the bodies. It is affordable, sturdier than cardboard and fairly easy to cut and bend.
Arduino UNO & Sensor Shield
We used the UNO R3 sensor shield so the kids could more easily connect the parts. You snap this shield on top of the Arduino and it's ready to use.
Motor Driver Board
We used this motor driver shield in order to make it easier for the kids to connect their motors.
To save on costs, we made our bots 2WD with 2 back motors and a front swivel wheel. The motor driver shield supports 4WD however, so you can easily assemble 2 more motors for the front.
18650 Battery Case
We chose these battery cases because they had 6" wire leads making it easy to connect to the Arduino.
PS2 Controller
We also wired up the bots to a PS2 controller that connected over Bluetooth.
There are tutorials that will teach you how to modify an existing PS2 controller for use with your bot but we used one we got from eBay that was already modified. There is a link to this controller under the components & supplies.
Other Supplies
We also used jumper wires (male/male & female/male), duct-tape, screws, nuts, bolts, wooden dowels, double-sided tape and velcro tape for assembling the parts.
In addition, we 3D printed some custom parts that were used for flippers, spinners and motor connectors. There are links to the STL files for one of the spinners and the motor connectors under "CUSTOM PARTS AND ENCLOSURES".
It was tons of fun building these battle bots! We loved seeing some of the concepts that the kids came up with using the limited supplies they were given. It was great seeing the progress they made as they tested their bots in battle and made changes based on where they saw the weaknesses.
Battle Videos
View Wiring & Diagrams Here
Download The Code Here
Download 3D Printed Parts Here
Get List Of Parts Used Here
Code
Battlebot with PS2 Controller
Code that allows you to control the battlebot with a PS2 controller
Custom parts and enclosures
This is a 3D printed spinner one of the students created that was attached to one of the motors. It is activated when the PS2 controller X button is pressed.This is a 3D printed connector piece that we used to attach to the ends of the motors so we could easily connect dowels to them.12 pack of the 3D printed connector piece that we used to attach to the ends of the motors. Use this if you want to print a lot of these for a class, otherwise use the Motor Connector - Single Piece .stl to print just 1.
Schematics
This is wiring for the motor board. Shows how the motors are connected to the motor board and also how the wires are connected from the motor board to the sensor shield.Diagram that displays how to connect the bluetooth wiring up to the sensor shield.This is an extra motor that was added to activate a flipper when the PS2 X button is pressed.


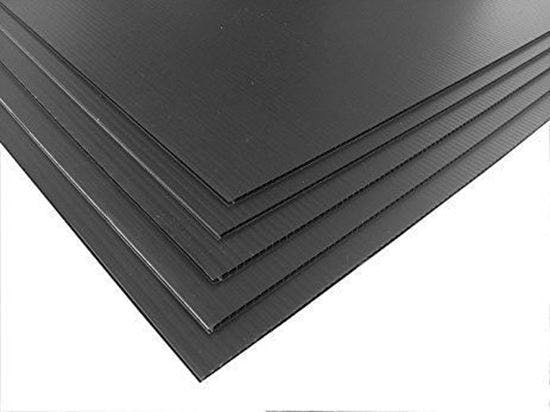


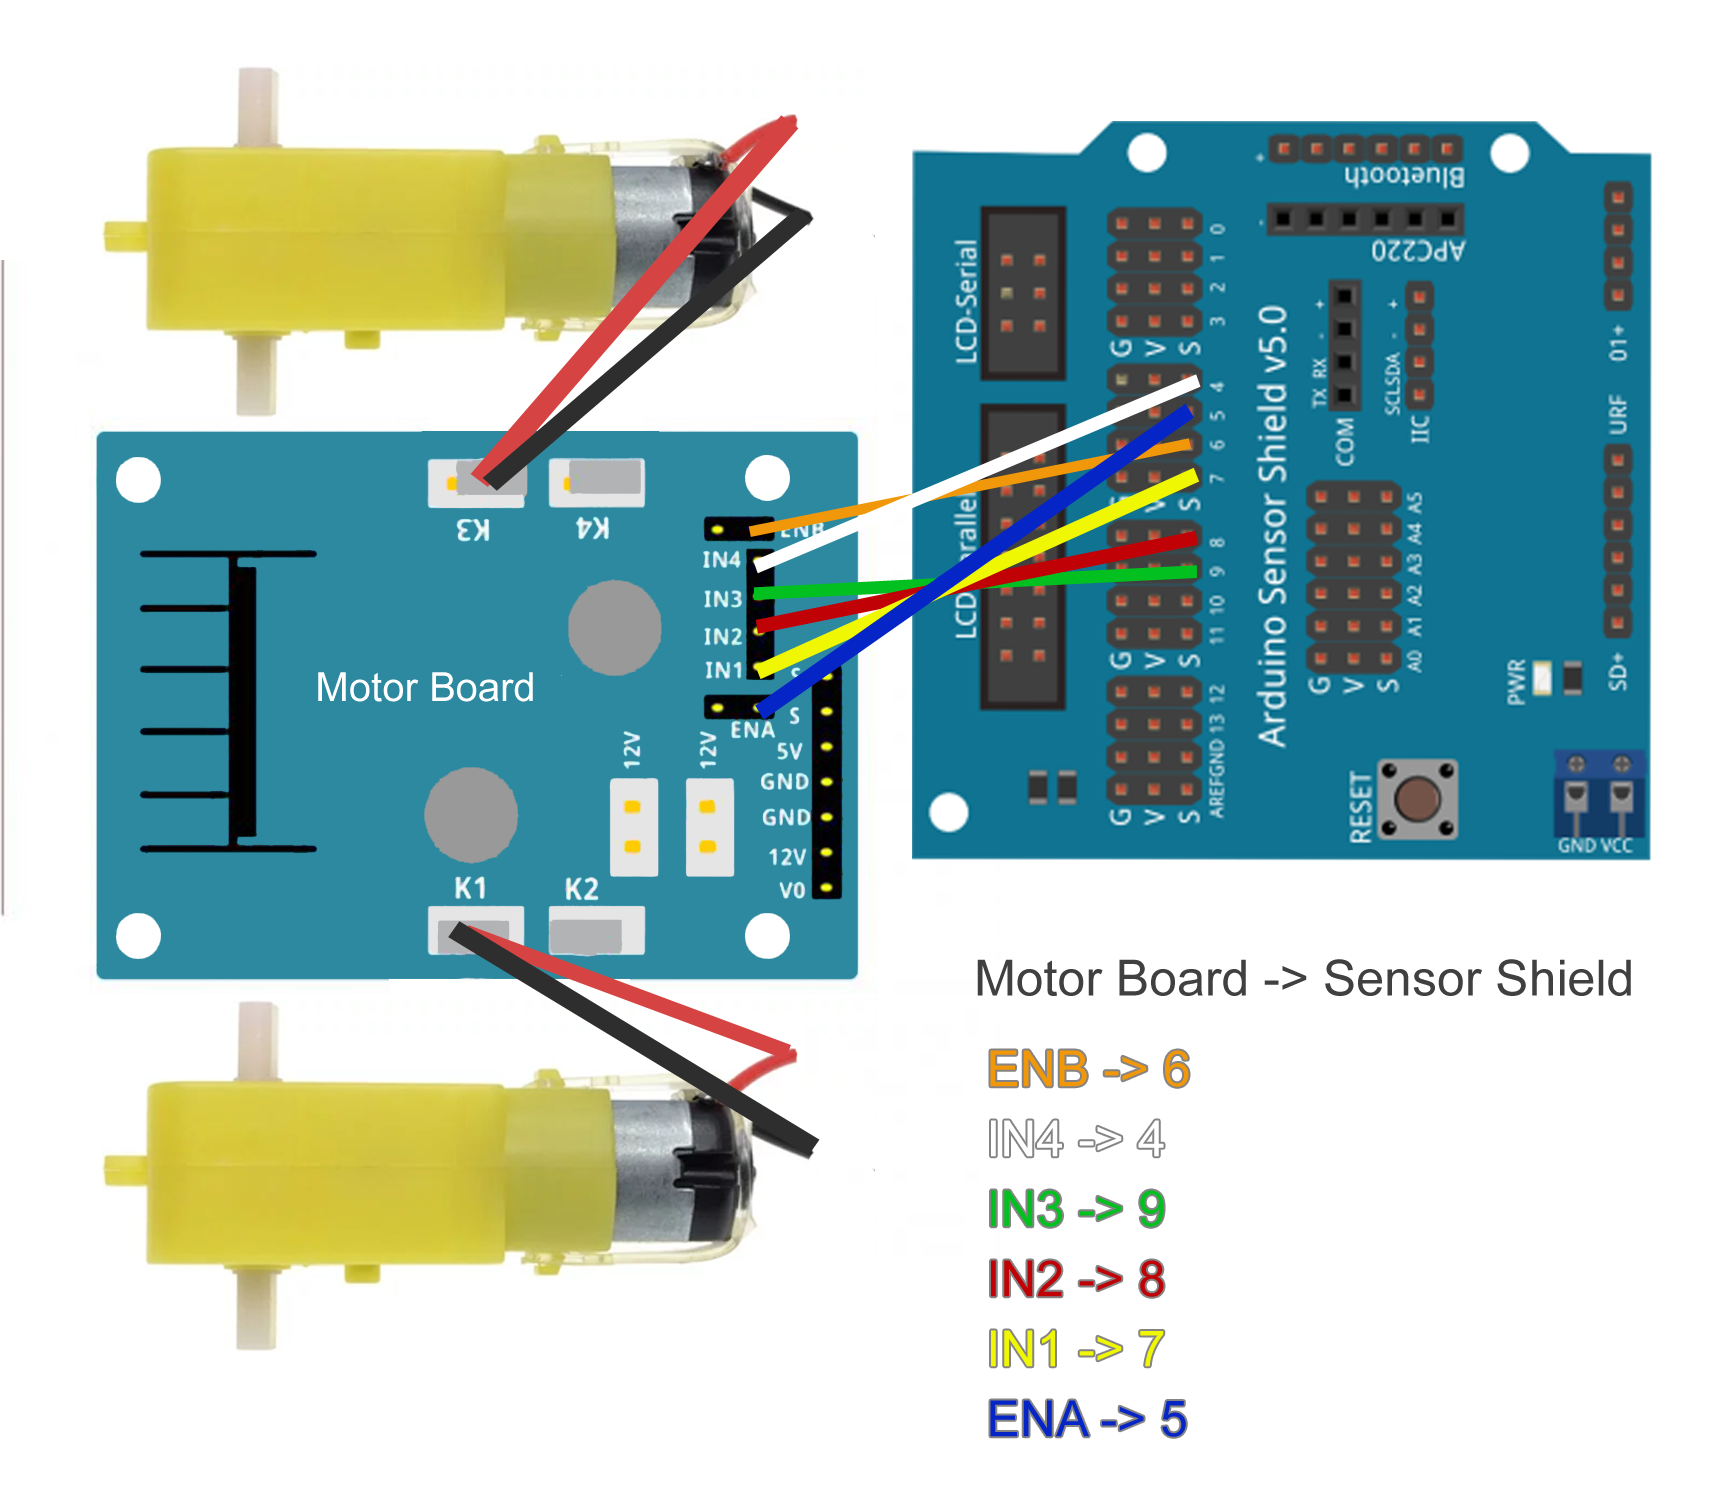 Diagram that displays how to connect the bluetooth wiring up to the sensor shield.
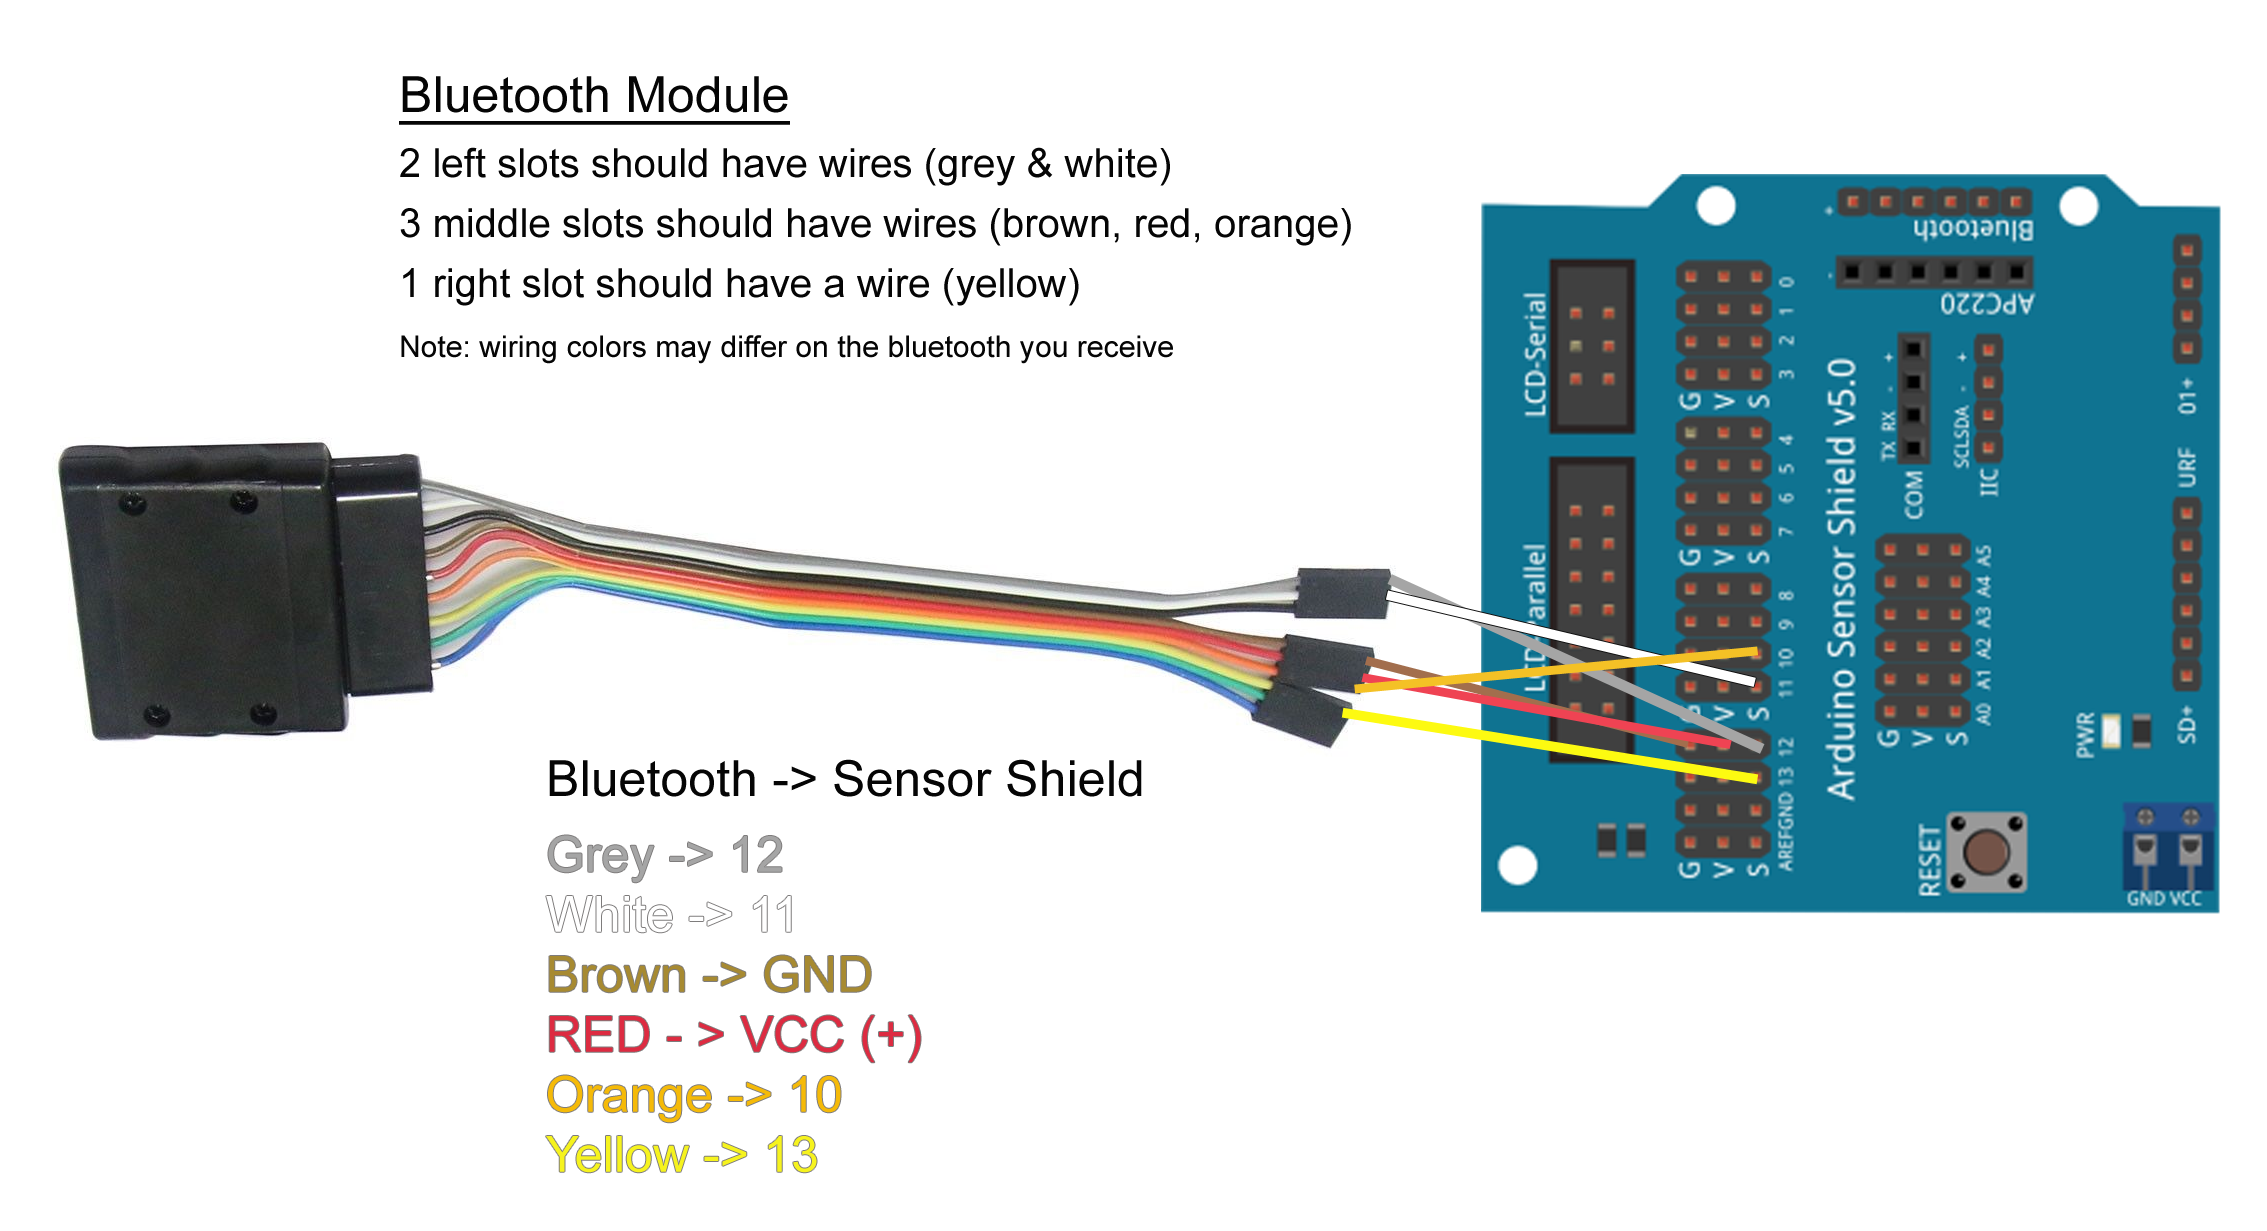 This is an extra motor that was added to activate a flipper when the PS2 X button is pressed.