


Smart 3D Printed Pet Feeder Powered by Arduino Nano
Components and supplies
 |
| × | 1 | |||
| × | 1 | ||||
| × | 1 | ||||
| × | 1 | ||||
| × | 1 | ||||
| × | 6 | ||||
| × | 1 | ||||
 |
| × | 1 | |||
| × | 1 | ||||
 |
| × | 1 | |||
 |
| × | 1 | |||
 |
| × | 5 | |||
| × | 1 | ||||
| × | 1 | ||||
 |
| × | 1 | |||
 |
| × | 2 |
Necessary tools and machines
 |
| |||
 |
| |||
|
About this project
The story behind the pet feederI have been playing around with microcontrollers for a while and wanted to try to branch out from tutorials. Before Covid-19, I didn't really have a set schedule and worked pretty long hours. My dog's feeding schedule was really starting to suffer and was leading to some visible discomfort. My area is also prone to flooding during hurricane season. Unfortunately, there were a couple of cases where I could not make it back home to feed my old girl. I needed to find a solution so, if I was unable to make it home, my dog would not go hungry. Instead of buying one for $30-$40, why not build one for $100+? Just kidding.
The feeder!My dog feeder uses an Arduino microcontroller. There were a few key features that I needed that most other versions of dog feeders did not have. Namely, a solution for power outage recovery feeding and addressing the issue of food getting stuck in the dispensing mechanism. My area also suffers from random power outages. The outages never usually last very long, so I didn't see a need for power redundancy. I also wanted something that was easy to take apart and clean. Be careful when washing the 3D printed parts, you can use warm water, NOT hot water unless you plan to print with ABS or PET-G.
The full list of features is as follows:
- Two feedings per day
- Accurate timekeeping with real-time clock
- Manual time change of real-time clock
- Manual feeding option
- LED indication of hall sensor and real-time clock failure
- Overview of feed times, current time, and feeding completions on the main screen
- Easy to navigate menu
- Power outage feeding resume (will feed when the power comes back on)
- Feeding times and completions safely stored in EEPROM
- Servo "jiggle" in the event of food getting stuck while dispensing
Demo Video coming soon!
What else do you need?- 4x M3-0.5 x 16 mm screws (encoder wheel)
- 4x M3-0.5 x 10 mm screws (servo bracket)
- 12x M3 hex nuts
- 4x M3 lock nuts
- 16x 1-1/2 inch (38 mm) Multi-purpose wood screws
- Wood glue
- 6x 0.315 x 0.118 inch (8 x 3 mm) magnets
- 1-1/2 x 1-1/2 inch (3.8 x 3.8 cm) wood for legs and servo mount
- 1/2 x 6 in (1.27 x 15.24 cm) wood for back and base
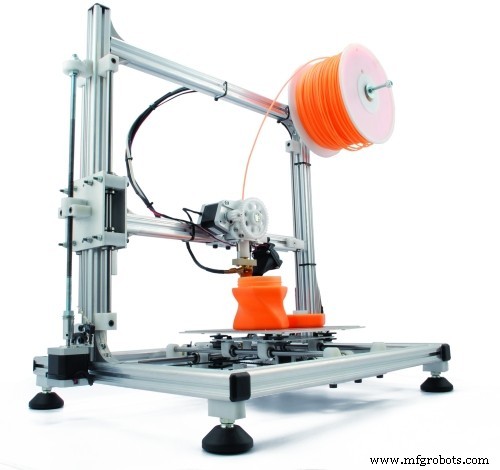
I recently obtained a 3D printer and thought, what better way to learn and put it to use than printing out custom parts for my pet feeder. Everything printed is PLA+ and was printed using an Ender 3 Pro using Cura as the slicer. The STL's for all the parts can be found on the Github project page. Link down below. Read the README file for printing instructions and slicer settings.
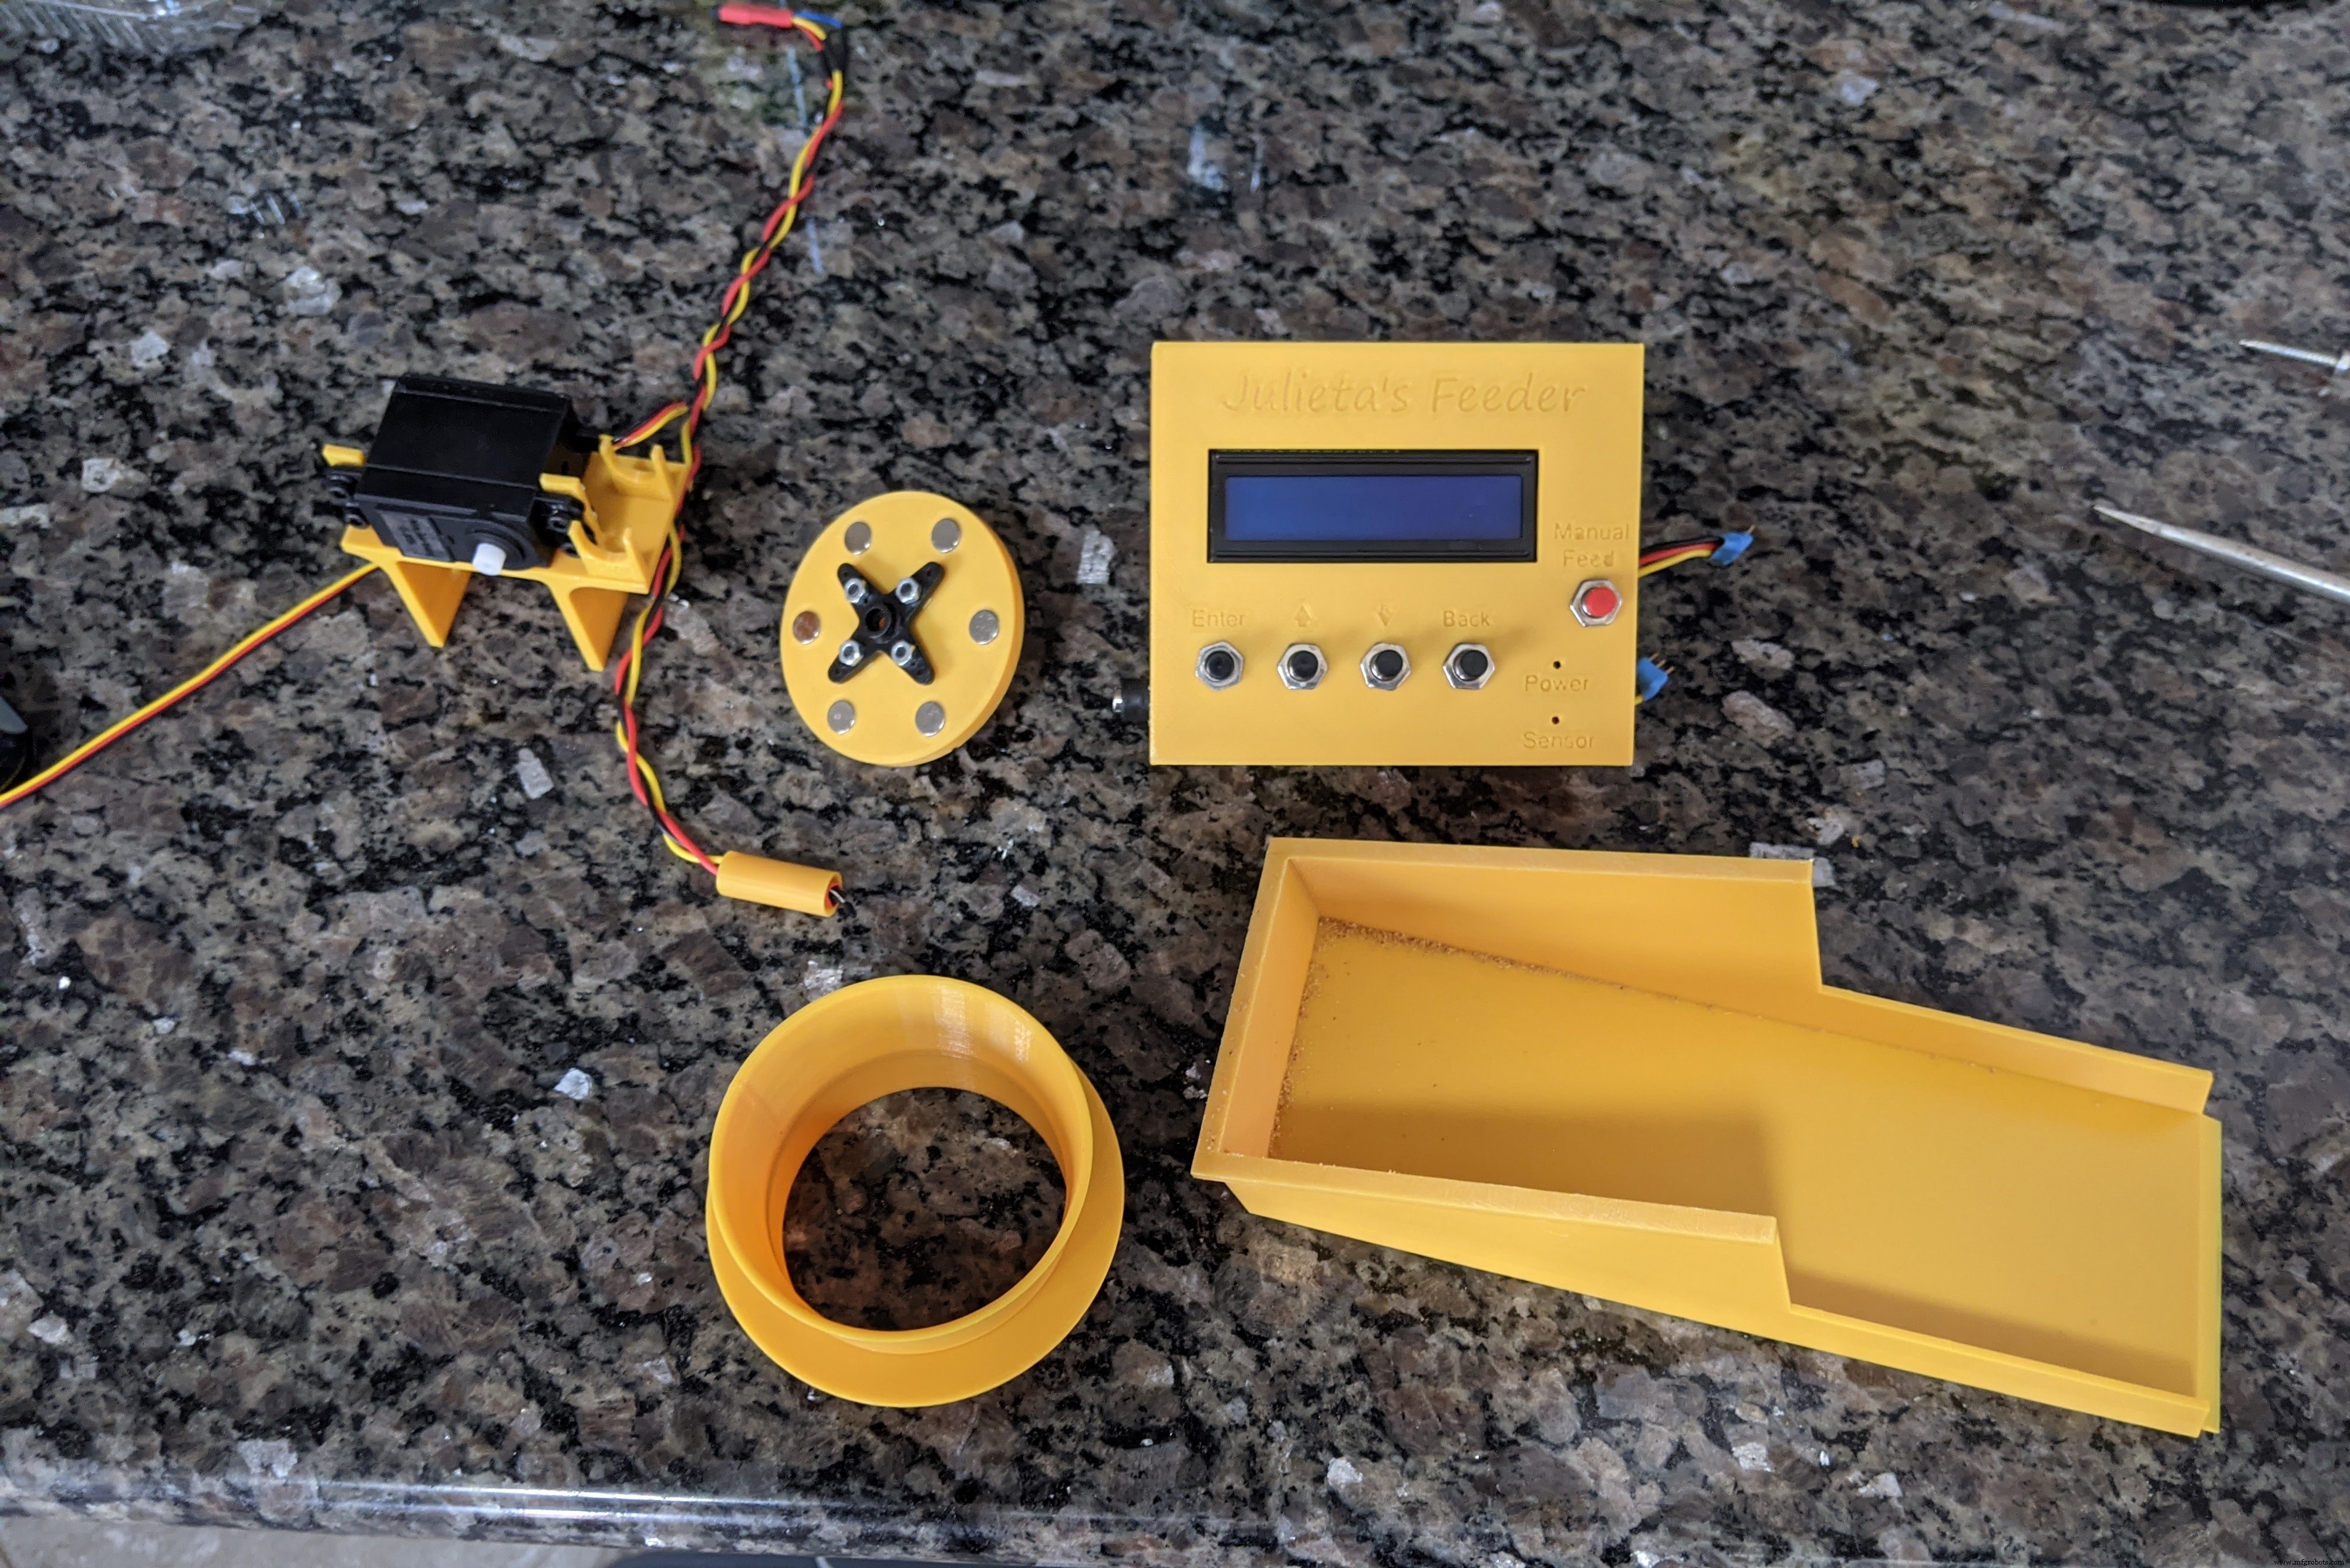
The housing is designed with convenience and simplicity in mind. No screws or nuts needed. Simply pop the components in and out. Each insert has 4 tabs that hold the components in place.

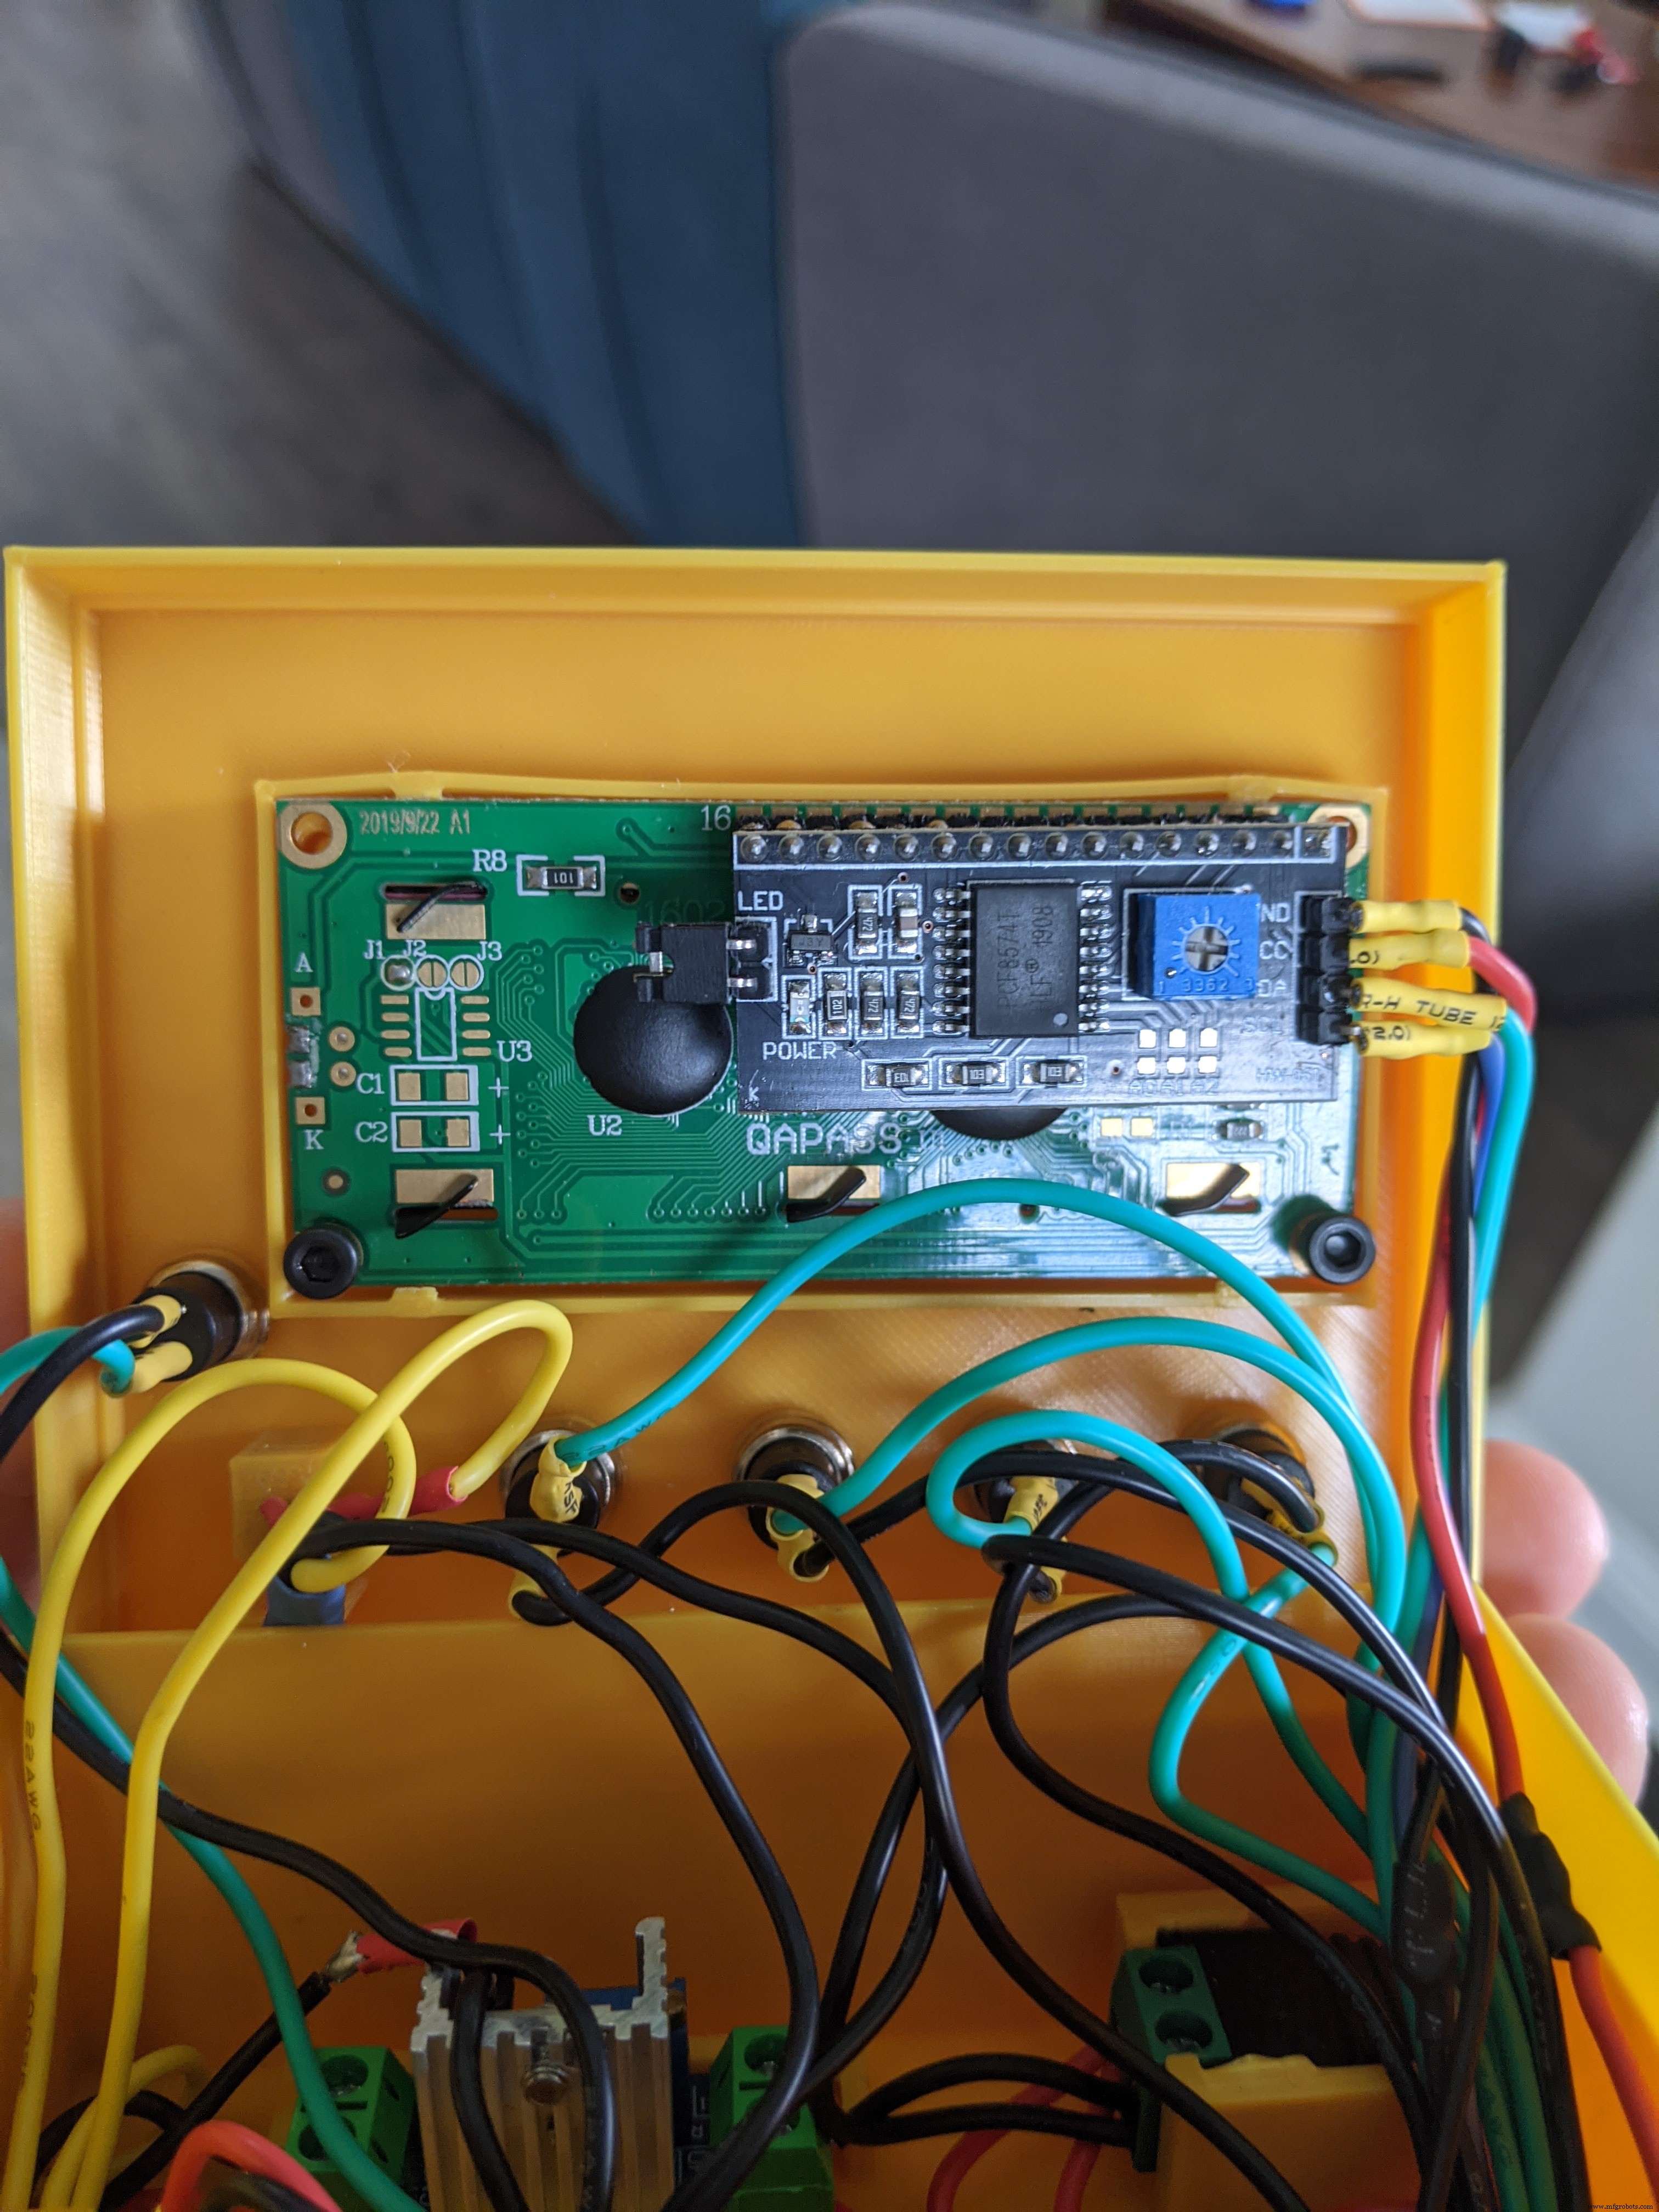
Even though I did initially mess up the LCD screen slot, I went back and fixed the model in Fusion 360. I was just too lazy to go back and reprint it. I used some extra M3 0.5 x 6mm screws I had lying around to secure it. There are four spacers at each corner of the LCD slot with holes in them so you can secure the screen if needed. Unfortunately, I never took pictures of the enclosure lid before I put everything in.
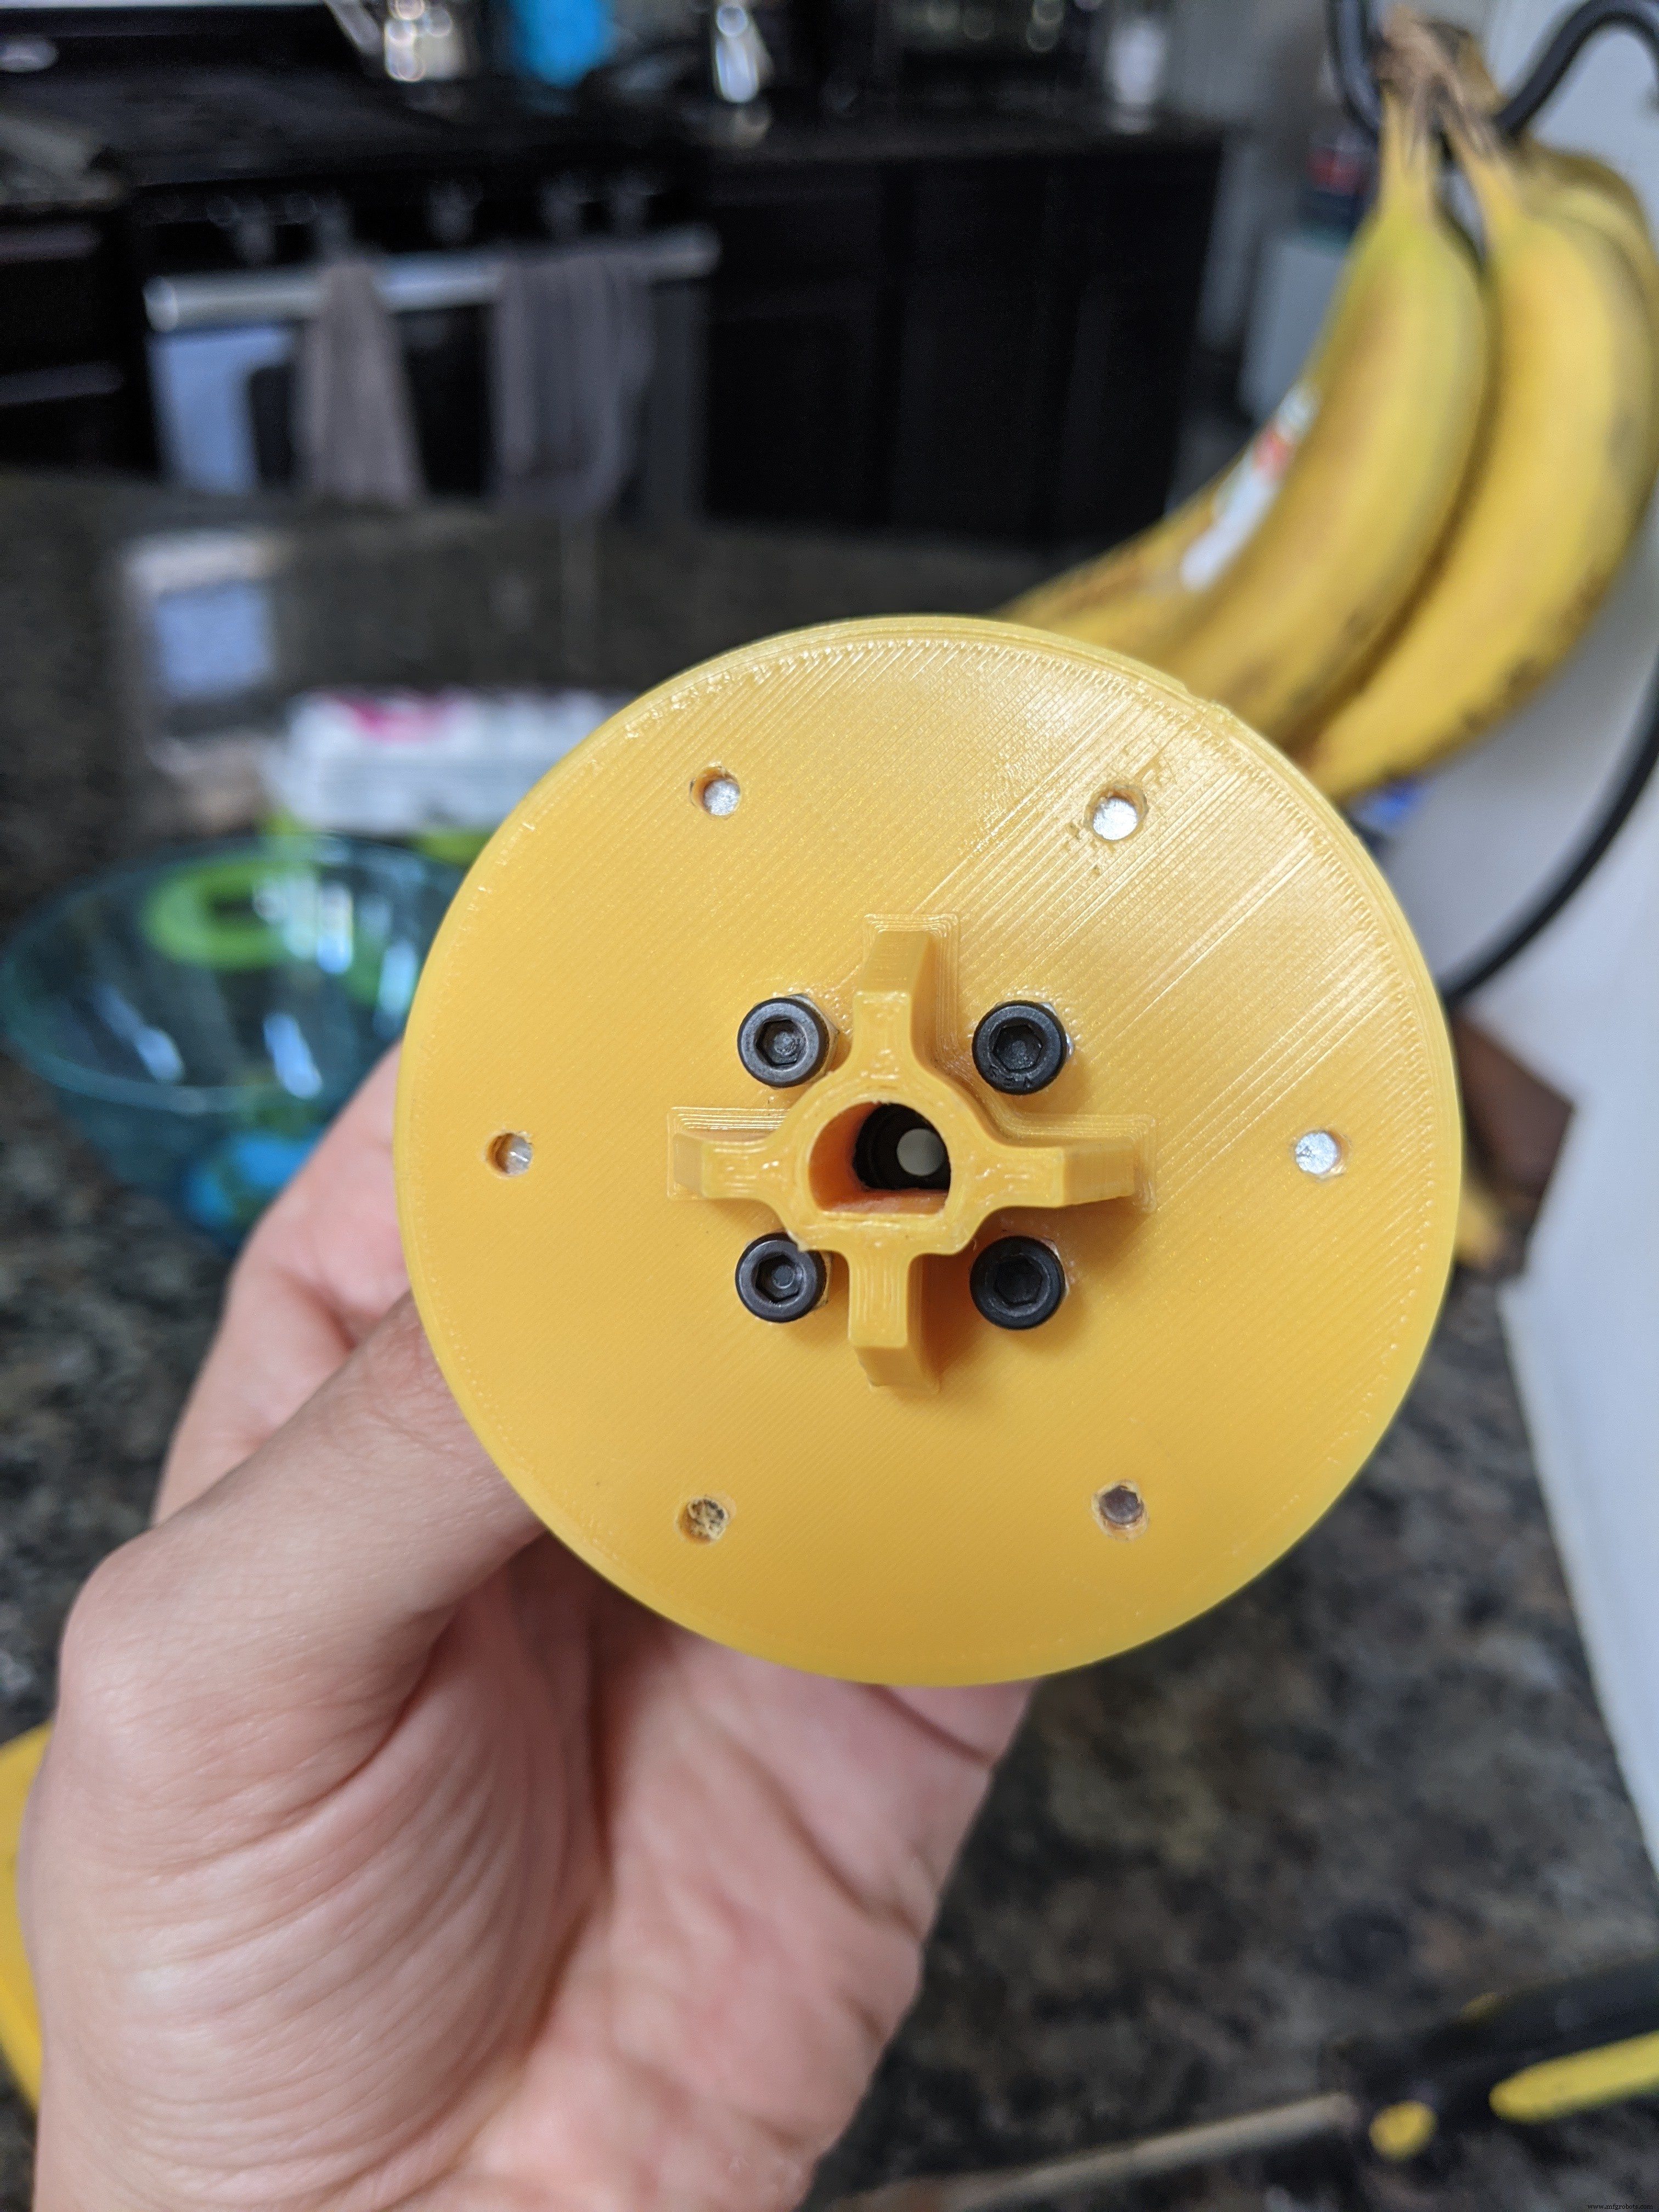
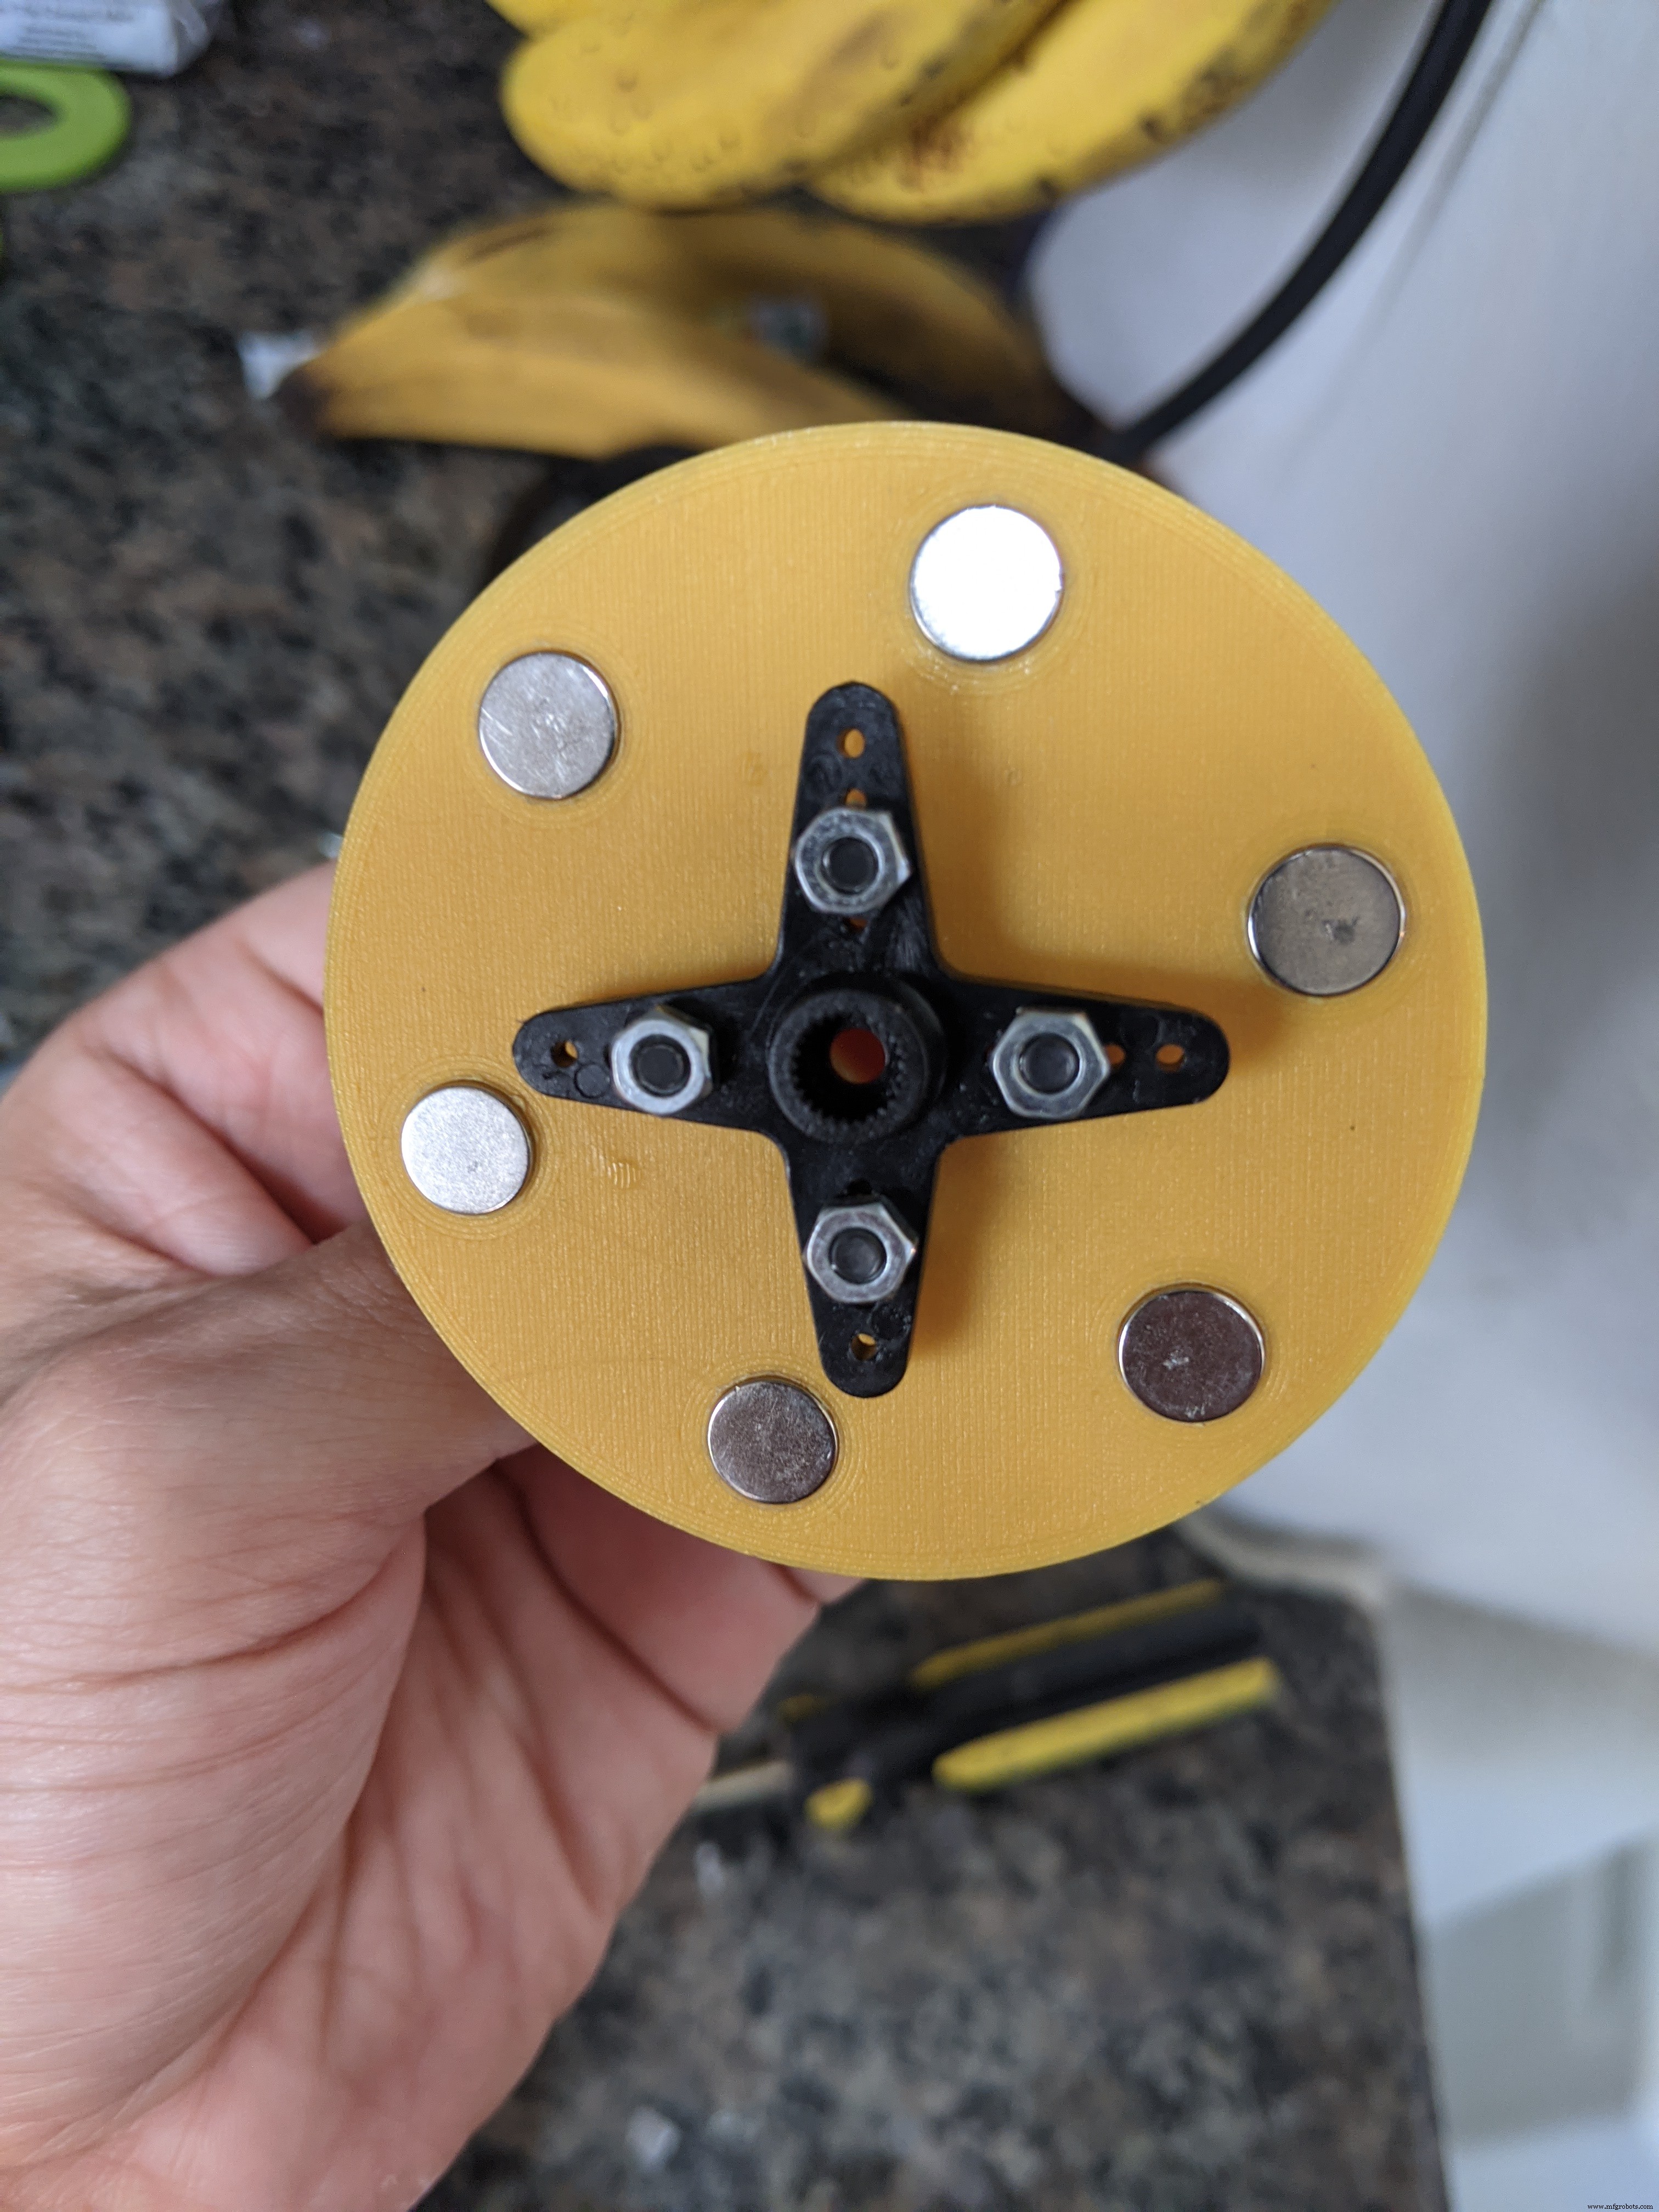
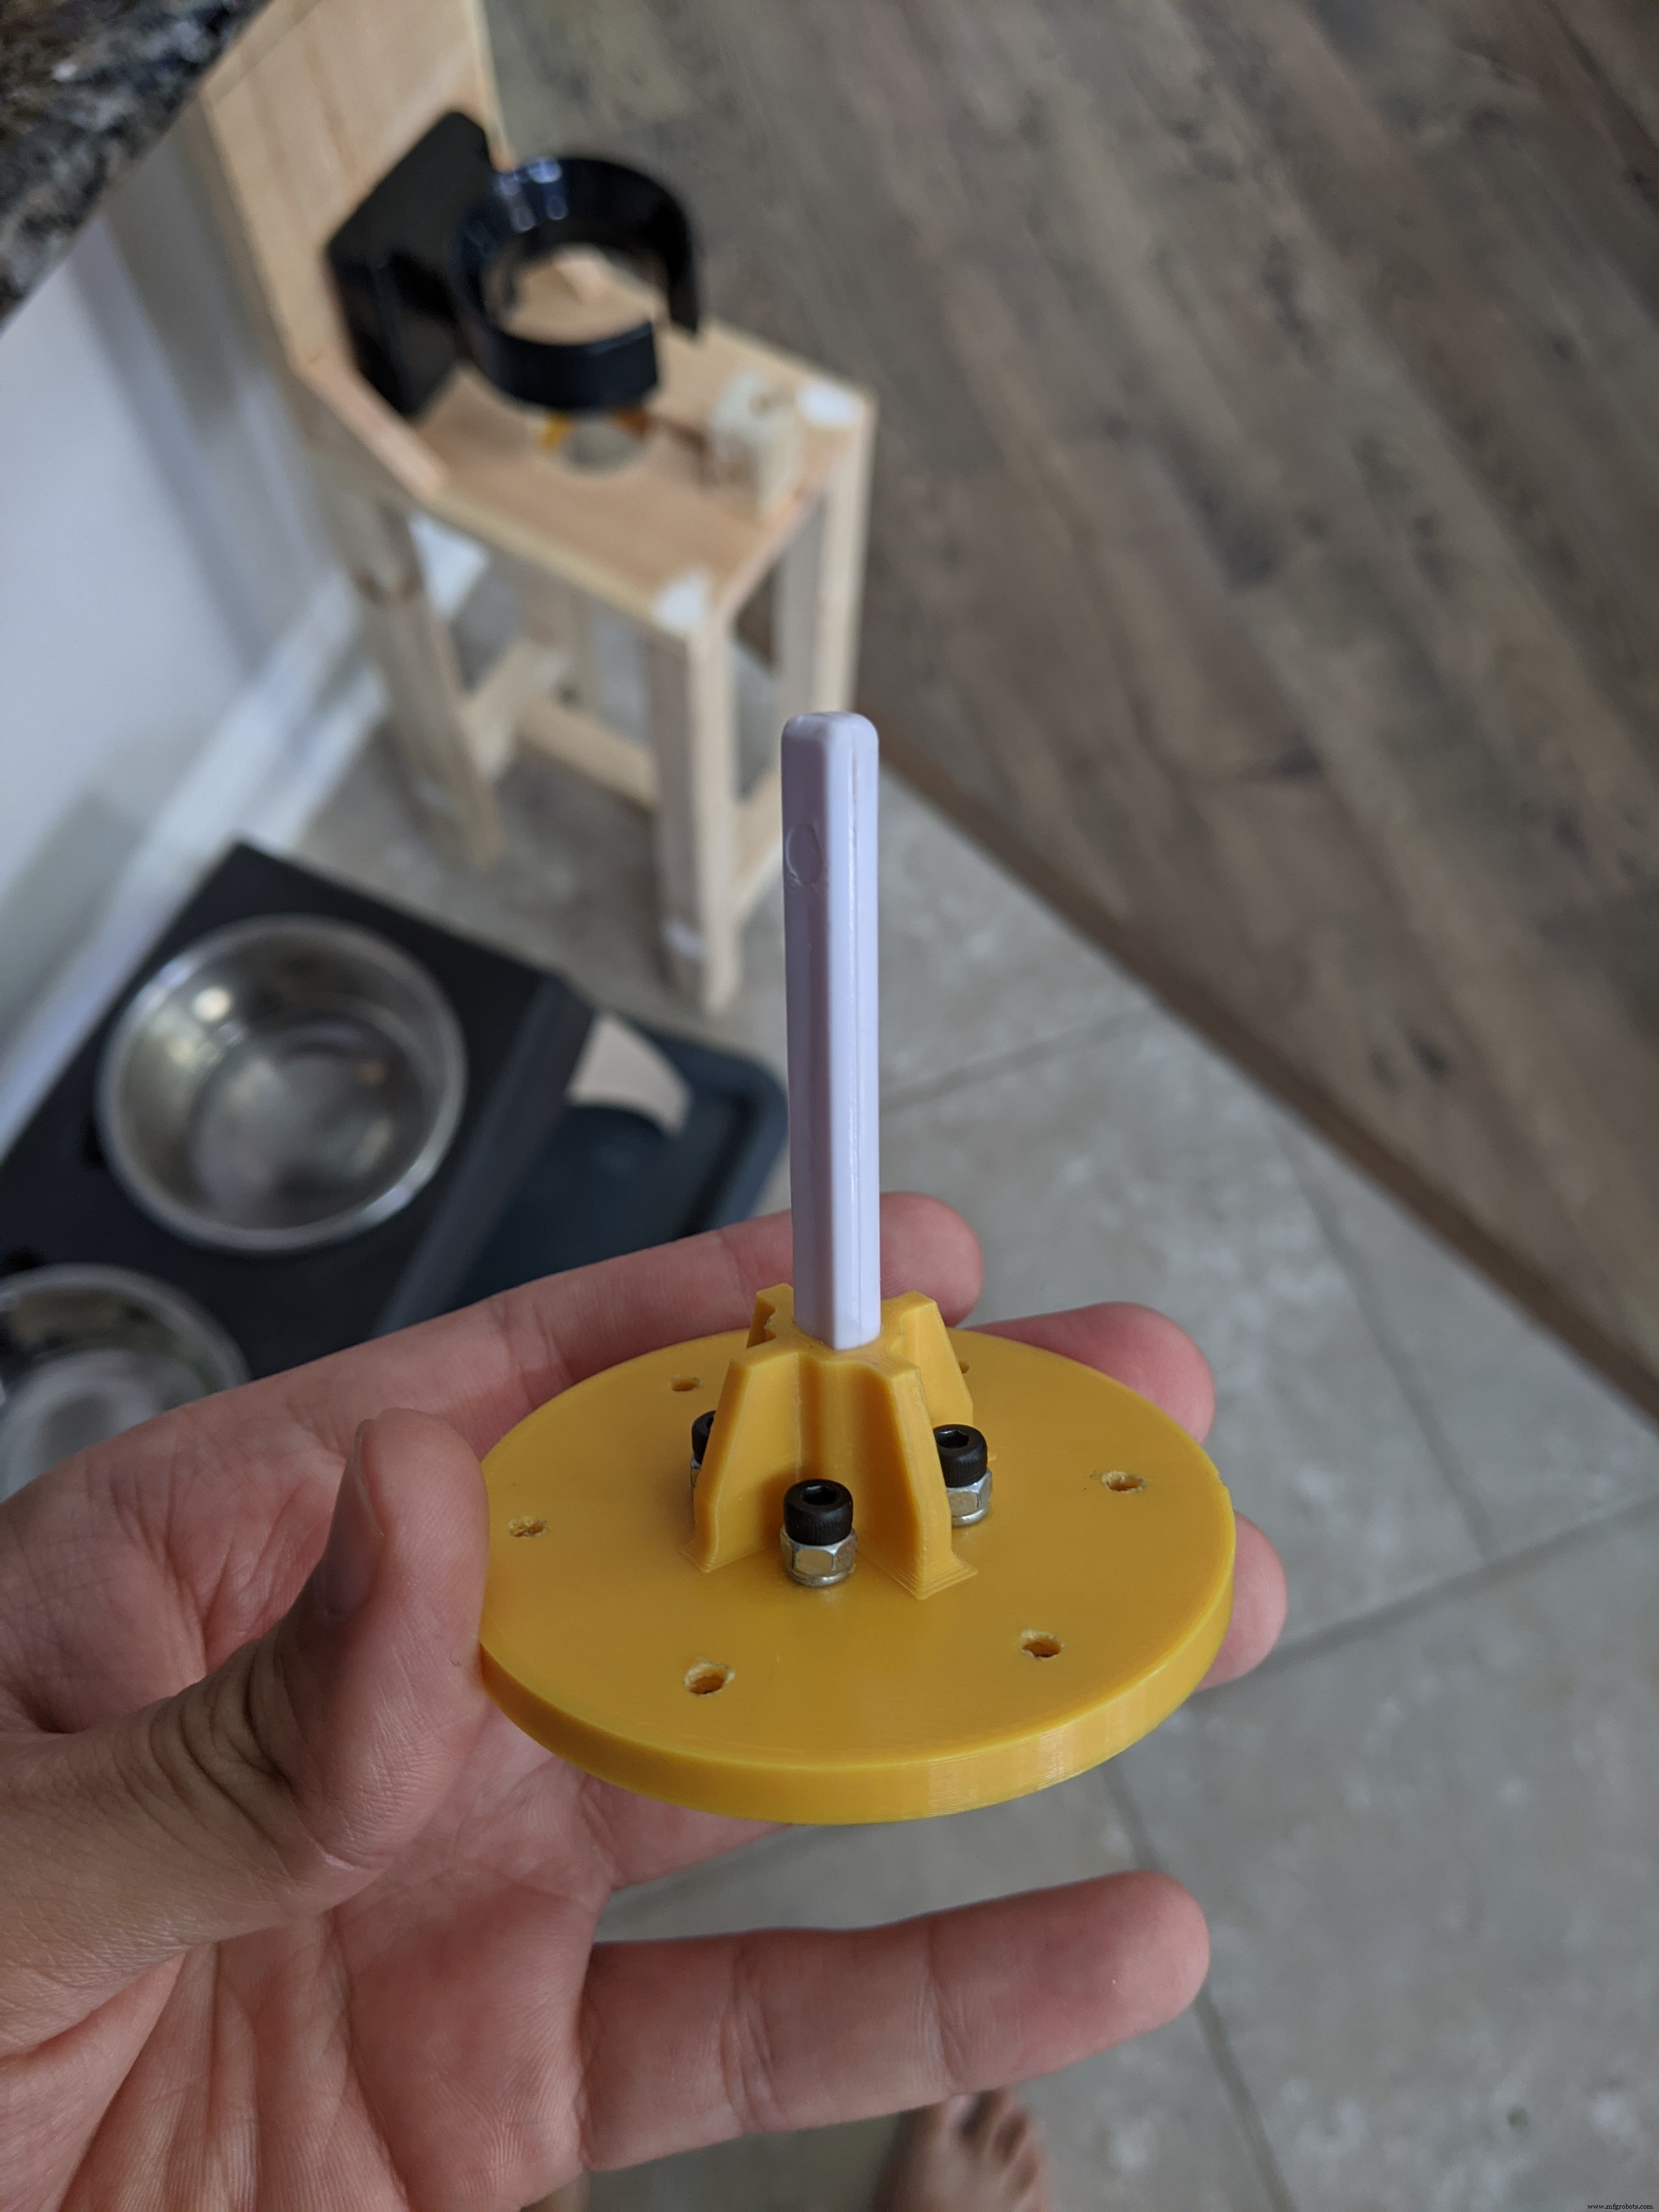
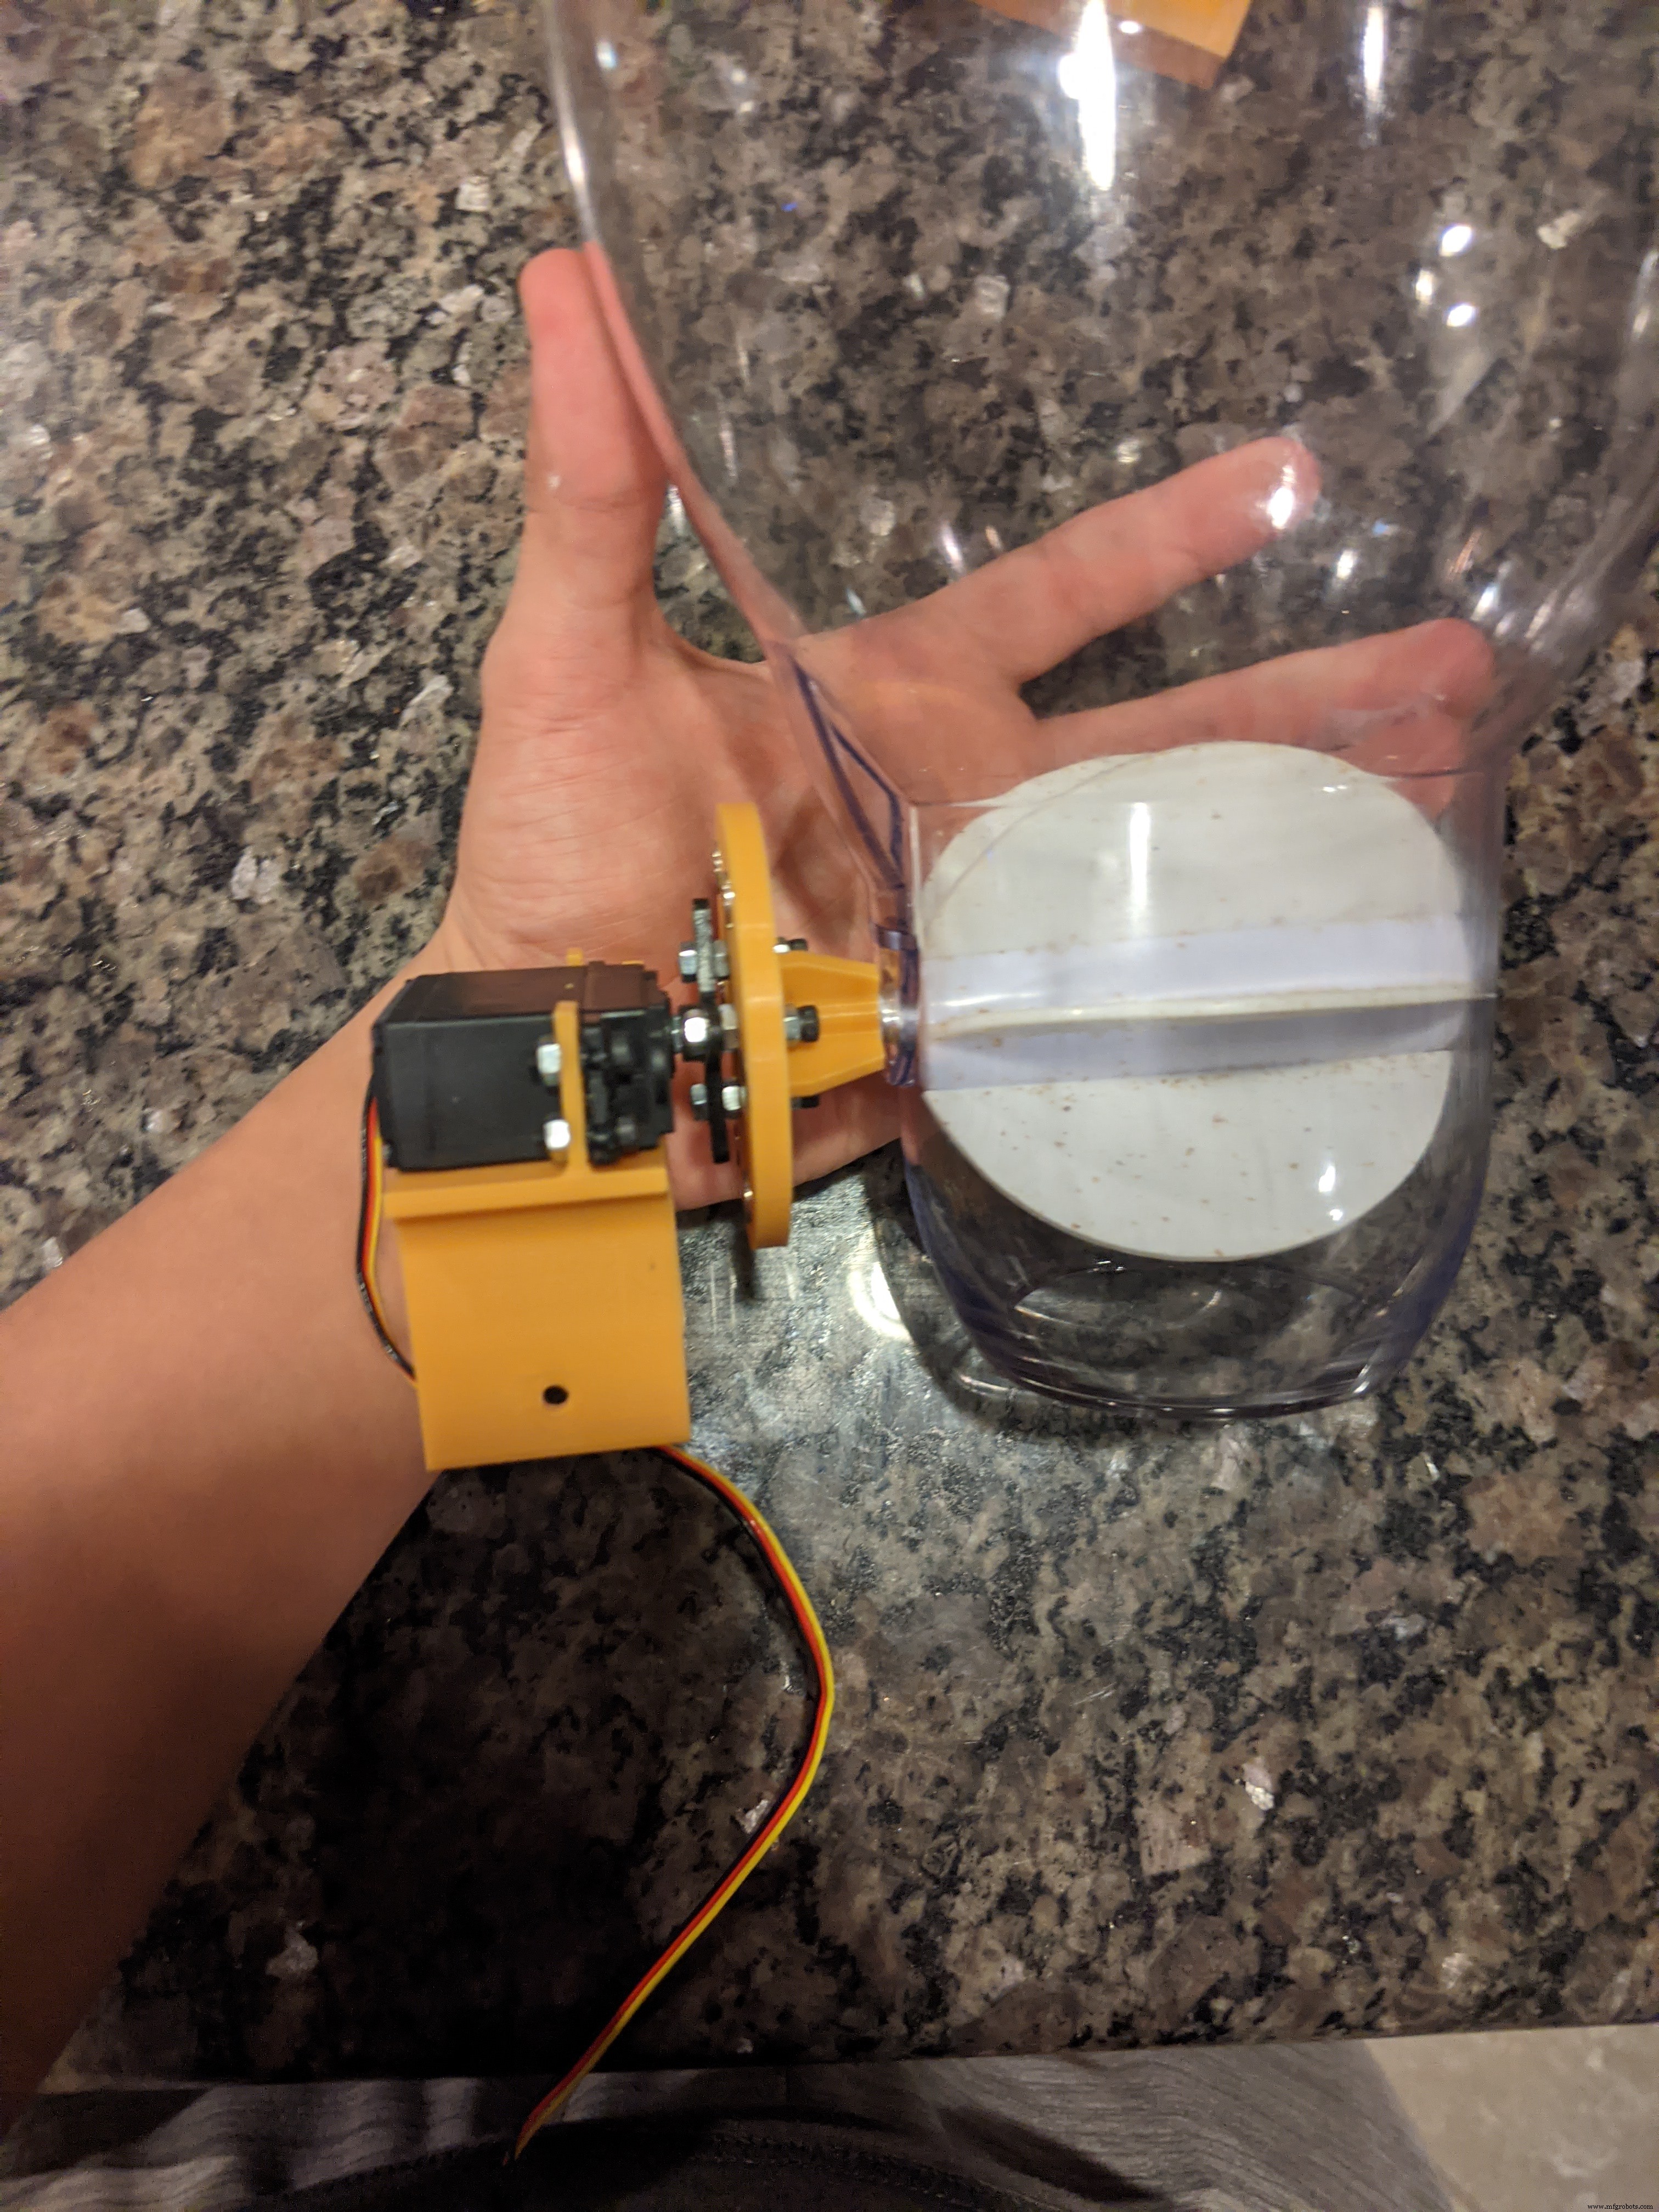
The encoder wheel attachmentThe wheel encoder wheel serves two purposes:
- Provides the Arduino with position feedback from the servo
- Attaches the rubber paddle to the servo
One feeding portion is equal to 1/6th (60 degrees) turn of the wheel. Use a food scale to measure out the amount of food your pet receives per feeding and then adjust the portion number until you get a range that satisfies that amount. I believe one feeding for me was about 173 grams of food. A portion size of 17 gave me a range of 170-177 grams per feeding. It all depends on the size of your kibble. Make sure the horn is sitting between the 8 M3 hex nuts.

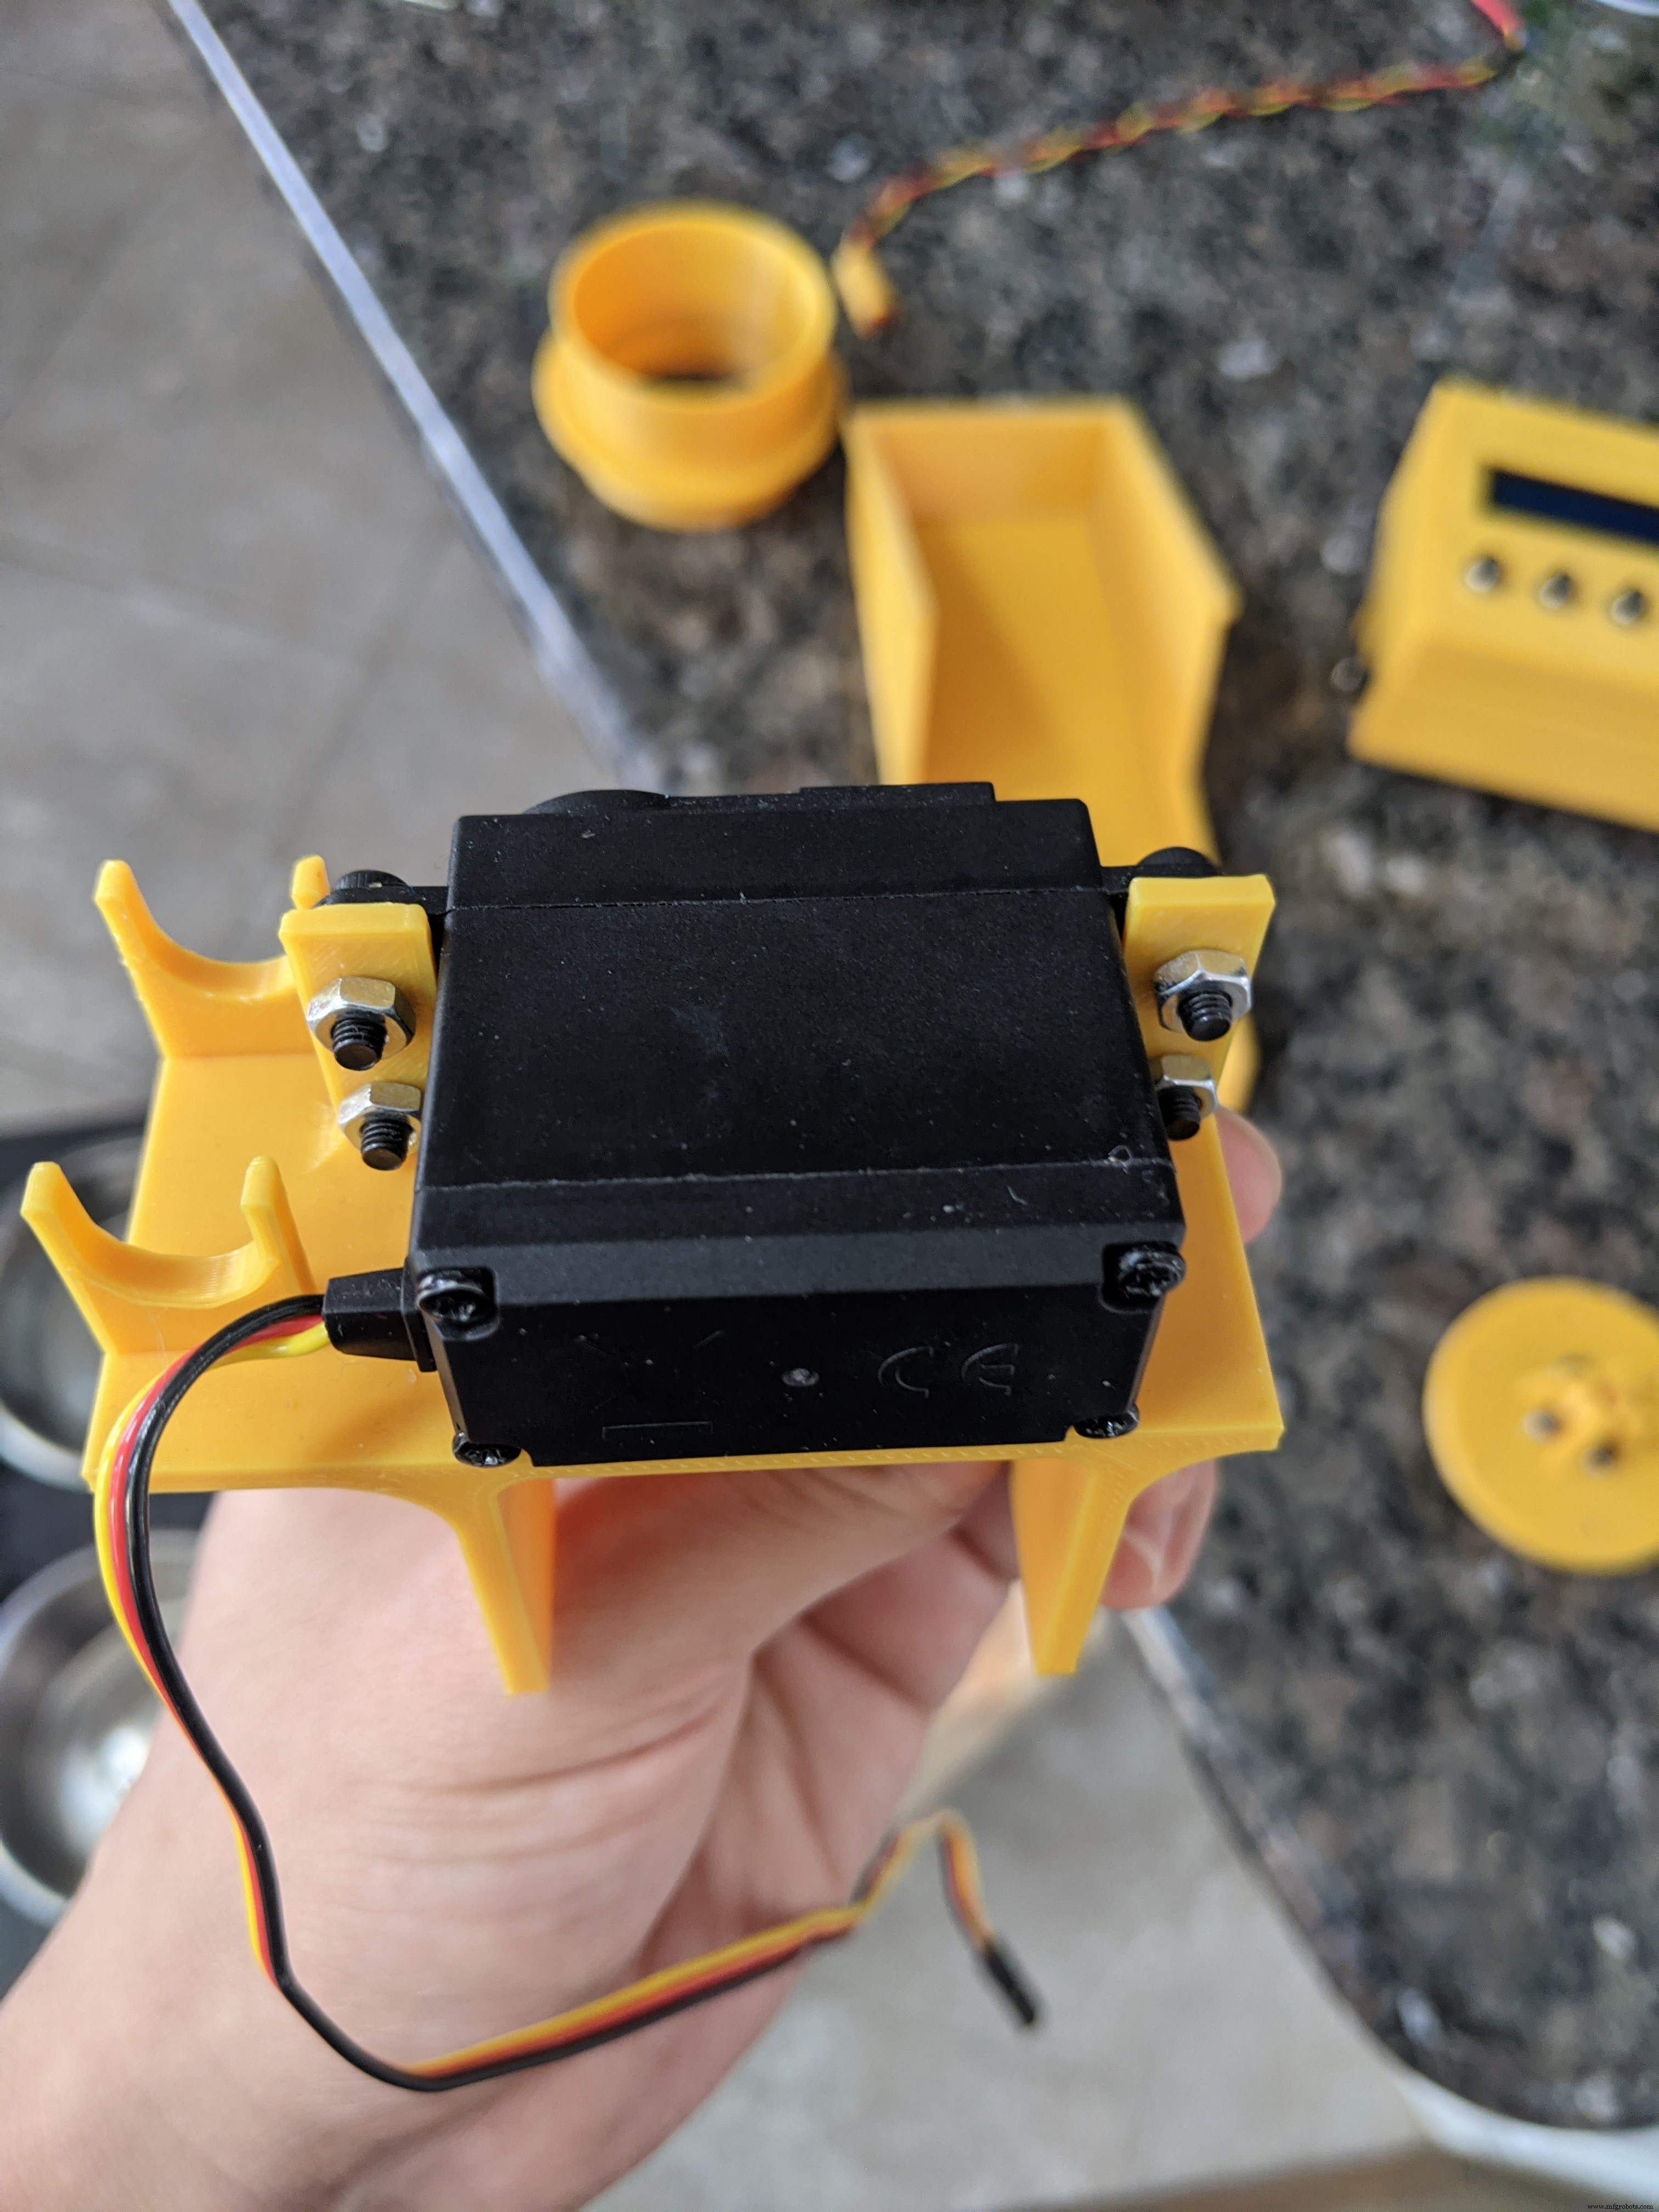
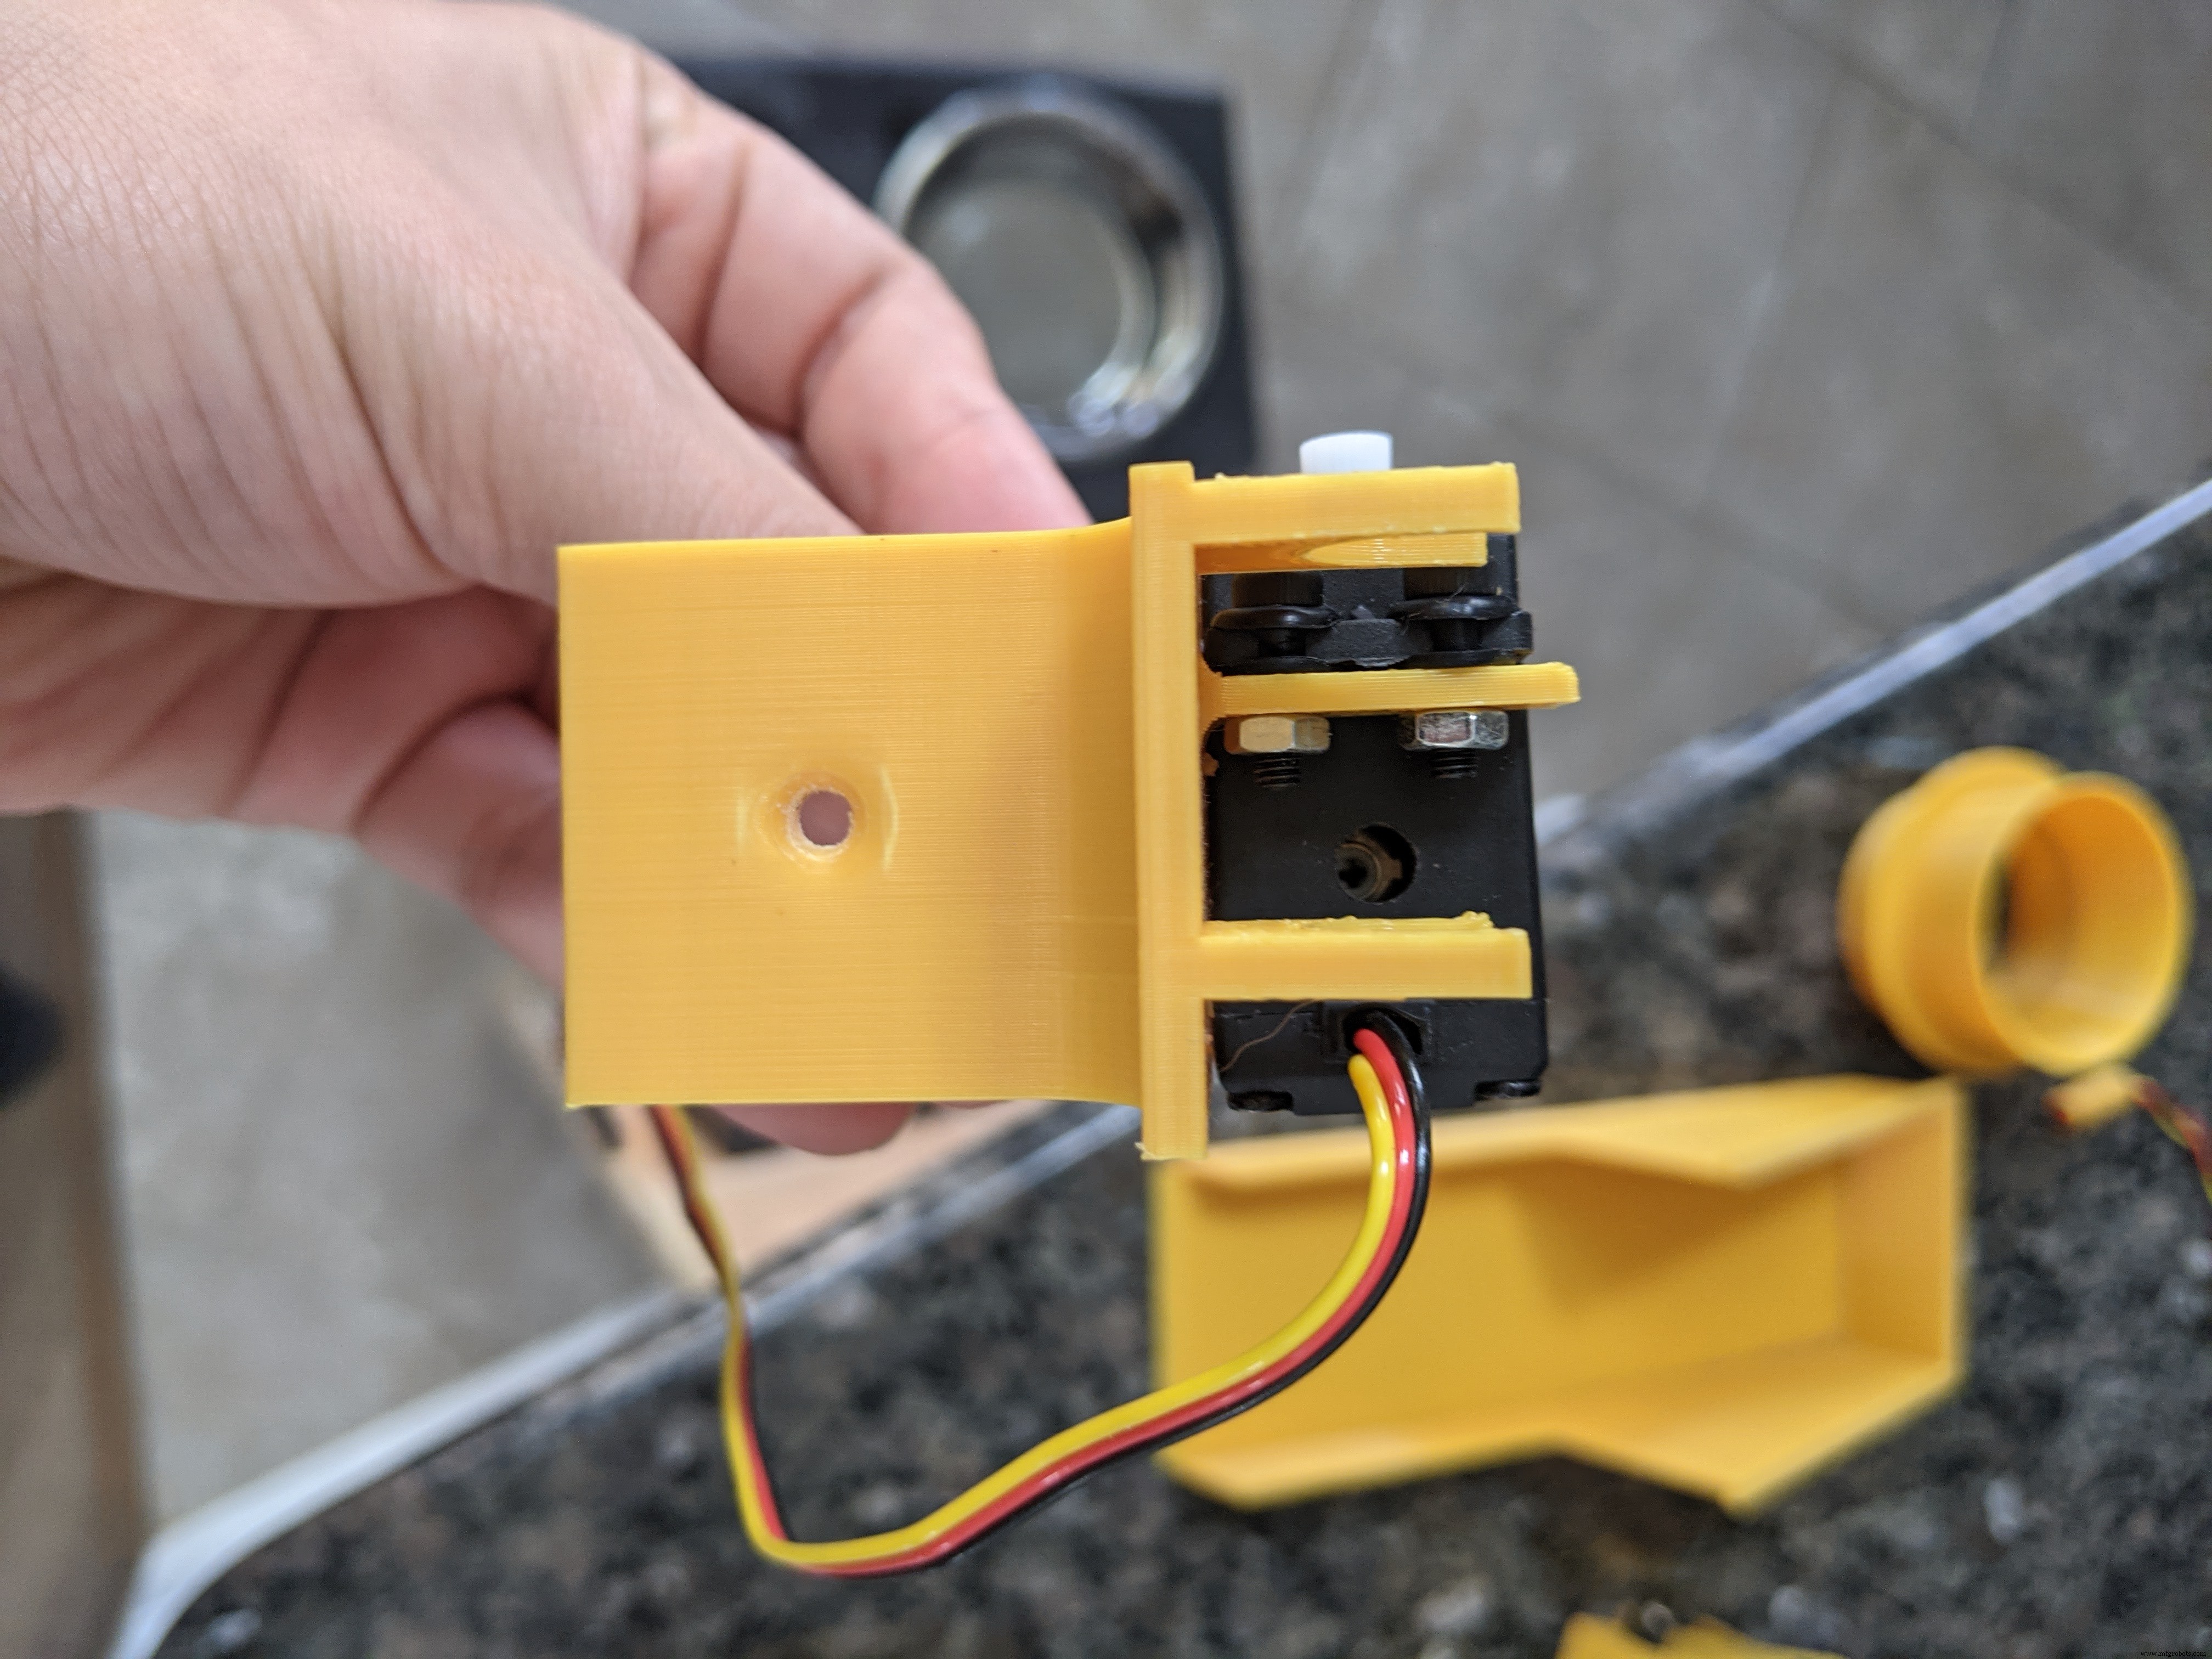
This custom servo bracket also holds the hall sensor and mounts the servo onto a piece of 1-1/2 x 1-1/2 inch (3.8 x 3.8 cm) wood. The length of the wood will depend on where the servo sits (more on that later). There's plenty of room for error with the mount so don't worry too much about getting the length perfect.

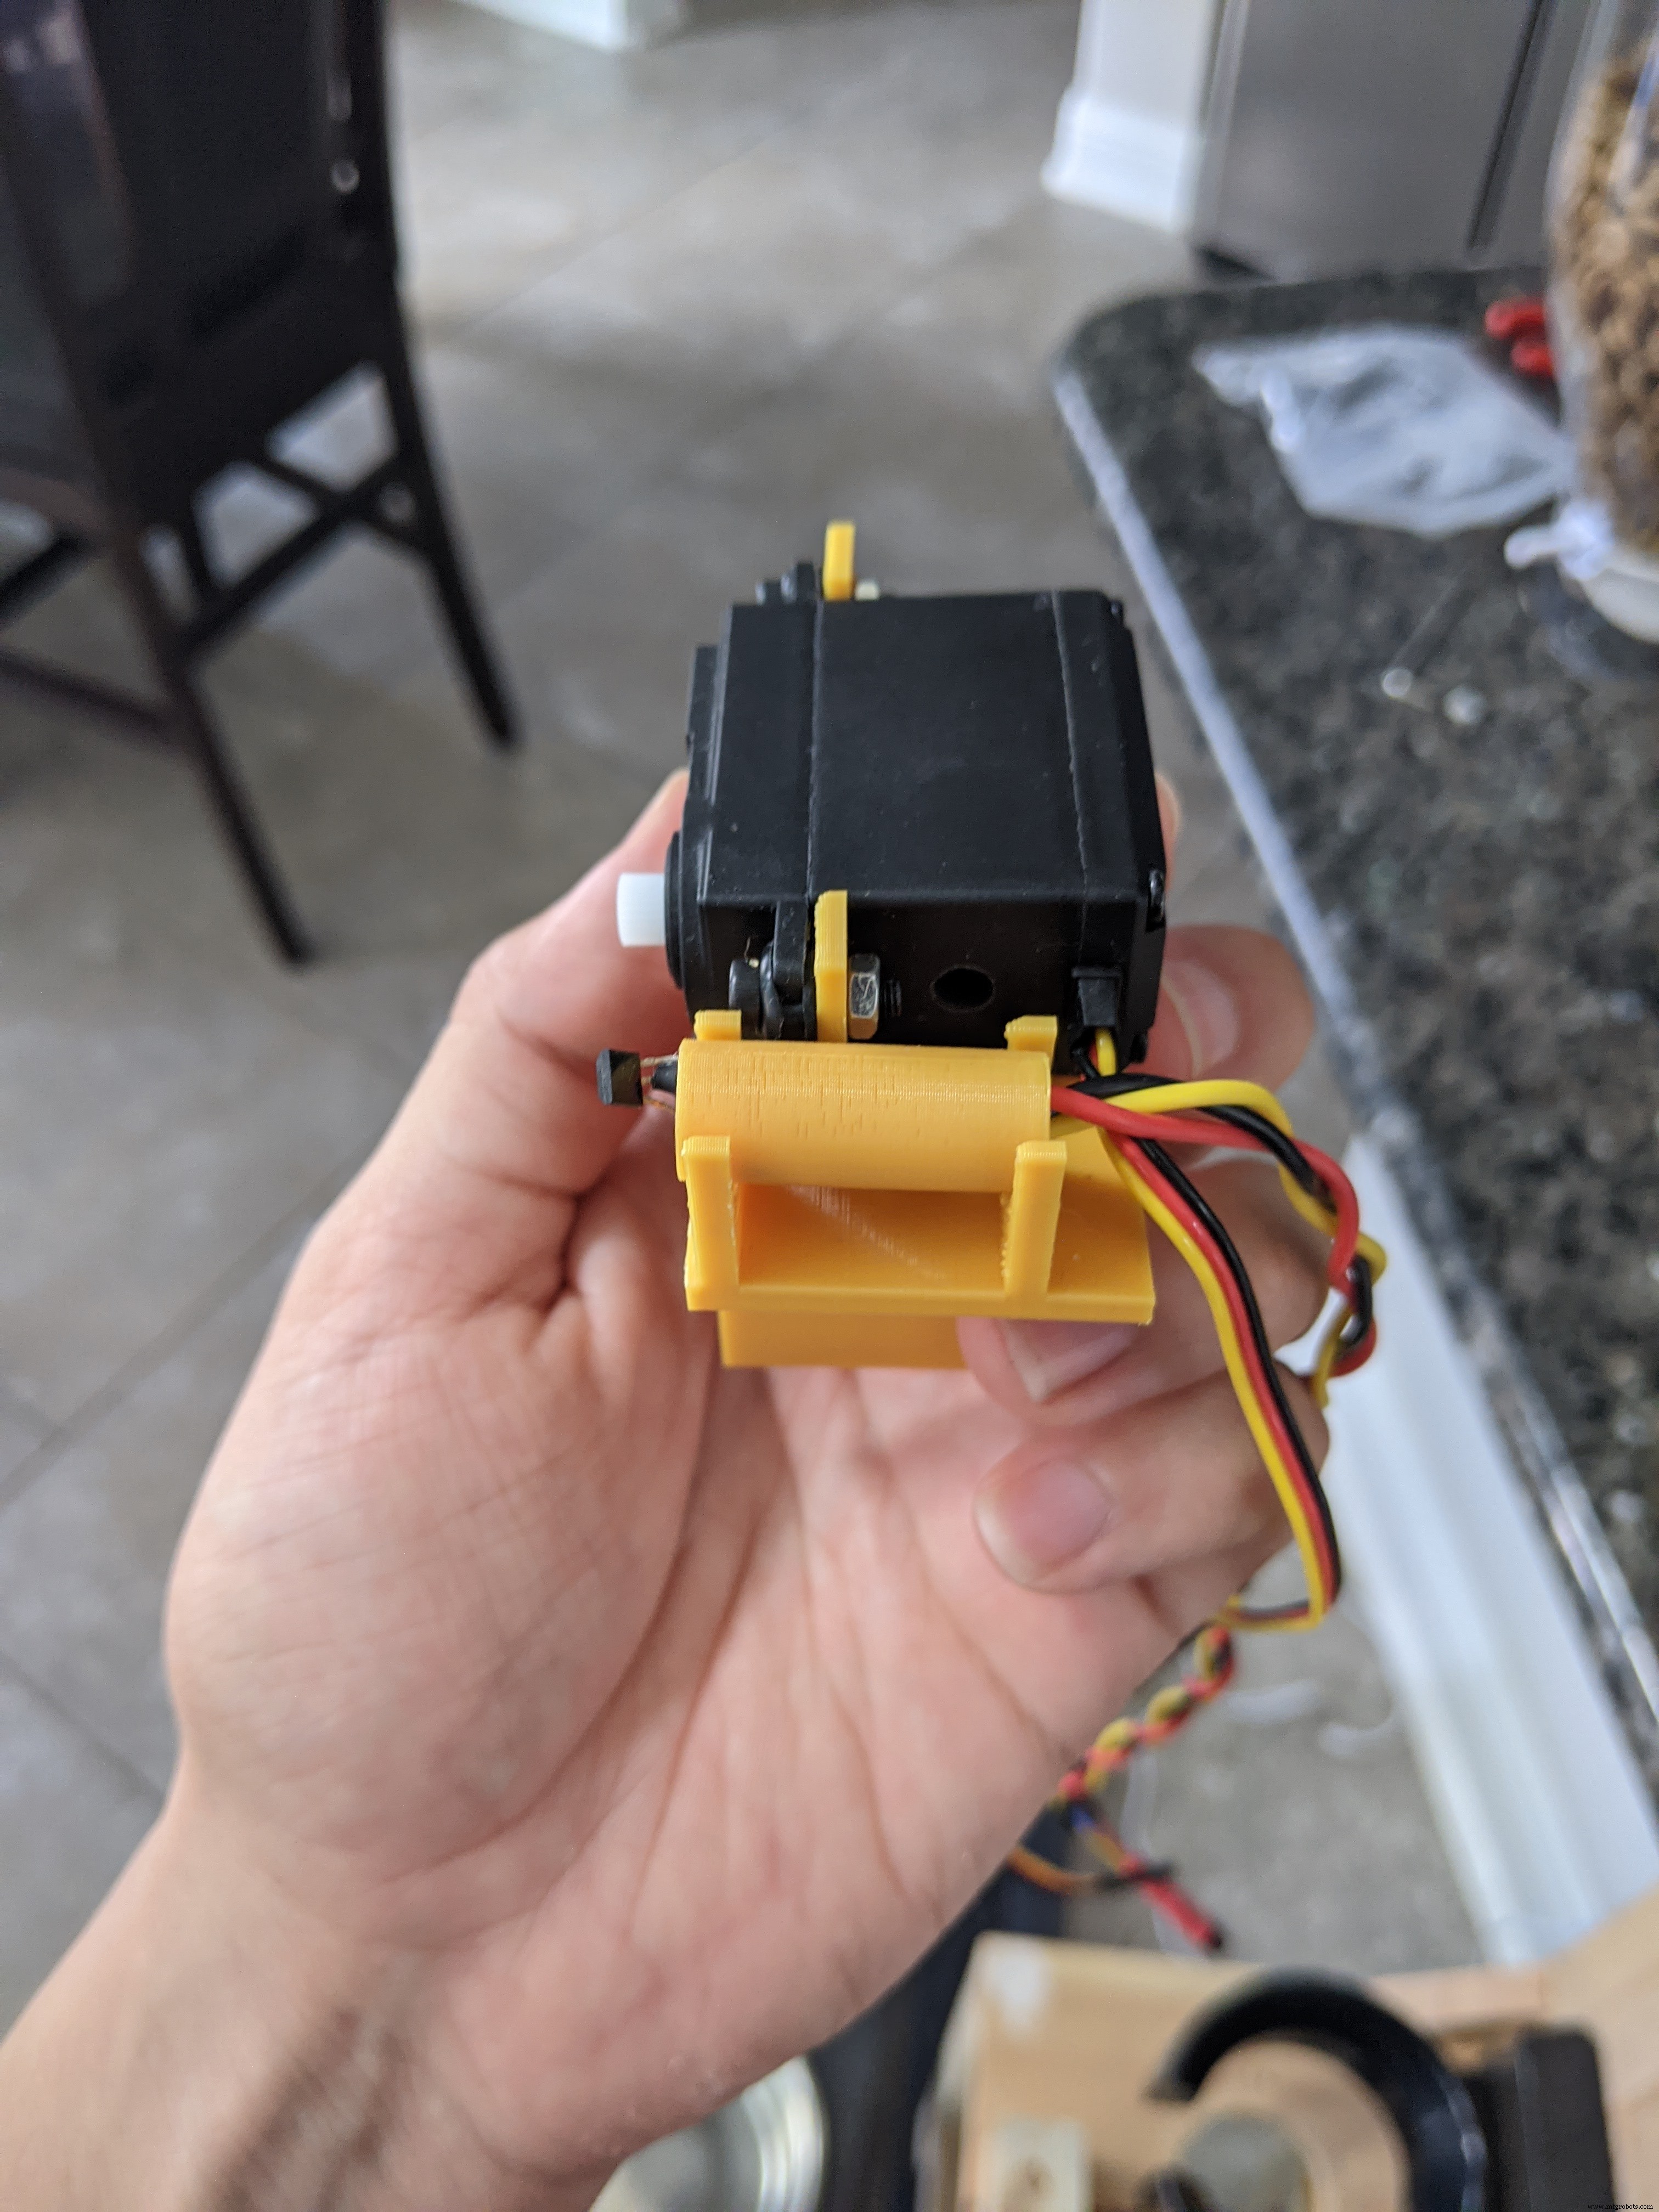
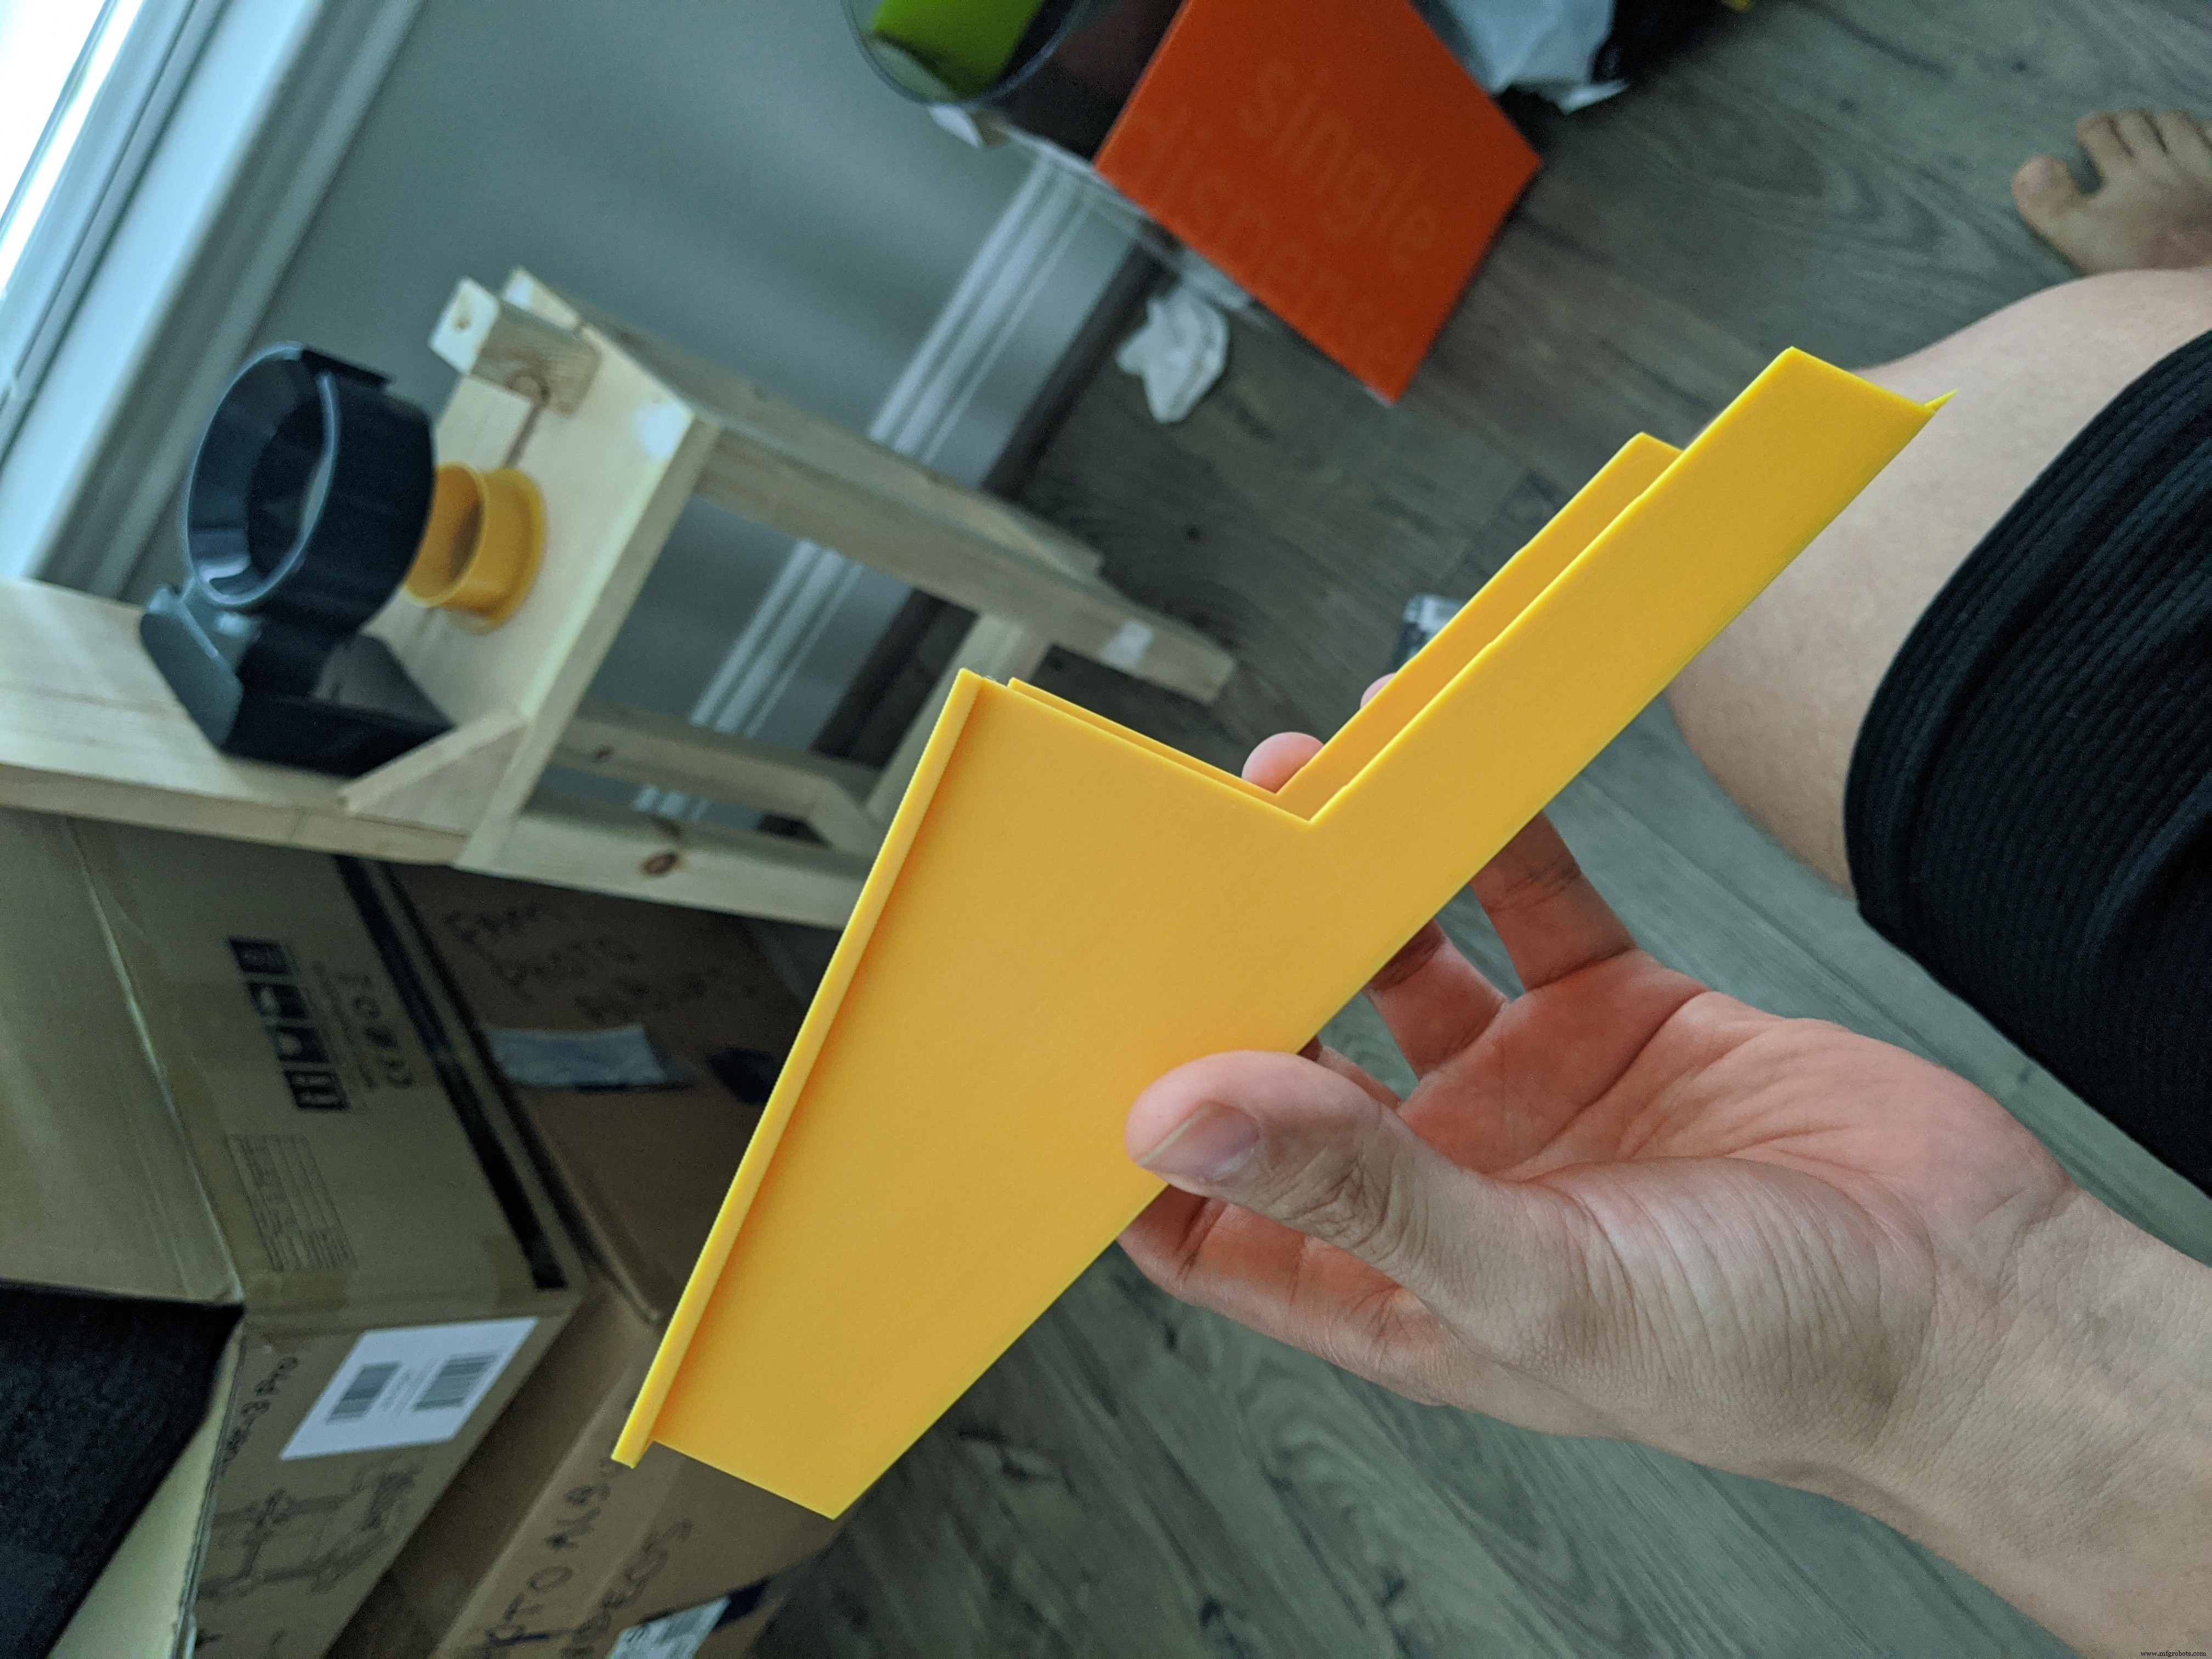
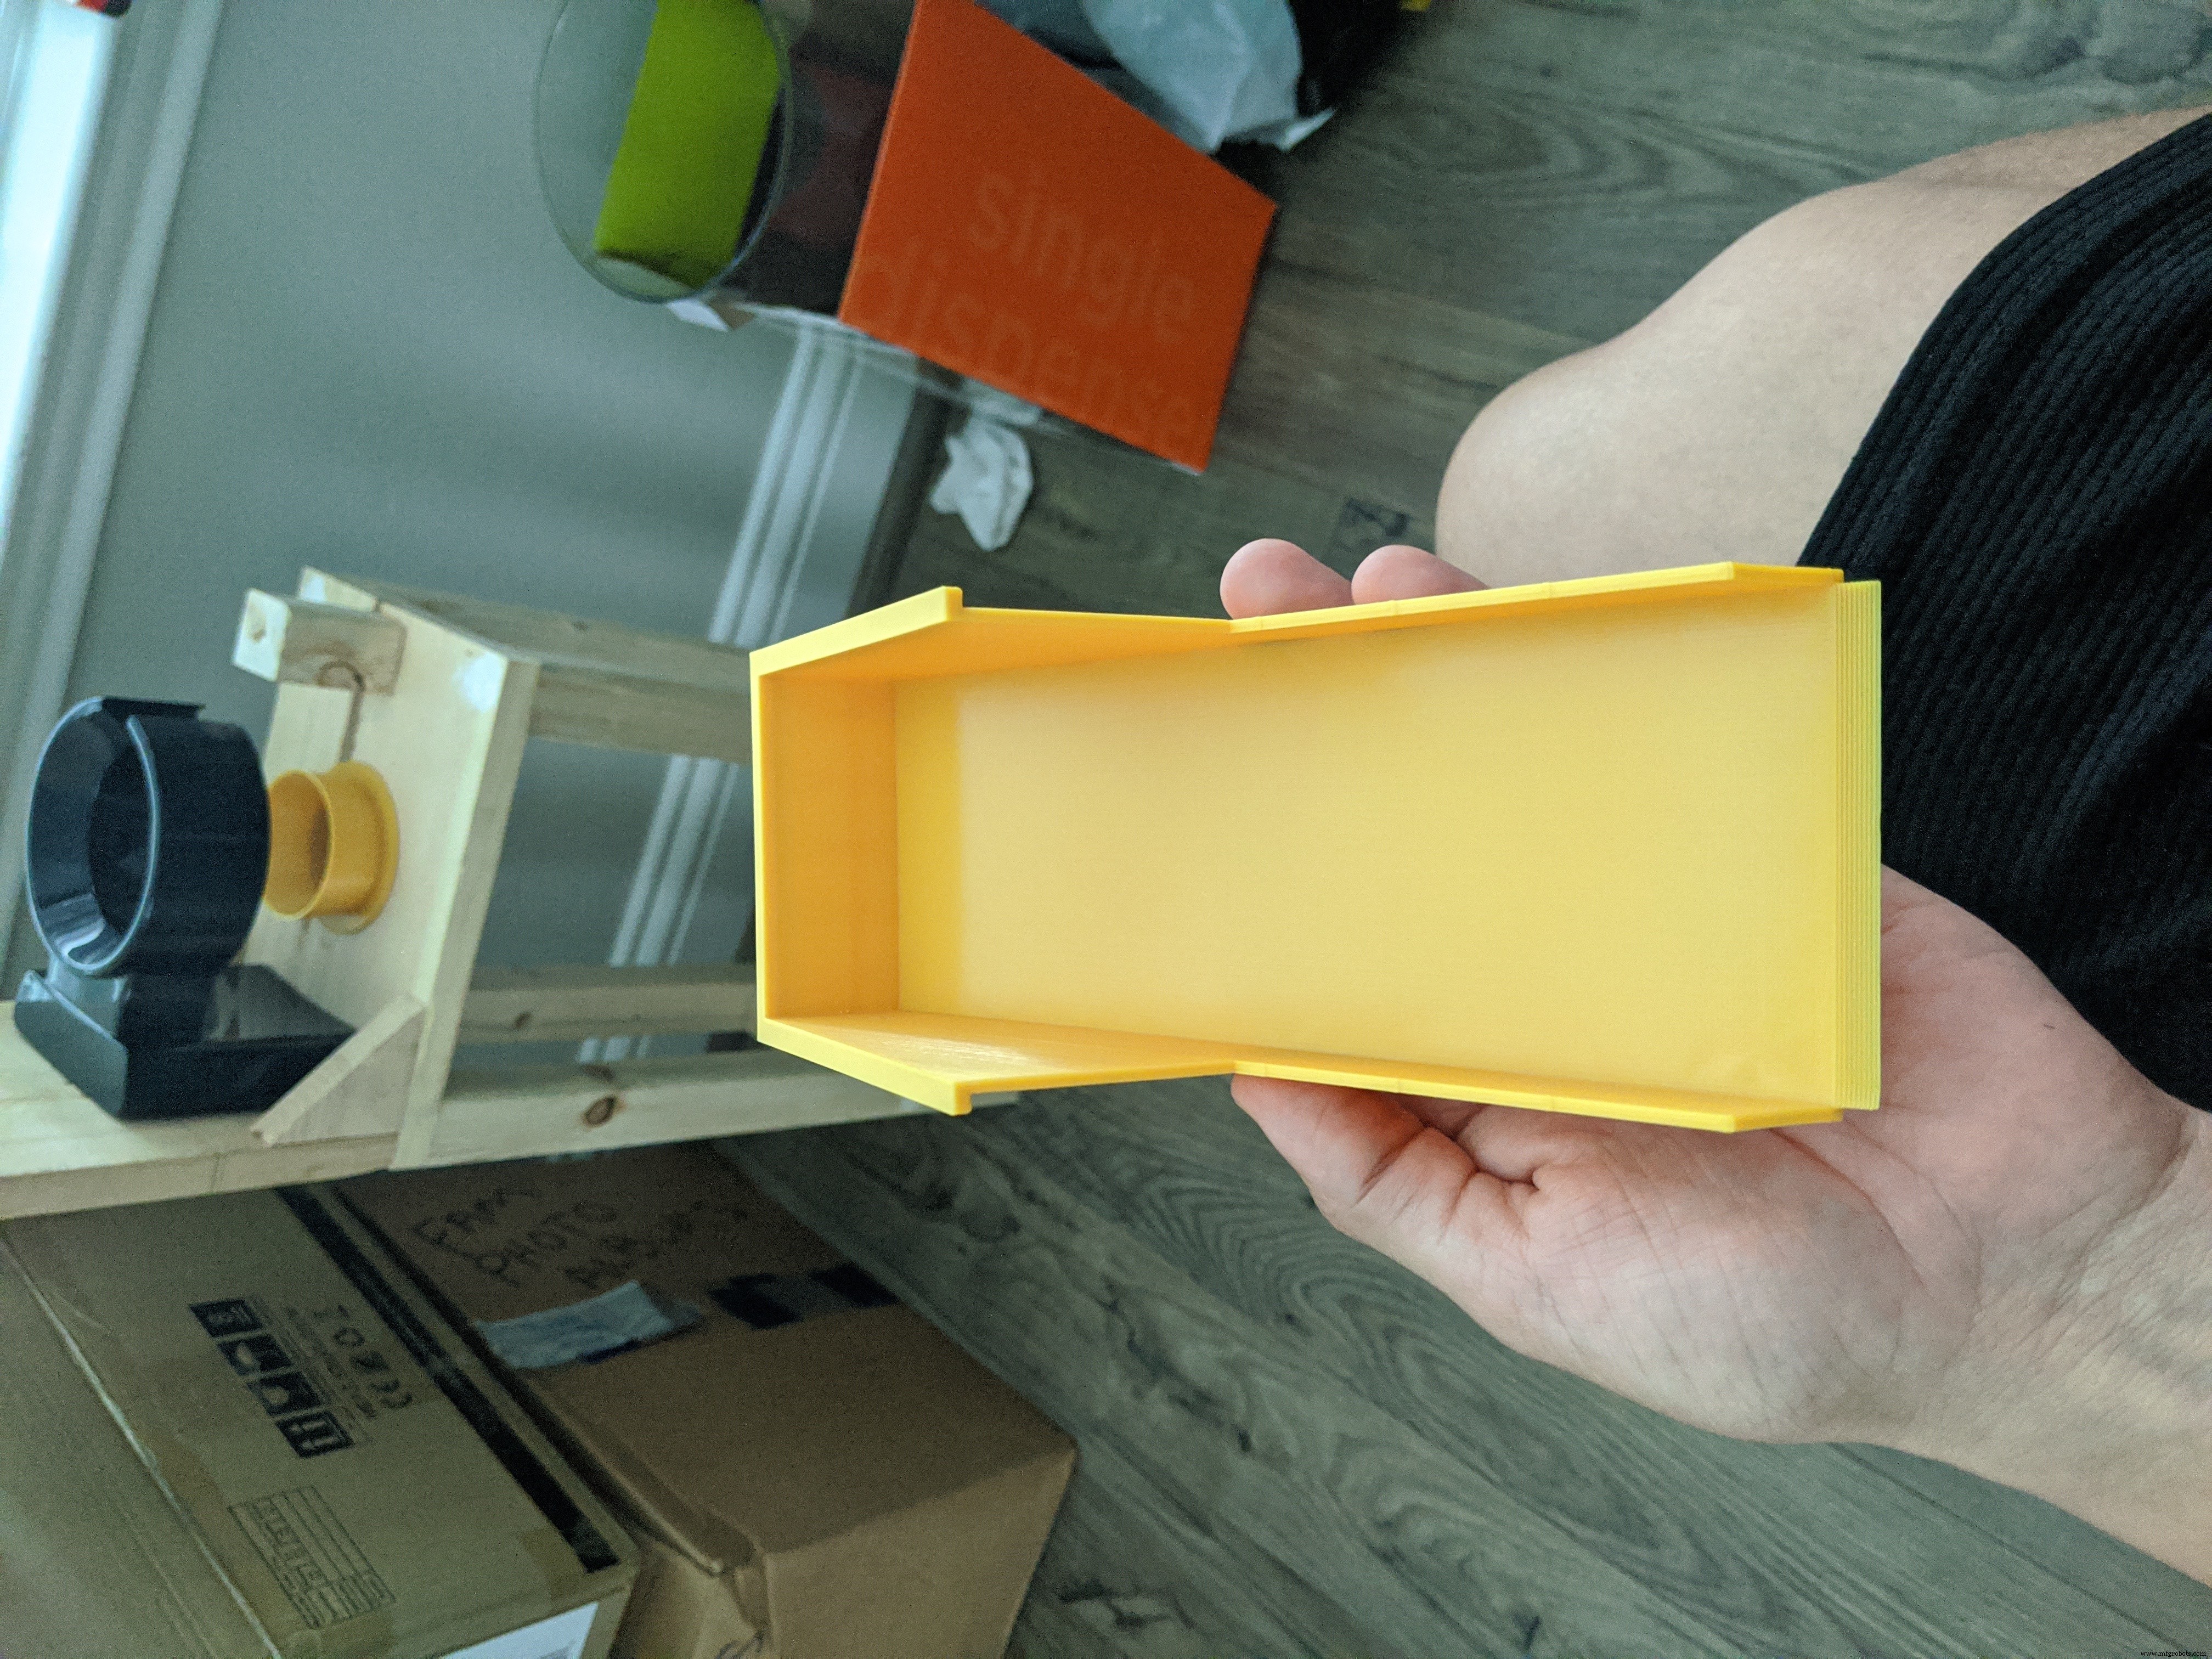
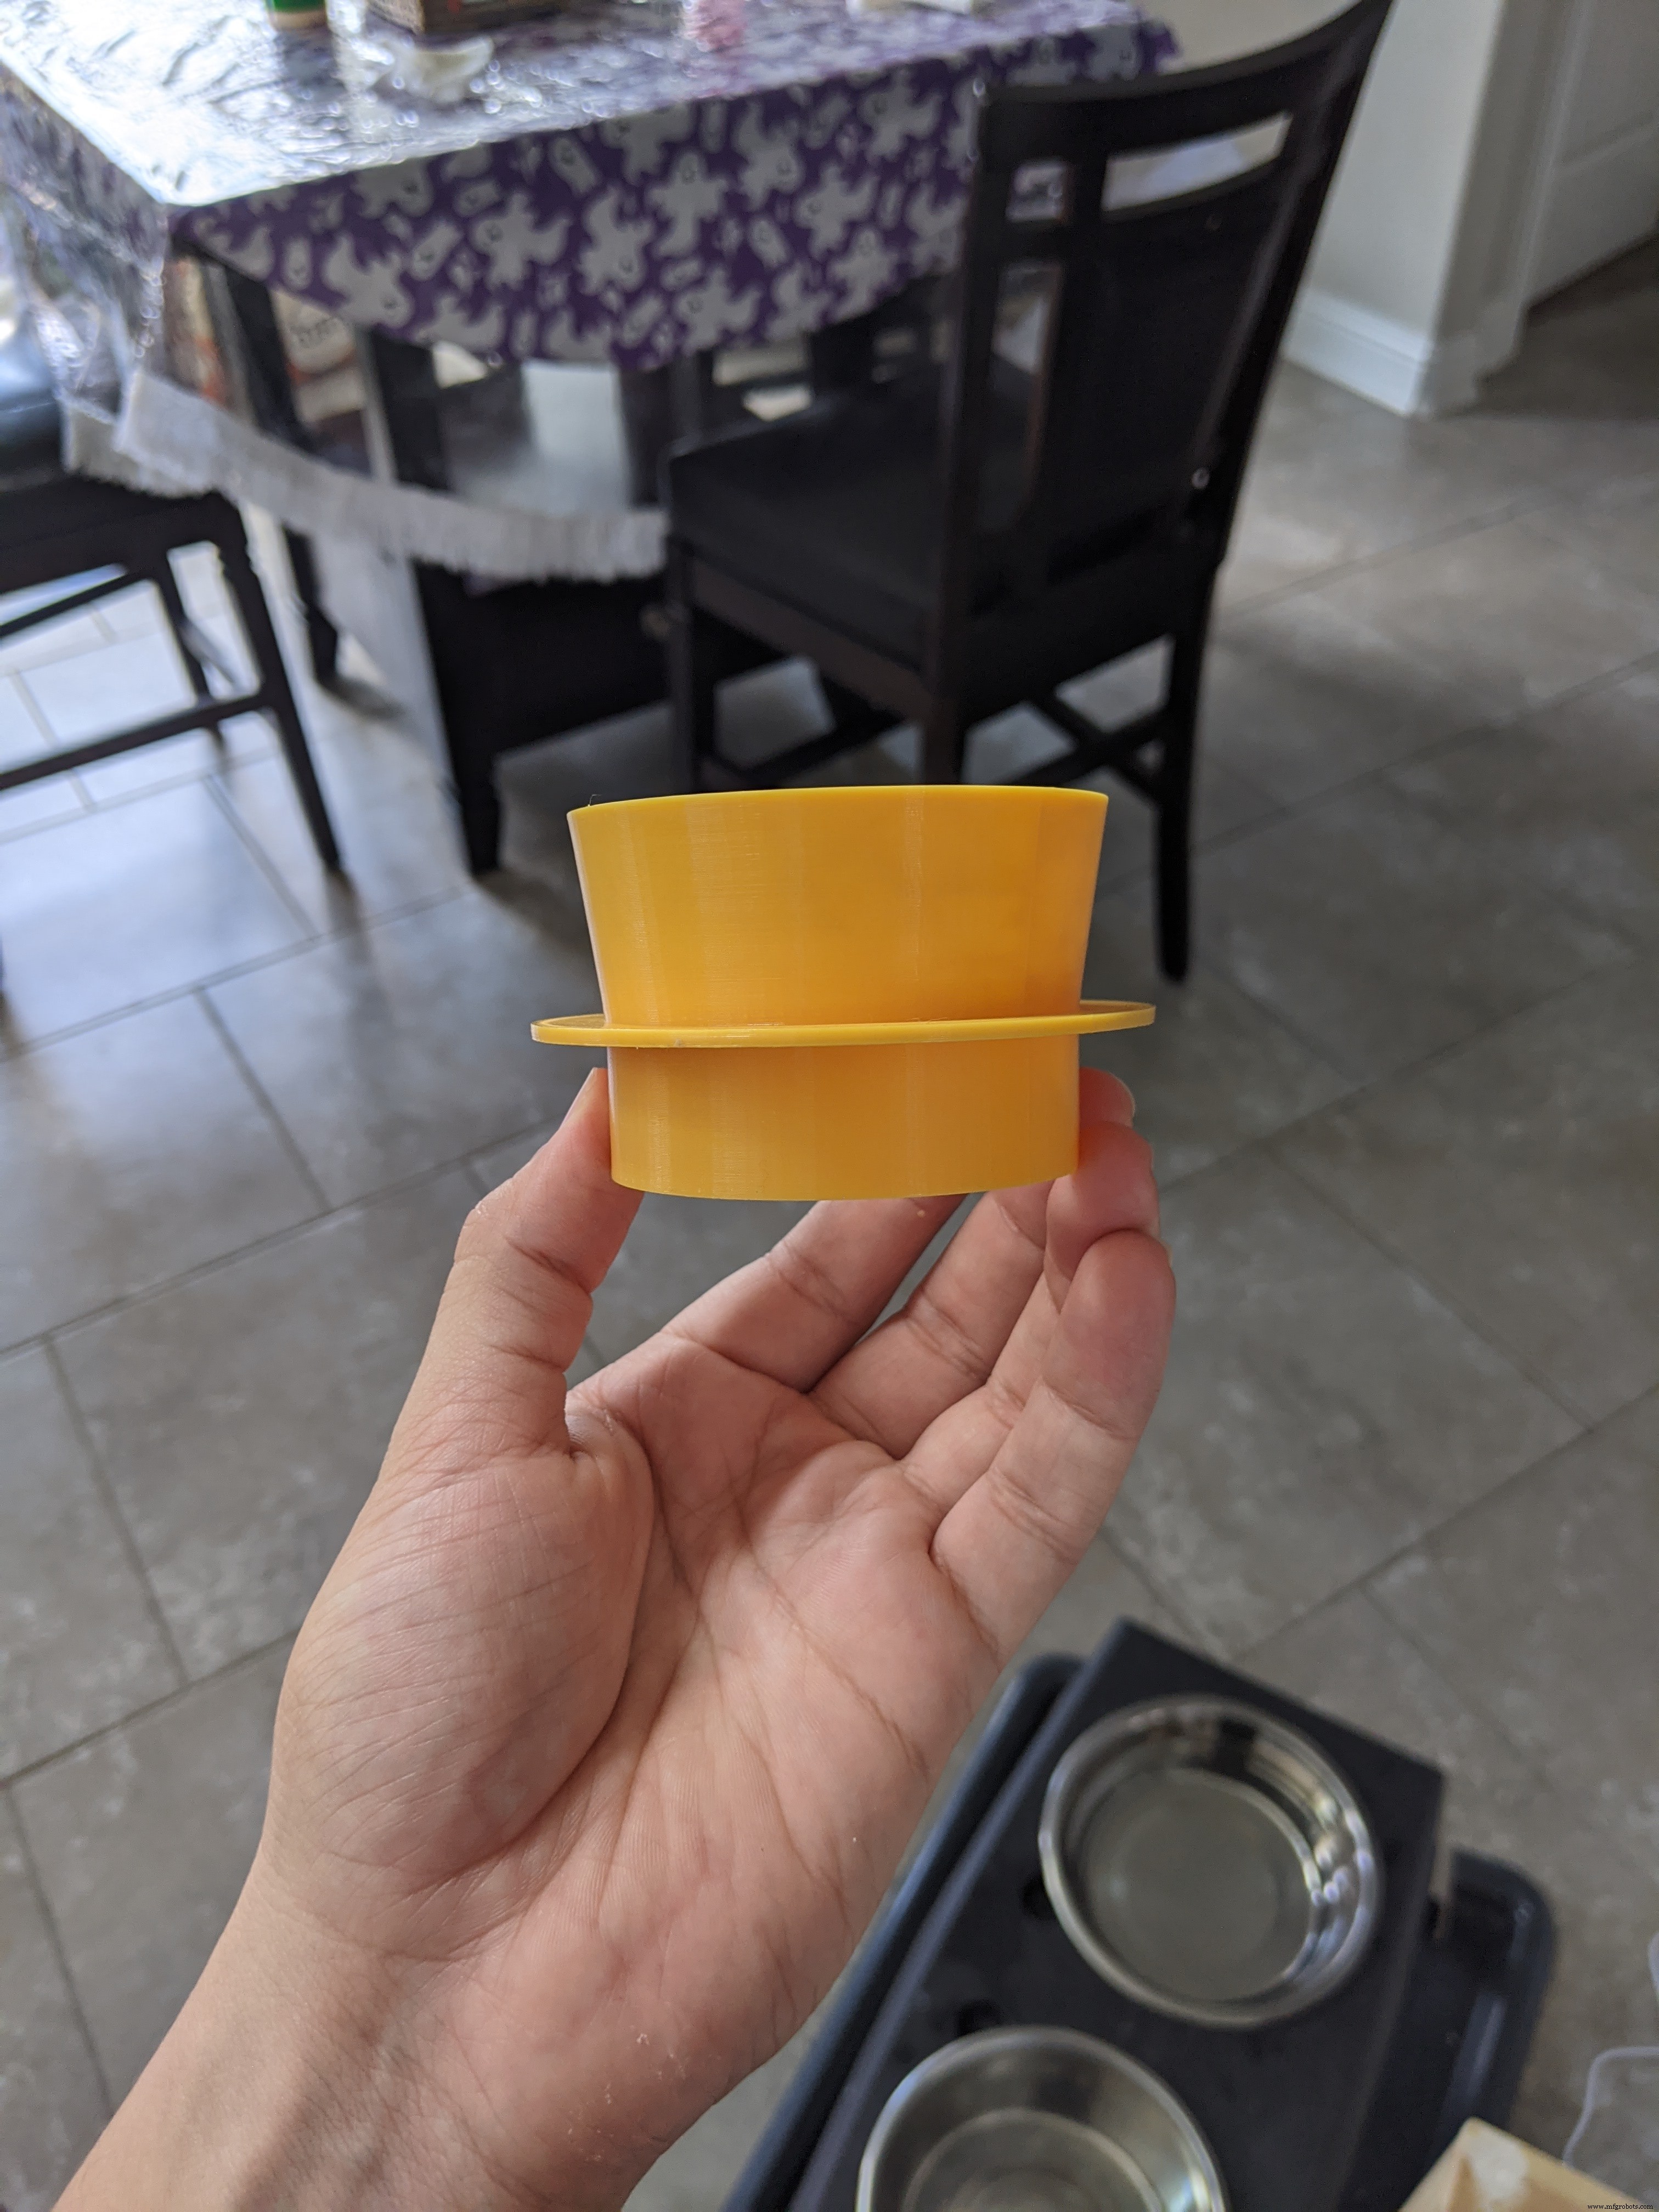
This makes up the food delivery system. The food comes down from the dispenser through the funnel and onto the chute and into the food bowl. Unfortunately, I did not take pictures of the chute rail before mounting it.
*Disclaimer* I did not take pictures of every step of the assembly process. Some of these pictures will have skipped steps, but I will still take you step-by-step for the frame assembly.
Makesuretopre-drillholesforanyscrewthatyouuse.Youdowanttosplitthewood!
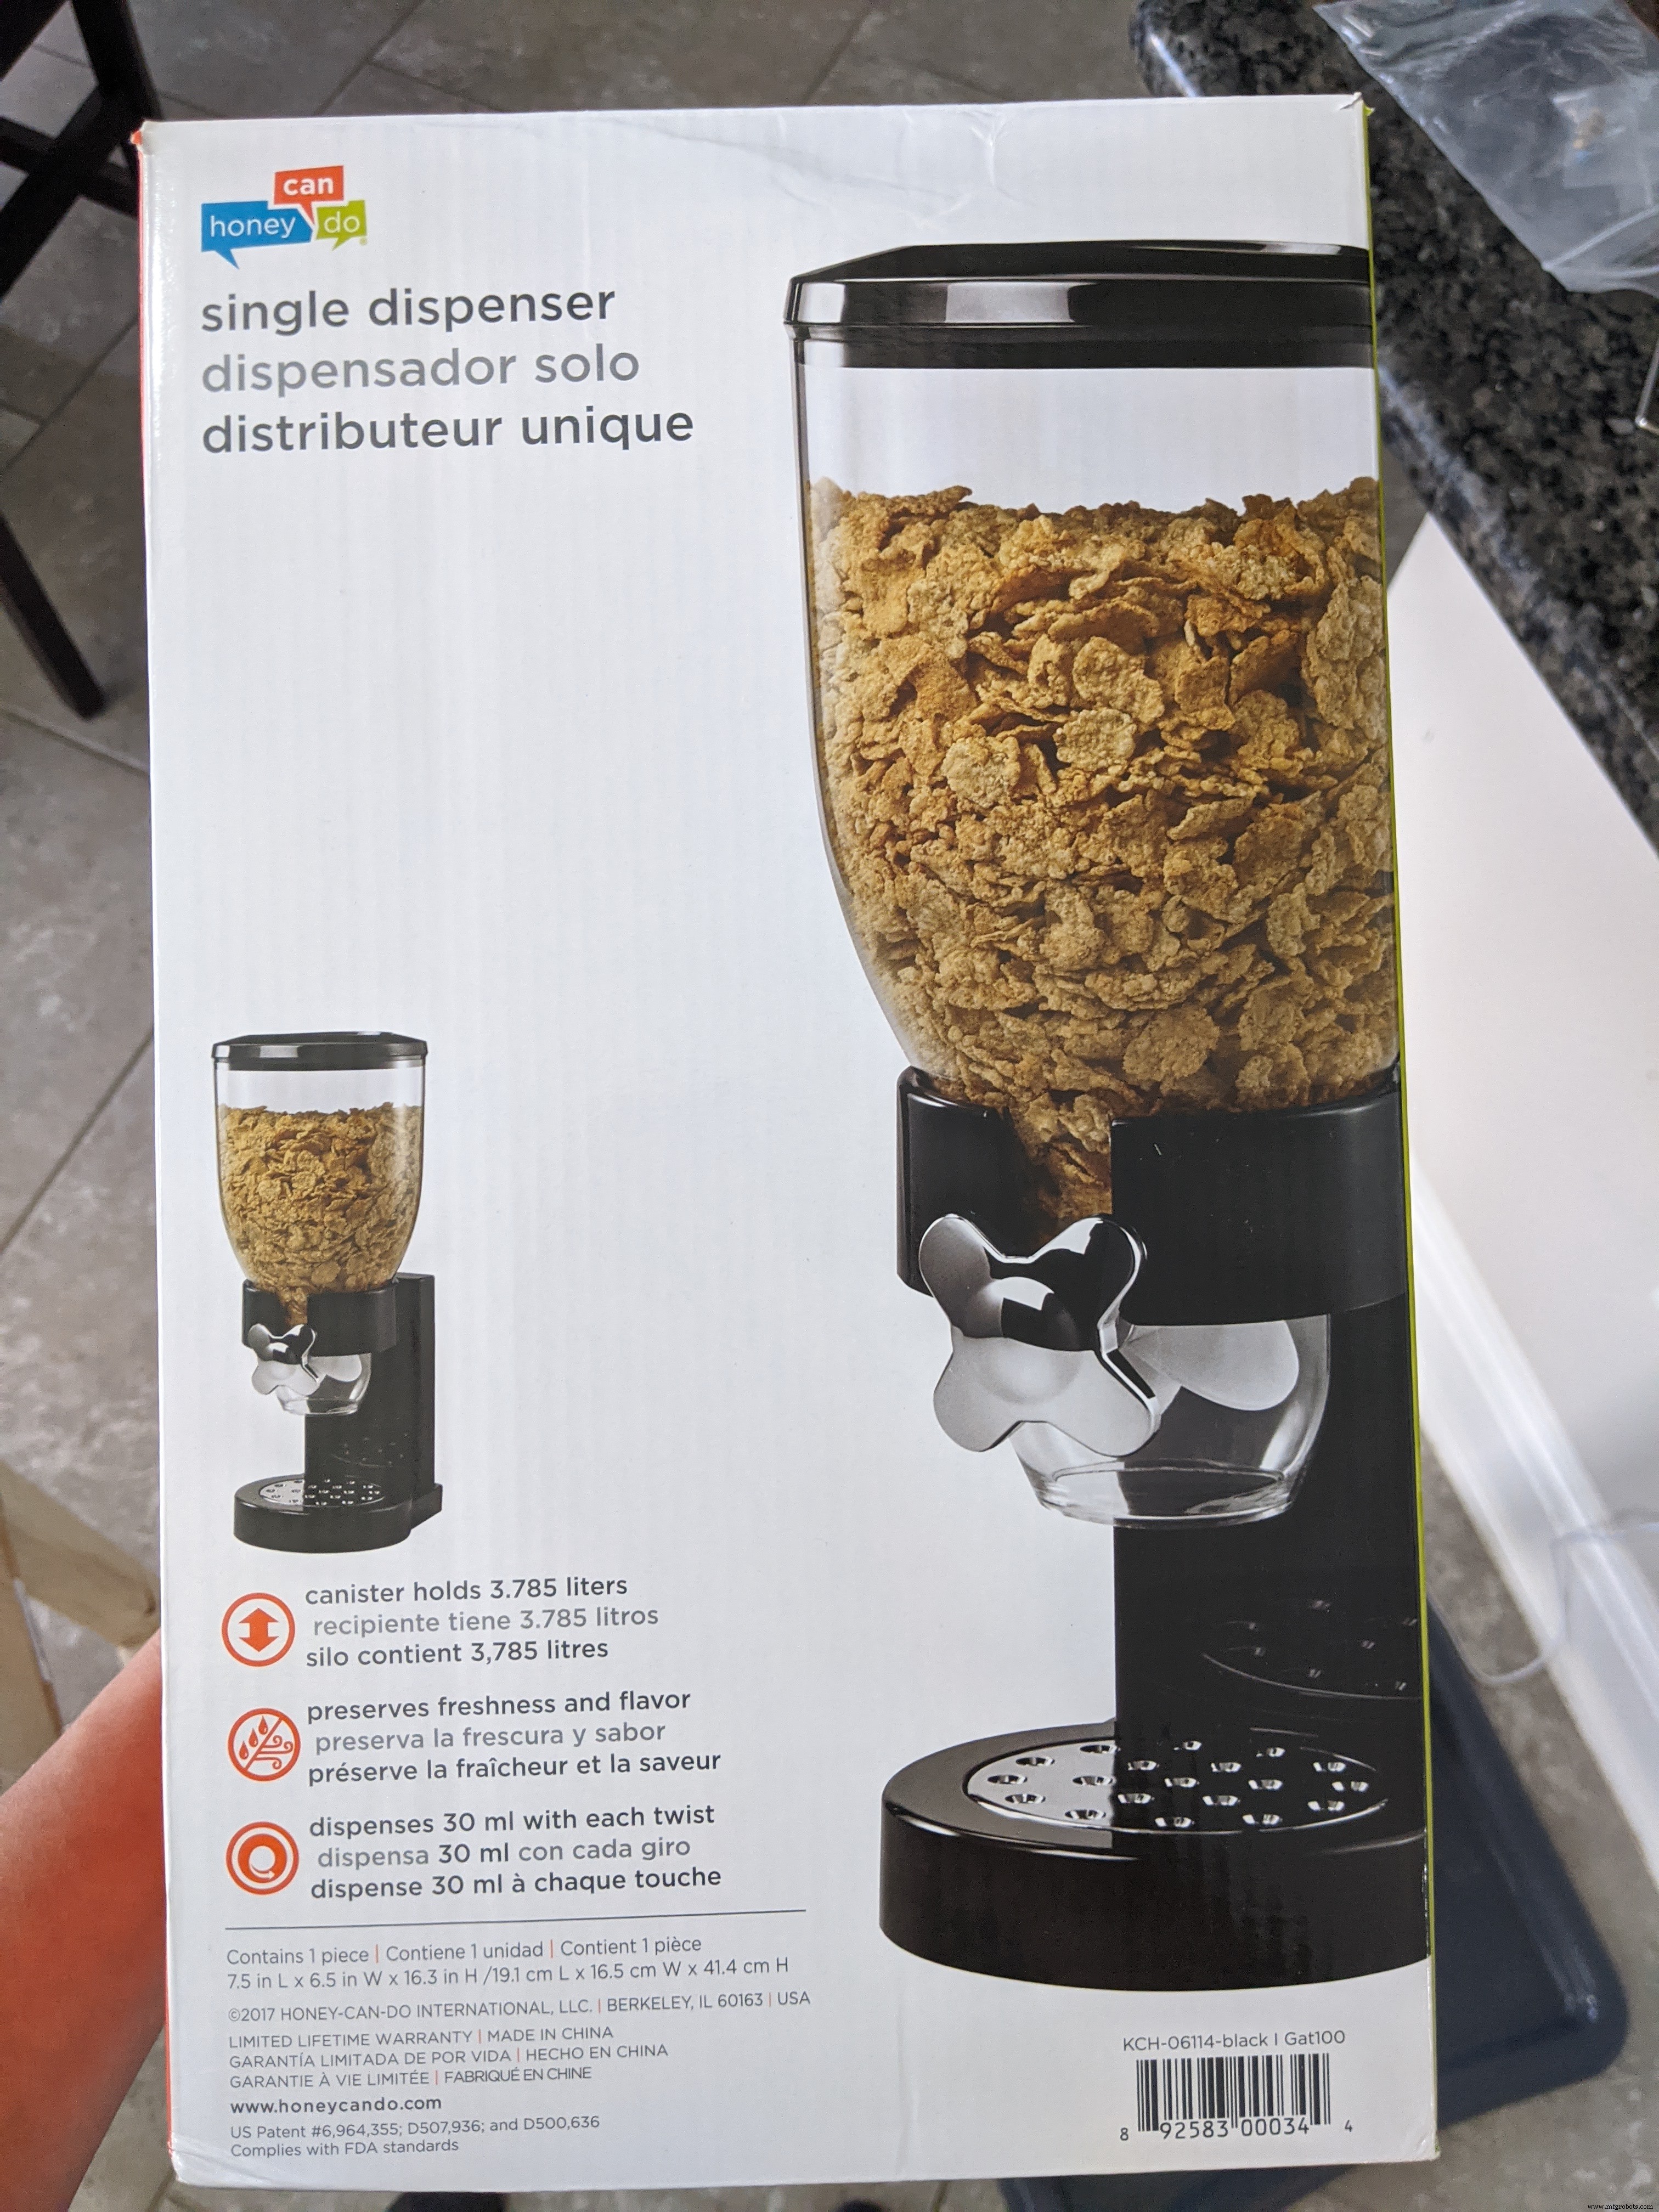
This is the cereal dispenser I bought off of Amazon. There are some that have multiple dispensers if you have multiple pets and need multiple feeders, I only needed one. The brand is Honey Can Do, but I'm sure any brand will work.
The first thing I started on was removing the knob from the rod that connected to the paddle wheel on the dispenser. I used a hand saw to remove the knob. You can use a power tool if you happen to have one. Do not cut the rod further down where the silver part ends. Cut right at the base of the knob.
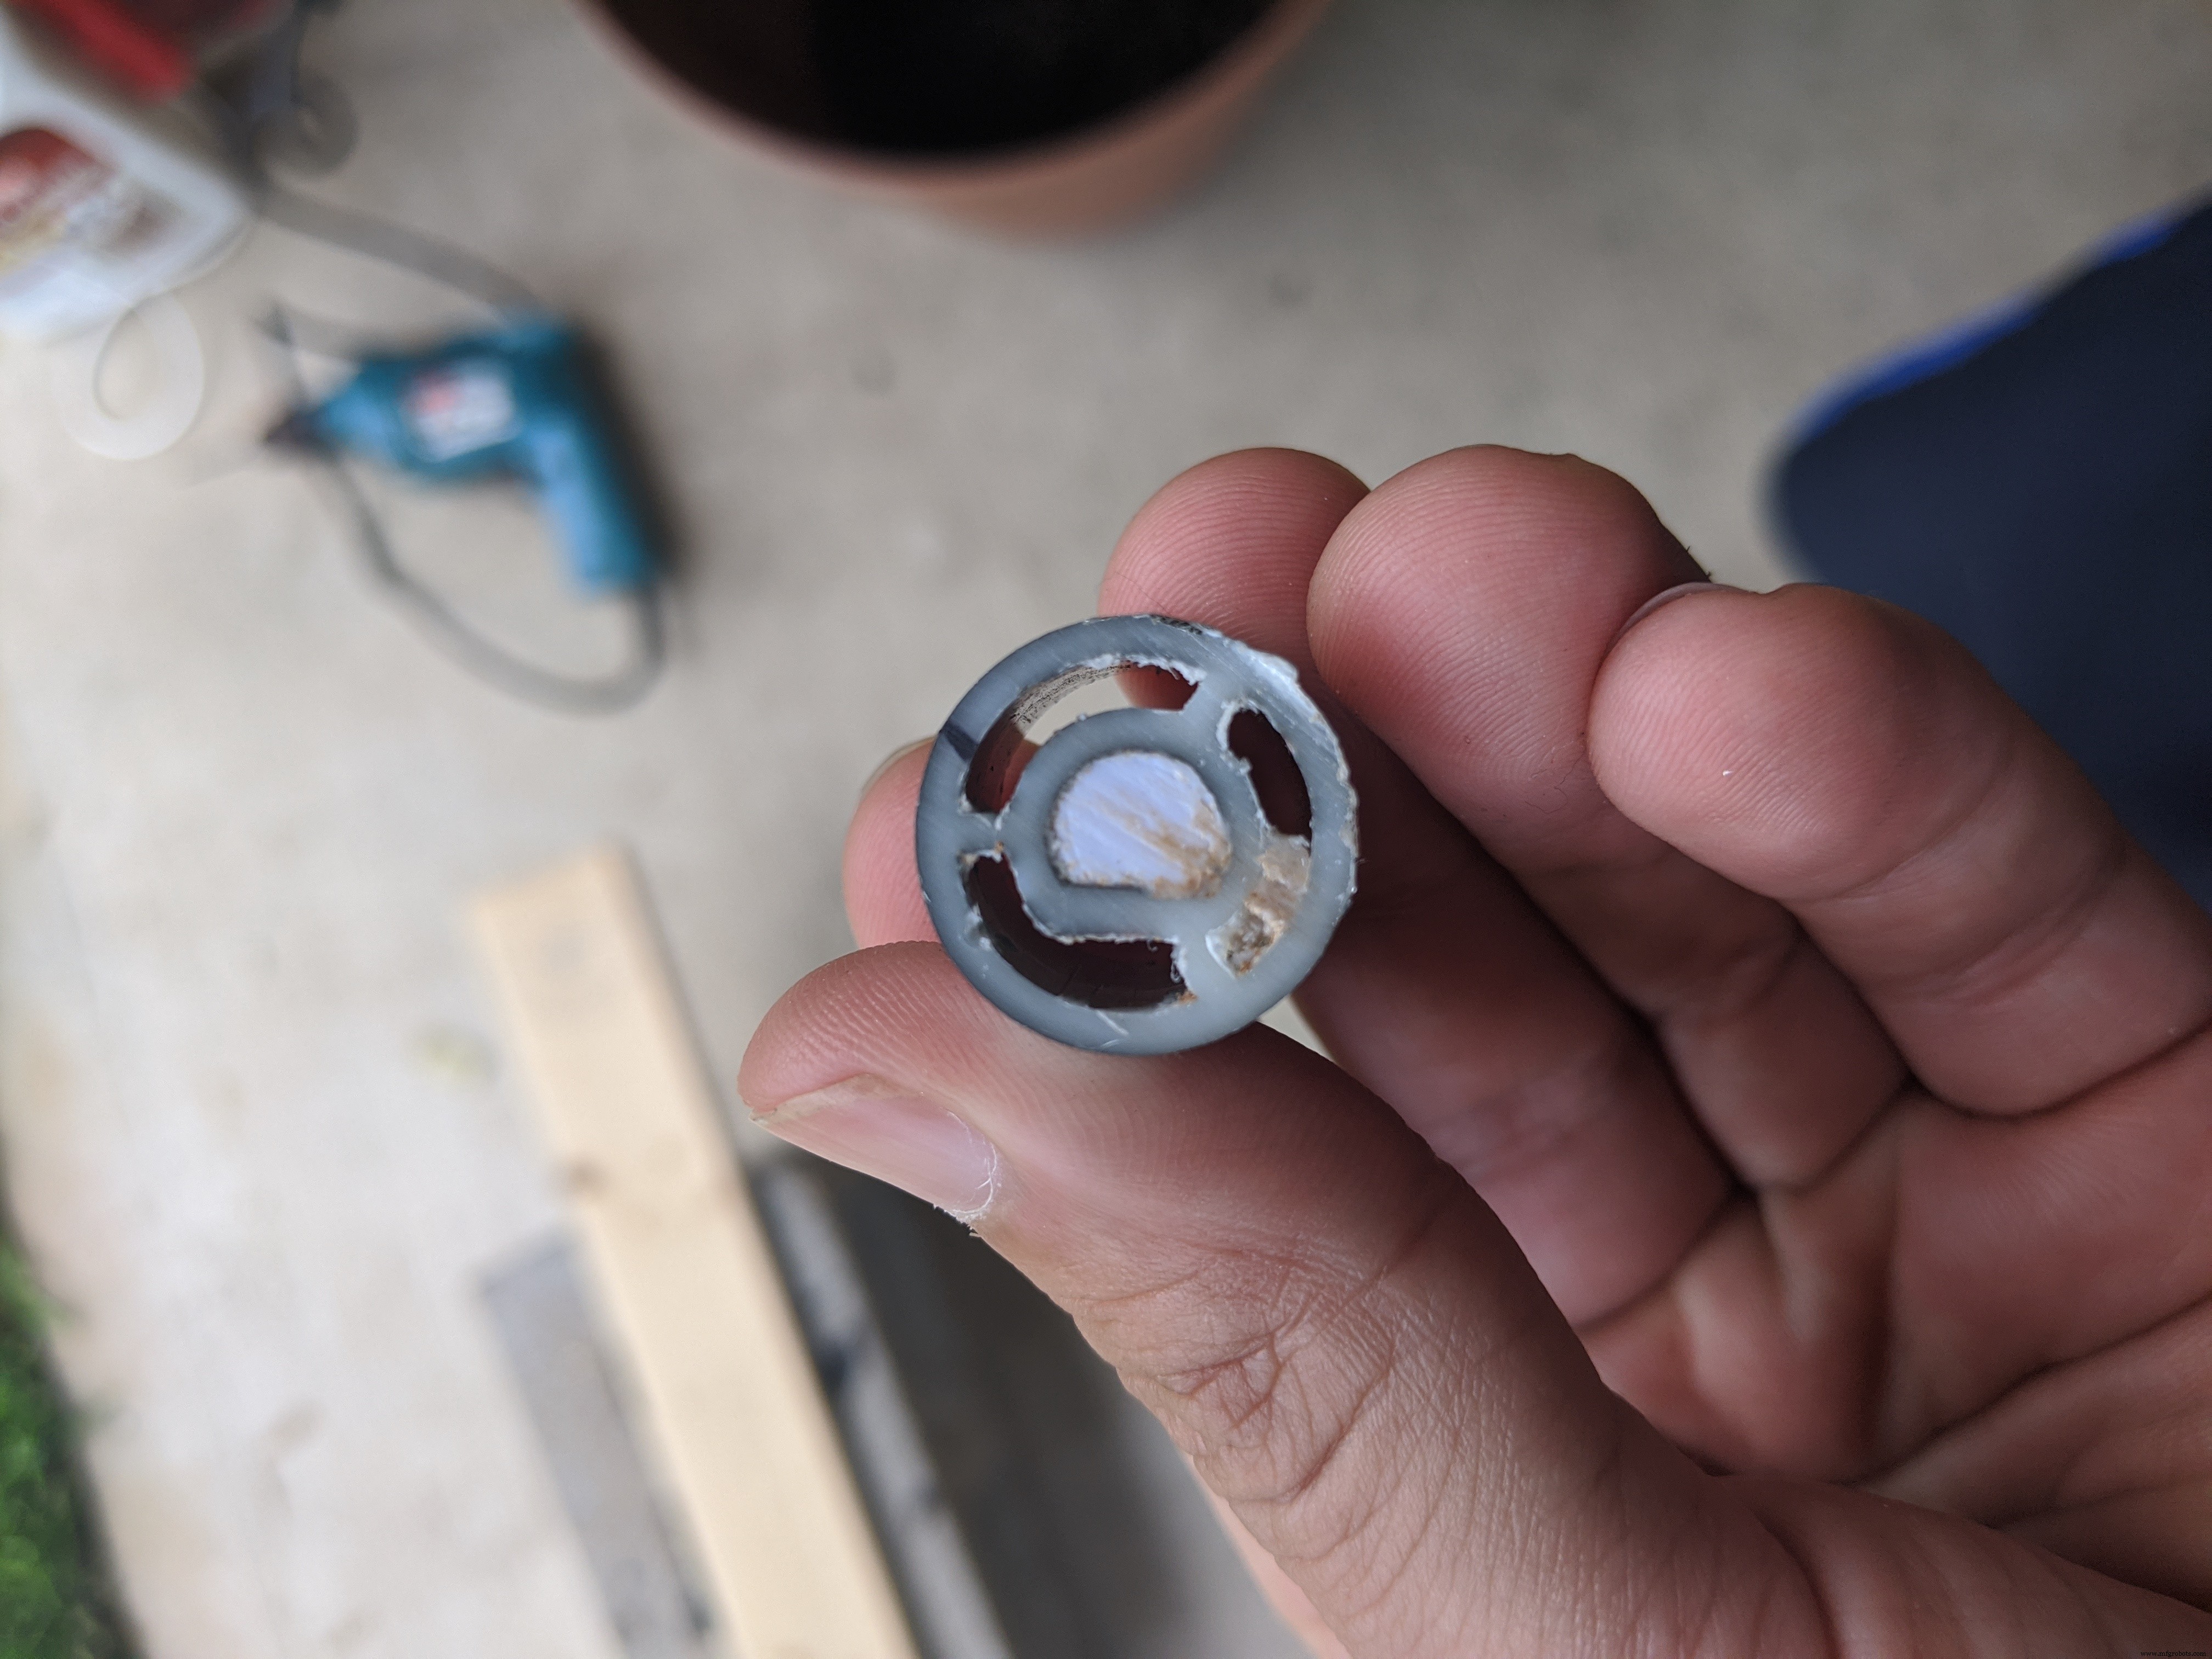
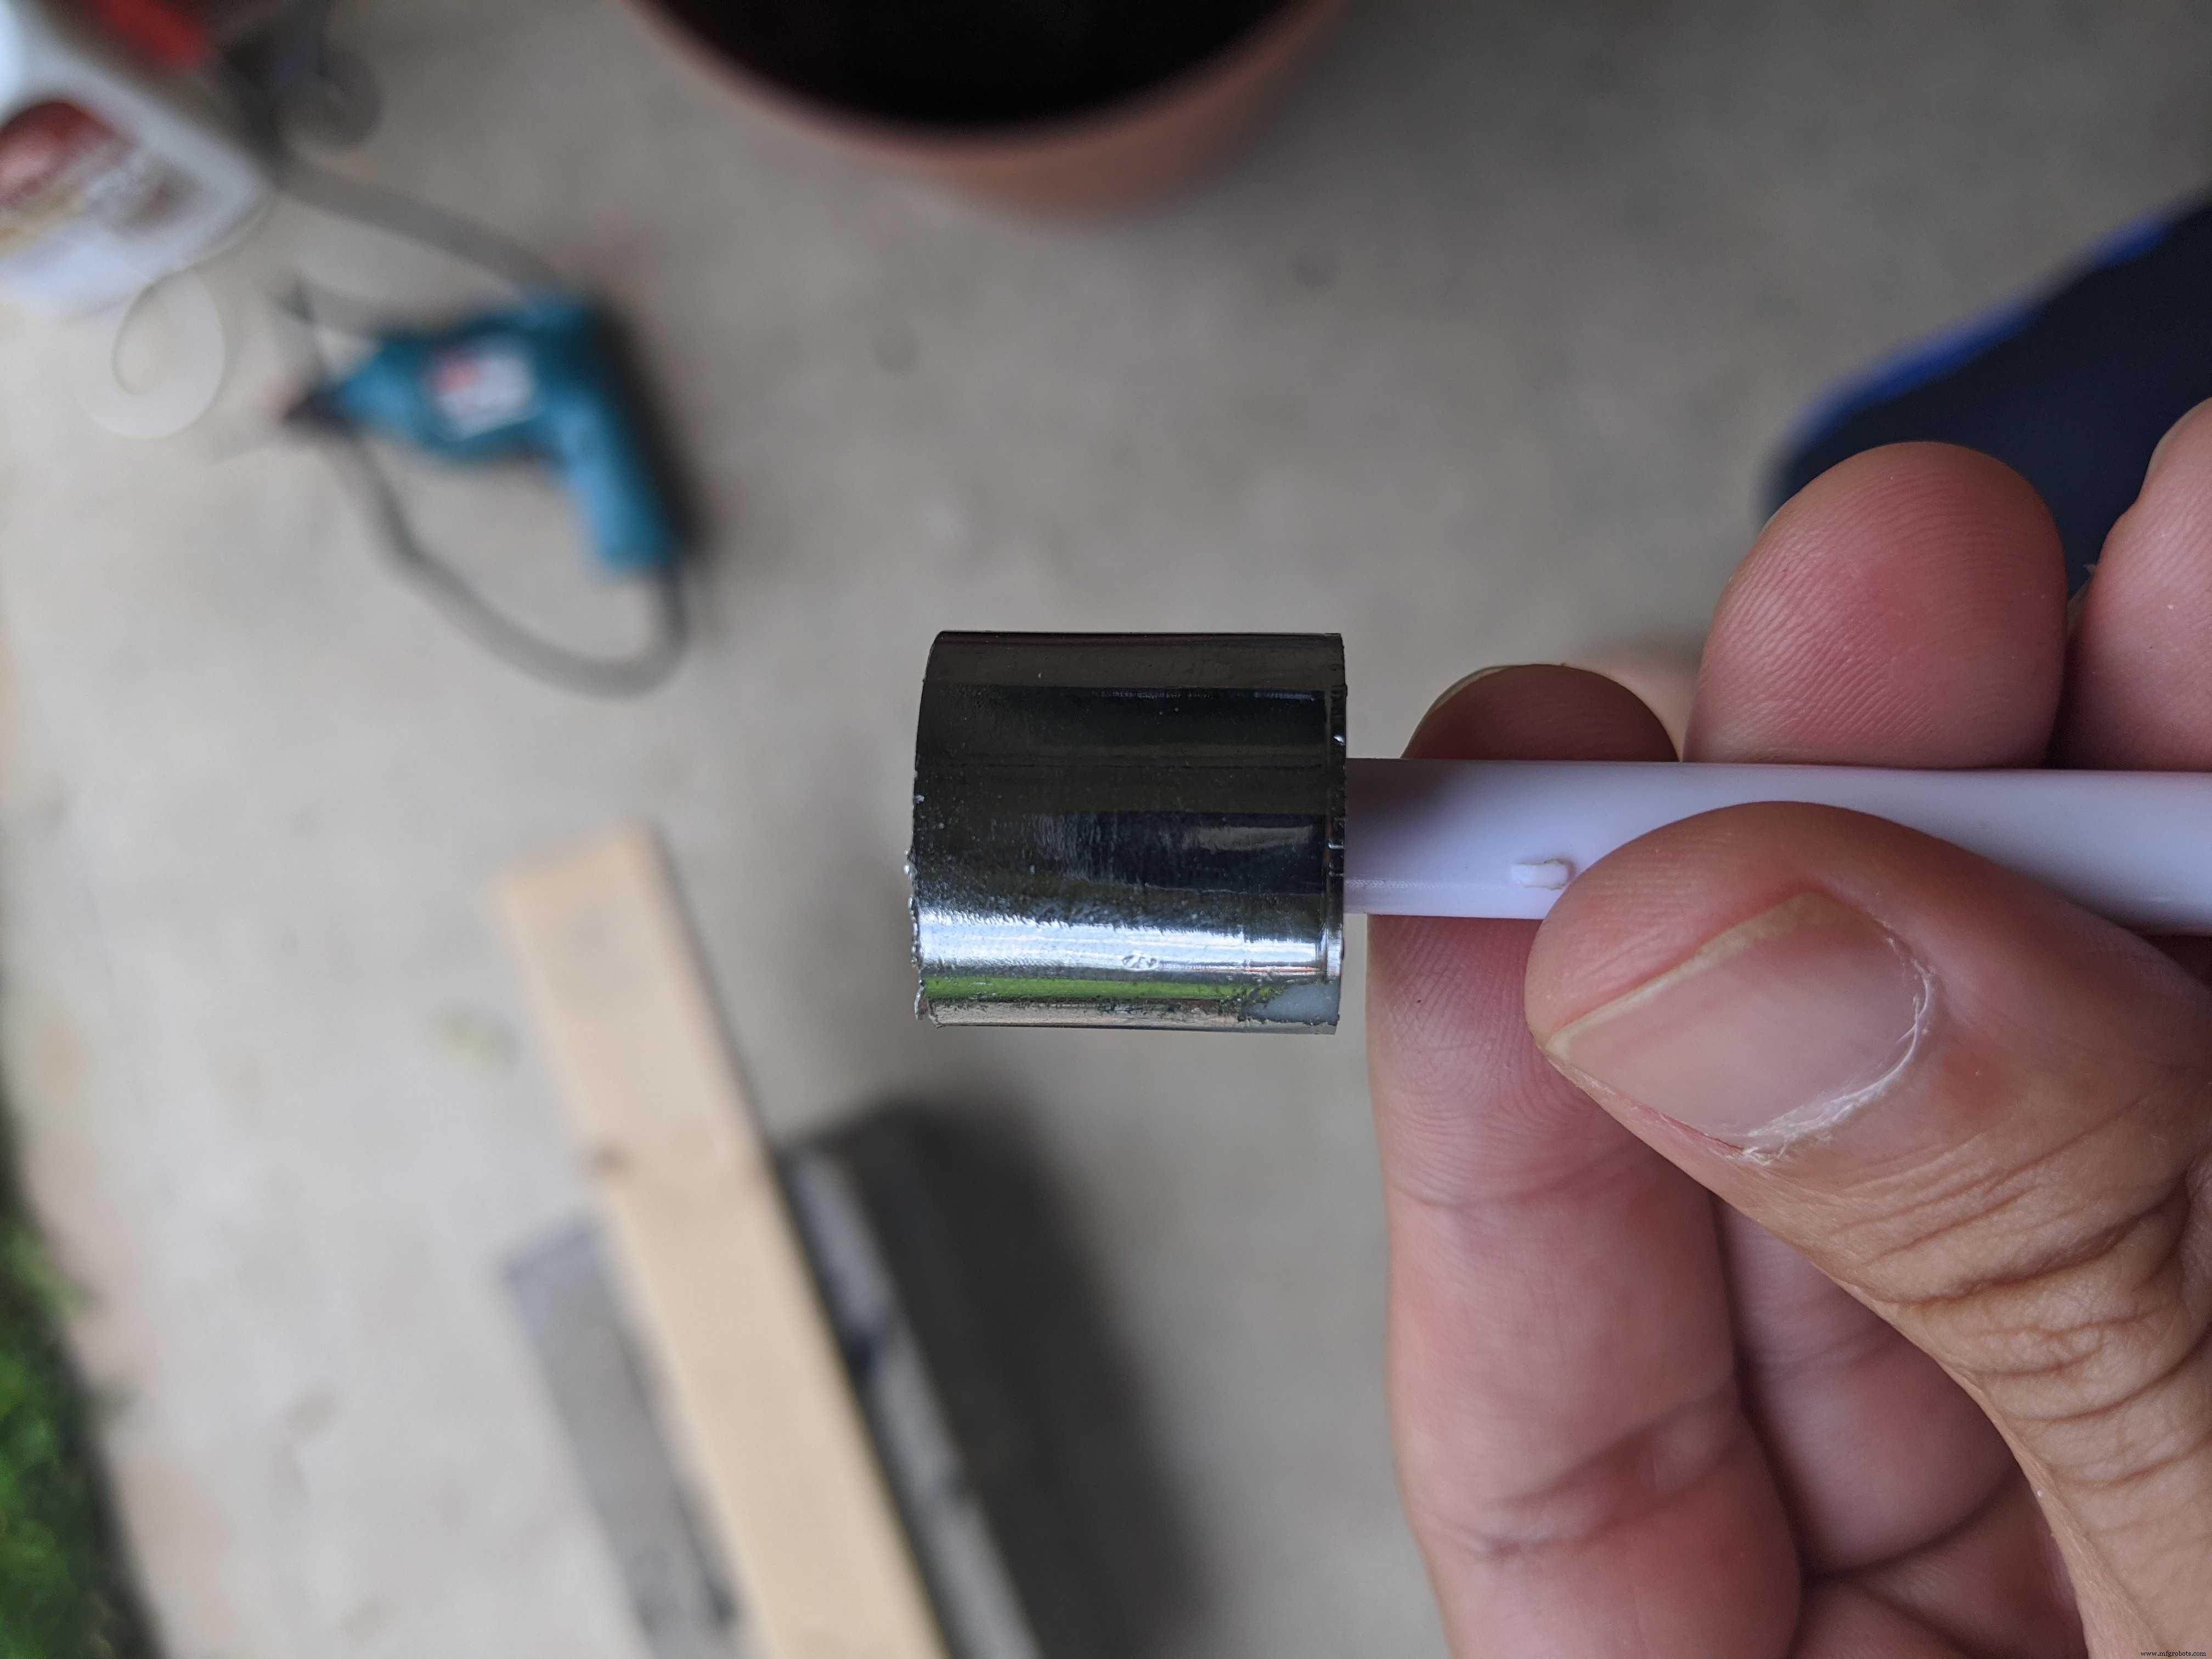
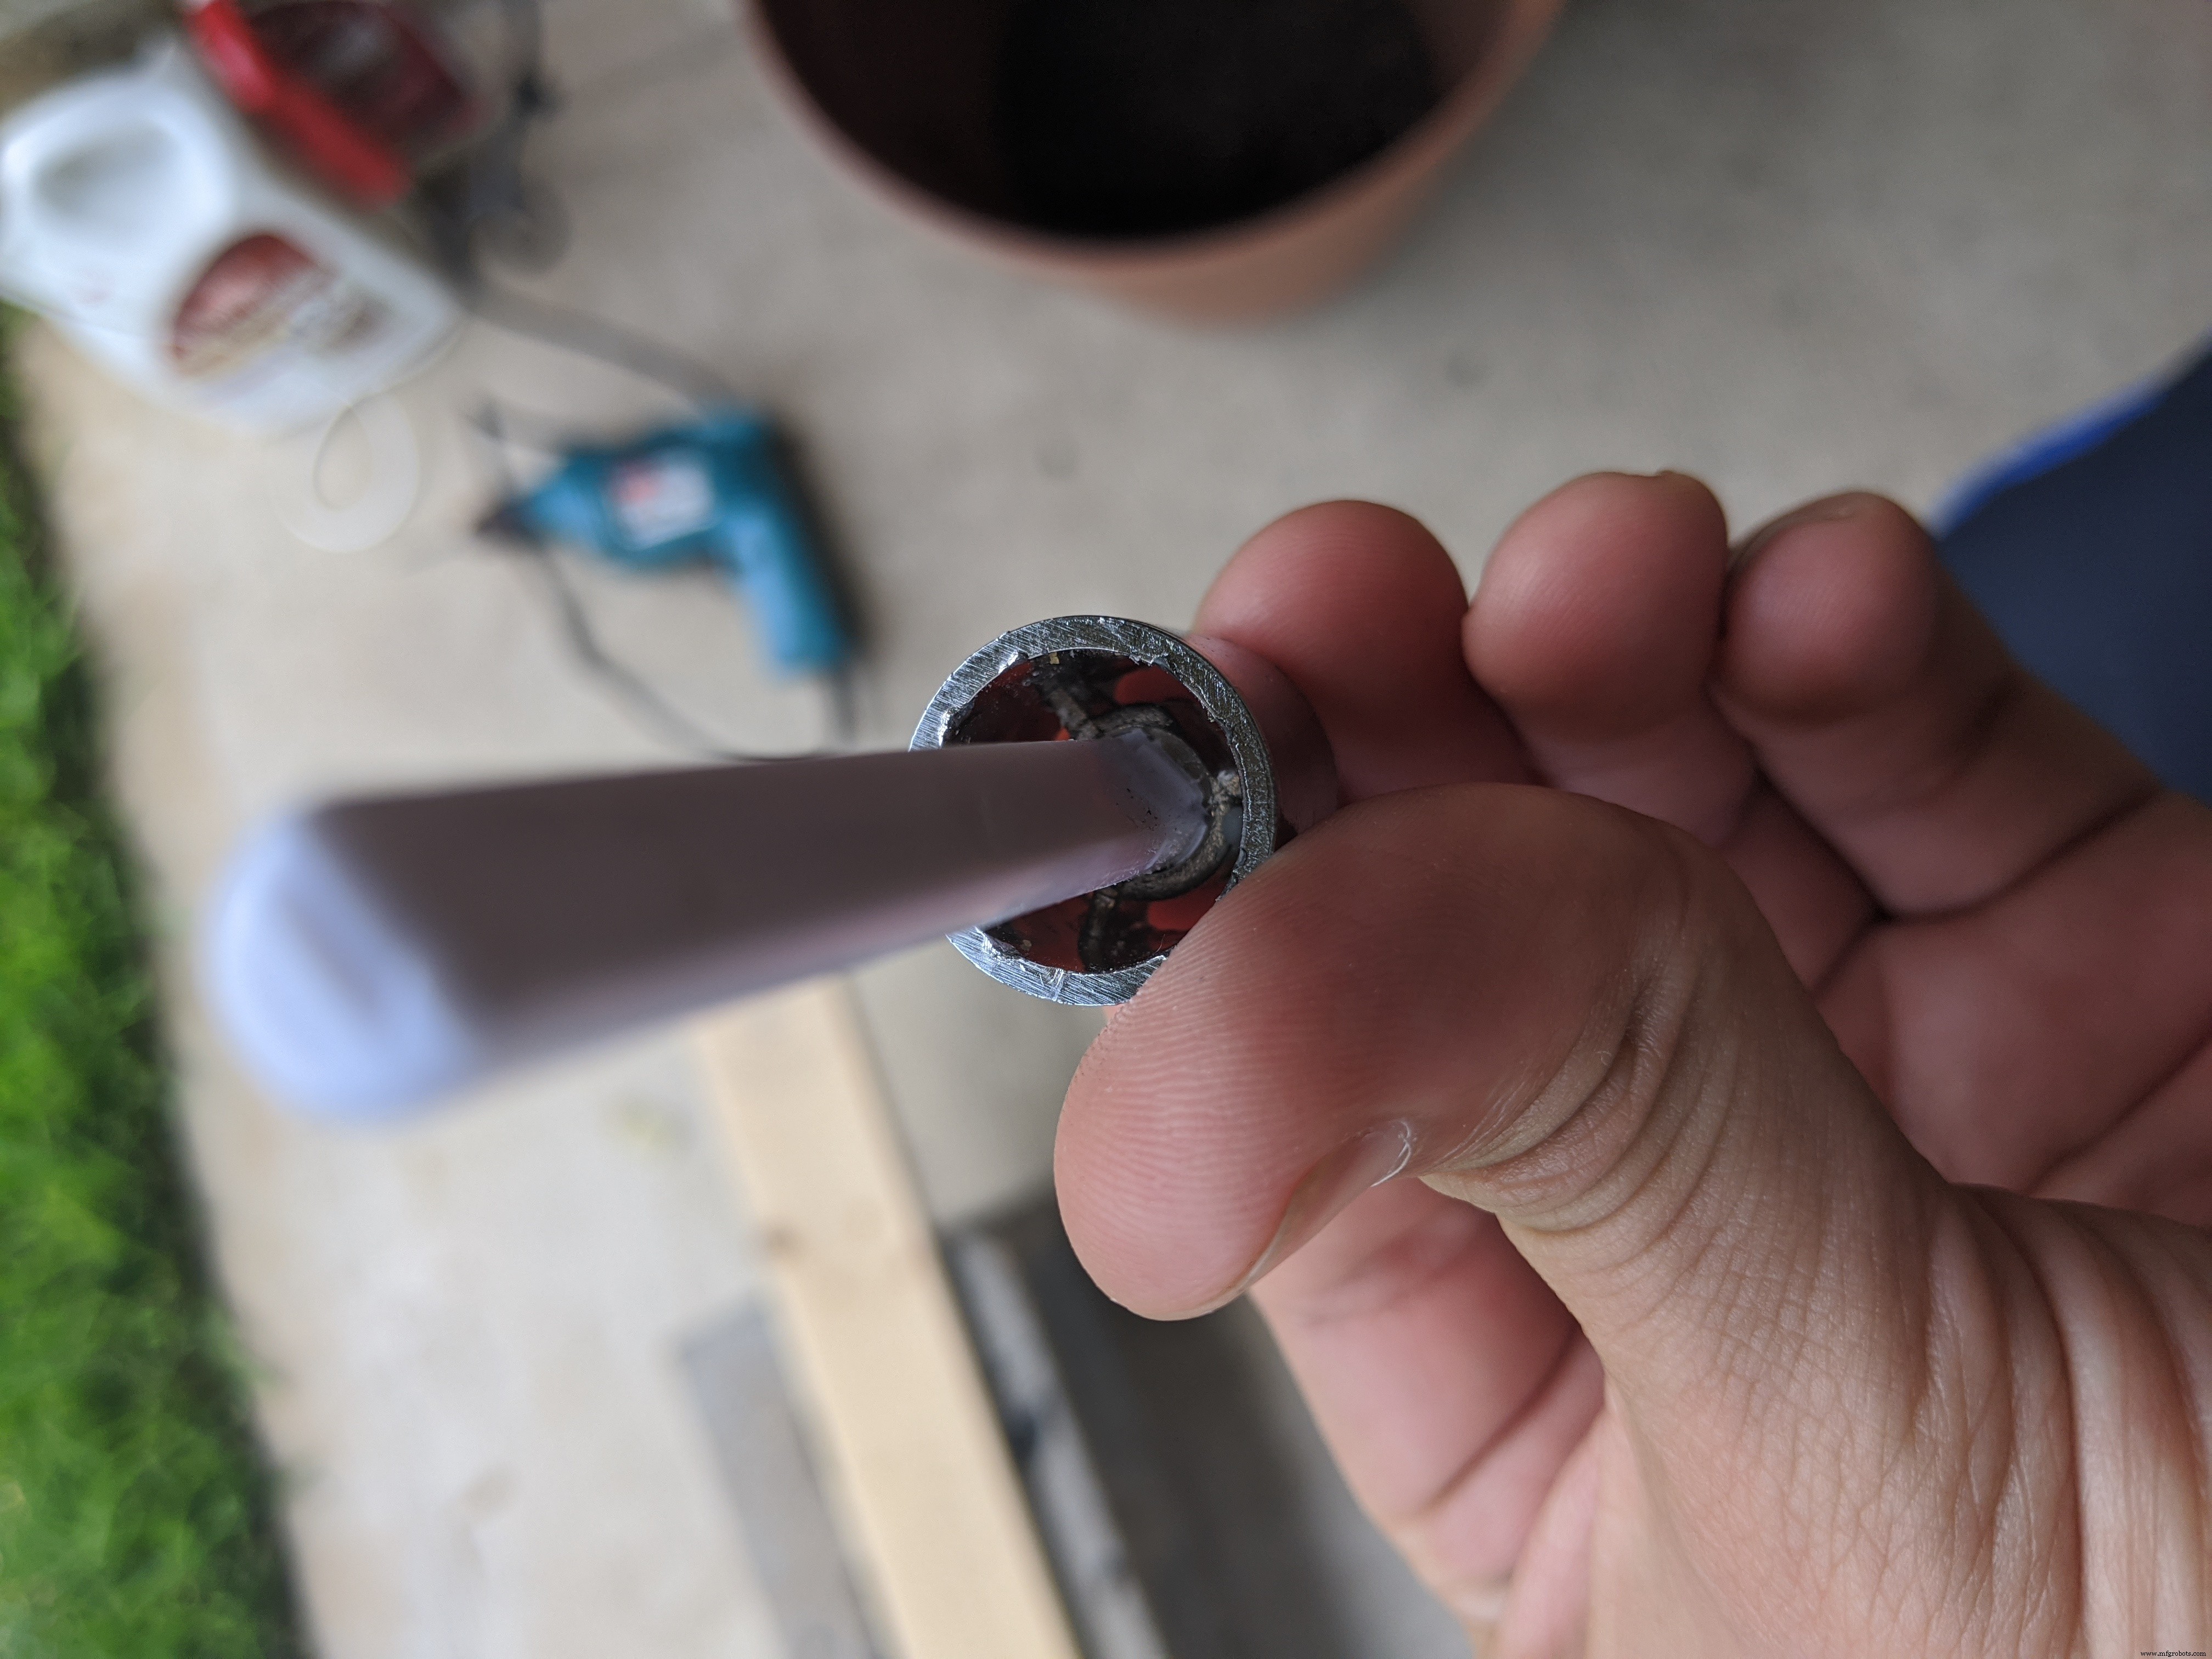
After you saw off the knob, remove the remaining material by cutting the 3 supports seen in the last picture above. This took quite a while. I imagine it will be faster if you have the right power tool. Once you remove those three supports, the remaining piece left on the rod itself should come off with a little elbow grease. You will have to sand down the part of the rod closest to the knob so that it will fit nicely into the encoder wheel.
Next, we start building the frame's base. I took the 1/2 x 6 inch (1.27 x 15.24 cm) wood and cut them into two 8 inch (20.32 cm) pieces. This will make up the base and the back of the feeder's frame. Apply some wood glue and use 2 of the multi-purpose nails to join them in an L shape. You will need to add a couple of right-angle supports to reinforce the back panel and bottom panel connection. Use 4 multi-purpose screws and some wood glue to secure them to both the back and bottom panels. I do not have a picture of this step, but you can see them in pictures further down.
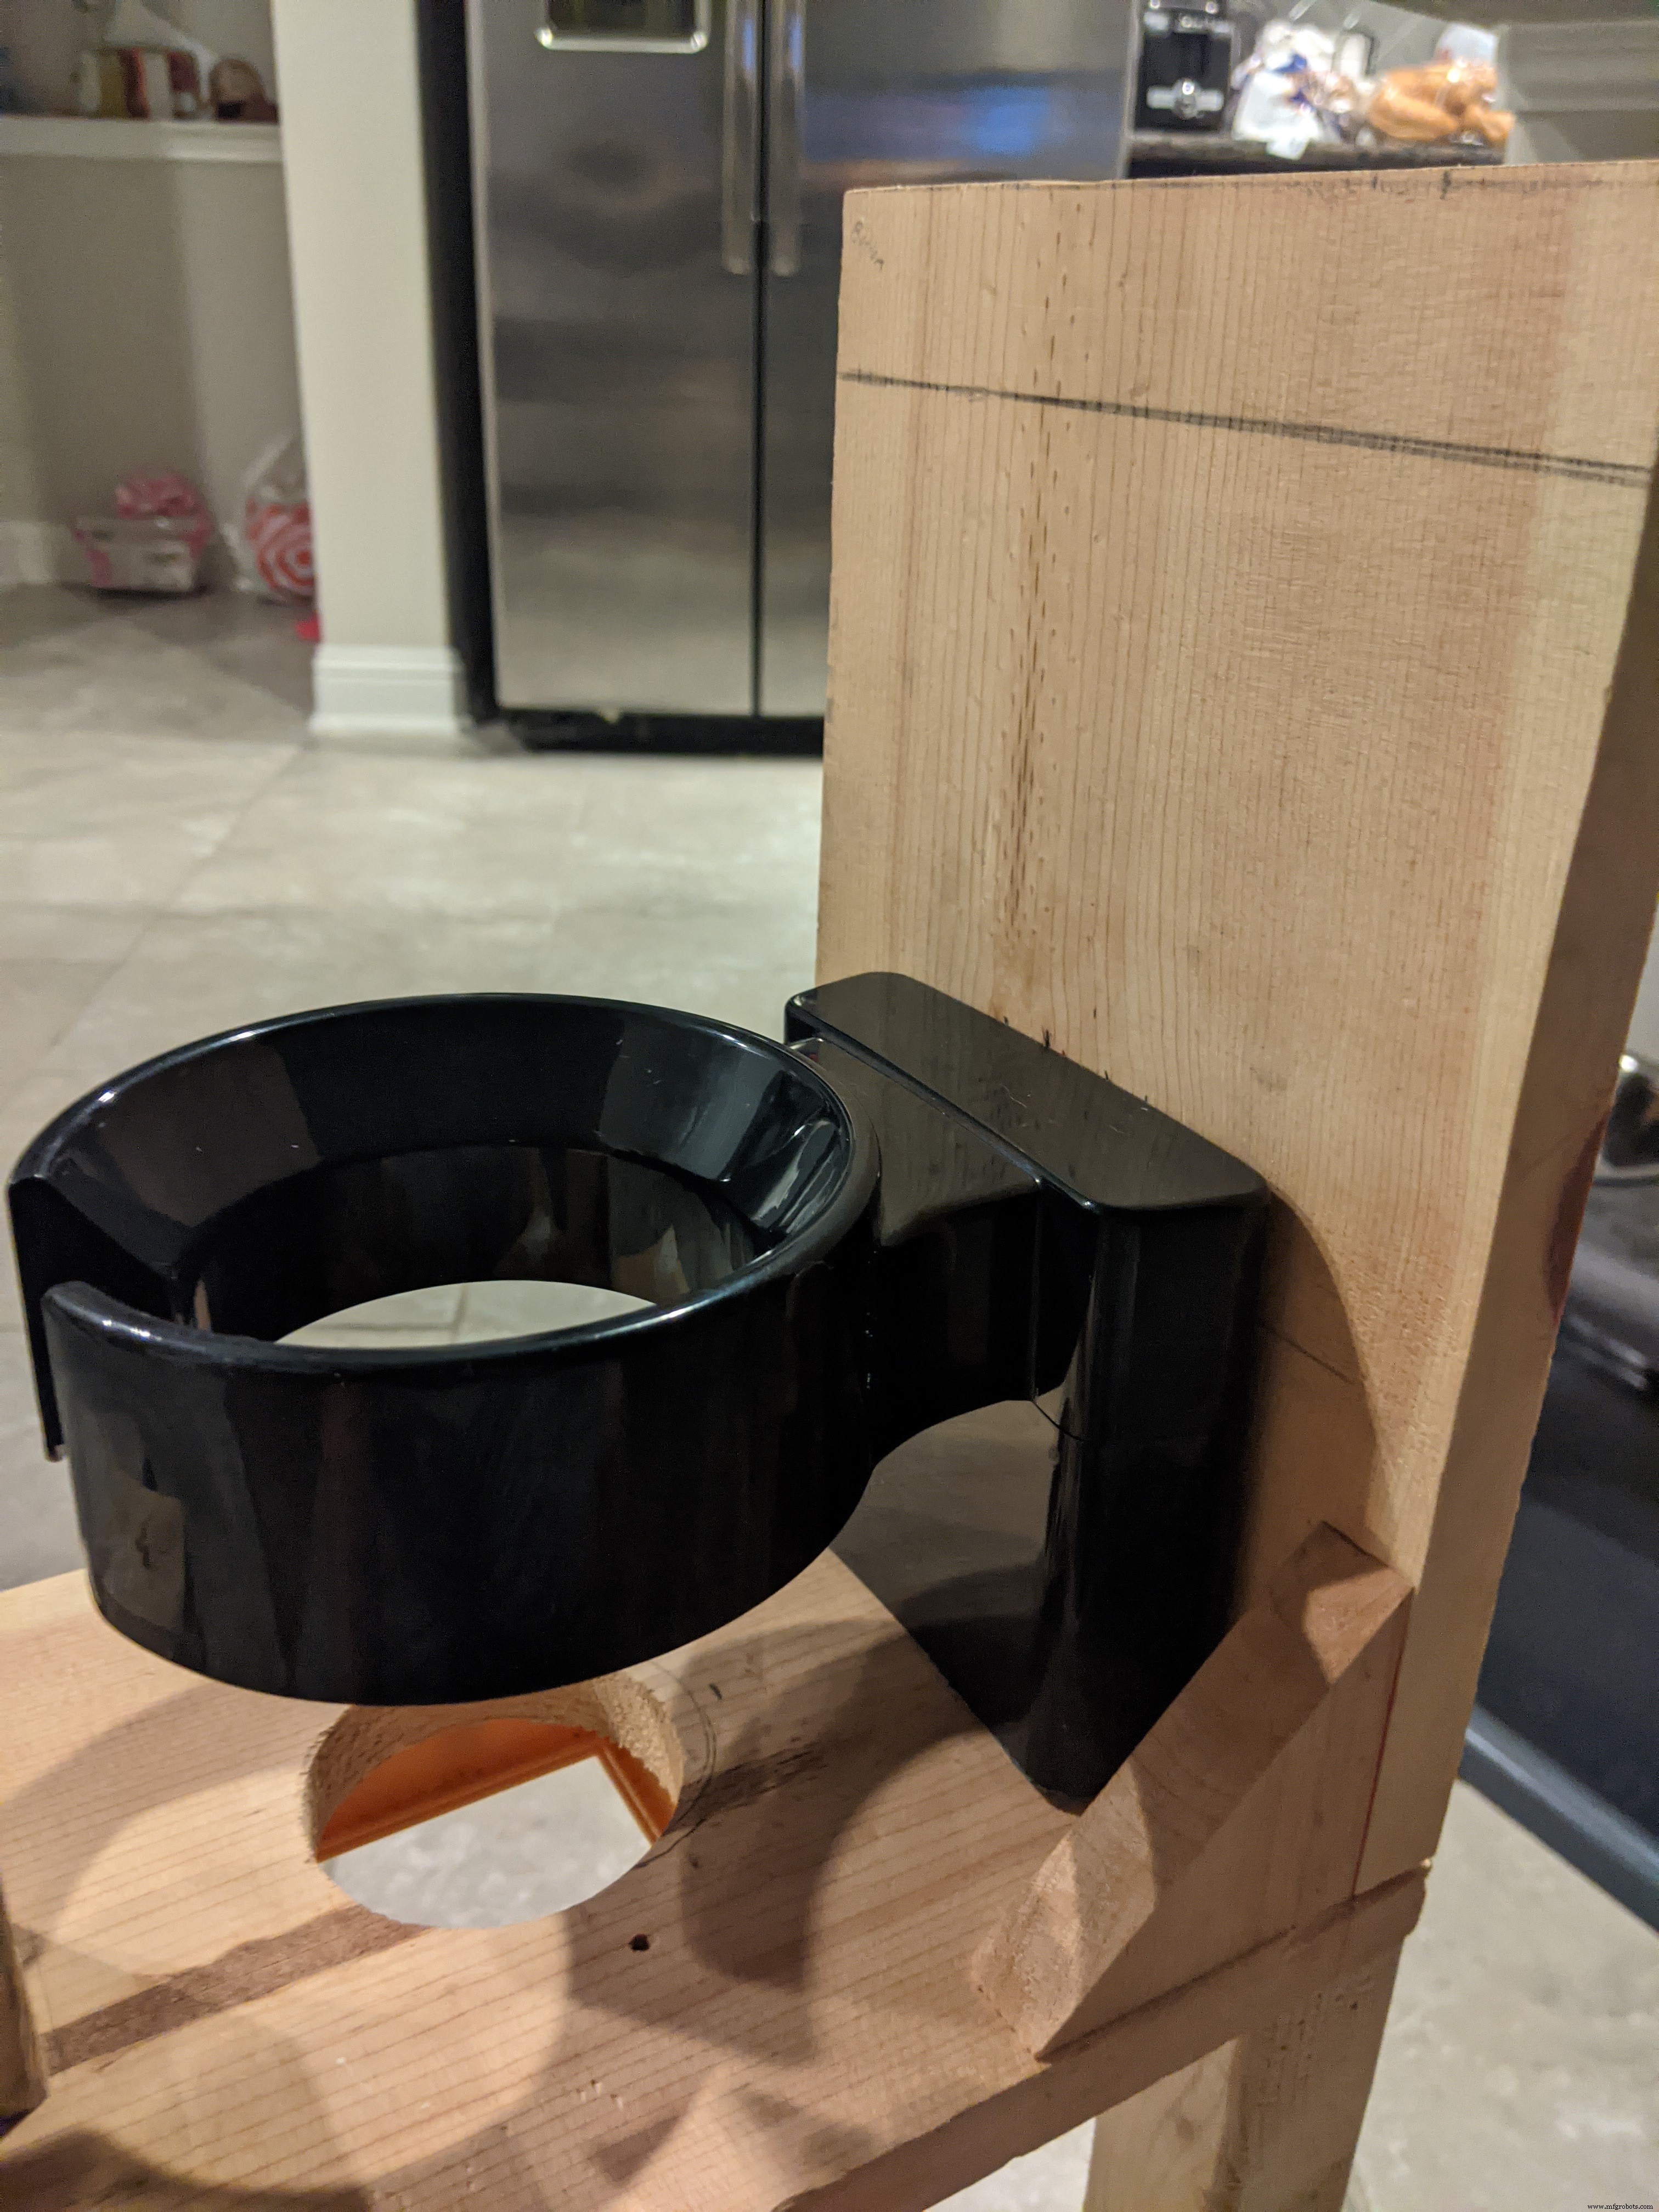
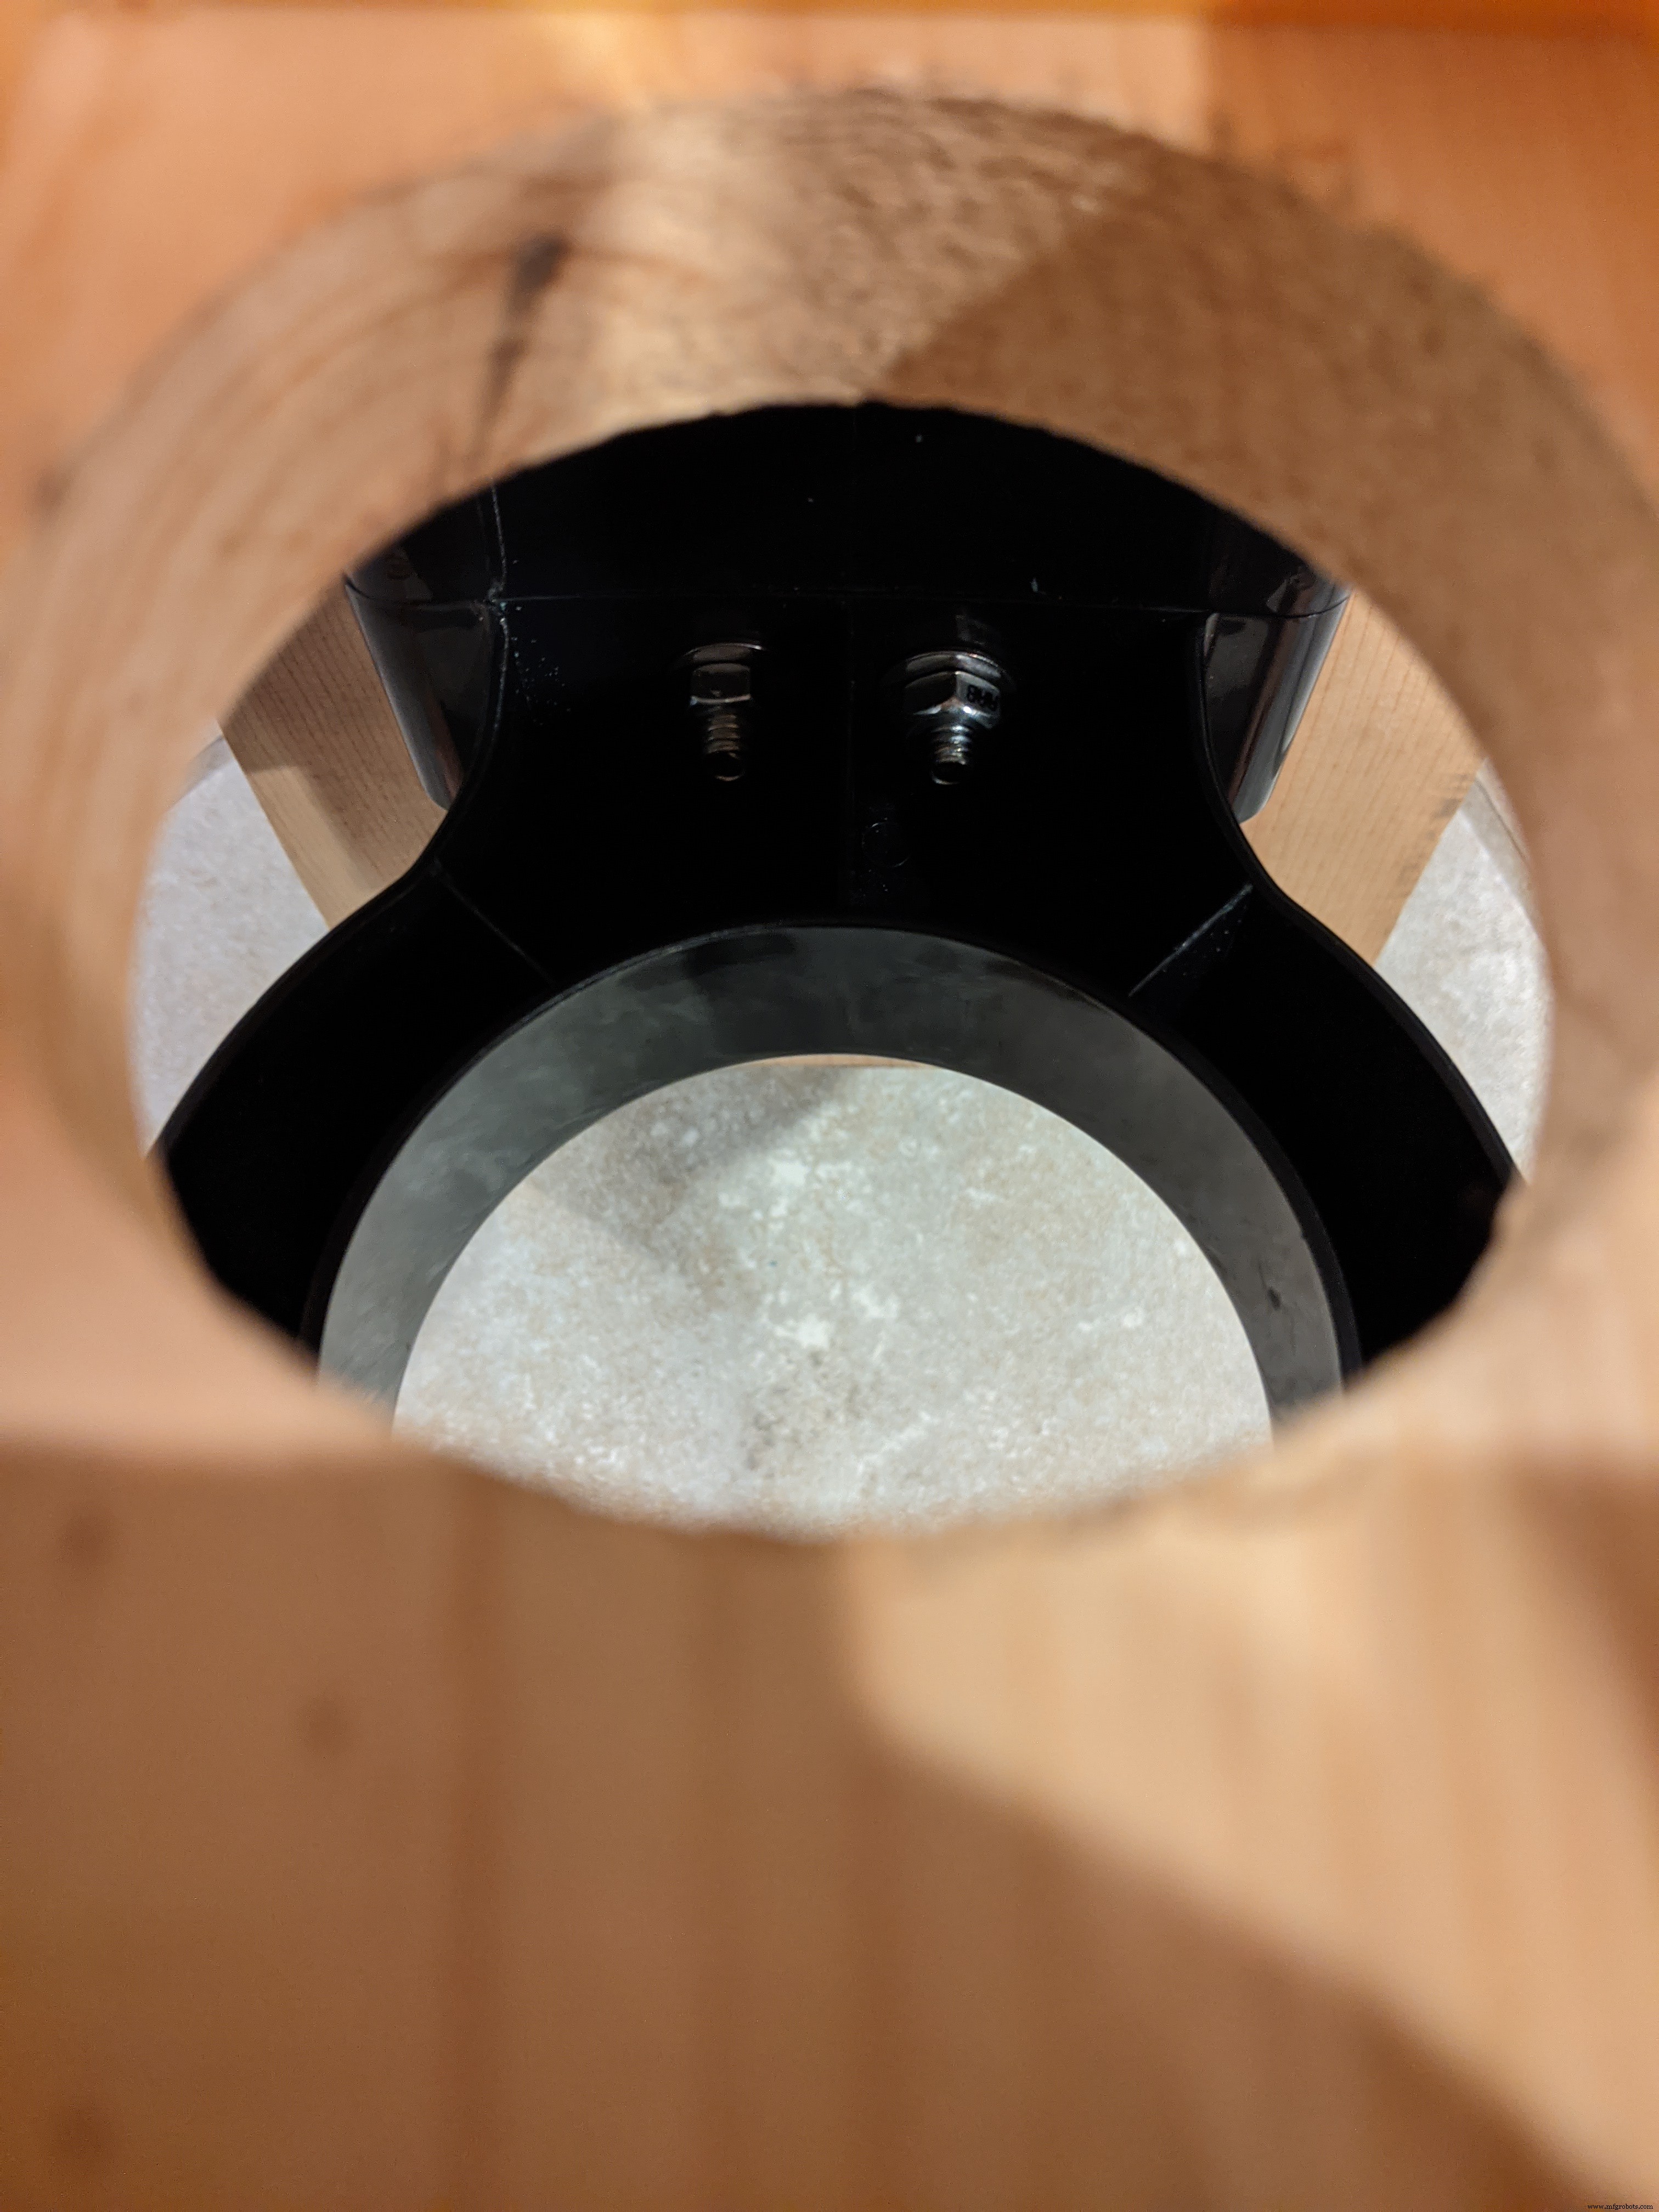
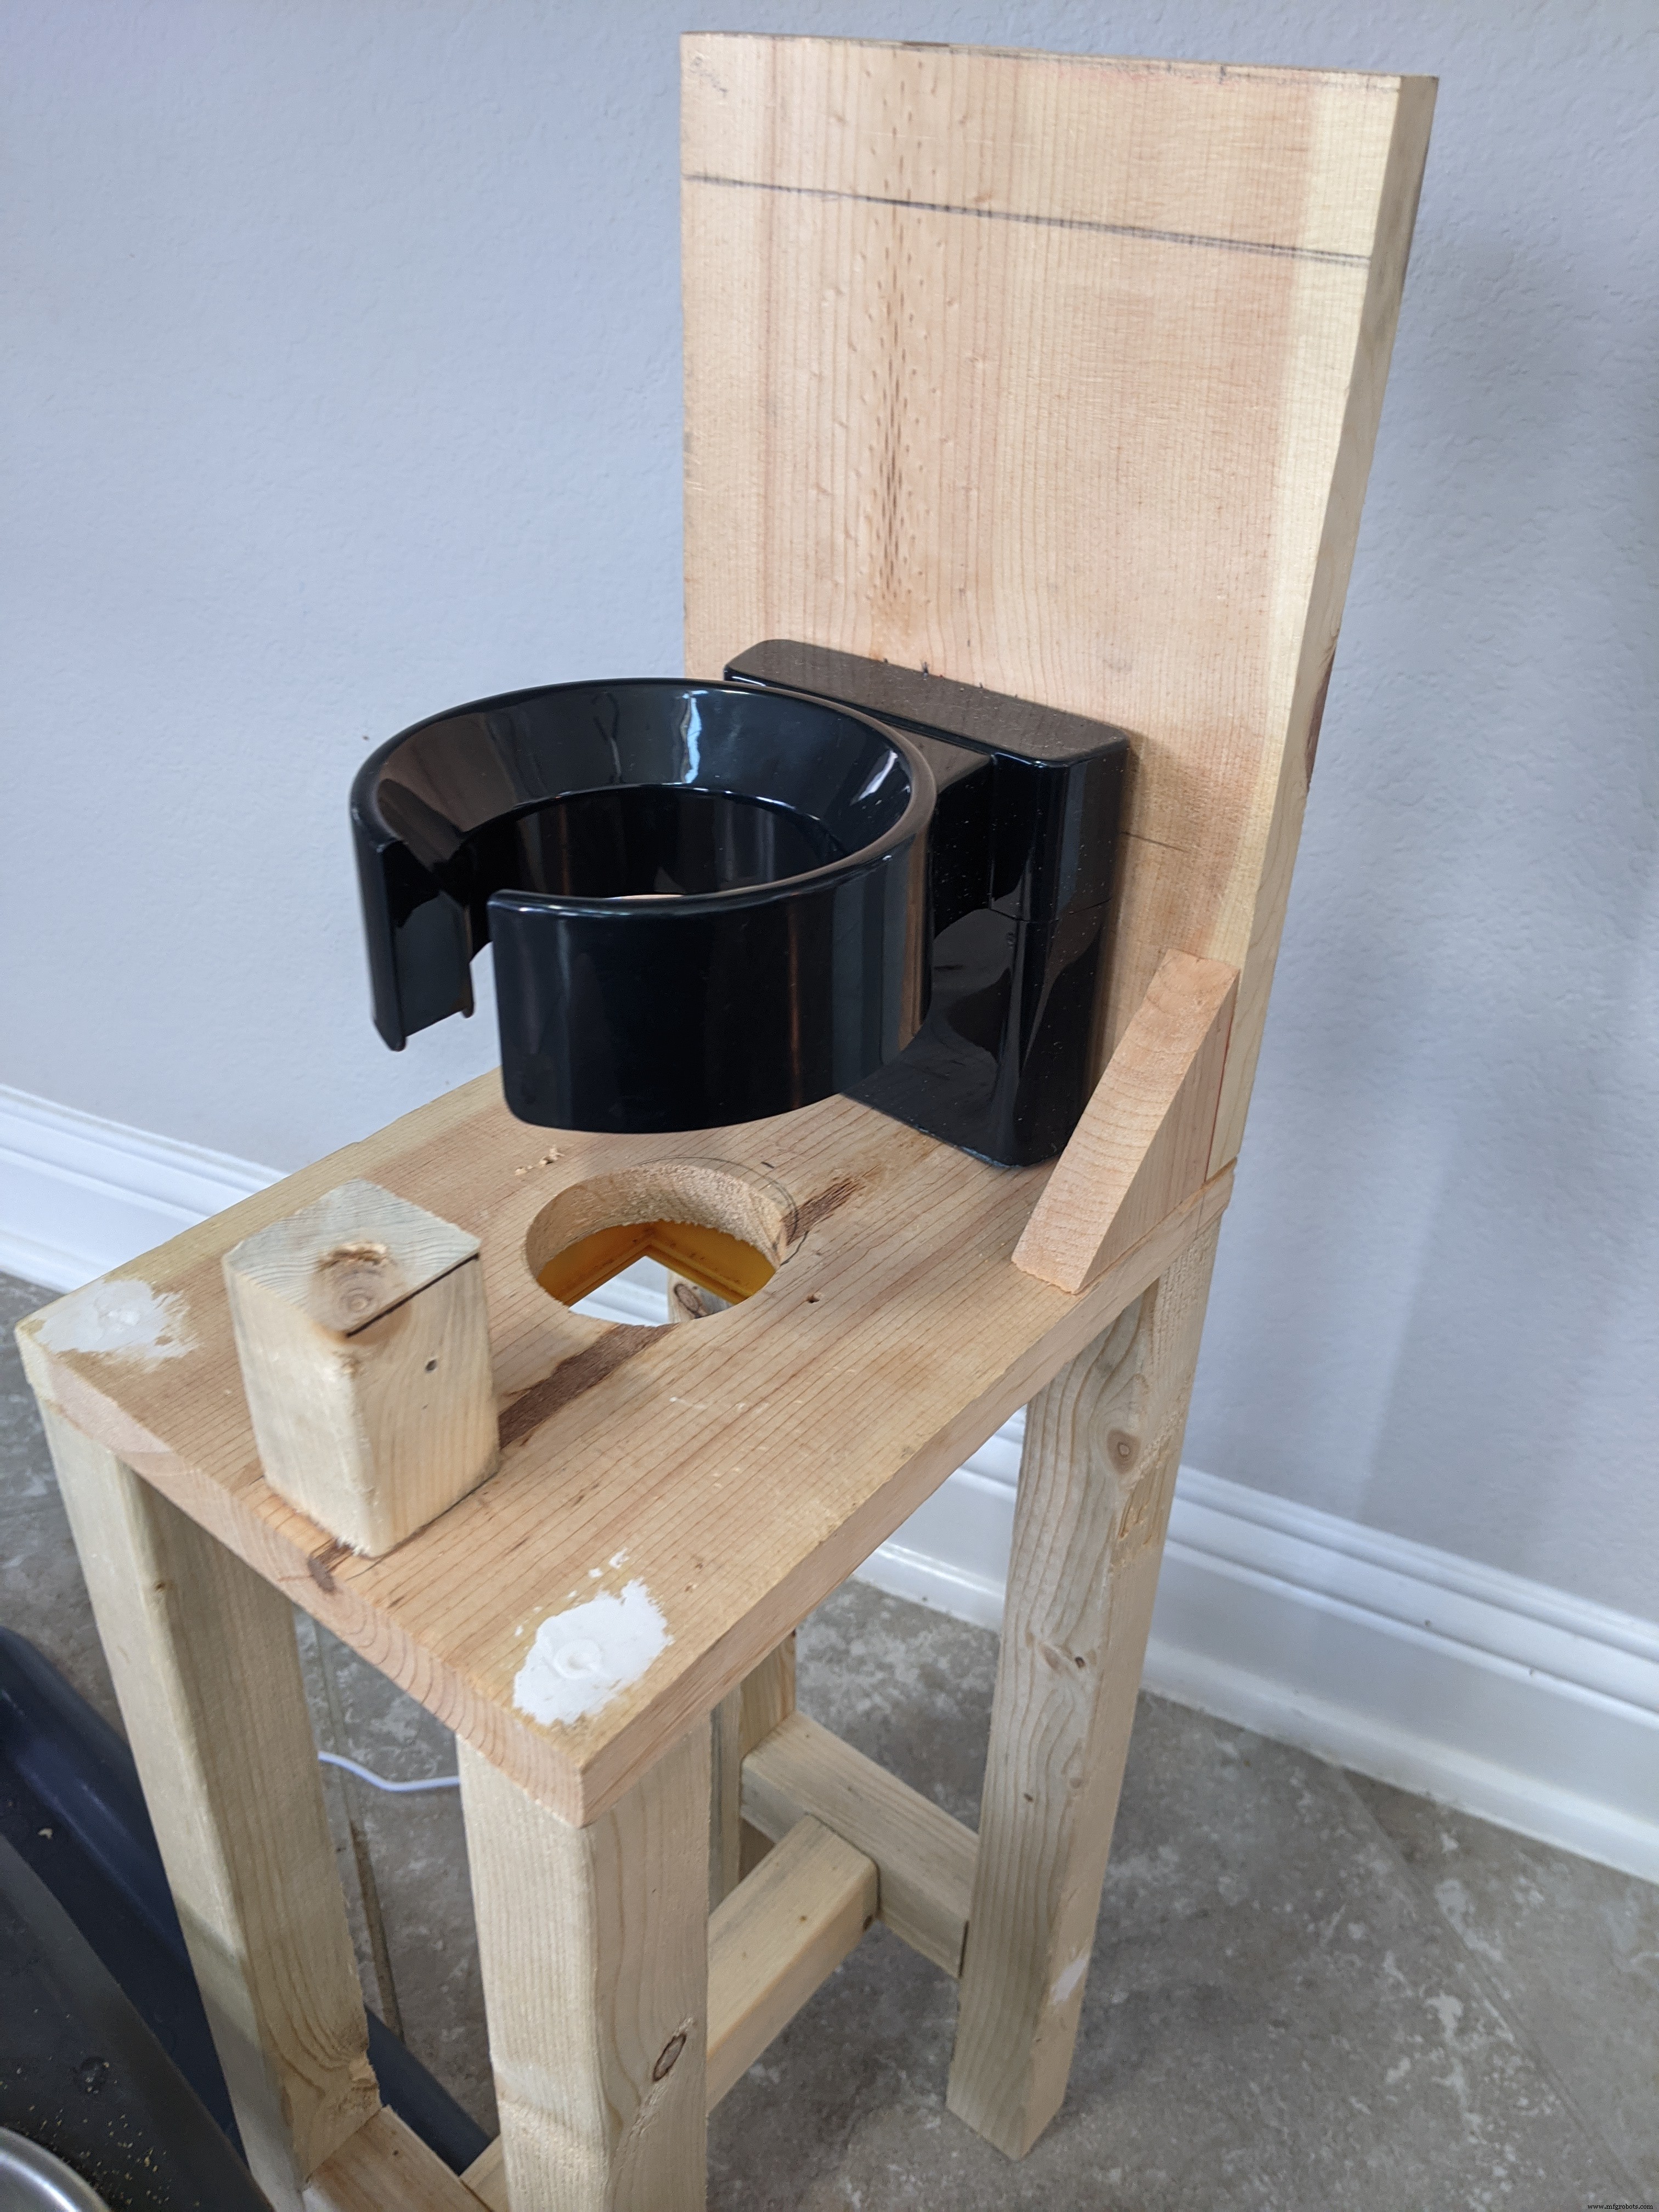
From here you have to cut the dispenser stand to a height of about 4.5 inches (11.43 cm). It doesn't have to be perfect. Try to get it as close as you can. The funnel allows for some wiggle room. Once you have the stand cut down to size, place it up against the back and make sure it is sitting flat on the base. Once you have it in position, use a pencil or pen to mark the center of where the dispensing end of the container will be. You will then need to drill a 2 inch (5.08 cm) hole all the way through the base panel. It is critical that you measure twice and cut once with this one. That will be the hole seen in the picture above.
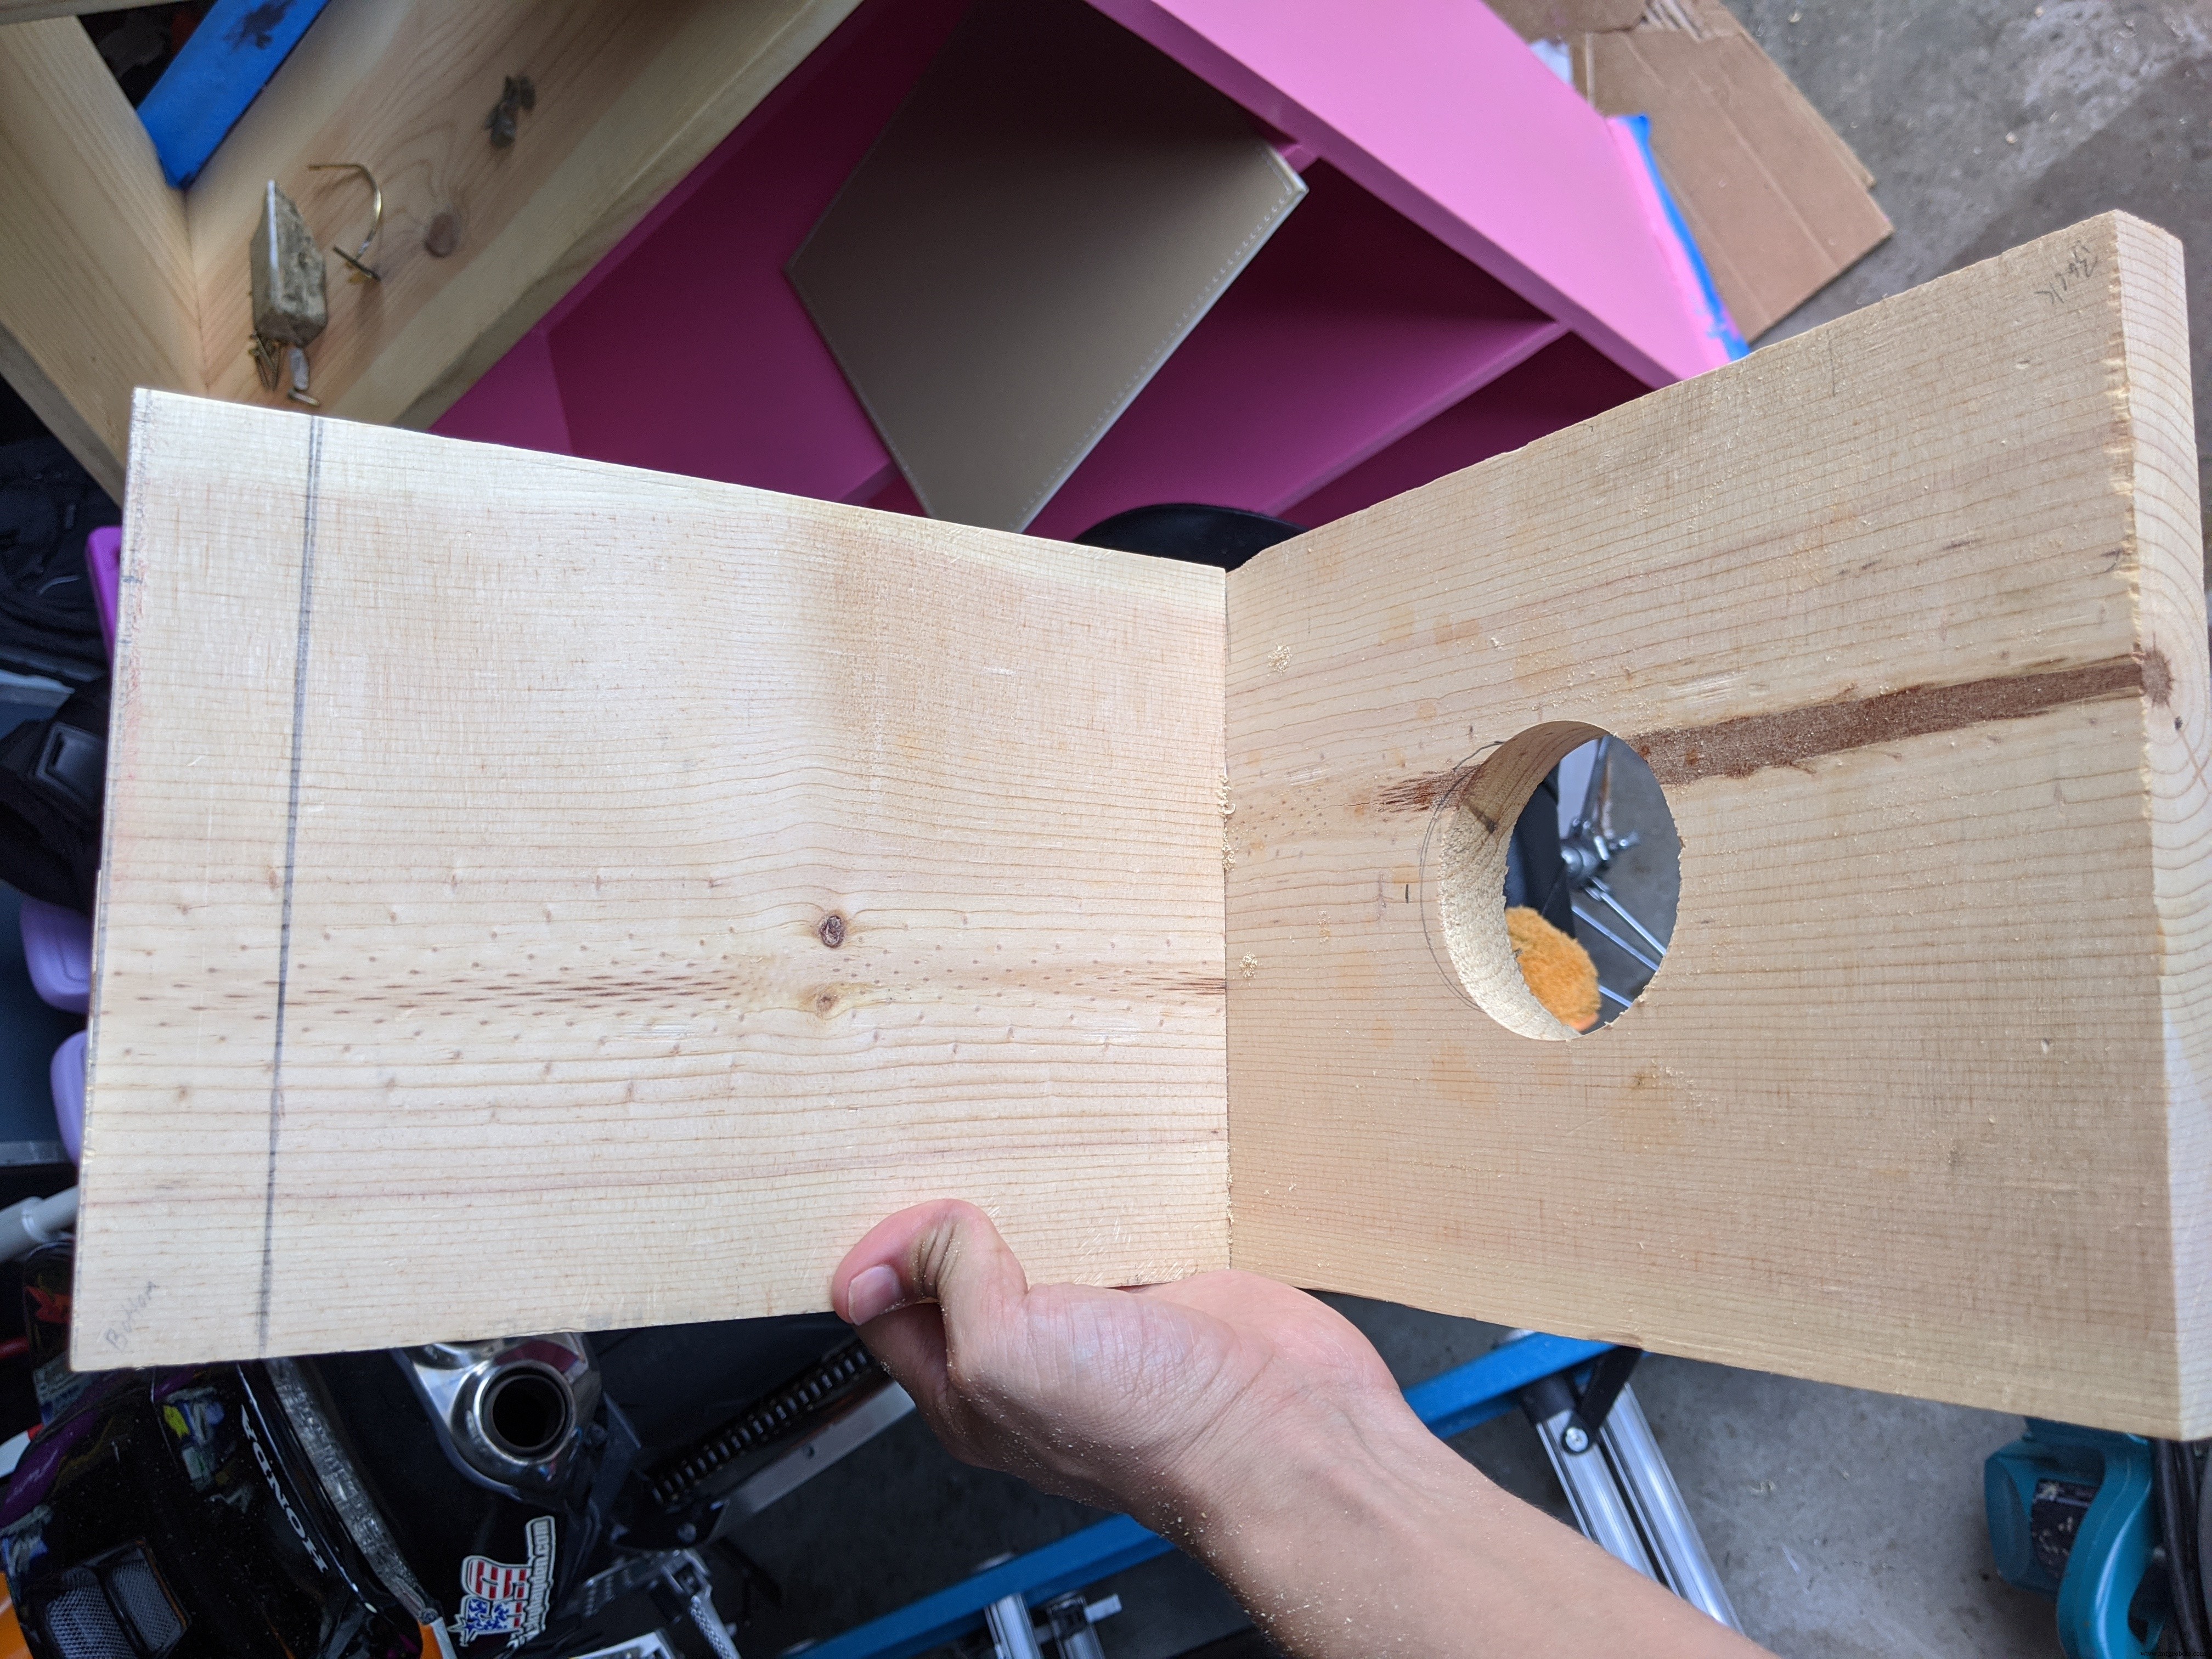
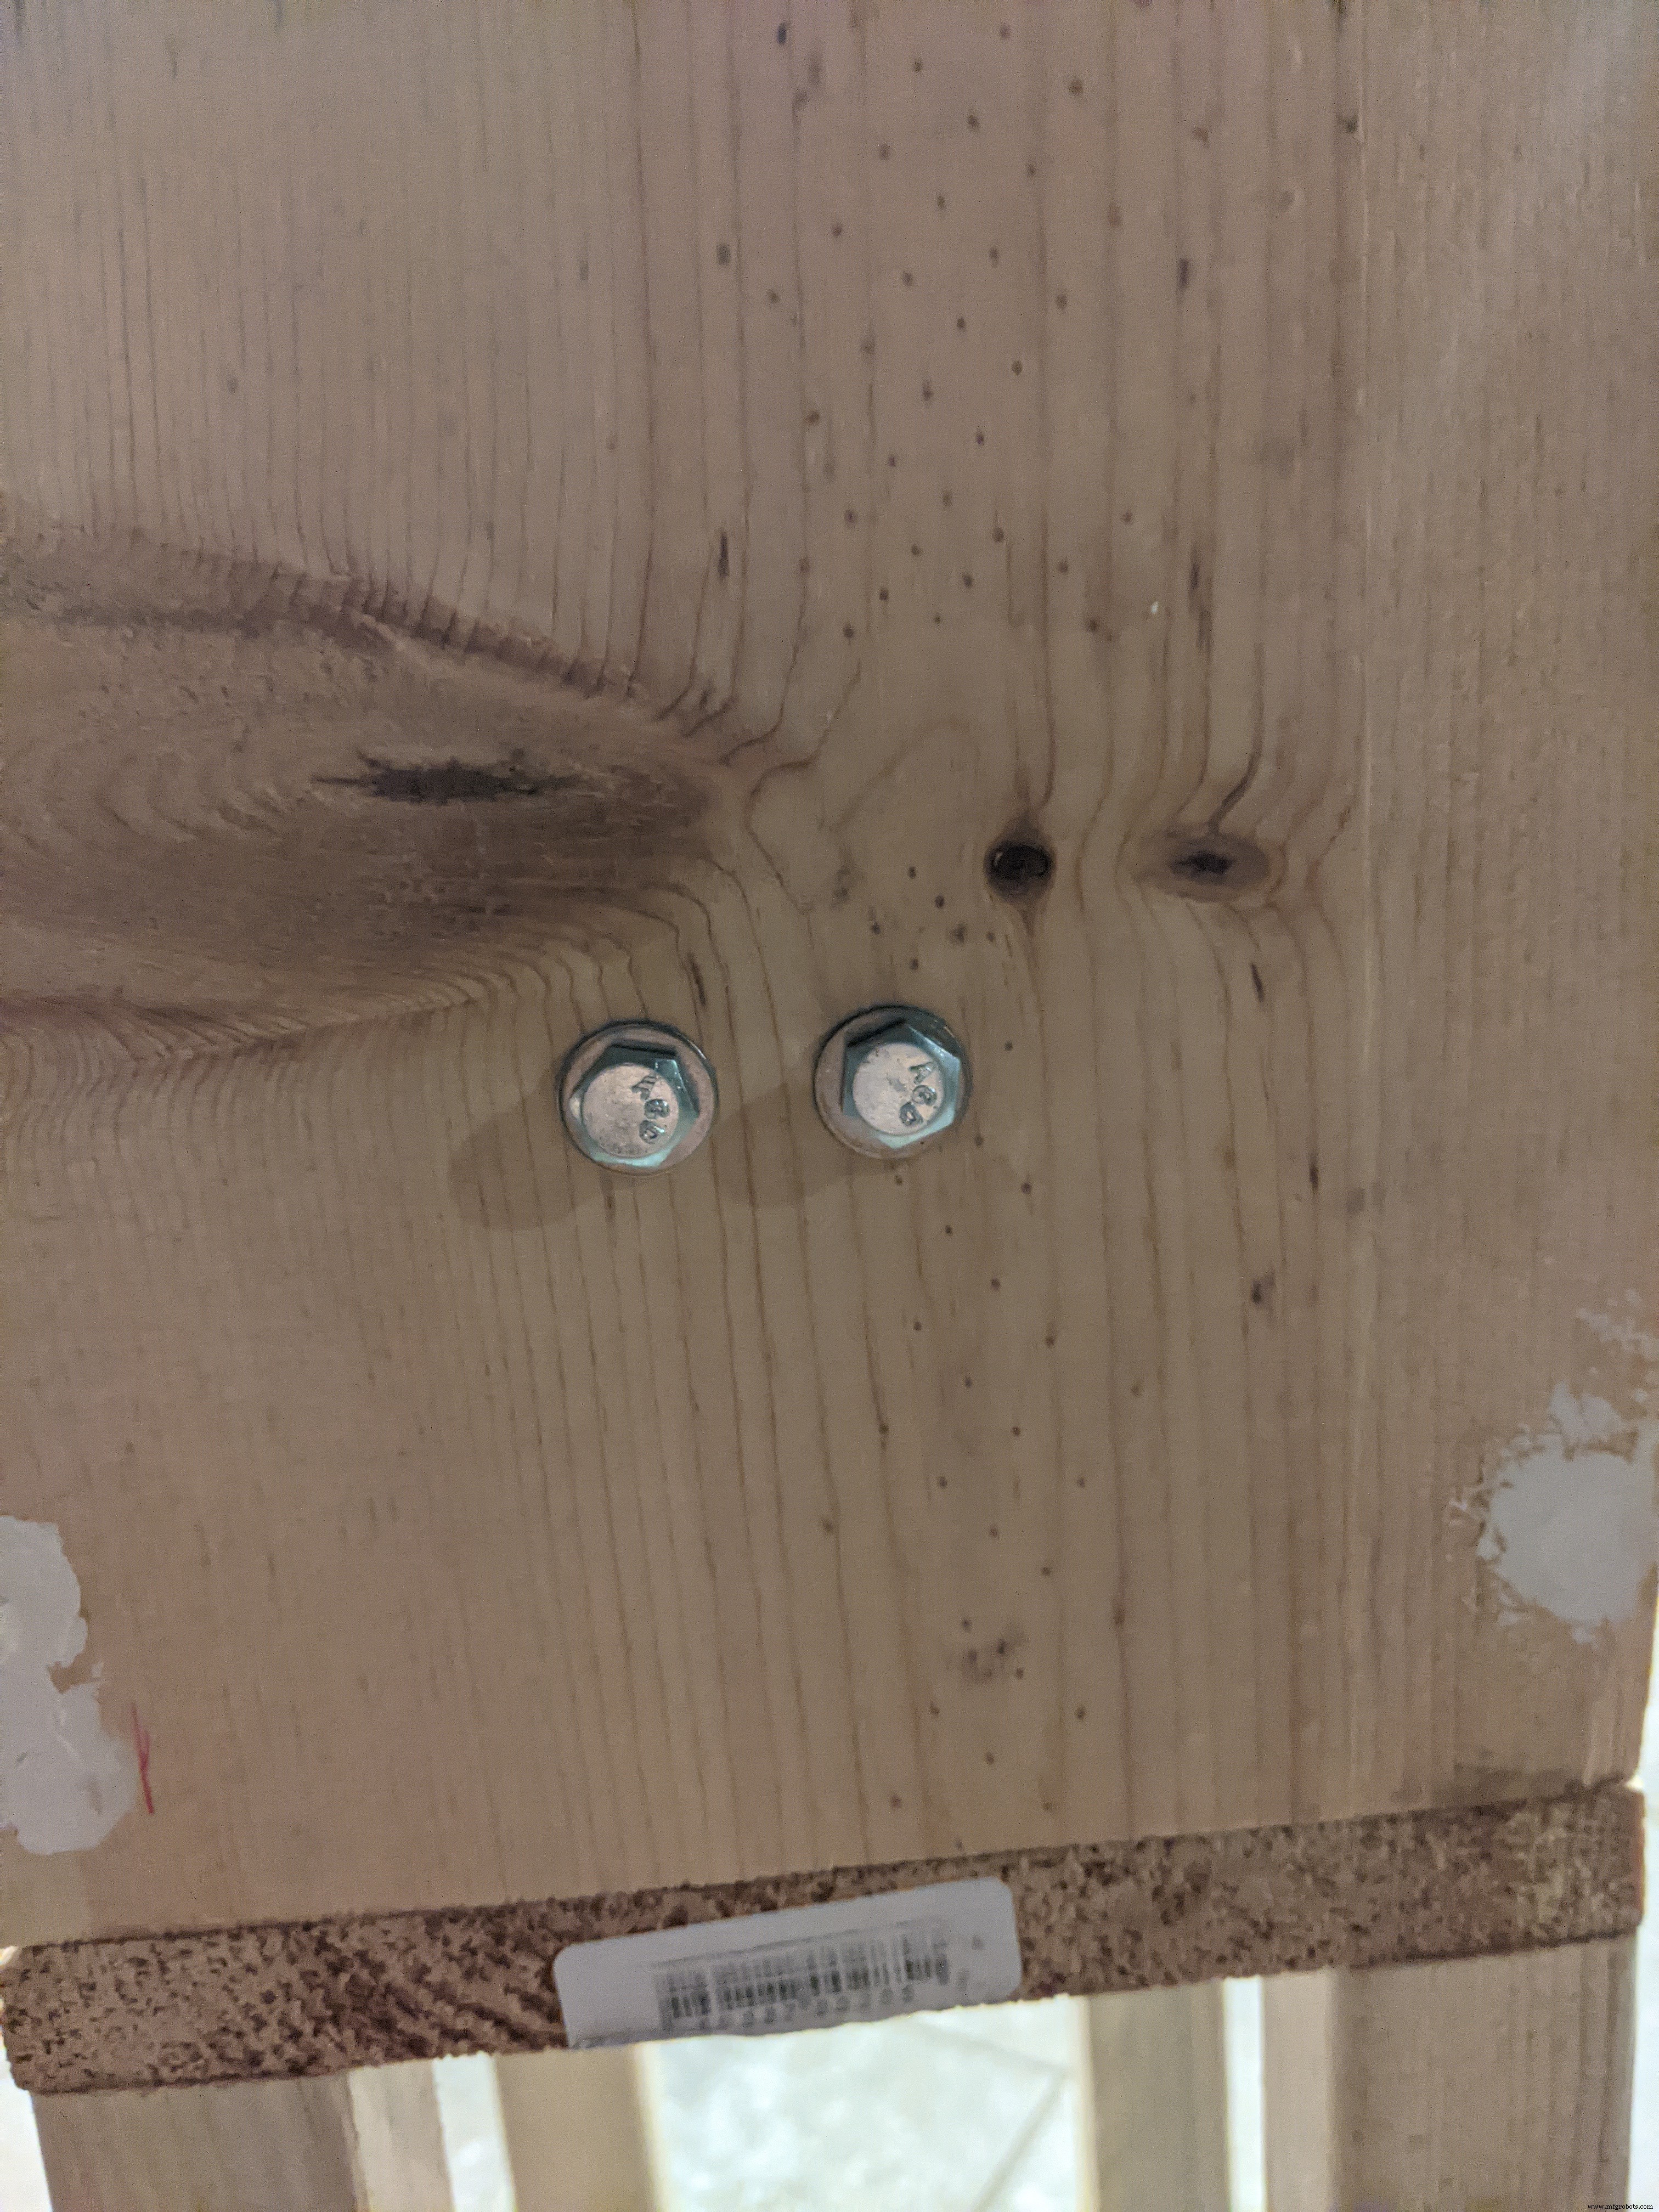
Once you drilled the hole in the base panel, we are ready to attach the dispenser stand to the back panel. What you want to do is set the stand against the back panel (shown in the first picture below). There are two cubby areas under the ring of the dispenser stand. This is where you want the holes to be (see picture below). Use a pencil or pen to mark the height of where the two holes should be on the back panel. You want them as close to the center of the dispenser stand as possible. There are two screws that connect the top ring of the stand to the lower part that you cut off. Be careful not to hit those when drilling. Again, remember to measure twice and drill once. Or twice, in this instance.
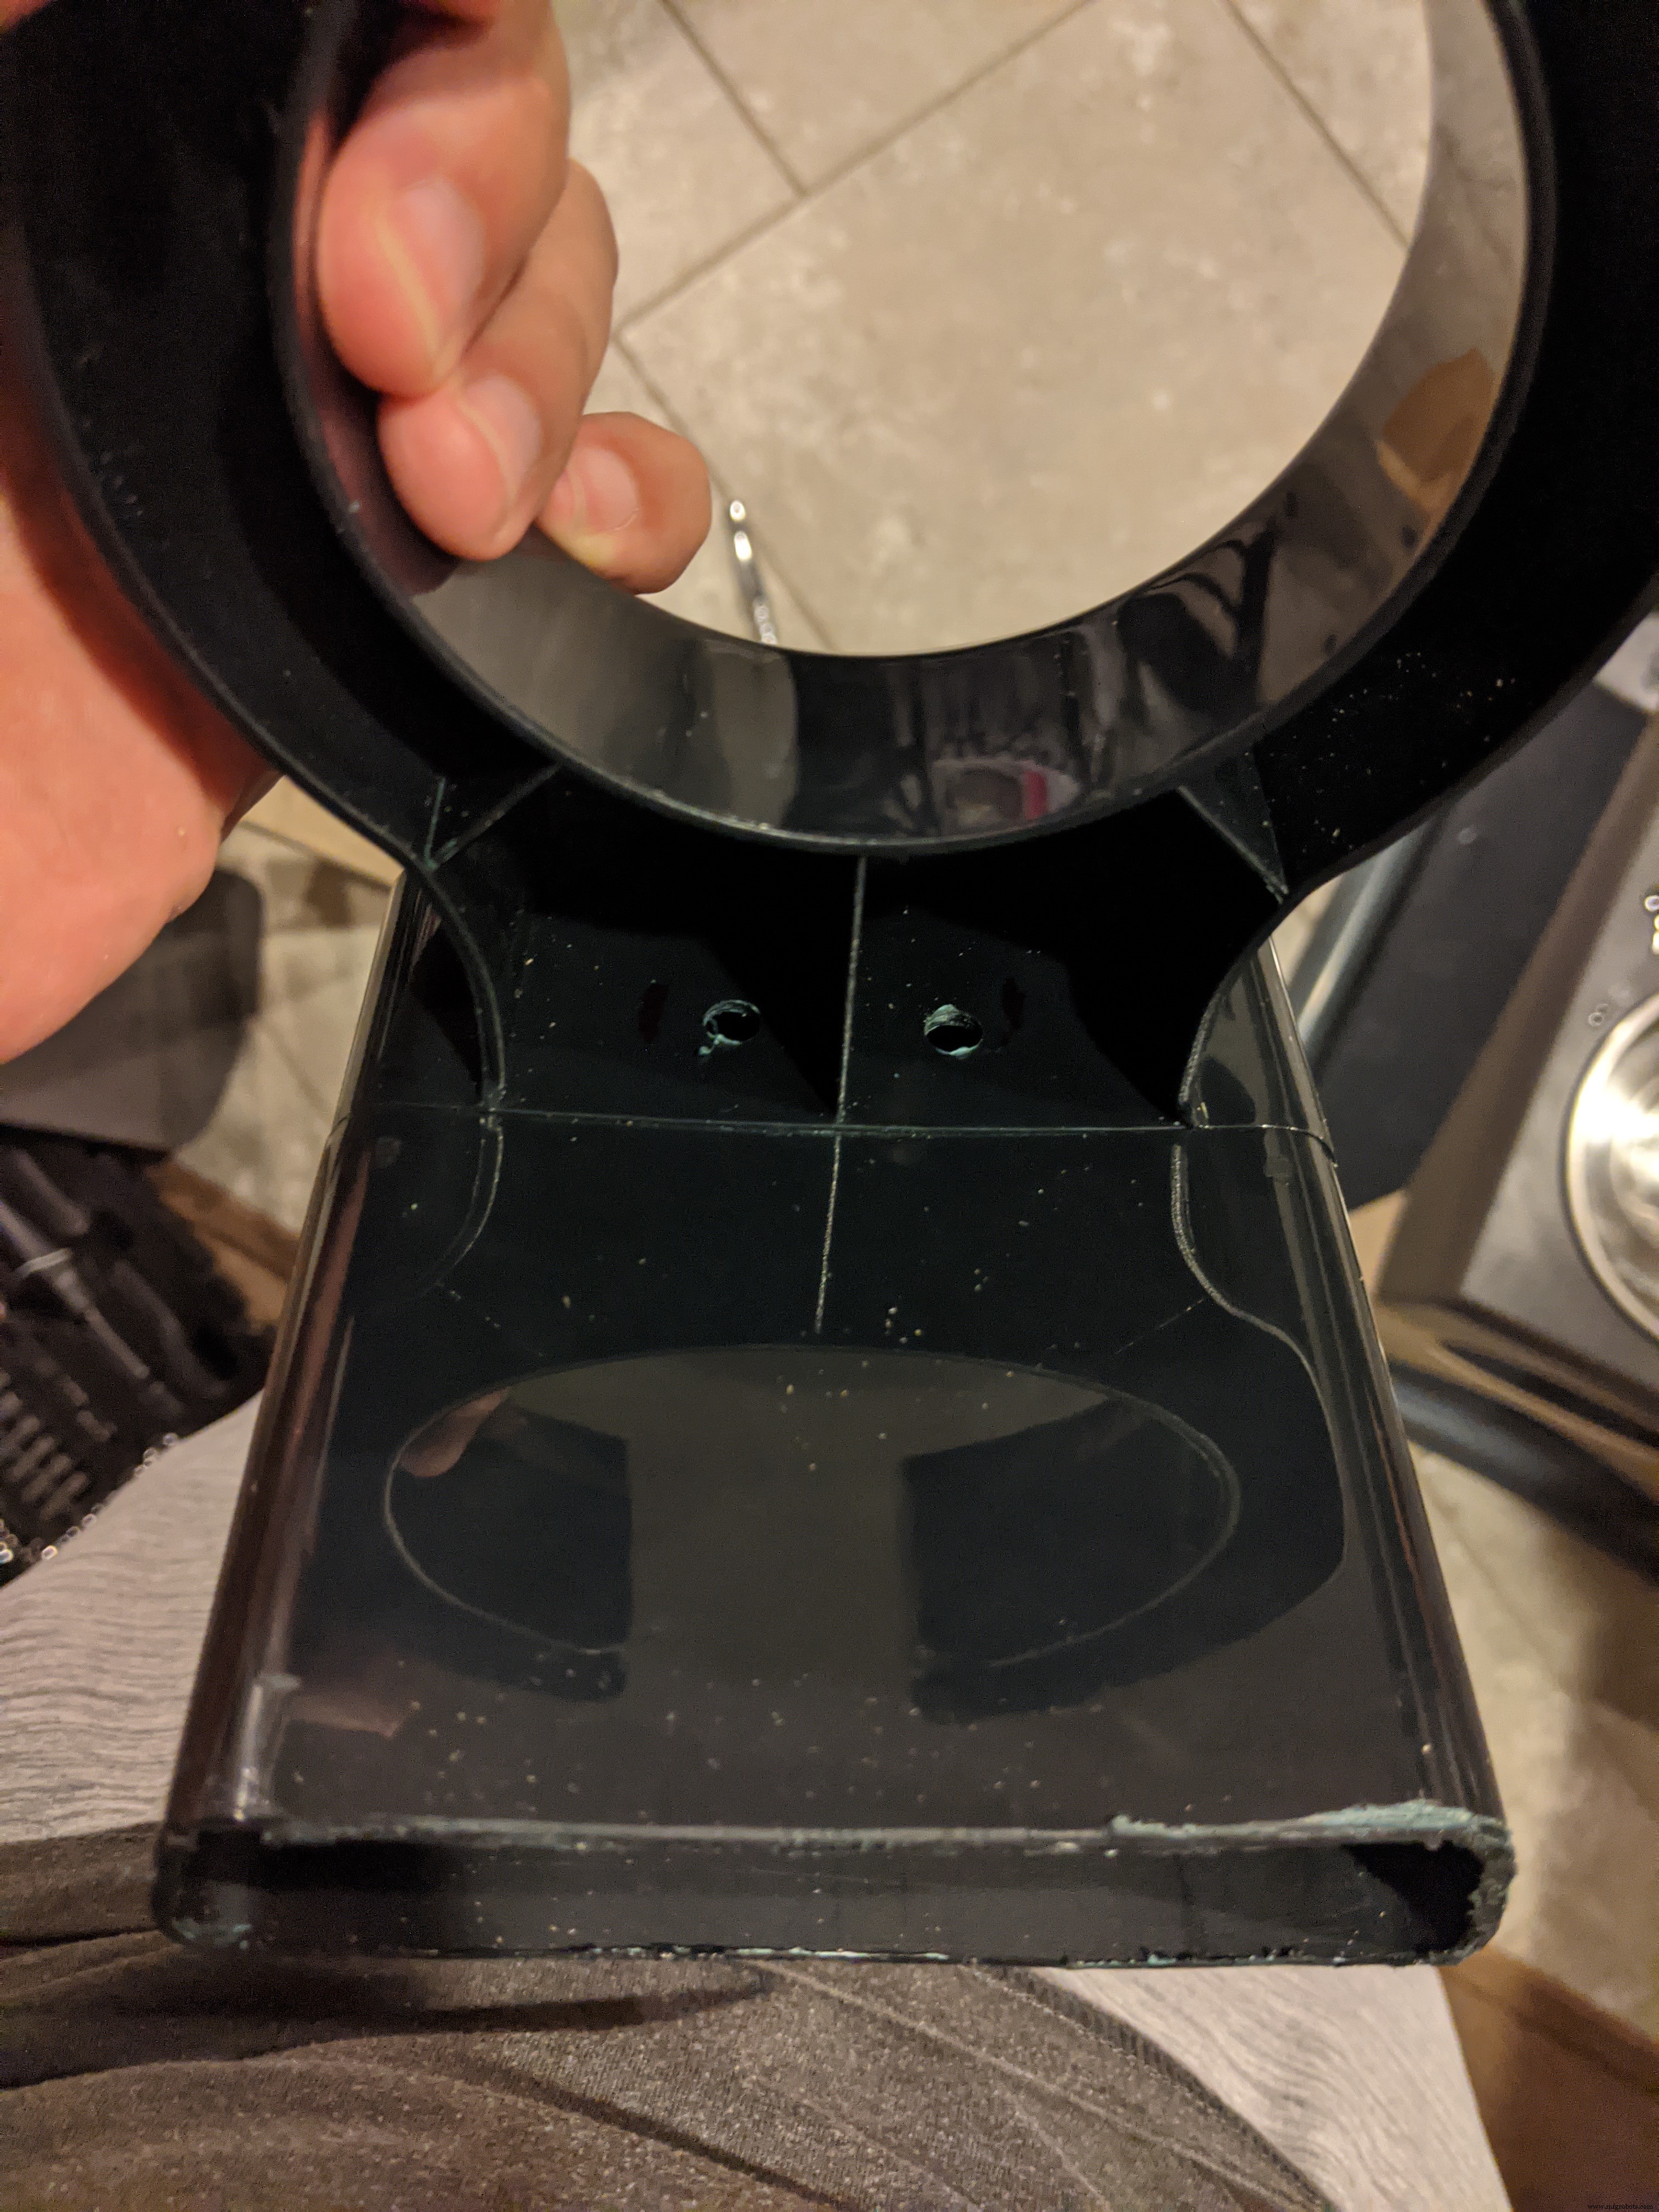
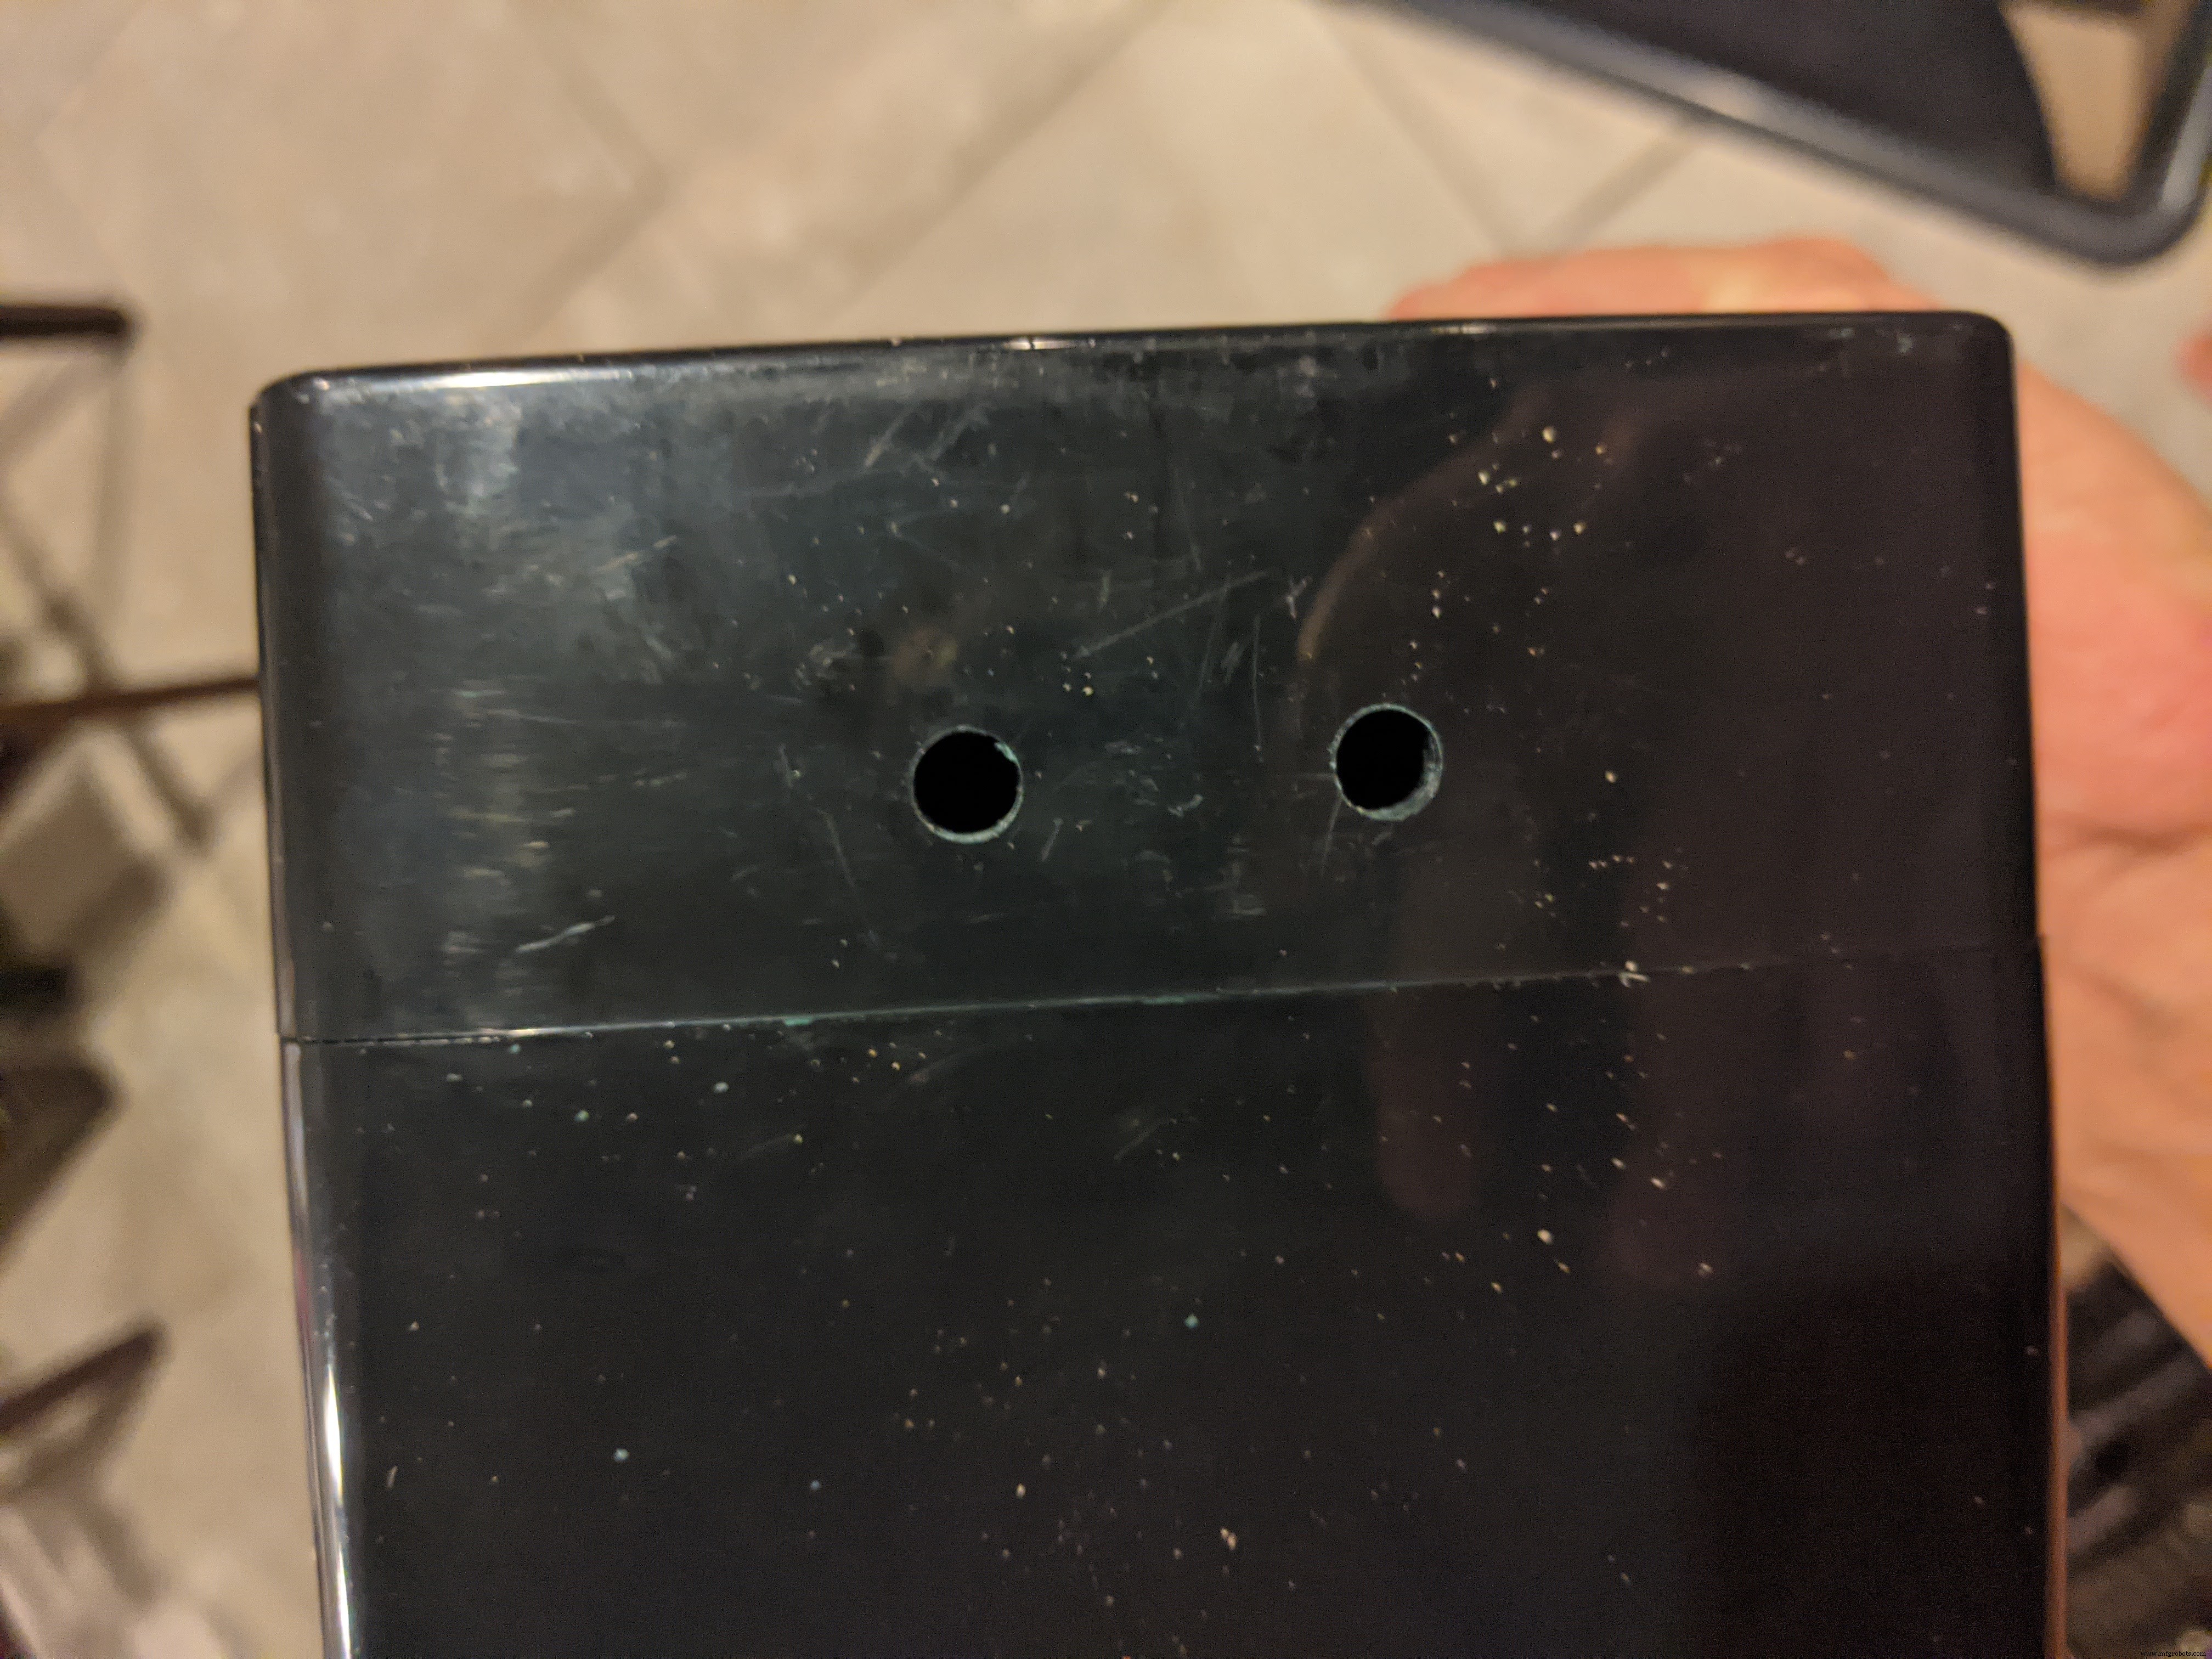
Now that we have the holes drilled, we can attach the stand to the back panel using the 5/16 inch hex bolts, 5/16 inch hex nuts, and 5/16 inch washers. You want to go ahead and push the bolts through making sure you place washers at the hex end of the bolts before pushing them through. After they come out the other side, place the other set of washers on the threaded side and then start to hand tighten the hex nuts. This is going to be a little tricky. After you hand tightened the nuts you will have to use a socket to hold the nut and tighten them further. Only about 1/4 turn or so. Be careful not to overtighten.
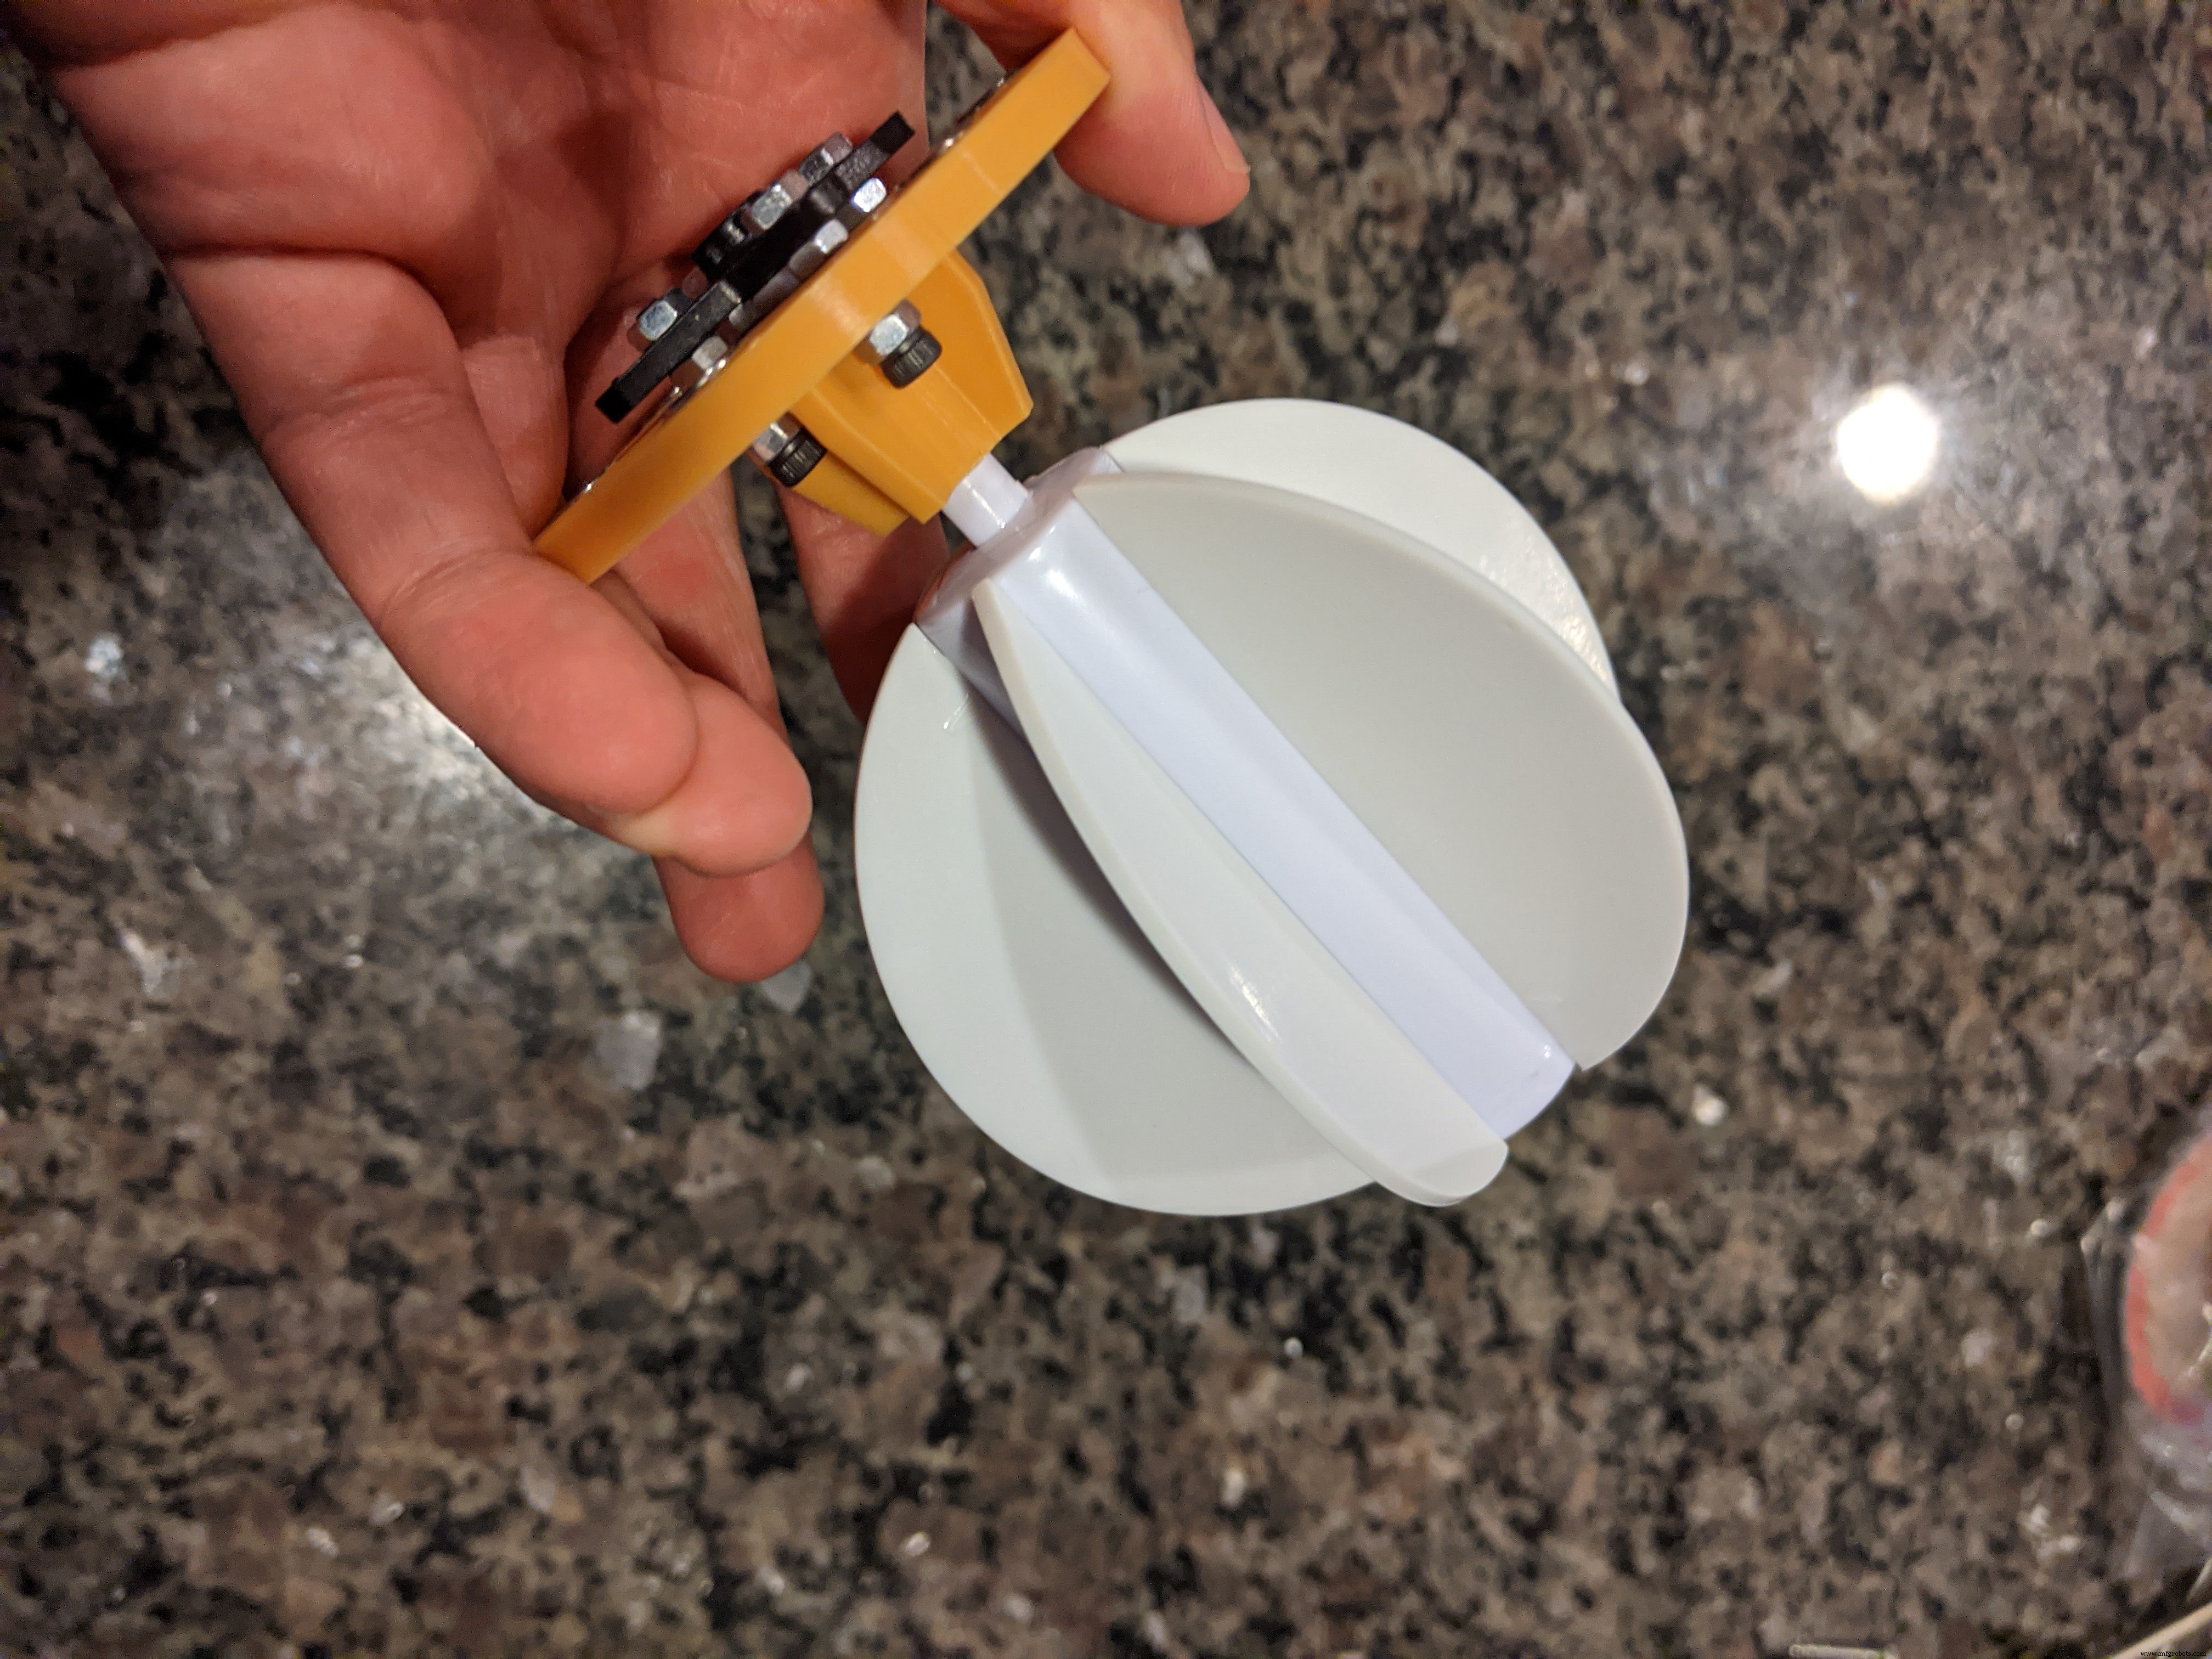
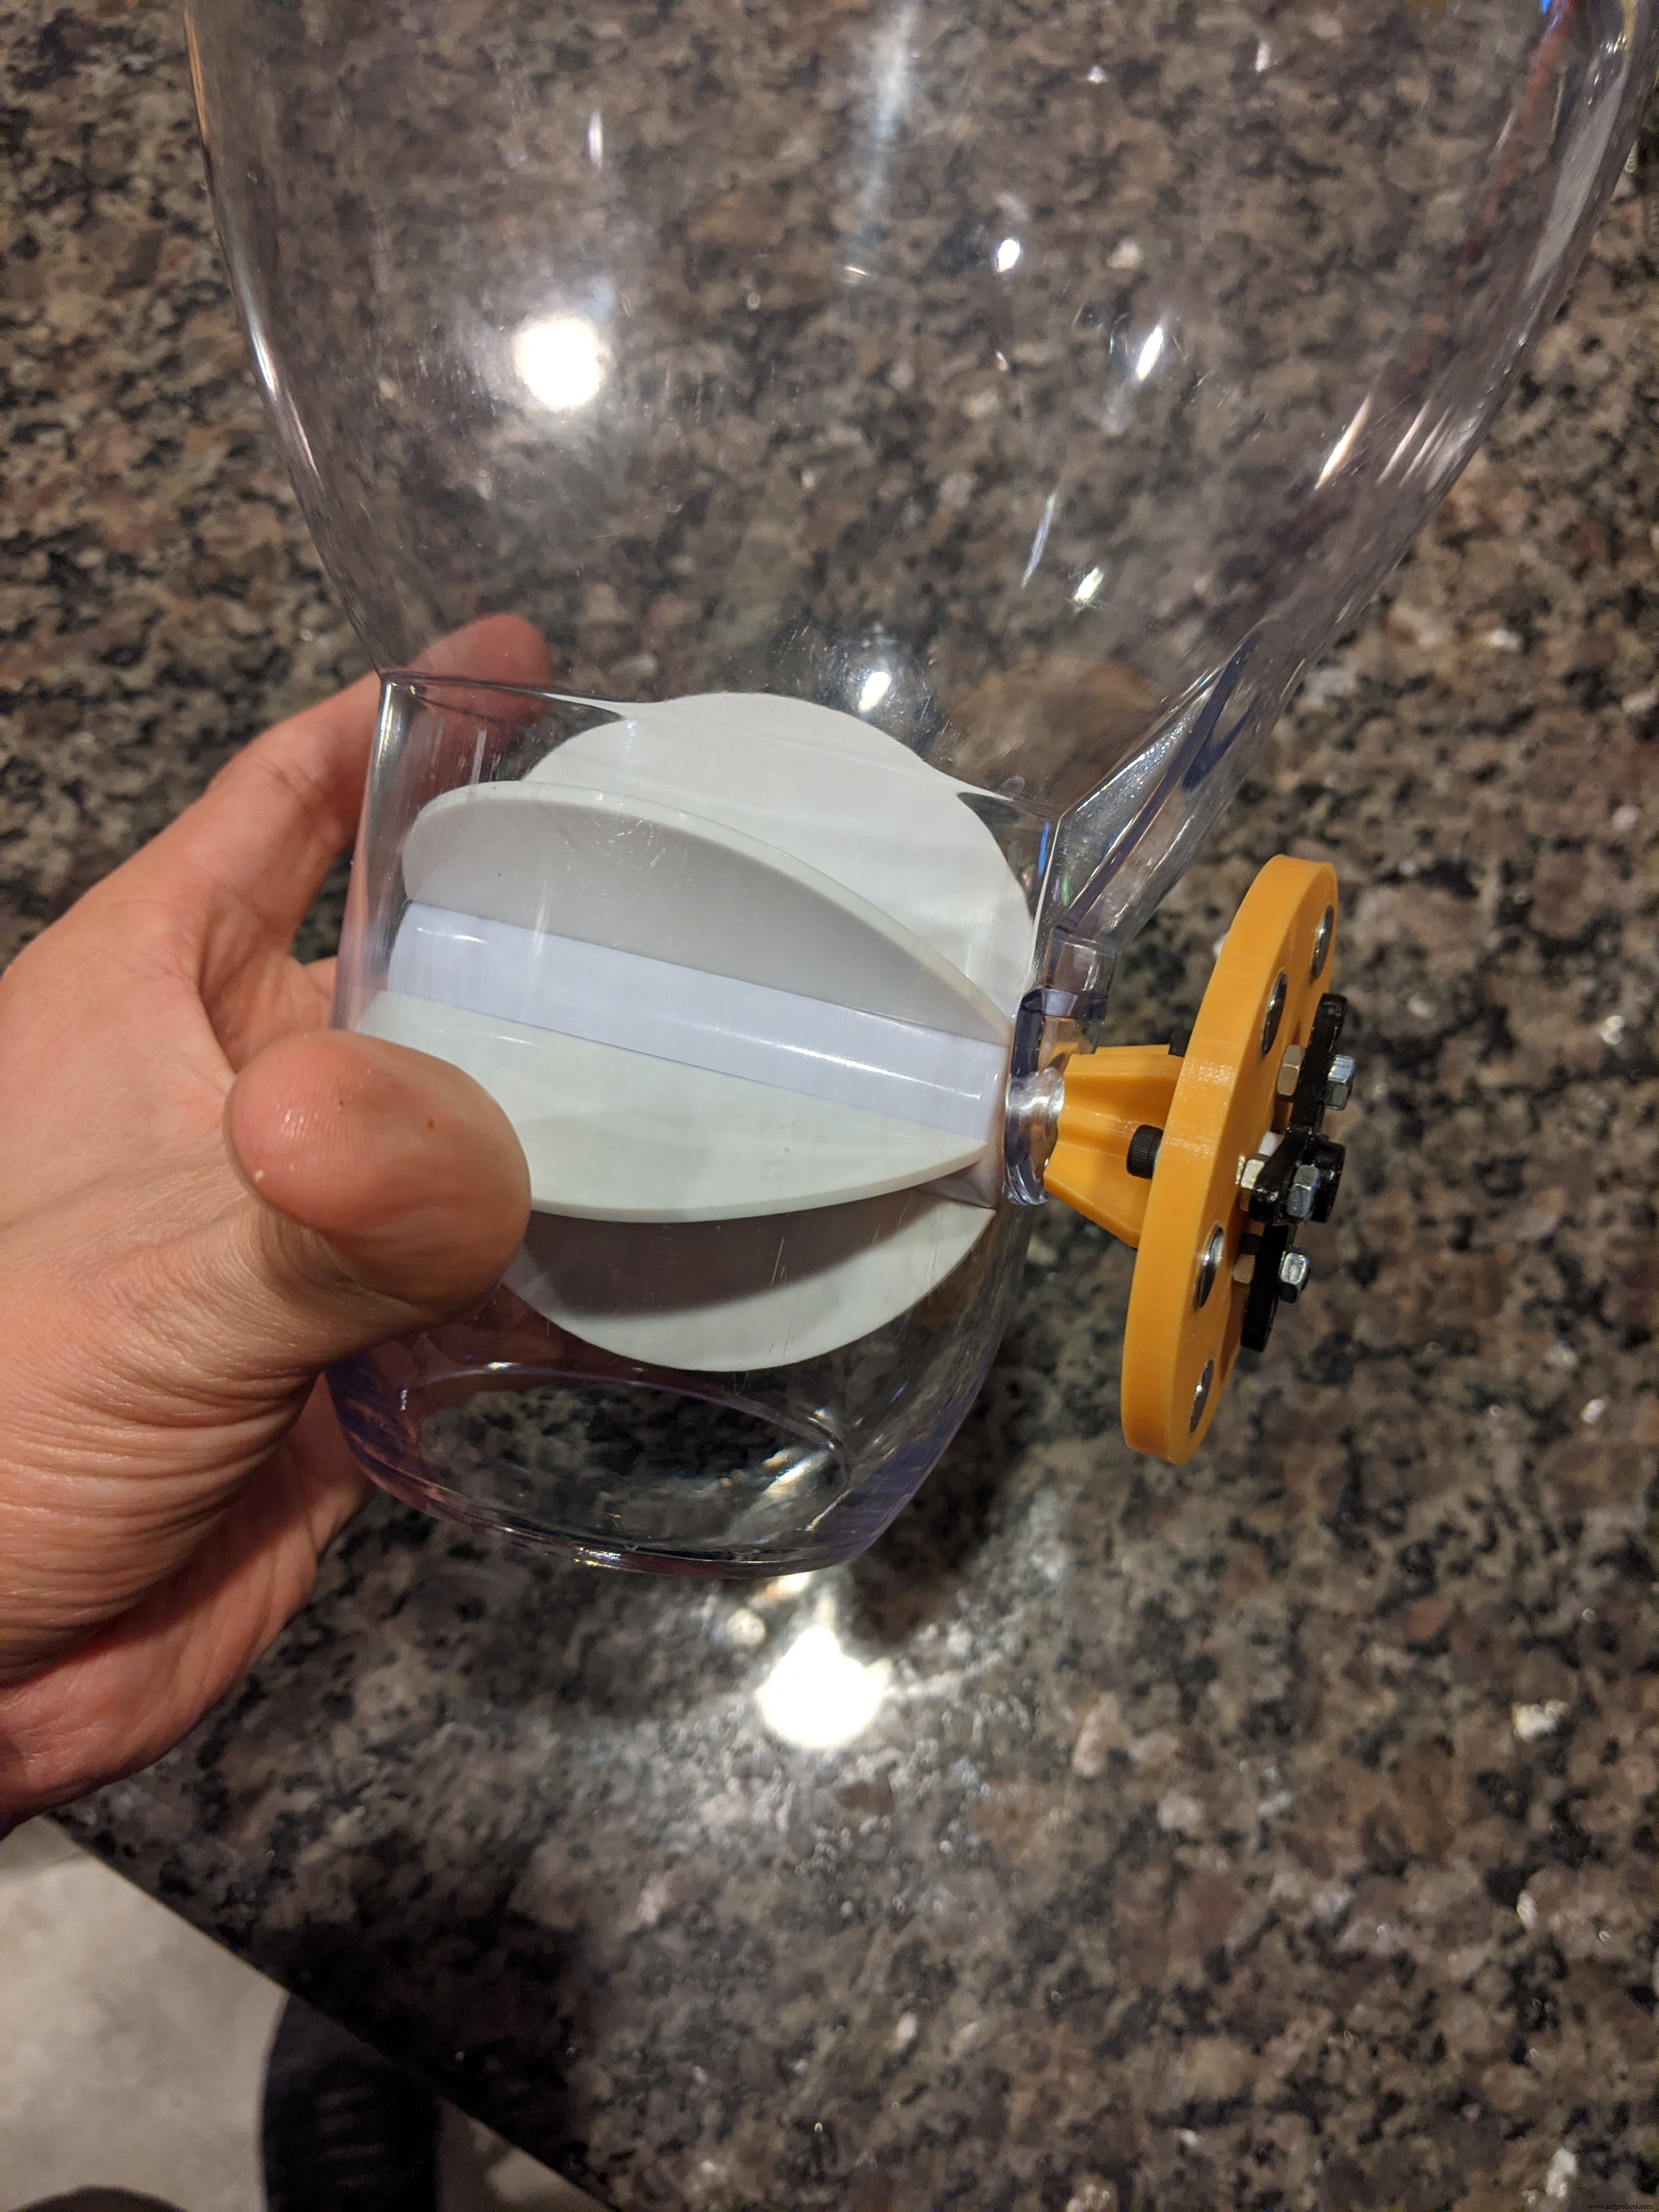
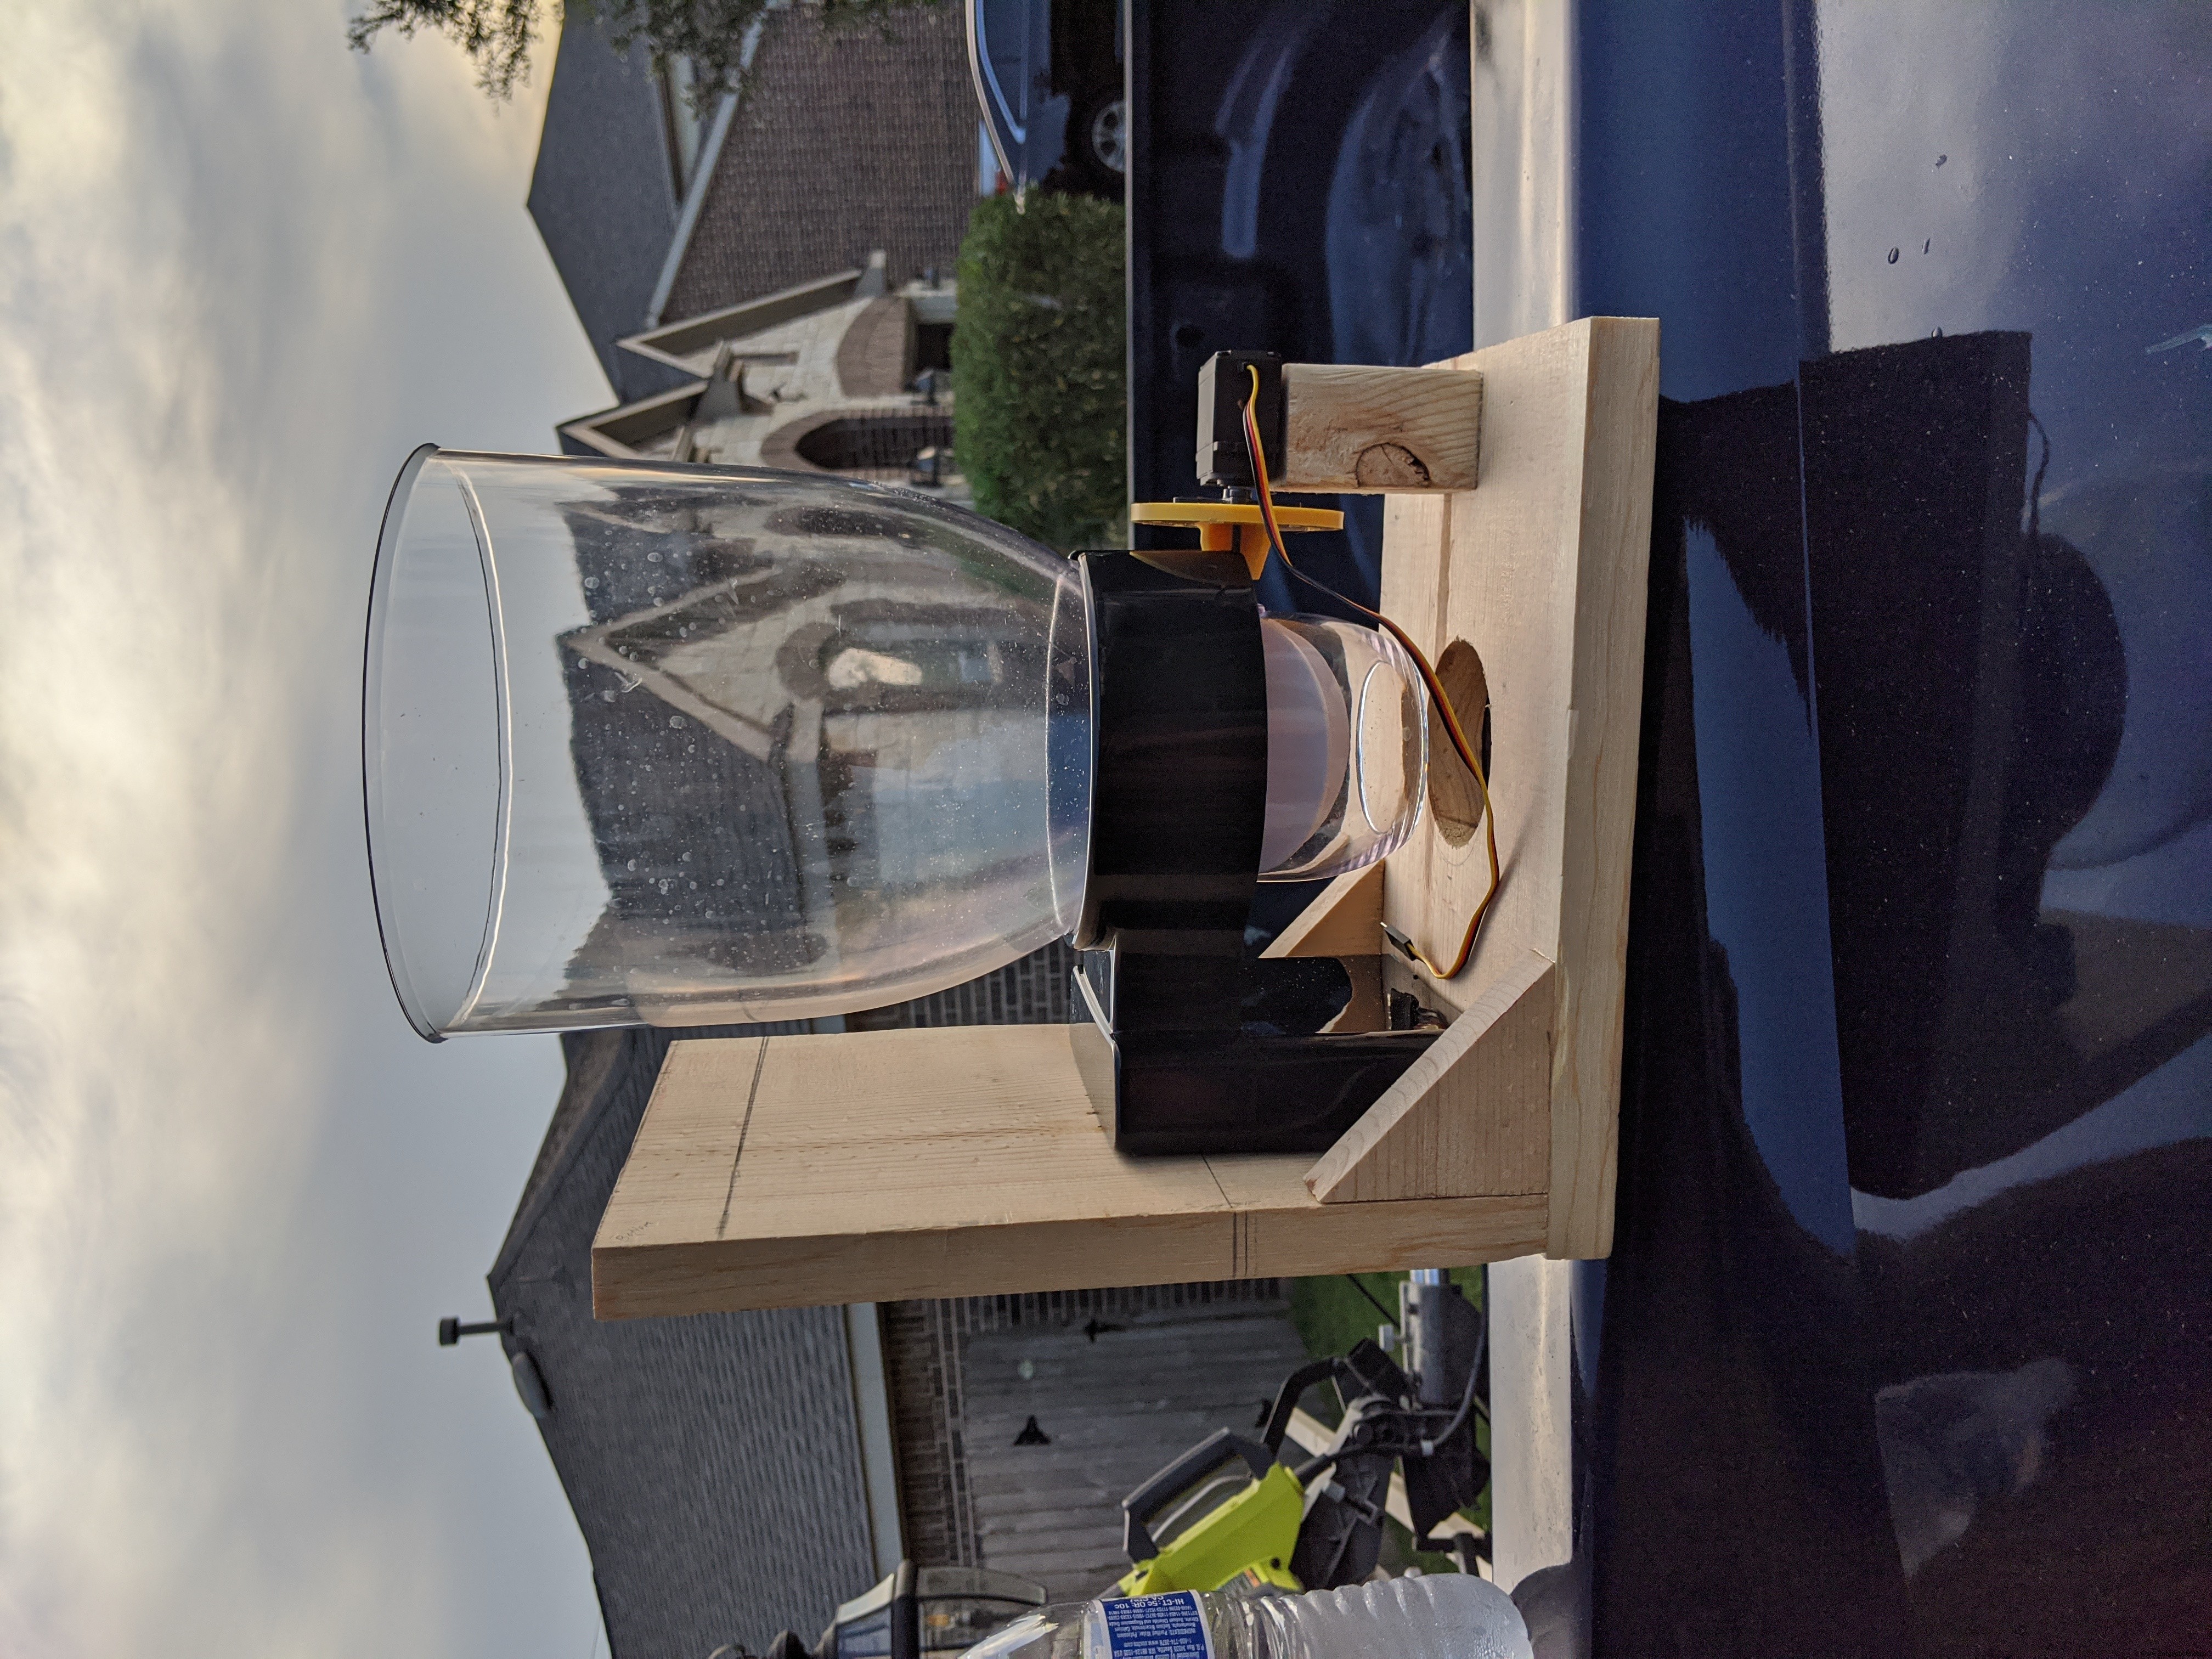
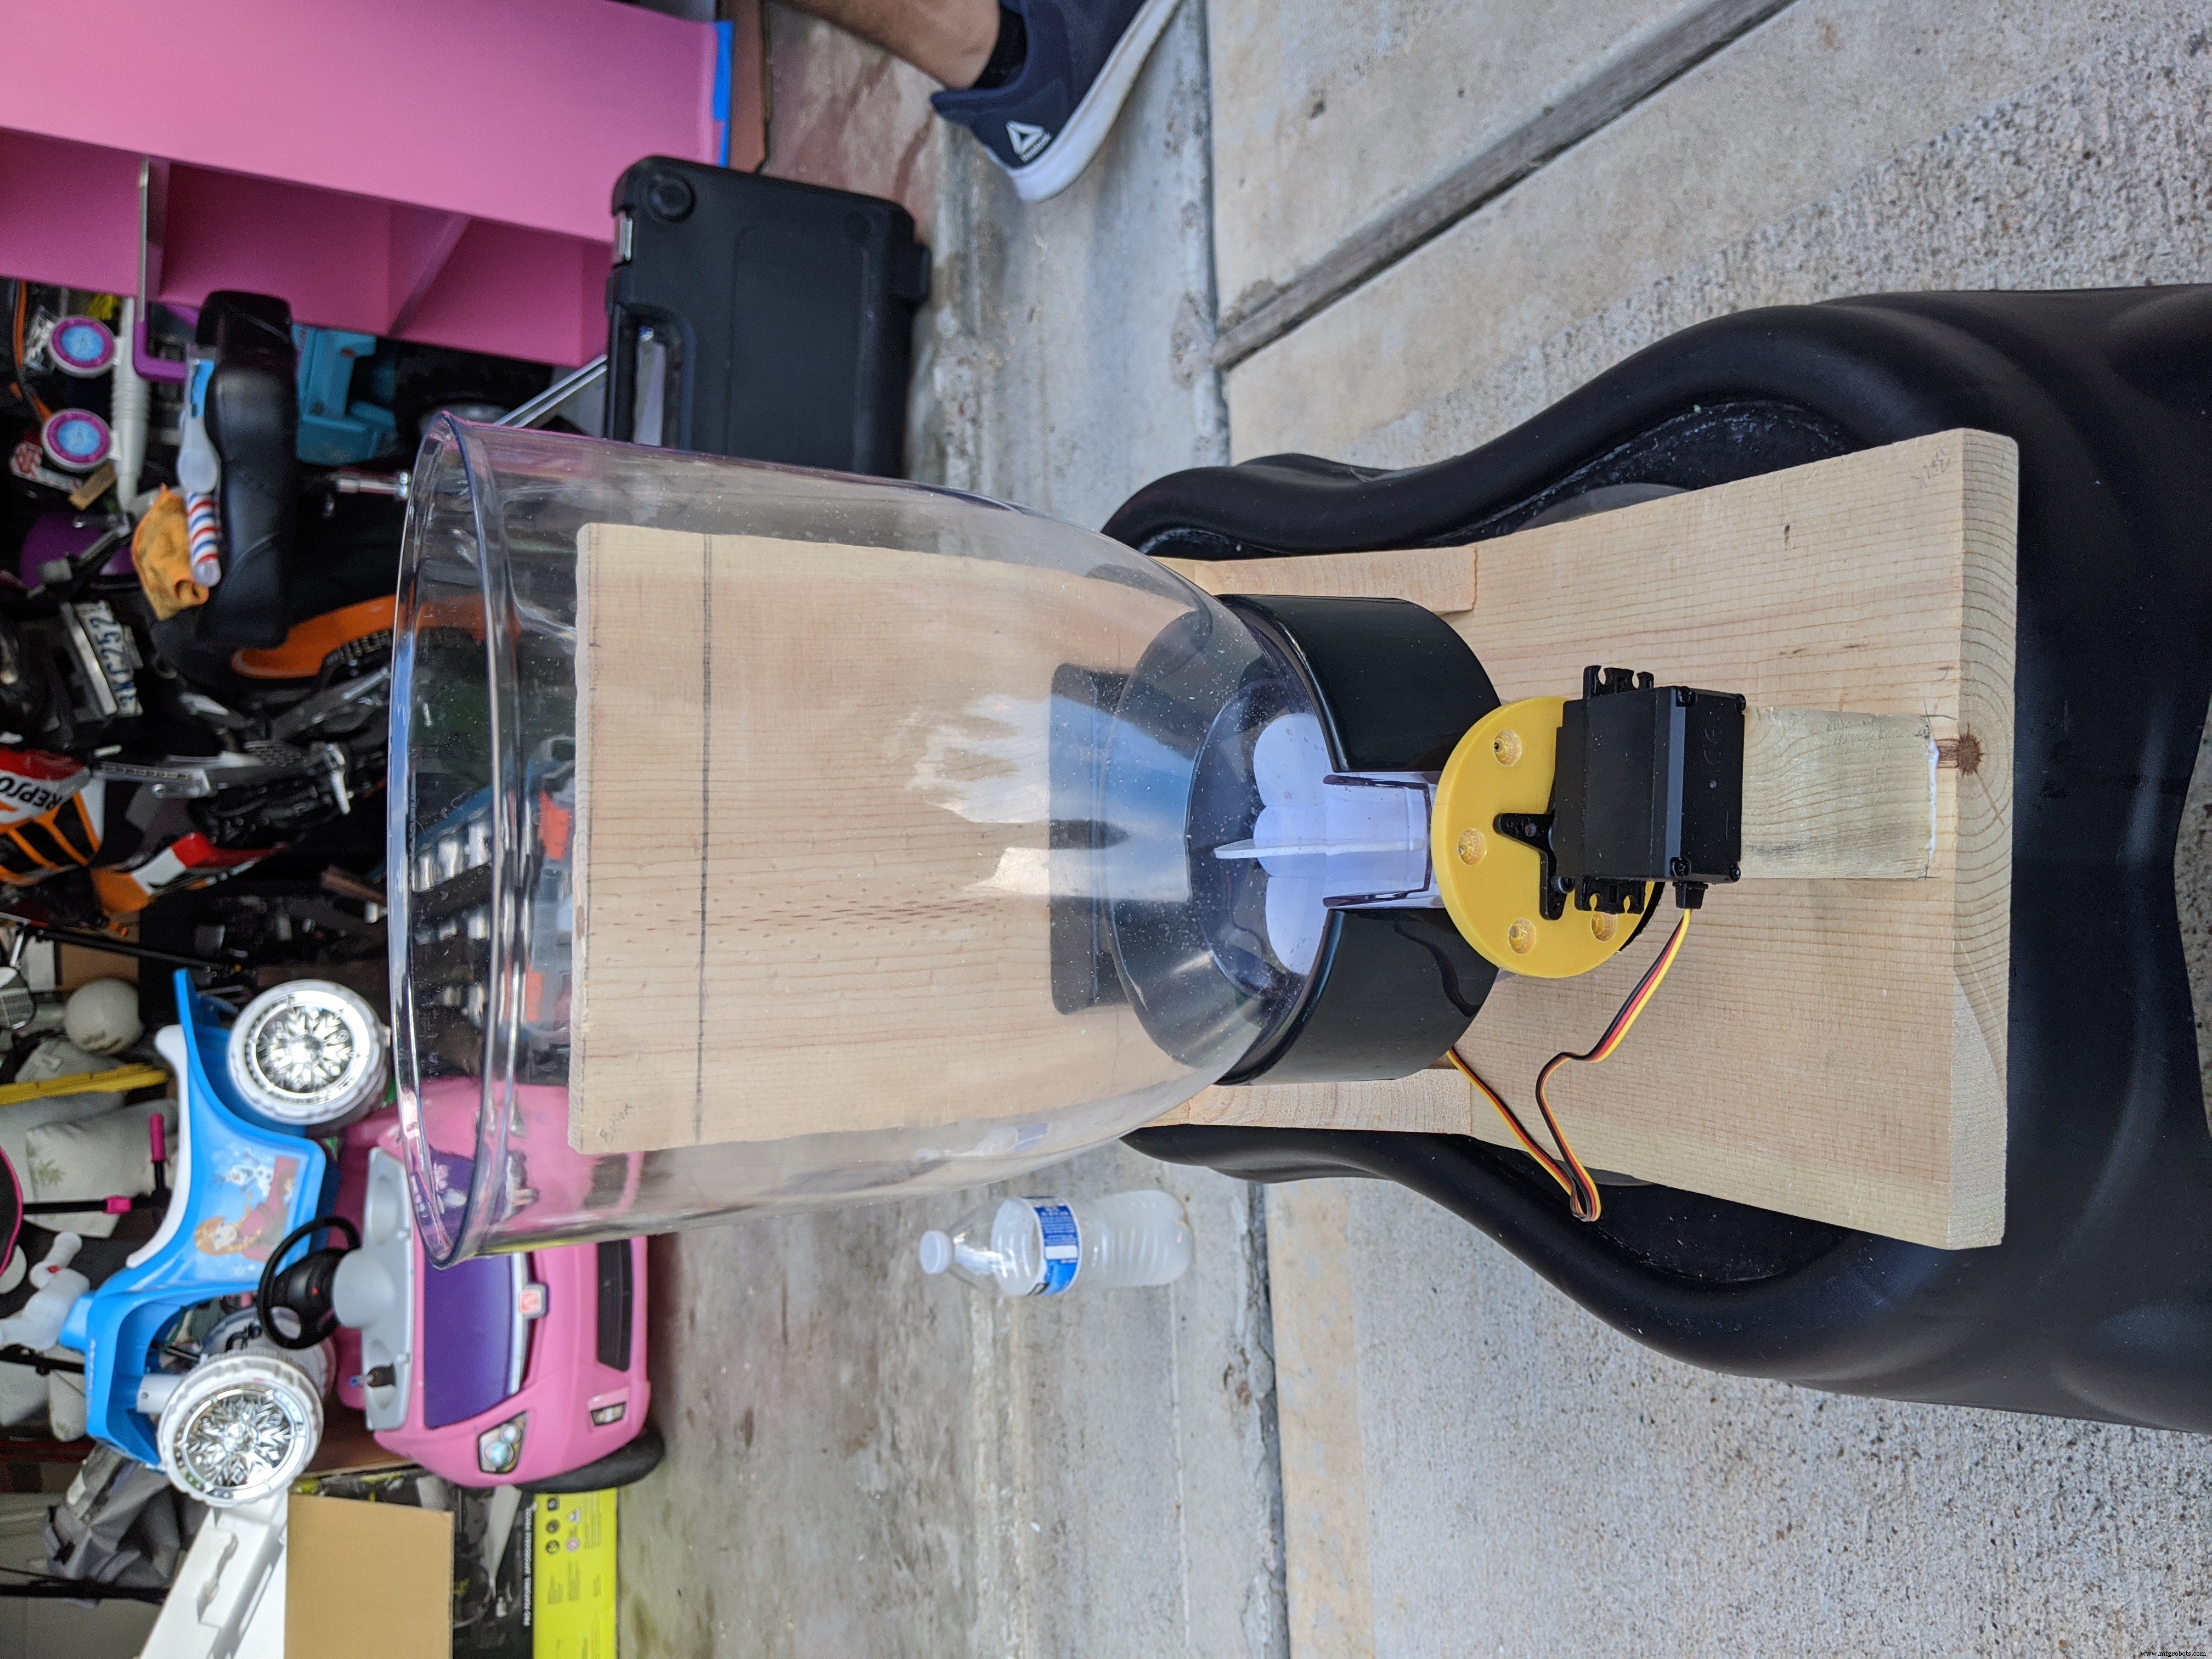
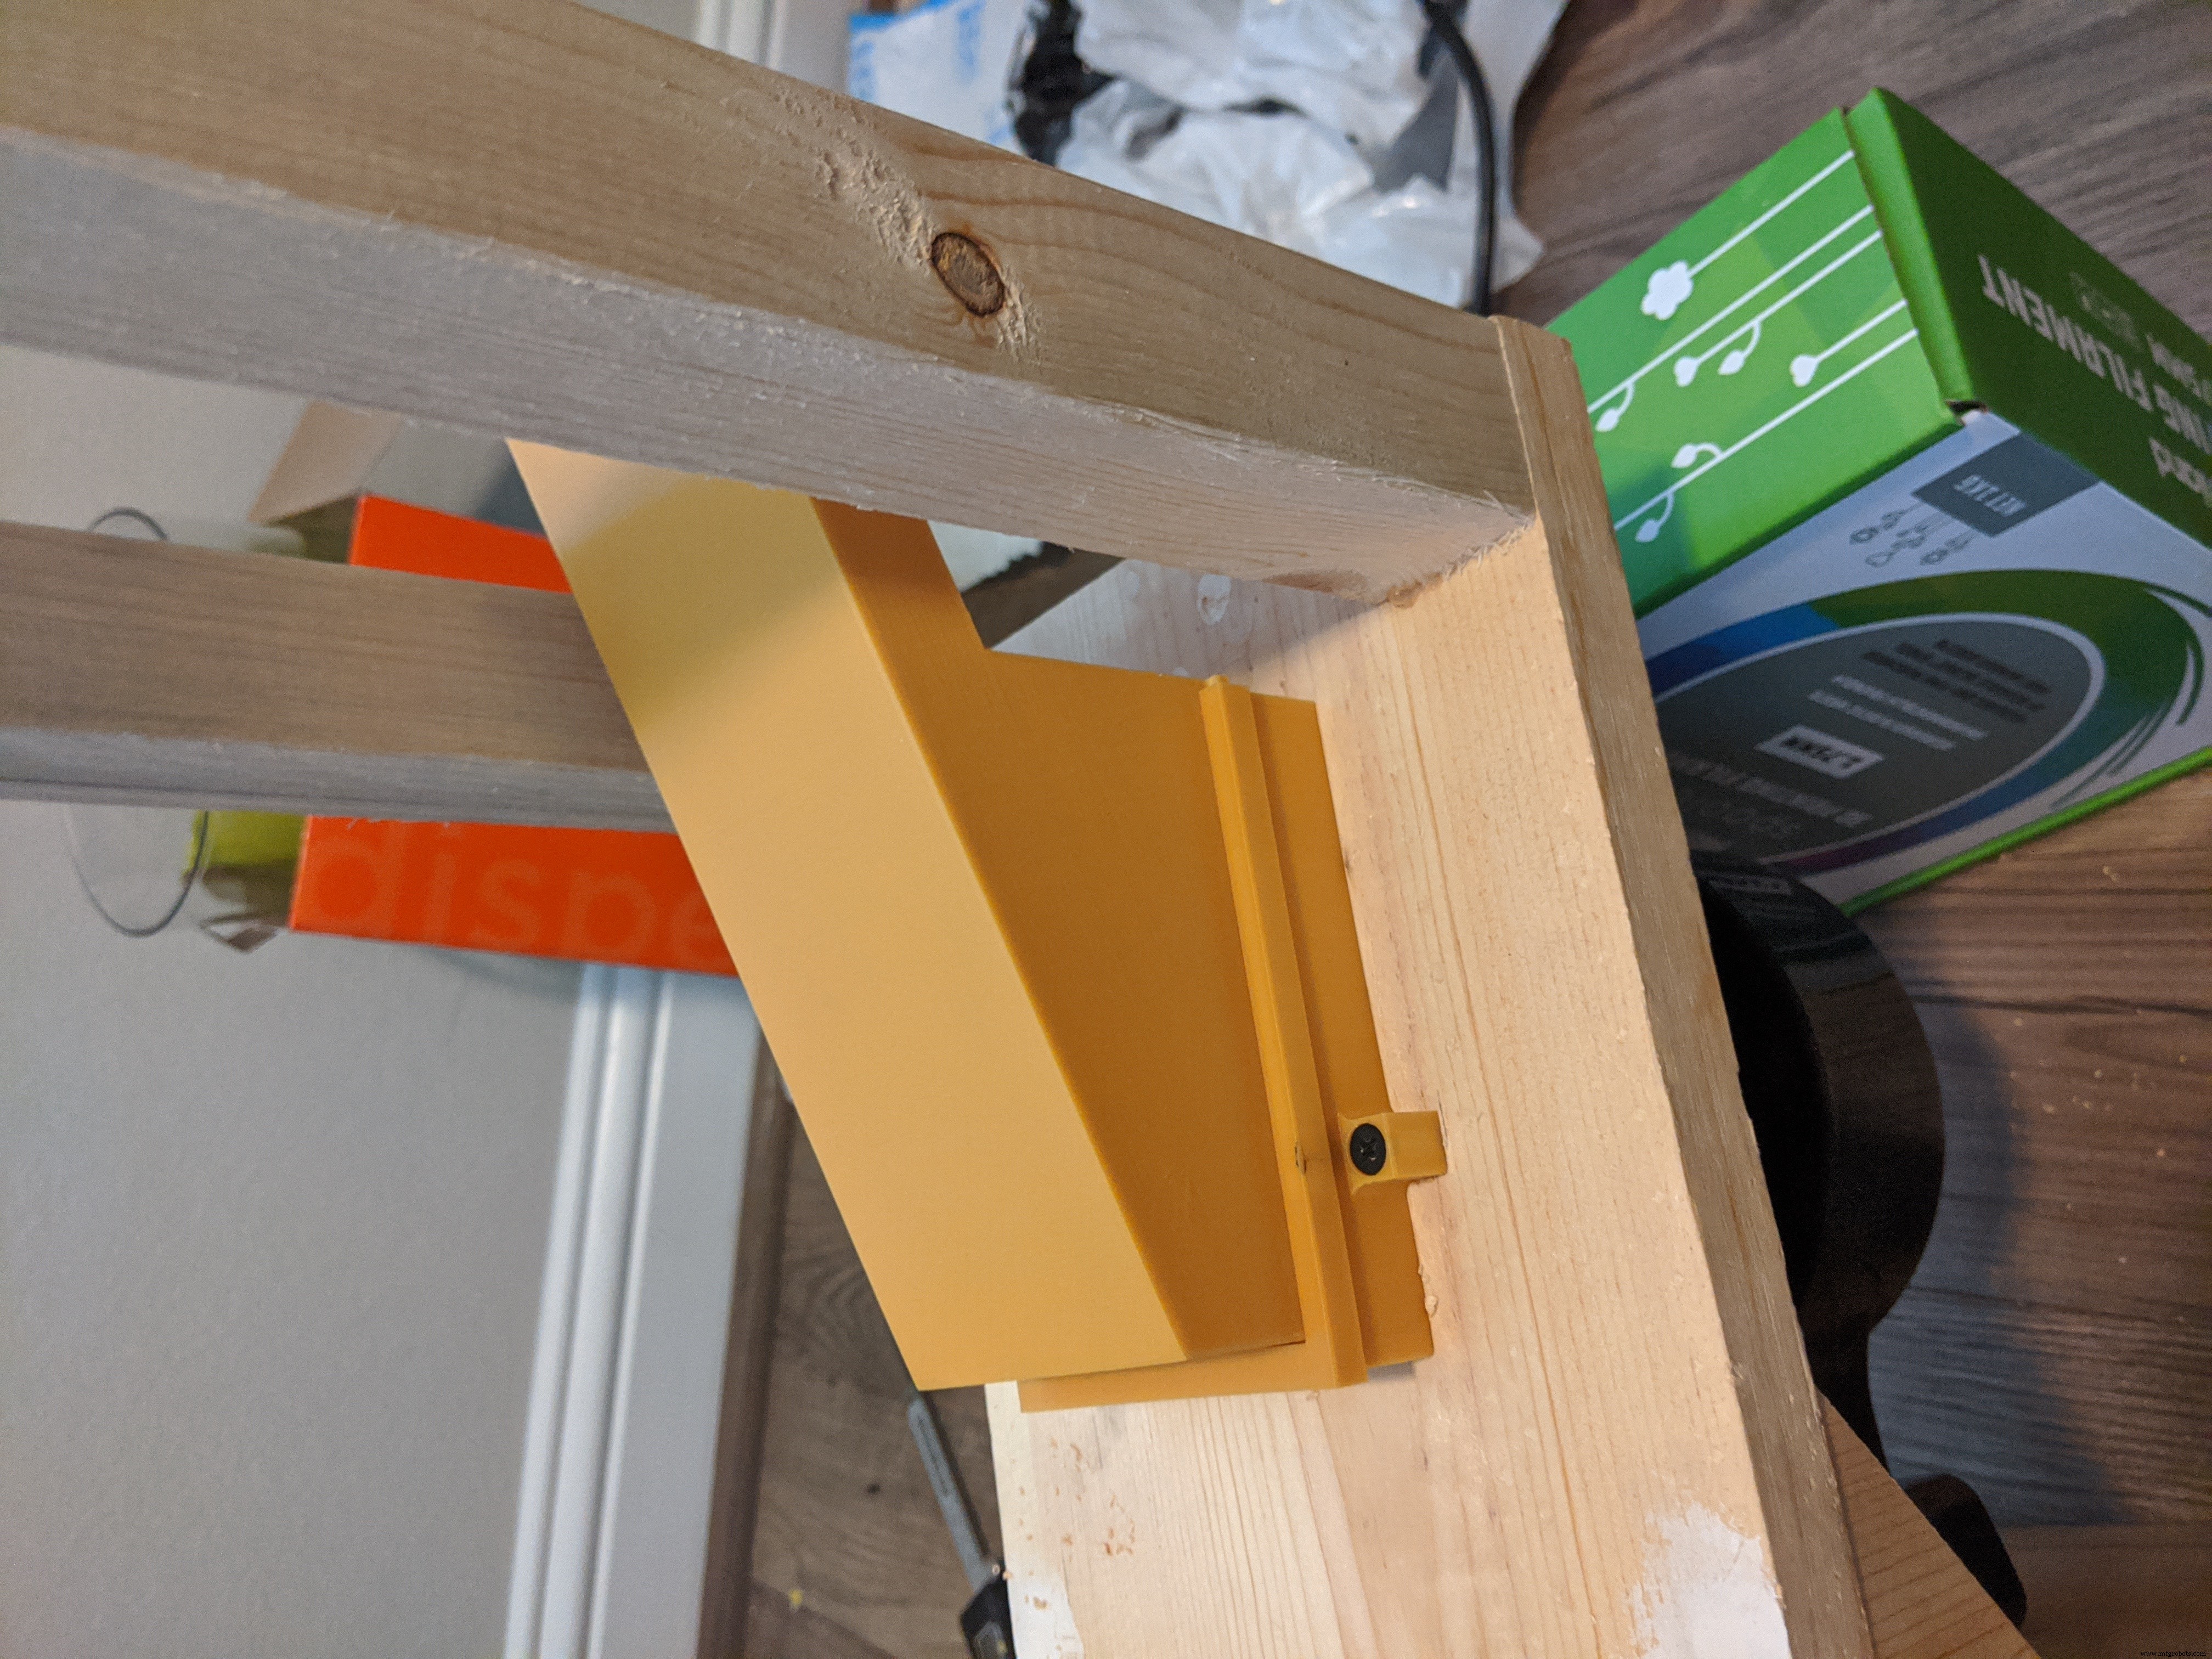
Now that the stand is safely secured we can now add the 1/2 x 1/2 inch piece of wood that the servo is going to sit on. The length of this is going to depend on where your servo will be sitting. Go ahead and assemble the feeding mechanism by attaching the servo to the horn on the encoder wheel and the encoder wheel to the rubber paddle inside the plastic container. Set the container down into the top ring and measure where the servo sits from the base panel. Don't worry about it being perfect. The servo bracket allows for quite a bit of wiggle room. Use wood glue and a single multi-purpose screw to secure the wood stand.
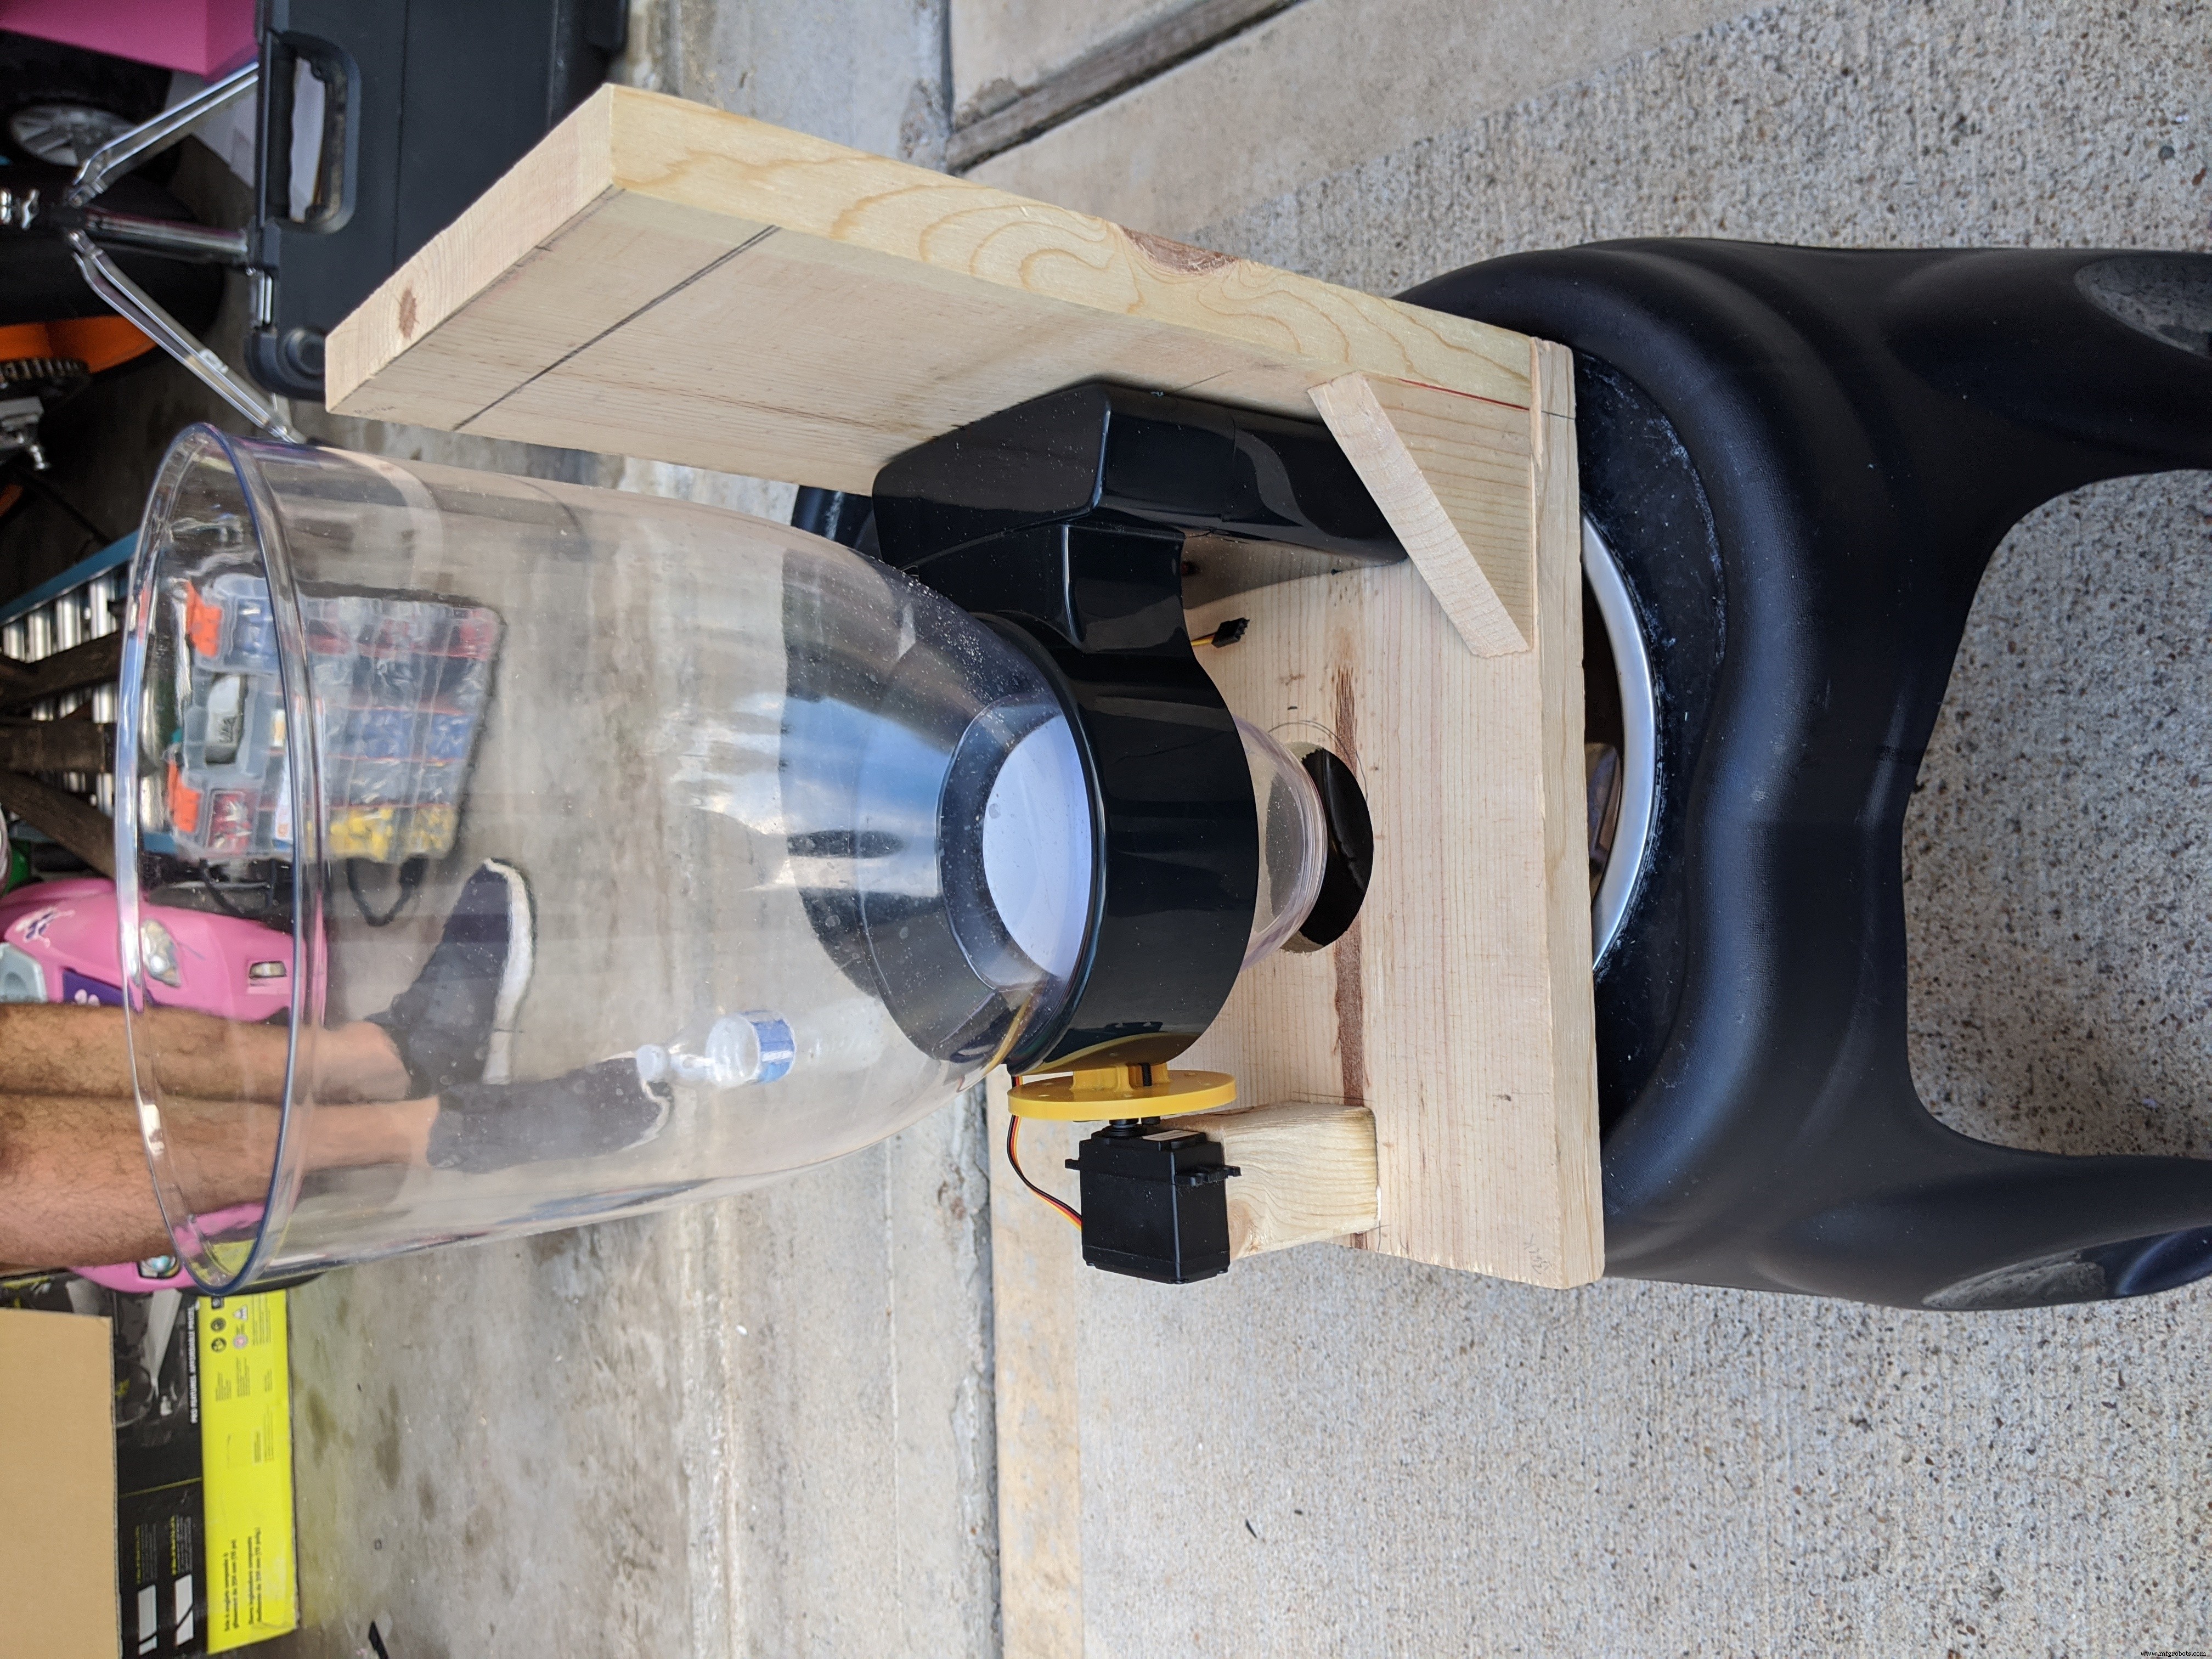
The next step is attaching the legs to the base panel of the feeder. The length of the legs is going to depend on how high your pet's food bowl is. My dog has her food bowl on a raised stand; therefore, I needed my feeder to sit quite high. Use 4 of the multi-purpose screws and some wood glue to secure them in place. I do recommend putting a cross beam between the two front and two back legs and another cross beam between the cross beams as shown below for added stability. Use a total of 6 multi-purpose screws and some wood glue to secure the pieces to the legs.
The next steps are:
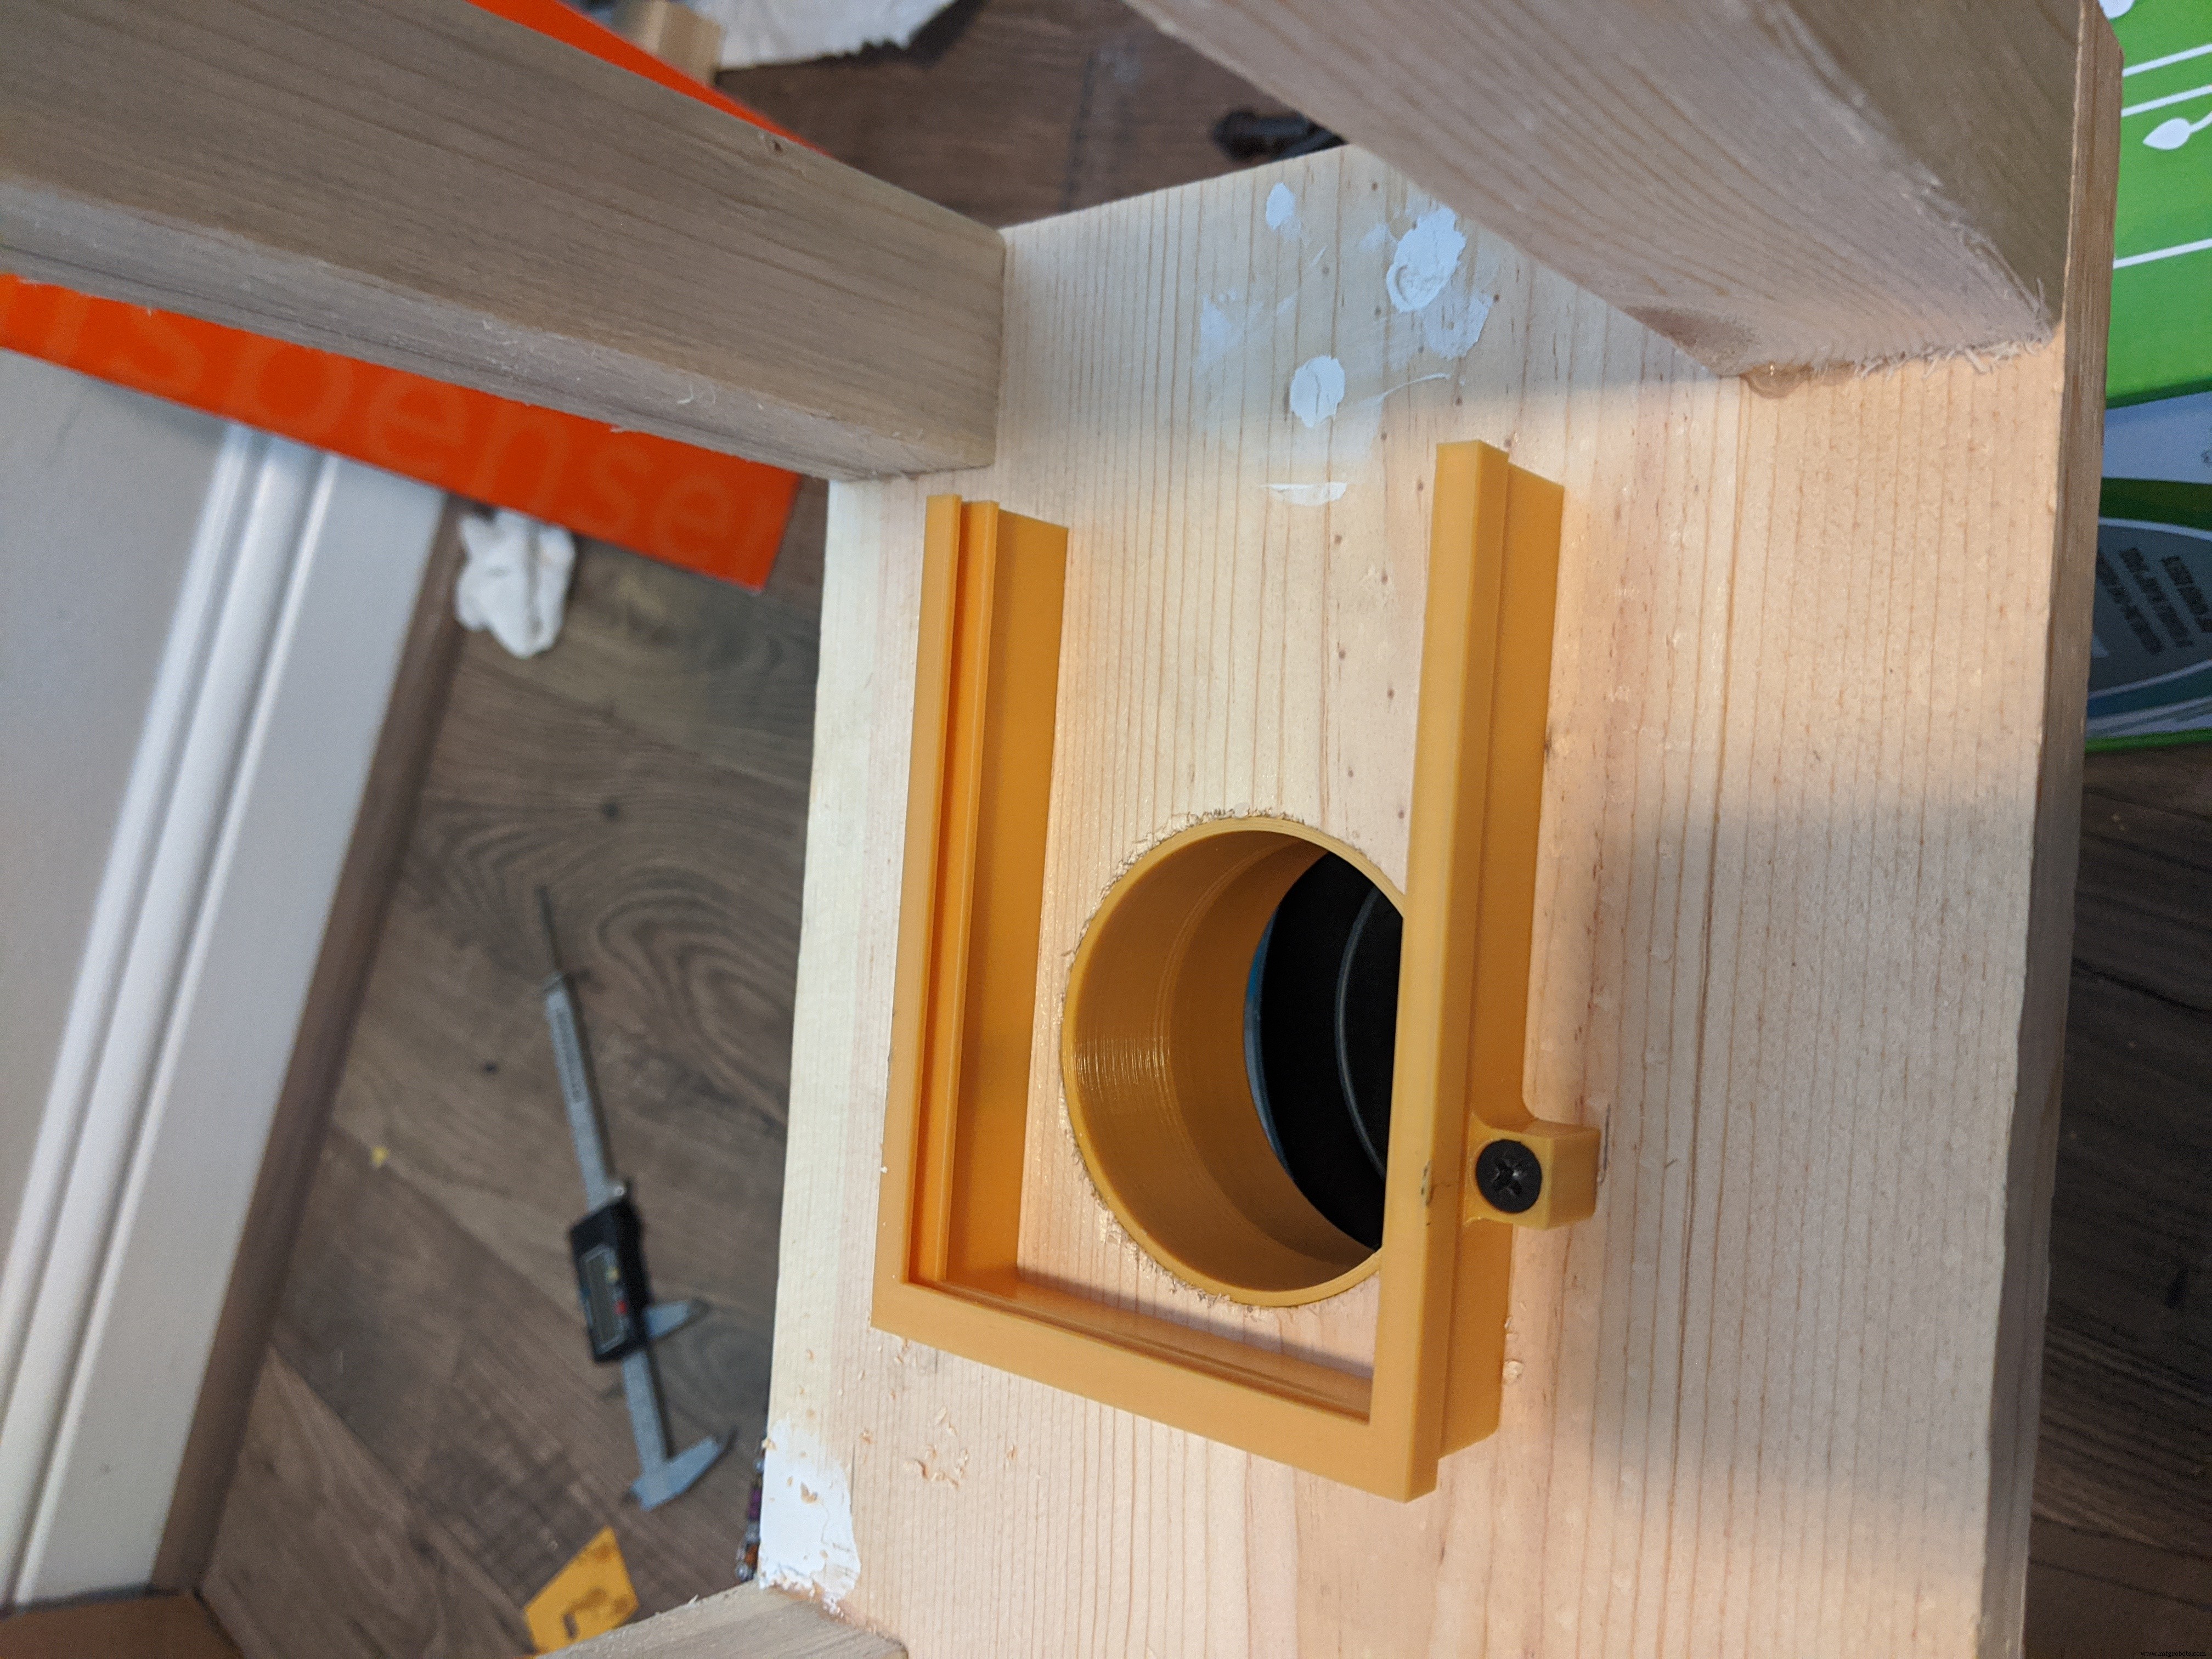
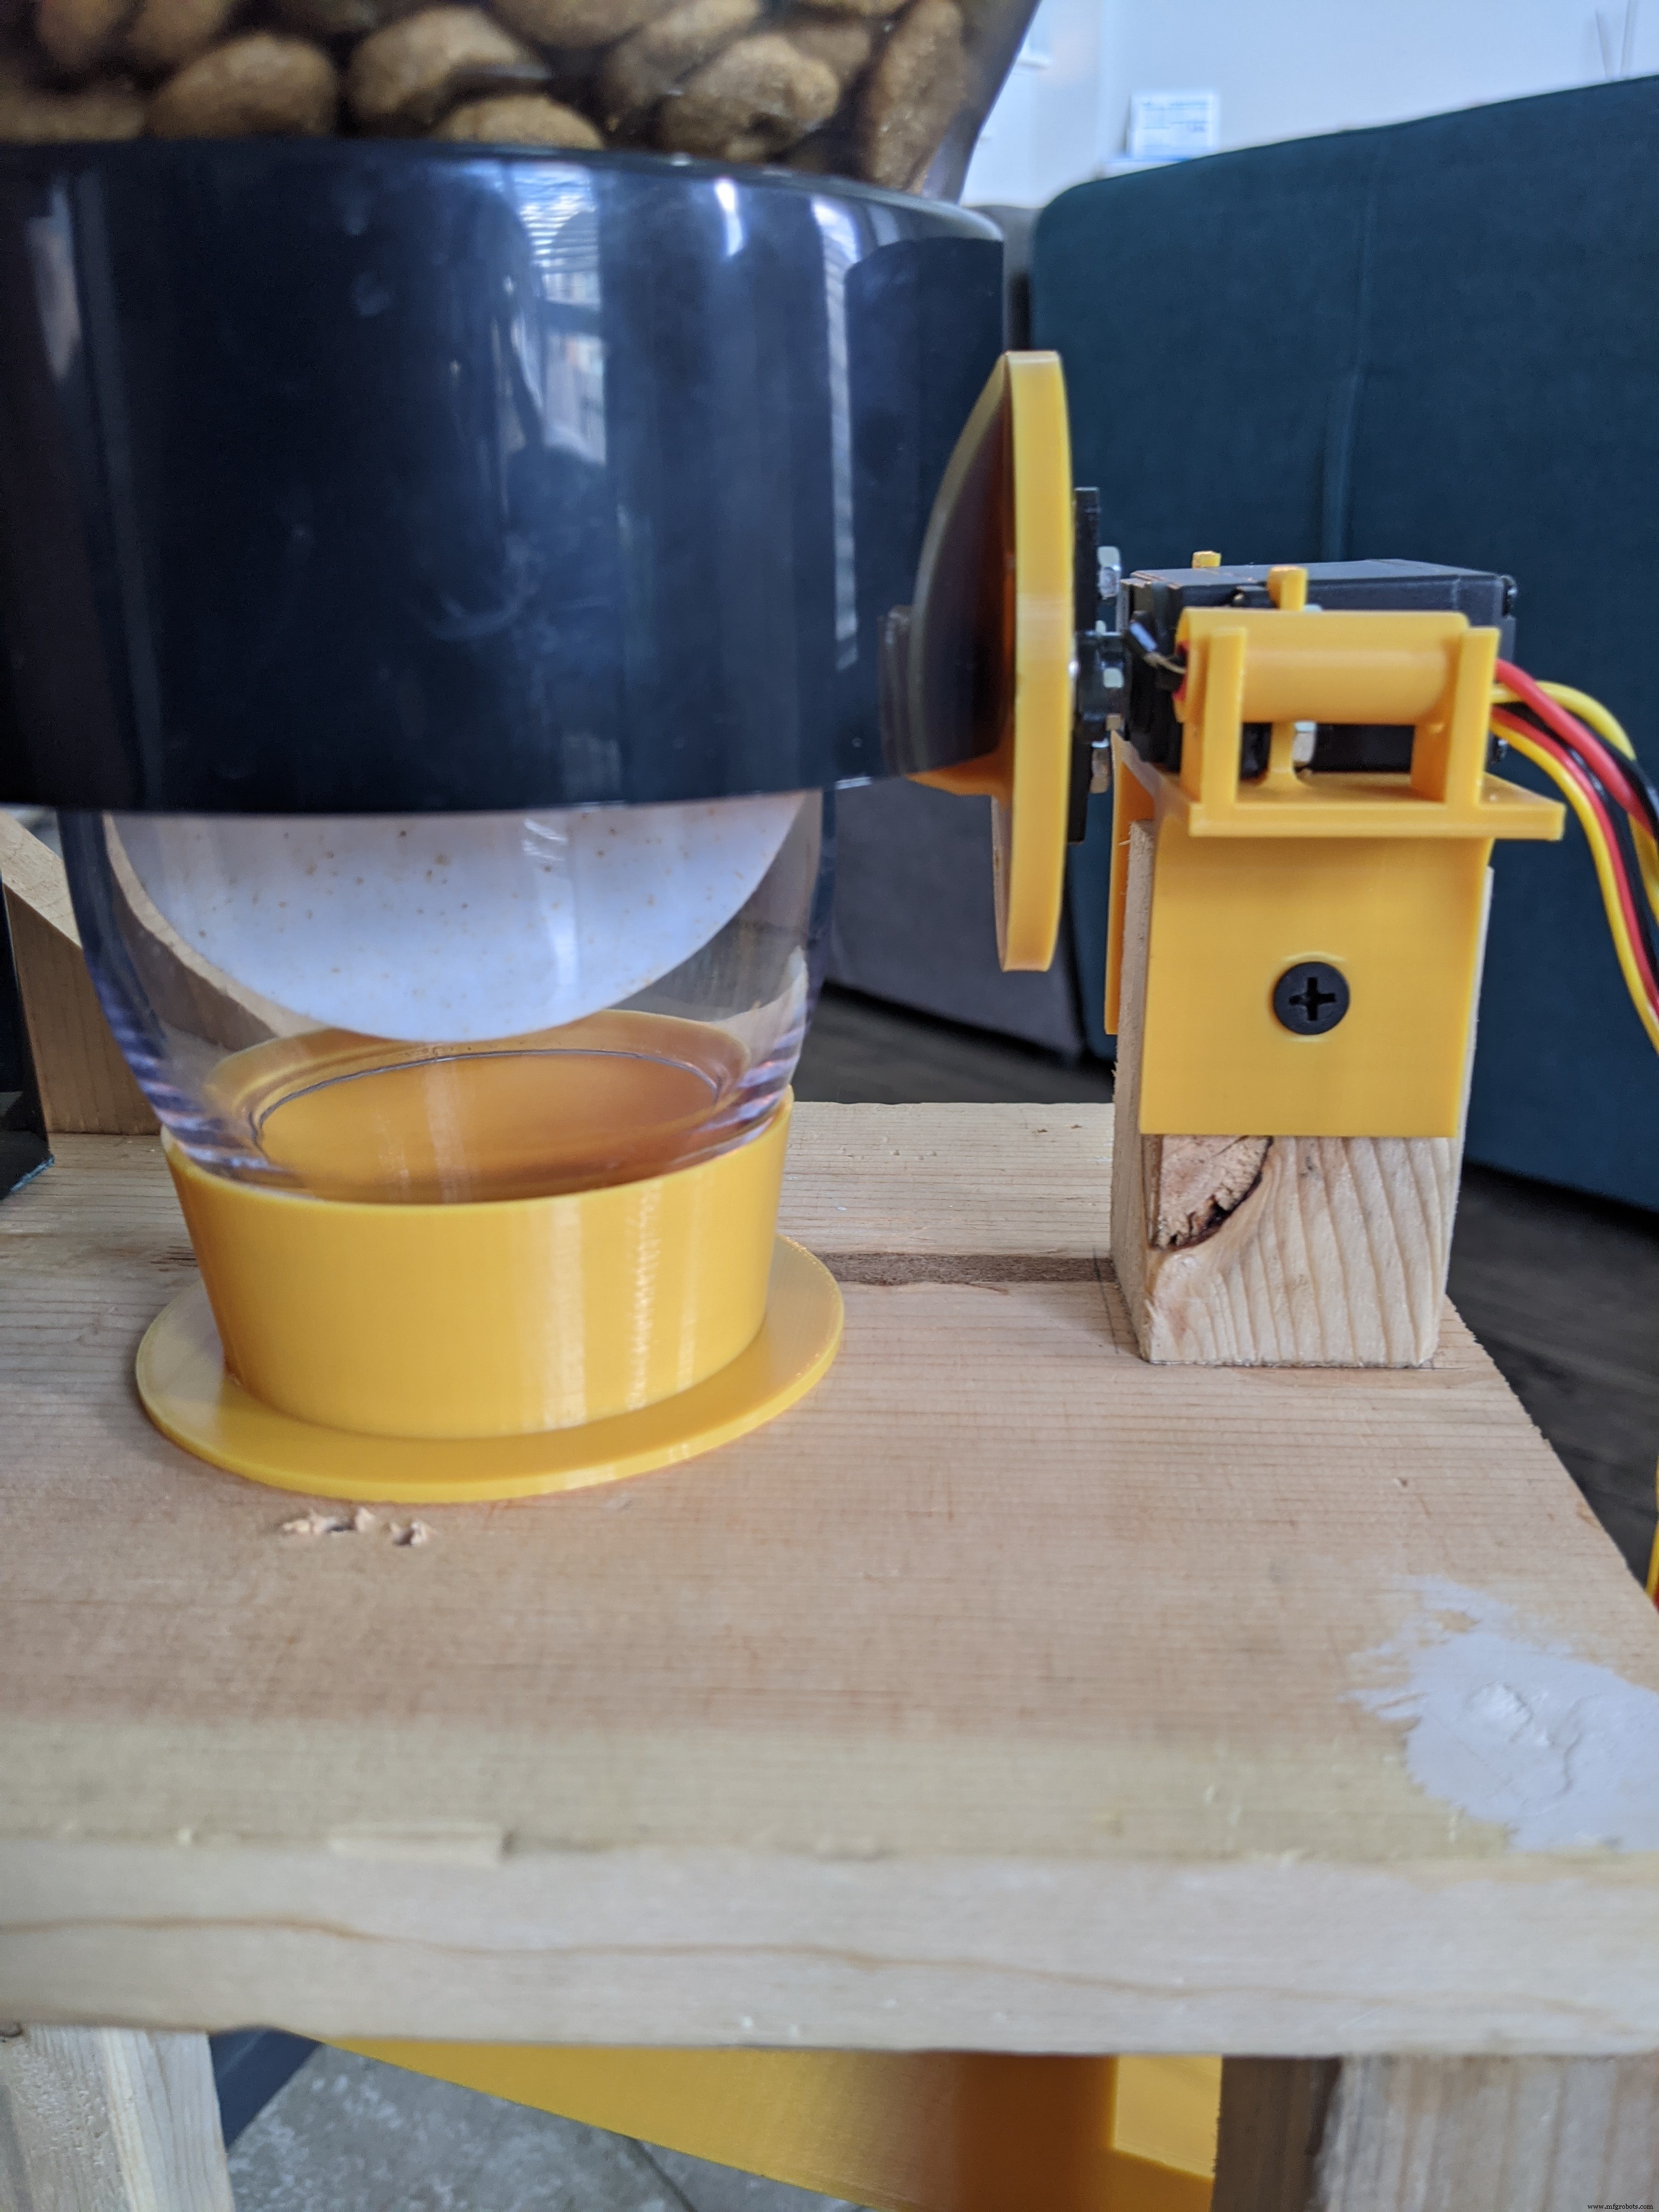
- insert the funnel into the hole we drilled in the base panel
- attach the servo to the servo bracket
- secure the bracket to the wood stand
Attach the servo to the bracket using the 4 M3 x 10 mm screws and 4 of the M3 hex nuts. Once the servo is secured, we can secure the bracket onto the wooden servo stand. Use two of the multi-purpose screws to lightly secure the bracket onto the wood stand. Do not overtighten or you will damage the bracket. Make sure you do the steps in that order. The funnel is going to raise the servo a bit and it fits pretty snug against the end of the plastic container so it's impossible to put on if the plastic container is already sitting in the top ring stand.


The final steps will be to attach the chute's slide-in bracket and the slide itself. You want to position the bracket slightly behind the hole in the base panel. You want it as far forward as you can get it so that the slide clears the frame of the feeder. Use two of the multi-purpose screws to secure the bracket to the bottom of the frame's base panel. It's best to do this with the slide in the bracket as the bracket has some flex and you're going to want a pretty secure fit between the slide and the bracket.

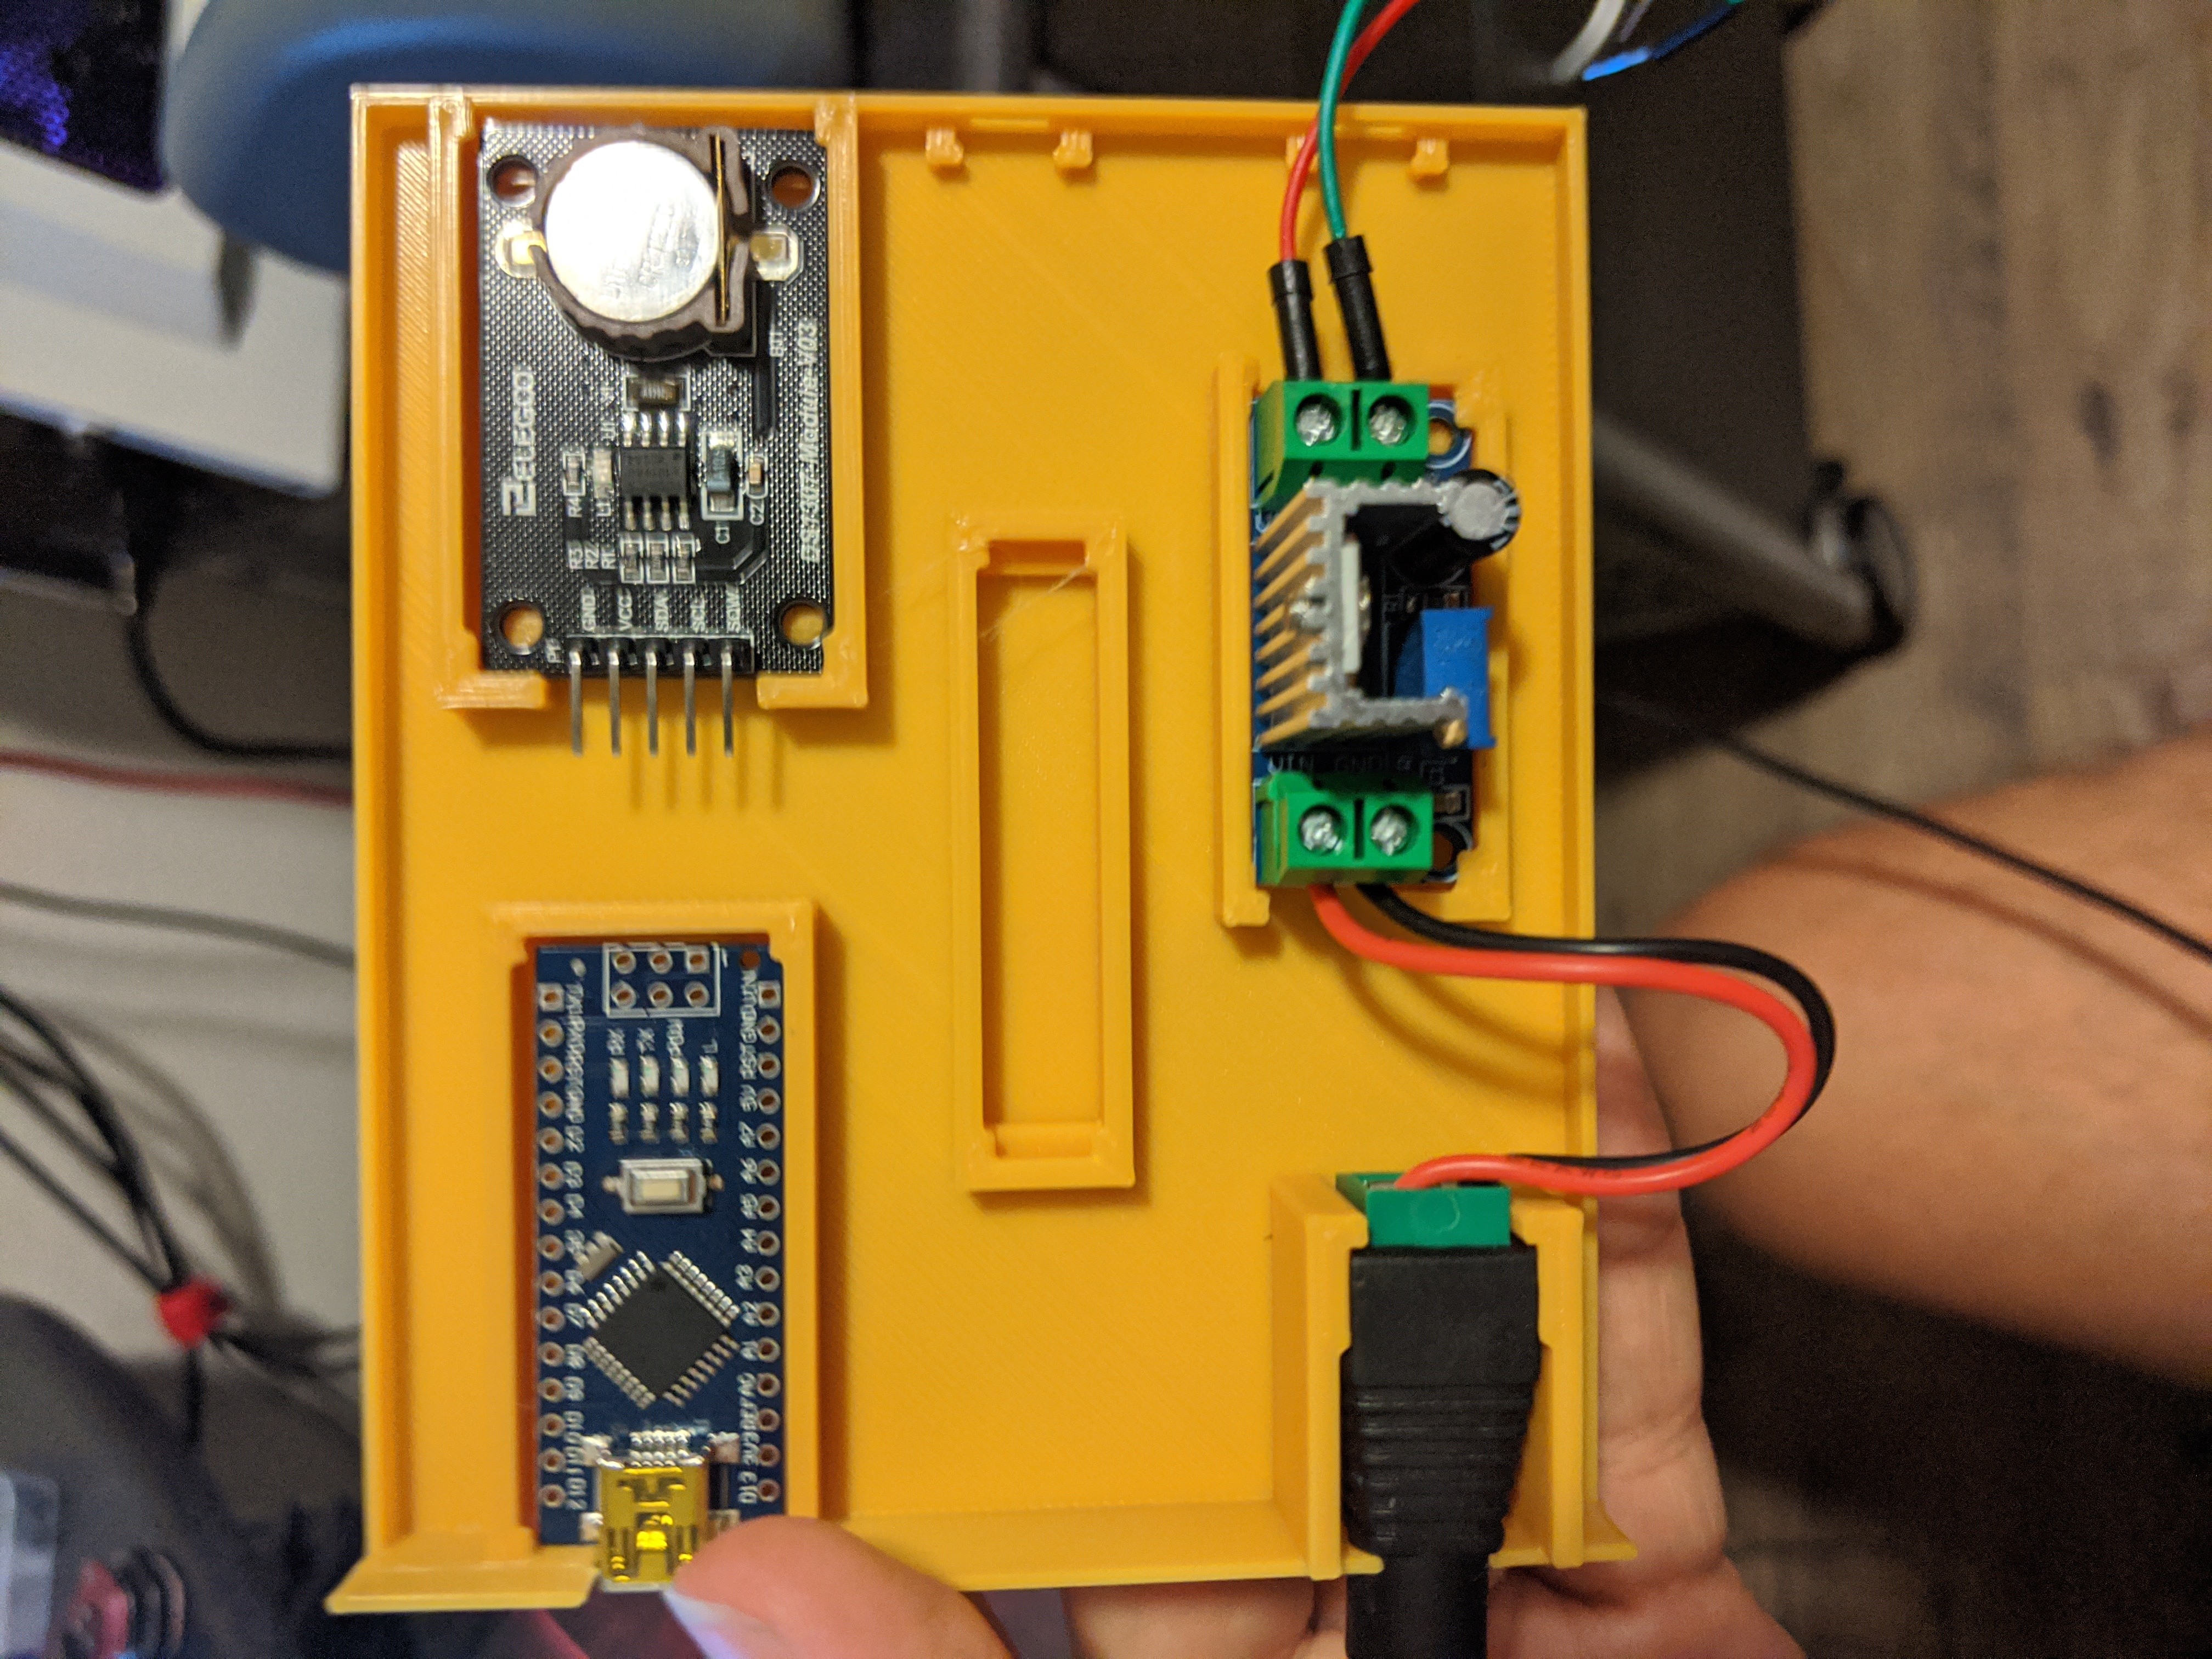
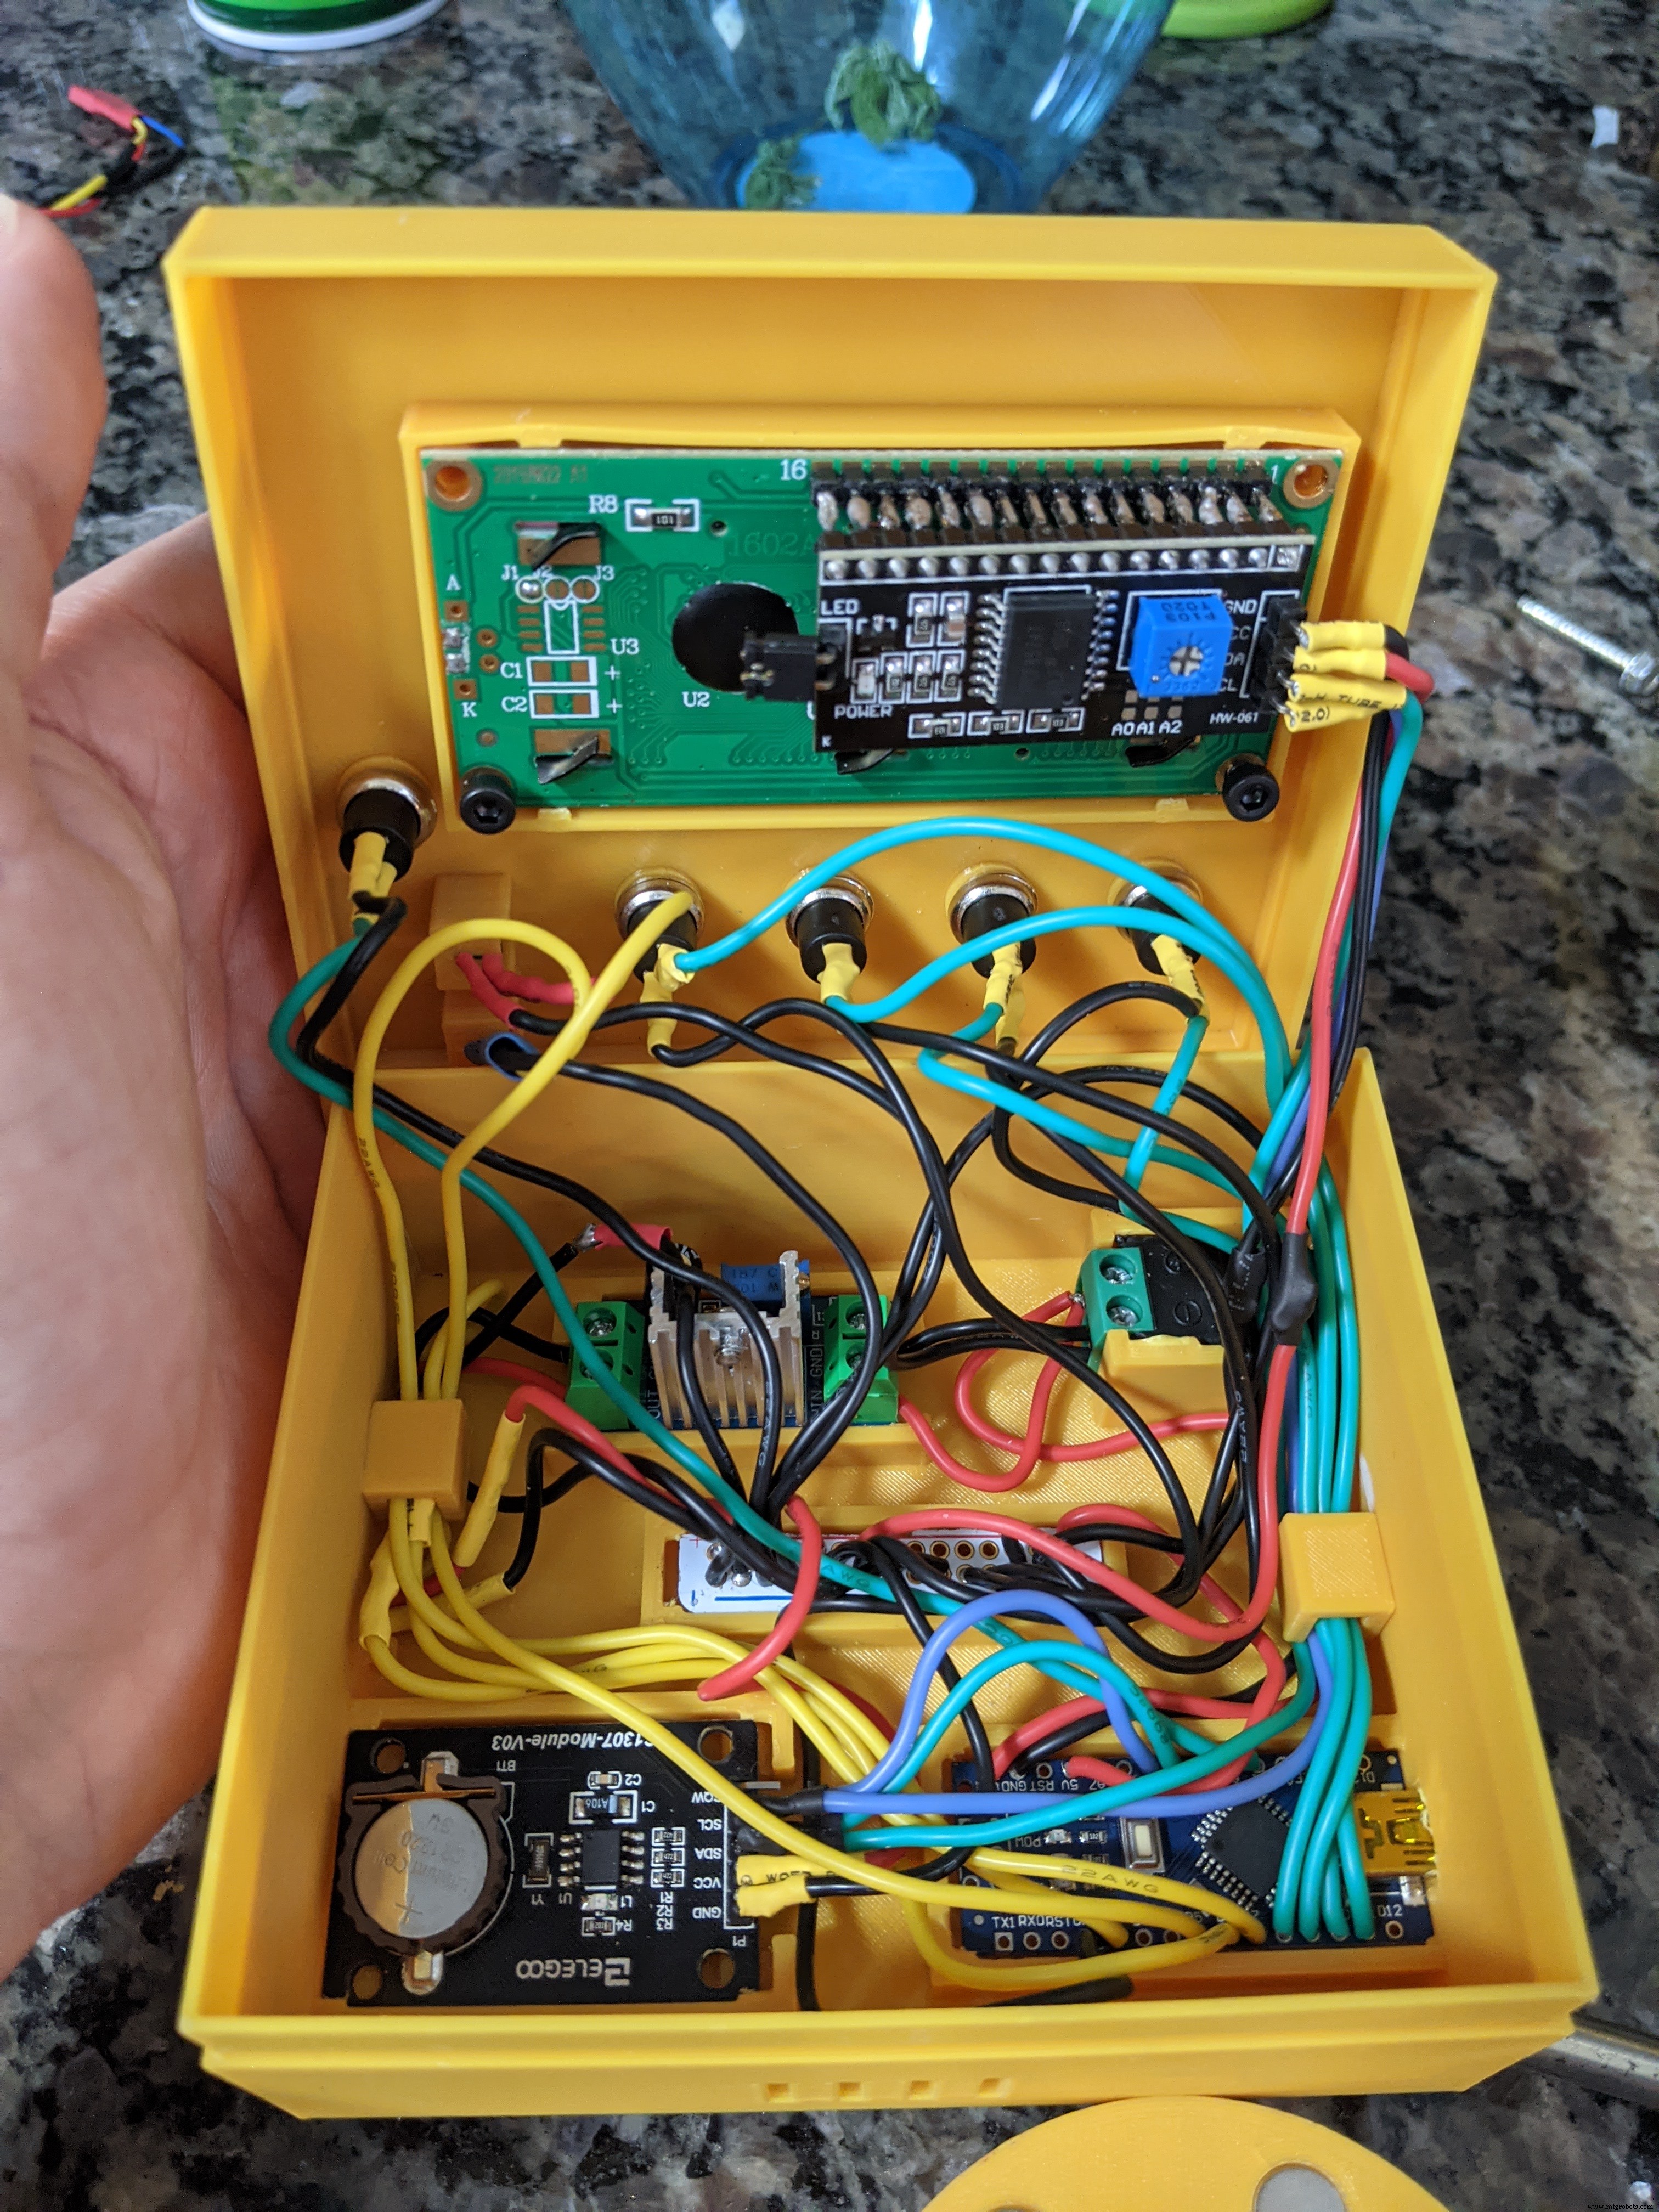
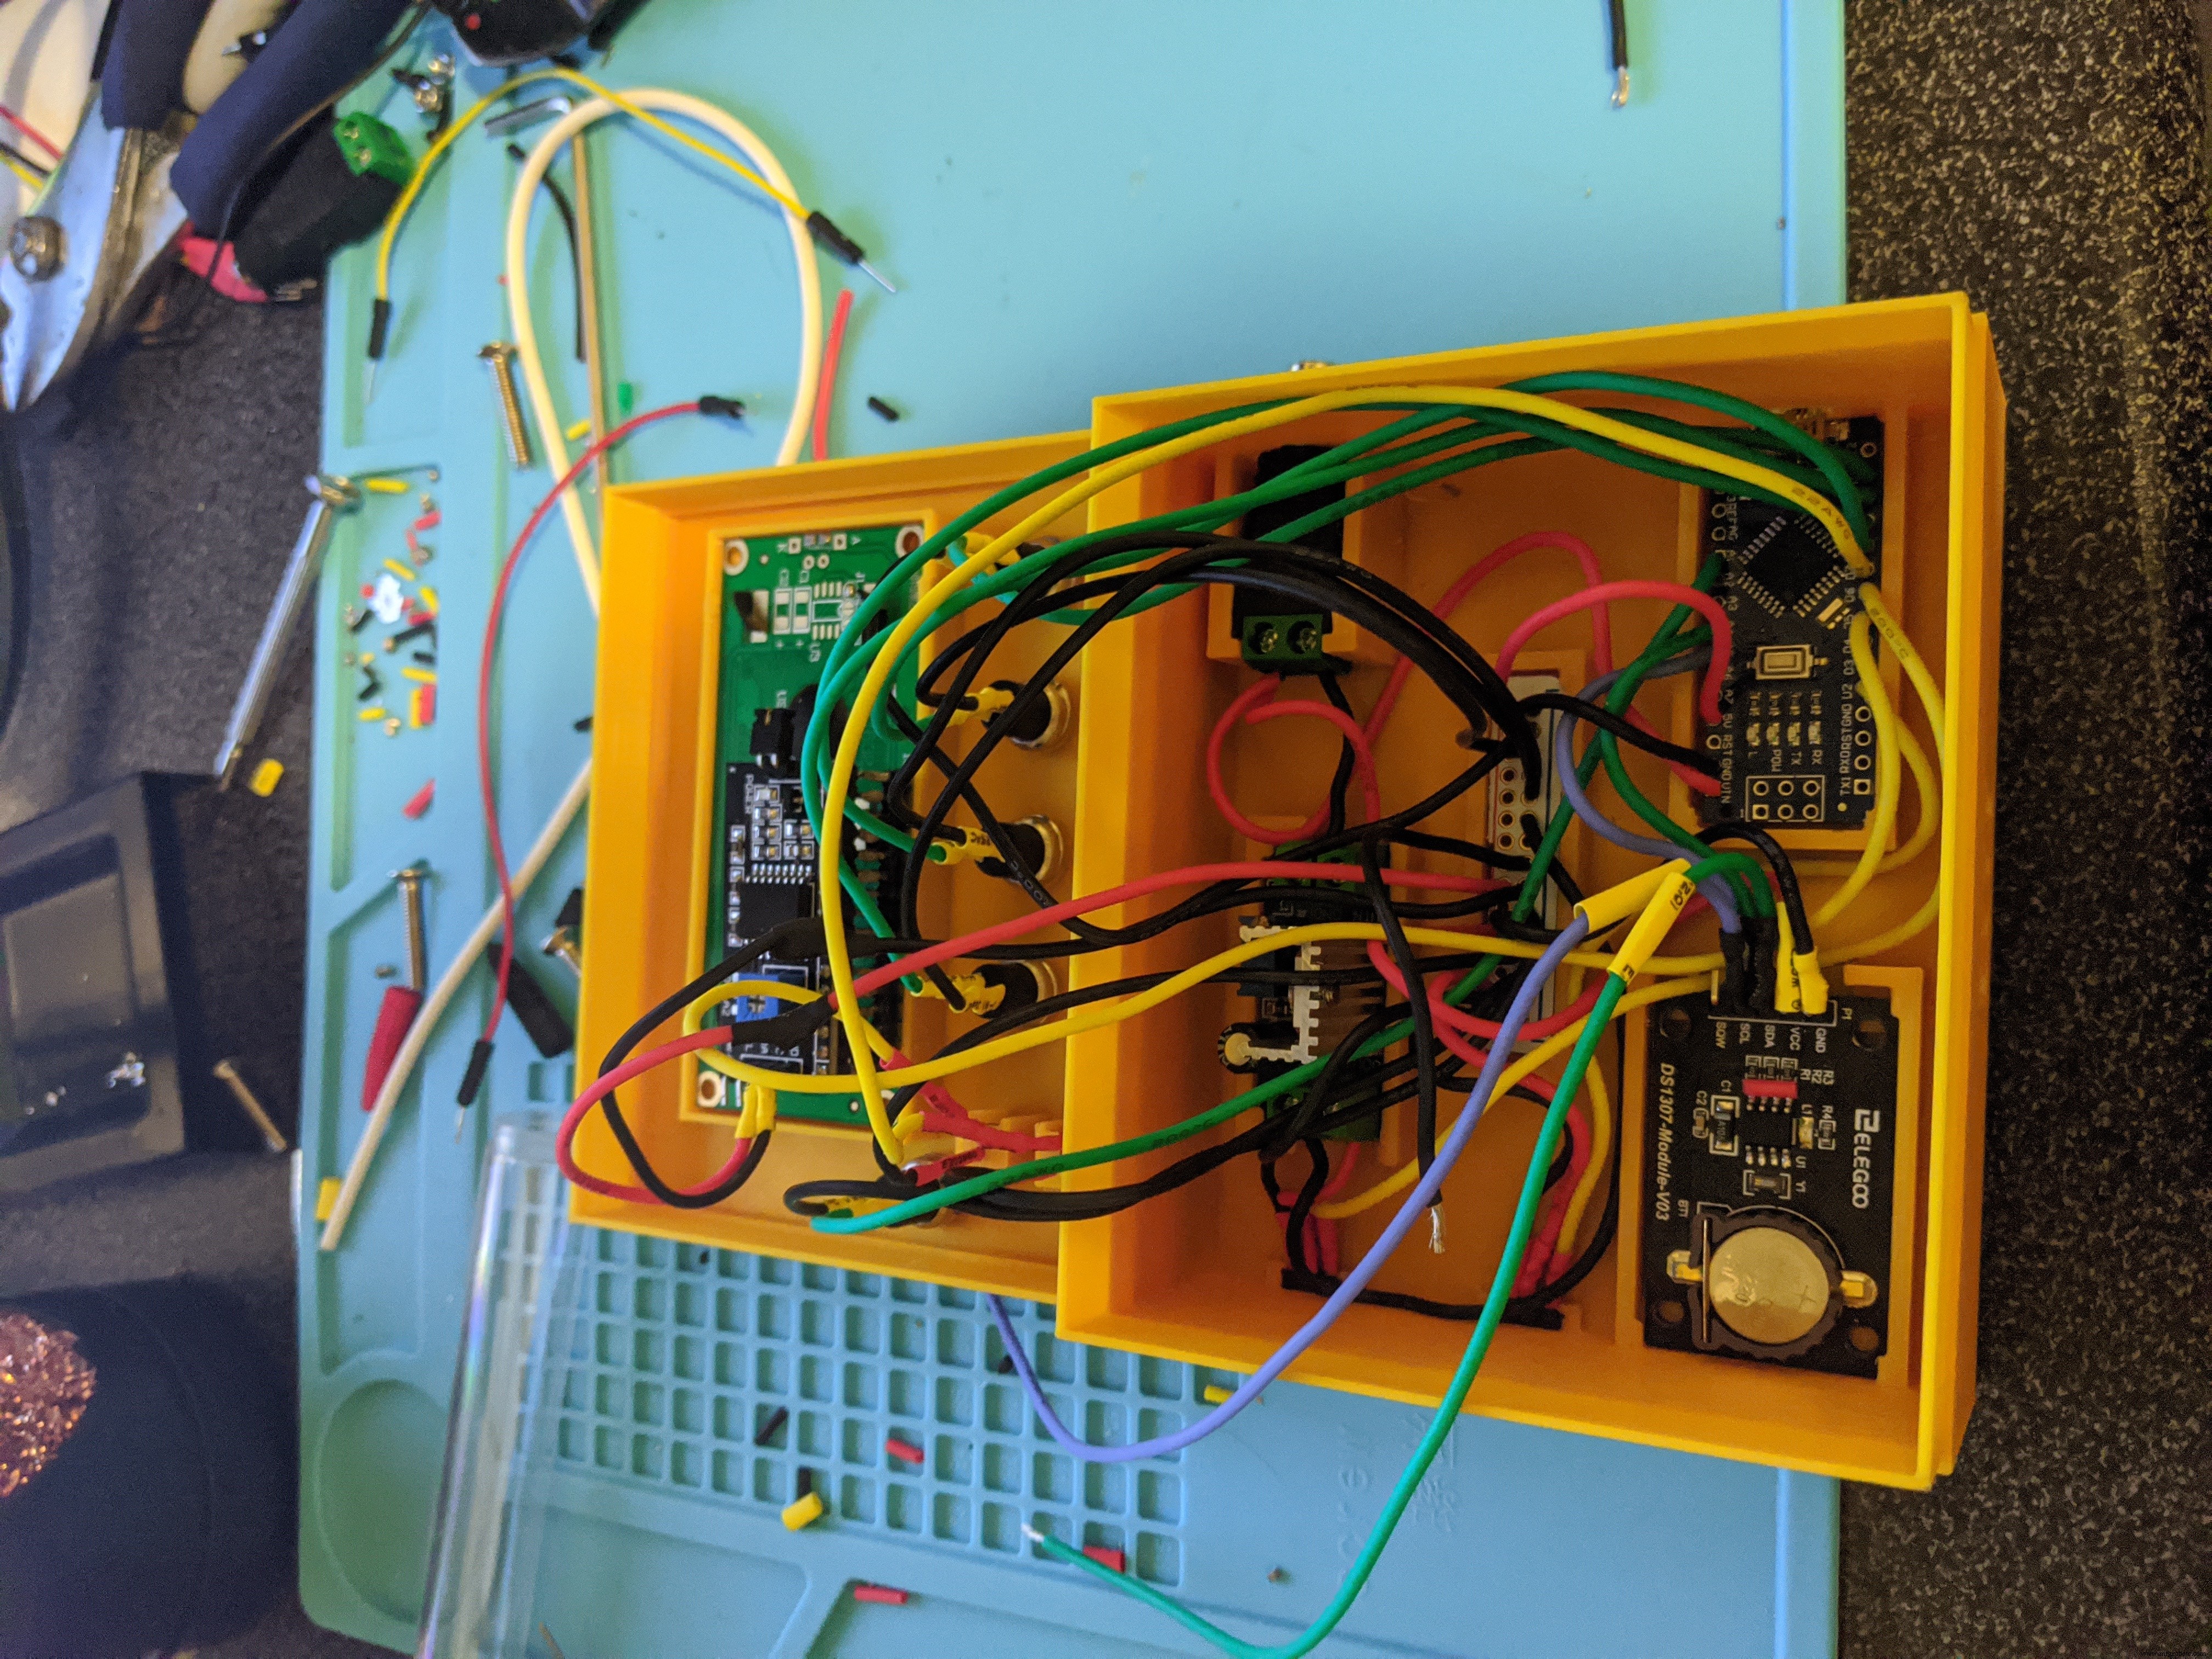
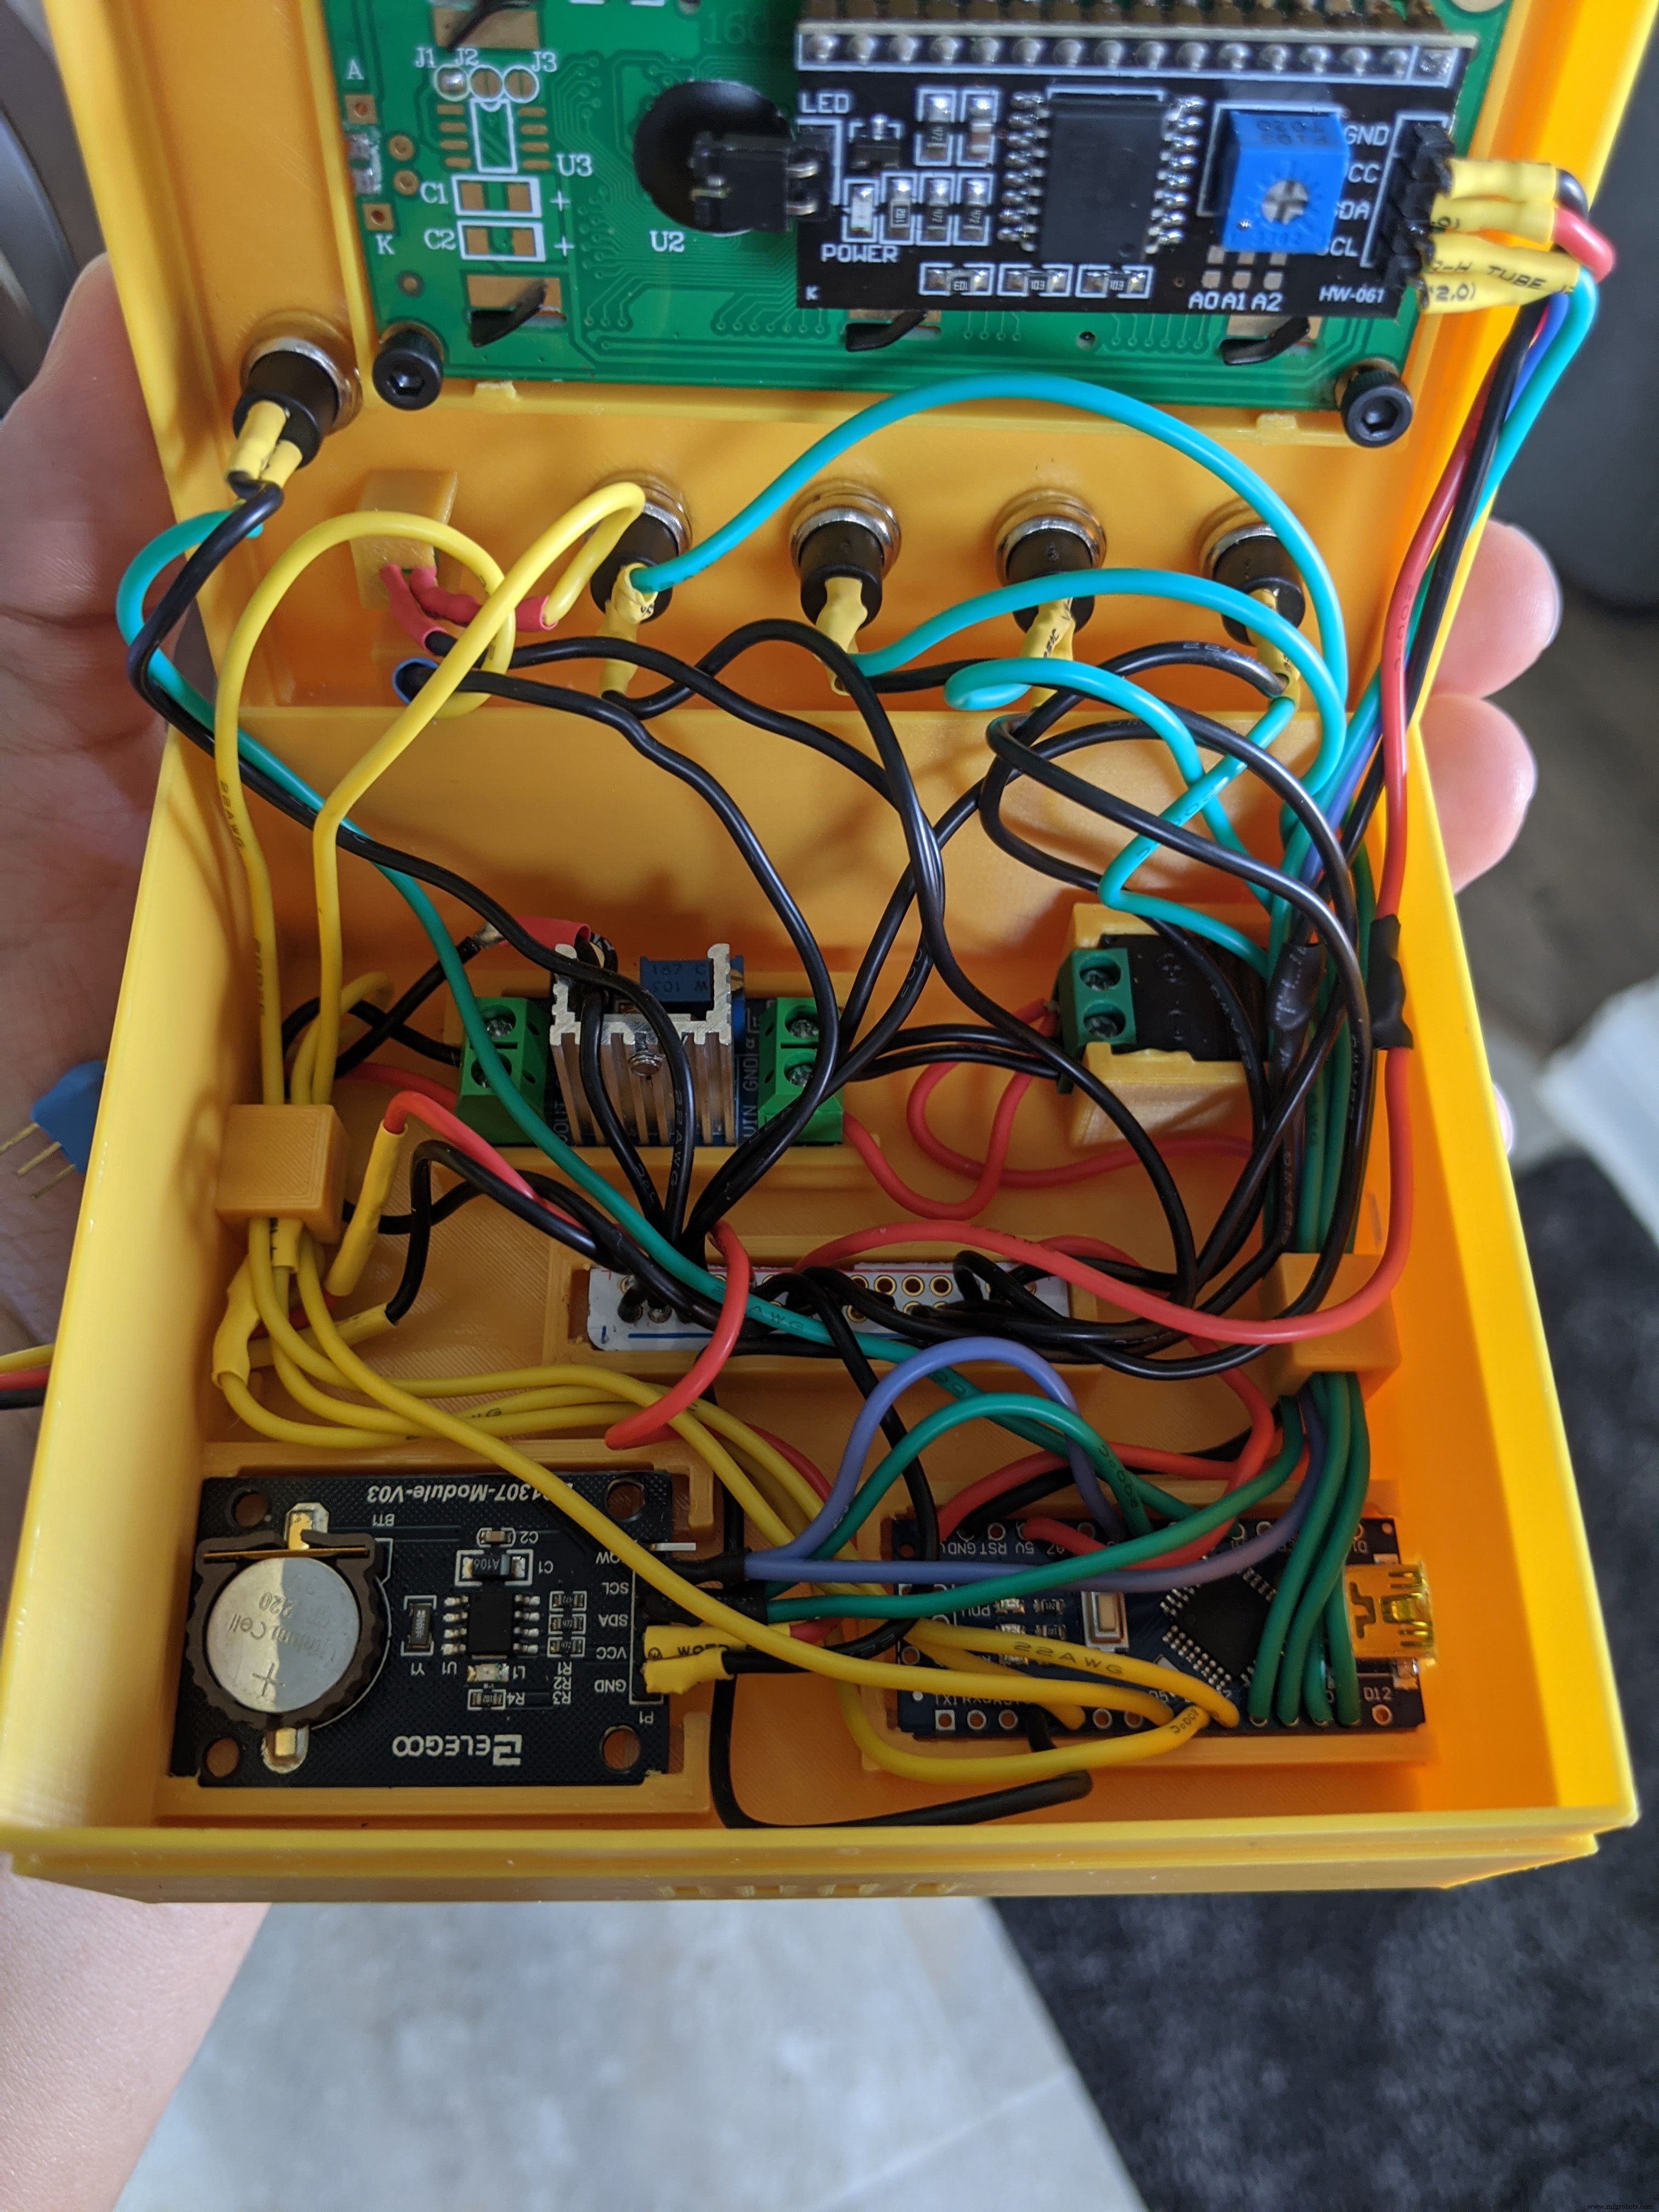
Unfortunately, I never took pictures of the soldering process. There isn't much to it though. Just solder each component to its corresponding pins and you should be good to go. If you would like to use pin headers instead, you can also do it that way. There is enough clearance under and above the Arduino slot to allow for the pins and connectors. I definitely recommend soldering everything together before setting all the components in their respective slots.
I powered my Arduino through the unregulated external power pin (pin 30). This requires an input voltage between 7-20 volts because this voltage is fed through the Arduino's onboard regulator. If you wish to power it via USB, you just have to make sure that you are supplying it with 5 Volts, NOT the 7-20 Volts.
Be sure to solder the 10k Ohm resistor between the Vcc and Signal pins on the hall sensor. Otherwise, you're not going to get a reading. Also, don't forget to connect all of the components to common ground. I made the mistake of missing one of the grounds and my system would work for a while, but the hall sensor would eventually begin to fail. That was a really good day for my dog.
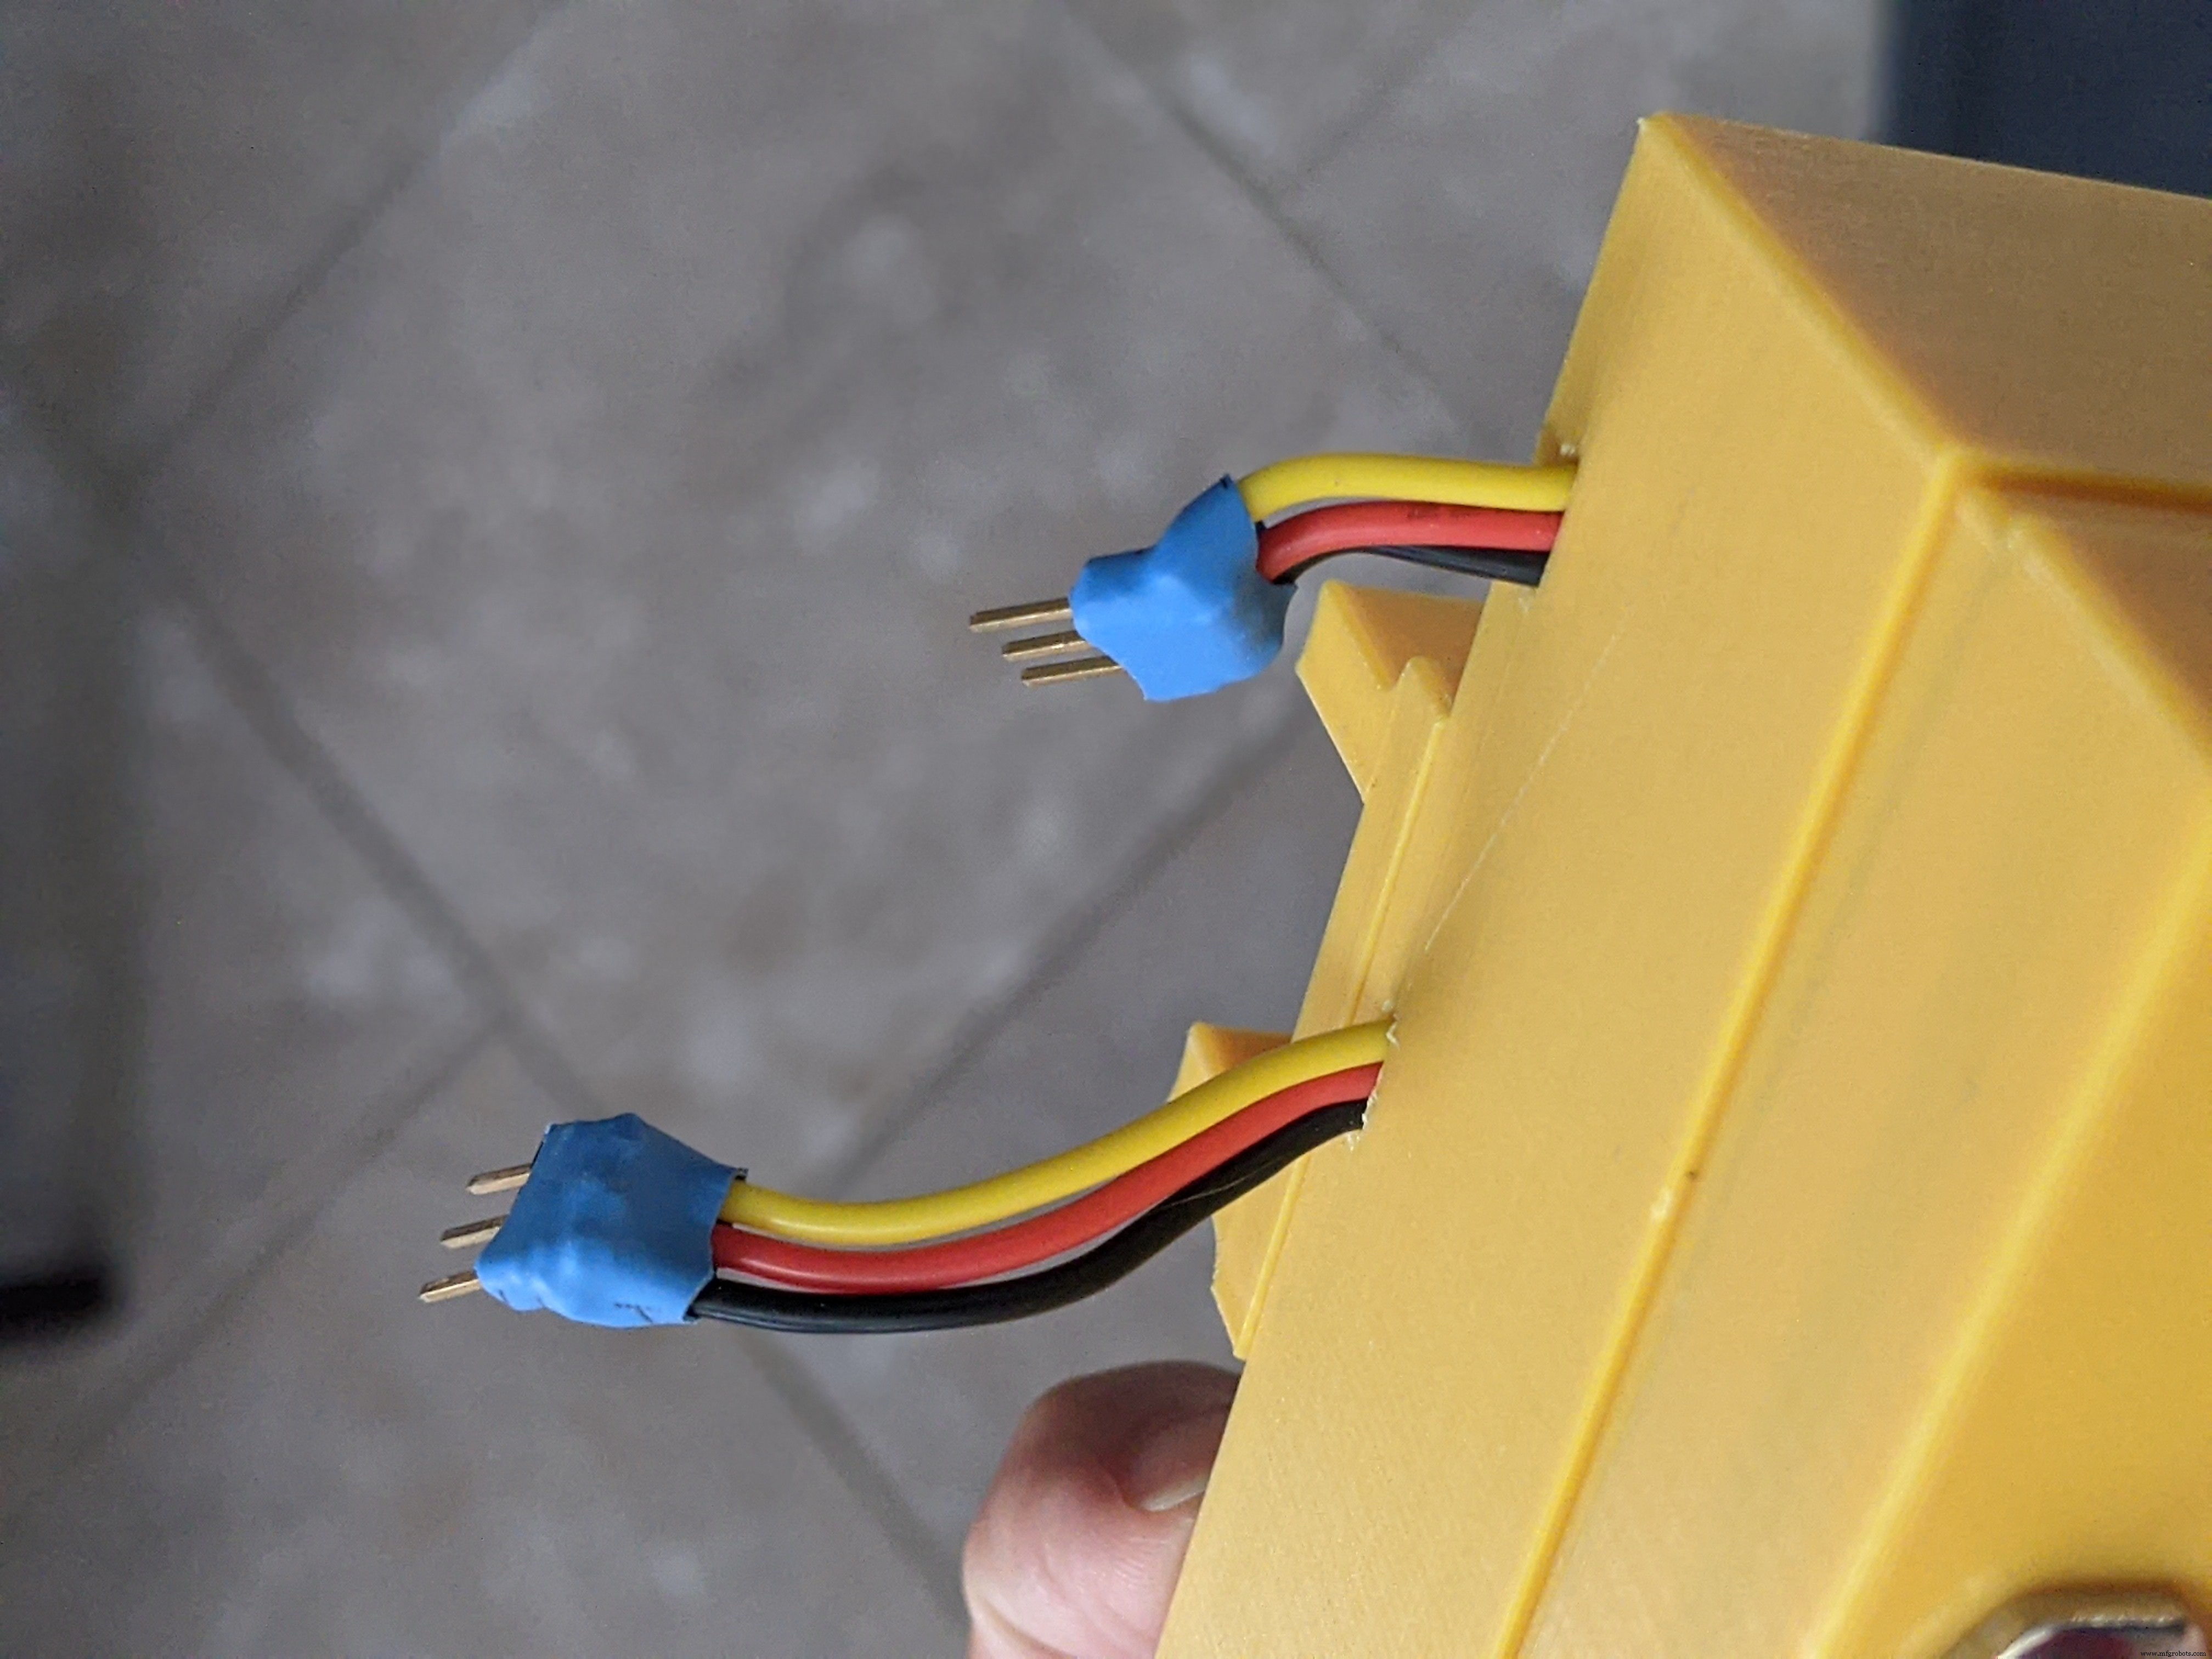
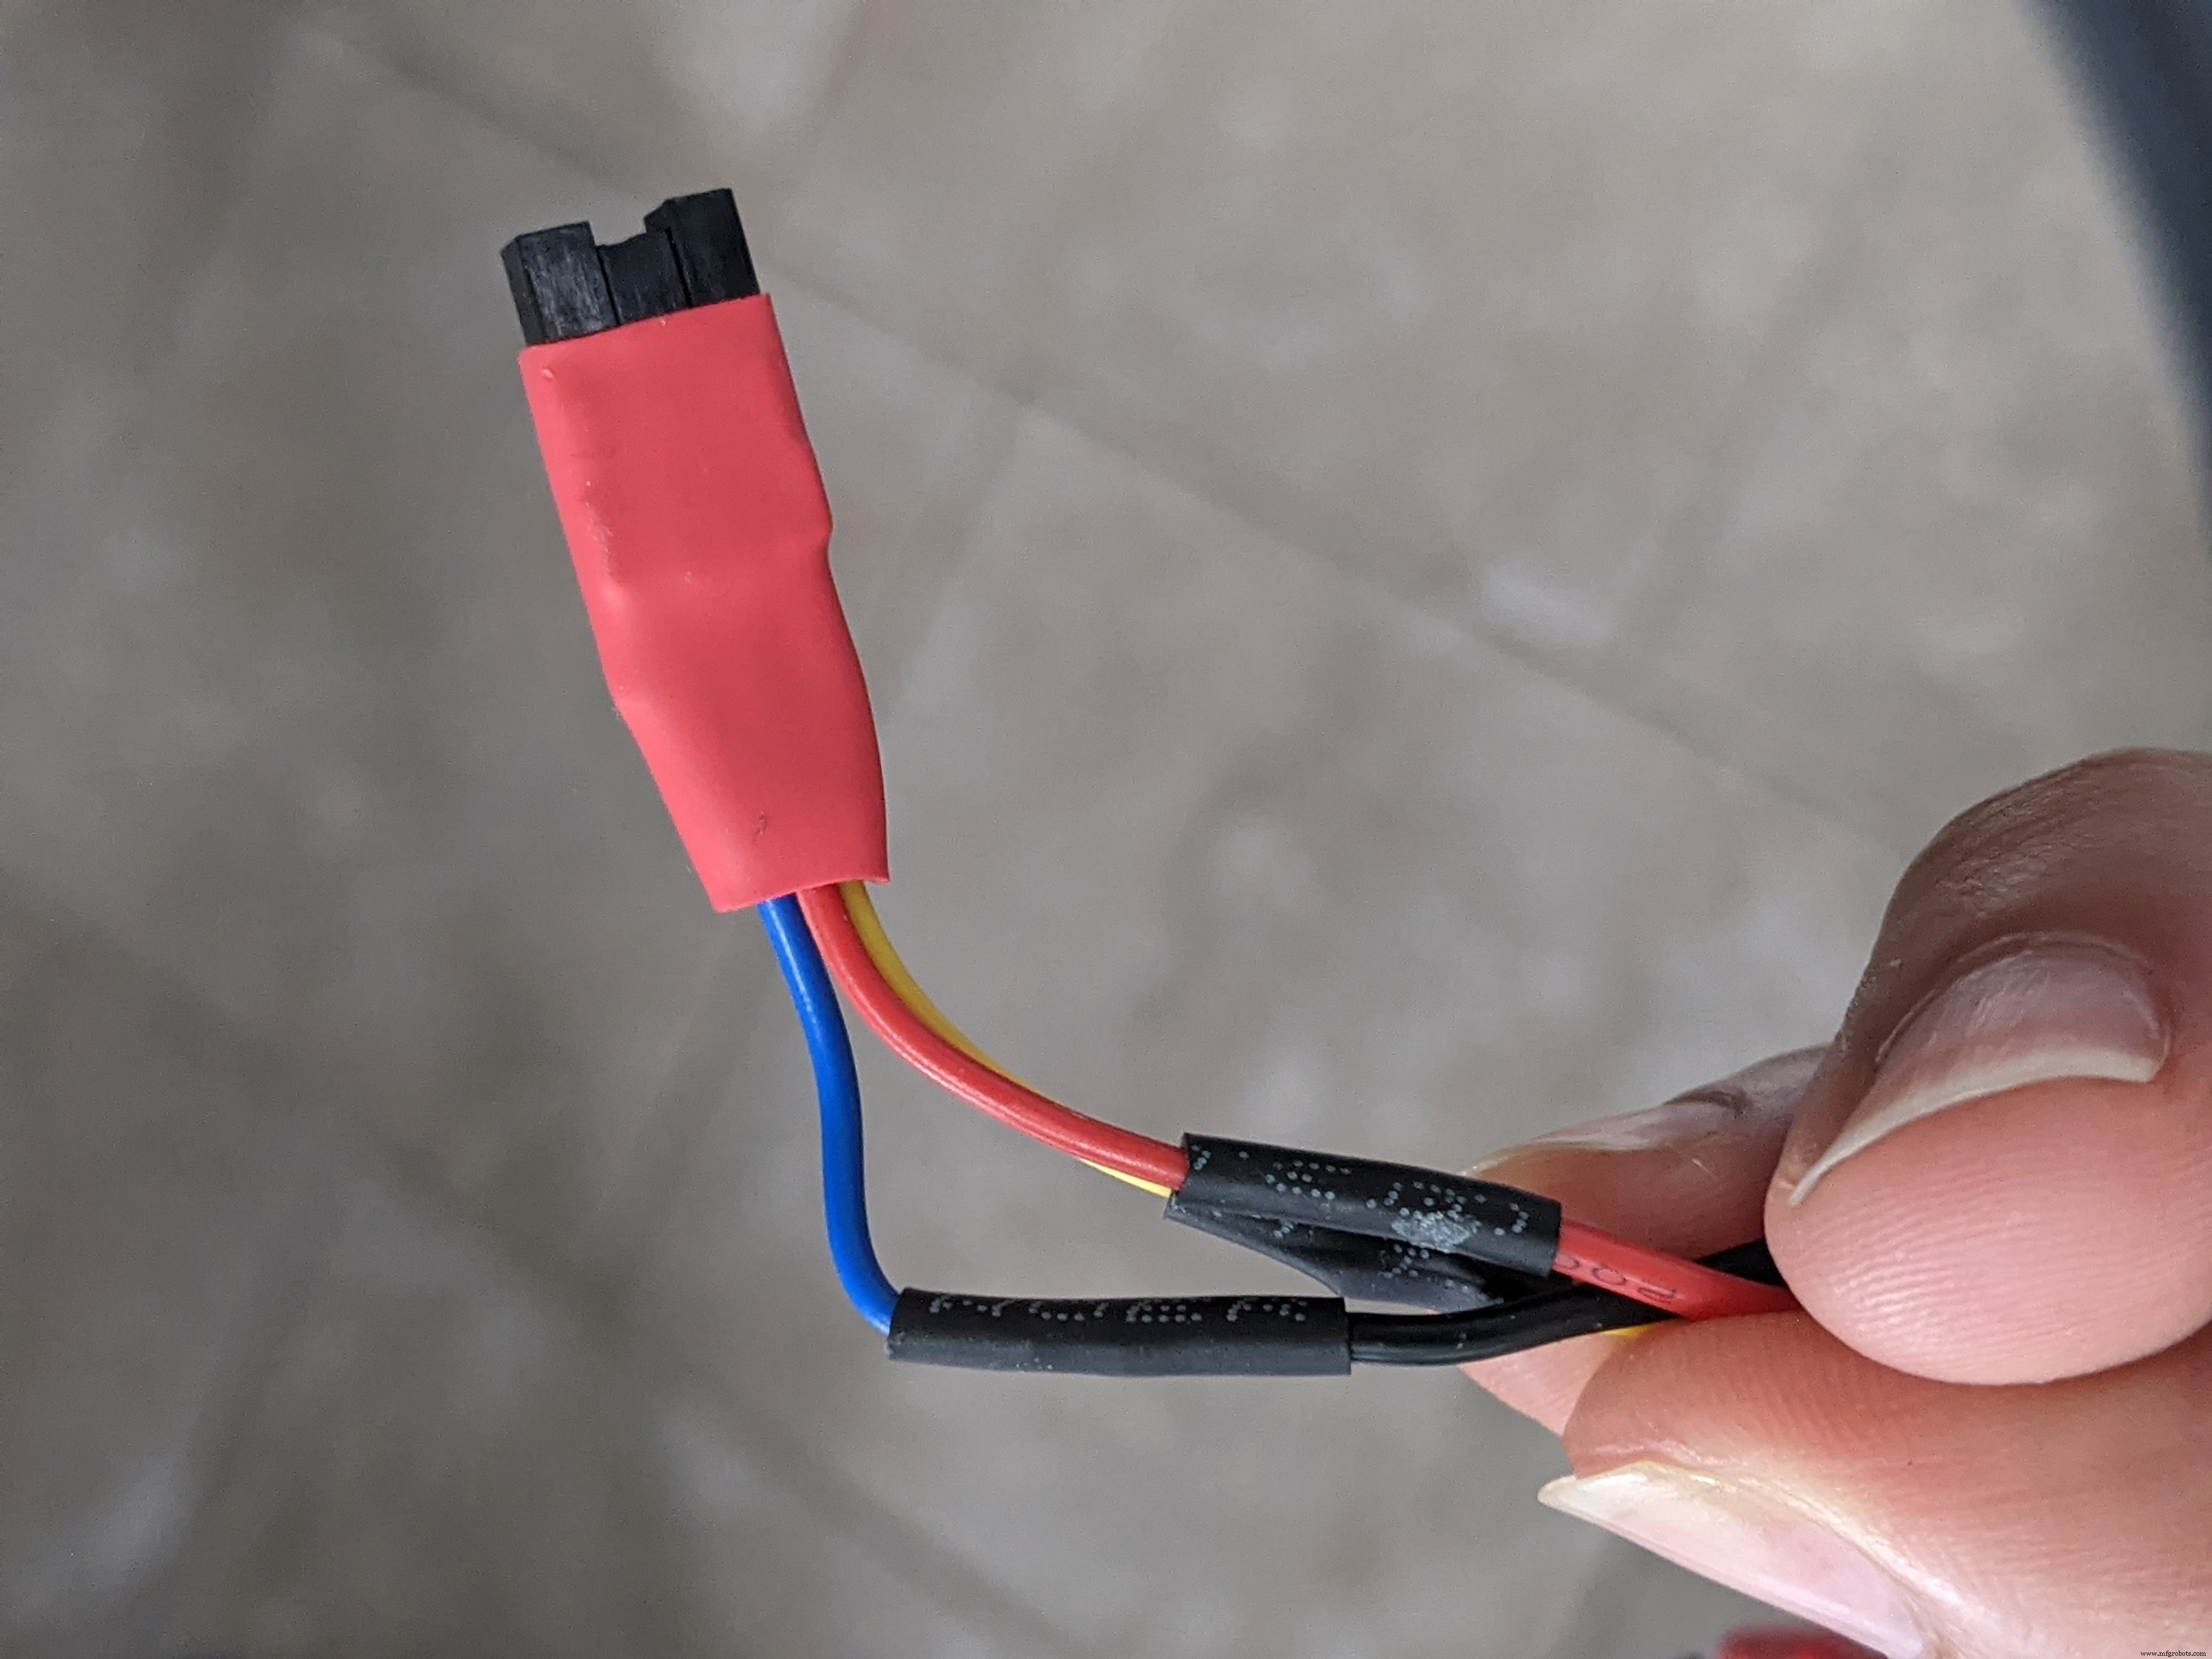
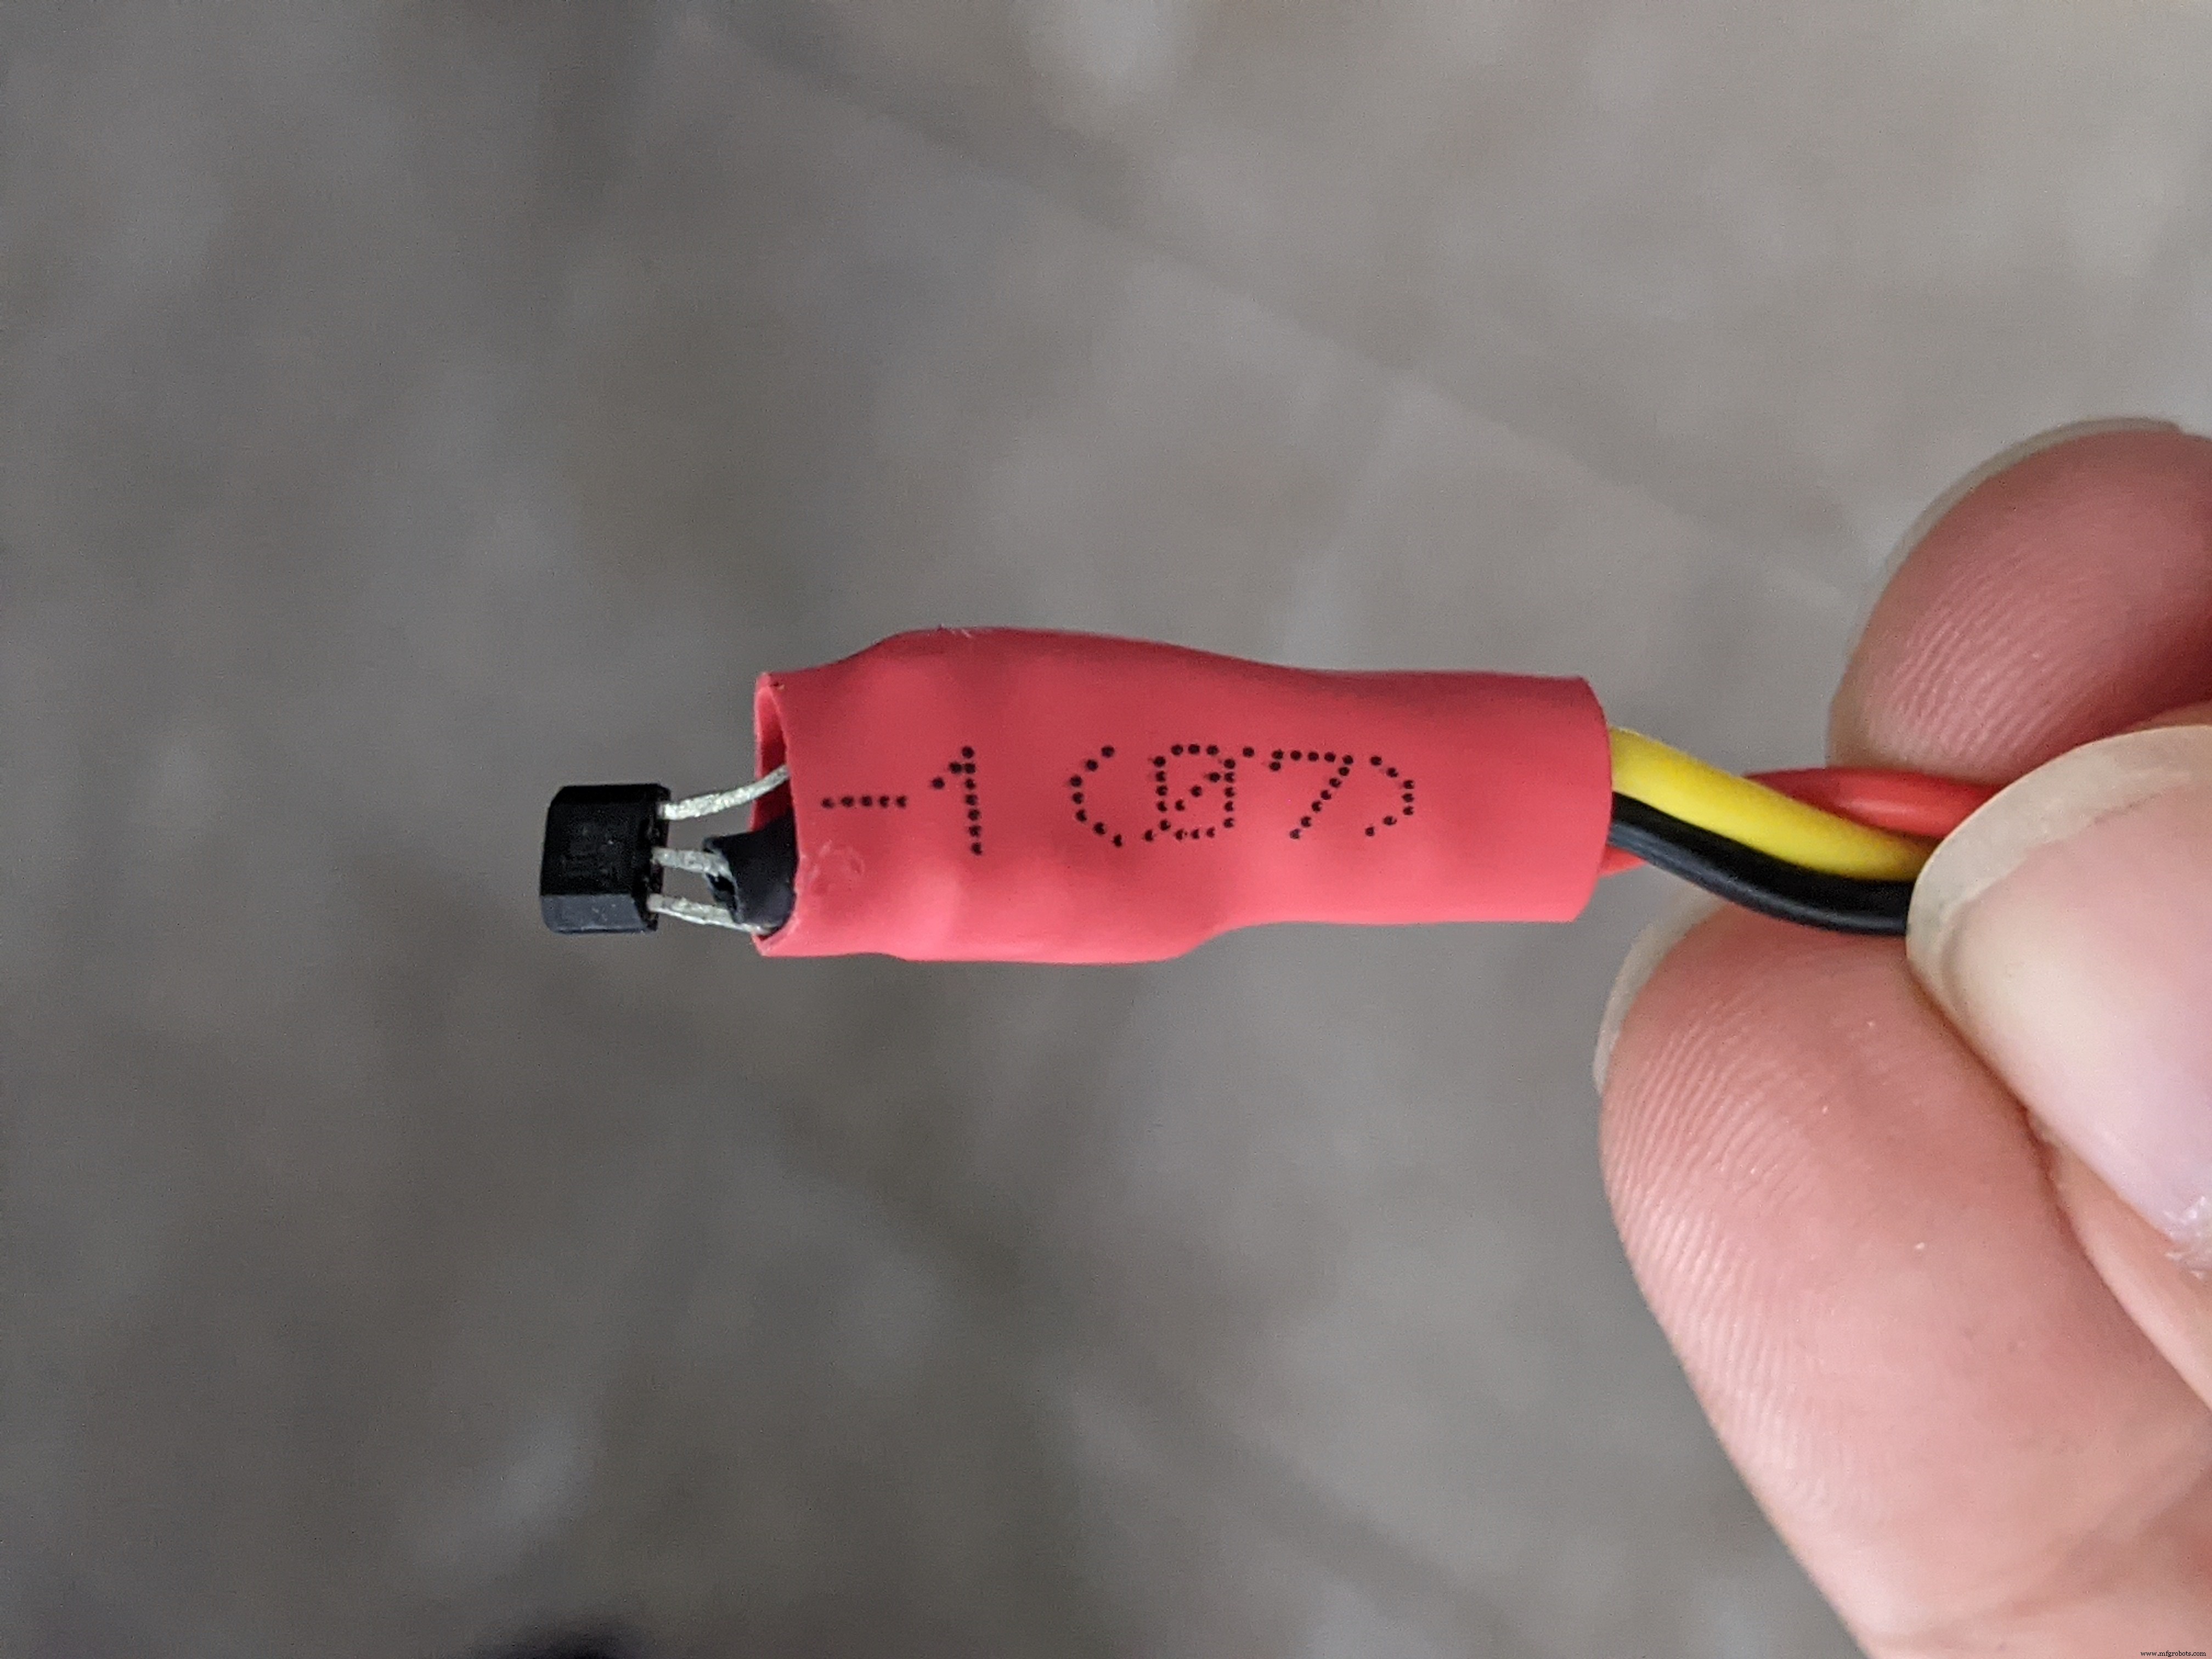
I did end up making custom connectors for the hall sensor and servo connections. I soldered the wires to male pin headers. These hang out of the bottom of the enclosure. For the hall sensor, I made a custom female adapter by cutting, stripping, and soldering a few Dupont connector wires I had lying around.
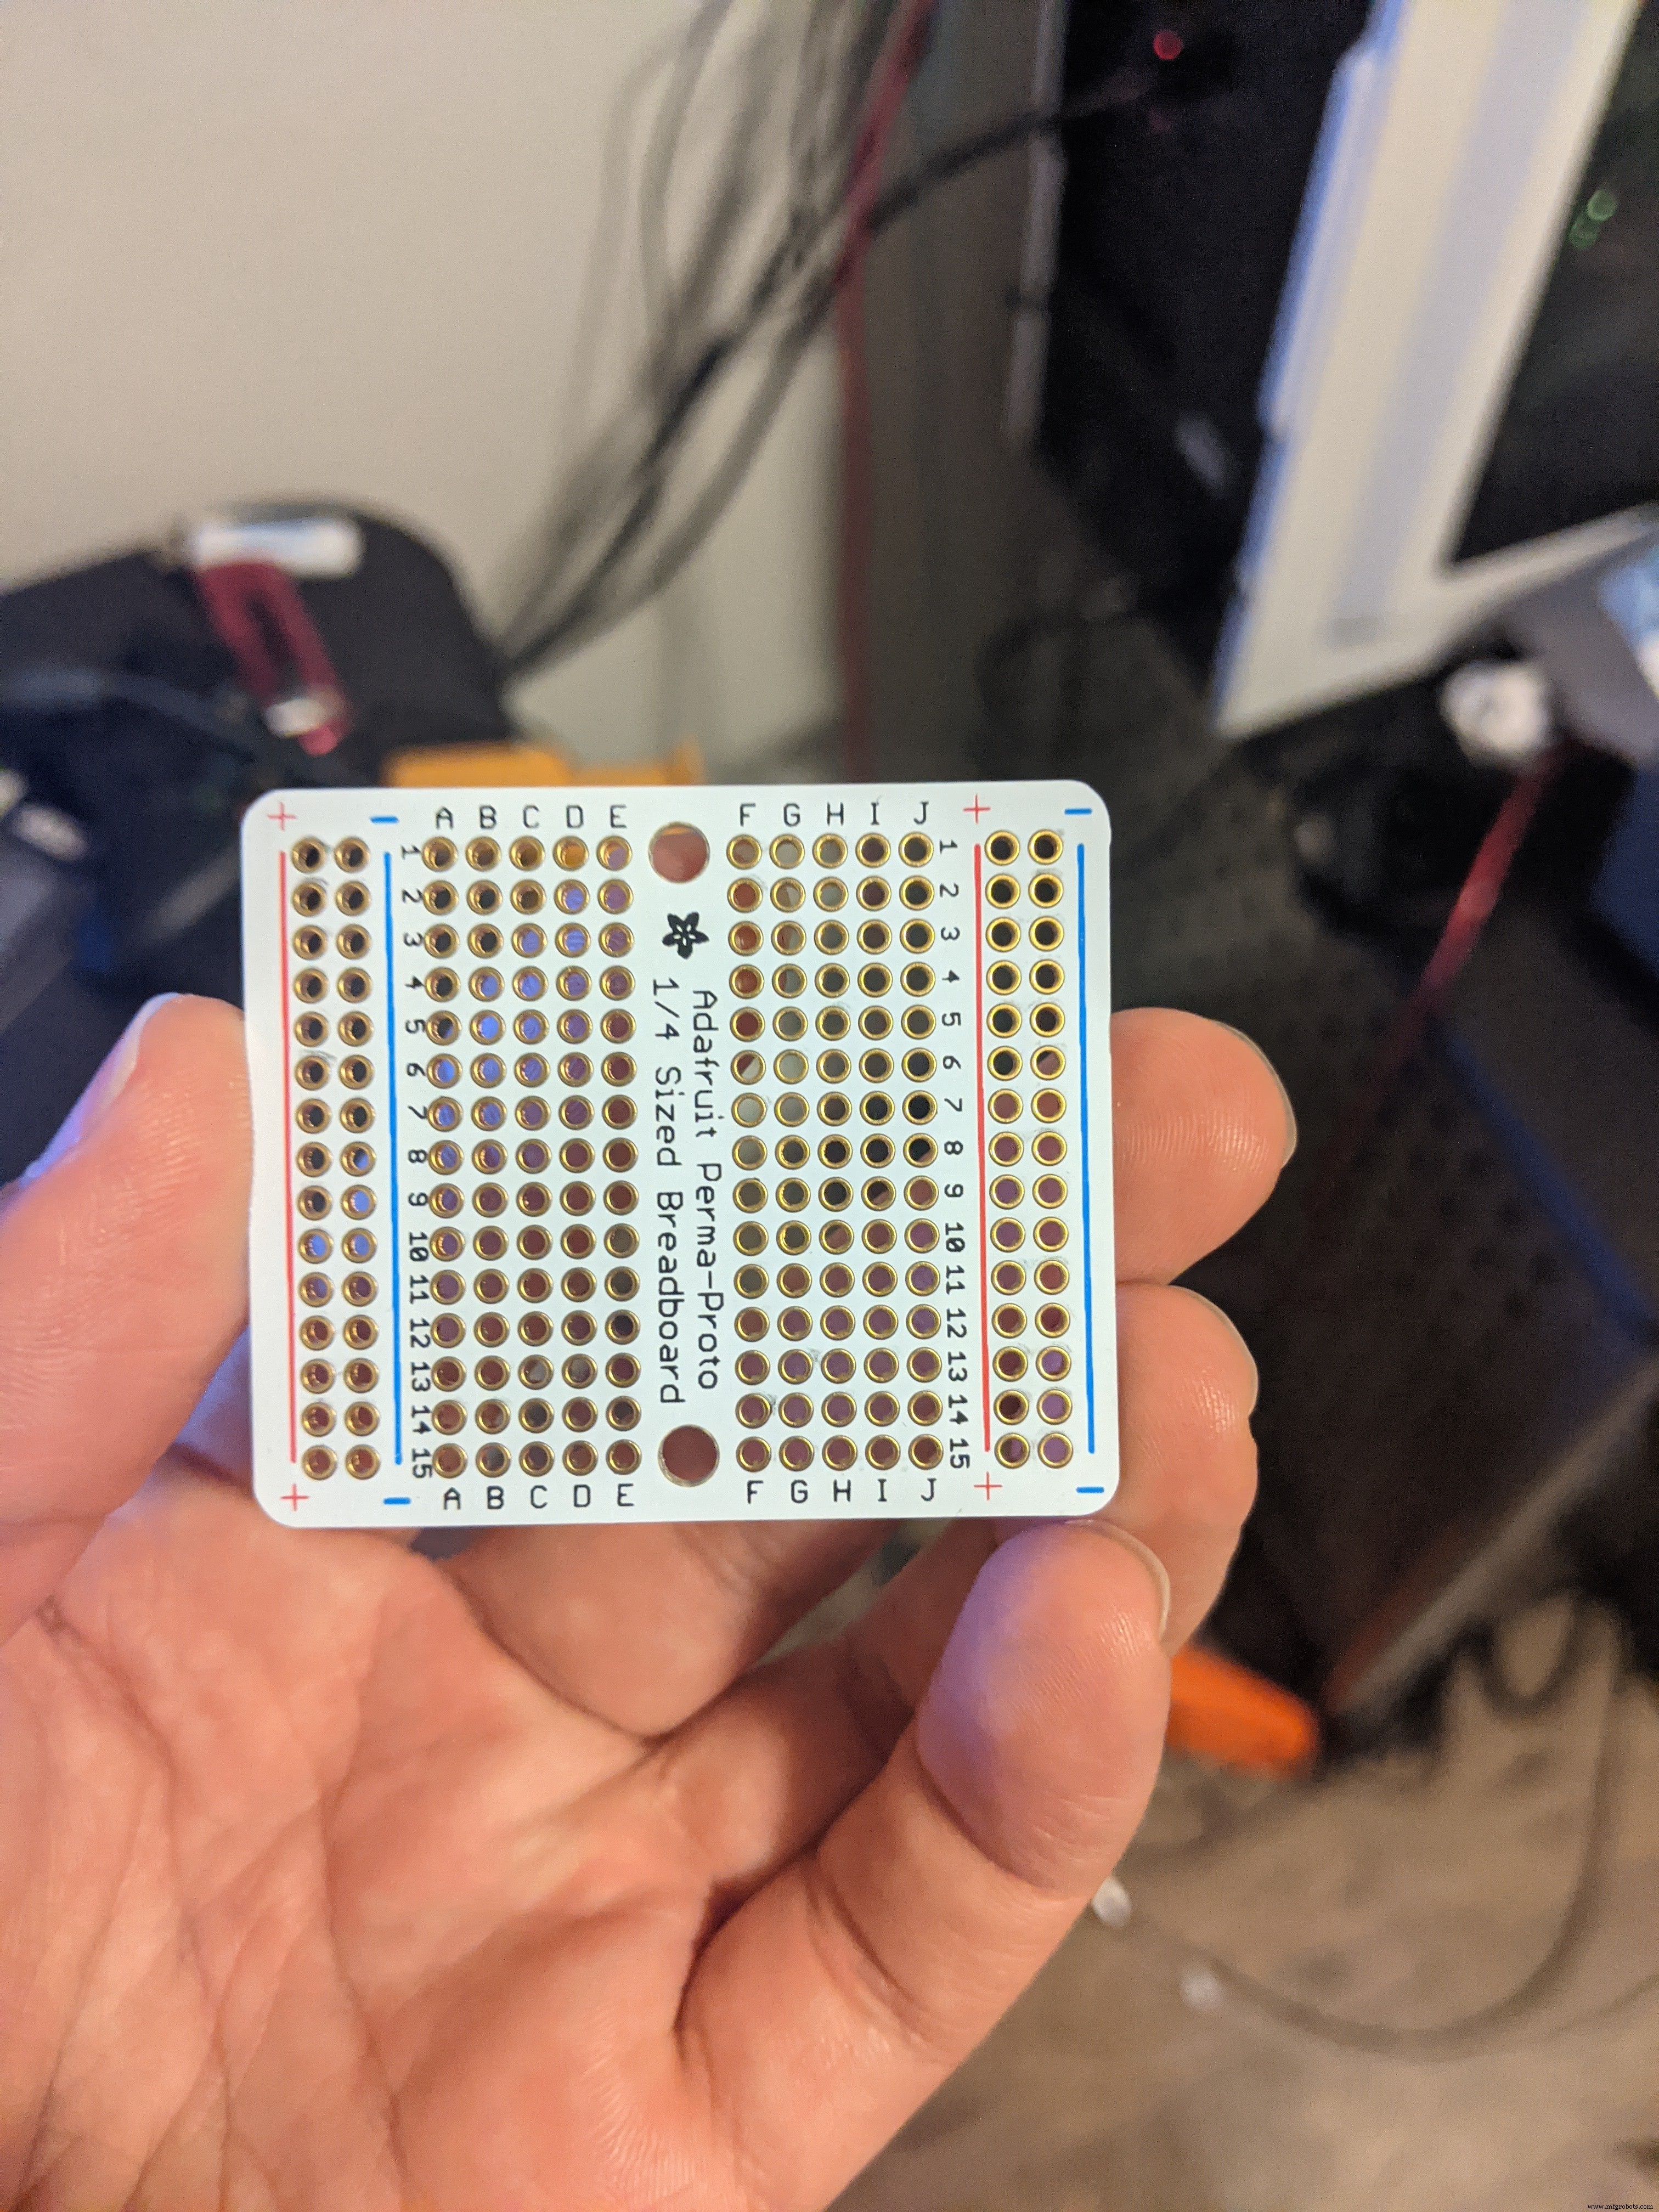
For the Vcc and ground rail, I cut the power rail section off some extra perma-proto breadboard I had lying around. Anything similar that you have around will work. Just double-check your connections before setting the rail in its slot. This is the hardest thing to get out once it's in. I also learned that the hard way.
That's it! Hope you guys have as much fun building this as I did. It looks challenging at first, but the more you get into it the easier it gets. Let me know if you have any questions about anything. Happy tinkering!
Code
- Feeder code
Feeder codeC/C++
// Final version for the pet feeder

/*  Features:
    - Easy to navigate menu
    - Overview of feed times, current time, feeding comletions,
      and feeding portion on the main screen
    - Controllable portions using a hall sensor for feedback
    - Accurate time keeping with DS1307 chip
    - Can manually change set time in DS1307 chip
    - Two feedings per day
    - Manual feeding option
    - Feeding restart in case of power outtage
    - LED indication of hall sensor and real time clock
    - Feeding times and completions safetly store in EEPROM
    - Servo "jiggle" in the event of food getting stuck
*/

#include <JC_Button.h>
#include <Wire.h>
#include <LiquidCrystal_I2C.h>
#include <LiquidMenu.h>
#include <RTClib.h>
#include <Servo.h>
#include <EEPROM.h>

// Creates servo object to control your servo
Servo myservo;

// Assigning all my input and I/O pins
#define ENTER_BUTTON_PIN 11
#define UP_BUTTON_PIN 10
#define DOWN_BUTTON_PIN 9
#define BACK_BUTTON_PIN 8
#define POWER_LED_PIN 5
#define MANUAL_BUTTON_PIN A1
#define hallPin 2
#define HALL_LED_PIN 7
#define SERVO_PIN 6

// Defining all the Buttons, works with the JC_Button library
Button enterBtn (ENTER_BUTTON_PIN);
Button upBtn (UP_BUTTON_PIN);
Button downBtn (DOWN_BUTTON_PIN);
Button backBtn (BACK_BUTTON_PIN);
Button manualFeedBtn (MANUAL_BUTTON_PIN);

// Defining LCD I2C and RTC
LiquidCrystal_I2C lcd(0x27, 16, 2);
RTC_DS1307 rtc;

//Variables used throughout the code

unsigned long hallSensorTime;
unsigned long rotationTime = 400;
unsigned long led_previousMillis = 0;
const long interval_delay = 1000;
unsigned long delay_interval = 2000;
int ledState = LOW;

boolean manualFeed = false;
boolean hall_sensor_fail = false;

unsigned long blink_previousMillis = 0;
unsigned long blink_currentMillis = 0;
unsigned long blink_interval = 500;

unsigned long delay_currentMillis = 0;
unsigned long delay_previousMillis = 0;

boolean blink_state = false;
int count;
boolean feeding1_complete = false;
boolean feeding2_complete = false;
boolean feeding1_trigger = false;
boolean feeding2_trigger = false;
boolean servoOn = true;

//Hall sensor interrupt

volatile boolean hallSensorActivated = false;
volatile int isr_count = 1;
void hallActiveISR()
{
  hallSensorActivated = true;
  digitalWrite(HALL_LED_PIN, HIGH);
  isr_count = isr_count + 1;
}

/* I use enums here to keep better track of what button is
    being pushed as opposed to just having each button set to
    an interger value.
*/
enum {
  btnENTER,
  btnUP,
  btnDOWN,
  btnBACK,
};

/* States of the State Machine. Same thing here with the enum
   type. It makes it easier to keep track of what menu you are
   in or want to go to instead of giving each menu an intreger value
*/
enum STATES {
  MAIN,
  MENU_EDIT_FEED1,
  MENU_EDIT_FEED2,
  MENU_EDIT_TIME,
  MENU_EDIT_PORTION,

  EDIT_FEED1_HOUR,
  EDIT_FEED1_MIN,

  EDIT_FEED2_HOUR,
  EDIT_FEED2_MIN,

  EDIT_HOUR,
  EDIT_MIN,

  EDIT_PORTION
};

// Holds state of the state machine
STATES state;

//User input variables
int Hour;
int Minute;
int portion;

int feed_time1_hour;
int feed_time1_min;
int feed_time2_hour;
int feed_time2_min;

int userInput;

// Special character check mark
byte check_Char[8] = {
  B00000,
  B00000,
  B00001,
  B00011,
  B10110,
  B11100,
  B11000,
  B00000
};
//======================The Setup===========================

void setup() {
  Wire.begin();
  Serial.begin(9600);
  lcd.init();
  lcd.backlight();
  lcd.createChar(0, check_Char);

  if (!rtc.begin()) {
    Serial.println("Couldn't find RTC!");
  }

  //  rtc.adjust(DateTime(F(__DATE__), F(__TIME__)));

  //The buttons
  enterBtn.begin();
  upBtn.begin();
  downBtn.begin();
  backBtn.begin();
  manualFeedBtn.begin();

  //Setting up initial state of State Machine
  state = MAIN;

  //Setting up inputs and outputs
  pinMode(POWER_LED_PIN, OUTPUT);
  pinMode(HALL_LED_PIN, OUTPUT);
  pinMode(hallPin, INPUT);

  /* Attatching interrupt to the pin that connects to the hall sensor.
     The hall sensor I used is set to HIGH and goes LOW when it encounters
     a magnet. Thats why its set to FALLING
  */
  attachInterrupt (digitalPinToInterrupt(hallPin), hallActiveISR, FALLING);
  // default state of LEDs
  digitalWrite(POWER_LED_PIN, HIGH);
  digitalWrite (HALL_LED_PIN, LOW);

  /* These functions get the stored feed time, completed feeding,
     and portion size from EEPROM on start-up. I did this because I get random
     power outtages here where I live.
  */
  get_feed_time1();
  get_feed_time2();
  get_completed_feedings();
  get_portion();

}

//======================The Loop===========================
void loop() {
  changing_states();

  check_buttons();

  check_feedtime ();

  check_rtc();

  manual_feed_check ();
}

//=============== The Functions =======================

/* Uses the JC_Button Library to continually check if a button
   was pressed. Depending on what button is pressed, it sets the
   variable userInput to be used in the fucntion menu_transitions
*/
void check_buttons () {
  enterBtn.read();
  upBtn.read();
  downBtn.read();
  backBtn.read();
  manualFeedBtn.read();

  if (enterBtn.wasPressed()) {
    Serial.println ("You Pressed Enter!");
    userInput = btnENTER;
    menu_transitions(userInput);
  }
  if (upBtn.wasPressed()) {
    Serial.println ("You Pressed Up!");
    userInput = btnUP;
    menu_transitions(userInput);
  }
  if (downBtn.wasPressed()) {
    Serial.println ("You Pressed Down!");
    userInput = btnDOWN;
    menu_transitions(userInput);
  }
  if (backBtn.wasPressed()) {
    Serial.println ("You Pressed Back!");
    userInput = btnBACK;
    menu_transitions(userInput);
  }
  if (manualFeedBtn.wasPressed()) {
    Serial.println ("You Are Manually Feeding!");
    manualFeed = true;
  }
}
//=====================================================

/* This funcion determines what is displayed, depending on what menu
    or "state" you are in. Each menu has a function that displays the
    respective menu
*/
void changing_states() {

  switch (state) {
    case MAIN:
      display_current_time();
      display_feeding_times();
      display_portion();
      break;

    case MENU_EDIT_FEED1:
      display_set_feed_time1_menu();
      break;

    case MENU_EDIT_FEED2:
      display_set_feed_time2_menu();
      break;

    case MENU_EDIT_TIME:
      display_set_time_menu();
      break;

    case MENU_EDIT_PORTION:
      display_set_portion_menu ();
      break;

    case EDIT_FEED1_HOUR:
      set_feed_time1();
      break;

    case EDIT_FEED1_MIN:
      set_feed_time1();
      break;

    case EDIT_FEED2_HOUR:
      set_feed_time2();
      break;

    case EDIT_FEED2_MIN:
      set_feed_time2();
      break;

    case EDIT_HOUR:
      set_the_time();
      break;

    case EDIT_MIN:
      set_the_time();
      break;

    case EDIT_PORTION:
      set_the_portion();
      break;
  }
}
//=====================================================
/* This is the transitional part of the state machine. This is
   what allows you to go from one menu to another and change values
*/
void menu_transitions(int input) {

  switch (state) {
    case MAIN:
      if (input == btnENTER) {
        lcd.clear();
        state = MENU_EDIT_FEED1;
      }
      if (input == btnBACK)
      {
        hall_sensor_fail = false;
      }
      break;
    //----------------------------------------------------
    case MENU_EDIT_FEED1:
      if (input == btnBACK) {
        lcd.clear();
        state = MAIN;
      }
      else if (input == btnENTER) {
        lcd.clear();
        state = EDIT_FEED1_HOUR;
      }
      else if (input == btnDOWN) {
        lcd.clear();
        state = MENU_EDIT_FEED2;
      }
      break;
    //----------------------------------------------------
    case EDIT_FEED1_HOUR:
      // Need this to prevent servo going off while setting time
      servoOn = false;
      if (input == btnUP) {
        feed_time1_hour++;
        if (feed_time1_hour > 23) {
          feed_time1_hour = 0;
        }
      }
      else if (input == btnDOWN) {
        feed_time1_hour--;
        if (feed_time1_hour < 0) {
          feed_time1_hour = 23;
        }
      }
      else if (input == btnBACK) {
        lcd.clear();
        servoOn = true;
        state = MENU_EDIT_FEED1;
      }
      else if (input == btnENTER) {
        state = EDIT_FEED1_MIN;
      }
      break;
    //----------------------------------------------------
    case EDIT_FEED1_MIN:
      if (input == btnUP) {
        feed_time1_min++;
        if (feed_time1_min > 59) {
          feed_time1_min = 0;
        }
      }
      else if (input == btnDOWN) {
        feed_time1_min--;
        if (feed_time1_min < 0) {
          feed_time1_min = 59;
        }
      }
      else if (input == btnBACK) {
        state = EDIT_FEED1_HOUR;
      }
      else if (input == btnENTER) {
        lcd.clear();
        lcd.setCursor(0, 0);
        lcd.print( "*Settings Saved*");
        delay(1000);
        lcd.clear();
        servoOn = true;
        write_feeding_time1 ();
        state = MAIN;
      }
      break;
    //----------------------------------------------------
    case MENU_EDIT_FEED2:
      if (input == btnUP) {
        lcd.clear();
        state = MENU_EDIT_FEED1;
      }
      else if (input == btnENTER) {
        lcd.clear();
        state = EDIT_FEED2_HOUR;
      }
      else if (input == btnDOWN) {
        lcd.clear();
        state = MENU_EDIT_TIME;
      }
      break;
    //----------------------------------------------------
    case EDIT_FEED2_HOUR:
      servoOn = false;
      if (input == btnUP) {
        feed_time2_hour++;
        if (feed_time2_hour > 23) {
          feed_time2_hour = 0;
        }
      }
      else if (input == btnDOWN) {
        feed_time2_hour--;
        if (feed_time2_hour < 0) {
          feed_time2_hour = 23;
        }
      }
      else if (input == btnBACK) {
        lcd.clear();
        servoOn = true;
        state = MENU_EDIT_FEED2;
      }
      else if (input == btnENTER) {
        state = EDIT_FEED2_MIN;
      }
      break;
    //----------------------------------------------------
    case EDIT_FEED2_MIN:
      if (input == btnUP) {
        feed_time2_min++;
        if (feed_time2_min > 59) {
          feed_time2_min = 0;
        }
      }
      else if (input == btnDOWN) {
        feed_time2_min--;
        if (feed_time2_min < 0) {
          feed_time2_min = 59;
        }
      }
      else if (input == btnBACK) {
        state = EDIT_FEED2_HOUR;
      }
      else if (input == btnENTER) {
        lcd.clear();
        lcd.setCursor(0, 0);
        lcd.print( "*Settings Saved*");
        delay(1000);
        lcd.clear();
        servoOn = true;
        write_feeding_time2 ();
        state = MAIN;
      }
      break;
    //----------------------------------------------------
    case MENU_EDIT_TIME:
      if (input == btnUP) {
        lcd.clear();
        state = MENU_EDIT_FEED2;
      }
      else if (input == btnENTER) {
        lcd.clear();
        state = EDIT_HOUR;
      }
      else if (input == btnDOWN) {
        lcd.clear();
        state = MENU_EDIT_PORTION;
      }
      break;
    //----------------------------------------------------
    case EDIT_HOUR:
      if (input == btnUP) {
        Hour++;
        if (Hour > 23) {
          Hour = 0;
        }
      }
      else if (input == btnDOWN) {
        Hour--;
        if (Hour < 0) {
          Hour = 23;
        }
      }
      else if (input == btnBACK) {
        lcd.clear();
        state = MENU_EDIT_TIME;
      }
      else if (input == btnENTER) {
        state = EDIT_MIN;
      }
      break;
    //----------------------------------------------------
    case EDIT_MIN:
      if (input == btnUP) {
        Minute++;
        if (Minute > 59) {
          Minute = 0;
        }
      }
      else if (input == btnDOWN) {
        Minute--;
        if (Minute < 0) {
          Minute = 59;
        }
      }
      else if (input == btnBACK) {
        state = EDIT_HOUR;
      }
      else if (input == btnENTER) {
        lcd.clear();
        lcd.setCursor(0, 0);
        lcd.print( "*Settings Saved*");
        delay(1000);
        lcd.clear();
        rtc.adjust(DateTime(0, 0, 0, Hour, Minute, 0));
        state = MAIN;
      }
      break;
    //----------------------------------------------------
    case MENU_EDIT_PORTION:
      if (input == btnUP) {
        lcd.clear();
        state = MENU_EDIT_TIME;
      }
      else if (input == btnENTER) {
        lcd.clear();
        state = EDIT_PORTION;
      }
      break;
    //----------------------------------------------------
    case EDIT_PORTION:
      if (input == btnUP) {
        portion++;
        if (portion > 20) {
          portion = 1;
        }
      }
      else if (input == btnDOWN) {
        portion--;
        if (portion < 1) {
          portion = 20;
        }
      }
      else if (input == btnBACK) {
        lcd.clear();
        state = MENU_EDIT_PORTION;
      }
      else if (input == btnENTER) {
        lcd.clear();
        lcd.setCursor(0, 0);
        lcd.print( "*Settings Saved*");
        delay(1000);
        lcd.clear();
        write_portion();
        state = MAIN;
      }
      break;
  }
}
//=====================================================
// This function checks the feed time against the current time

void check_feedtime ()
{
  DateTime now = rtc.now();
  if (now.second() == 0) {
    if ((now.hour() == feed_time1_hour) && (now.minute() == feed_time1_min))
    {
      feeding1_trigger = true;
      if (servoOn)
      {
        if (feeding1_complete == false)
        {
          lcd.clear();
          lcd.setCursor(3, 0);
          lcd.print ("Dispensing");
          lcd.setCursor(1, 1);
          lcd.print("First Feeding");
          startFeeding();
        }
      }
    }
    else if ((now.hour() == feed_time2_hour) && (now.minute () == feed_time2_min))
    {
      feeding2_trigger = true;
      if (servoOn)
      {
        if ( feeding2_complete == false)
        {
          lcd.clear();
          lcd.setCursor(3, 0);
          lcd.print ("Dispensing");
          lcd.setCursor(0, 1);
          lcd.print("Second Feeding");
          startFeeding();
        }
      }
    }
  }
  // Midnight Reset
  if ( (now.hour() == 0) && (now.minute() == 0))
  {
    feeding1_complete = false;
    feeding2_complete = false;
    EEPROM.write(4, feeding1_complete);
    EEPROM.write(5, feeding2_complete);
  }
  /*If power outtage happens during a feed time, this checks to see if the
     feed time has passed and if the feeding occurred. If not, it feeds.
  */
  if ( (now.hour() >= feed_time1_hour) && (now.minute() > feed_time1_min))
  {
    if ((feeding1_complete == 0) && (feeding1_trigger == 0))
    {
      lcd.clear();
      lcd.setCursor(5, 0);
      lcd.print ("Uh-Oh!");
      lcd.setCursor(2, 1);
      lcd.print("Power Outage");
      startFeeding();
    }
  }
  if ( (now.hour() >= feed_time2_hour) && (now.minute() > feed_time2_min))
  {
    if ((feeding2_complete == 0) && (feeding2_trigger == 0))
    {
      lcd.clear();
      lcd.setCursor(5, 0);
      lcd.print ("Uh-Oh!");
      lcd.setCursor(2, 1);
      lcd.print("Power Outage");
      startFeeding();
    }
  }
}

//=====================================================
// Displays the set portion menu option
void display_set_portion_menu () {
  lcd.setCursor(2, 0);
  lcd.print("Menu Options");
  lcd.setCursor(0, 1);
  lcd.print("Set the Portion");
}
//=====================================================
// Displays the menu where you change the current time
void set_the_time ()
{
  lcd.setCursor(2, 0);
  lcd.print("Set the Time");
  switch (state)
  {
    //----------------------------------------------------
    case EDIT_HOUR:

      if (blink_state == 0)
      {
        lcd.setCursor(5, 1);
        add_leading_zero(Hour);
      }
      else
      {
        lcd.setCursor(5, 1);
        lcd.print("  ");
      }
      lcd.print(":");
      add_leading_zero(Minute);
      break;
    //----------------------------------------------------
    case EDIT_MIN:
      lcd.setCursor(5, 1);
      add_leading_zero(Hour);
      lcd.print(":");
      if (blink_state == 0)
      {
        lcd.setCursor(8, 1);
        add_leading_zero(Minute);
      }
      else
      {
        lcd.setCursor(8, 1);
        lcd.print("  ");
      }
      break;
  }
  blinkFunction();
}
//=====================================================
// Displays the menu where you change the feeding portion
void set_the_portion ()
{
  lcd.setCursor (0, 0);
  lcd.print("Set the Portion");
  switch (state)
  {
    case EDIT_PORTION:
      if (blink_state == 0)
      {
        lcd.setCursor(7, 1);
        add_leading_zero(portion);
      }
      else
      {
        lcd.setCursor(7, 1);
        lcd.print("  ");
      }
  }
  blinkFunction();
}
//=====================================================
//Displays the menu option for setting the time
void display_set_time_menu () {
  lcd.setCursor(2, 0);
  lcd.print("Menu Options");
  lcd.setCursor(2, 1);
  lcd.print("Set the Time");
}
//=====================================================
// Displays the menu where you change the second feeding time
void set_feed_time2 ()
{
  lcd.setCursor(0, 0);
  lcd.print("Set Feed Time 2");
  switch (state)
  {
    //----------------------------------------------------
    case EDIT_FEED2_HOUR:

      if (blink_state == 0)
      {
        lcd.setCursor(5, 1);
        add_leading_zero(feed_time2_hour);
      }
      else
      {
        lcd.setCursor(5, 1);
        lcd.print("  ");
      }
      lcd.print(":");
      add_leading_zero(feed_time2_min);
      break;
    //----------------------------------------------------
    case EDIT_FEED2_MIN:
      lcd.setCursor(5, 1);
      add_leading_zero(feed_time2_hour);
      lcd.print(":");
      if (blink_state == 0)
      {
        lcd.setCursor(8, 1);
        add_leading_zero(feed_time2_min);
      }
      else
      {
        lcd.setCursor(8, 1);
        lcd.print("  ");
      }
      break;
  }
  blinkFunction();
}
//=====================================================
// Displays the menu where you change the first feeding time
void set_feed_time1 ()
{
  lcd.setCursor(0, 0);
  lcd.print("Set Feed Time 1");
  switch (state)
  {
    //----------------------------------------------------
    case EDIT_FEED1_HOUR:

      if (blink_state == 0)
      {
        lcd.setCursor(5, 1);
        add_leading_zero(feed_time1_hour);
      }
      else
      {
        lcd.setCursor(5, 1);
        lcd.print("  ");
      }
      lcd.print(":");
      add_leading_zero(feed_time1_min);
      break;
    //----------------------------------------------------
    case EDIT_FEED1_MIN:
      lcd.setCursor(5, 1);
      add_leading_zero(feed_time1_hour);
      lcd.print(":");
      if (blink_state == 0)
      {
        lcd.setCursor(8, 1);
        add_leading_zero(feed_time1_min);
      }
      else
      {
        lcd.setCursor(8, 1);
        lcd.print("  ");
      }
      break;
  }
  blinkFunction();
}
//=====================================================
// Adds a leading zero to single digit numbers
void add_leading_zero (int num) {
  if (num < 10) {
    lcd.print("0");
  }
  lcd.print(num);
}
//=====================================================
/* Displays the feeding time on the main menu as well as the
   check mark for visual comfirmation of a completed feeding
*/
void display_feeding_times () {
  //Displaying first feed time
  lcd.setCursor(0, 0);
  lcd.print ("F1:");
  add_leading_zero(feed_time1_hour);
  lcd.print(":");
  add_leading_zero(feed_time1_min);
  lcd.print(" ");
  if (feeding1_complete == true)
  {
    lcd.write(0);
  }
  else
  {
    lcd.print(" ");
  }
  //Displaying second feed time
  lcd.setCursor(0, 1);
  lcd.print("F2:");
  add_leading_zero(feed_time2_hour);
  lcd.print(":");
  add_leading_zero(feed_time2_min);
  lcd.print(" ");
  if (feeding2_complete == true)
  {
    lcd.write(0);
  }
  else
  {
    lcd.print(" ");
  }
}
//=====================================================
// Displays the current time in the main menu
void display_current_time () {
  DateTime now = rtc.now();
  lcd.setCursor(11, 0);
  add_leading_zero(now.hour());
  lcd.print(":");
  add_leading_zero(now.minute());
}
//=====================================================
// Displays the menu option for setting the first feed time
void display_set_feed_time1_menu () {
  lcd.setCursor(2, 0);
  lcd.print("Menu Options");
  lcd.setCursor(0, 1);
  lcd.print("Set Feed Time 1");
}
//=====================================================
// Displays the meny option for setting the second feed time
void display_set_feed_time2_menu () {
  lcd.setCursor(2, 0);
  lcd.print("Menu Options");
  lcd.setCursor(0, 1);
  lcd.print("Set Feed Time 2");
}
//=====================================================
// Displays the feeding portion in the main menu
void display_portion ()
{
  lcd.setCursor (12, 1);
  lcd.print("P:");
  add_leading_zero(portion);
}
//=====================================================
// Starts the feeding process.

void startFeeding()
{
  // attach the servo to the pin
  myservo.attach(SERVO_PIN);
  count = 1;
  hallSensorTime = millis();
  // loop so that the servo runs until desired portion is reached
  while (count <= portion)
  {
    servoStart();
    if (hallSensorActivated == true)
    {
      //      digitalWrite(LED_PIN,HIGH);
      count = count + 1;
      //resetting for next interrupt
      hallSensorTime = millis();
      hallSensorActivated = false;
      digitalWrite(HALL_LED_PIN, LOW);
    }
    /* Moved the servo clockwise a bit to dislodge food stuck in the
       dispensing mechanism
    */
    if (millis() - hallSensorTime > rotationTime)
    {
      hall_sensor_fail = true;
      Serial.println("I'm in Jiggle");
      jiggle();
    }
  }
  // Keeps track of which feeding just happened and writes it to EEPROM
  if ((feeding1_complete == false) && (feeding2_complete == false))
  {
    feeding1_complete = true;
    EEPROM.write(4, feeding1_complete);
  }
  else if ((feeding1_complete == true) && (feeding2_complete == false))
  {
    feeding2_complete = true;
    EEPROM.write(5, feeding2_complete);
  }
  servoStop();
  digitalWrite(HALL_LED_PIN, LOW);
  /* Detaches the servo from the pin so that it is no longer recieving a signal.
     You may have to add a delay before this so the sensor stops when a magnet is over
     the hall sensor. There was significant momentum left in my system that I did not need it
  */
  myservo.detach();
  lcd.clear();
  delay_currentMillis = millis();
  while (millis() - delay_currentMillis <= delay_interval)
  {
    lcd.setCursor(2, 0);
    lcd.print ("Feeding Done");
  }
  lcd.clear();
}
//=====================================================

void servoStart()
{
  myservo.write(180);
}
//=====================================================

void servoStop()
{
  // this value will vary, you have to find it through trial and error
  myservo.write(94);
}
//=====================================================
// "jiggles" the servo in case food gets stuck

void jiggle()
{
  myservo.write(80);
  delay(30);
  myservo.write(93);
  delay(30);
  myservo.write(180);
}
//=====================================================
// Writes the hour and minute valies set for 1st feeding to the EEPROM

void write_feeding_time1 ()
{
  EEPROM.write(0, feed_time1_hour);
  EEPROM.write(1, feed_time1_min);
}
//=====================================================
// Writes the hour and minute values set for 2nd feeding to the EEPROM

void write_feeding_time2 () {
  EEPROM.write(2, feed_time2_hour);
  EEPROM.write(3, feed_time2_min);
}
//=====================================================
// Writes portion value set to the EEPROM

void write_portion ()
{
  EEPROM.write(6, portion);
}
//=====================================================
// Reads the hour and minute values from 1st feed time from EEPROM

void get_feed_time1 ()
{
  feed_time1_hour = EEPROM.read(0);
  if (feed_time1_hour > 23) feed_time1_hour = 0;
  feed_time1_min = EEPROM.read(1);
  if (feed_time1_min > 59) feed_time1_min = 0;

}
//=====================================================
// Reads the hour and minute values from 2nd feed time from EEPROM

void get_feed_time2 ()
{
  feed_time2_hour = EEPROM.read(2);
  if (feed_time2_hour > 23) feed_time2_hour = 0;
  feed_time2_min = EEPROM.read(3);
  if (feed_time2_min > 59) feed_time2_min = 0;
}
//=====================================================
// Reads portion set value from EEPROM

void get_portion ()
{
  portion = EEPROM.read(6);
}
//=====================================================
// Reads boolean value of whether or not feedings have occured from EEPROM

void get_completed_feedings()
{
  feeding1_complete = EEPROM.read(4);
  feeding2_complete = EEPROM.read(5);
}
//=====================================================
/* Checks to see if the hall sensor has failed to read a magnet and
   blinks the red LED
*/

void check_hall_sensor () {
  if (hall_sensor_fail == true)
  {
    if (blink_state == 0)
    {
      digitalWrite(HALL_LED_PIN, HIGH);
    }
    else
    {
      digitalWrite(HALL_LED_PIN, LOW);
    }
    blinkFunction();
  }
  else
  {
    digitalWrite(HALL_LED_PIN, LOW);
    hall_sensor_fail = false;
  }
}
//=====================================================
// Checks if you push the manual feed button

void manual_feed_check () {
  if (manualFeed == true)
  {
    lcd.clear();
    lcd.setCursor(0, 0);
    lcd.print(" Manual Feeding");
    startFeeding();
    manualFeed = false;
  }
}
//=====================================================
// checks to see if RTC is running

void check_rtc () {
  if (!rtc.isrunning())
  {
    led_blink();
  }
}
//=====================================================
/* Blinks the red led when RTC has failed. Note: the led
   will be blinking at a different rate than when the hall
   sensor fails
*/

void led_blink()
{
  unsigned long led_currentMillis = millis();
  if (led_currentMillis - led_previousMillis >= interval_delay)
  {
    led_previousMillis = led_currentMillis;
    if (ledState == LOW)
    {
      ledState = HIGH;
    }
    else
    {
      ledState = LOW;
    }
    digitalWrite(HALL_LED_PIN, ledState);
  }
}
//=====================================================
// Creates the blinking effect when changing values

void blinkFunction()
{
  blink_currentMillis = millis();

  if (blink_currentMillis - blink_previousMillis > blink_interval)
  {
    blink_previousMillis = blink_currentMillis;
    blink_state = !blink_state;
  }
}
//=====================================================
Link to Code on my Github
https://github.com/russo08/Pet-feeder/blob/main/feeder_final.inoCustom parts and enclosures
Fusion 360 and STL files on my Github
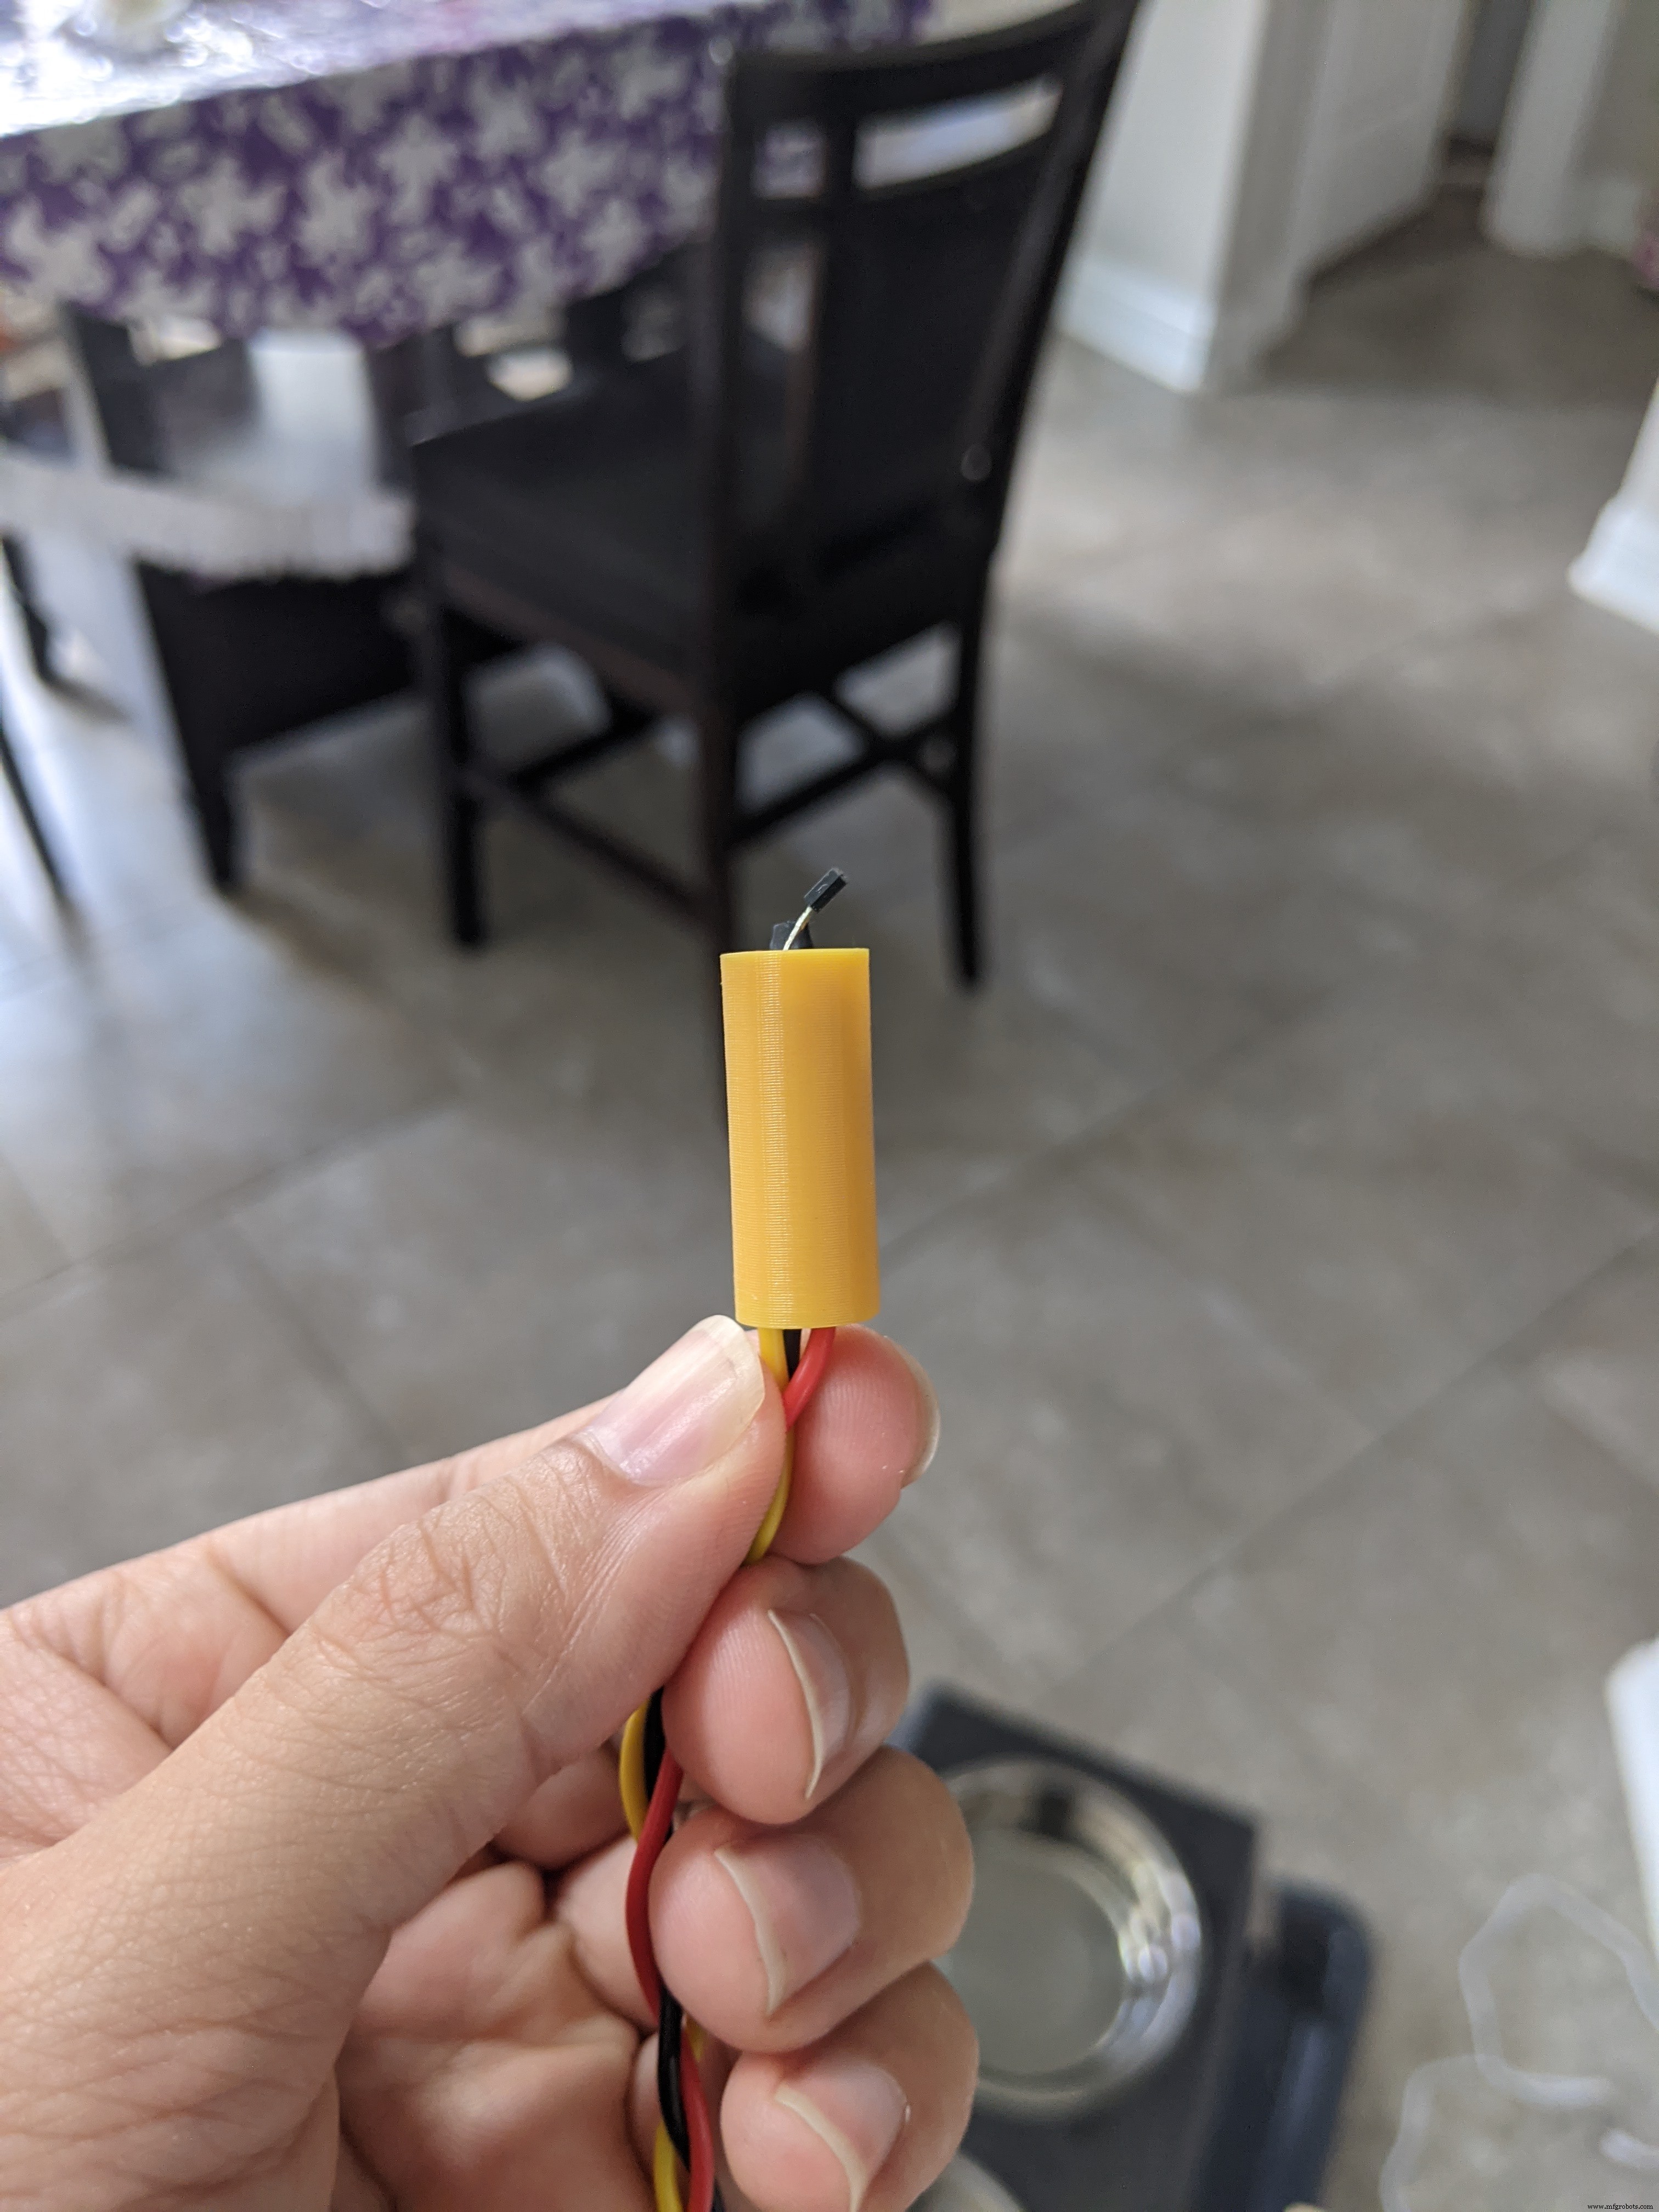
Here are all the fusion 360 files in case you want to customize them for different component sizes. I have also provided the STL files. The only model not on there is the tube for the hall sensor. That should be pretty easy to model and print.https://github.com/russo08/Pet-feeder.gitSchematics
This is the circuit schematic. You can change it up if you need to. If you do, just remember to make the same adjustments in the code.
Manufacturing process
- Coloring 3D‑Printed Parts with Wax Crayons: A Novel Post‑Processing Technique
- Build a Robust Temperature & Sensor API on Raspberry Pi Using the GY‑91 Module
- Elevating Quality Control: 3D‑Printed Tooling Enhances Manufacturing Precision
- Designing Functional 3D‑Printed Bicycle Pannier Adapters with Kevlar CFF
- Reimagining the Go‑Kart: 3D‑Printed Carbon‑Fiber Parts for Unmatched Performance
- Webinar: Build Stronger 3D Parts with Eiger Software
- Master Vibration Detection with Arduino: A Simple Sensor & LED Setup
- Build an IR Sensor Project with Arduino UNO – Simple Guide
- PIR Motion Sensor: Working Principles & Arduino Integration Guide
- Professional Guide: Dyeing 3D Printed Polyamide Parts for Vibrant Color and Durability