


Professional Guide: Dyeing 3D Printed Polyamide Parts for Vibrant Color and Durability
Nylon or polyamide (PA) is one of the most widely used polymers in professional 3D printing. This is due to its excellent mechanical properties of impact resistance, flexibility, chemical resistance and high temperature resistance.
The material is currently used in pellet, filament or powder form depending on whether an FDM 3D printer or SLS 3D printing equipment is used.
Despite the differences in the nature of each manufacturing technology, polyamide 3D printed parts are incredibly strong, enabling the manufacture of functional prototypes or final parts.
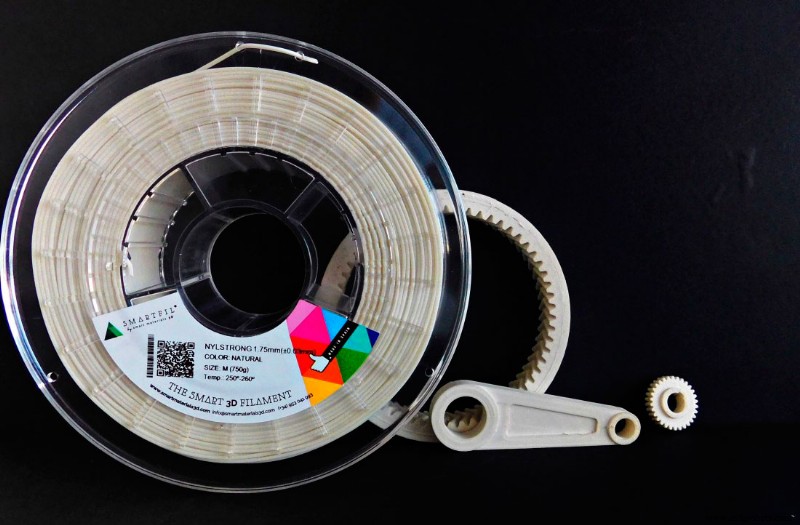
Image 1: Spool and parts 3D printed with polyamide 6 using FDM 3D printing. Source: Smart Materials.
Like many other technical materials, they are generally purchased in their "natural" version, without colour additives. Therefore, this type of filaments or powders usually have a white or off-white shade which, in some cases, may not be suitable for the corresponding application. There are cases in which the need may arise to obtain finishes in different colours.
To dye 3D printed parts with polyamide, it must be taken into account that this is a synthetic material, so a special dye for synthetic materials must be used, such as RIT synthetic dye, which is available in a wide range of colours.
Another fact to take into account is the hygroscopicity of nylon. This means that nylon has the ability to absorb moisture from the environment, which is a handicap when storing and processing the material, as moisture can adversely affect the printing process and even cause print failures. For this reason, it is recommended to carry out the dyeing process only with final parts and not with the unprocessed material.
The dyeing process requires prior preparation of the 3D printed parts depending on the manufacturing technology used:
- FDM 3D printing: If you want to dye 3D printed parts using FDM technology, you must remove the substrates and post-process the parts before dyeing them. It is important to clean the underside of the parts, especially if any adhesive has been used.
- SLS 3D printing: If the user is working with SLS 3D printing technology, excess powder should be removed, first manually, and then using a compressed air gun. Afterwards, it is recommended to wash the parts with lukewarm water.
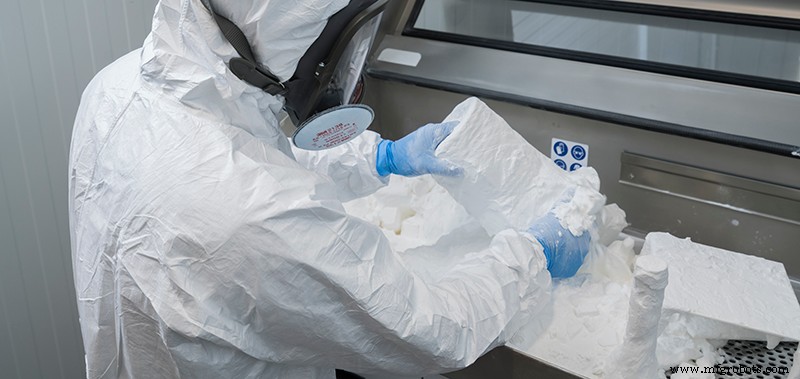
Image 2: Dust removal process of 3D printed parts with SLS technology. Source: Filament2print.
At this point, the pieces would be ready to be dyed. To do this, the following steps must be followed:
1. Selecting the dye
The user must bear in mind that the dye chosen must be suitable for synthetic materials such as nylon. In case of using a dye for natural fibres, it is very likely that the desired results will not be achieved.
At Filament2print we recommend RIT dyes, with which we have been working for years with excellent results. In addition, they have a wide range of colours and even allow you to mix several colours, thus being able to achieve customised shades.
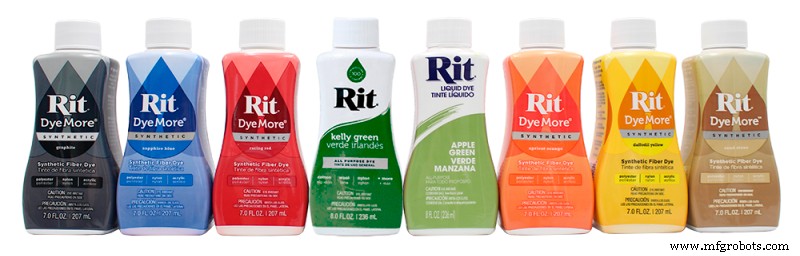
Image 3: RIT dye range. Source: Filament2print.
2. Dilute the dye
Once the colour has been chosen, the user must prepare the water and dye solution. A ratio that usually gives good results would be 5:1. It should be noted that the proportion of this solution will directly affect the result obtained. If a more saturated shade is desired, the ratio of water should be reduced, while if a less saturated finish is desired, the ratio of water to dye can be increased.
On the other hand, it is very important to calculate the volume of liquid needed to completely submerge the piece.
3. Heating the solution
The next step is to heat the solution. The temperature is also a decisive factor for the finish of the tinted parts. This parameter will depend to a great extent on the colour used, but we can say that it should be around 60-80 ºC. Below 60ºC, the dye may not filter well into the piece and above 80ºC, the piece may become deformed.
Taking this step into account, it is recommended to use a container that can be insulated so that the heat does not dissipate easily and is maintained throughout the process.
4. Insert the parts
Once the solution has reached the right temperature, the 3D printed parts can be placed in the container with the dye solution.
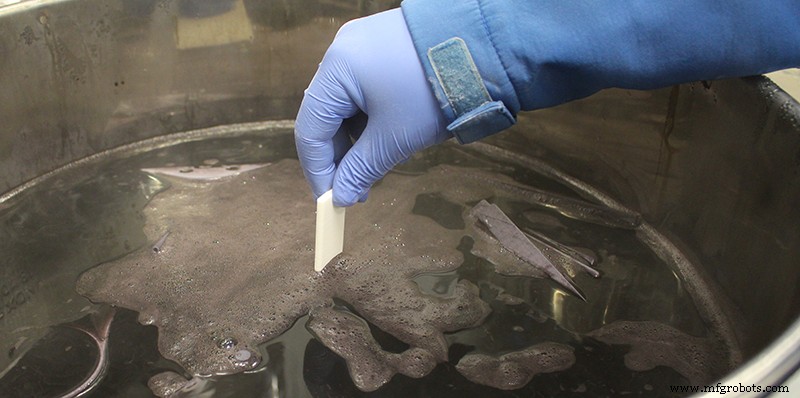
Image 4: Introduction of 3D printed parts in dyeing solution. Source: Filament2print.
The parts must be completely submerged and the user must ensure that they do not float, as this would mean that a part of the part would not absorb the dye properly and would result in an uneven shade. The same problem would occur in the case of tinting several parts at the same time if they come into contact with each other.
5. Tinting time
The tinting time may vary according to the desired colour and saturation. It is advisable to remove the pieces from time to time to see the evolution of the tinting, and to remove them definitively when the desired finish is reached.
The longer the piece is left in the solution, the darker the final colour will be. Below you can see how a lighter or darker finish is achieved depending on the tinting time.
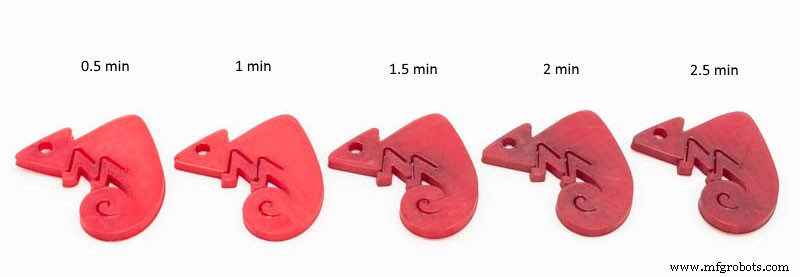
Image 5: Colour according to tinting time. Source: Filament2print.
6. Cleaning
Once the pieces have been removed from the solution, they should be rinsed under running water to remove excess dye. The parts should then be placed on a paper towel and left to dry for a few minutes.
Finally, if the dyeing process has been carried out correctly, the user obtains uniformly dyed parts. It should be taken into account that both the proportion of dye and the temperature used and the dyeing time will directly affect the finish of the pieces, so it is recommended to carry out tests until the desired result is achieved.
Undoubtedly, thanks to synthetic dyes, it is possible to obtain a multitude of customised finishes in 3D printed parts with polyamide, which offers companies great design freedom and the possibility of personalising their parts and differentiating them from the rest.
3D printing
- Coloring 3D‑Printed Parts with Wax Crayons: A Novel Post‑Processing Technique
- Elevating Quality Control: 3D‑Printed Tooling Enhances Manufacturing Precision
- Designing Functional 3D‑Printed Bicycle Pannier Adapters with Kevlar CFF
- Reimagining the Go‑Kart: 3D‑Printed Carbon‑Fiber Parts for Unmatched Performance
- Webinar: Build Stronger 3D Parts with Eiger Software
- Optimizing 3D Printed Part Strength with Efficient Fiber Routing – Part 1
- Björn Lindwall’s 3D‑Printed Gear Powers His Everest Ascent
- Smart 3D Printed Pet Feeder Powered by Arduino Nano
- Enhancing the Strength of 3D Printed Parts: Proven Techniques
- Calculating SLS 3D Printing Costs: A Step-by-Step Guide for Sinterit Lisa & Lisa Pro