During the hottest months of the summer, plants can dry out, and leave a once colourful garden completely dead. Watering by hand uses up precious time in our busy schedules, which most of us cannot afford. Also, hand watering wastes water, a precious resource, especially during these months. Here, this system is designed to take the hassle out of watering, by watering only when the soil becomes dry, all without manual intervention.
How It Works
Soil moisture is read using an Arduino Uno, via a pair of carbon (graphite) electrodes inserted approximately 10 cm into the ground. The moisture level is read as a voltage, by passing a current through the rods and the soil. As the soil moisture decreases, the voltage read increases, activating a valve to water the area. On the contrary, as the soil becomes moist enough, the conductance increases, the voltage across the rods decreases, and the valve is turned off.
Prepare the Moisture Sensor
First, snap the arc gouging rod in half, then remove the copper jacket from the graphite core using a file, leaving 5 cm of copper at the top. Solder a piece of 20 gauge copper wire to the copper part, which will connect the sensing rod to the Arduino. Ensure the wire is long enough to go from the plant's location to the control hardware. Lastly, insert the rods into the ground beside plant to be watered, keeping the copper above the soil.
Setup the Arduino
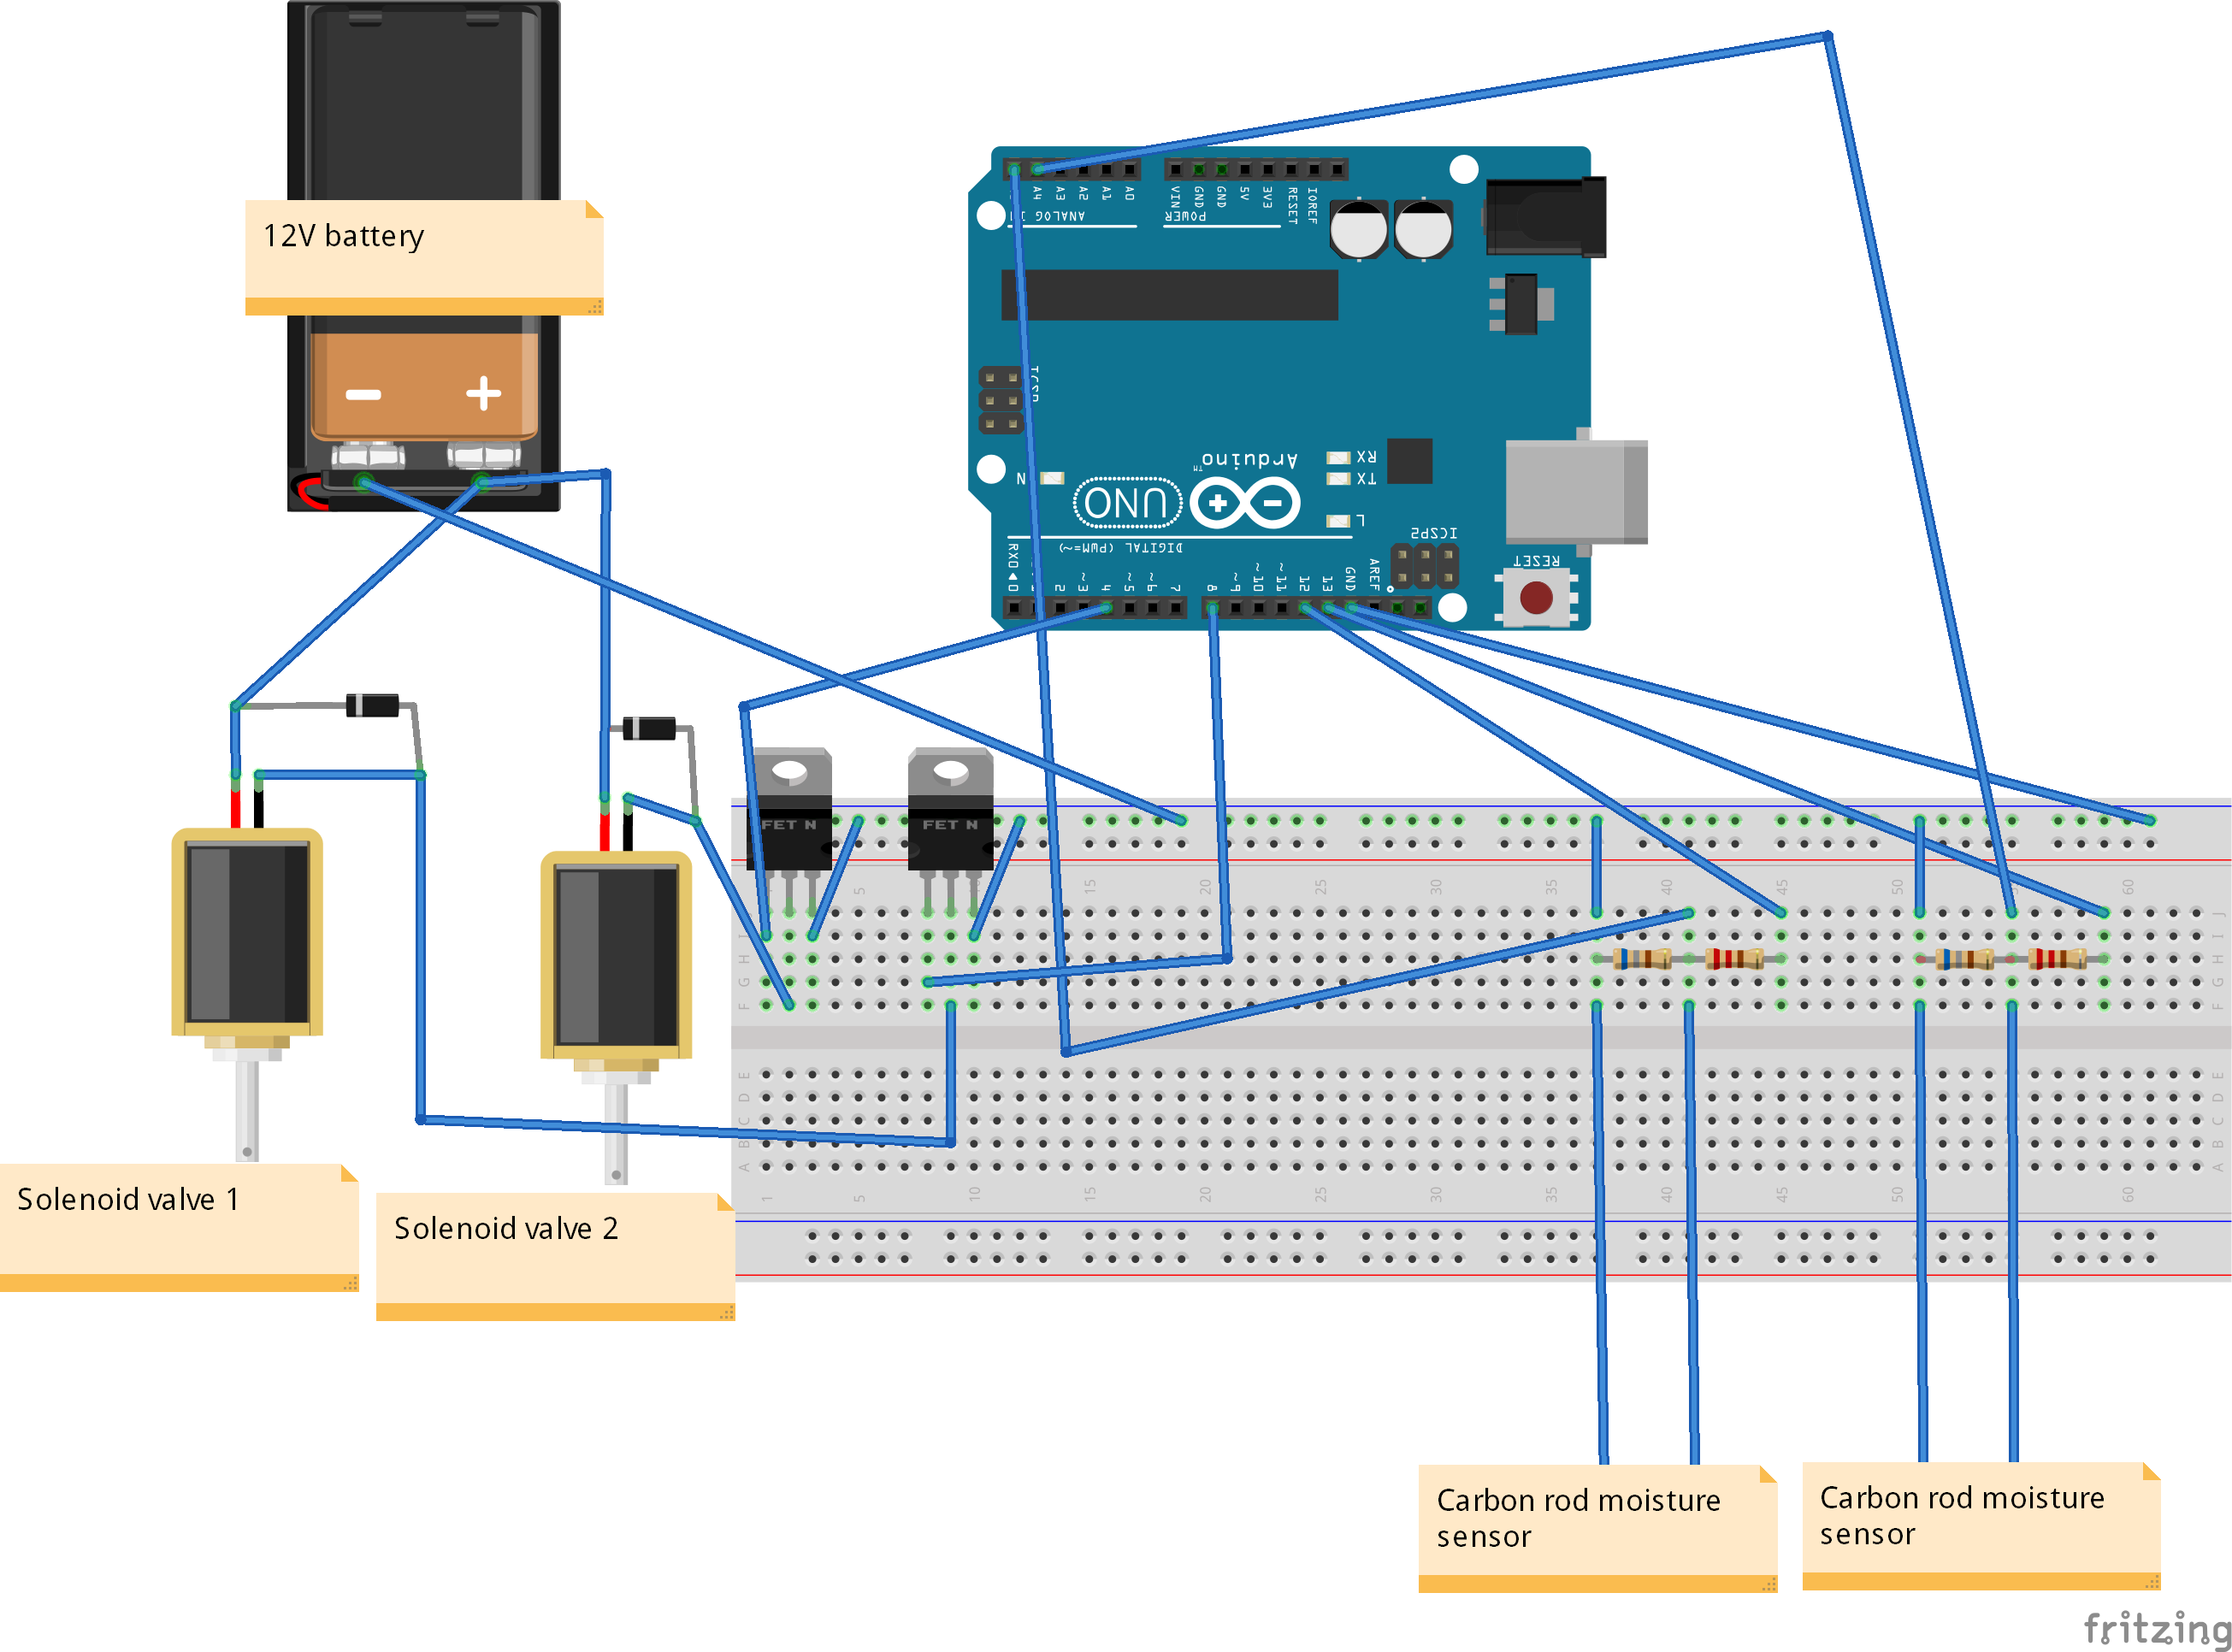
The code for this project is provided below. Customize it for the number of rods and output valves needed. Auxiliary electronics will need to be connected as shown in the schematic, and component values shown are a general guideline and do not need to be exact. The threshold value in the code will need to be adjusted based on the soil characteristics in your area.
Next, Connect pins 4 and 8 to the gates of the two transistors. A transistor such as an IRF640, TIP120 or similar will work well to switch the solenoid valve. To protect the transistors, connect diodes in reverse polarity across the solenoids.
Powering the Project
A DC 12V mains isolating power supply, battery or solar panel can be used to run it. For safety reasons, non-isolating wall adapters must not be used as they will pose a shock hazard since live mains current can travel through the electronics and into the ground.
Putting It All Together
Install the Arduino and auxiliary electronics in a waterproof box and the solenoid valves in a separate box. Connect the hoses, power on the system and adjust the sensor rod depth for optimal results. Position the hose far enough away from the sensor as to ensure the plant is watered thoroughly before shutting off.
Note on using metal electrodes
Metal electrodes may be convenient, but they can cause problems and should be avoided. As a current is passed through the soil to sense moisture, the metal breaks down, corroding and leaching into the soil. The electrode's resistance will increase, giving inaccurate dry/wet readings and contaminating the soil with metal ions which can be detrimental to plant health. If the arc gouging rods are unavailable, try extracting the carbon rods from carbon-zinc batteries or a thick pencil lead.
Next Steps
This project can be integrated with with an ESP8266 unit to allow for remote control over the internet. As well, a custom 3D printed case can be used to better fit the hardware components more neatly and efficiently.
Andthereitis!Please leaveyour feedback and improvement suggestions in the comments below, I'dhighly appreciateit!
Code
Arduino code for this project
Works with any Arduino Uno, with auxiliary components as shown in the schematic.https://github.com/MansonHau/AutoWateringSystem/blob/master/Moisture_Detection.ino