


Master Solo Drone Servo Control with Arduino: Easy Setup & Sweep Tutorial
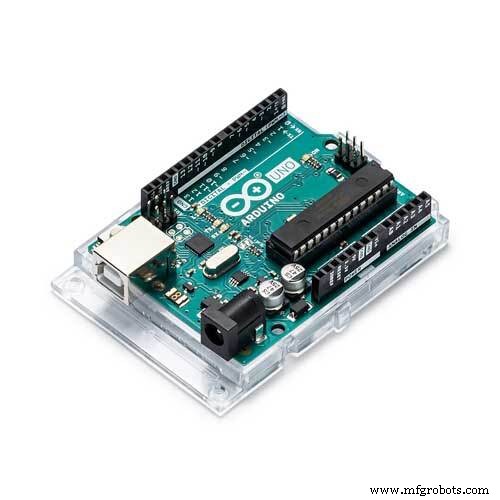
Components and supplies
 |
| × | 1 | |||
 |
| × | 1 | |||
| × | 1 | ||||
| × | 1 |
About this project
Intro
Solo has a great development environment but a lack of I/O. Currently the Accessory port breaks out CAN, Mavlink Serial to Pixhawk, and USB to Sololink(imx6). By using an arduino and firmata can add custom sensors, control servos, blink LEDs, or any other arduino function.
This tutorial will walk you through the steps of using an arduino with Solo to control a servo.
Software Preqs:
- Solo update 1.2.0 or greater
- Arduino IDE
- Filezilla
- Putty or any other SSH Client
Step 1: Upload Firmata Host to Arduino Uno
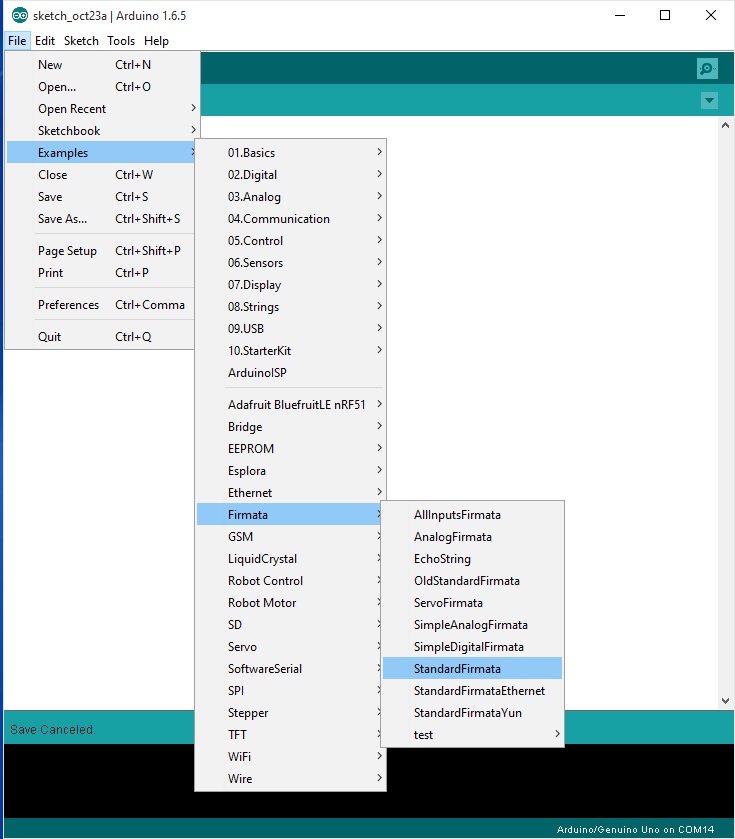
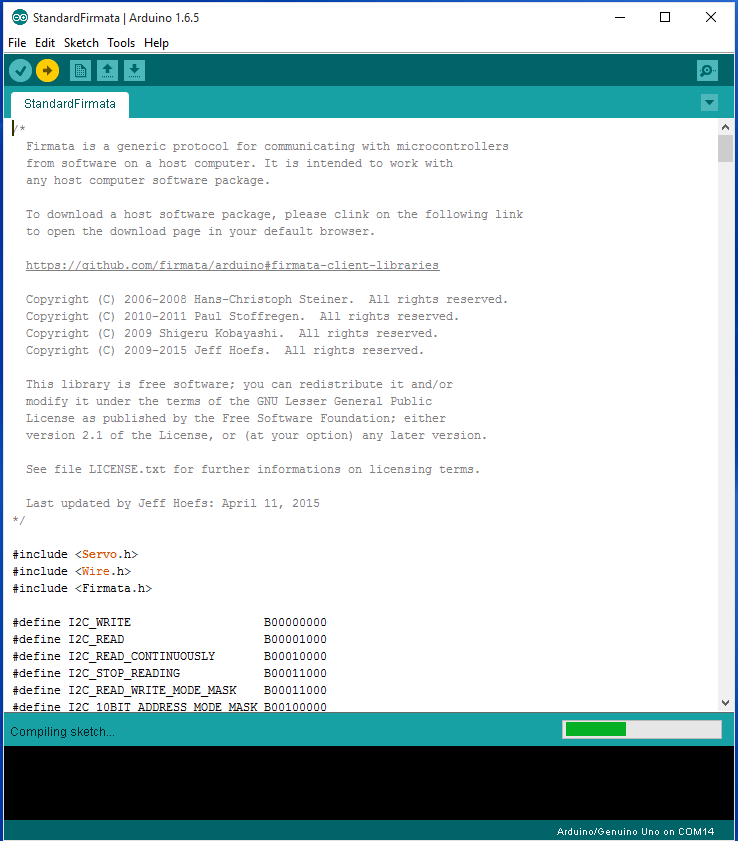
Open StandardFirmata from the examples tab. Select board and port. Upload!
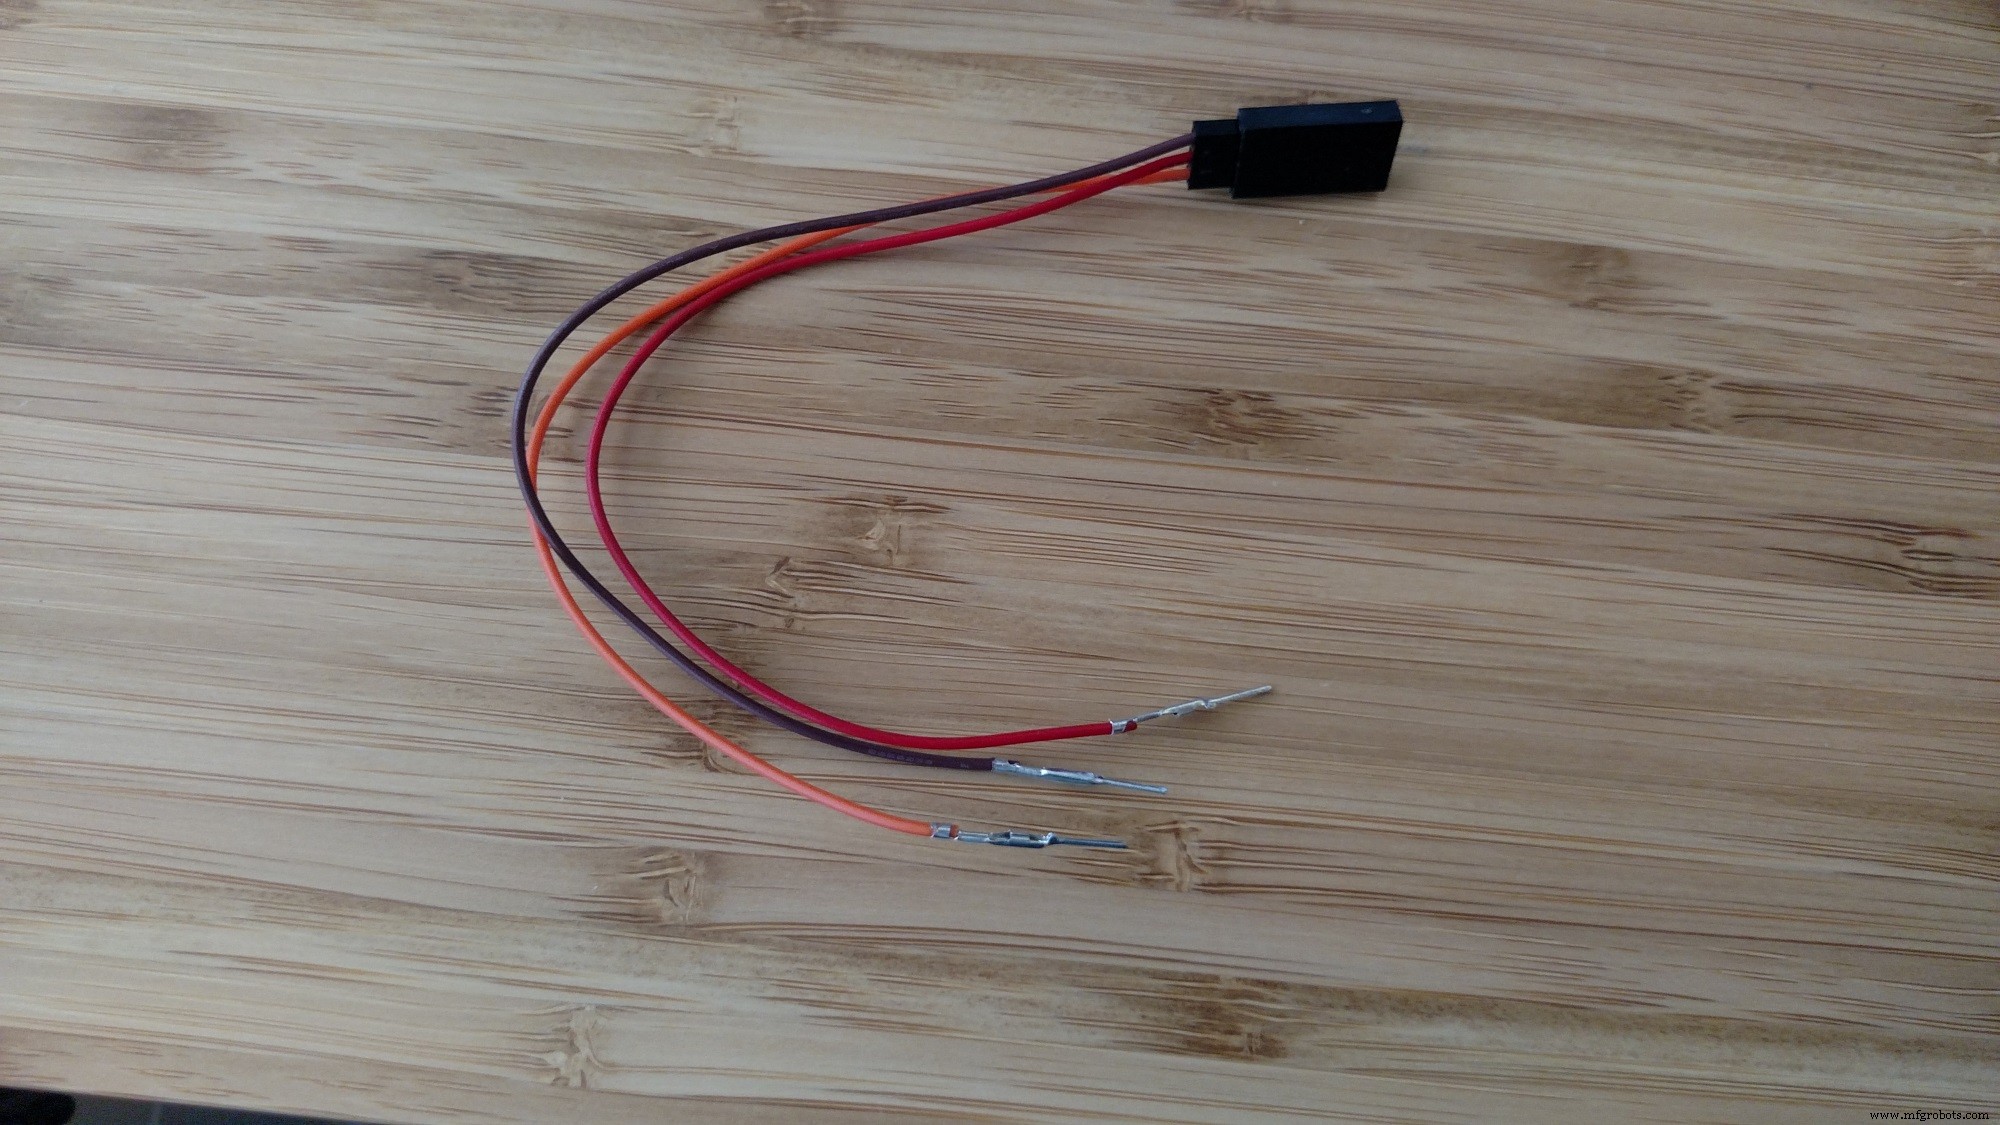
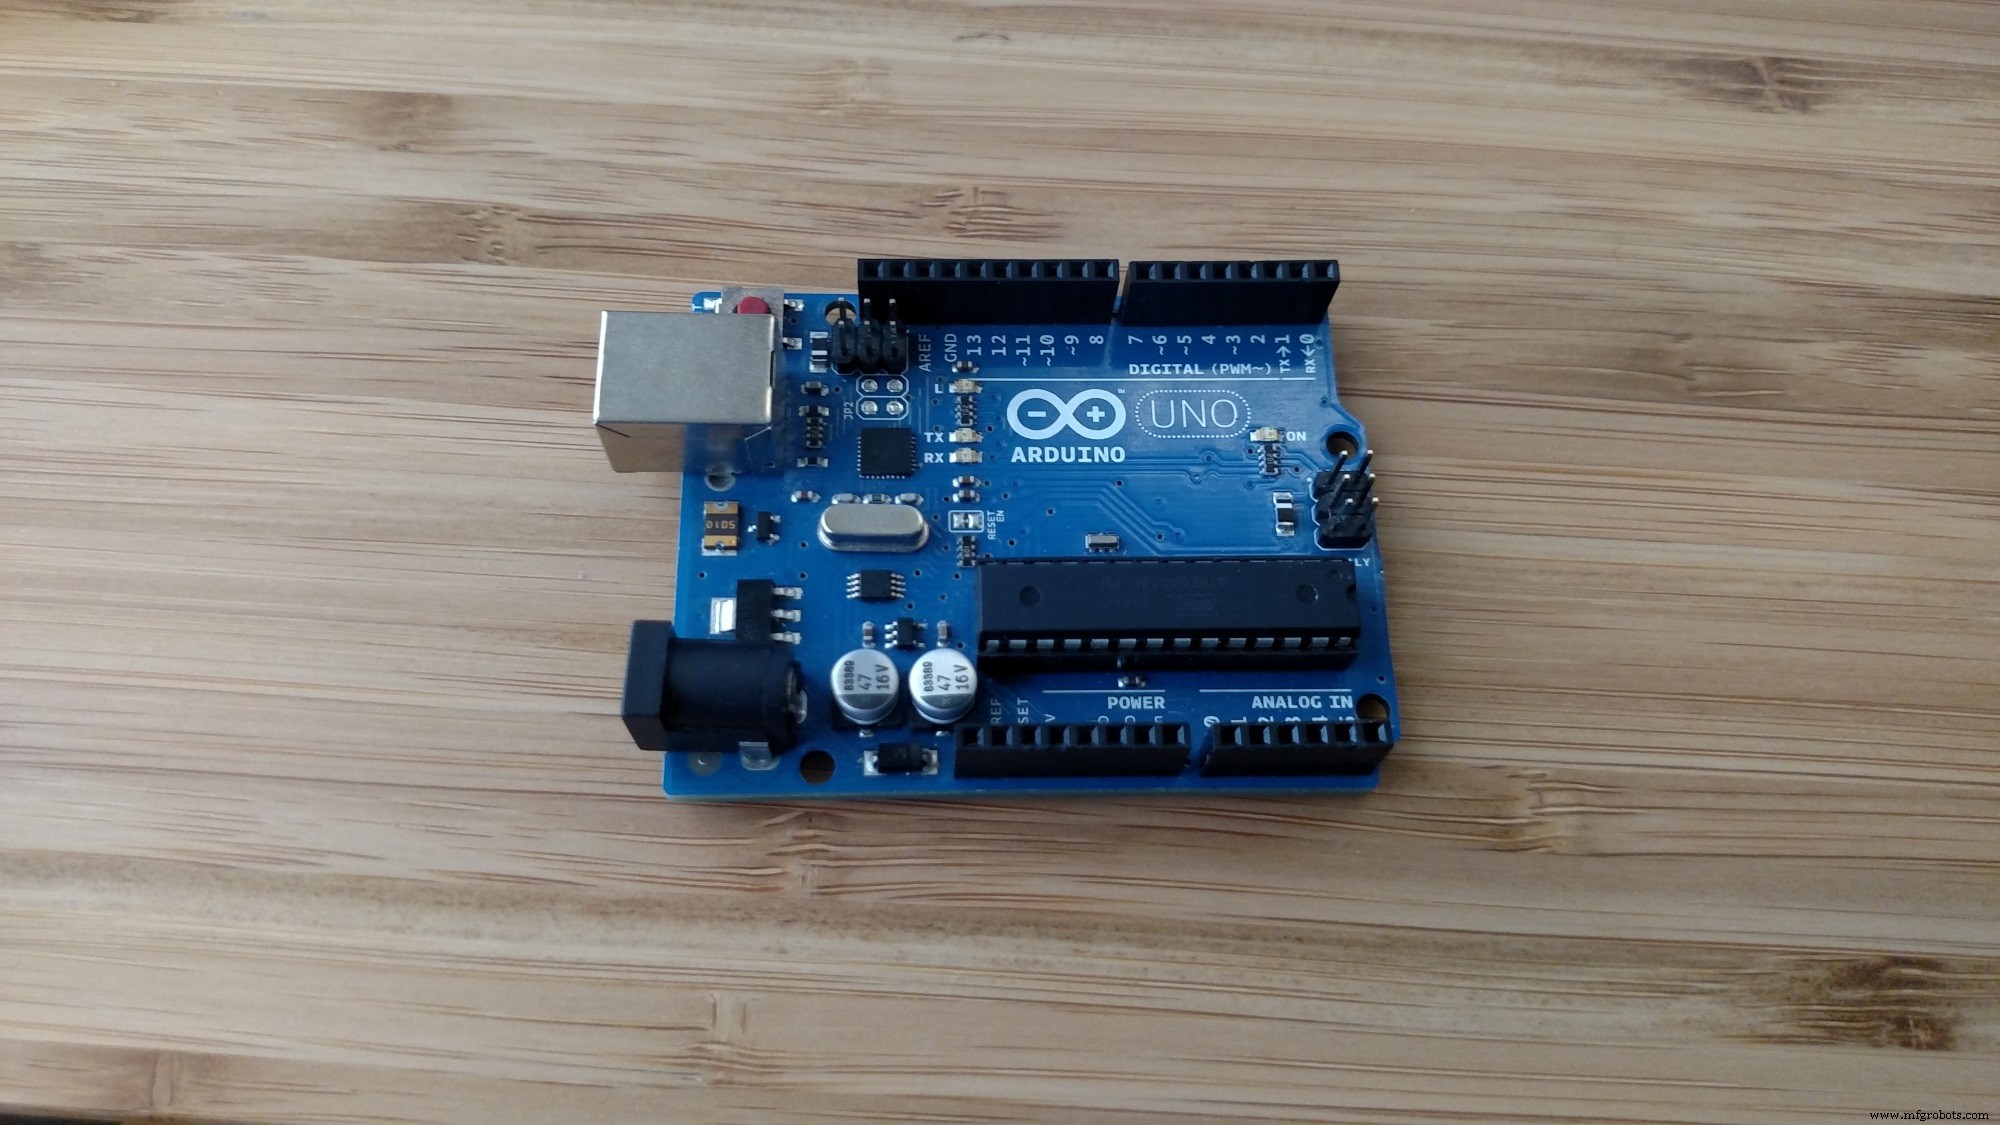
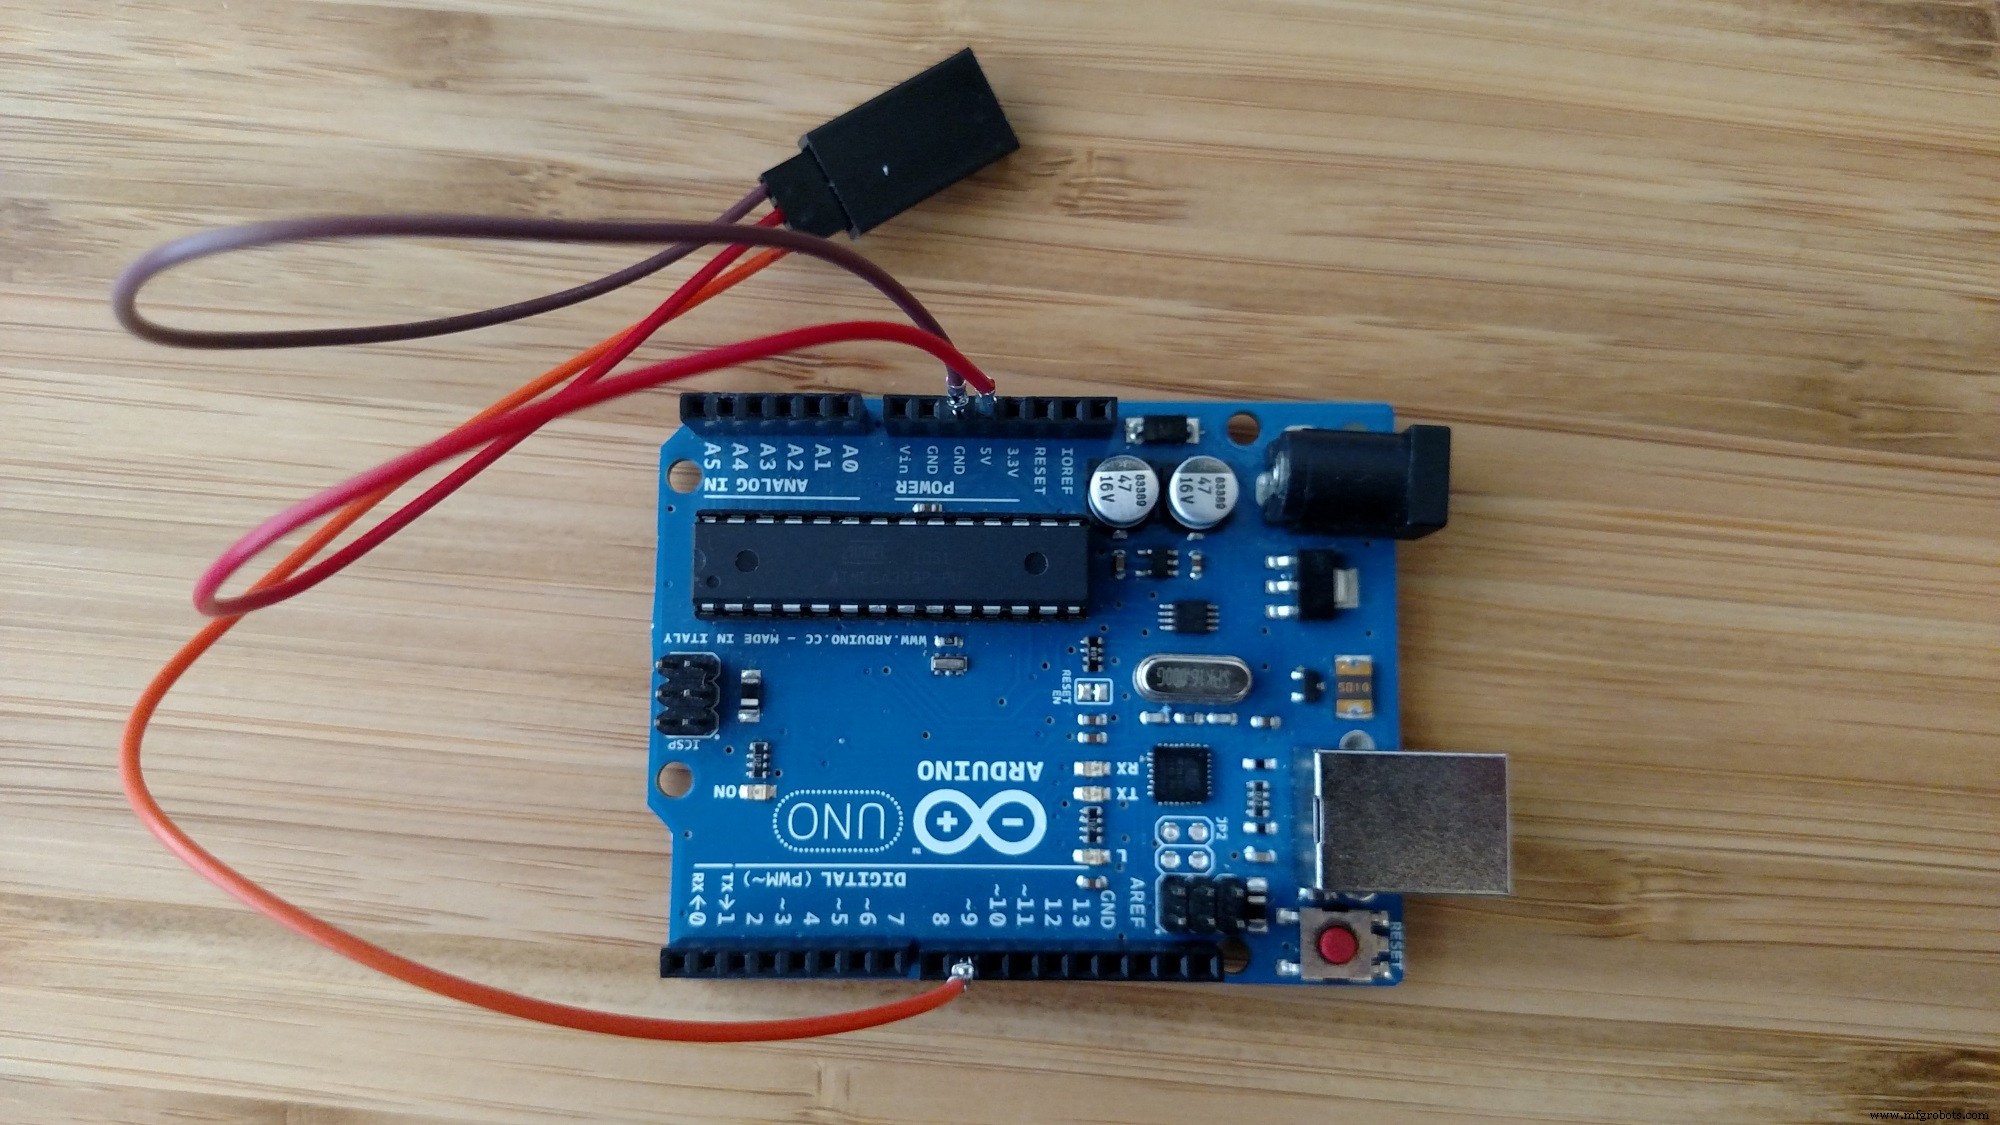
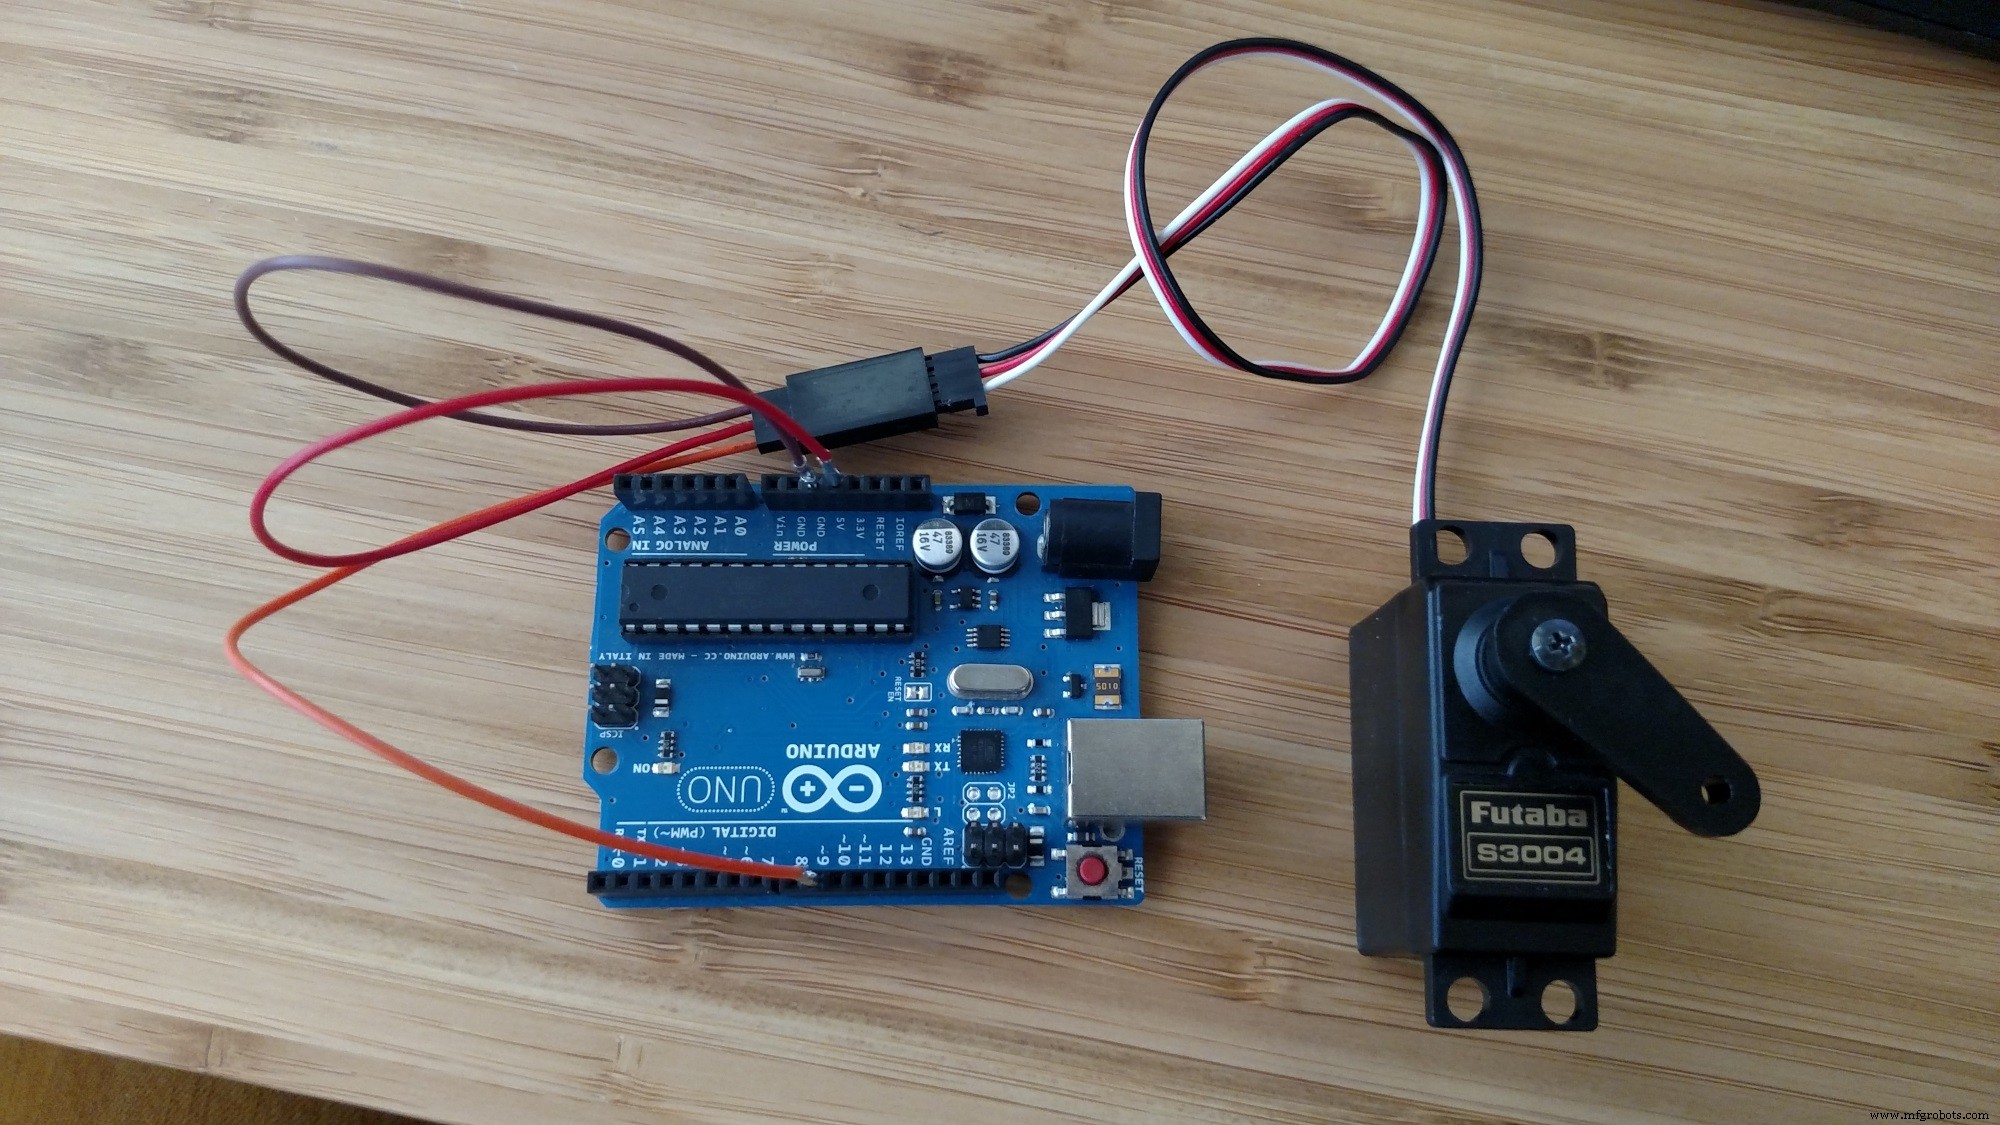
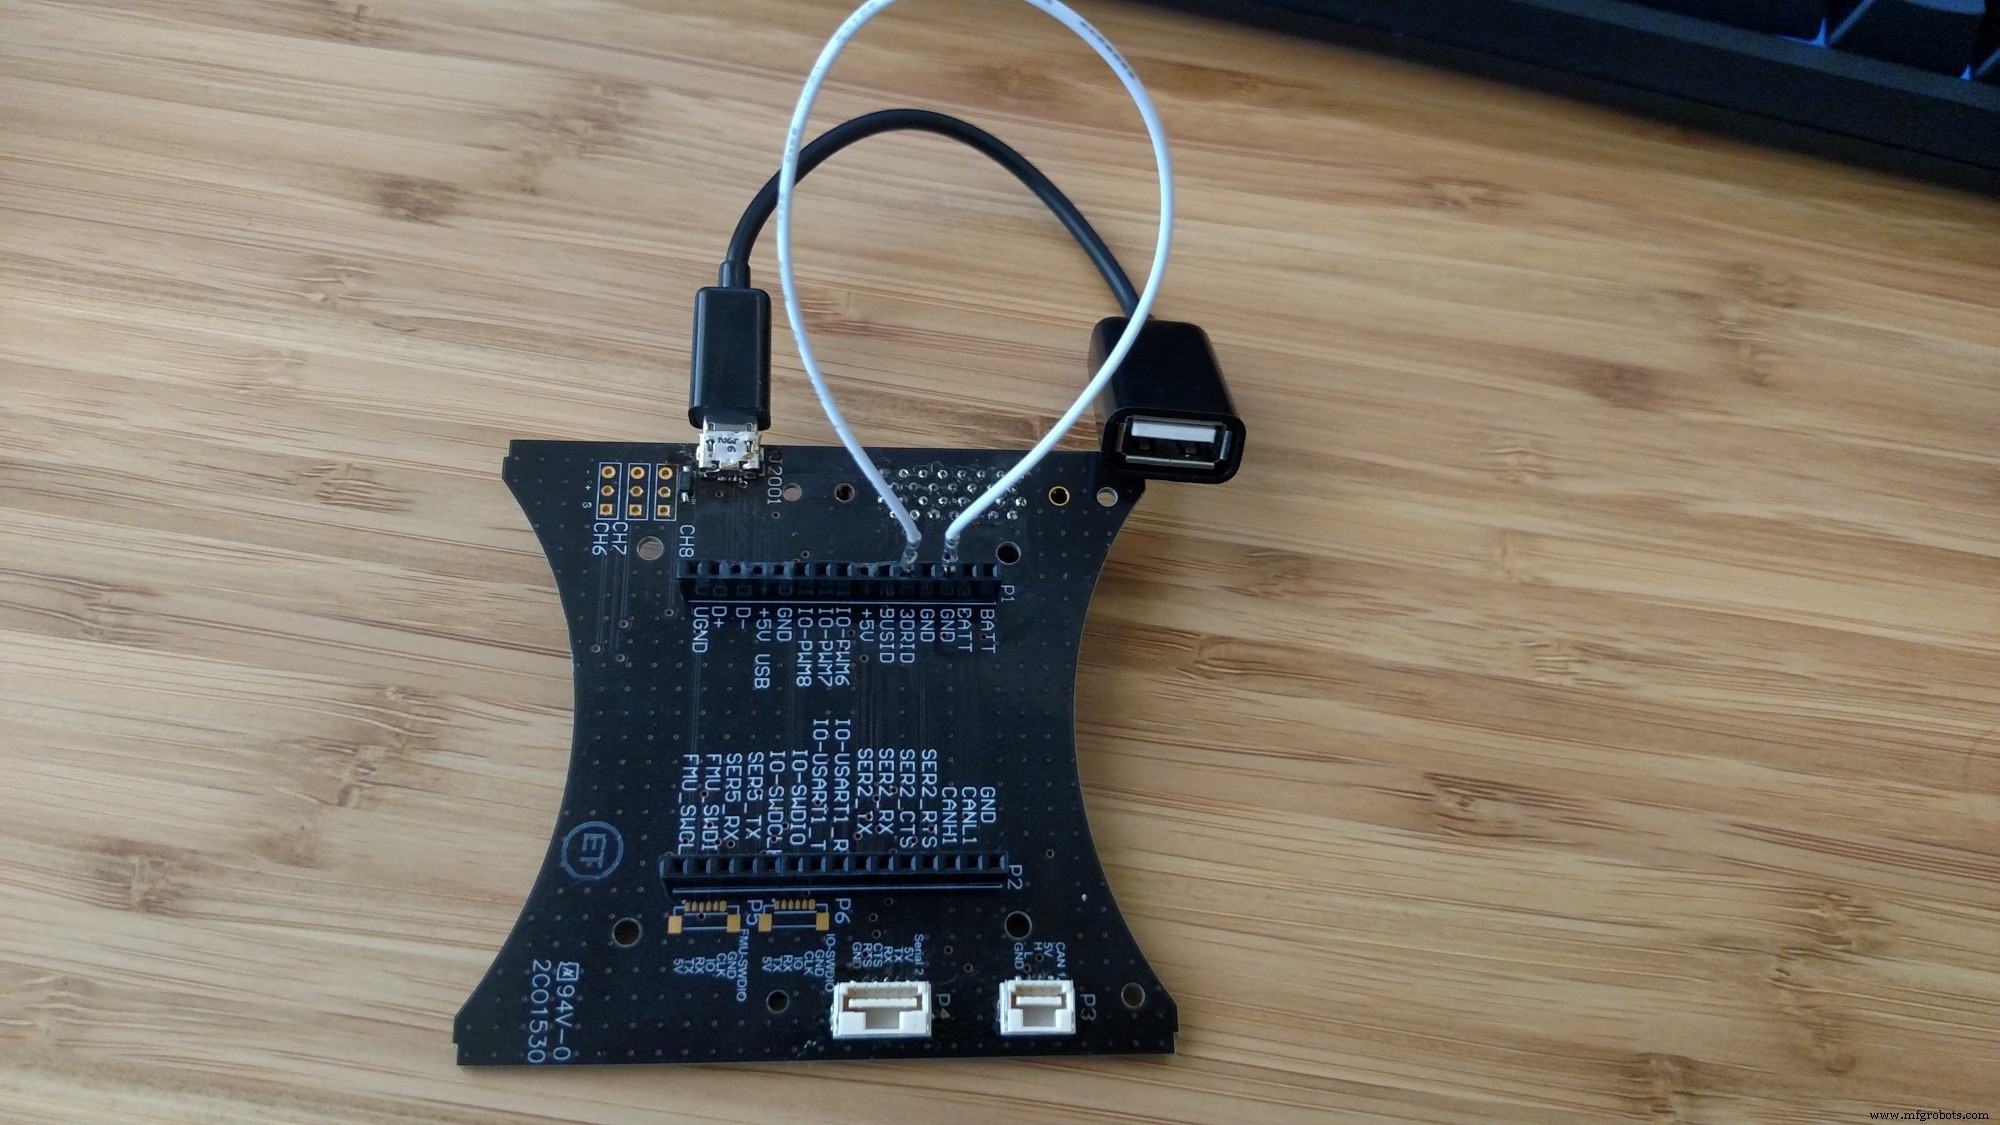
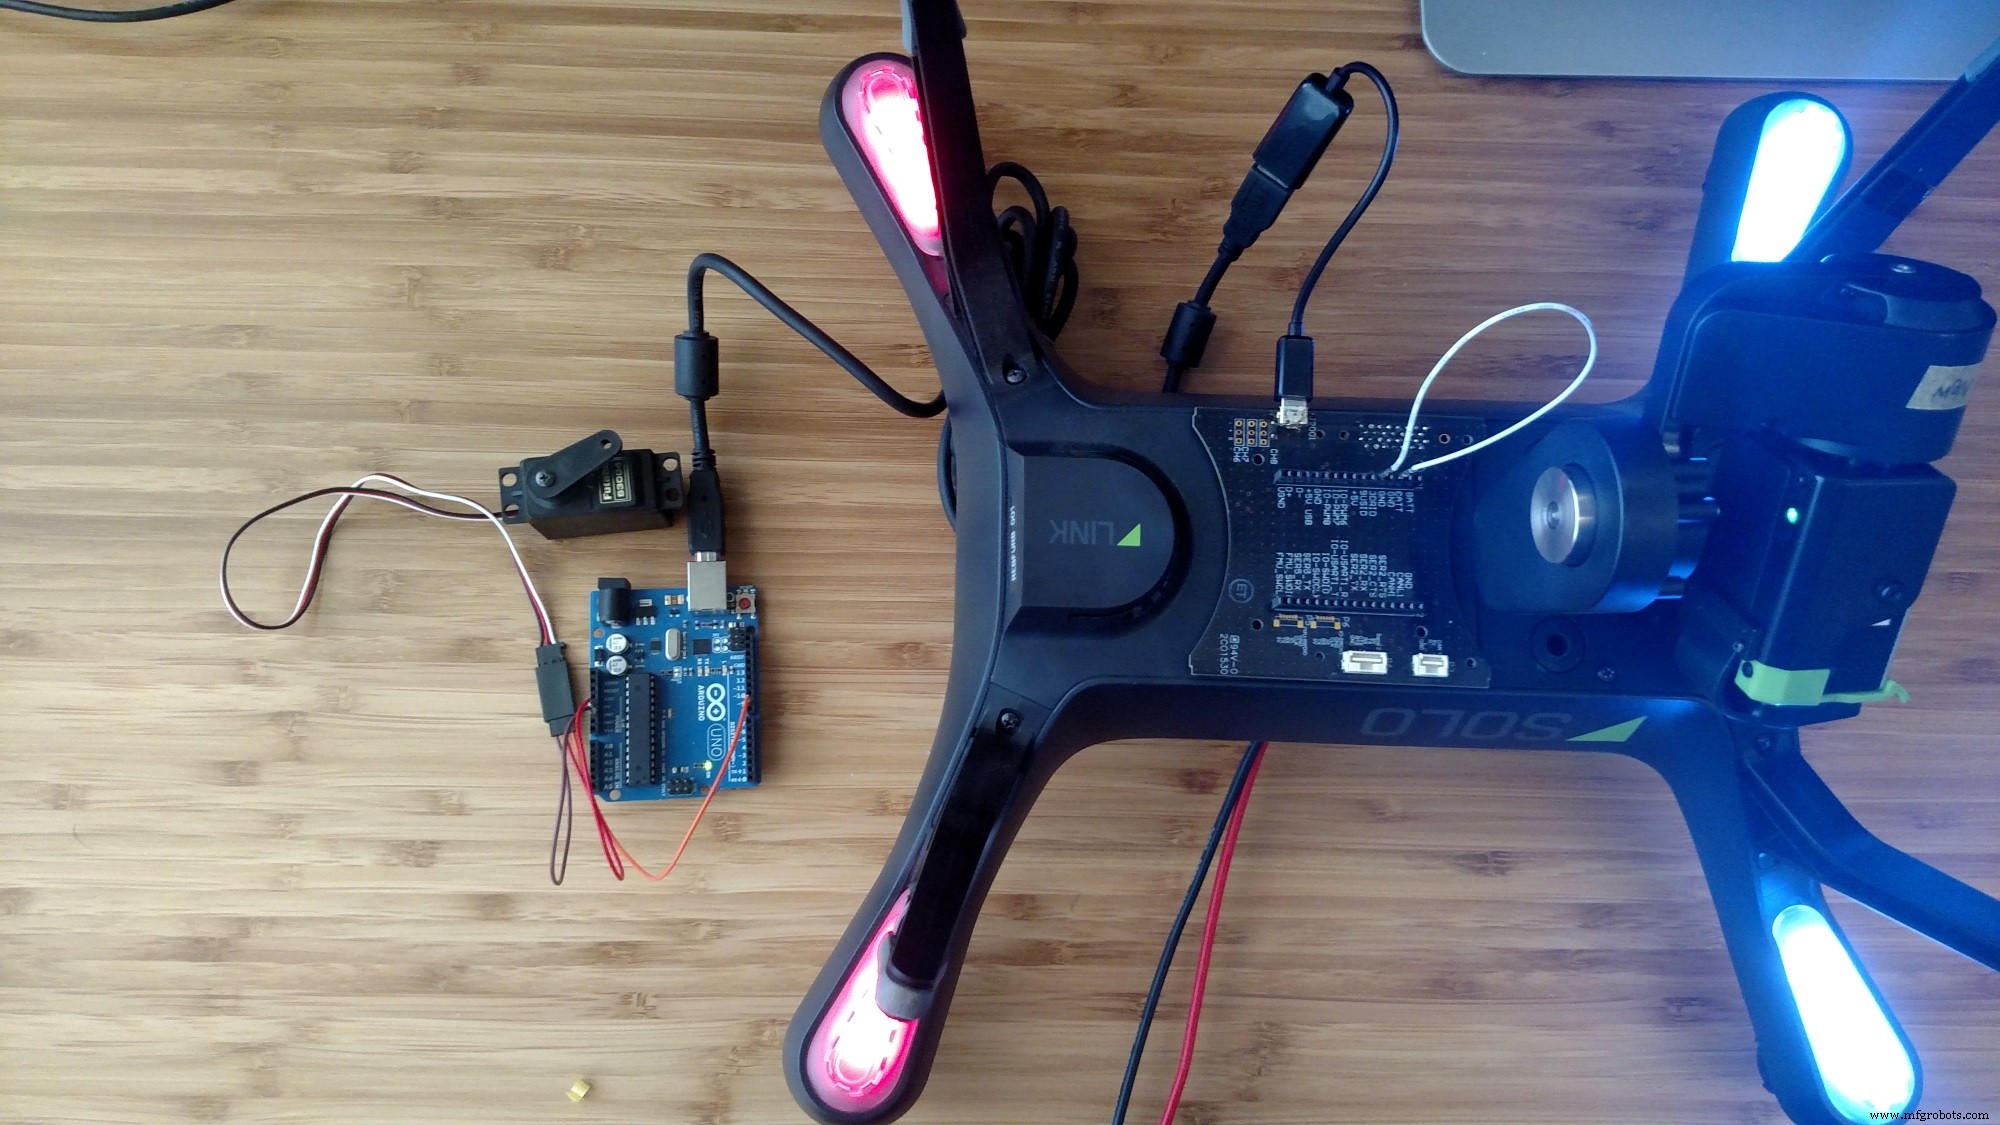
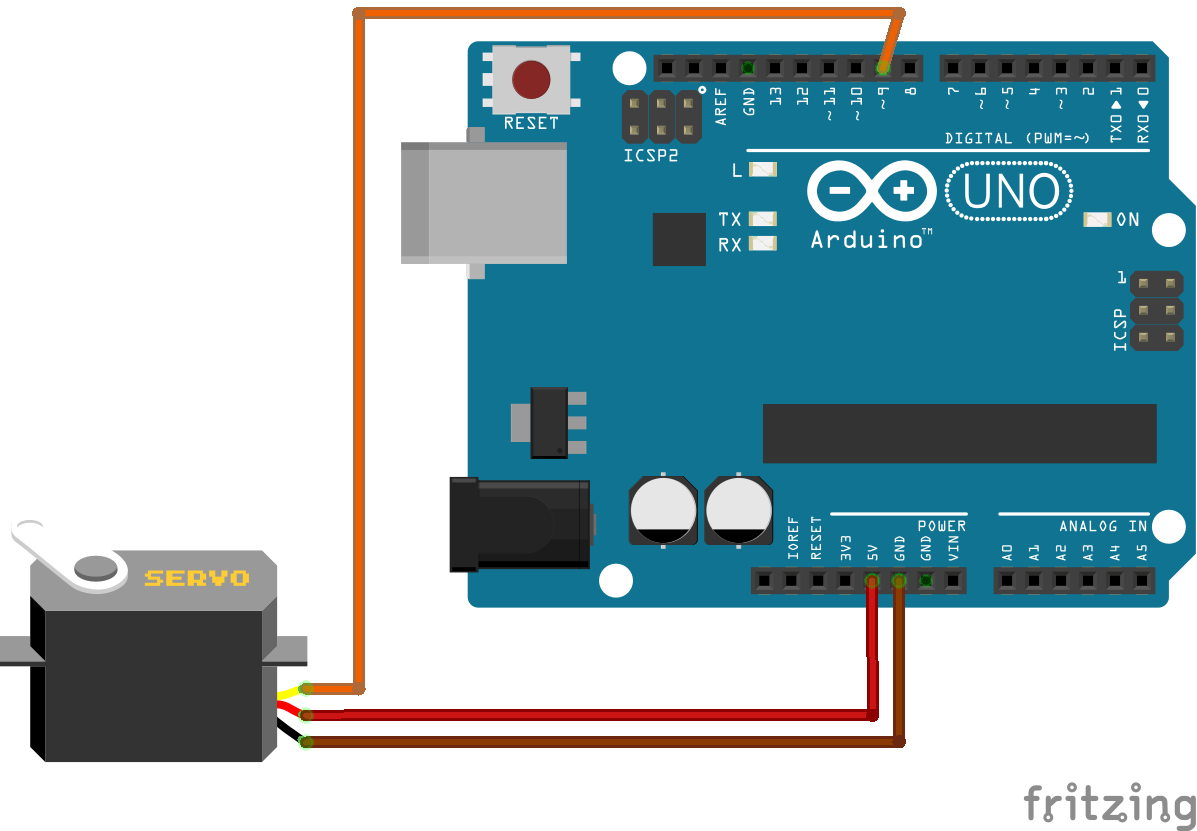
Step 2: Hardware Setup
Parts
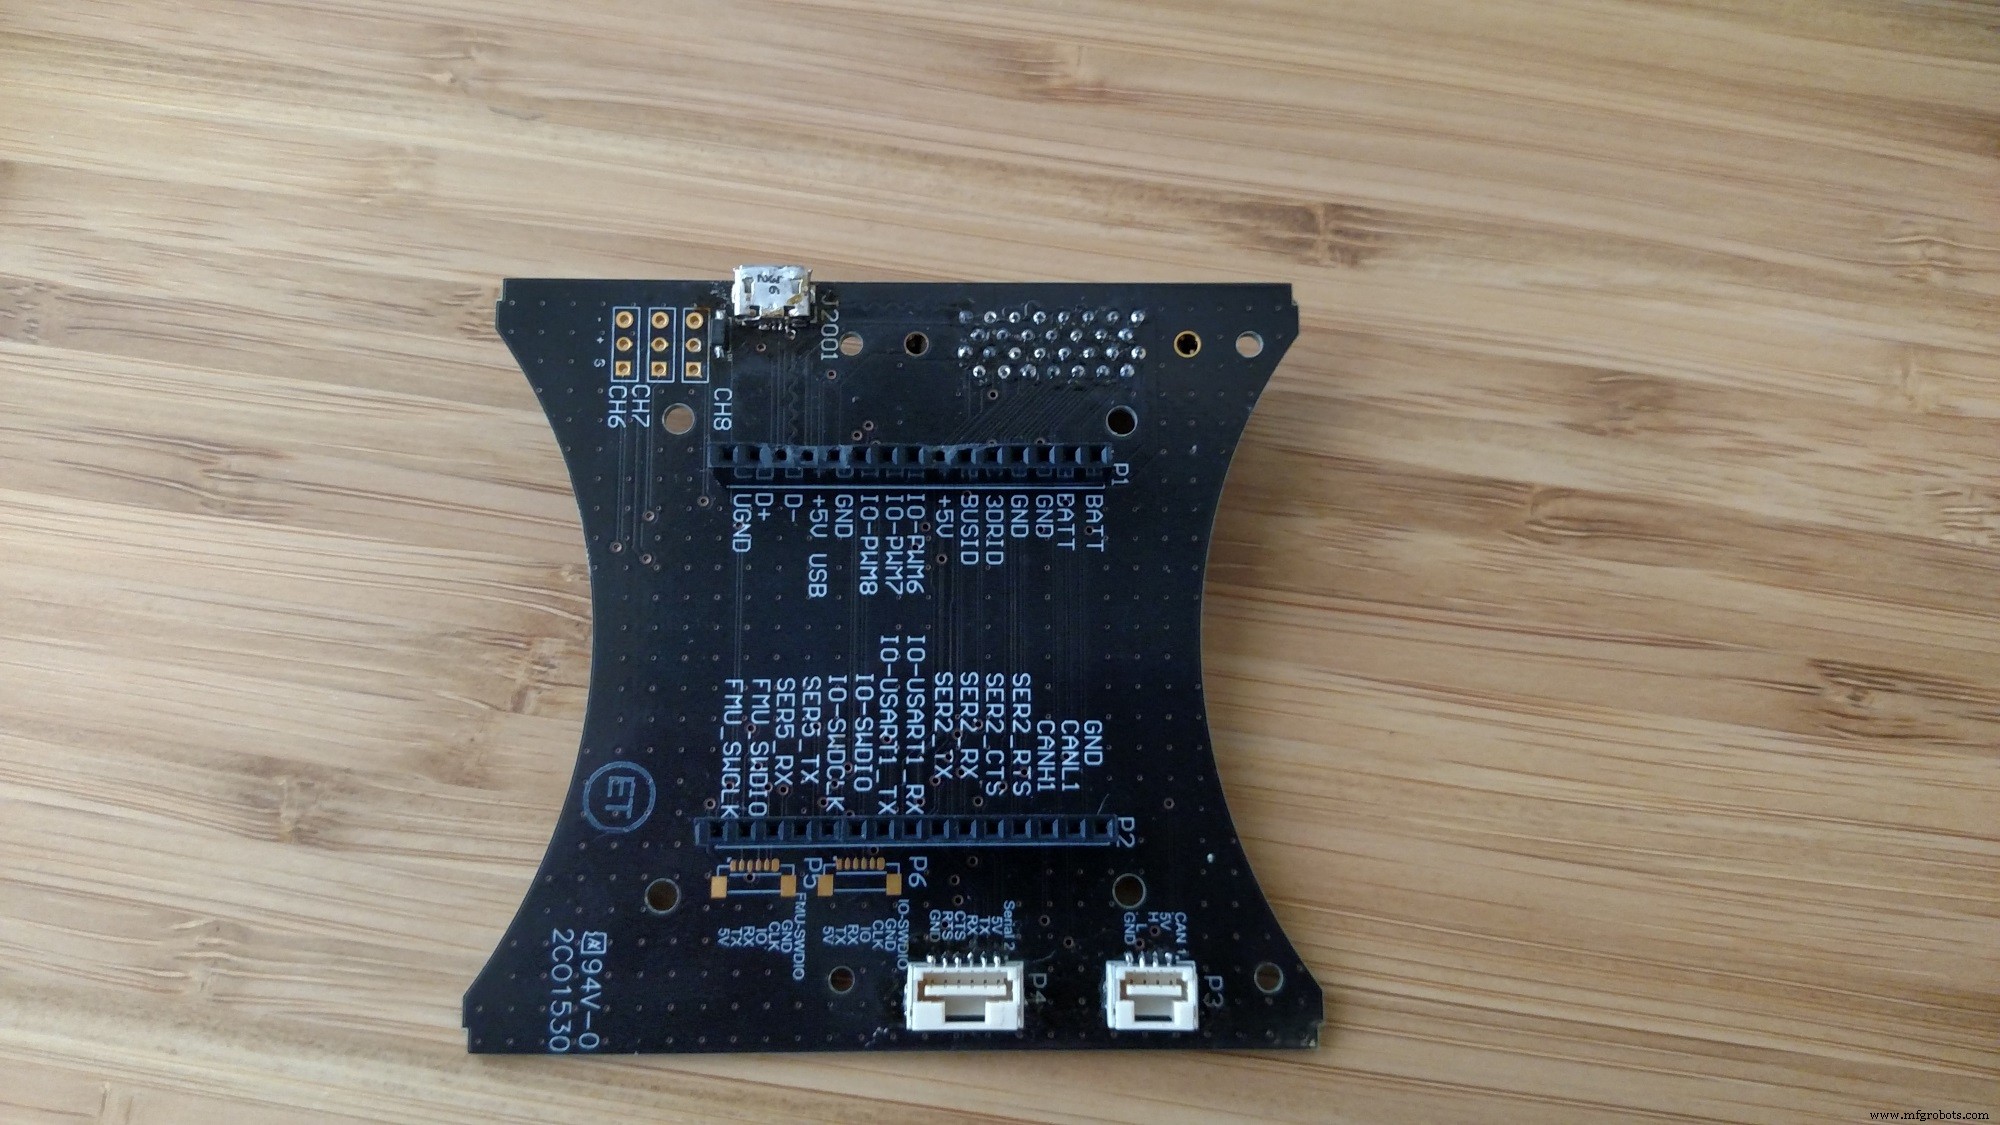
Note: The breakout board is not sold at this point. Please refer to here
Assembly
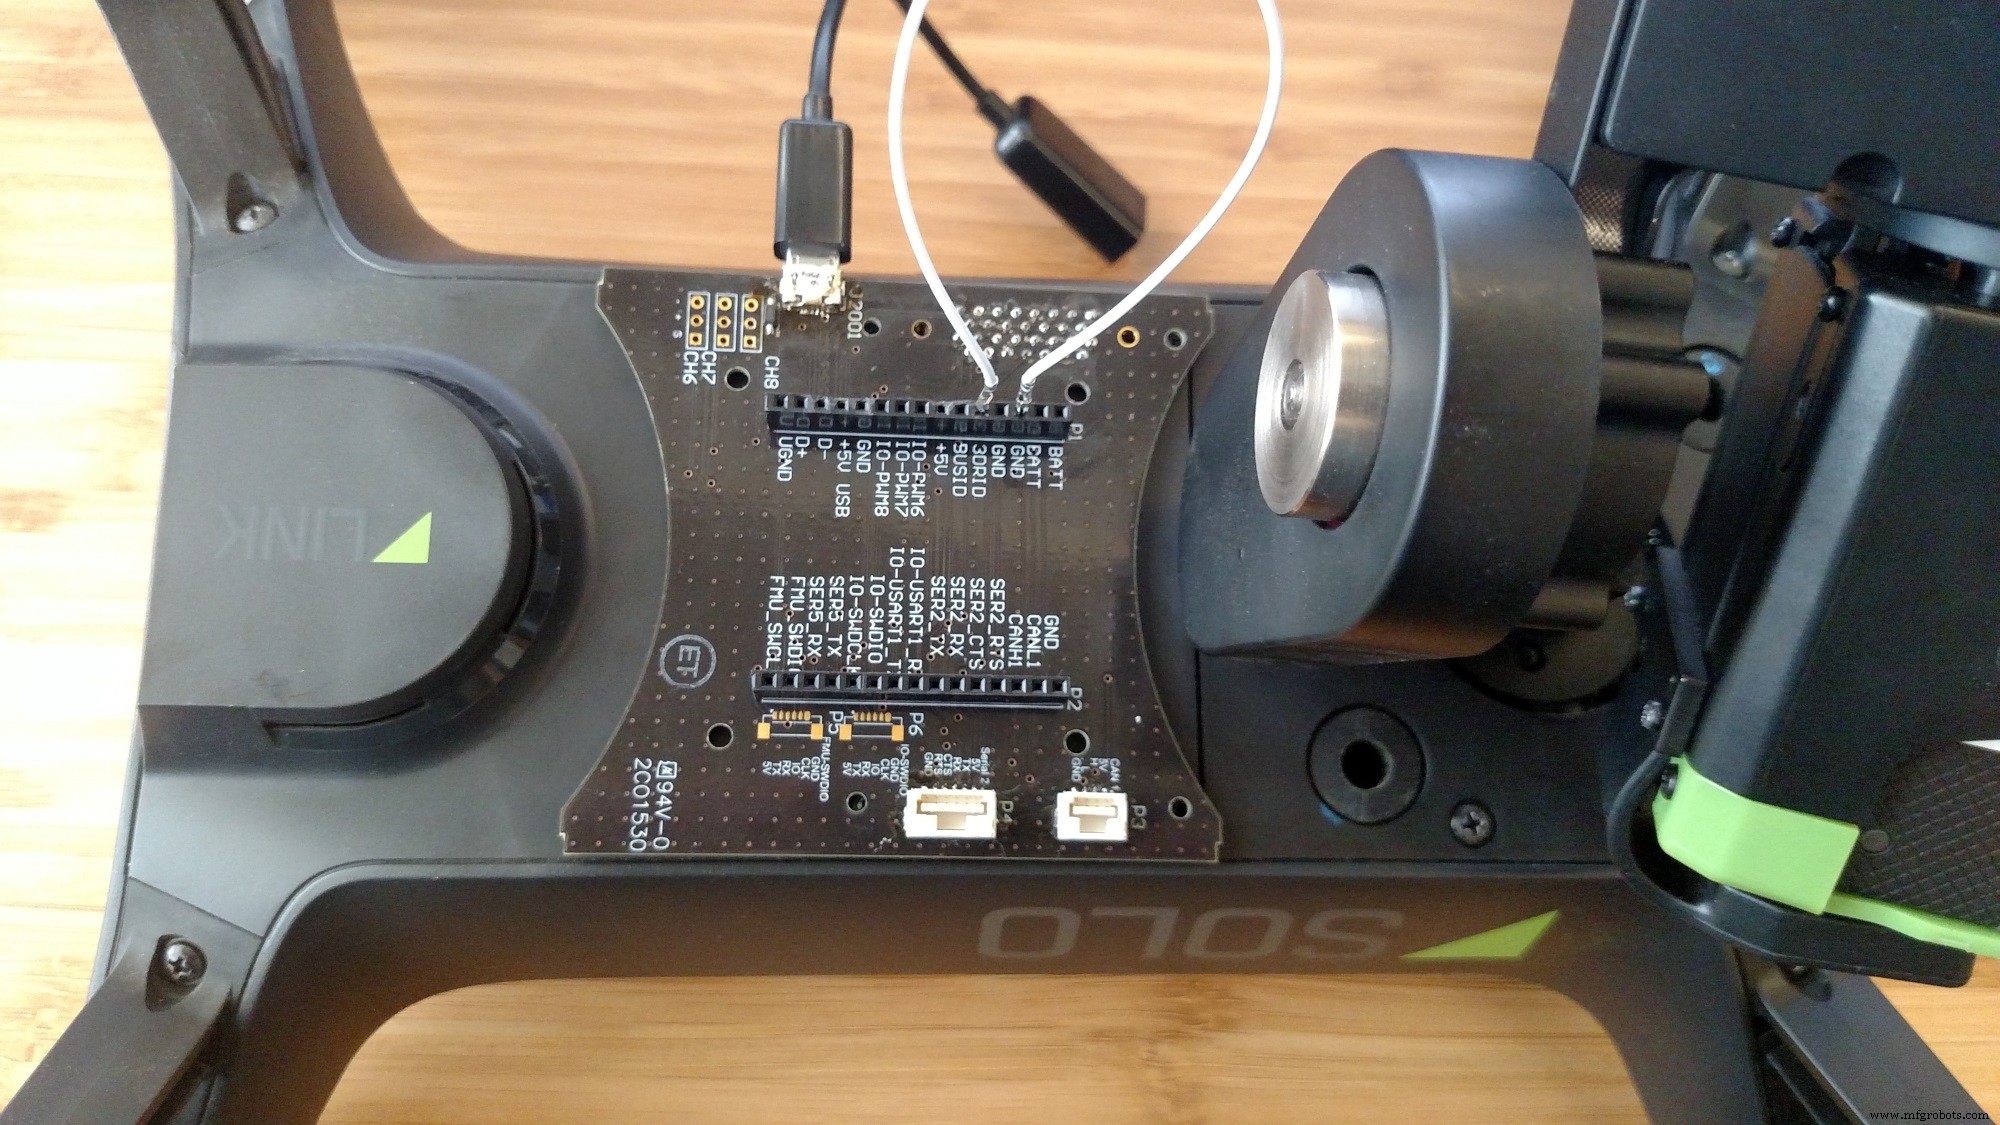
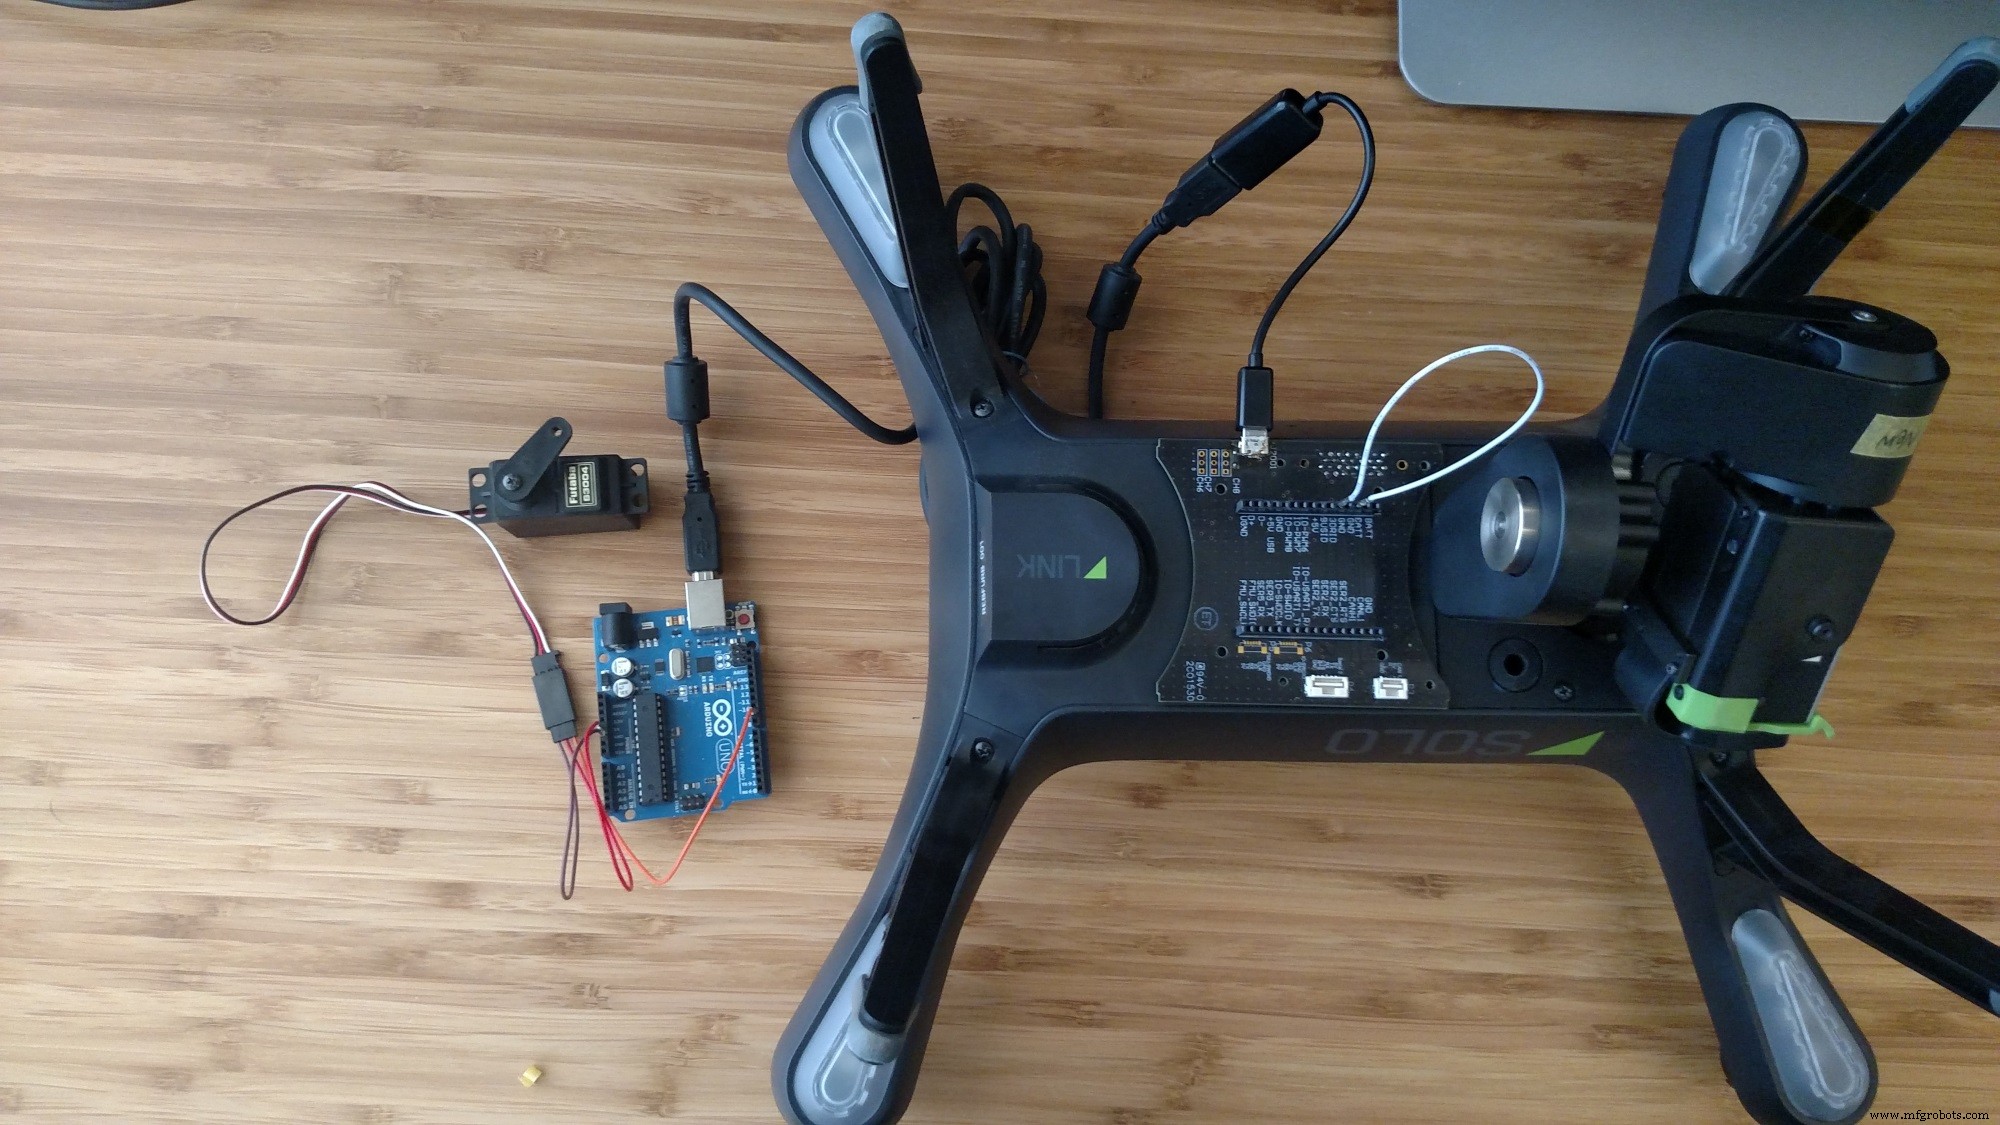
Power on
Step 2: Download pyMata and Code
pyMata
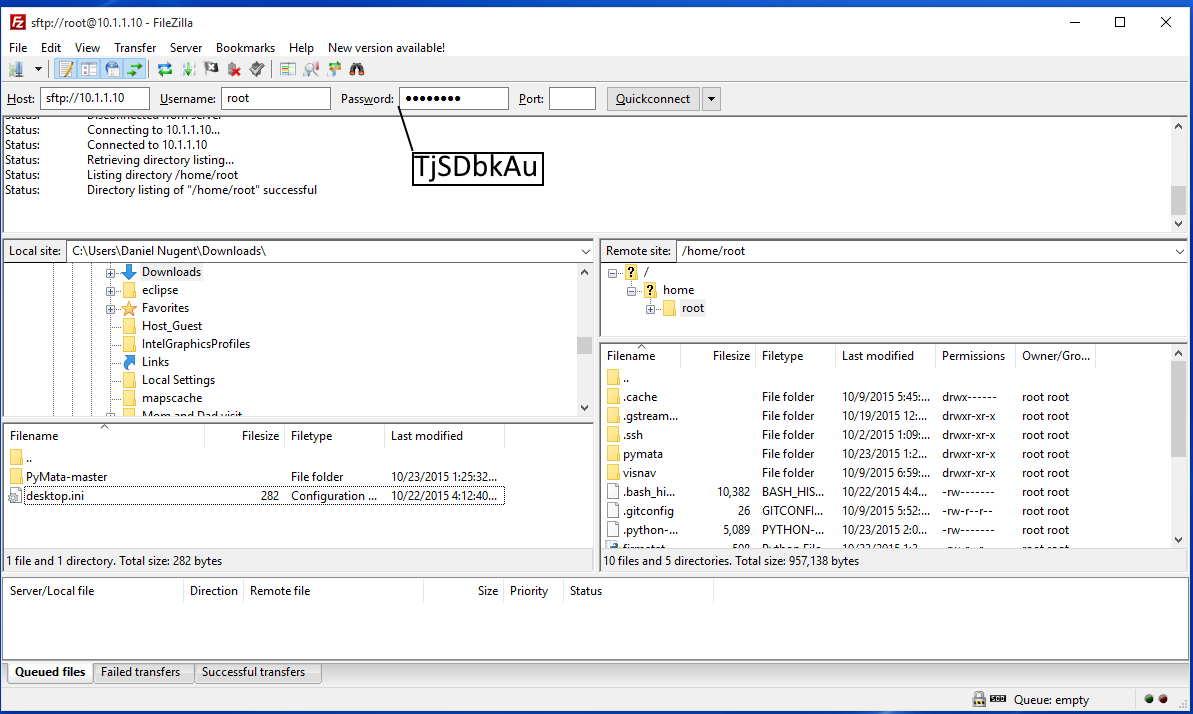
SoloServoSweep.pyStep 3: Transfer Files to Solo
- Connect to your Solo's Wifi network!

Step 4: SSH into Solo
SSH into Solo using your OS's SSH client. For Windows we will use Putty.

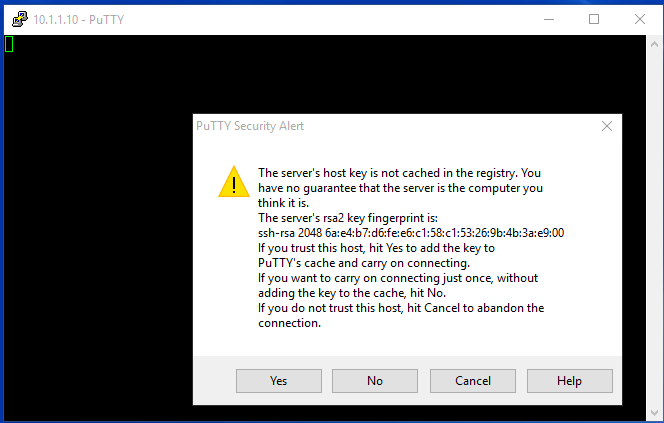
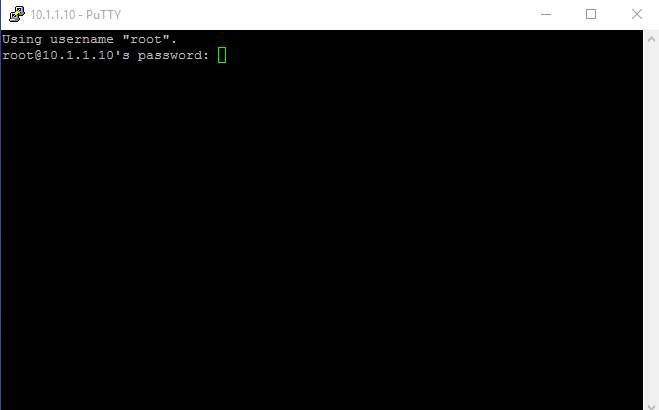
Make sure you are still connected to Solo's Wifi!
See the photos captions for more details
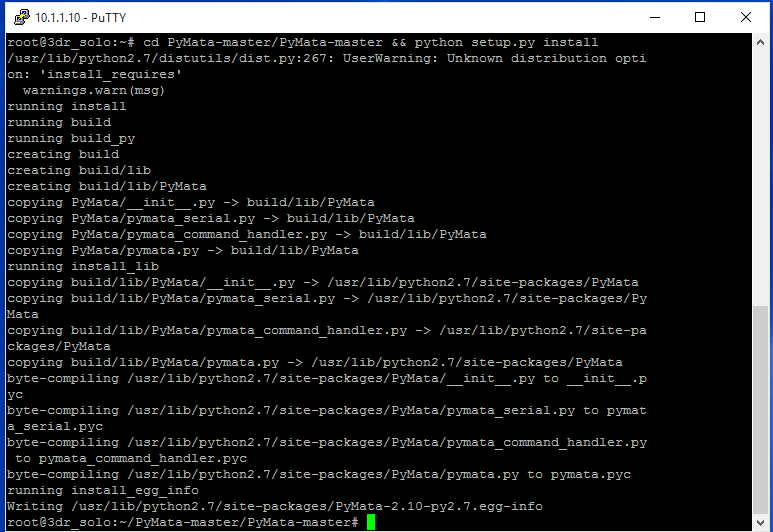
Step 5: Install pyMata
Run this command in your SSH session:
This should be your result
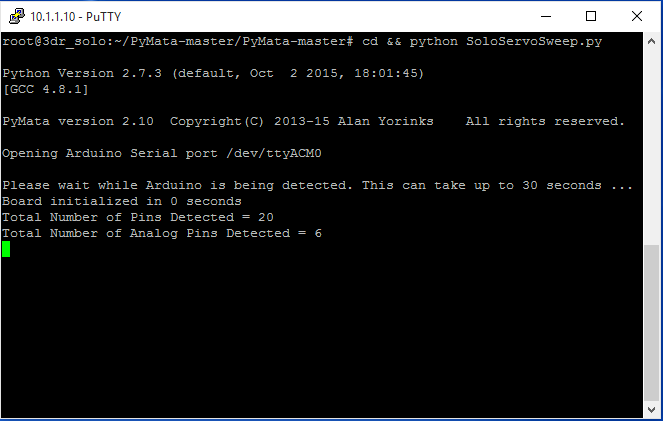
Step 7: Run the example
While your ssh session is still open run:
Code
- SoloServoSweep.py
SoloServoSweep.pyPython
Drive a servo in python from Solofrom PyMata.pymata import PyMata
import time
import sys
SERVO_MOTOR = 9 # servo attached to this pin
END = 170 # Max servo travel
# create a PyMata instance
board = PyMata("/dev/ttyACM0")
# configure pin as servo
board.servo_config(SERVO_MOTOR)
try:
while True:
for i in range (0,END):
# sweep up
board.analog_write(SERVO_MOTOR, i)
time.sleep(.015)
for i in range (END,0,-1):
# sweep down
board.analog_write(SERVO_MOTOR, i)
time.sleep(.015)
except KeyboardInterrupt:
board.close()
sys.exit()
Custom parts and enclosures
Solo Breakout Board
Breakout board for 3DR Solo accessory porthttps://github.com/3drobotics/Pixhawk_OS_Hardware/tree/master/Accessory_Breakout_X1Schematics
Manufacturing process
- Servo‑Driven Obstacle‑Avoiding Robot: Build with Arduino & HC‑SR04
- Arduino & MPU6050: Precise Servo Motor Control with SG90 & MG996R
- Master ServoTimer2 Library: Simple Guide to Servo Sweep Control
- Arduino‑Powered Smart Trash Bin with Auto‑Open Lid
- Control Multiple Servos via Bluetooth: Arduino & Android App
- Build a Two-Legged Arduino Robot: Baby Dino DIY Guide
- Bluetooth‑Controlled Servo Motor with Arduino Uno & HC‑05
- Build a Self-Stabilizing Arduino Gimbal with 3‑Axis Servo Control
- Build an Arduino Color Sorter: Simple Guide with TCS3200 & Servos
- Build an Arduino Radar System with Ultrasonic Sensor & Servo – Step‑by‑Step Guide