


WiFi‑Enabled Smart Door Lock with Arduino & ESP8266 – Unlock via Phone
Components and supplies
| × | 1 | ||||
| × | 1 | ||||
 |
| × | 1 | |||
| × | 1 |
Apps and online services
 |
|
About this project
You can read this and other amazing tutorials on ElectroPeak's official website
In this tutorial, you will learn how to create an Arduino based smart door lock; this smart lock has the ability to be unlocked by your cell phone. At the end of this project:
- You will learn how to generate a specific QR code.
- You will learn how to create a login page by ESP8266.
- You will be able to unlock a door using your cell phone.
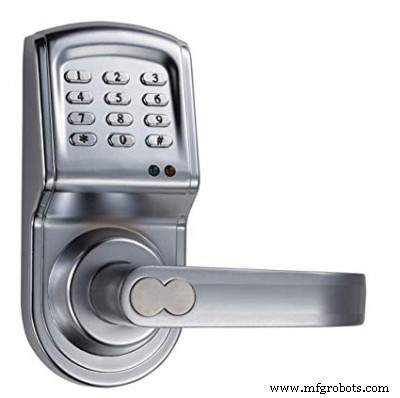
These days, you can improve your home or office security using state of the art technology. Using smartphones and smart devices becomes easier and affordable for all people and it’s a good option for us to make our stuff smarter. Each day, engineers and technicians produce new systems and tools that you can make smarter home automation by using them and create new ways to make your life safer and easier. Probably, you have seen smart locks for doors that have a keypad or use a fingerprint to set the door lock or unlock.
In this project, we want to make an Arduino based system that helps you to make a login section for a door by WiFi and solenoid lock. We don’t use keypad or complicated mechanical elements and these are advantages of this system. We just stick a QR code to the door and the allowed people can scan it to see the login page and enter their password. After typing the password, the solenoid lock will be activated. We only use an Arduino board and a driver for the solenoid and an ESP8266 to make a connection to local WiFi. Let’s do it.
Circuit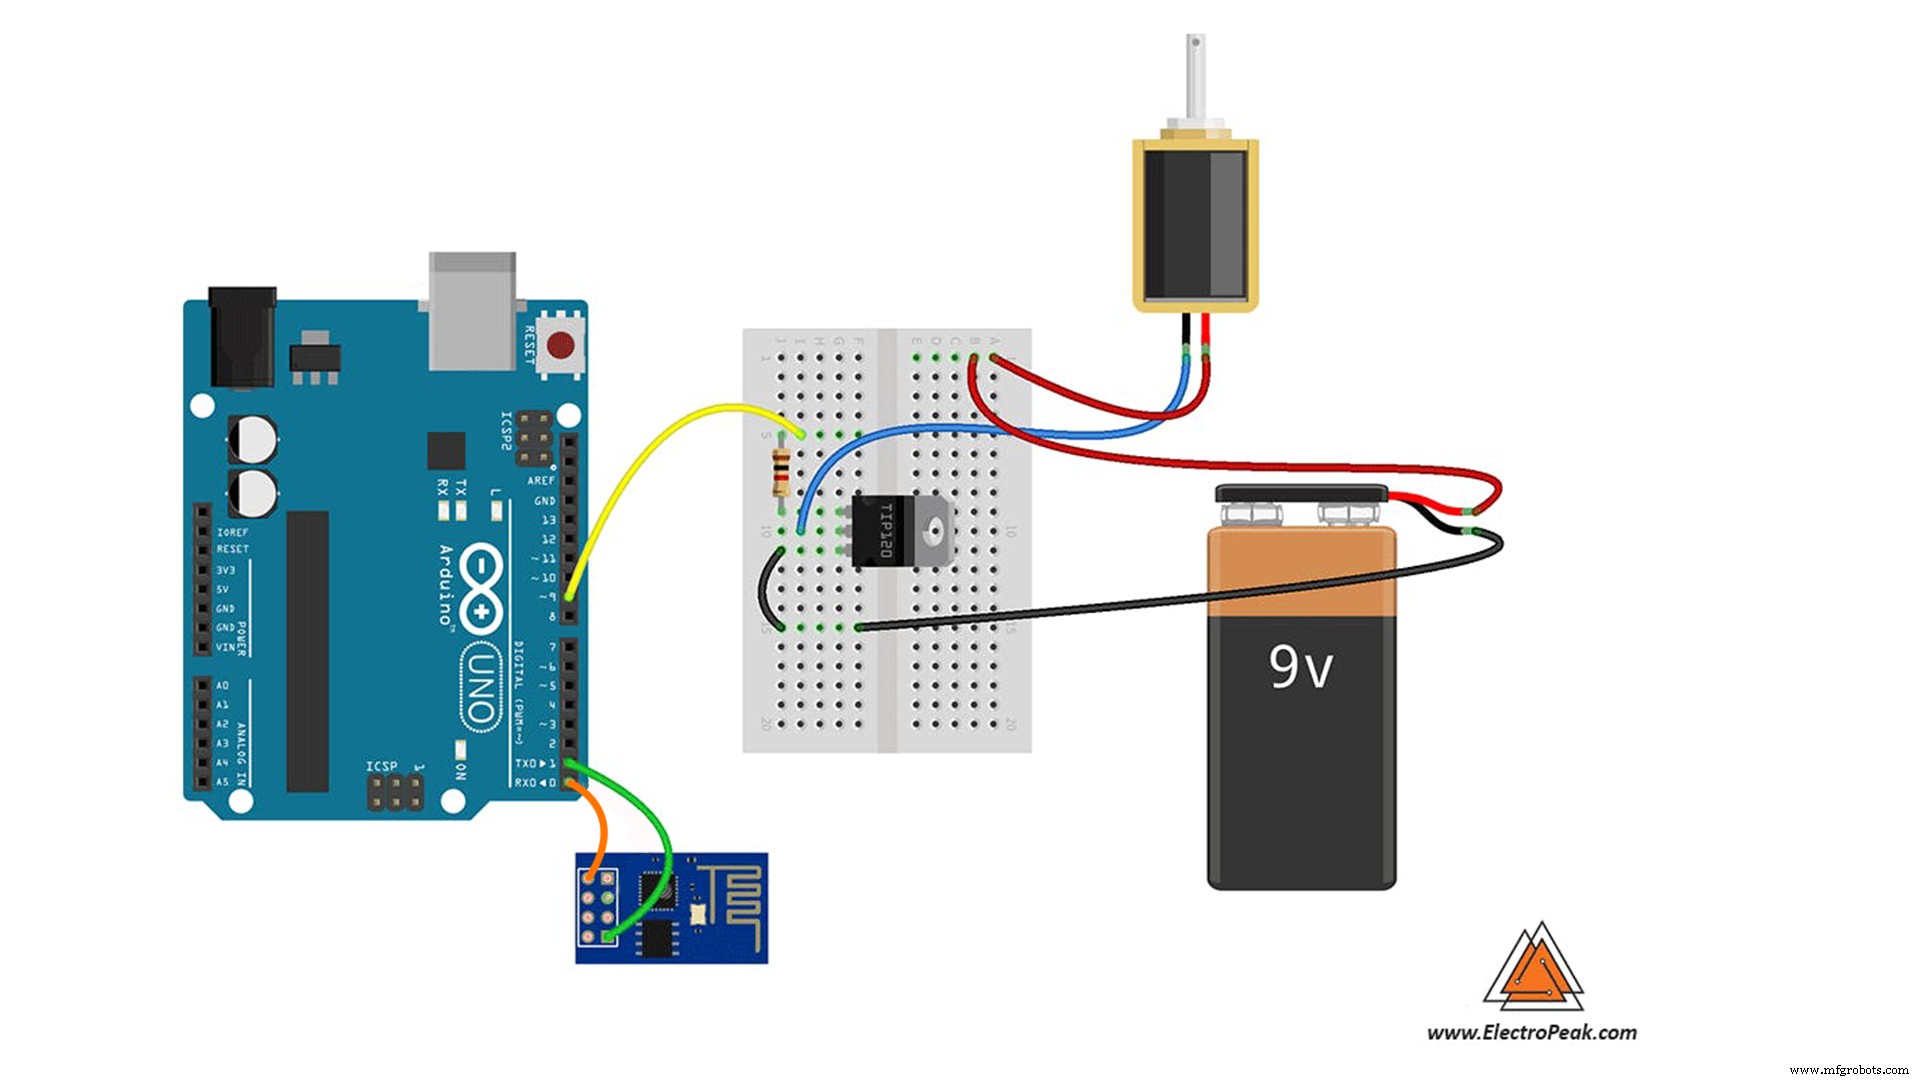
First, we write a code for ESP-01 to make a login page and receive password from user and then send it to the Arduino by the Serial port. Then we write another code for Arduino to get data from ESP-01 and control the servo motor. You can use Arduino IDE to compile both codes and Upload them to boards.
You must add the library and then upload the code. If it is the first time you run an Arduino board, don’t worry. Just follow these steps:
- Go to www.arduino.cc/en/Main/Software and download the software of your OS. Install the IDE software as instructed.
- Run the Arduino IDE and clear the text editor and copy the following code in the text editor.
- Choose the board in tools and boards, select your Arduino Board.
- Connect the Arduino to your PC and set the COM port in tools and port.
- Press the Upload (Arrow sign) button.
- You are all set!
String inputString = "";         // a String to hold incoming data
bool stringComplete = false;  // whether the string is complete
void setup() {
 // initialize serial:
 Serial.begin(115200);
 // reserve 200 bytes for the inputString:
 inputString.reserve(200);
 pinMode(9,OUTPUT);
}
void loop() {
 // print the string when a newline arrives:
 if (stringComplete) {
   if (inputString=="your_password")
  {
      digitalWrite(9,HIGH);
      delay(300);
      digitalWrite(9,LOW);
      Serial.println(inputString);
      // clear the string:
      inputString = "";
     stringComplete = false;
   }
 }
}
void serialEvent() {
 while (Serial.available()) {
   // get the new byte:
   char inChar = (char)Serial.read();
   // add it to the inputString:
   inputString += inChar;
   // if the incoming character is a newline, set a flag so the main loop can
   // do something about it:
   if (inChar == '\n') {
     stringComplete = true;
   }
 }
}
Now, it's time to upload the ESP-01 code. You should use the Arduino IDE to upload the sketch to ESP. Before uploading the code, you should select ESP board for IDE.
Go to File>Preferences and add http://arduino.esp8266.com/stable/package_esp8266com_index.json in the additional boards. Then download and install it. Now you can see the ESP boards in Tools>Board. Select “Generic ESP8266 Module” and copy the code in a new sketch. Then you should set USB to TTL Converter as Uploader hardware. Just plug the converter in and set the right port in Tools>Port. It’s ready to Upload.
#include <ESP8266WiFi.h>
#include <ESP8266WebServer.h>
// WiFi network
const char* ssid = "YourSSID";
const char* password = "YourPASSWORD";
ESP8266WebServer server ( 80 );
char htmlResponse[3000];
void handleRoot() {
snprintf ( htmlResponse, 3000,
"<!DOCTYPE html>\
<html lang=\"en\">\
<head>\
<style>\
body {background-color: rgb(160, 0, 53);}\
h3 {color: white;text-align:center;}\
p {color: white; text-align:center;}\
div {color: white; text-align:center;}\
ID {text-align:center;}\
input {text-align:center;}\
</style>\
<meta charset=\"utf-8\">\
<meta name=\"viewport\" content=\"width=device-width, initial-scale=1\">\
</head>\
<body>\
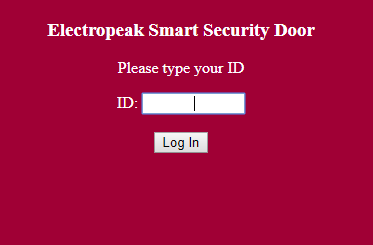
<h3>\<canter>Electropeak Smart Security Door</canter>\</h3>\
<p>\<canter>Please type your ID</canter>\</p>\
<div>ID: <input type='text' name='pass_word' id='pass_word' align='center' size=10 autofocus></div> \
<div>\
<br><button id=\"save_button\">Log In</button>\
</div>\
<script src=\"https://ajax.googleapis.com/ajax/libs/jquery/1.11.3/jquery.min.js\"></script>\
<script>\
var pass;\
$('#save_button').click(function(e){\
e.preventDefault();\
pass = $('#pass_word').val();\
$.get('/save?pass=' + pass, function(data){\
console.log(data);\
});\
});\
</script>\
</body>\
</html>");
server.send ( 200, "text/html", htmlResponse );
}
void handleSave() {
if (server.arg("pass")!= ""){
Serial.println(server.arg("pass"));
}
}
void setup() {
// Start serial
Serial.begin(115200);
delay(10);
// Connecting to a WiFi network
Serial.println();
Serial.println();
Serial.print("Connecting to ");
Serial.println(ssid);
WiFi.begin(ssid, password);
while (WiFi.status() != WL_CONNECTED) {
delay(500);
Serial.print(".");
}
Serial.println("");
Serial.println("WiFi connected");
Serial.println("IP address: ");
Serial.println(WiFi.localIP());
server.on ( "/", handleRoot );
server.on ("/save", handleSave);
server.begin();
Serial.println ( "HTTP server started" );
}
void loop() {
server.handleClient();
}
After uploading the code, Open Serial monitor of Arduino IDE and get your IP. Now if you type the IP in a browser URL bar, You can see UI of the web server. Type your ID in the text box and if you do it correctly, Arduino will activate the lock. Note that you have to connect to a common WiFi router with ESP8266.
Now it’s time to make a QR code and make a simple way for users to reach this webpage. There are a lot of online tools to generate a specific QR code for you. We suggest this one.
Just copy your IP in the bar and click on “Create QR Code”.
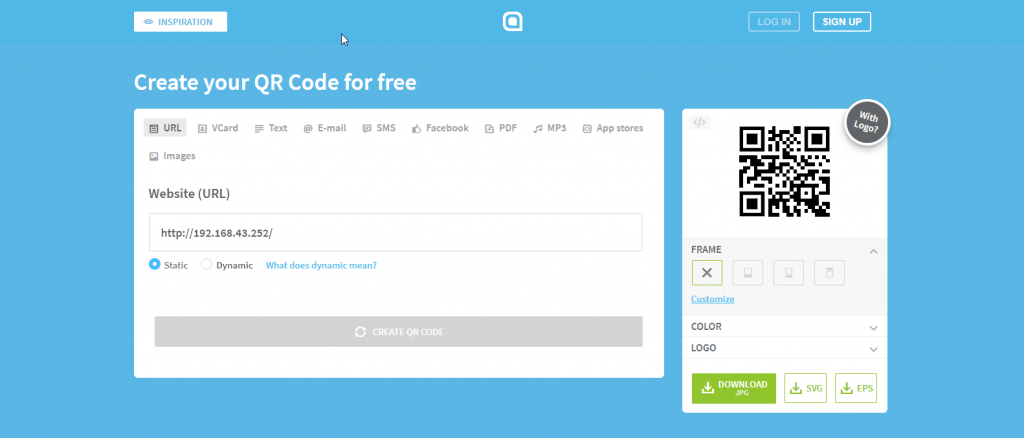
Print it and stick it near the door. To unlock the door, you have to connect to the WiFi, scan the QR code, and type your ID.

Here are a few suggestions:
- Try to make a professional UI for the login page.
- Try to add more options for users such as different permission levels or time-based permission.
You can read this and other amazing tutorials on ElectroPeak's official website
Manufacturing process
- Build a Smart IoT Jar with ESP8266, Arduino & Ultrasonic Sensor – Real‑Time Monitoring
- Arduino Uno WiFi Web Server: Toggle an LED via Browser
- Build a Smart Arduino‑Controlled Robotic Arm: Easy DIY Tutorial
- Seamless Smart Phone Control of Home Lighting Systems
- Smart Keyless Door Lock – Arduino & Android Bluetooth‑Controlled Password System
- Octopod: A Smart IoT Automation Solution for Home and Industry
- Advanced Smart Waste Monitoring with Arduino 101: BLE & WiFi Integration
- Seamlessly Control Arduino Uno via ESP8266 WiFi Module and Blynk App
- Secure Arduino‑Based Keyless Door Lock with LCD Display and 4×4 Keypad
- Build an Arduino RFID Door Lock – Master RFID Technology with a Step‑by‑Step Guide