


J.A.R.V.I.S. – Smart Home Virtual Assistant Powered by Arduino
Components and supplies
 |
| × | 1 | |||
 |
| × | 1 | |||
 |
| × | 1 |
Necessary tools and machines
 |
| |||
 |
|
Apps and online services
| ||||
 |
| |||
| ||||
| ||||
 |
|
About this project
Why tackle the Smart Home problem?What’s new?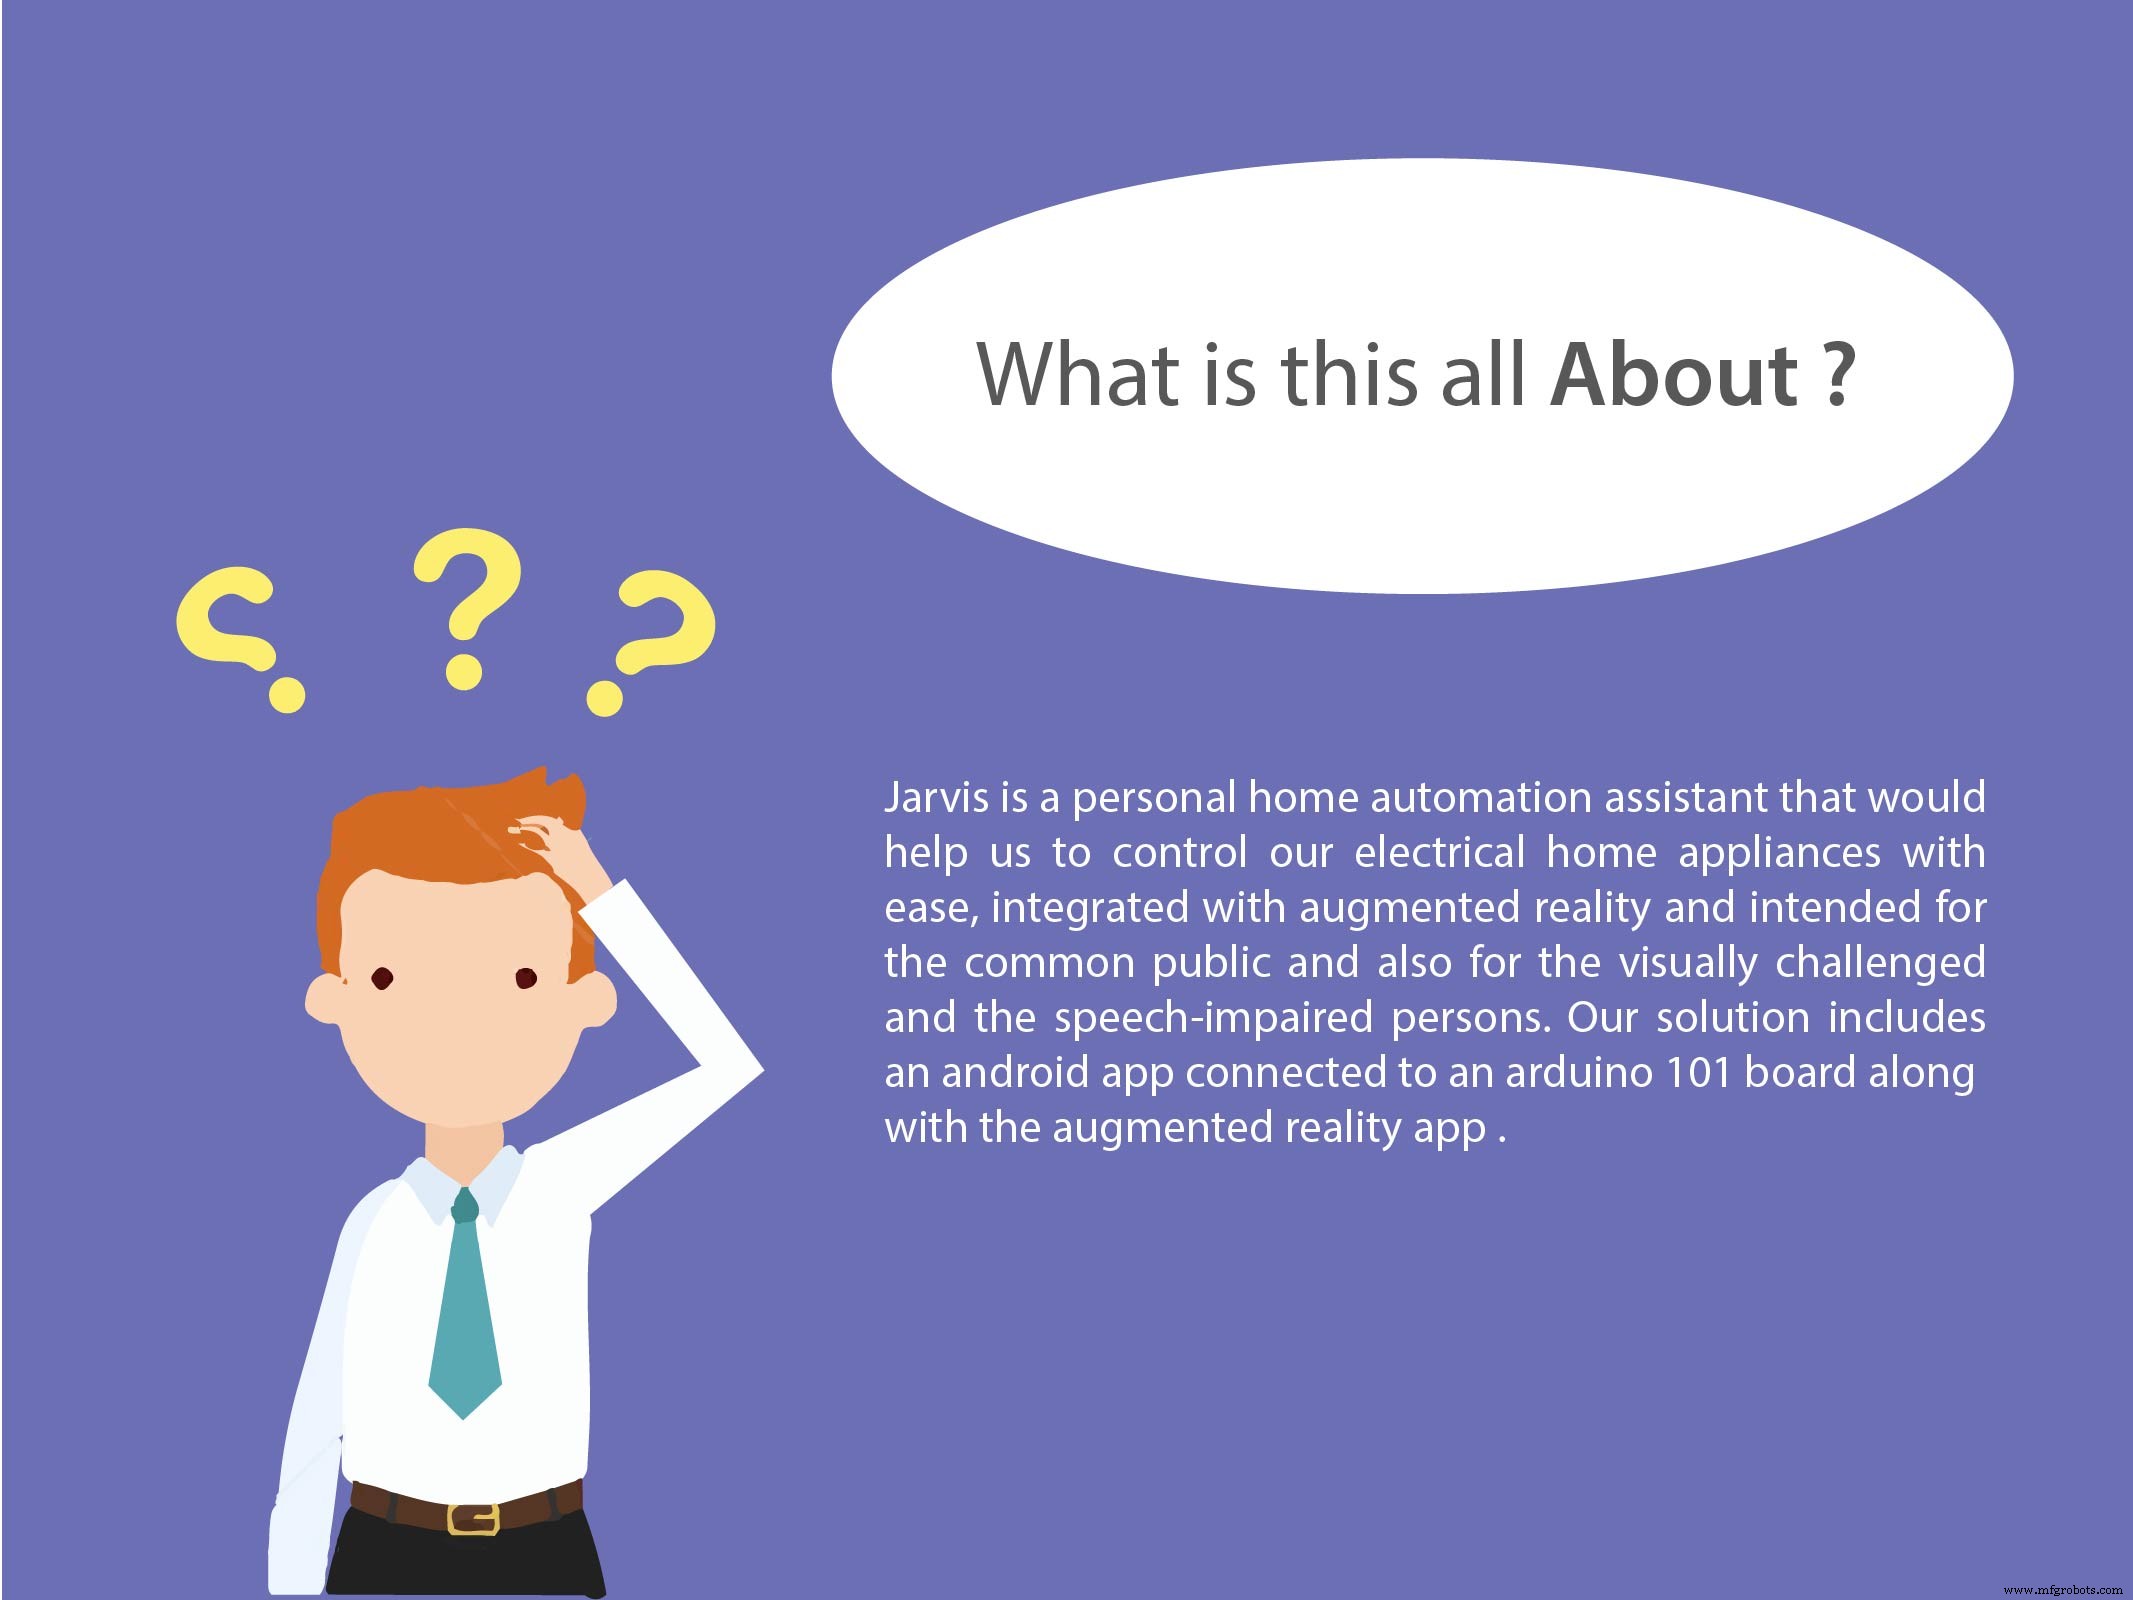


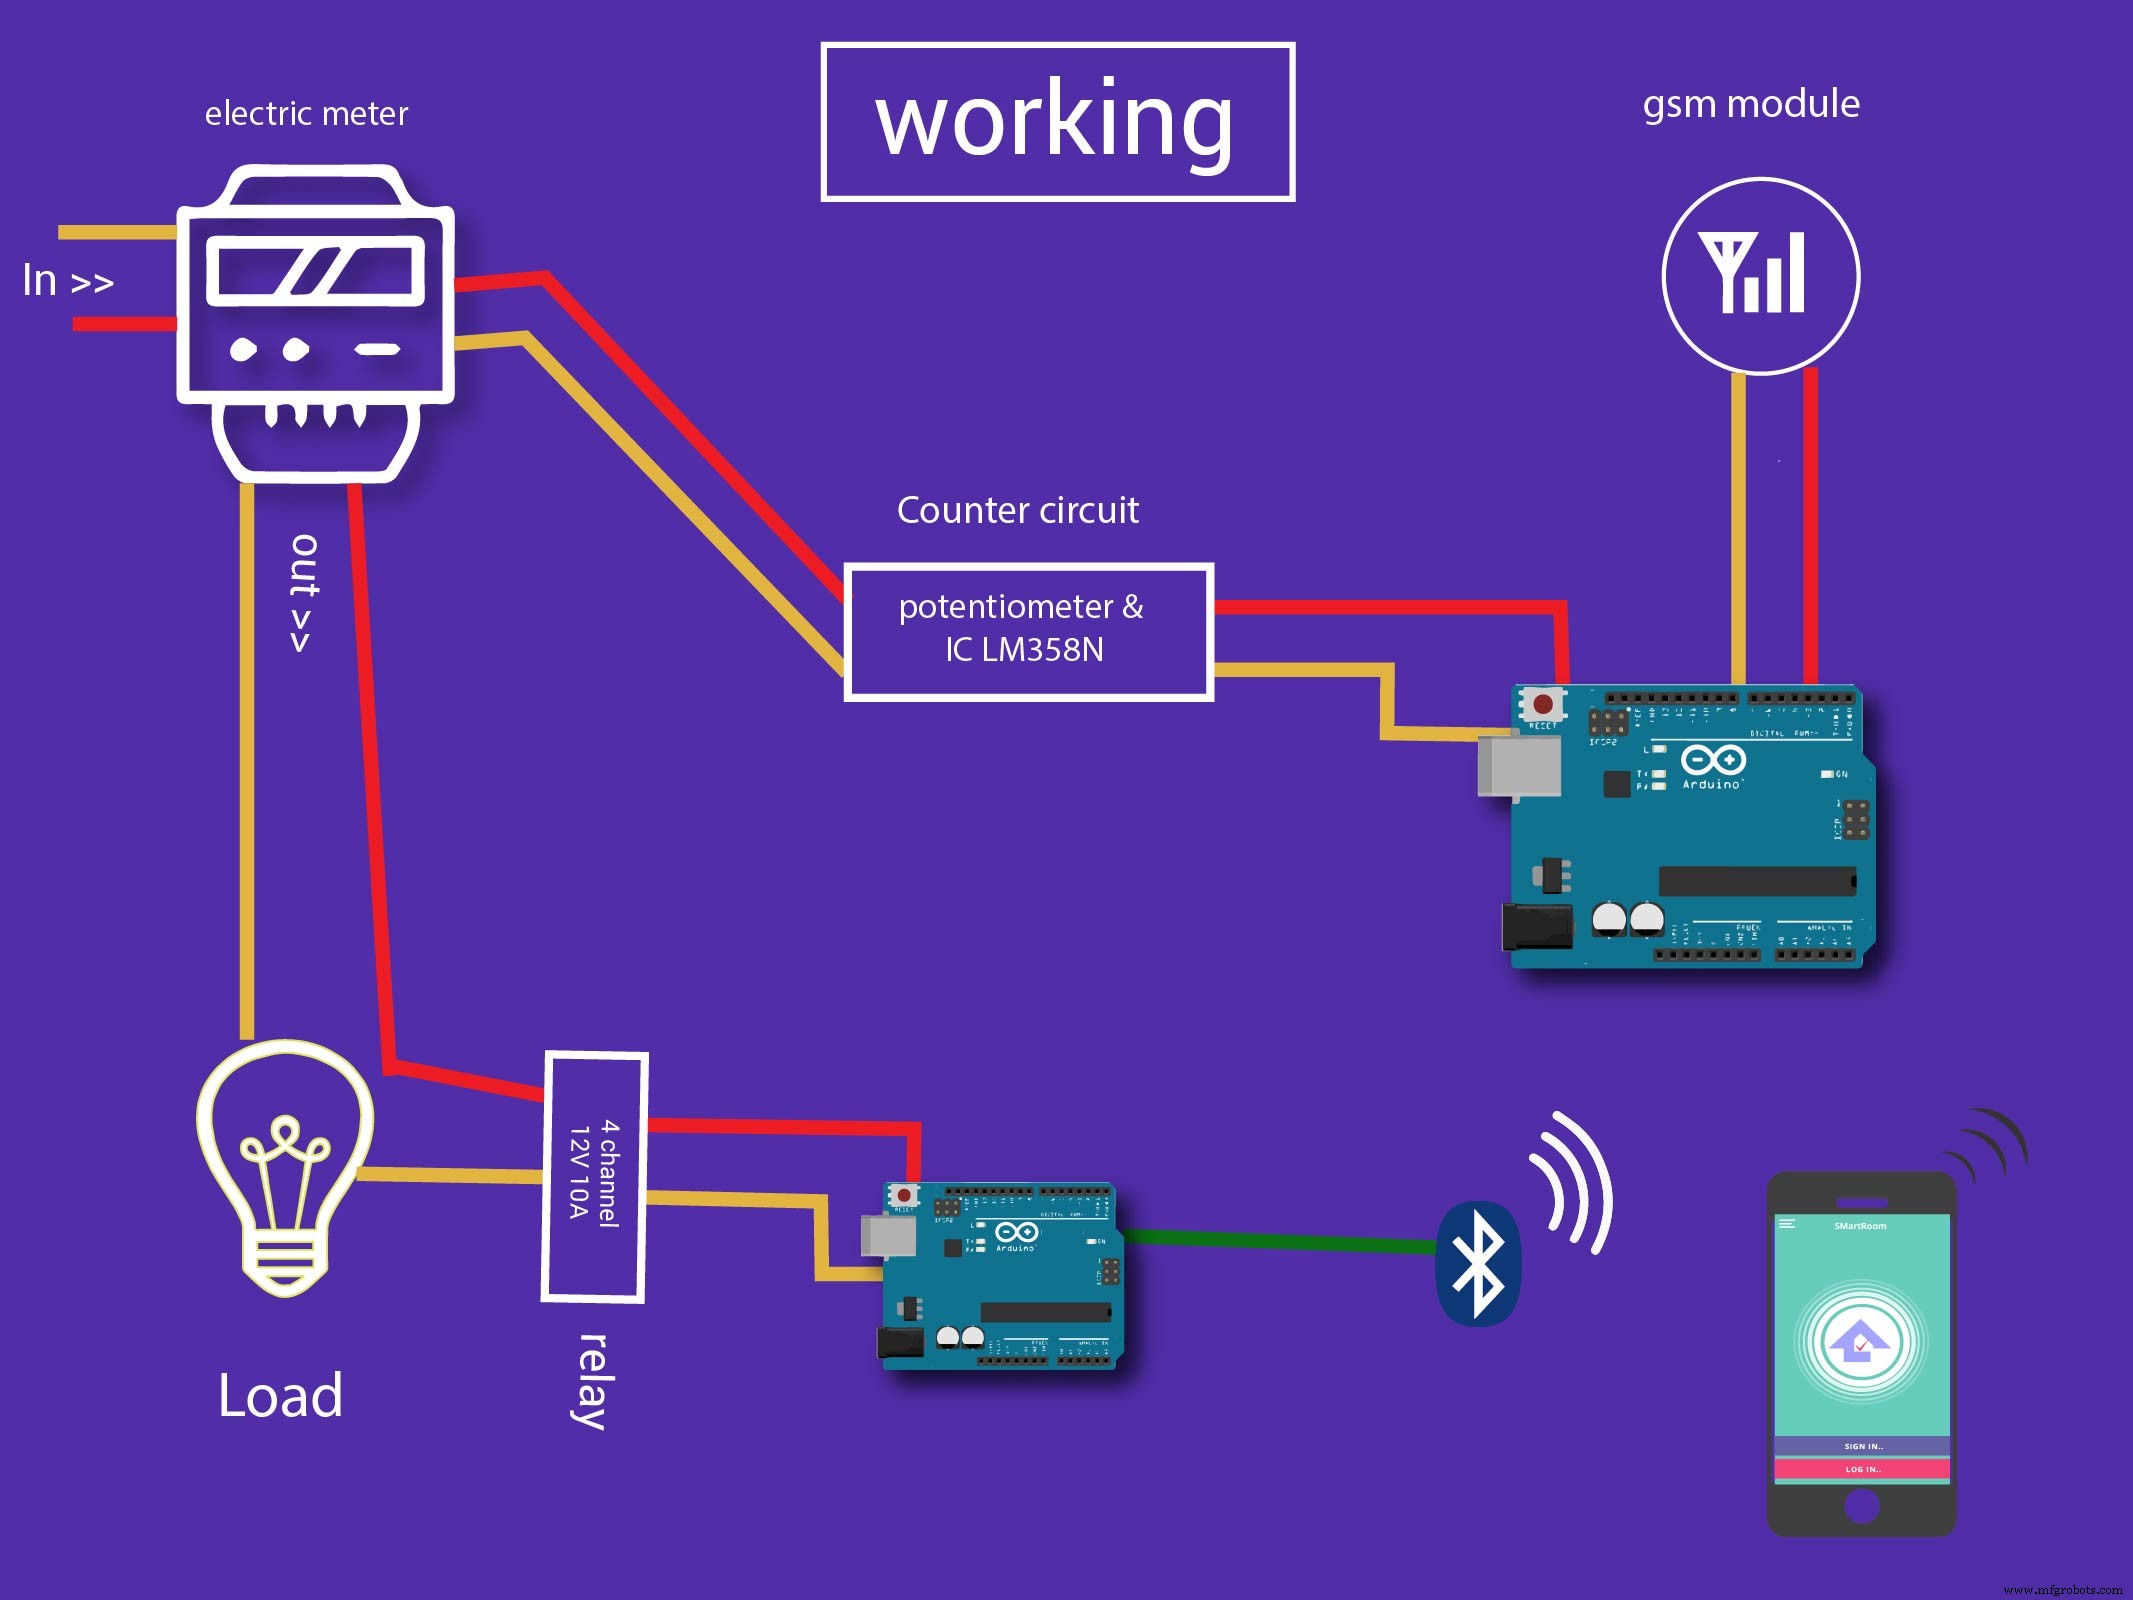
The Digital Energy Meter

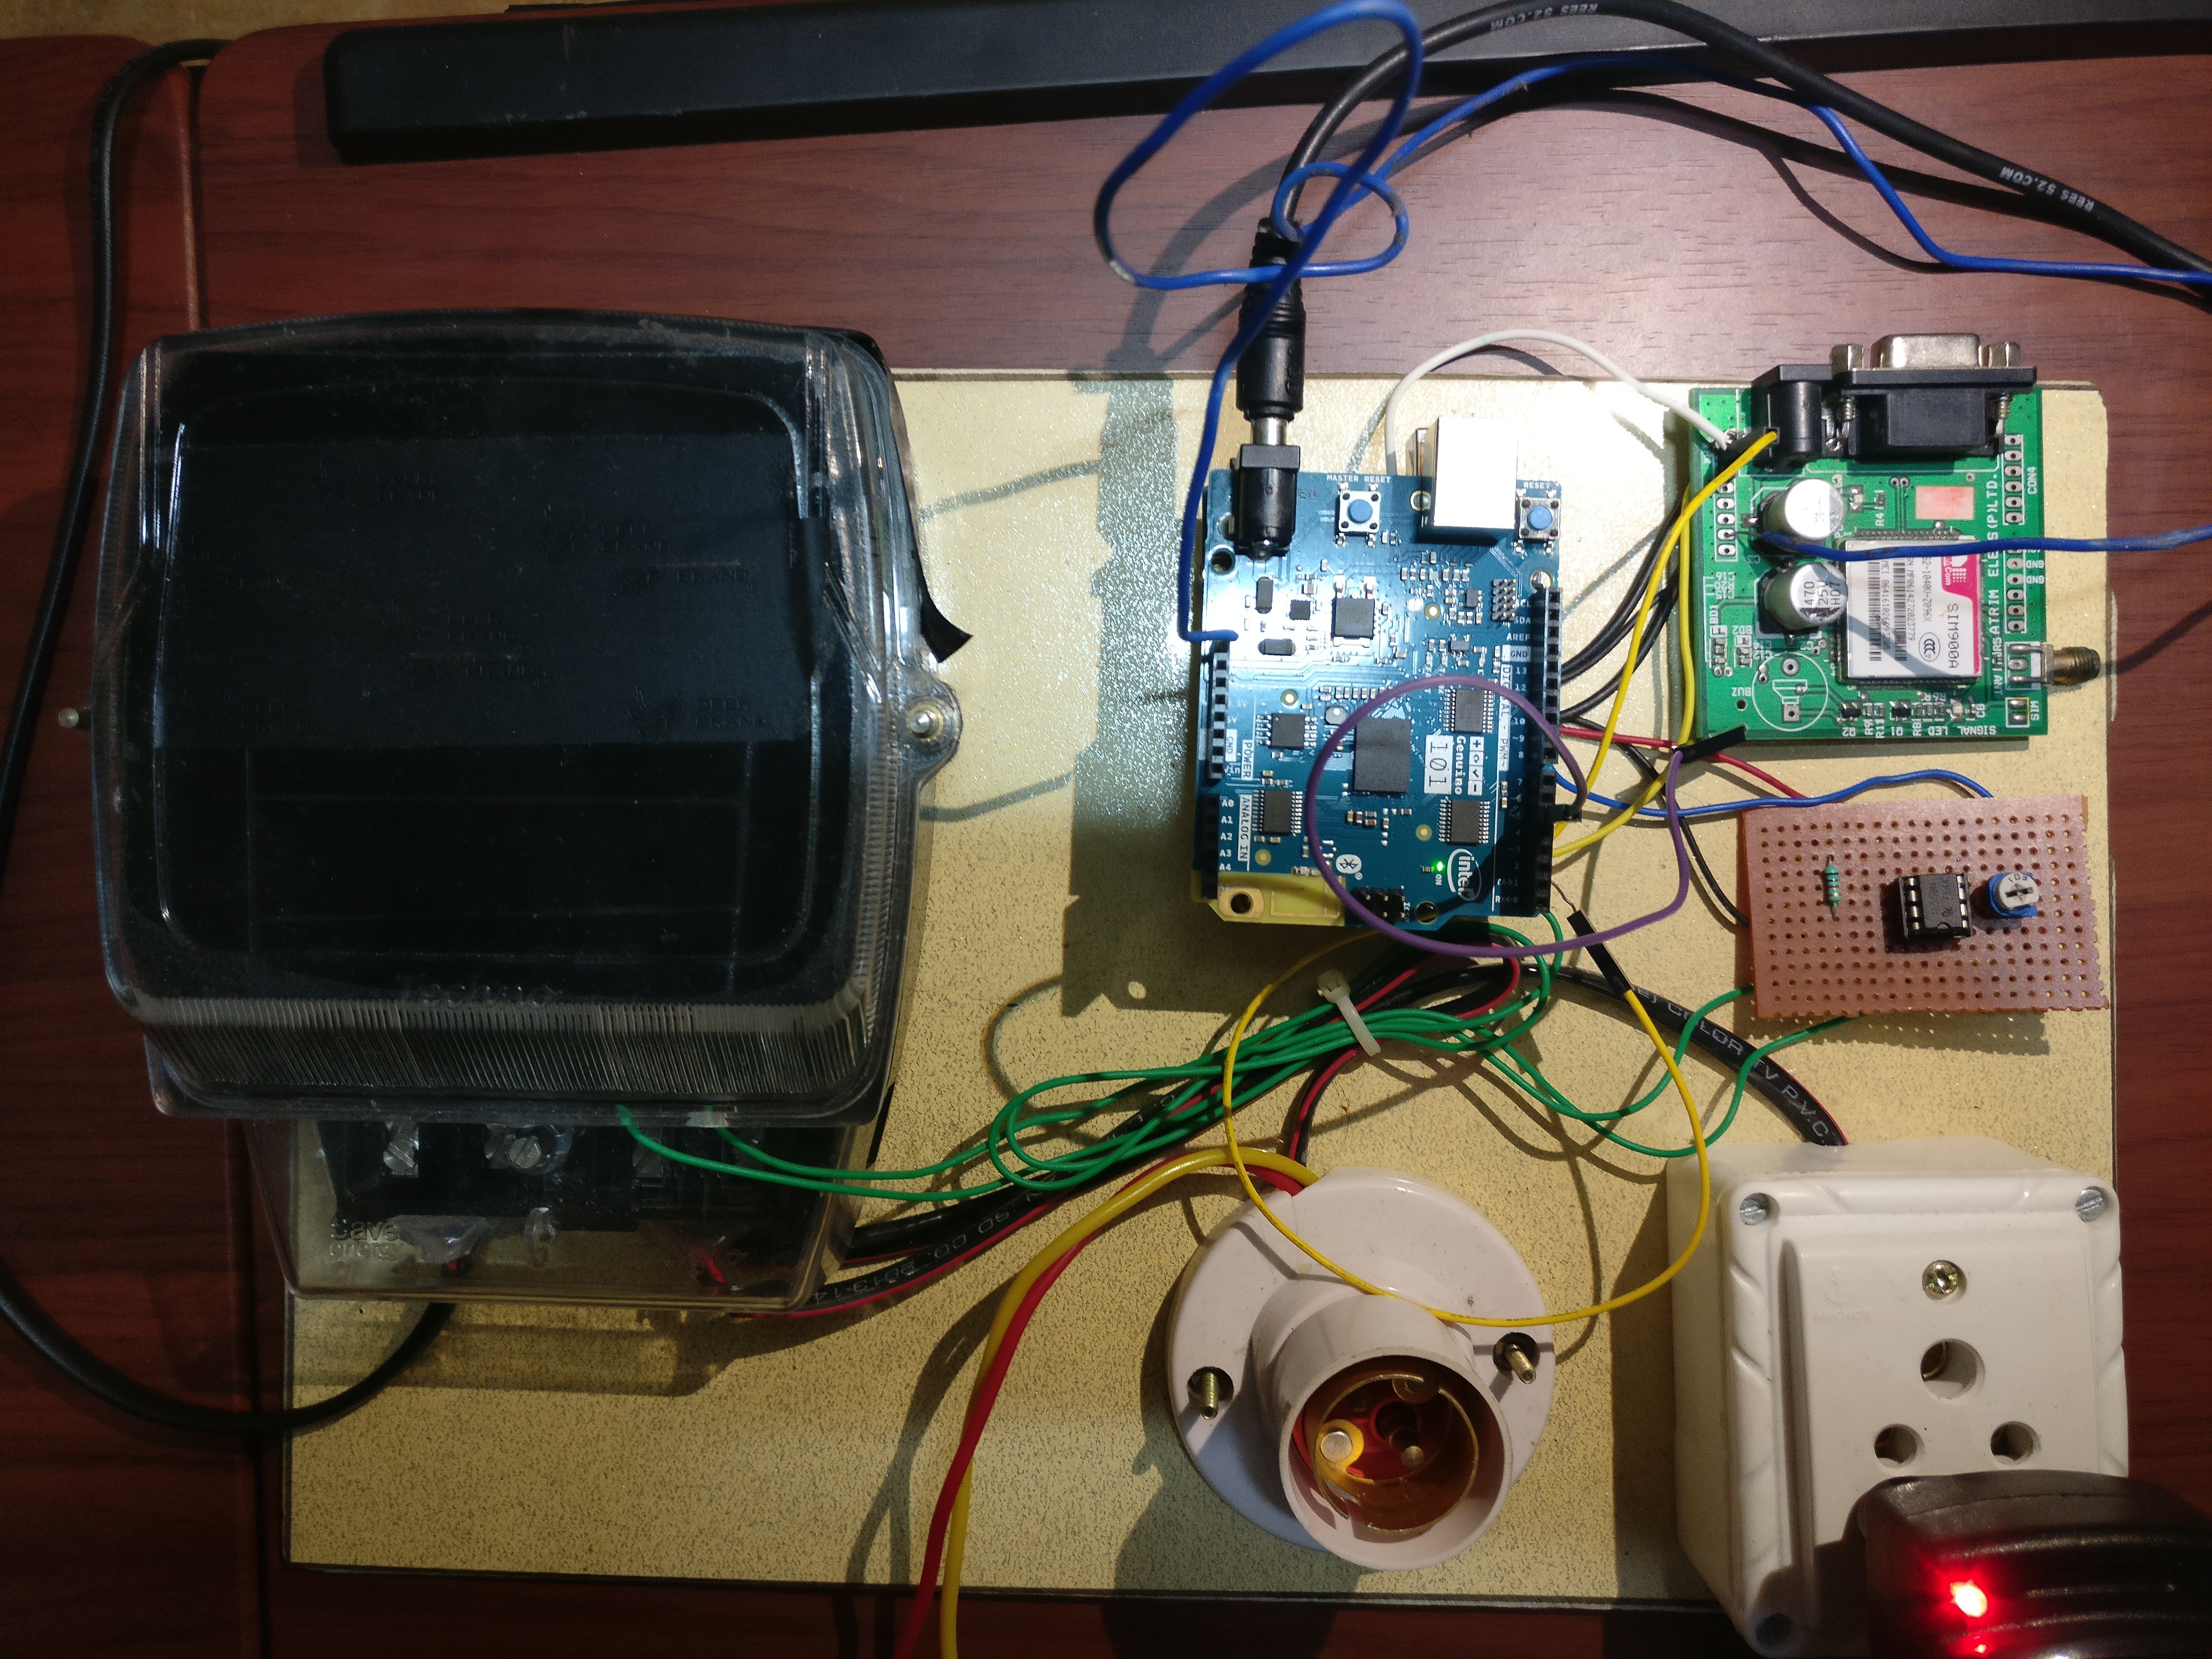
The AI Virtual Assistant
The flow of signals is as follows:
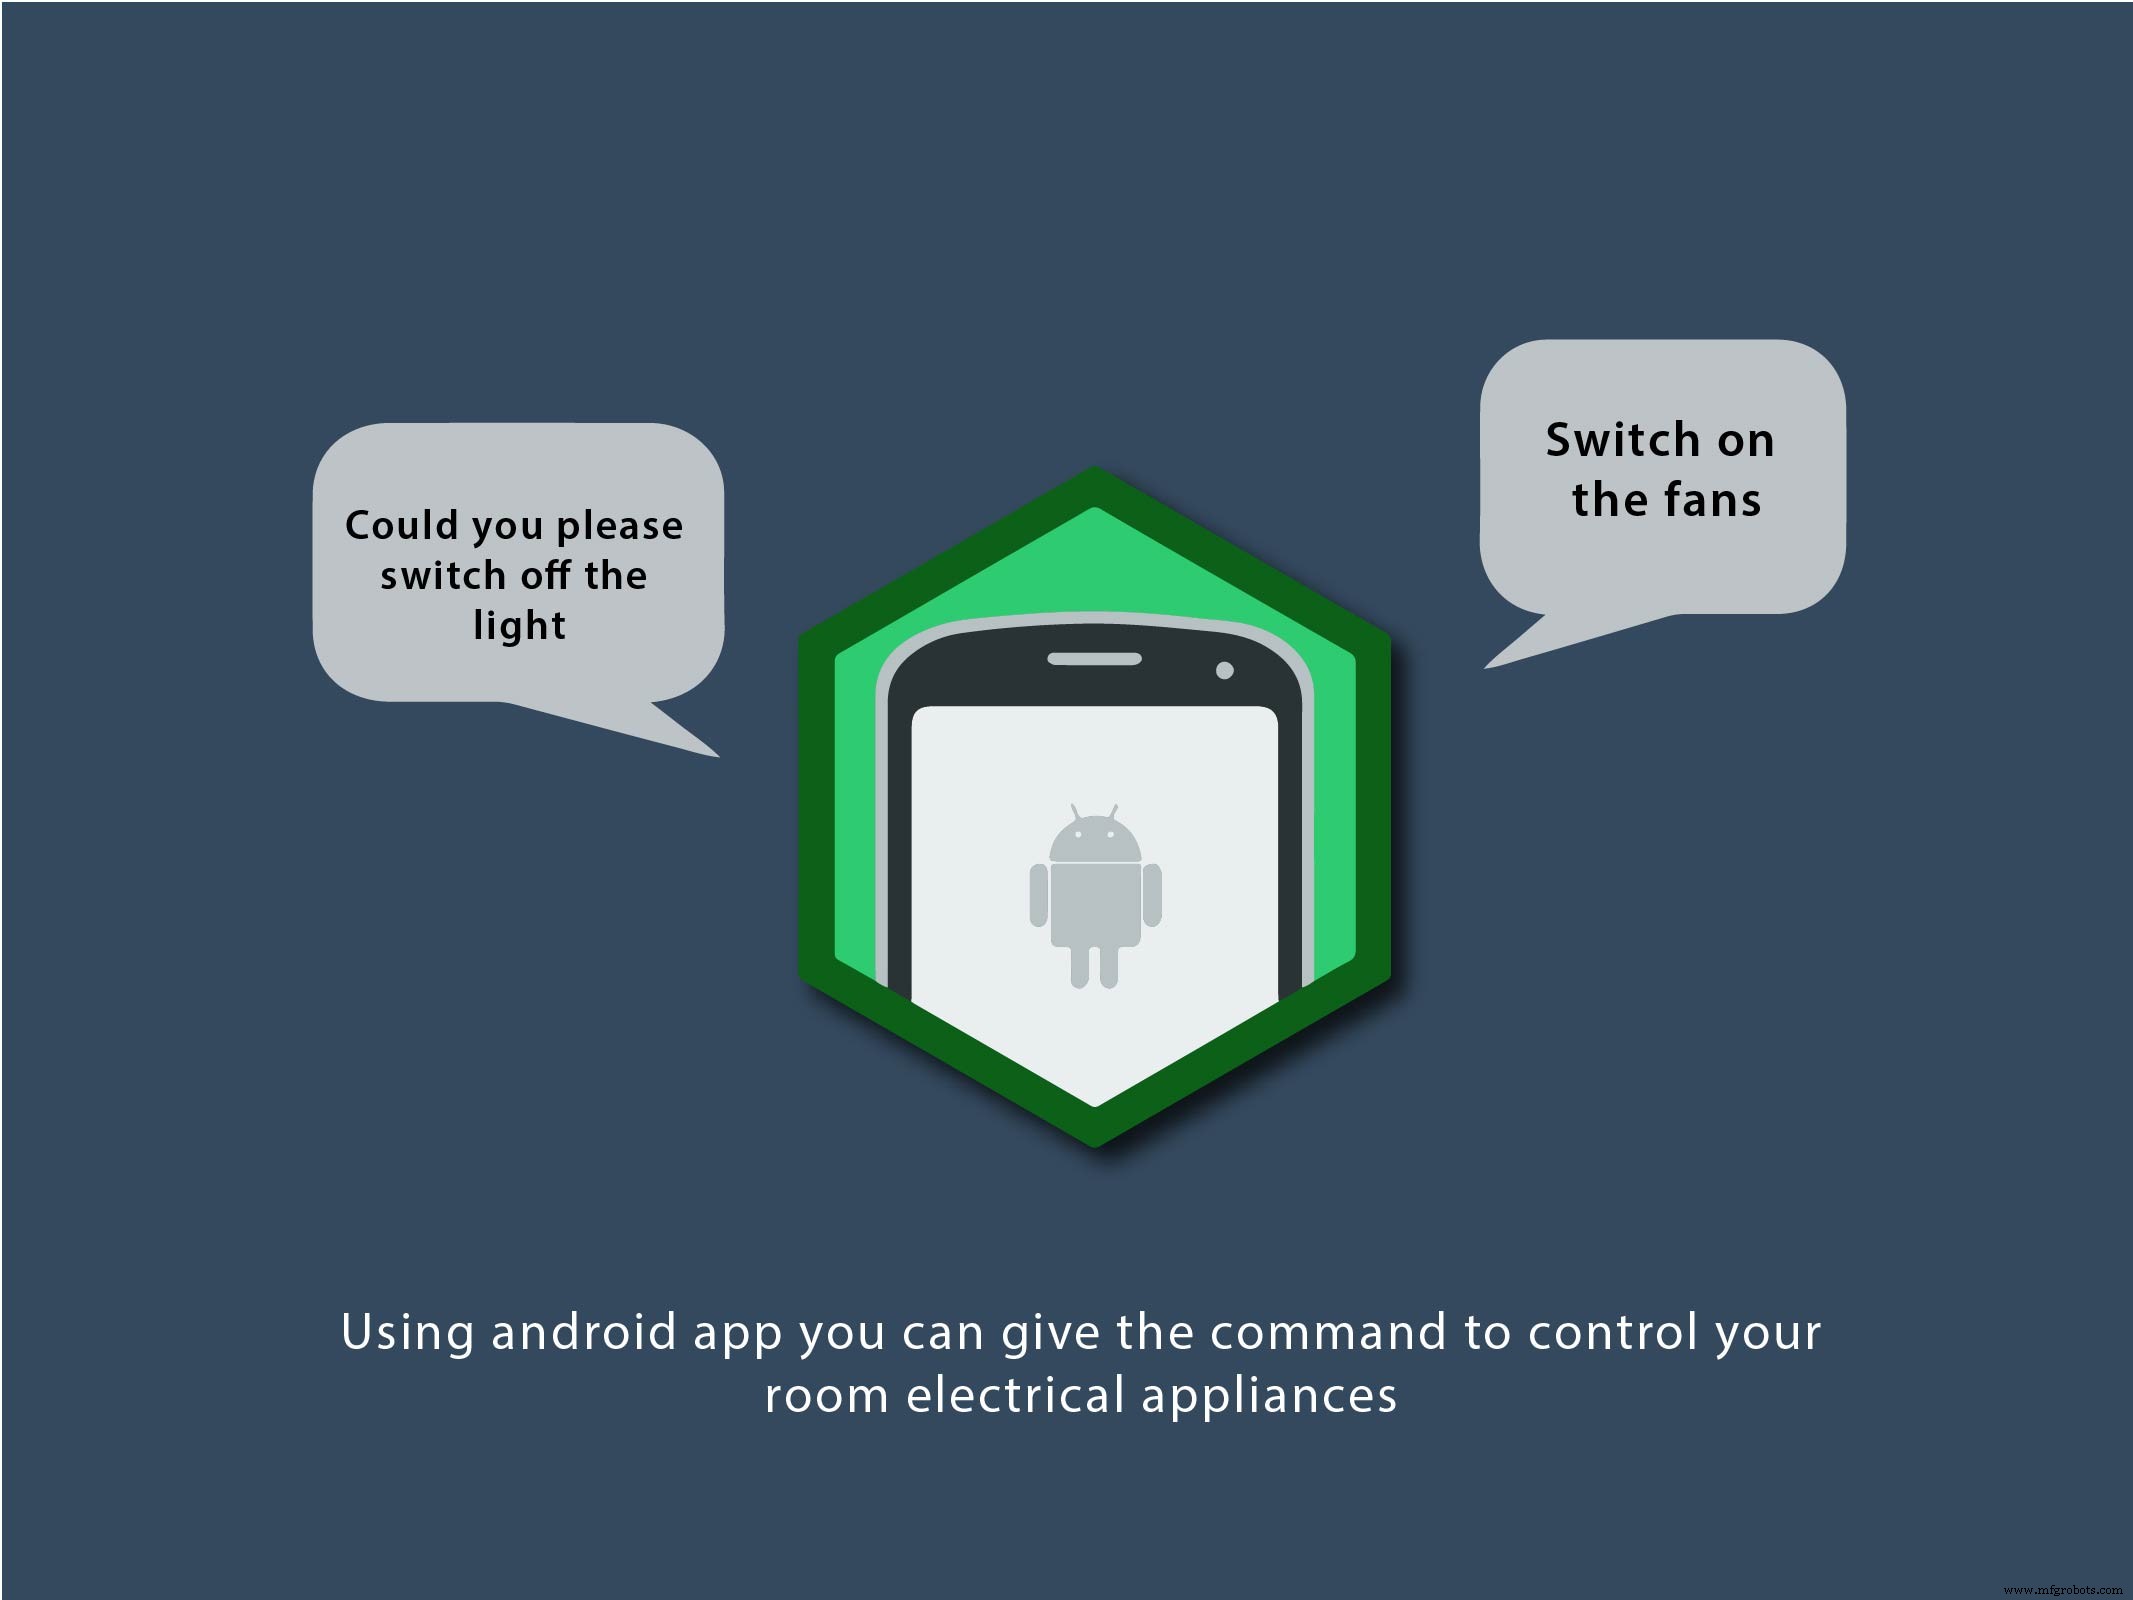
- 1. Voice Input to Android App
- 2. Processing on Android App
- 3. Sending encrypted data to Arduino via Bluetooth.
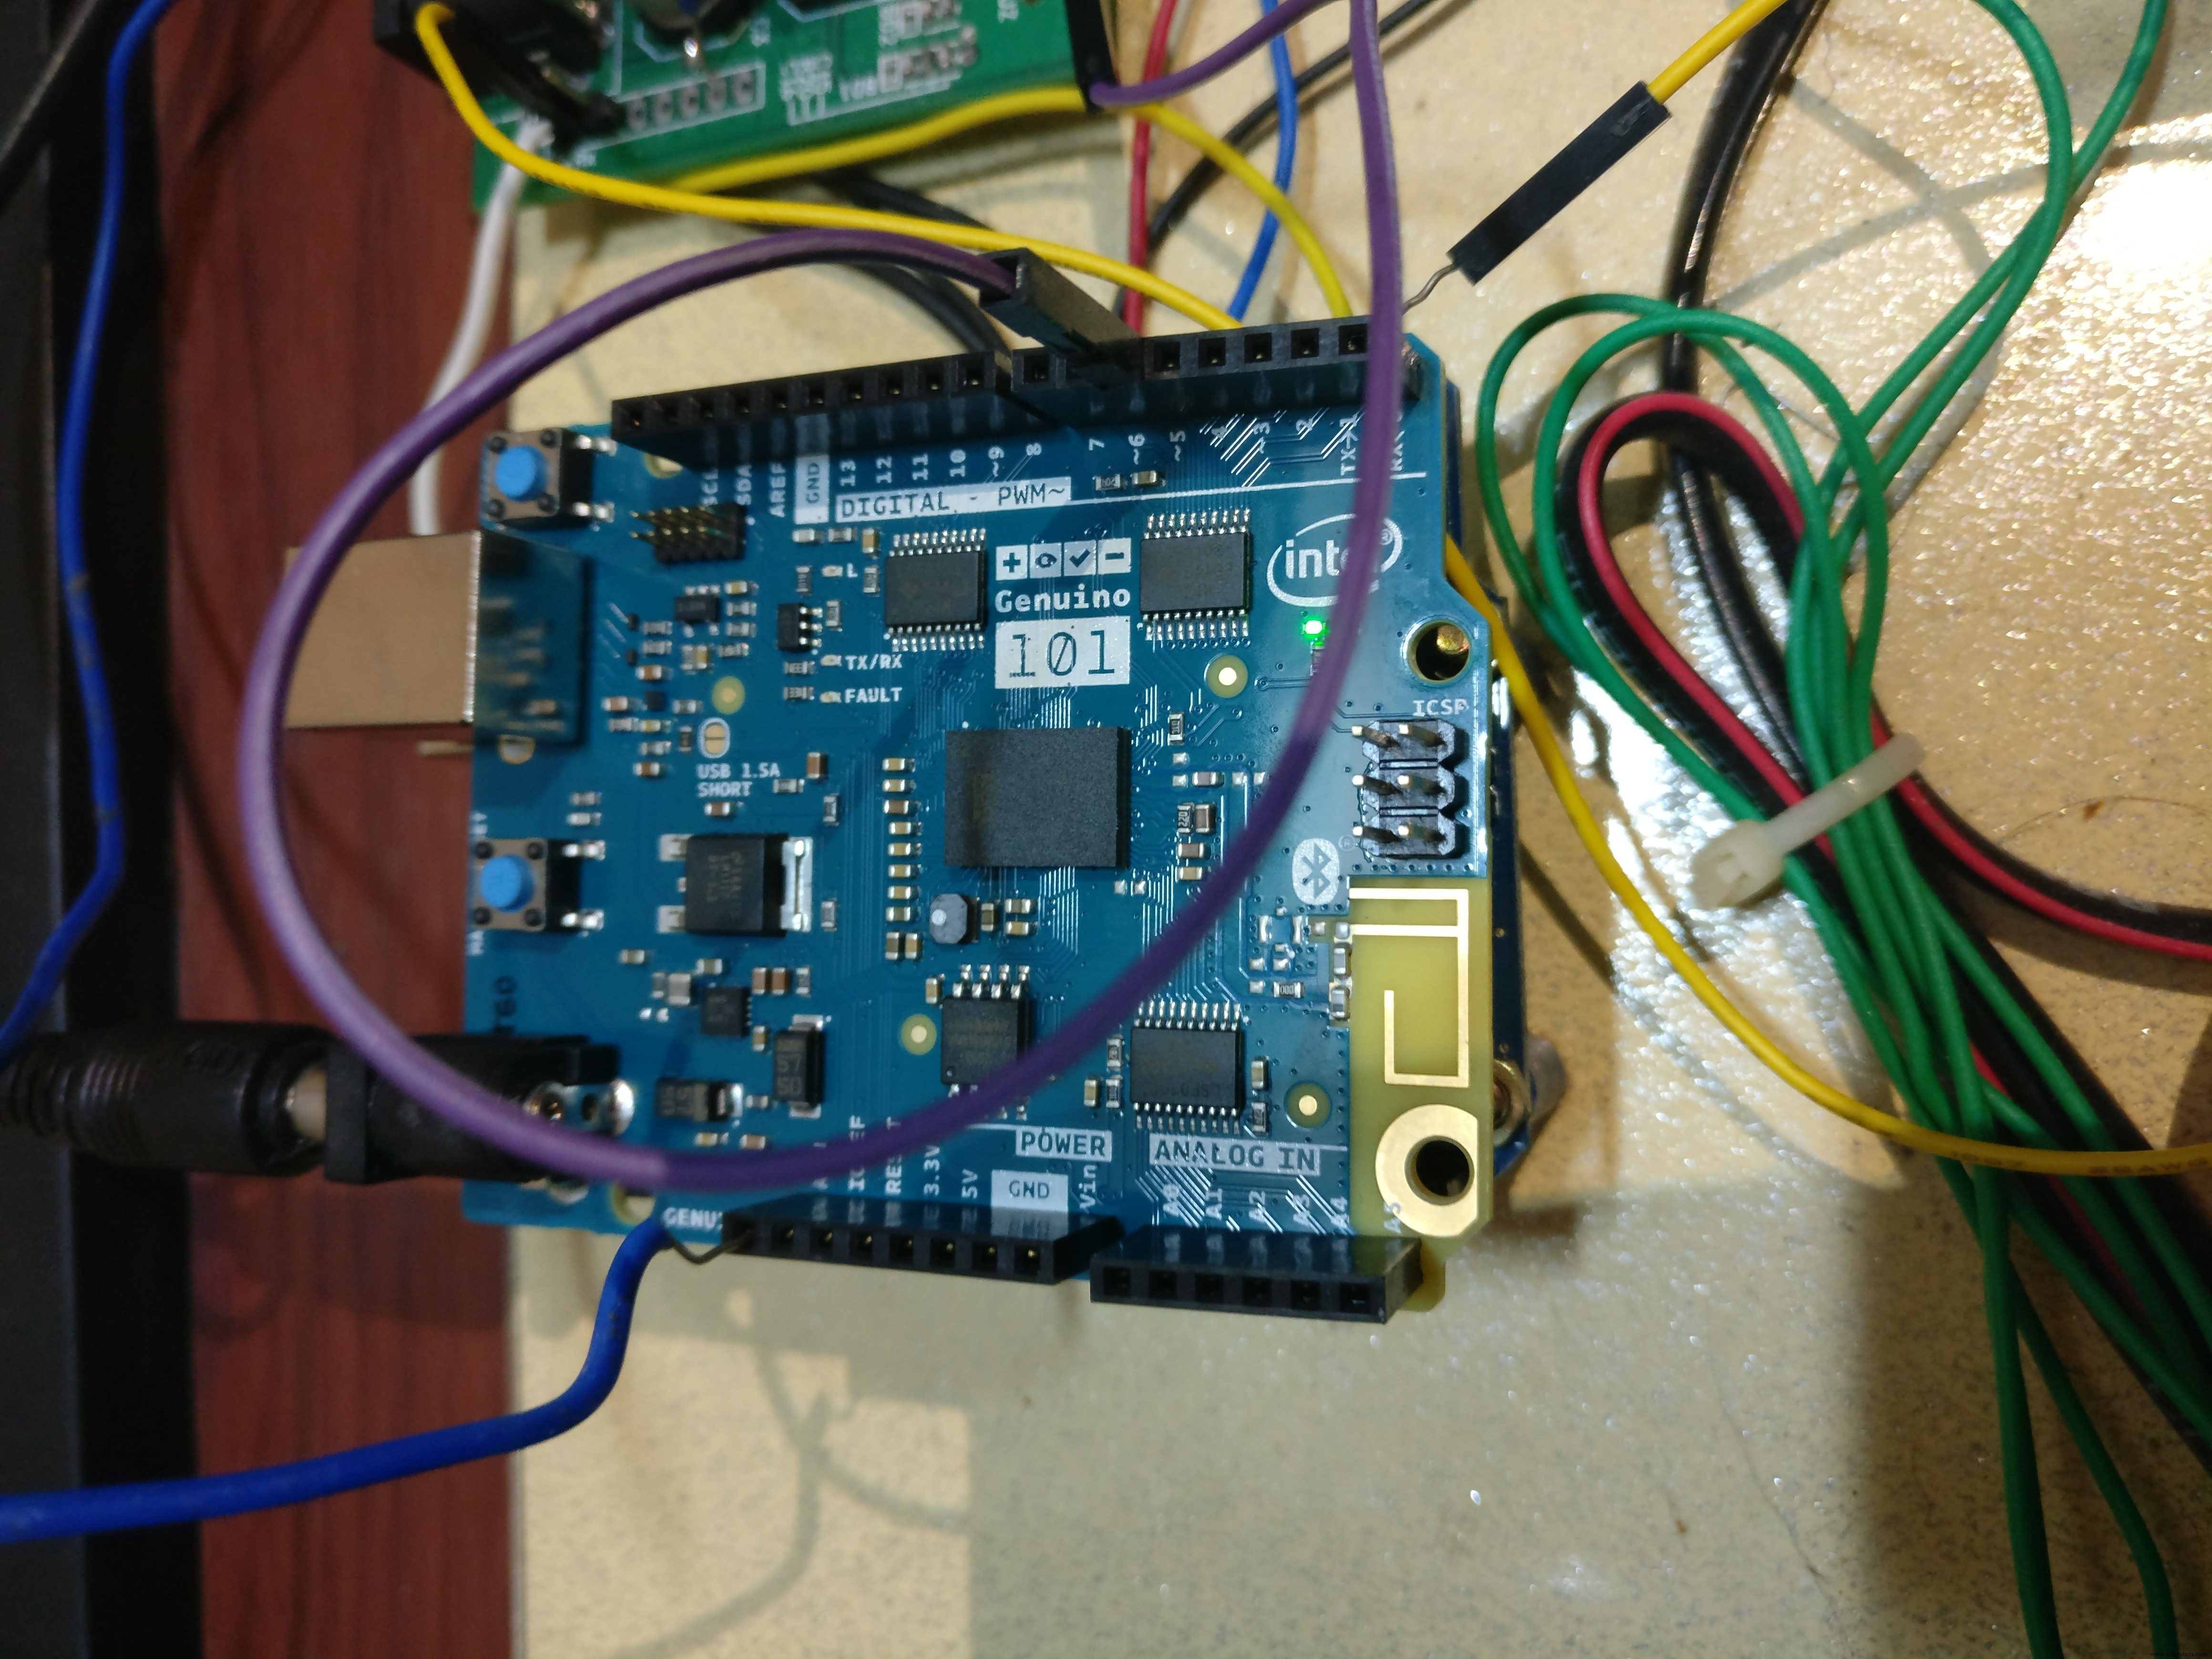
- 4. Processing on Arduino 101
- 5. Digital signals to relay
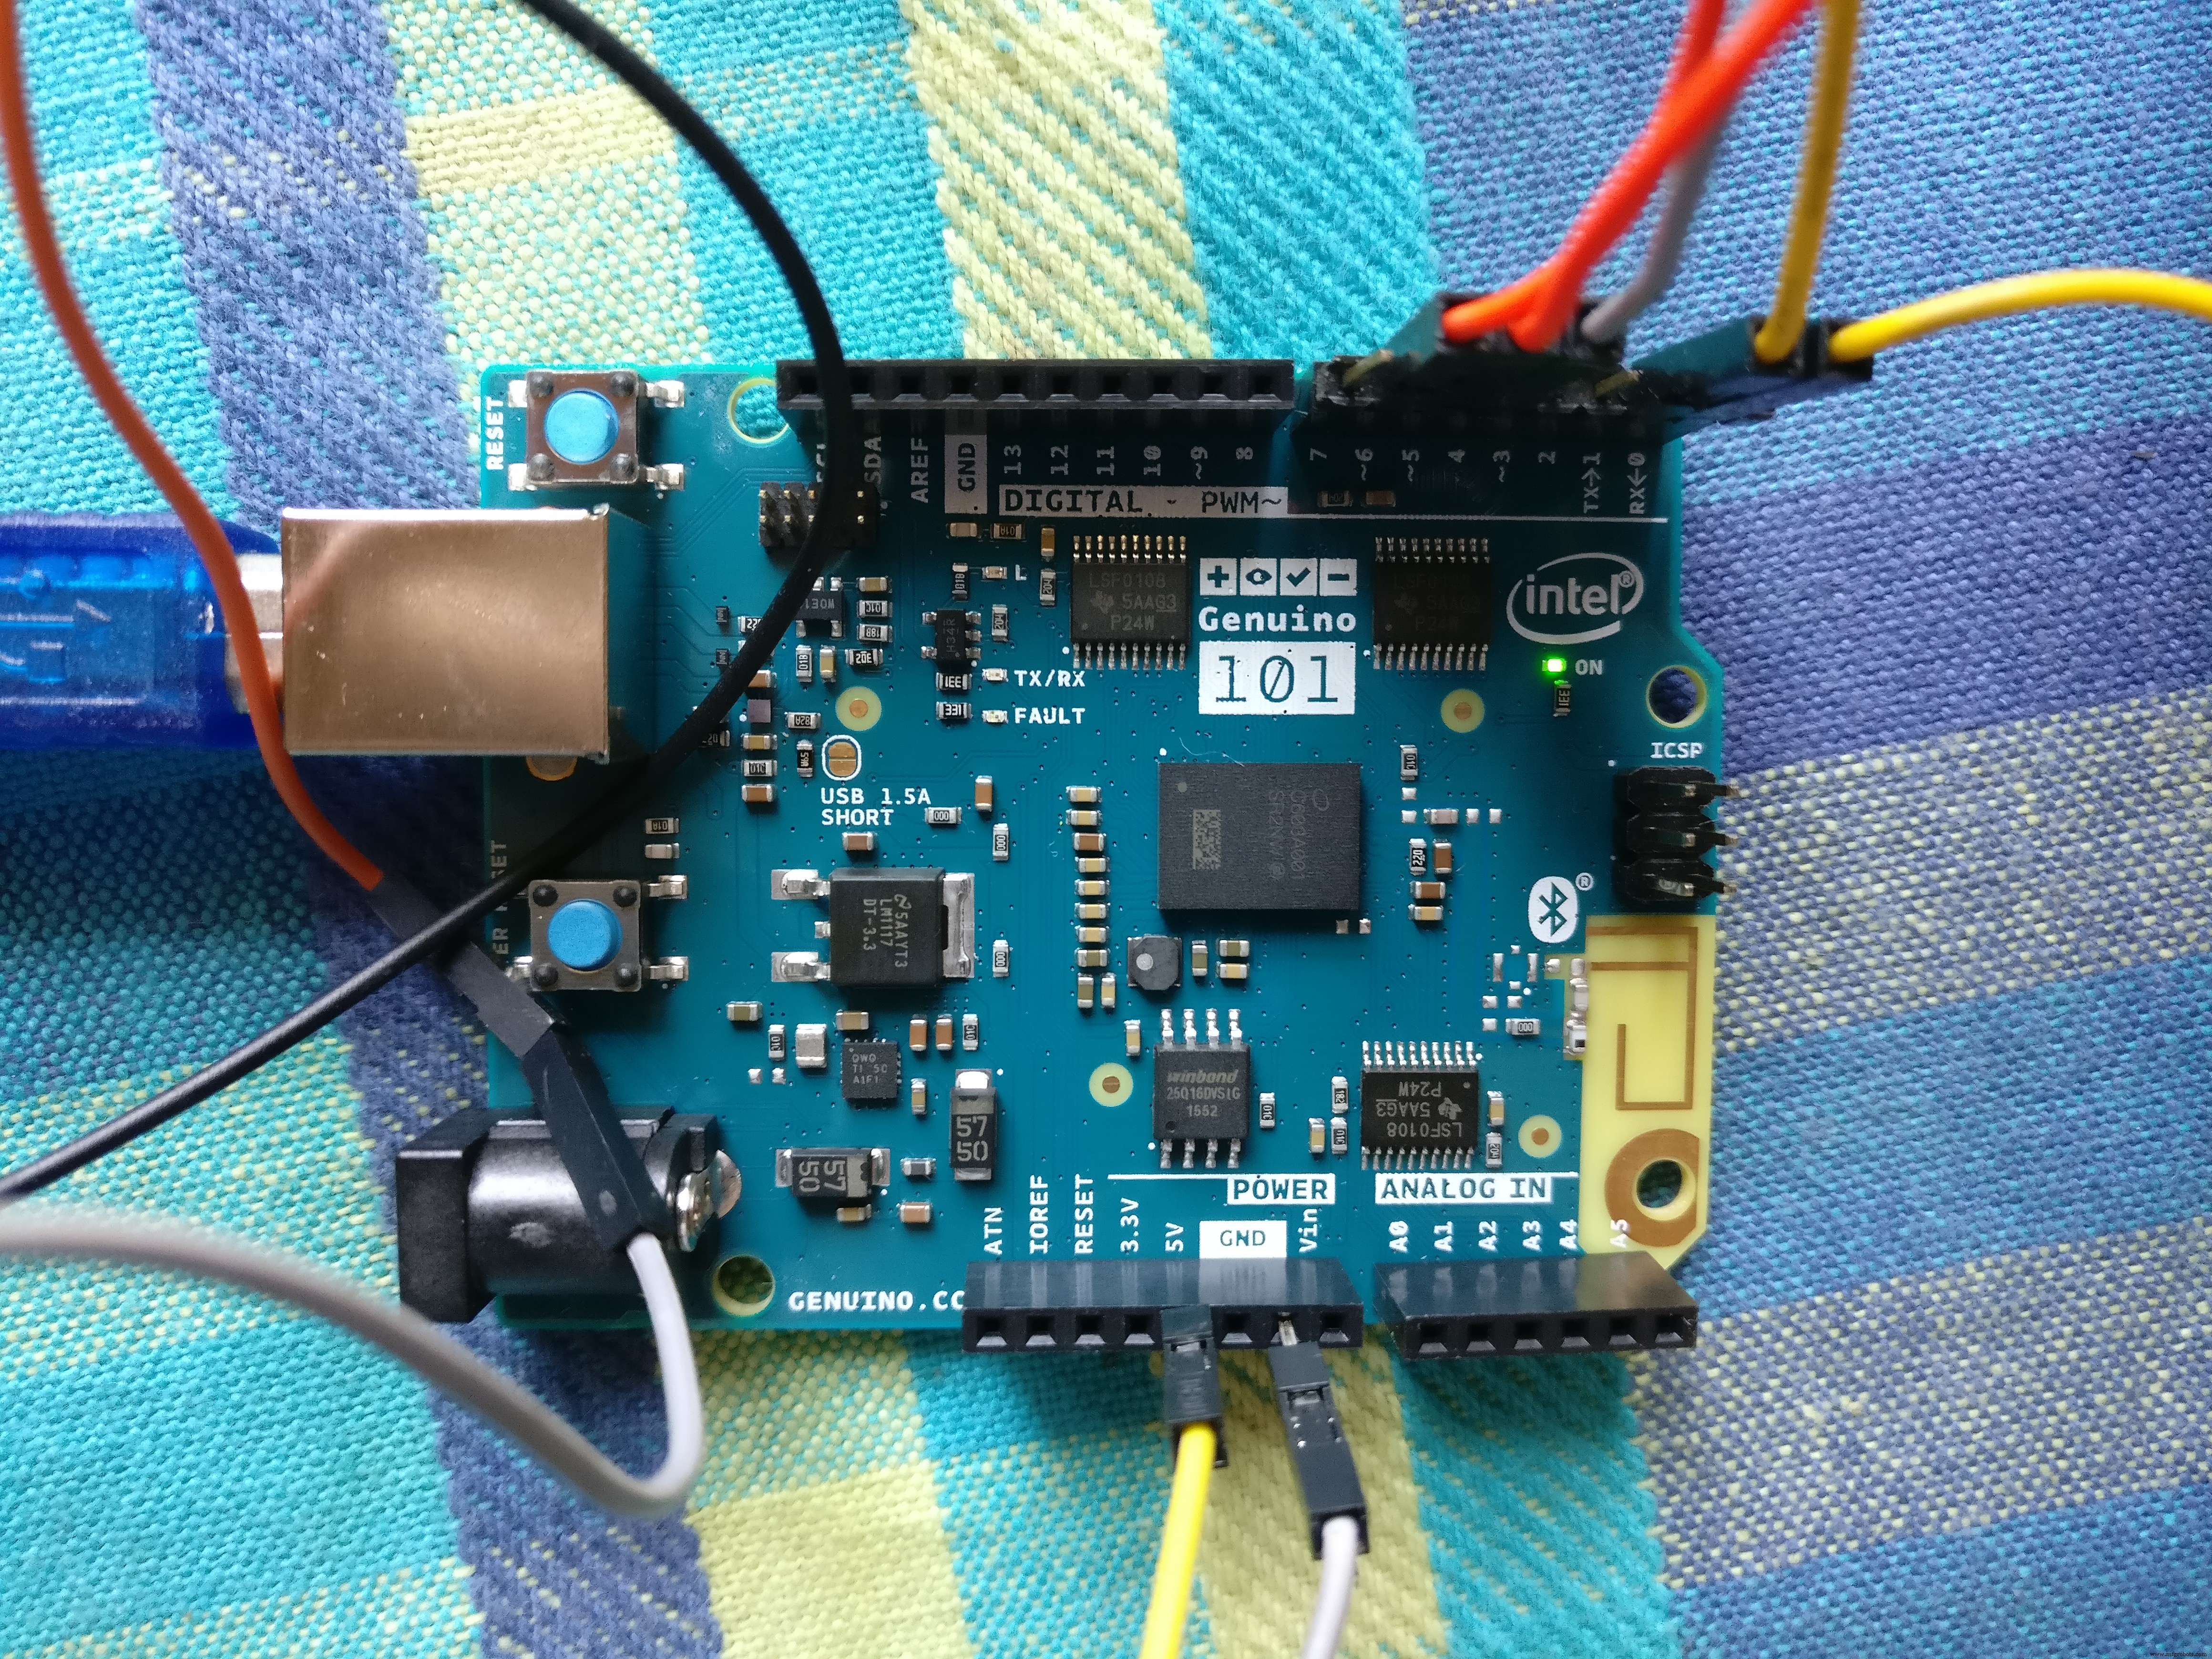
Pins connections:
- Pin 8 -- > PulseIn [Digital Input]
- Pin 6 -- > IN1 -- > Fan Output
- Pin 4 -- > IN2 -- > Light Output
- Pin 5 -- > IN3 -- > Coffee Maker
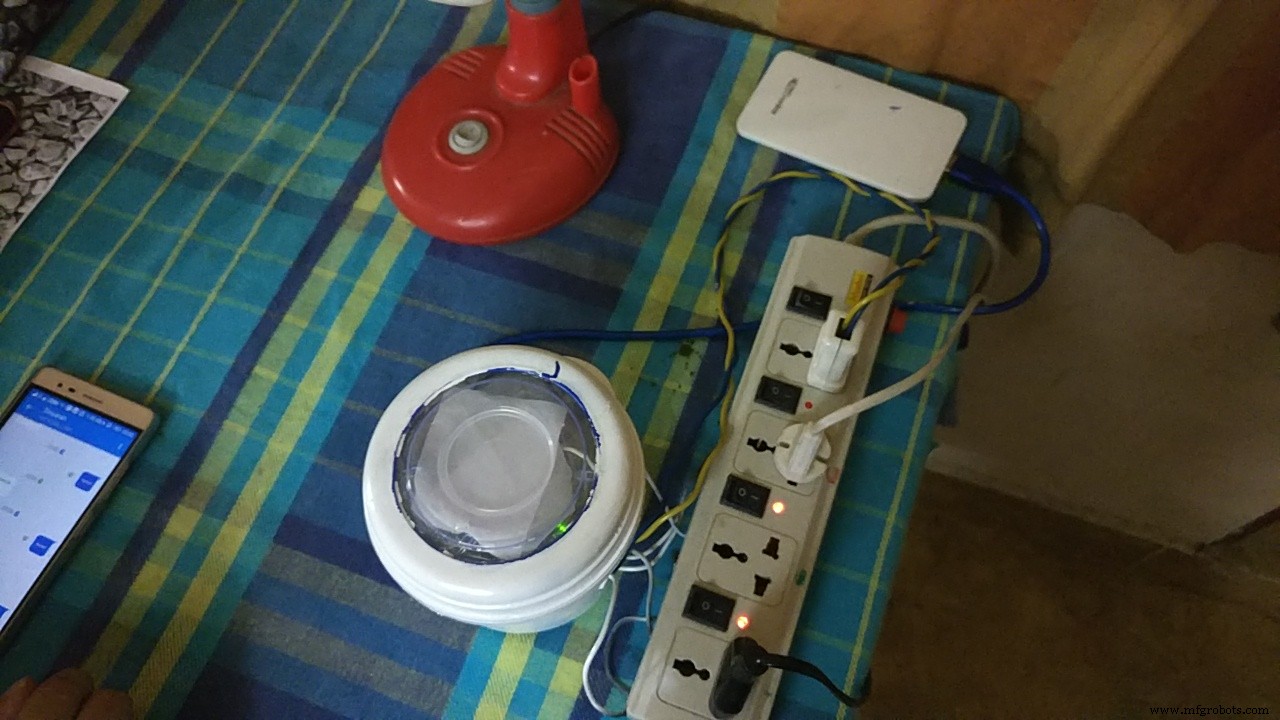


Connections of Energy meter:
- Connect the meter to the supply.
- Cover the energy meter with a black tape, preventing the LDR inside the energy meter from outside light.
- Connect the neutral wire directly to the loads and the phase wire to the relay.
- Take the wires from the LDR outside the meter to the counter circuit.
- Now take the output from the counter circuit to the assigned pin 8 pulsepin as in the code.
- Connect the TX, RX pin of the Arduino 101 to RX, TX pin of the GSM module.
- Now power up the boards after burning the code.

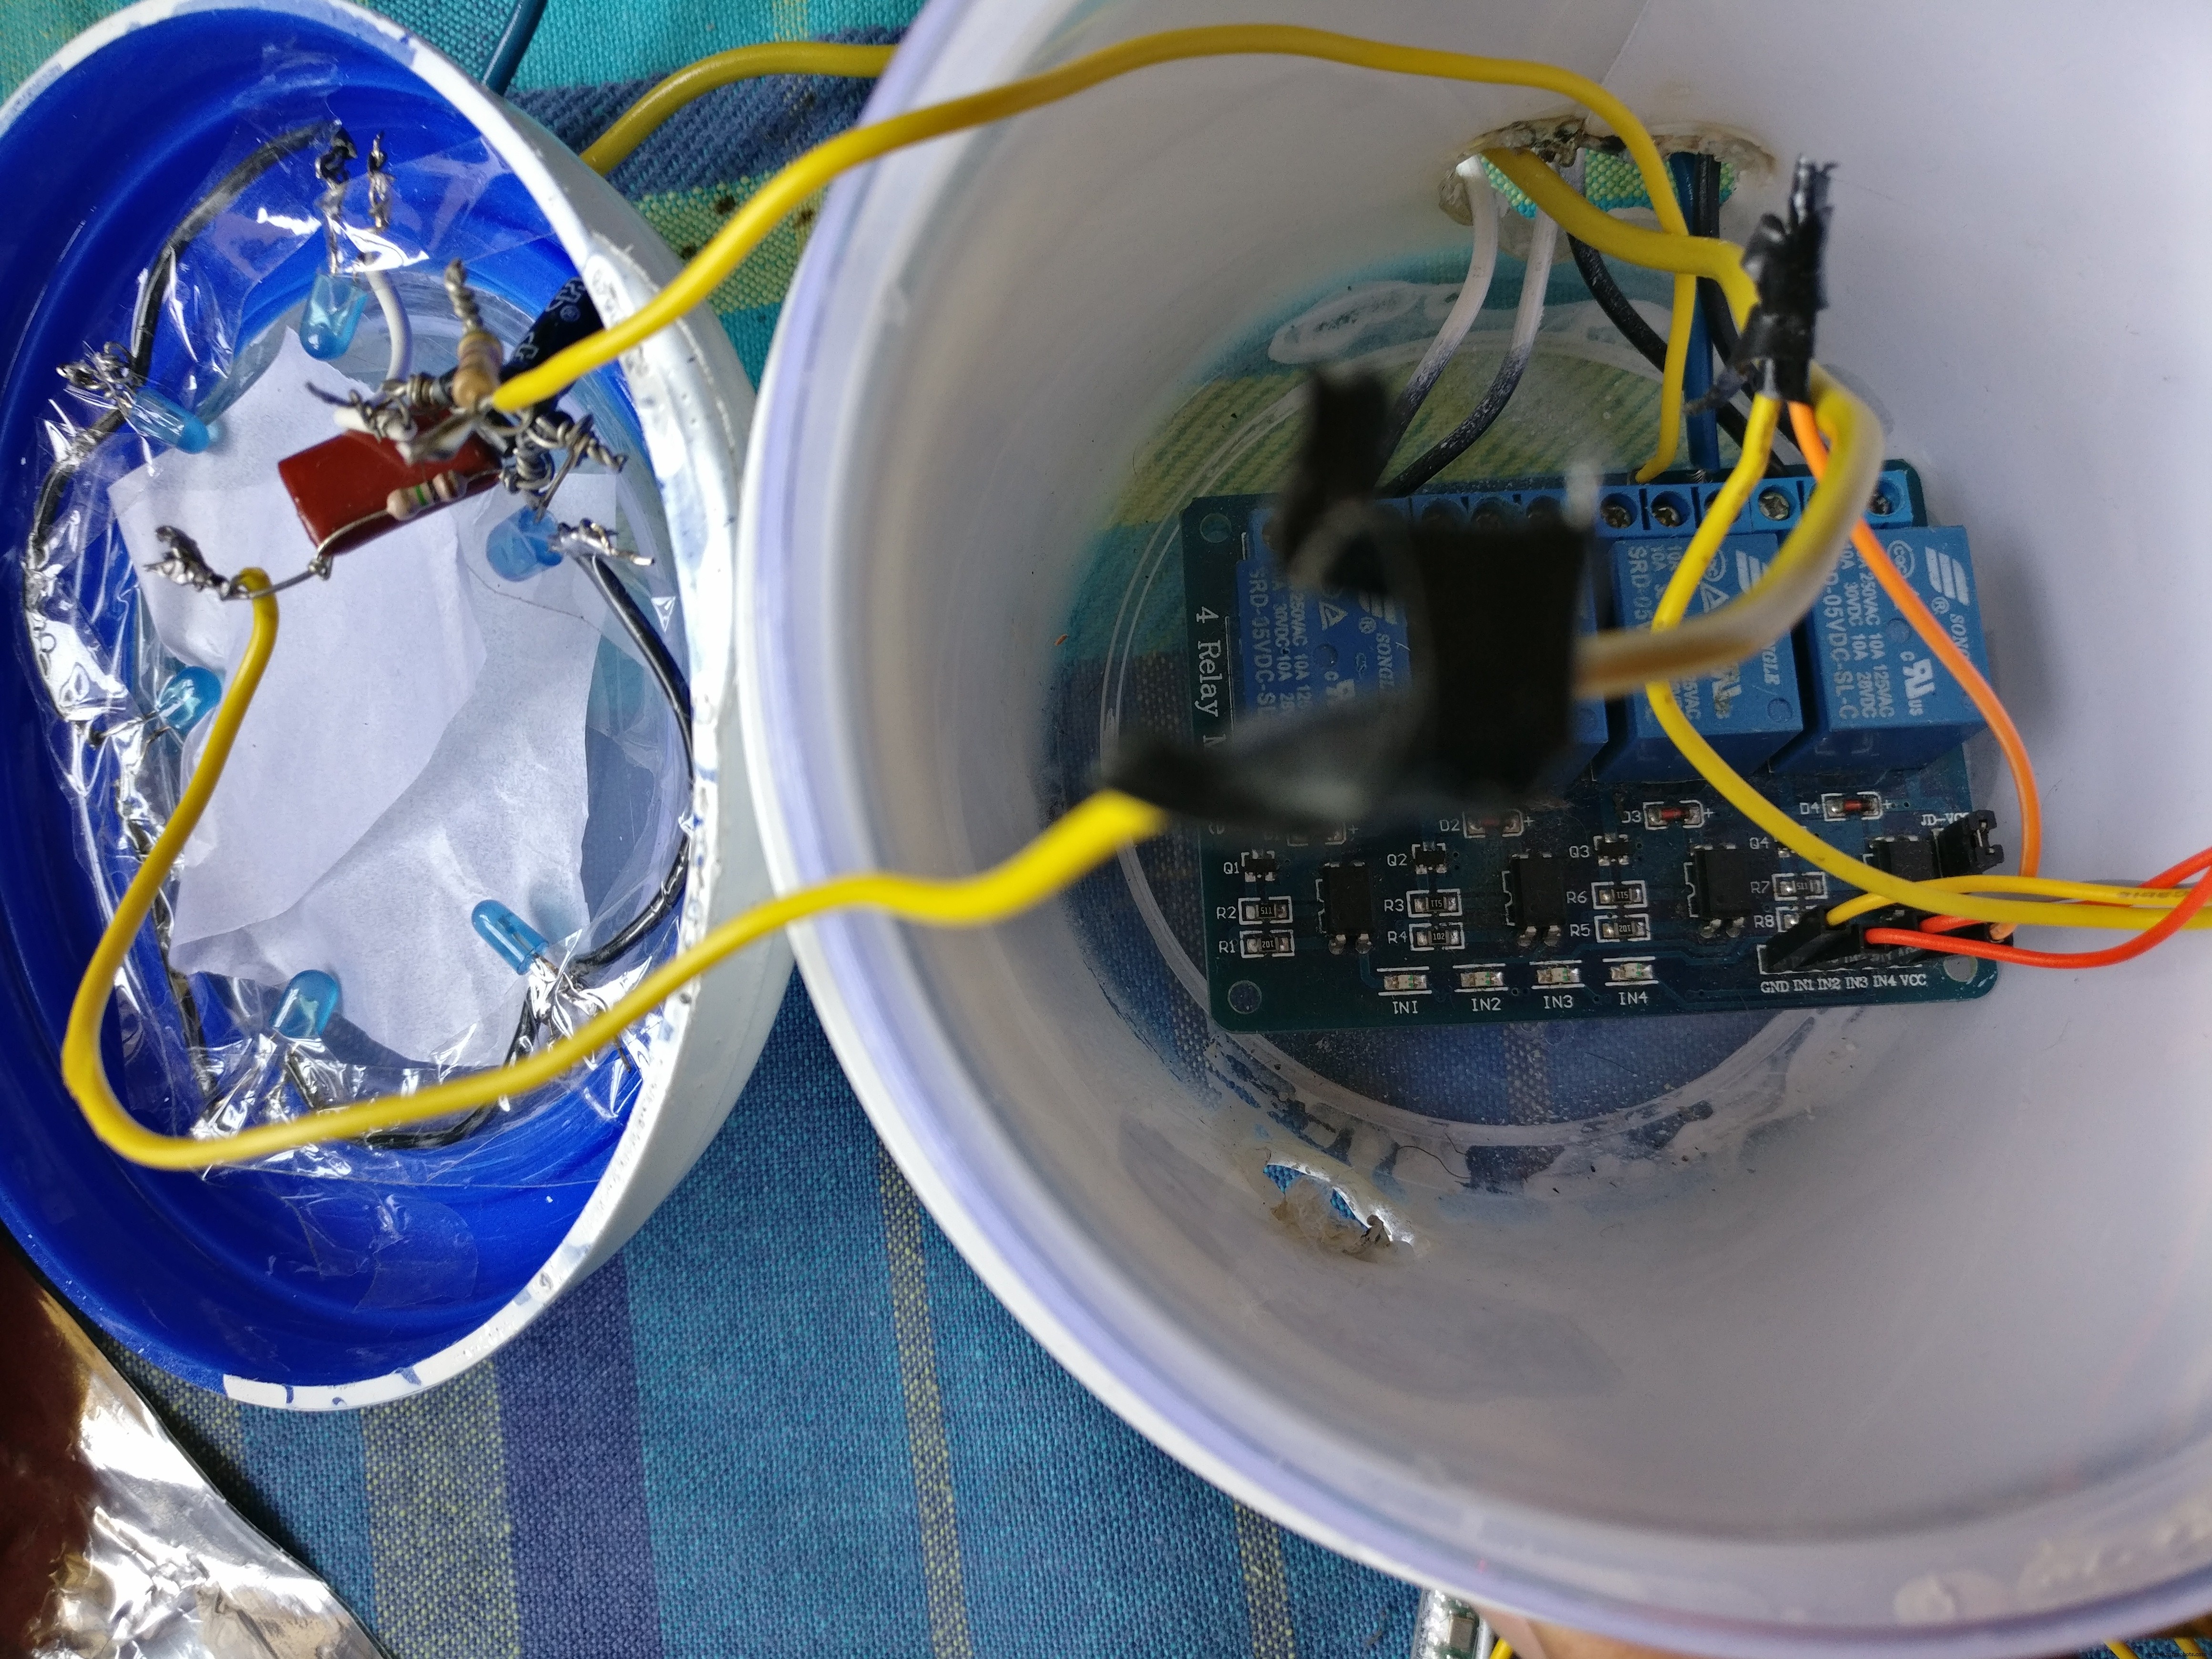
- Inside Energy meter: LDR Light Dependent Resistor
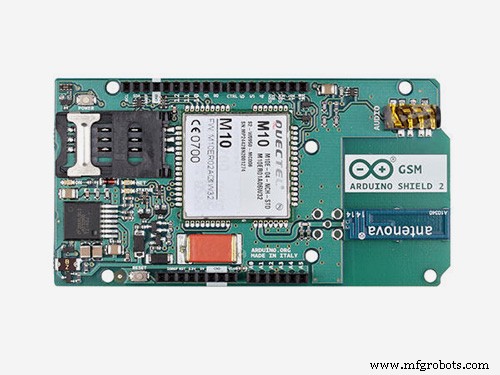
- GSM module
- Counter circuit: potentiometer, IC LM358N
- Arduino 101
- BlueTooth-HC05 module
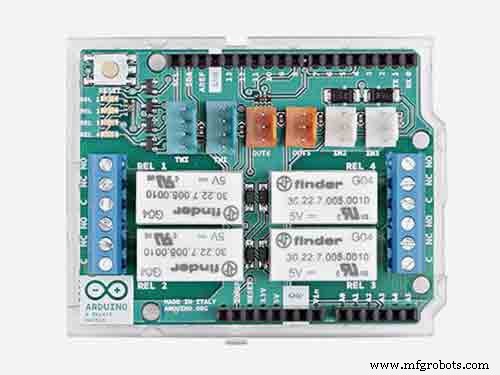
- 4 channel 12V 10A relay control board module with optocoupler for PIC AVR ARM
Programming Platforms
- · For programming the Arduino 101, we have used the default Arduino IDE.
- · We have developed our Android app using Android Studio (JAVA and XML).
- · Database connectivity is done using Google's Firebase.
- · For augmented reality we have used Unity along with the Vuforia SDK.
- All the components are giving readings to the Arduino, where we are converting these readings into character code in order to send the bytes efficiently and quickly to the computer. Inside a never ending loop, every reading corresponds to a character.
- A code should run on the computer in order to receive the data that is being sent by arduino via serial ports.
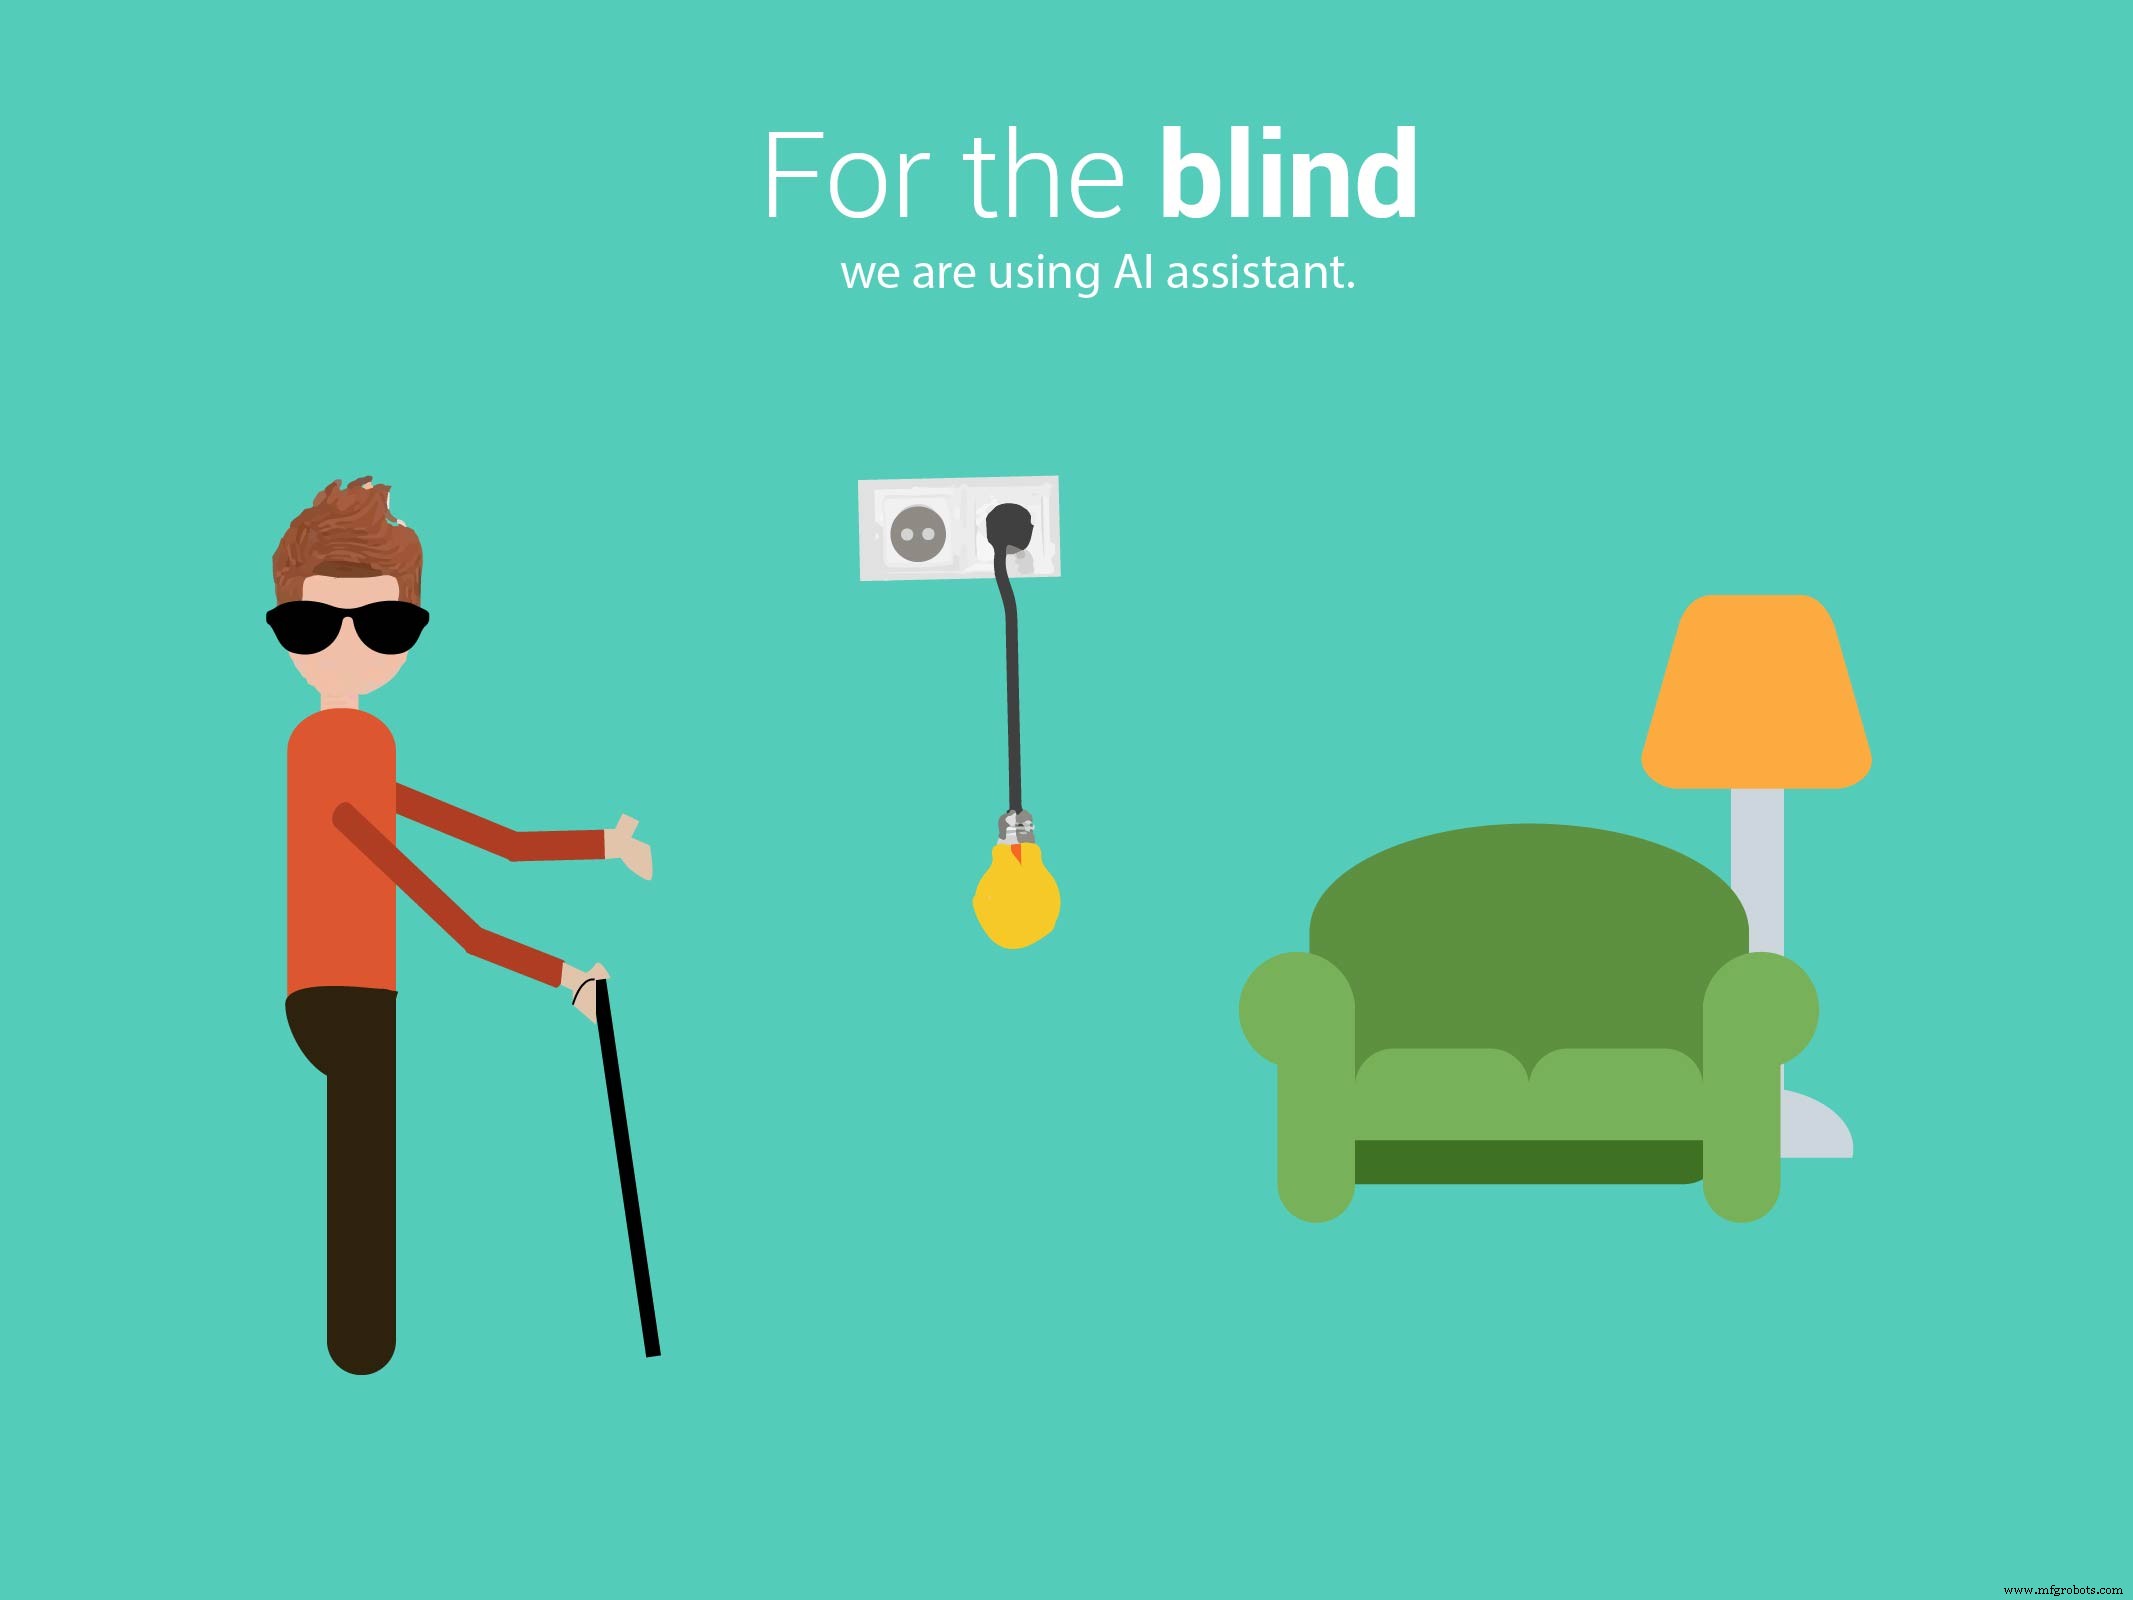
- For developing the android app we are using android studio and to convert voice to text we are using the standard google api.
- For speech recognition we are using acoustic-phonetic speech parameters for speaker-independent speech recognition in the android app.
- We have the AI (artificial intelligence) virtual assistant which uses deep learning techniques like CNN (Convolutional Neural Network) using python to implement the natural language processing.
- For the augmented reality app we are using Unity IDE and VuforiaSDK (It is an Augmented Reality Software Developments Kit (SDK) for mobile devices that enables the creation of Augmented Reality applications).
Code
- Arduino code for digital energy reading and cost calculation
- Arduino implementing JARVIS connection to relay using Arduino
Arduino code for digital energy reading and cost calculationArduino
This code implements the energy units consumed by an appliance connected to the Arduino.Instructions :
1. Make the connections and insert a mobile number in the Arduino code
2. Upload the code to an Arduino 101
3. Run the code
4. Send an SMS from any mobile to the mobile number specified in the code in the format #anytext*
5. A reply containing the units consumed and the cost would be received
#include <LiquidCrystal.h>
LiquidCrystal lcd(7,6,5,4,3,2);

int led=13; // declering LED in 13th pin
#define pulsein 8 //defining the pulse input pin 8
unsigned int pusle_count=0; //Declaring Pulse count type as integer
float units=0; //Declaring units as Float
unsigned int rupees=0; //declaring rupees types as unsigned integer

unsigned int temp=0,i=0; //declaring temp& i as unsigned integer

char str[70],flag1=0,flag2=0; // character length as string and declaring flags


void setup()
{
  lcd.begin(16,2);  // initializing LCD type as 16x2
  Serial.begin(9600); // initializing serial baud rate as 9600
  pinMode(led, OUTPUT);
  pinMode(pulsein, INPUT);
   digitalWrite(pulsein, HIGH);
  lcd.setCursor(0,0);
  lcd.print("Wireless Energy");
  lcd.setCursor(0,1);
  lcd.print("      Meter    ");
  delay(2000);
  lcd.clear();
  lcd.print("By   ");
  delay(2000);
  lcd.clear();
  lcd.print("GSM Initilizing...");
  gsm_init();
  lcd.clear();
  lcd.print("System Ready");
  Serial.println("AT+CNMI=2,2,0,0,0");
  init_sms();
  send_data("System Ready");
  send_sms();
  delay(1000);
  digitalWrite(led, LOW);
  lcd.clear();
}

void loop()
{
    serialEvent();  // checking serial event
    units=rupees/5.0;  // calculation of unit
    lcd.setCursor(0,0);
    lcd.print("Units:");
    lcd.print(units);
    lcd.print("      ");
    lcd.setCursor(0,1);
    lcd.print("Rupees:");
    lcd.print(rupees);
    lcd.print("      ");
    read_pulse();

    if(temp==1)
    {
          check();
    }
}

void serialEvent() // serial event for receiving and checking the incoming sms
{
  while(Serial.available())
  {
    if(Serial.find("#"))
    {
      digitalWrite(led, HIGH);
      delay(1000);
      digitalWrite(led, LOW);
      while (Serial.available())
      {
      char inChar=Serial.read();
      str[i++]=inChar;
      if(inChar=='*')
      {
        temp=1;
        return;
      }
      }
    }
   }
 }

void init_sms() //initializing & configuration of sending message
{
   Serial.println("AT+CMGF=1");
   delay(200);
   Serial.println("AT+CMGS=\"INSERT MOBILE NUMBER HERE\"");
   delay(200);
}

void send_data(String message)
{
  Serial.println(message);
  delay(200);
}

void send_sms()
{
  Serial.write(26);
}

//Reading Pulse from Energy Meter
void read_pulse()
{
    if(!digitalRead(pulsein))
    {
      digitalWrite(led, HIGH);
      units++;
      rupees=units*5;
      while(!digitalRead(pulsein));
      digitalWrite(led,LOW);

    }
}

//Checking the status of Message
void check()
{

     if(!(strncmp(str,"units",5)))
      {
        Serial.println("AT+CMGF=1");
   delay(200);
   Serial.println("AT+CMGS=\"INSERT MOBILE NUMBER HERE\"");
   delay(200);
       lcd.setCursor(0,1);
       send_data("Energy Meter Unit:");
       Serial.println(units);
       send_data("\nRupees:");
       Serial.println(rupees);
       delay(200);
       Serial.write(26);
       flag1=1;
       flag2=1;
       temp=0;
      }
     }


void message_sent()
{
  lcd.clear();
  lcd.print("Message Sent.");
  delay(1000);
}

void gsm_init()
{
  lcd.clear();
  lcd.print("Finding Module..");
  boolean at_flag=1;
  while(at_flag)
  {
    Serial.println("AT");
    while(Serial.available()>0)
    {
      if(Serial.find("OK"))
      at_flag=0;
    }
    delay(1000);
  }

  lcd.clear();
  lcd.print("Module Connected..");
  delay(1000);
  lcd.clear();
  lcd.print("Disabling ECHO");
  boolean echo_flag=1;
  while(echo_flag)
  {
    Serial.println("ATE0");
    while(Serial.available()>0)
    {
      if(Serial.find("OK"))
      echo_flag=0;
    }
    delay(1000);
  }

  lcd.clear();
  lcd.print("Echo OFF");
  delay(1000);
  lcd.clear();
  lcd.print("Finding Network..");
  boolean net_flag=1;
  while(net_flag)
  {
    Serial.println("AT+CPIN?");
    while(Serial.available()>0)
    {
      if(Serial.find("+CPIN: READY"))
      net_flag=0;
    }
    delay(1000);
  }
  lcd.clear();
  lcd.print("Network Found..");
  delay(1000);
  lcd.clear();
}
Arduino implementing JARVIS connection to relay using ArduinoArduino
This is a code implementing serial Bluetooth transfer of characters between the android app and the Arduino.# define CH3 7
# define CH4 4
# define CH5 5
# define CH6 6
void setup()
{
Serial.begin(9600);
pinMode(CH3, OUTPUT);
pinMode(CH4, OUTPUT);
pinMode(CH5, OUTPUT);
pinMode(CH6, OUTPUT);
//Provide power to both LEDs
//Turn OFF any power to the Relay channels
digitalWrite(CH3, HIGH);
digitalWrite(CH4, HIGH);
digitalWrite(CH5, HIGH);
digitalWrite(CH6, HIGH);
delay(2000); //Wait 2 seconds before starting sequence
}
void loop()
{
delay(100);
if(Serial.available())
{
//Serial.println(sum1);
char c = Serial.read();
Serial.print(c);
if(c=='b')
{
//coffee off
}
else if(c=='c')//light on
{digitalWrite(CH4 ,LOW);
delay(100);}
else if(c=='d')//fan on
{digitalWrite(CH6,LOW);
delay(100);}
else if(c=='k')//coffee on
{digitalWrite(CH5,LOW);
delay(100);}
else if(c=='g')//coffee off
{digitalWrite(CH5,HIGH);
delay(100);}
else if(c=='e')//light off
{digitalWrite(CH4,HIGH);
delay(100);}
else if(c=='f')//fan off
{digitalWrite(CH6,HIGH);
delay(100);}
else if(c=='z')//goodbye
{digitalWrite(CH6,HIGH);
digitalWrite(CH4,HIGH);
digitalWrite(CH3,HIGH);
digitalWrite(CH5,HIGH);
delay(500);
digitalWrite(CH5,LOW);
delay(500);
digitalWrite(CH5,HIGH);
delay(500);
digitalWrite(CH5,LOW);
delay(500);
digitalWrite(CH5,HIGH);
delay(10000);
}
}
}
Custom parts and enclosures
Instructions :1. Download and install the app
2. Make sure that the phone is connected to the internet
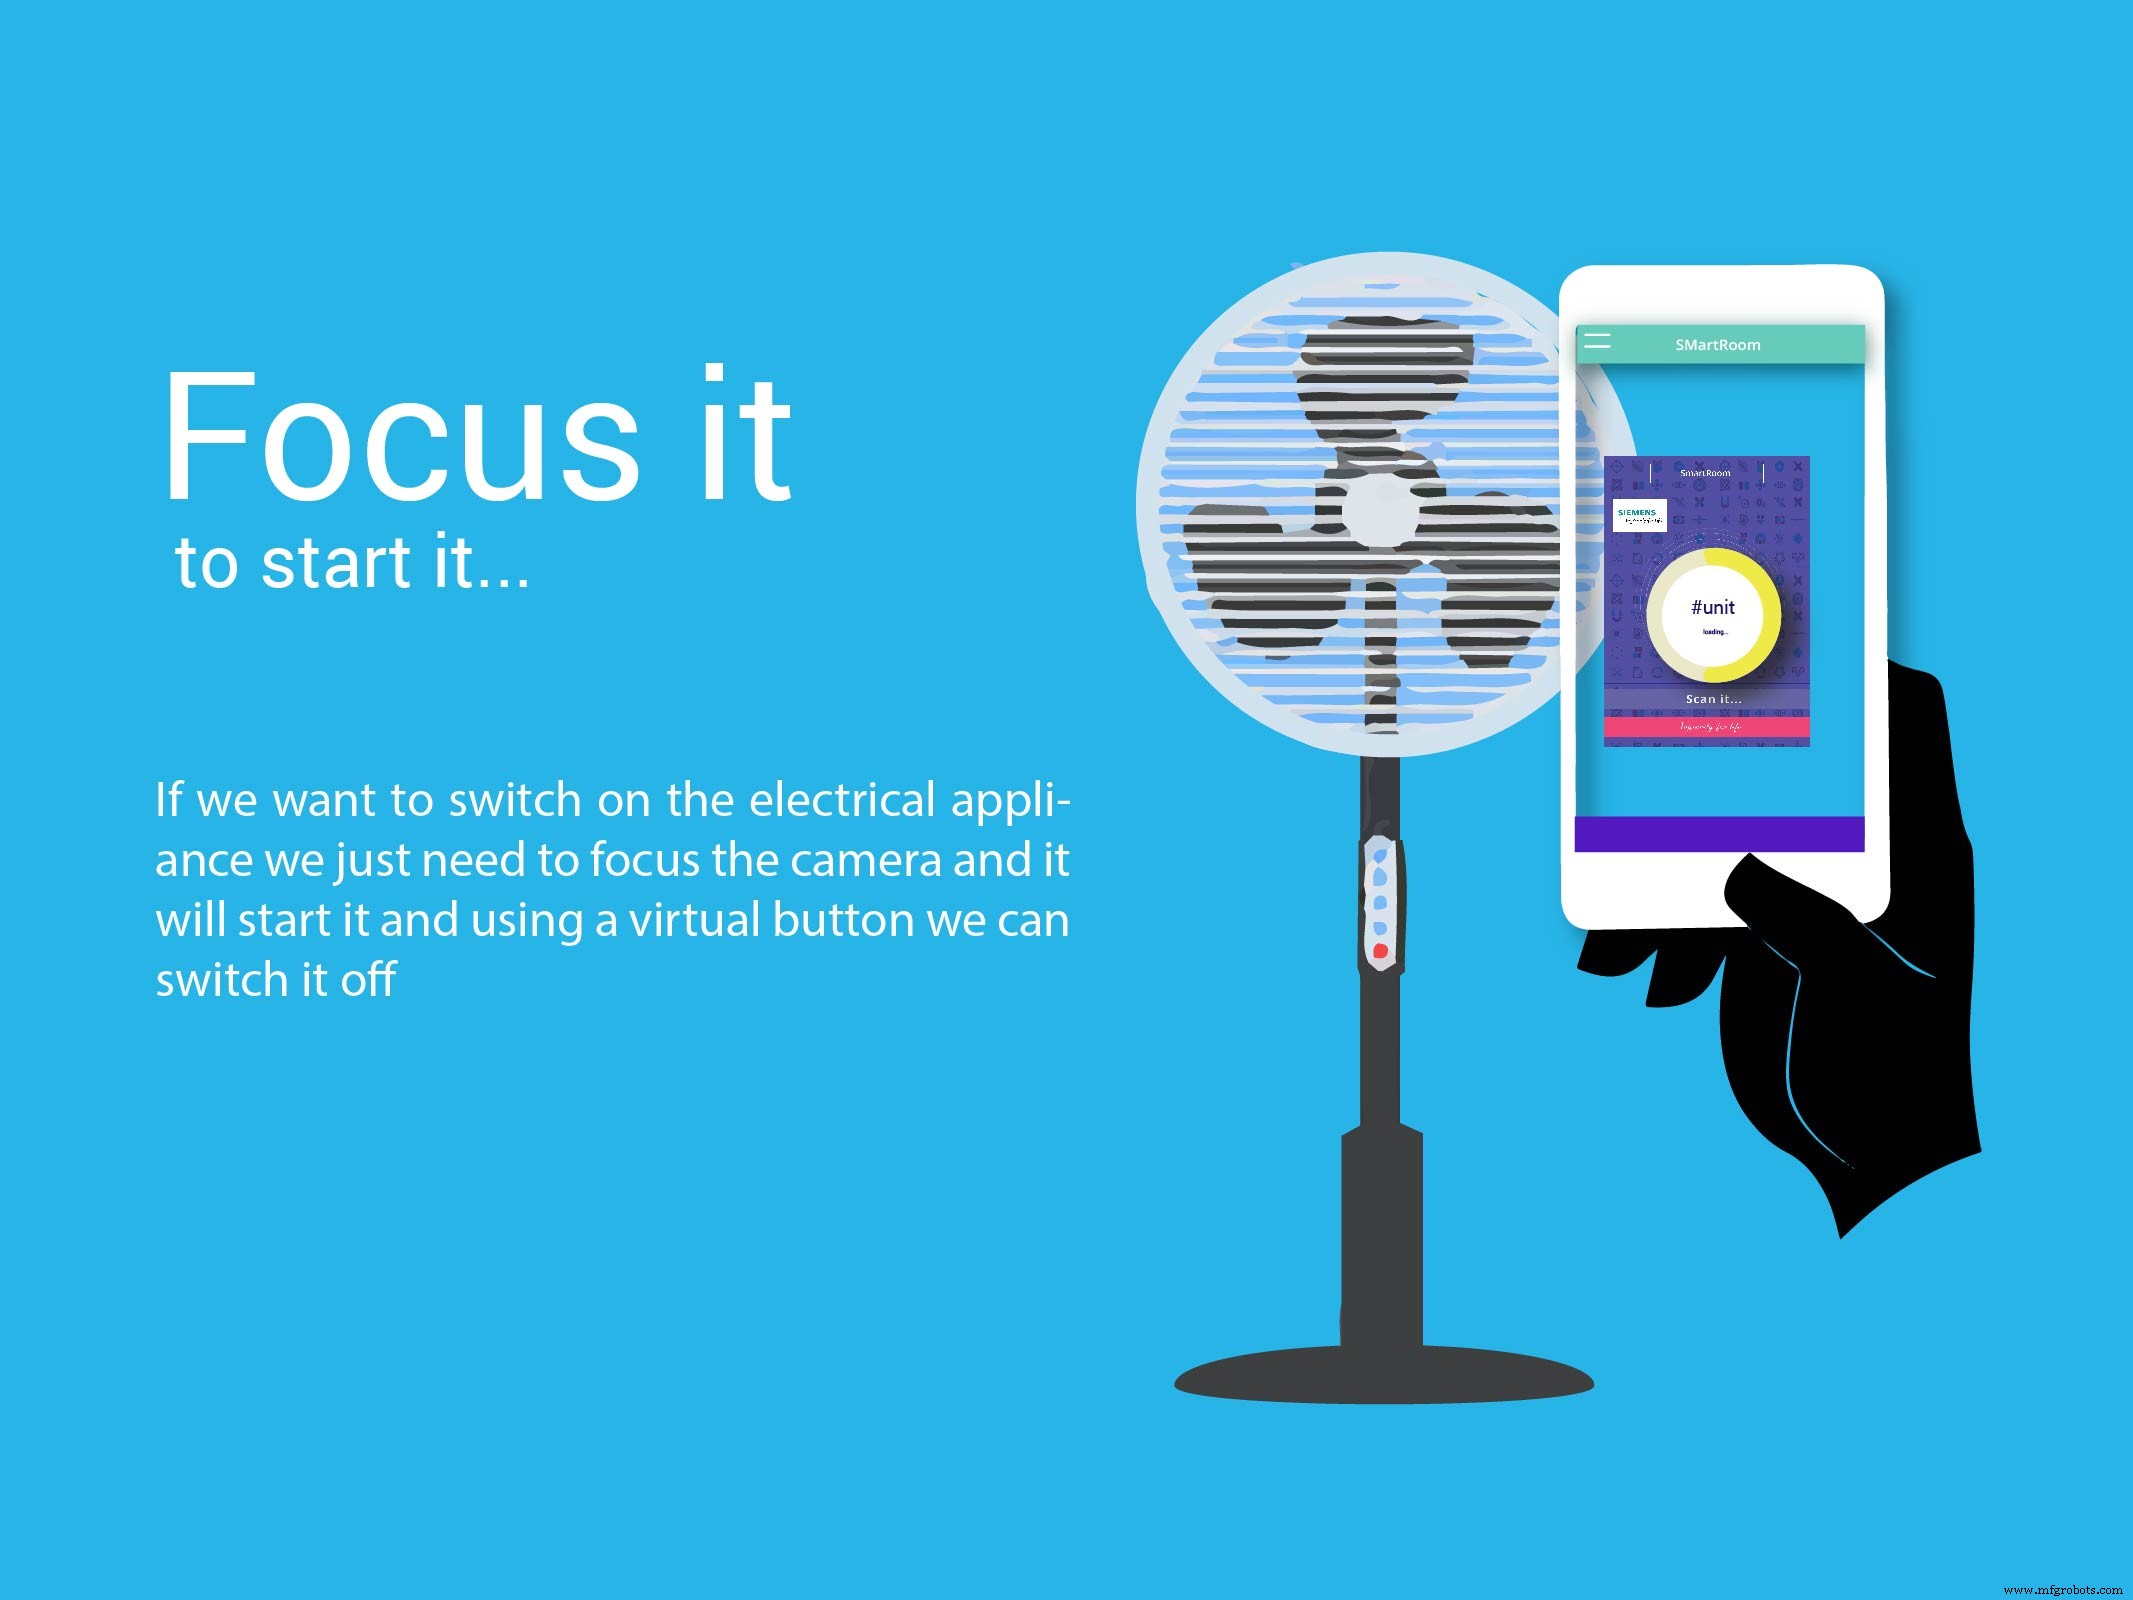
3. Start the app and point it to an appliance which has been configured with Vuforia (the default Vuforia marker is used here)
4. The appliance should start
5. To turn off the appliance, click on the virtual button that appears on the screen whenever phone is pointed towards the devicejarvisaugmented_I2zWAu2jGG.apk
Schematics
 Kindly note: Active Internet Connection on phone is required at all times
Instructions :
1. Install the app on an android phone
2. After setting up the hardware and running it successfully, start the app
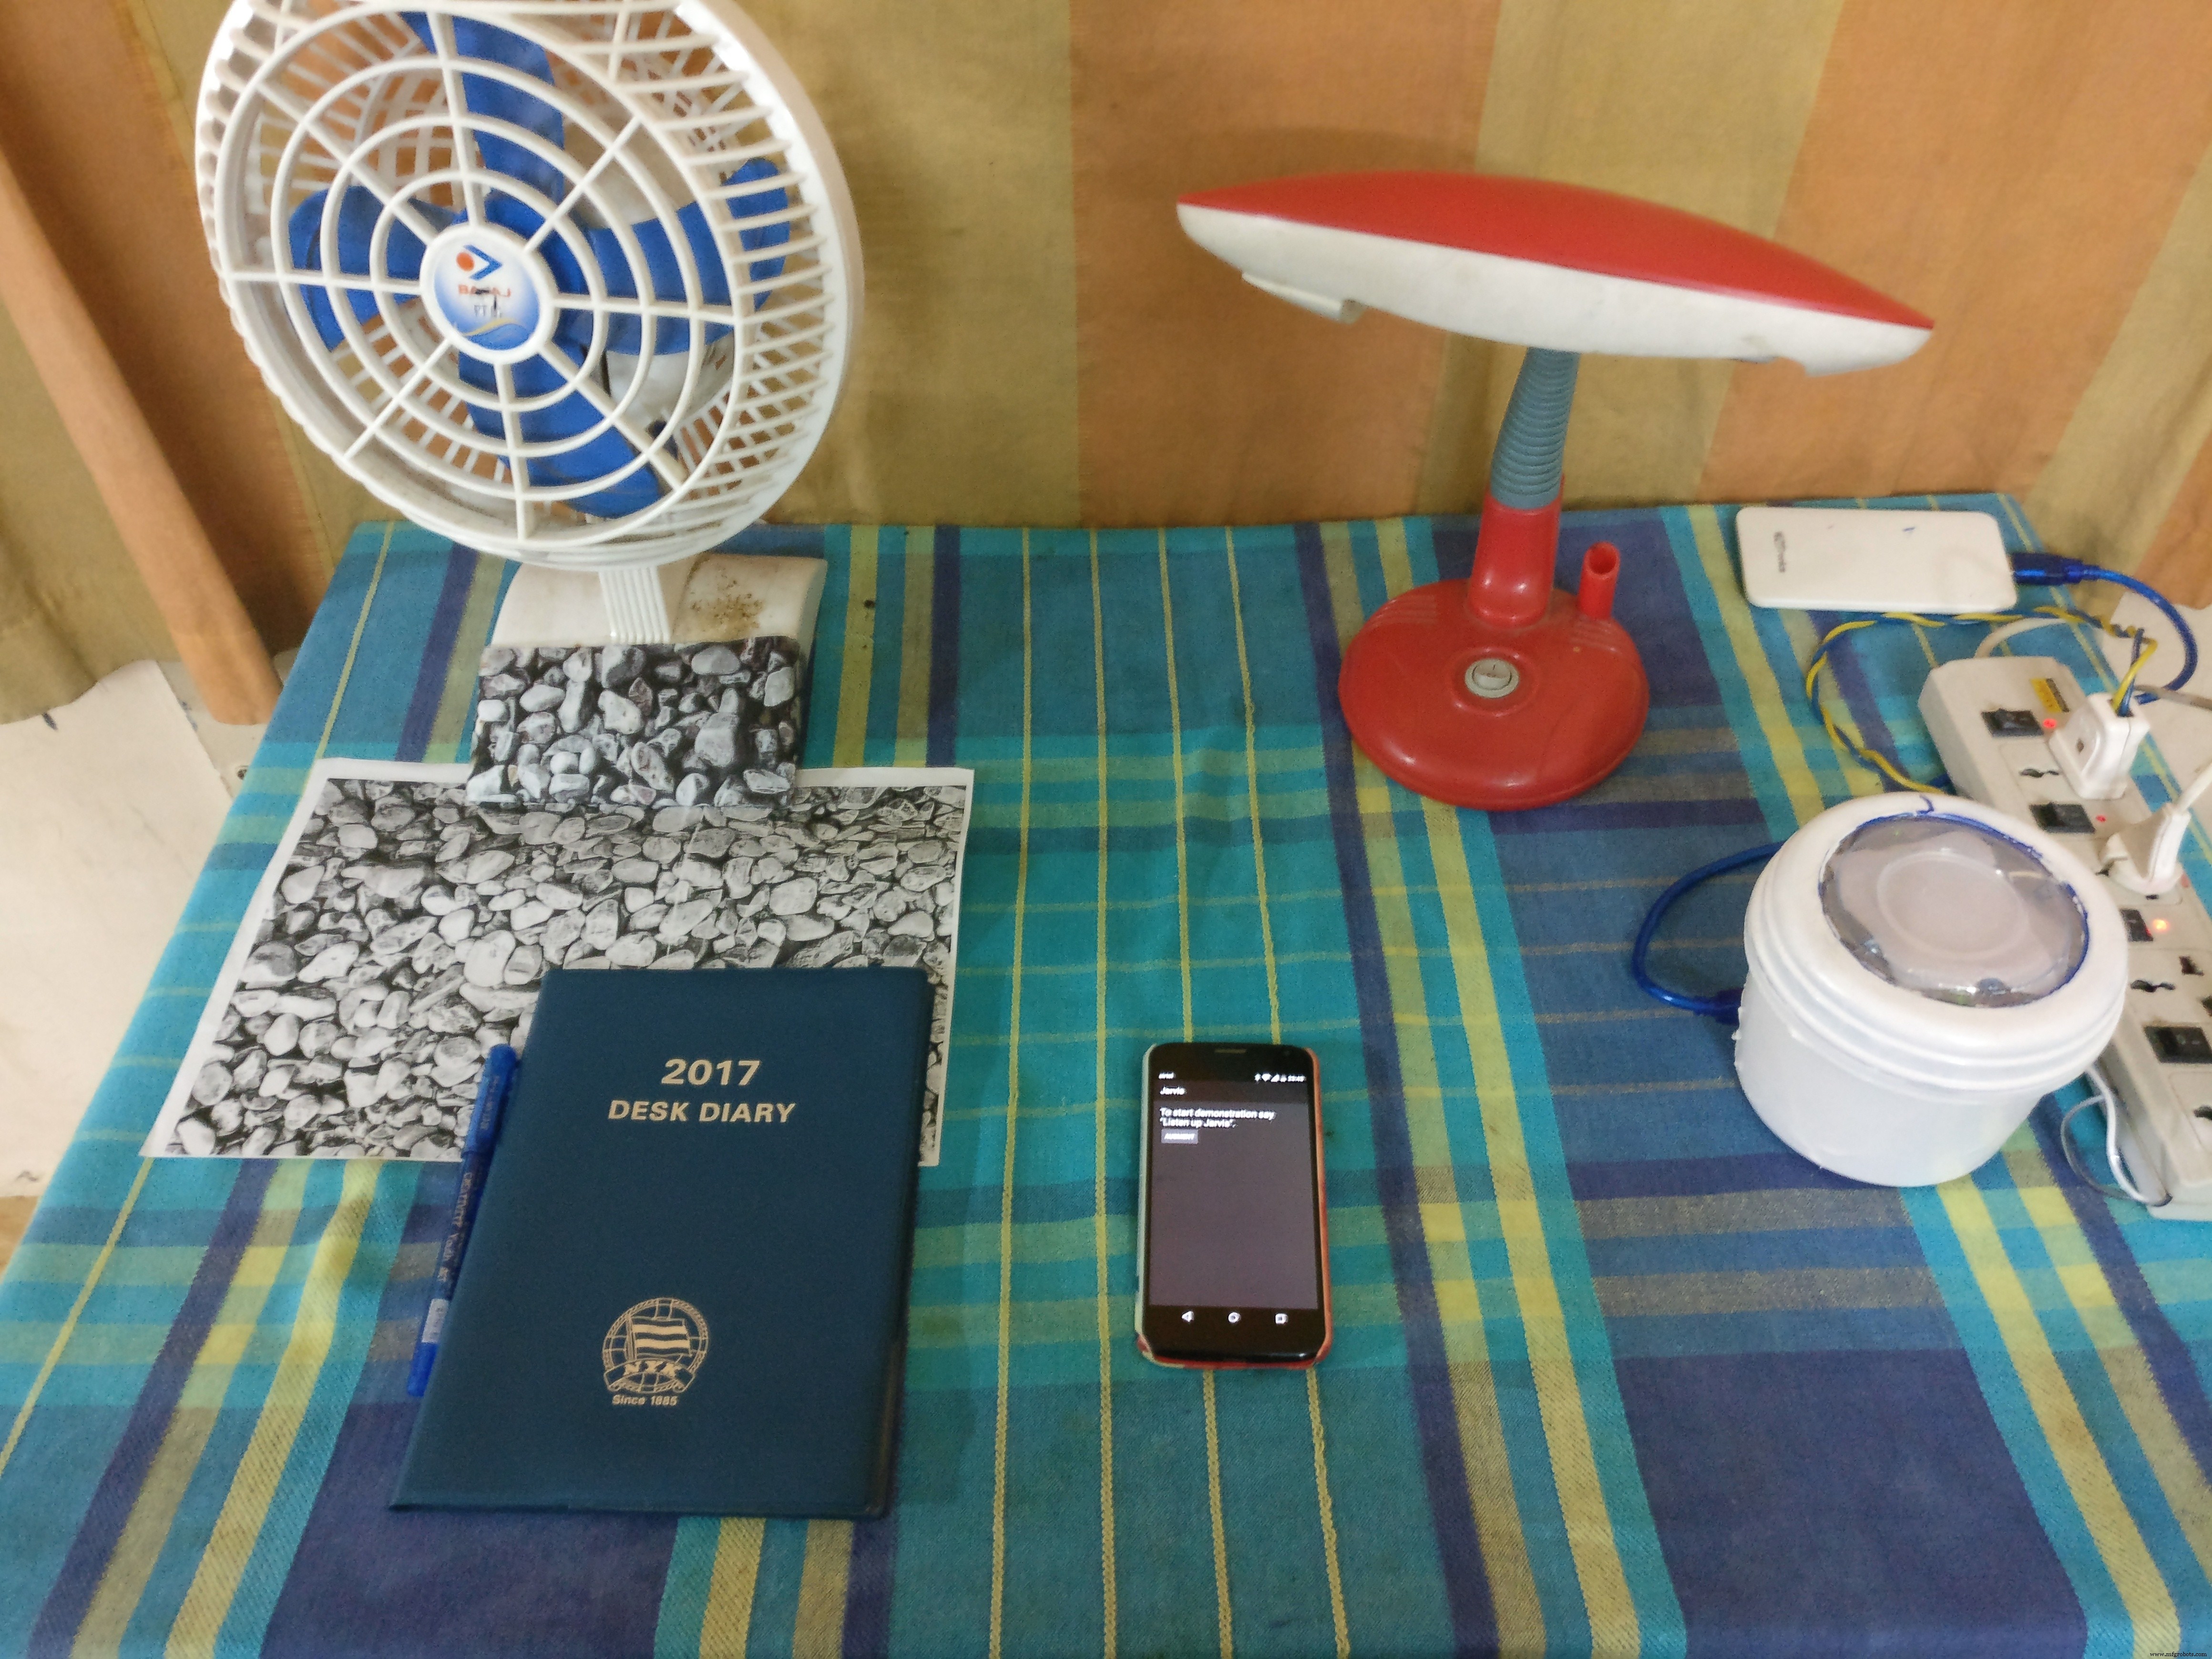
3. For using Virtual Assistant (Voice), say the keyword, 'Listen Up JARVIS'. This should activate the agent
3.1 Speak your command clearly
3.2 The agent should provide a response
4. To start the augmented reality app, click on the augment button; a blank screen should appear
4.1 Open the Jarvis Augmented App on a different phone (NOTE : The J.A.R.V.I.S. android app should be on a different phone)
4.2 Proceed to instructions given in JarvisAugmented for implementing augmented reality
NOTE : 1. If app is stuck at any point, try restarting the app
2. If a message similar to, 'Could not open Microphone' appears on the screen, restart the app
3. This app is implemented using HC05 Bluetooth module to increase the scope of the project. Hence, HC05 Bluetooth Module is recommendedapp-release_eo3LK2AsLV.apk
Build a 7‑Segment Clock with Arduino Nano, DS3231 RTC, and LDR Auto‑Brightness
Build an IR Sensor Project with Arduino UNO – Simple Guide
Manufacturing process
- Build a Bluetooth‑controlled Arduino Spybot
- Build an Autonomous Home Assistant Robot: Full Parts List & Setup Guide
- Advanced Home Monitoring System with Arduino Mega and IoT Sensors
- Arduino-Driven GrowBox Controller – Open-Source Firmware & Hardware Guide
- Smart Domotic Greenhouse: Automated Climate Control with Arduino
- Arduino Tennis Game – Build a Virtual Racquet Experience with NeoPixel, Sensors, and Bluetooth
- ED BMSdiag – Arduino CAN‑BUS & OBD‑II Diagnostic Kit
- WARAN Home Automation Kit: Raspberry Pi, Arduino, Sensors & Components
- Smart Home Automation with Bluetooth Connectivity
- Arduino UNO Web-Enabled Servo Control with PHPoC WiFi Shield