


Build an Arduino Memory Game (Simon Clone) – Step‑by‑Step Tutorial
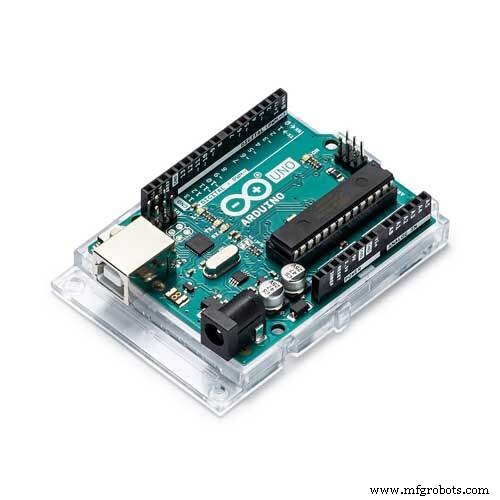
Components and supplies
 |
| × | 1 | |||
| × | 1 | ||||
| × | 1 | ||||
| × | 1 | ||||
| × | 1 | ||||
| × | 1 | ||||
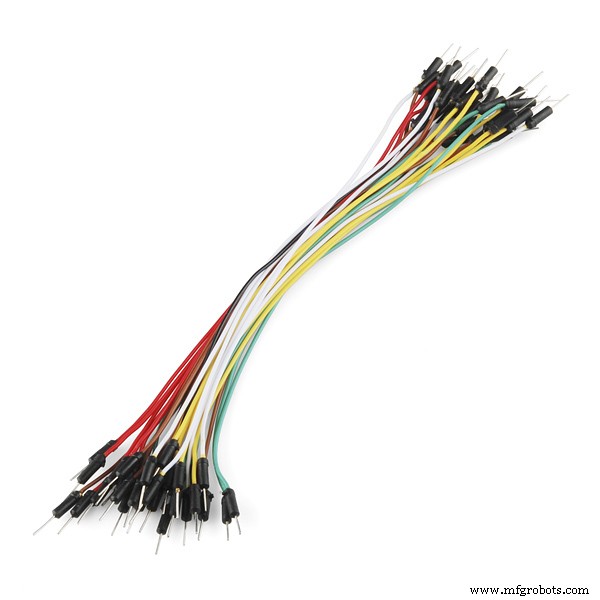 |
| × | 1 |
Apps and online services
 |
|
About this project
Do you remember the game "Simon"? A lot of people my age (born in the 70s) got to lose a lot of time playing it. The game was simple, it had 4 buttons of different colors that would light up in sequence and you had to repeat the sequence. Every time, you got it right, the game would give you the sequence again with an additional color at the end.
I got one for Xmas long long ago but then I moved and moved, and moved some more so the game got lost in one of the many boxes that never get unpacked from a move to another...
As an "adult", I discovered the joys of Arduino and with that, got the opportunity to revive my long lost time wasting friend.
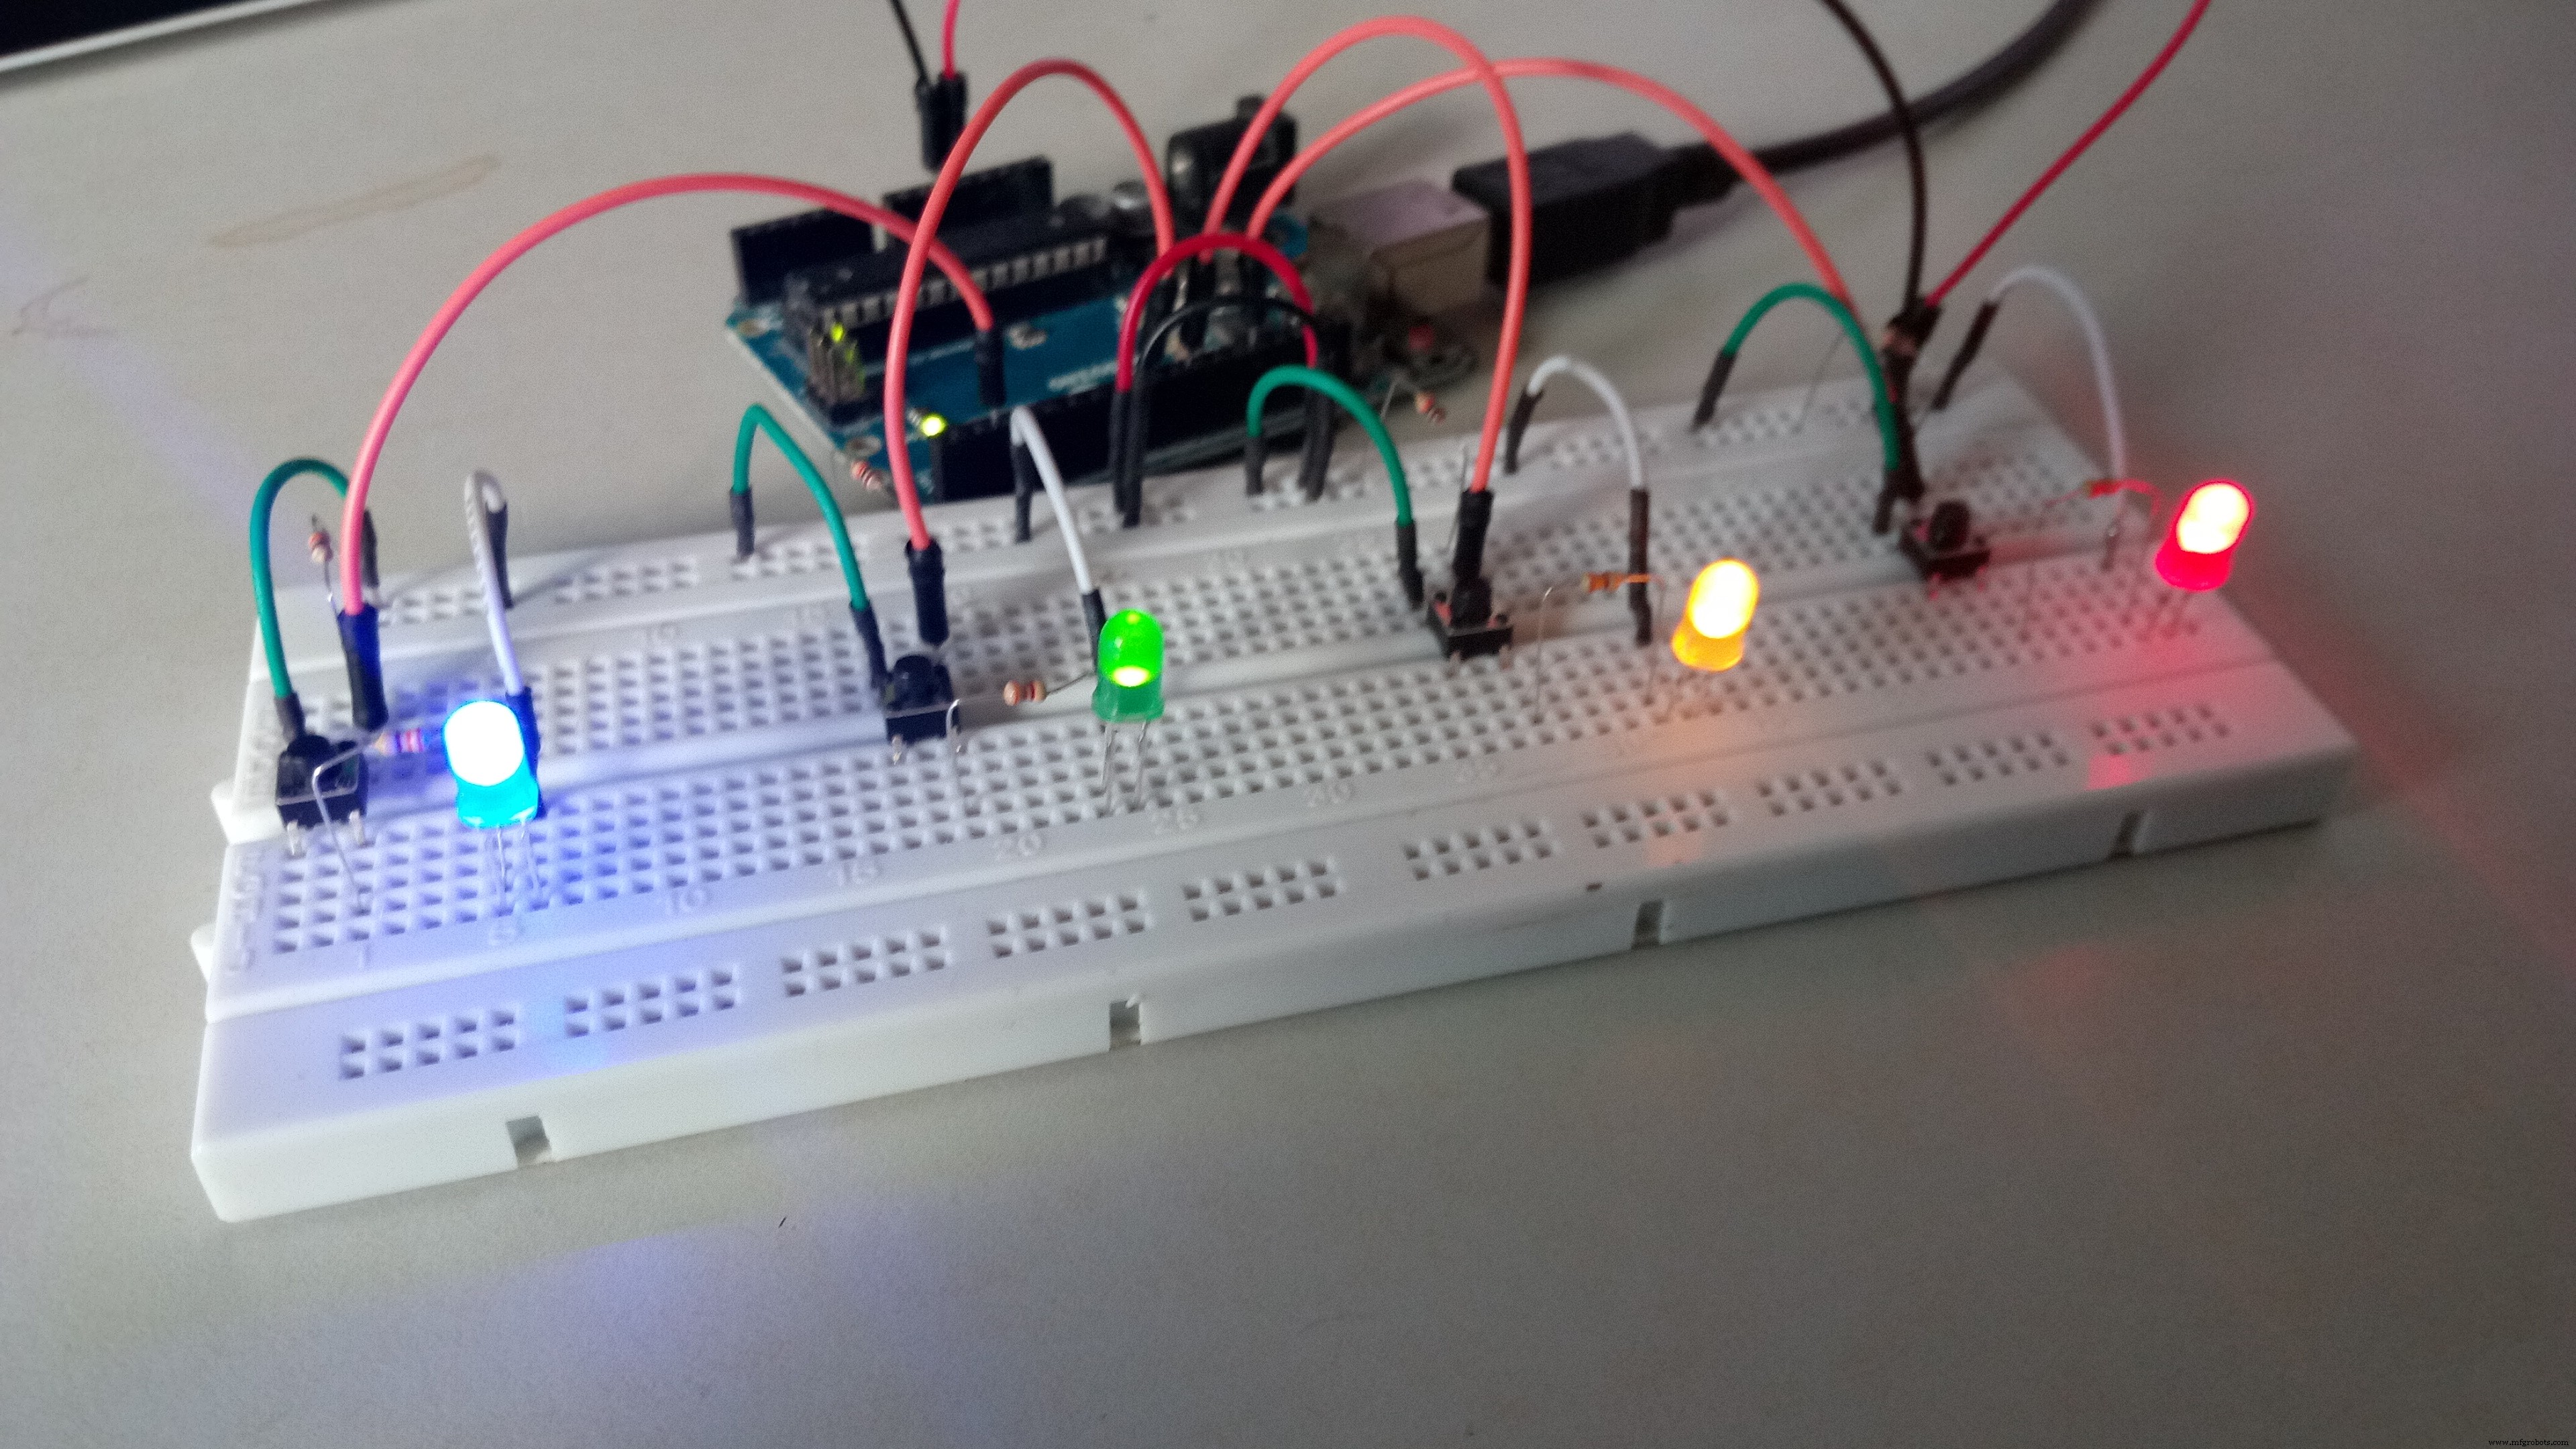
This tutorial will show you how to make a similar game using an Arduino Uno a few LEDs and resistors and a relatively simple circuit.
The program itself may be a little complicated for a beginner so I tried to explain in the code what it does and how.
The simplest way to get this game running is this.
1) Connect the circuit exactly as shown on the diagram. The color of the wires is not relevant so if you run out of black wires, it's ok. :)
2) Paste the source code into your favorite Arduino editor and upload it to the board
3) Play the game
The game starts after about 3 seconds with 5 slow flashes of all the LEDs.
If one or more LEDs don't flash, check the wiring. On my board, the very small buttons don't always sit properly and have a tendency of popping themselves out.
If the wiring looks right, try inverting a working LED with a non working one to see if it's wiring or the LED itself.
After the 5 flashes complete, One LED will light up. I can't tell you which, it's a surprise :) Press the button for that LED. This LED will light up again followed by a new one. Press the correct buttons in sequence... You see where I'm going with that...
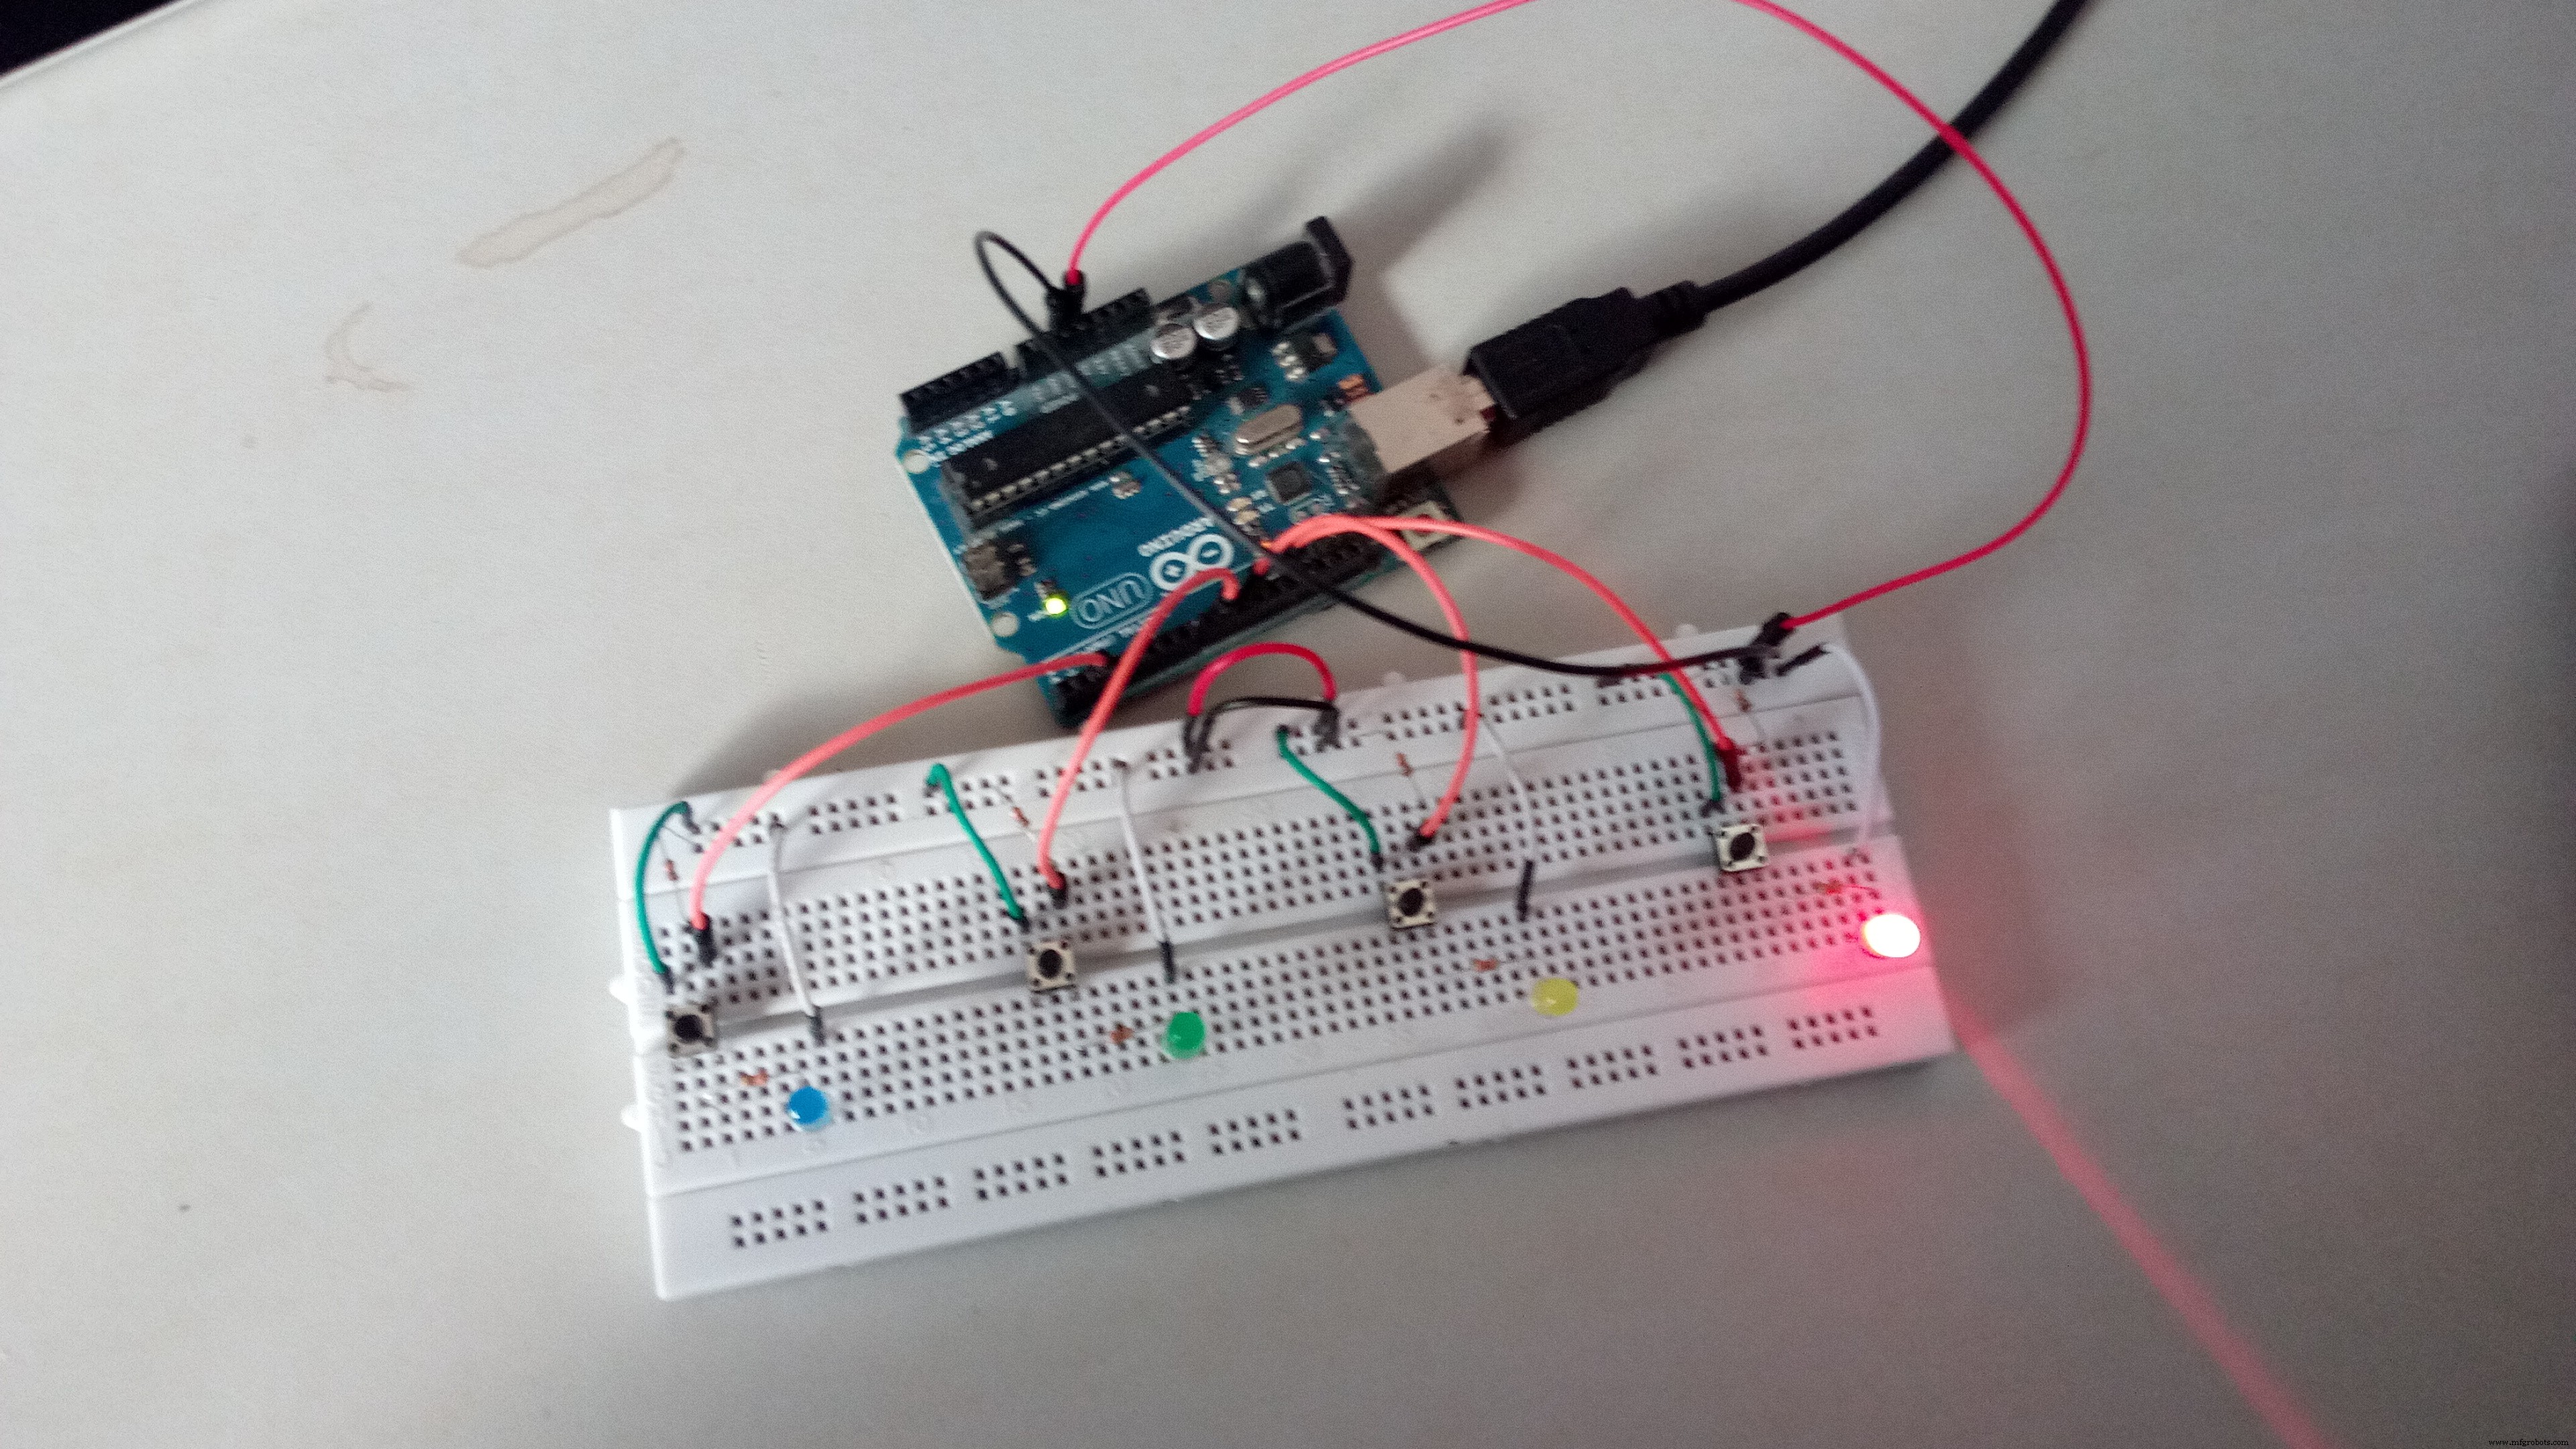
Then, fairly soon, you'll see them all flash rapidly. That means you lost. :D
The last sequence you were given will play so you can count your points followed by the 5 slow blinks from earlier indicating the game is starting again.
You have 2 seconds to press each button.
There you go! Have fun!
Want to make it a little harder? Why not change the top line in the code to a different value?
#define PLAYER_WAIT_TIME 2000
Or you could add another LED, if you have one... For this, you first need to reproduce this portion of the circuit:
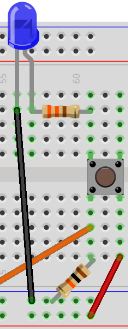
The orange wire here will go to any unused pin on your Arduino (Avoid 0 and 1 though)
Then modify the following lines in the code:
byte noPins = 4
byte pins[] = {2, 13, 10, 8};
if you added one LED on pin 6, the code would become
byte noPins = 5
byte pins[] = {2, 13, 10, 8, 6};
A small tip for writing Arduino code:
void setup() {
 delay(3000);
 Serial.begin(9600);
 Reset();
}
Put a short delay as the first statement of your setup() function. It's very easy to make the Arduino go into an infinite loop or lock it up in some way. If that happens that short delay allows you reset you Arduino and upload a blank sketch before it locks up again. .
I eventually took this little idea and made it portable...
If you want to see a really cool idea for a similar (yet way more advanced) game. Check this https://www.instructables.com/id/Lego-Mini-Memory-Game by Peter Kent. He made the game on mobile with an interface to a Lego car. It's really awesome!
Code
- Memory Game Code
Memory Game CodeArduino
This is the entire code for the game. Simply copy and paste it in your favorite IDE and upload it to the Arduino.#define PLAYER_WAIT_TIME 2000 // The time allowed between button presses - 2s
byte sequence[100]; // Storage for the light sequence
byte curLen = 0; // Current length of the sequence
byte inputCount = 0; // The number of times that the player has pressed a (correct) button in a given turn
byte lastInput = 0; // Last input from the player
byte expRd = 0; // The LED that's suppose to be lit by the player
bool btnDwn = false; // Used to check if a button is pressed
bool wait = false; // Is the program waiting for the user to press a button
bool resetFlag = false; // Used to indicate to the program that once the player lost
byte soundPin = 5; // Speaker output
byte noPins = 4; // Number of buttons/LEDs (While working on this, I was using only 2 LEDs)
// You could make the game harder by adding an additional LED/button/resistors combination.
byte pins[] = {2, 13, 10, 8}; // Button input pins and LED ouput pins - change these vaules if you wwant to connect yourbuttons to other pins
// The number of elements must match noPins below
long inputTime = 0; // Timer variable for the delay between user inputs
void setup() {
delay(3000); // This is to give me time to breathe after connection the arduino - can be removed if you want
Serial.begin(9600); // Start Serial monitor. This can be removed too as long as you remove all references to Serial below
Reset();
}
///
/// Sets all the pins as either INPUT or OUTPUT based on the value of 'dir'
///
void setPinDirection(byte dir){
for(byte i = 0; i < noPins; i++){
pinMode(pins[i], dir);
}
}
//send the same value to all the LED pins
void writeAllPins(byte val){
for(byte i = 0; i < noPins; i++){
digitalWrite(pins[i], val);
}
}
//Makes a (very annoying :) beep sound
void beep(byte freq){
analogWrite(soundPin, 2);
delay(freq);
analogWrite(soundPin, 0);
delay(freq);
}
///
/// Flashes all the LEDs together
/// freq is the blink speed - small number -> fast | big number -> slow
///
void flash(short freq){
setPinDirection(OUTPUT); /// We're activating the LEDS now
for(int i = 0; i < 5; i++){
writeAllPins(HIGH);
beep(50);
delay(freq);
writeAllPins(LOW);
delay(freq);
}
}
///
///This function resets all the game variables to their default values
///
void Reset(){
flash(500);
curLen = 0;
inputCount = 0;
lastInput = 0;
expRd = 0;
btnDwn = false;
wait = false;
resetFlag = false;
}
///
/// User lost
///
void Lose(){
flash(50);
}
///
/// The arduino shows the user what must be memorized
/// Also called after losing to show you what you last sequence was
///
void playSequence(){
//Loop through the stored sequence and light the appropriate LEDs in turn
for(int i = 0; i < curLen; i++){
Serial.print("Seq: ");
Serial.print(i);
Serial.print("Pin: ");
Serial.println(sequence[i]);
digitalWrite(sequence[i], HIGH);
delay(500);
digitalWrite(sequence[i], LOW);
delay(250);
}
}
///
/// The events that occur upon a loss
///
void DoLoseProcess(){
Lose(); // Flash all the LEDS quickly (see Lose function)
delay(1000);
playSequence(); // Shows the user the last sequence - So you can count remember your best score - Mine's 22 by the way :)
delay(1000);
Reset(); // Reset everything for a new game
}
///
/// Where the magic happens
///
void loop() {
if(!wait){
//****************//
// Arduino's turn //
//****************//
setPinDirection(OUTPUT); // We're using the LEDs
randomSeed(analogRead(A0)); // https://www.arduino.cc/en/Reference/RandomSeed
sequence[curLen] = pins[random(0,noPins)]; // Put a new random value in the next position in the sequence - https://www.arduino.cc/en/Reference/random
curLen++; // Set the new Current length of the sequence
playSequence(); // Show the sequence to the player
beep(50); // Make a beep for the player to be aware
wait = true; // Set Wait to true as it's now going to be the turn of the player
inputTime = millis(); // Store the time to measure the player's response time
}else{
//***************//
// Player's turn //
//***************//
setPinDirection(INPUT); // We're using the buttons
if(millis() - inputTime > PLAYER_WAIT_TIME){ // If the player takes more than the allowed time,
DoLoseProcess(); // All is lost :(
return;
}
if(!btnDwn){ //
expRd = sequence[inputCount]; // Find the value we expect from the player
Serial.print("Expected: "); // Serial Monitor Output - Should be removed if you removed the Serial.begin above
Serial.println(expRd); // Serial Monitor Output - Should be removed if you removed the Serial.begin above
for(int i = 0; i < noPins; i++){ // Loop through the all the pins
if(pins[i]==expRd)
continue; // Ignore the correct pin
if(digitalRead(pins[i]) == HIGH){ // Is the buttong pressed
lastInput = pins[i];
resetFlag = true; // Set the resetFlag - this means you lost
btnDwn = true; // This will prevent the program from doing the same thing over and over again
Serial.print("Read: "); // Serial Monitor Output - Should be removed if you removed the Serial.begin above
Serial.println(lastInput); // Serial Monitor Output - Should be removed if you removed the Serial.begin above
}
}
}
if(digitalRead(expRd) == 1 && !btnDwn) // The player pressed the right button
{
inputTime = millis(); //
lastInput = expRd;
inputCount++; // The user pressed a (correct) button again
btnDwn = true; // This will prevent the program from doing the same thing over and over again
Serial.print("Read: "); // Serial Monitor Output - Should be removed if you removed the Serial.begin above
Serial.println(lastInput); // Serial Monitor Output - Should be removed if you removed the Serial.begin above
}else{
if(btnDwn && digitalRead(lastInput) == LOW){ // Check if the player released the button
btnDwn = false;
delay(20);
if(resetFlag){ // If this was set to true up above, you lost
DoLoseProcess(); // So we do the losing sequence of events
}
else{
if(inputCount == curLen){ // Has the player finished repeating the sequence
wait = false; // If so, this will make the next turn the program's turn
inputCount = 0; // Reset the number of times that the player has pressed a button
delay(1500);
}
}
}
}
}
}
Schematics
simonsays_siKds3Jmk2.fzz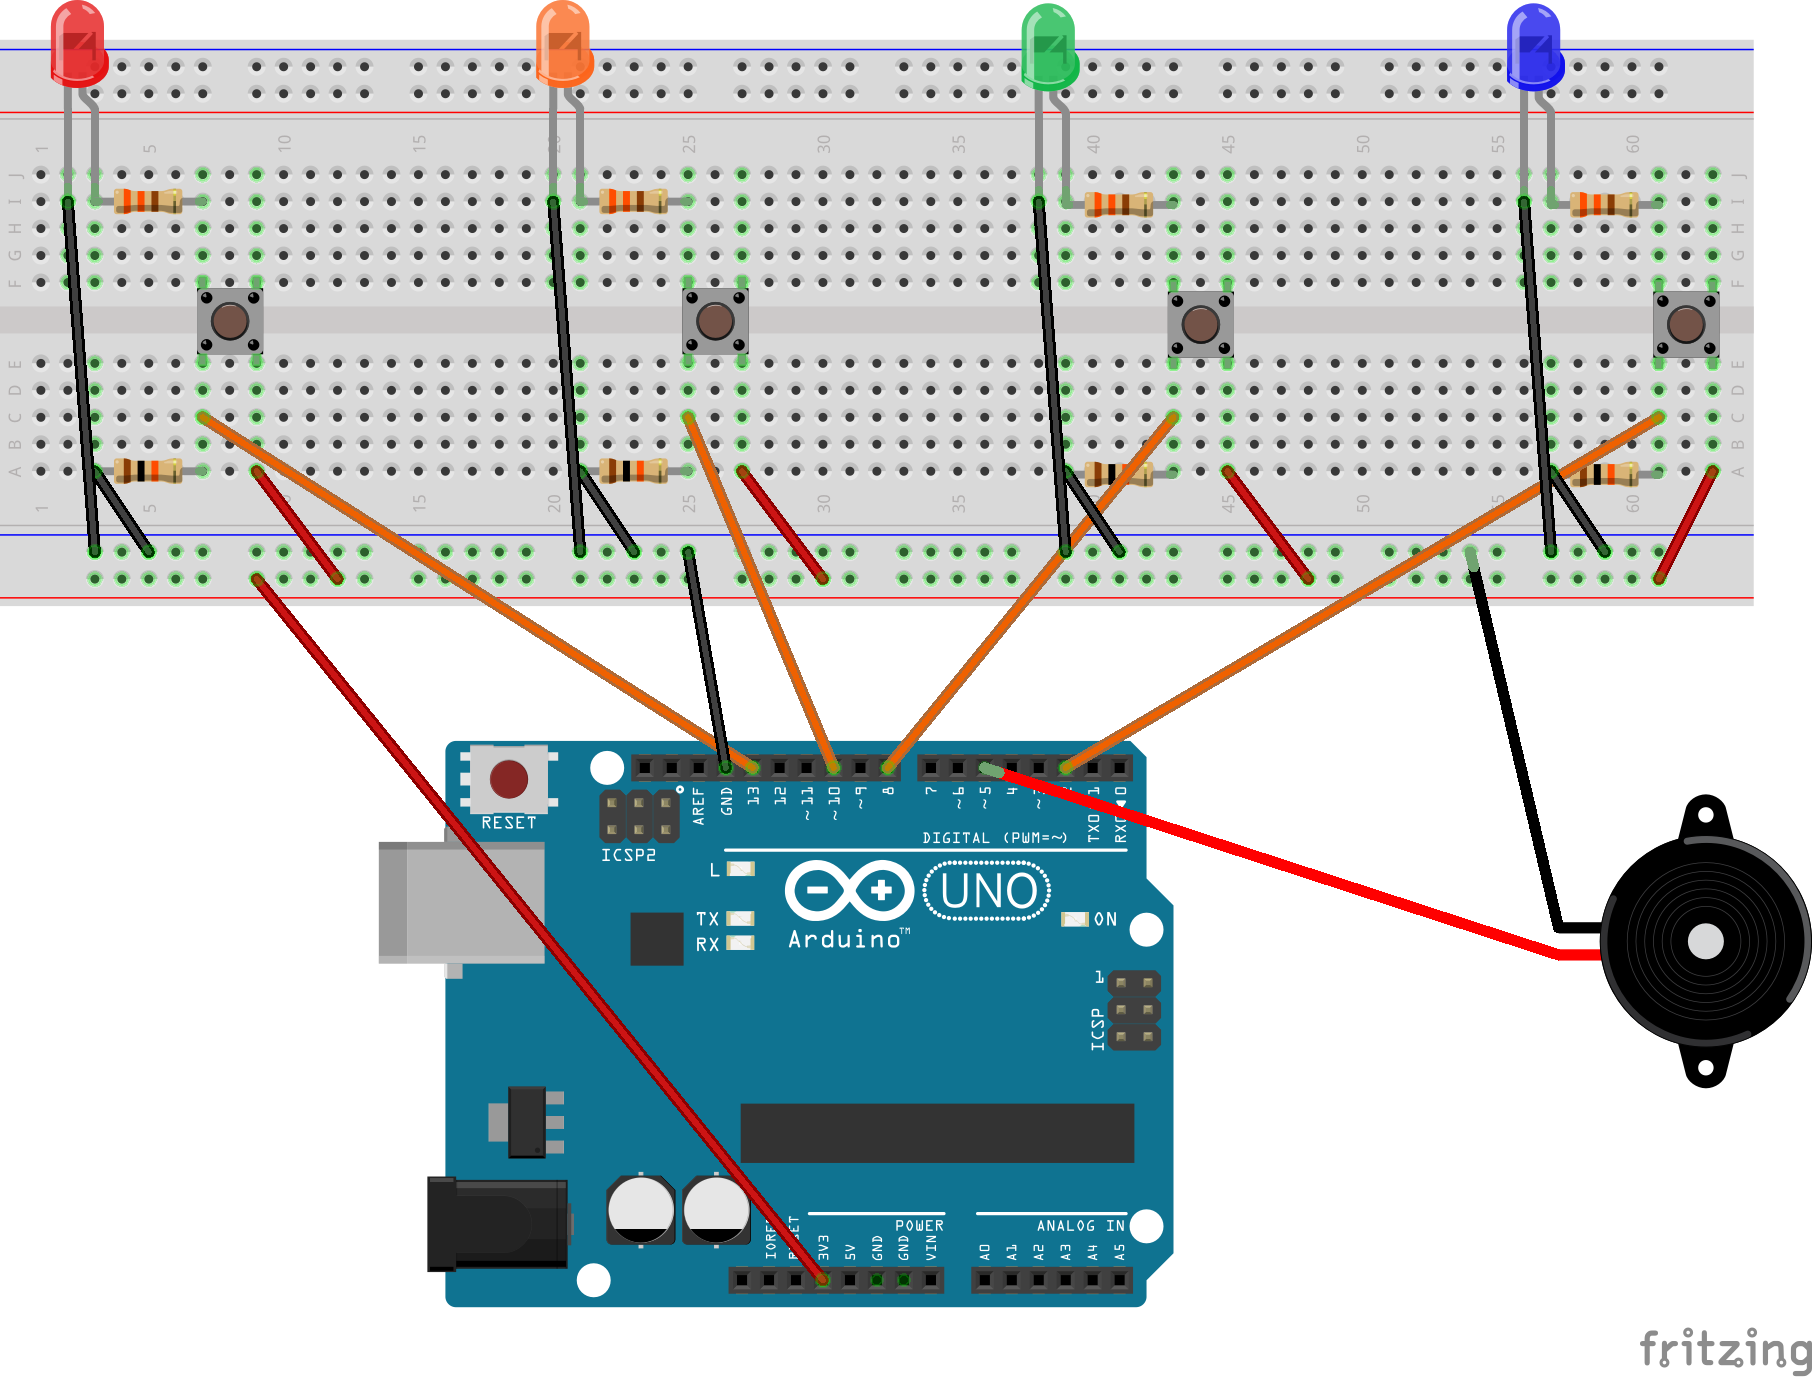
Manufacturing process
- DIY Arduino USB Gaming Controller – Build Your Own High-Performance Gamepad
- Pixel Chaser: Interactive One-Tap LED Game with Arduino Nano
- Smart Gesture-to-Text Hand Glove for Sign Language
- Arduino DMX-512 Tester Controller – Full Parts Kit for Reliable Lighting Control
- DIY LED Roulette Game – Build a One‑Person Arcade with Arduino Nano
- Bluetooth‑Controlled Arduino Mini Lift: Compact Stepper Motor Platform
- Arduino 4WD RC Car – Complete Parts List & Build Guide
- Build an Arduino Tic‑Tac‑Toe Game on a Touchscreen: A Step‑by‑Step Tutorial
- Build a Web-Based Two-Player Game with Arduino UNO & PHPoC WiFi Shield
- Build an Interactive LCD Game with Arduino UNO