


Arduino Joystick‑Controlled Mouse: Precise Cursor Navigation
Components and supplies
 |
| × | 1 | |||
| × | 1 |
Apps and online services
 |
| |||
|
About this project
As an alternative to tracking computer's cursor using a mouse or a trackpad, I have made this same application with the help of a joystick. The joystick can move the cursor in any direction (x and Y axis) and also performs click function with the built-in joystick's switch.
Basics-A joystick plainly consists of 2 potentiometers aligned in the x and y direction. The arduino reads analog values from the joystick in the range of 0 to 1023. Thus, when the joystick is in its default(center) position, the analog value also becomes close to 500(between 0 and 1023).

The arduino sketch is programmed such that when the joystick is moved away from the center, then print values in the range from -sensitivity to +sensitivity value(default vlaue set is 10) depending on the position. So, when the joystick is moved in one extreme position, the arduino prints value 10 and if the joystick is moved in other extreme position, then -10 is printed.
To print separate values for x and y direction, we will use ":" between the x and y direction values. Example:
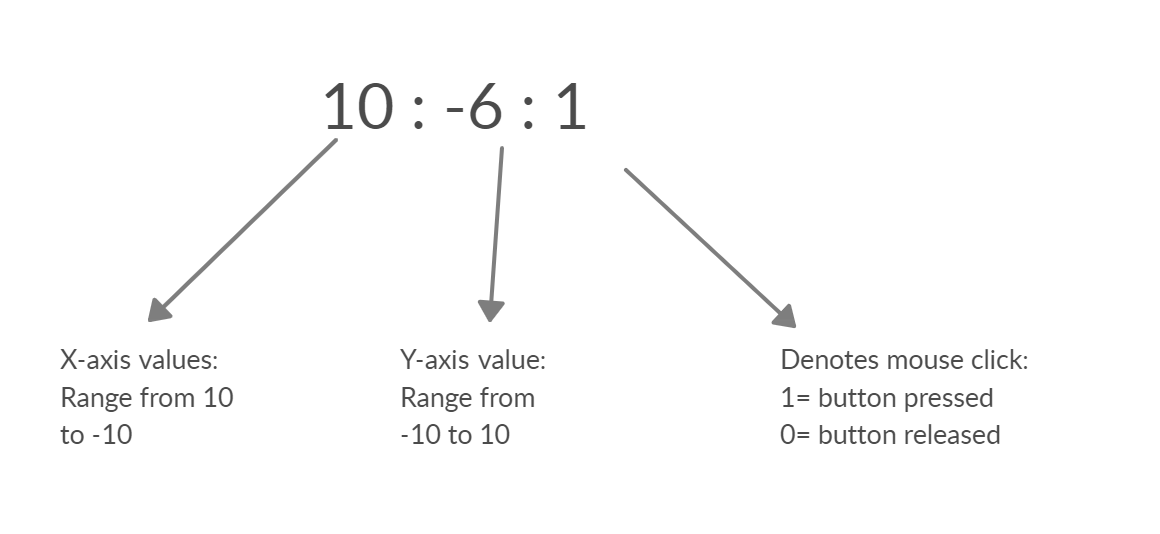
The status of joystick button(SW) is printed(1/0) on the serial monitor after the x and y values.
For the laptop/computer to recognize the values, we will need the python's pyautogui module.
Python Programming(edited 12/11/2020 - changed the library from 'pyautogui' to 'mouse')
The user must have python 3 installed on their laptop/computer. It can be downloaded from the here.
After installation, Copy the path of the python file location.
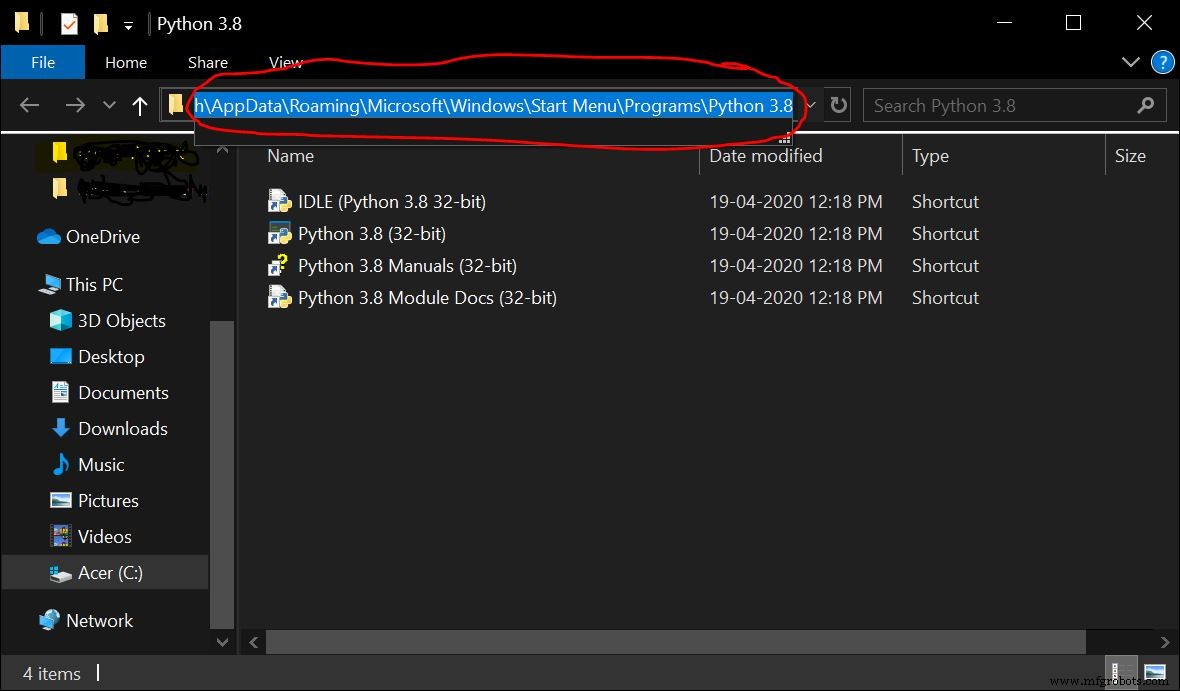
The following steps are to be performed on the command prompt. Open command prompt and enter the following-
1. cd <paste the path of the python file>
2. py –m pip install –-upgrade pip
3. py –m pip install mouse
4. py -m pip install pyserial
The mouse module is used to perform mouse action and pyserial module is used to send/receive data from the arduino. I had already installed the necessary modules, so I got this

The python program is made to read the data printed by the Arduino and recognise the x and y direction values as well as the status of switch(SW).
The current coordinates of the cursor is obtained from the mouse function mouse.get_position() which provides the cursor's X and Y co-ordinates in the form of pixels.
When the joystick is moved, the analog values provided by the arduino is added with the current cursor's position to move the cursor in the desired direction.
To move the cursor in the given direction, the function mouse.move(X+x,Y+y) satisfies this purpose.
where X and Y is the current cursor's position and x and y are the increment/decrement positions provided by the arduino.
example: mouse.moveTo(100,150) moves the cursor to 100 pixels in the x-axis and 150 pixels in the y-axis.
To perform click operation based on the SW status, mouse.click(button="left") is used.
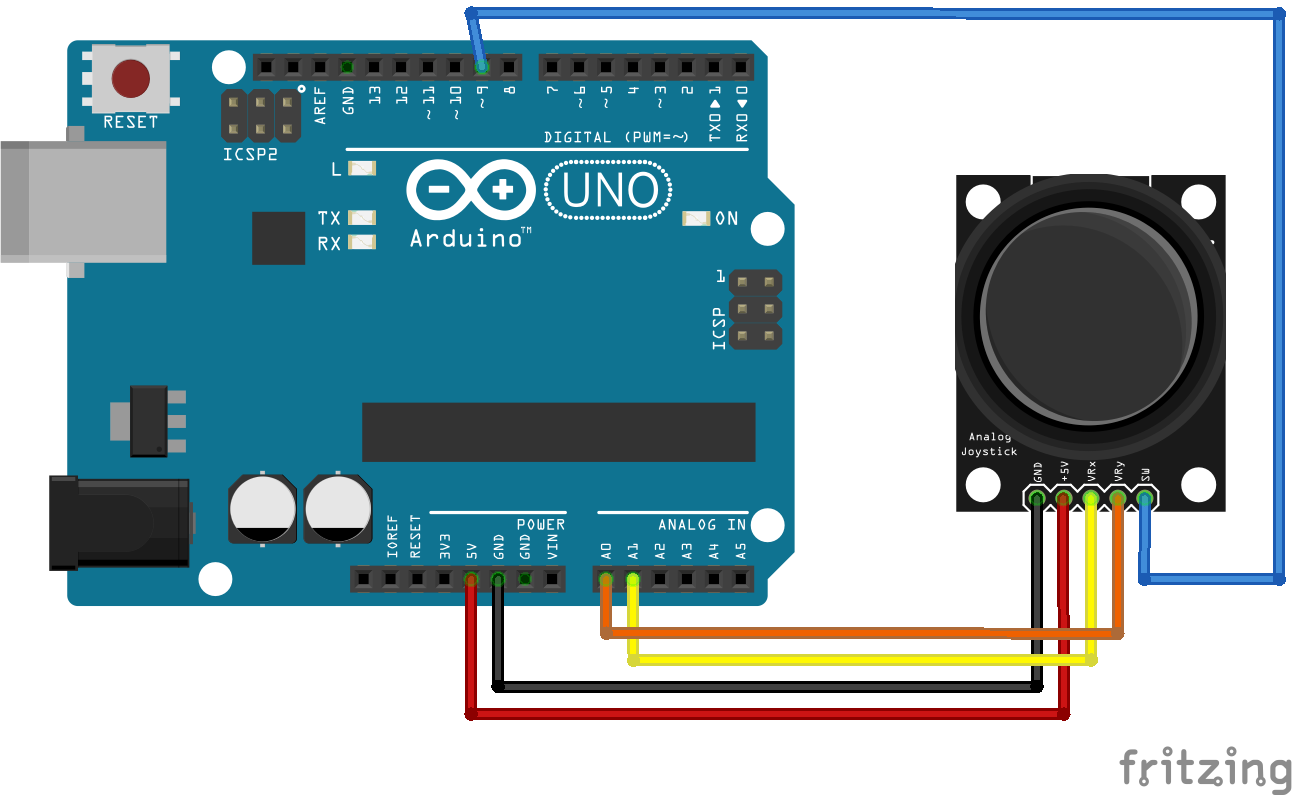
Upload the arduino sketch(given below) to your arduino UNO and connect the joystick to the arduino pins as given in the schematic.
After ensuring that mouse and pyserial is installed on your computer/laptop perform the following steps.
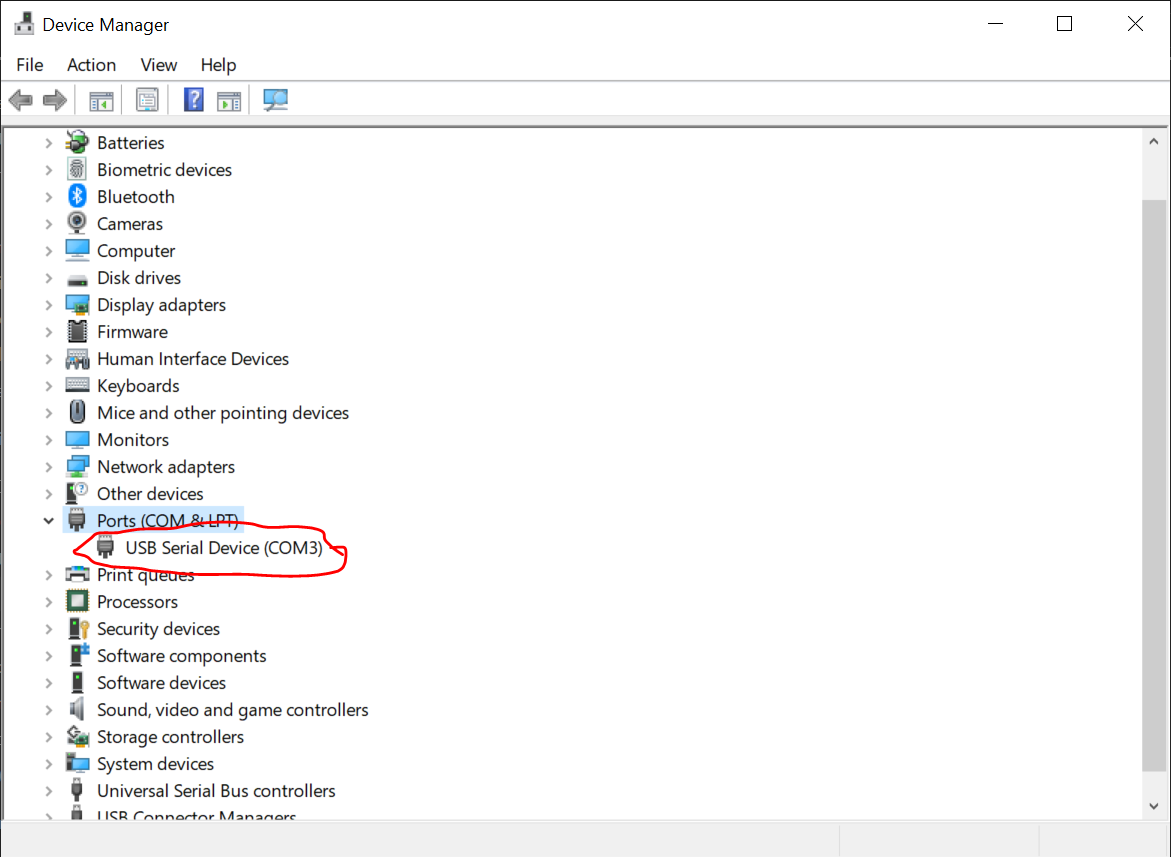
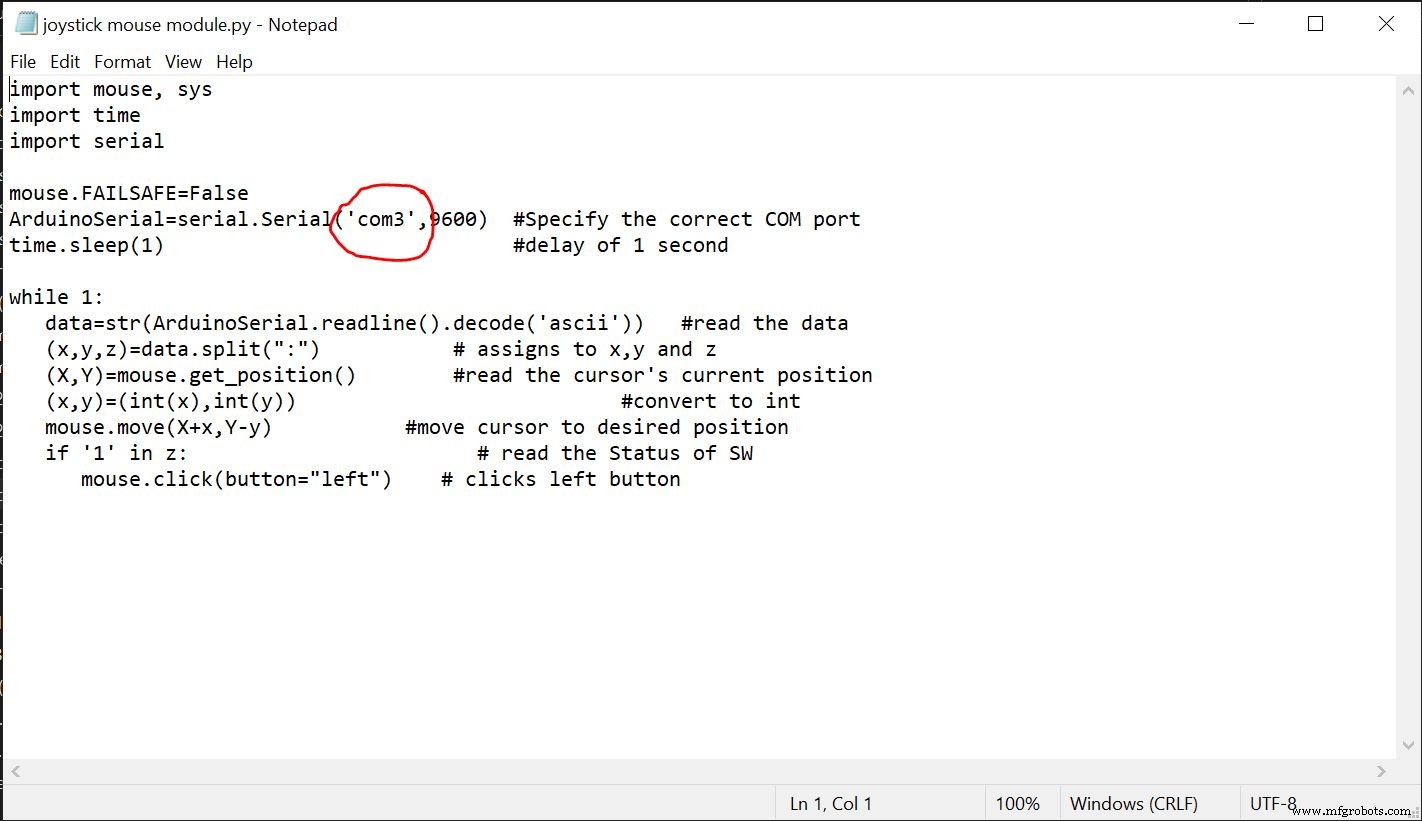
1. Copy the python sketch in a notepad file. Specify the correct COM port of the arduino. From the device manager, you can get the COM port to which the arduino board is connected. Save the file as ".py" after making changes.
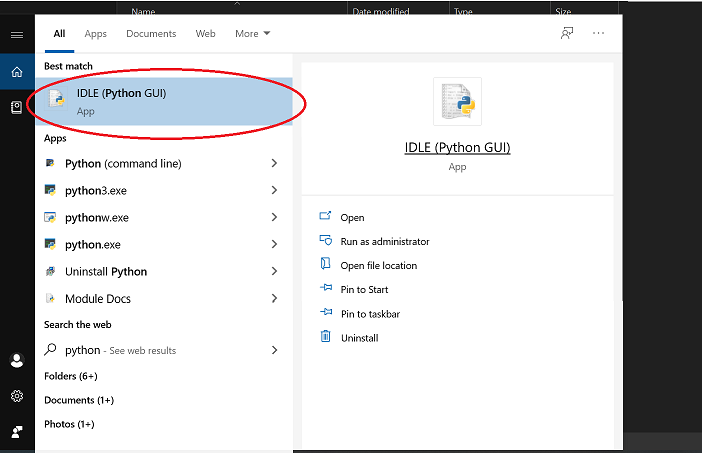
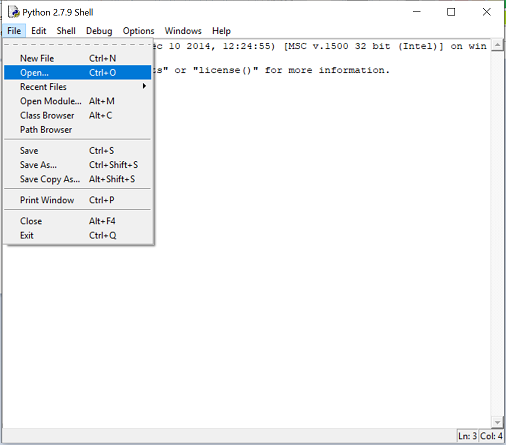
2. Open python's IDLE(python GUI) and open notepad file from it.
3. run the module.
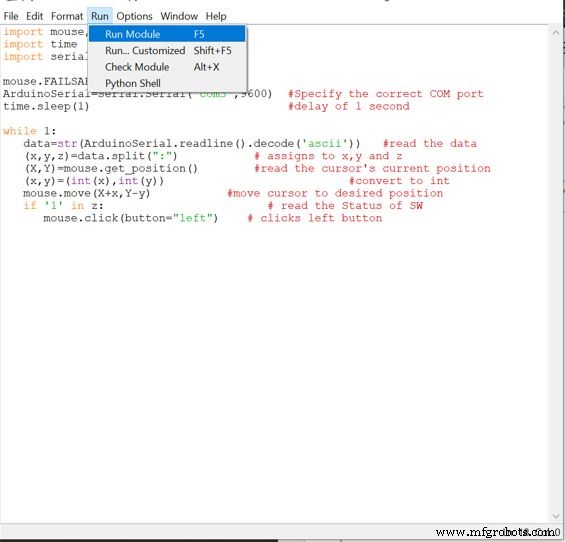
You will then be directed back to screen in Fig 4
In case you see any errors, restart the IDLE and check whether you have mentioned the correct COM port of the arduino.
If there are no errors, then move the joystick and you will see the movement of the cursor.
Code
- Arduino Code
- Python Code
Arduino CodeArduino
////////////////////////////////
// Joystick controlled mouse///
/// by Shubham Santosh////////
/////////////////////////////


void setup()
{
  Serial.begin(9600);
  pinMode(9,INPUT);     // SW pin
  digitalWrite(9,HIGH);

}
int prev_state=0;   // previous state of switch
void loop() {
  int z=0,xpos=0,ypos=0;
  int x=analogRead(A0);
  int y=analogRead(A1);
  int sensitivity=10;    // you can adjust the sensitivity based on your comfort
  if(x>=550)                     // when moved up
  xpos=map(x,550,1023,0,sensitivity);
  if(x<=450)                   // when moved down
  xpos=map(x,450,0,0,-sensitivity);
  if(y>=550)                    // when moved right
  ypos=map(y,550,1023,0,sensitivity);
  if(y<=450)                  // when moved left
  ypos=map(y,450,0,0,-sensitivity);
  int curr_state=digitalRead(9);
  if(curr_state==1 && prev_state==0)   // when SW is pressed
  z=1;
  else
  z=0;
  if(xpos!=0 or ypos!=0 or z==1) // prints only when the joystick is moved
  {
  Serial.print(xpos);    // print the data and separating by ":"
  Serial.print(":");
  Serial.print(ypos);
  Serial.print(":");
  Serial.println(z);
  }
  prev_state=curr_state;
  delay(10);         // for normal operation
}
Python CodePython
# Joystick controlled mouse
# By Shubham Santosh
# last edited 12/11/2020
import mouse, sys
import time
import serial

mouse.FAILSAFE=False
ArduinoSerial=serial.Serial('com3',9600)  #Specify the correct COM port
time.sleep(1)                             #delay of 1 second

while 1:
   data=str(ArduinoSerial.readline().decode('ascii'))   #read the data
   (x,y,z)=data.split(":")           # assigns to x,y and z
   (X,Y)=mouse.get_position()        #read the cursor's current position
   (x,y)=(int(x),int(y))                           #convert to int
   mouse.move(X+x,Y-y)           #move cursor to desired position
   if '1' in z:                        # read the Status of SW
      mouse.click(button="left")    # clicks left button
Schematics
Manufacturing process
- The Evolution of the Computer Mouse: Design, Manufacturing, and Future Trends
- Temperature‑Controlled Fan: DIY Relay System for Media Furniture Cooling
- Transform an Old RC Car into a Joystick‑Controlled Vehicle with Arduino
- Interactive Joystick Game with Arduino and LED Feedback
- Build a Custom Arduino Joystick Steering Wheel for Gaming
- DIY Arduino USB Trackpad: Convert an Old Laptop Pad into a Modern Input Device
- Smartphone‑Controlled Bluetooth Mouse: Build Your Own Virtual Joystick
- Build a Precise PC‑Controlled Robotic Arm with Arduino Nano & Tower Pro MG996R Servos
- Create a Web-Operated Joystick with Arduino UNO & WiFi Shield
- FeNi42 Alloy: Low Thermal Expansion for Precision Seals