


Build Your Own Electronic Piano Keyboard with Built‑in Songs
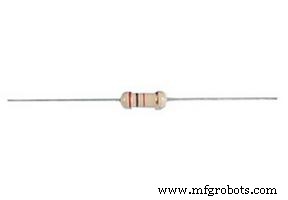
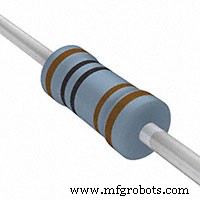
Components and supplies
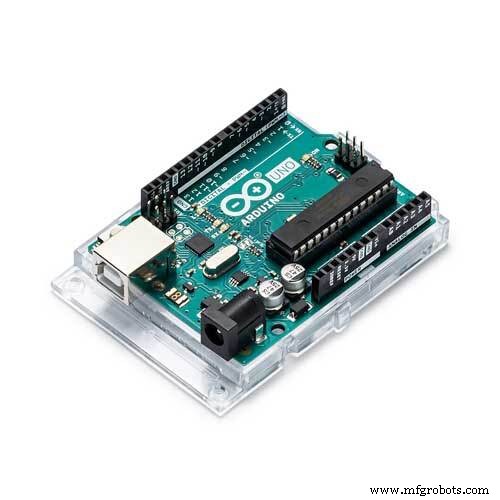 |
| × | 1 | |||
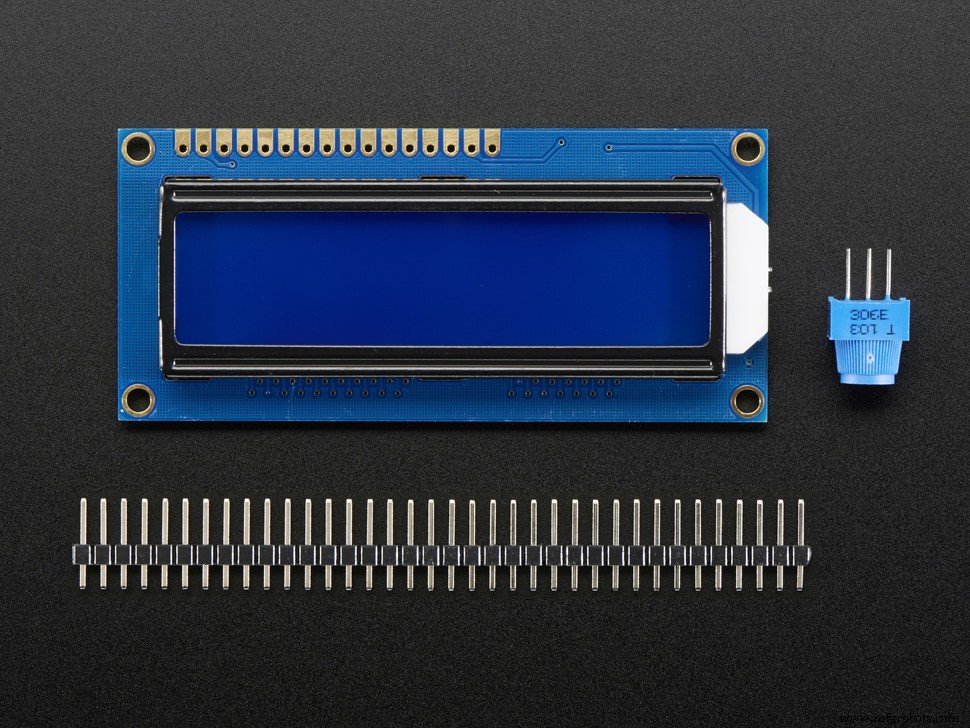 |
| × | 1 | |||
 |
| × | 8 | |||
 |
| × | 4 | |||
| × | 1 | ||||
 |
| × | 1 | |||
| × | 1 | ||||
 |
| × | 3 | |||
 |
| × | 1 | |||
 |
| × | 1 | |||
|
| × | 1 | |||
 |
| × | 1 | |||
 |
| × | 1 | |||
 |
| × | 1 |
About this project
IntroTo begin, I should fill you in that I am completely new to the world of electronics. I have a decent background in coding, which helps, but I am always open to new ideas and suggestions for any of the projects I've created.
Recently, I've been learning more about the Piezo Buzzer and the coding involved, and this is my creation based on what I've learned so far. There is plenty of room for expansion with new features or switches, which I plan to do later, but for now it's on to the next challenge!
Below is a video of how the device works, including the menu of preset songs. I will admit, technically song 4 and 5 are the same, but what can I say, I have the urge to create bigger and better things and writing the music code for more songs was not one of them! The basic coding for both the main loops, and the individual song loops are pretty easy to adapt to your own ideas, so feel free to change however you see fit.
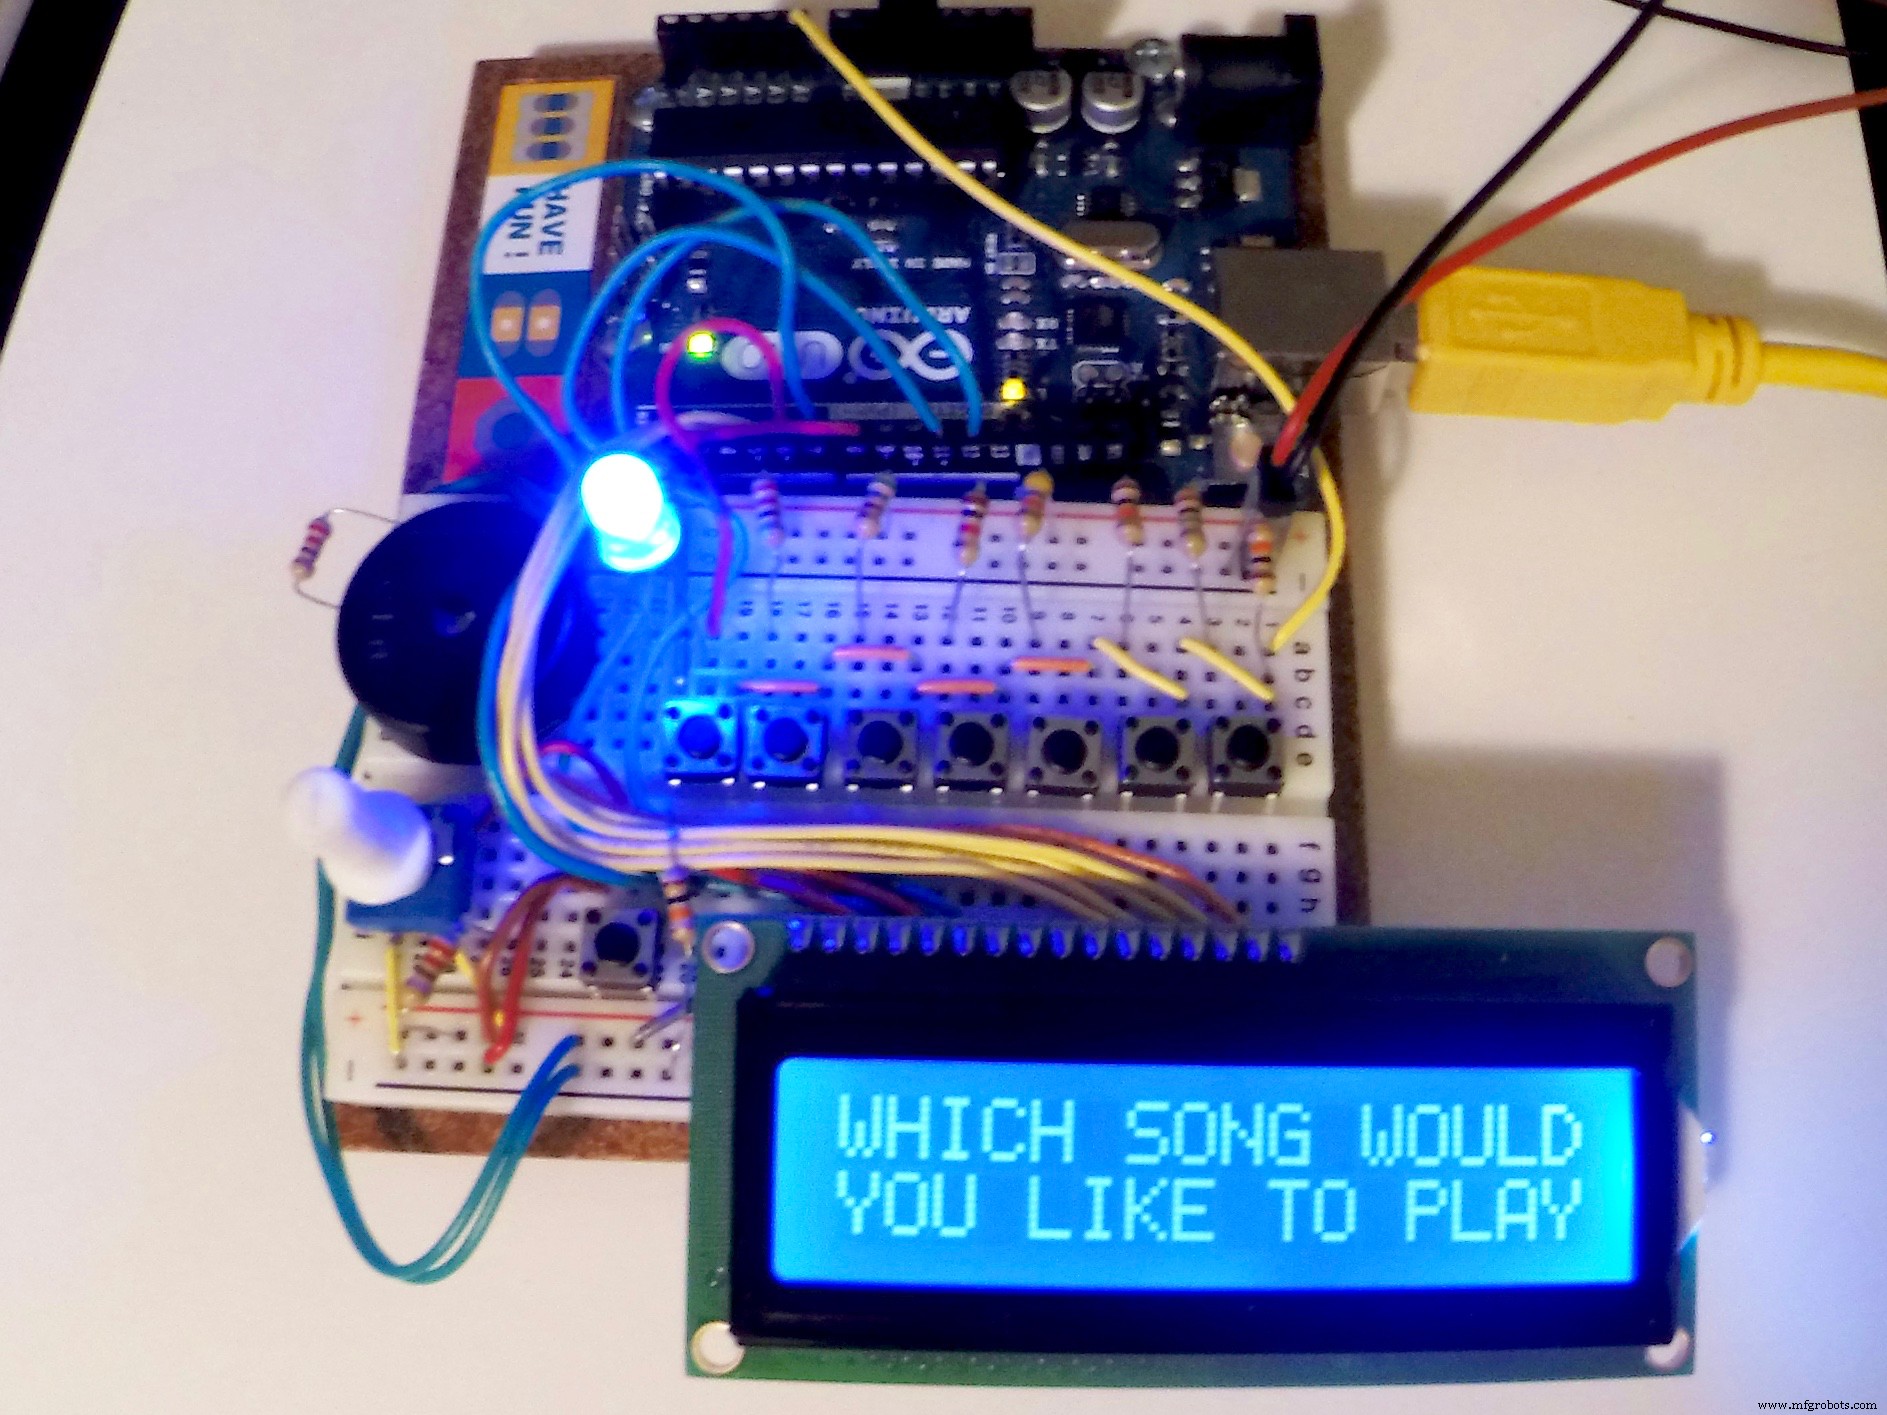
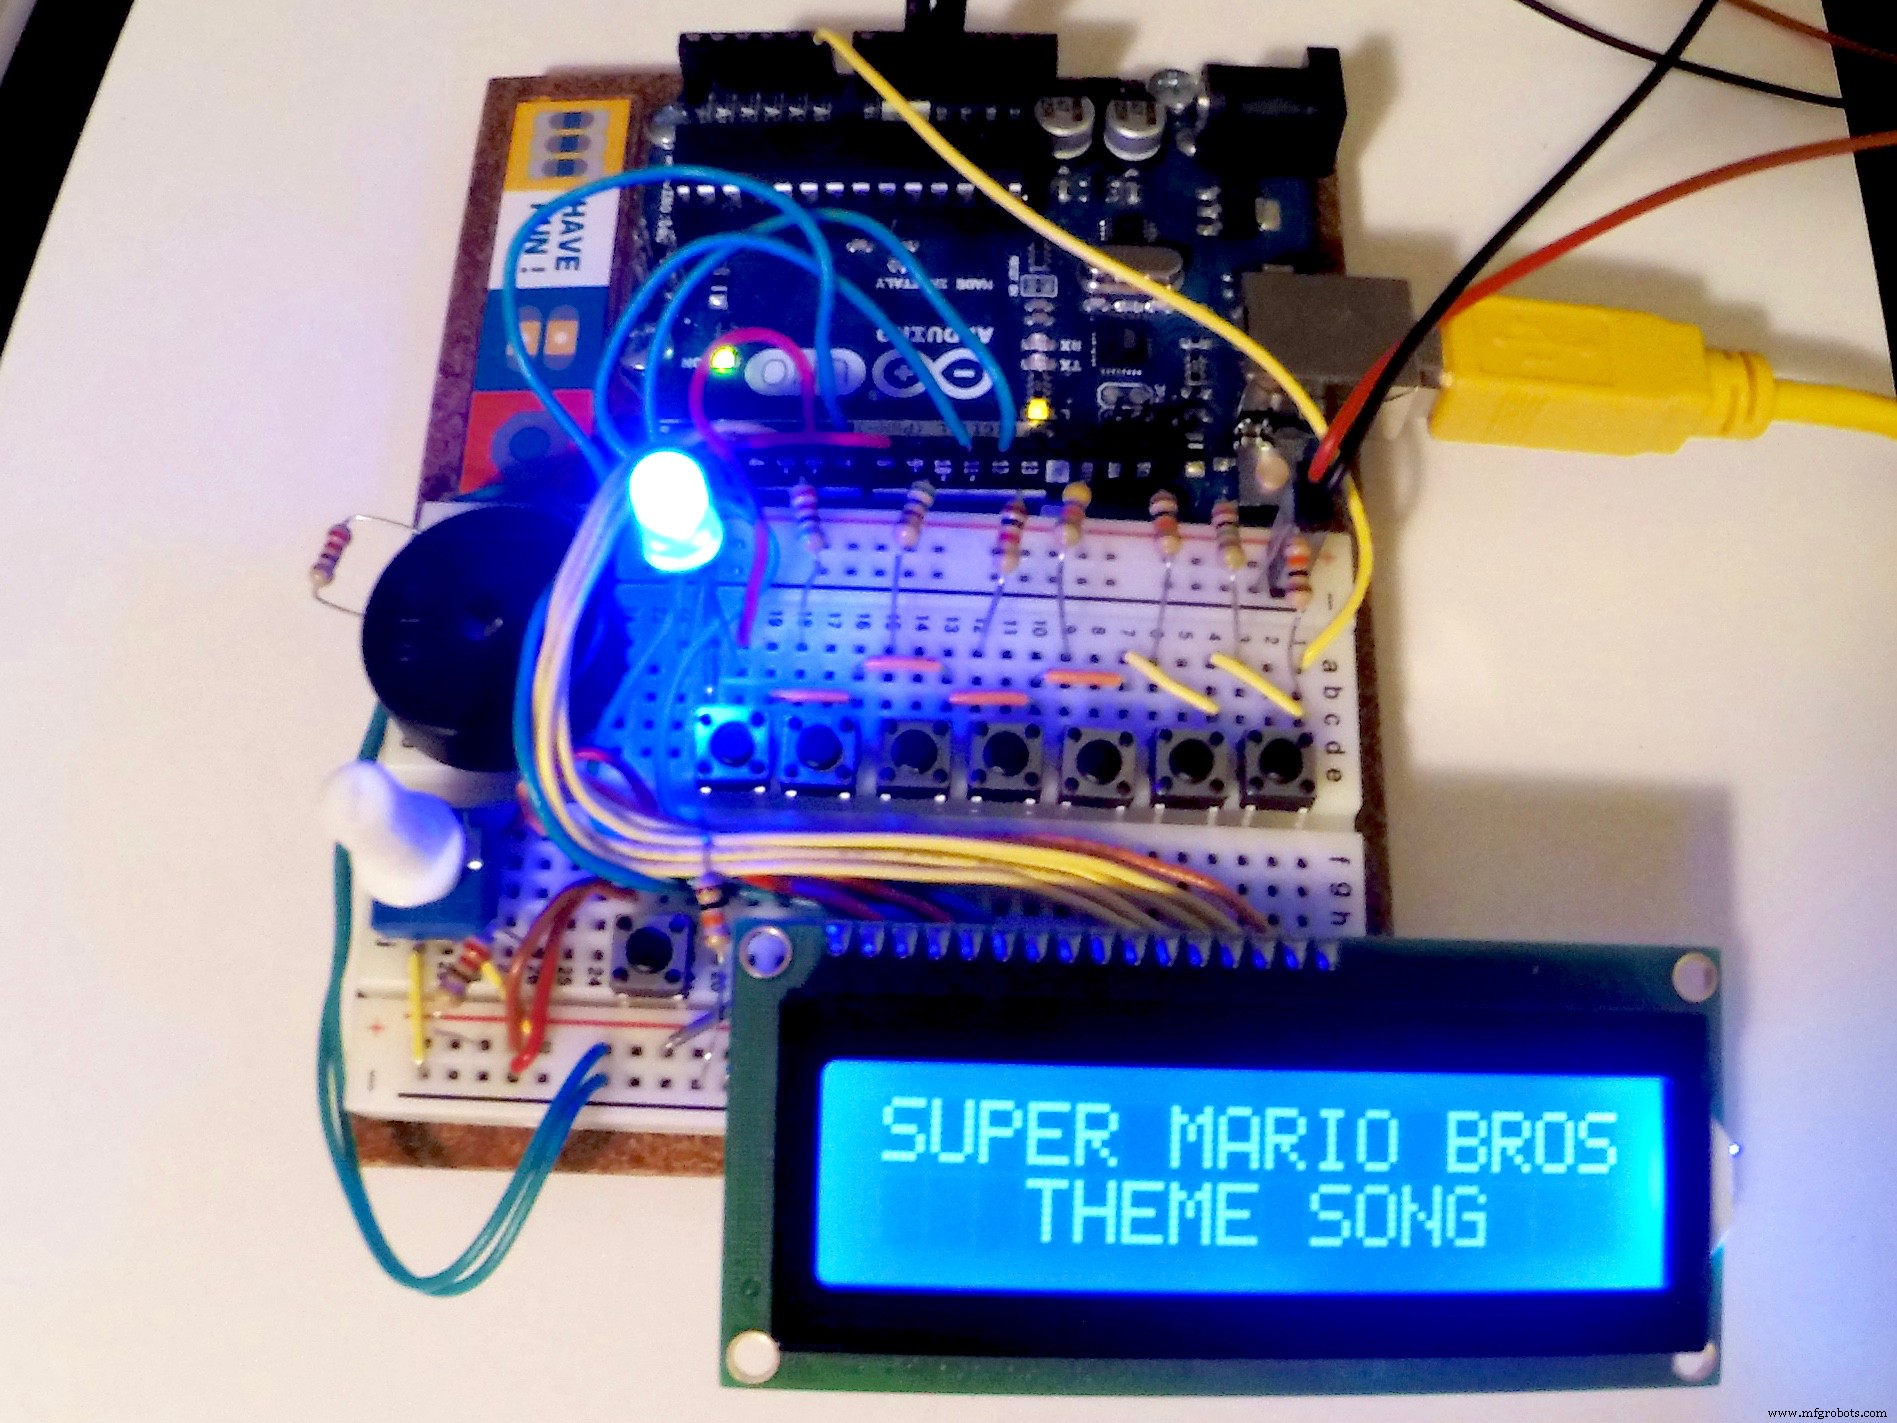
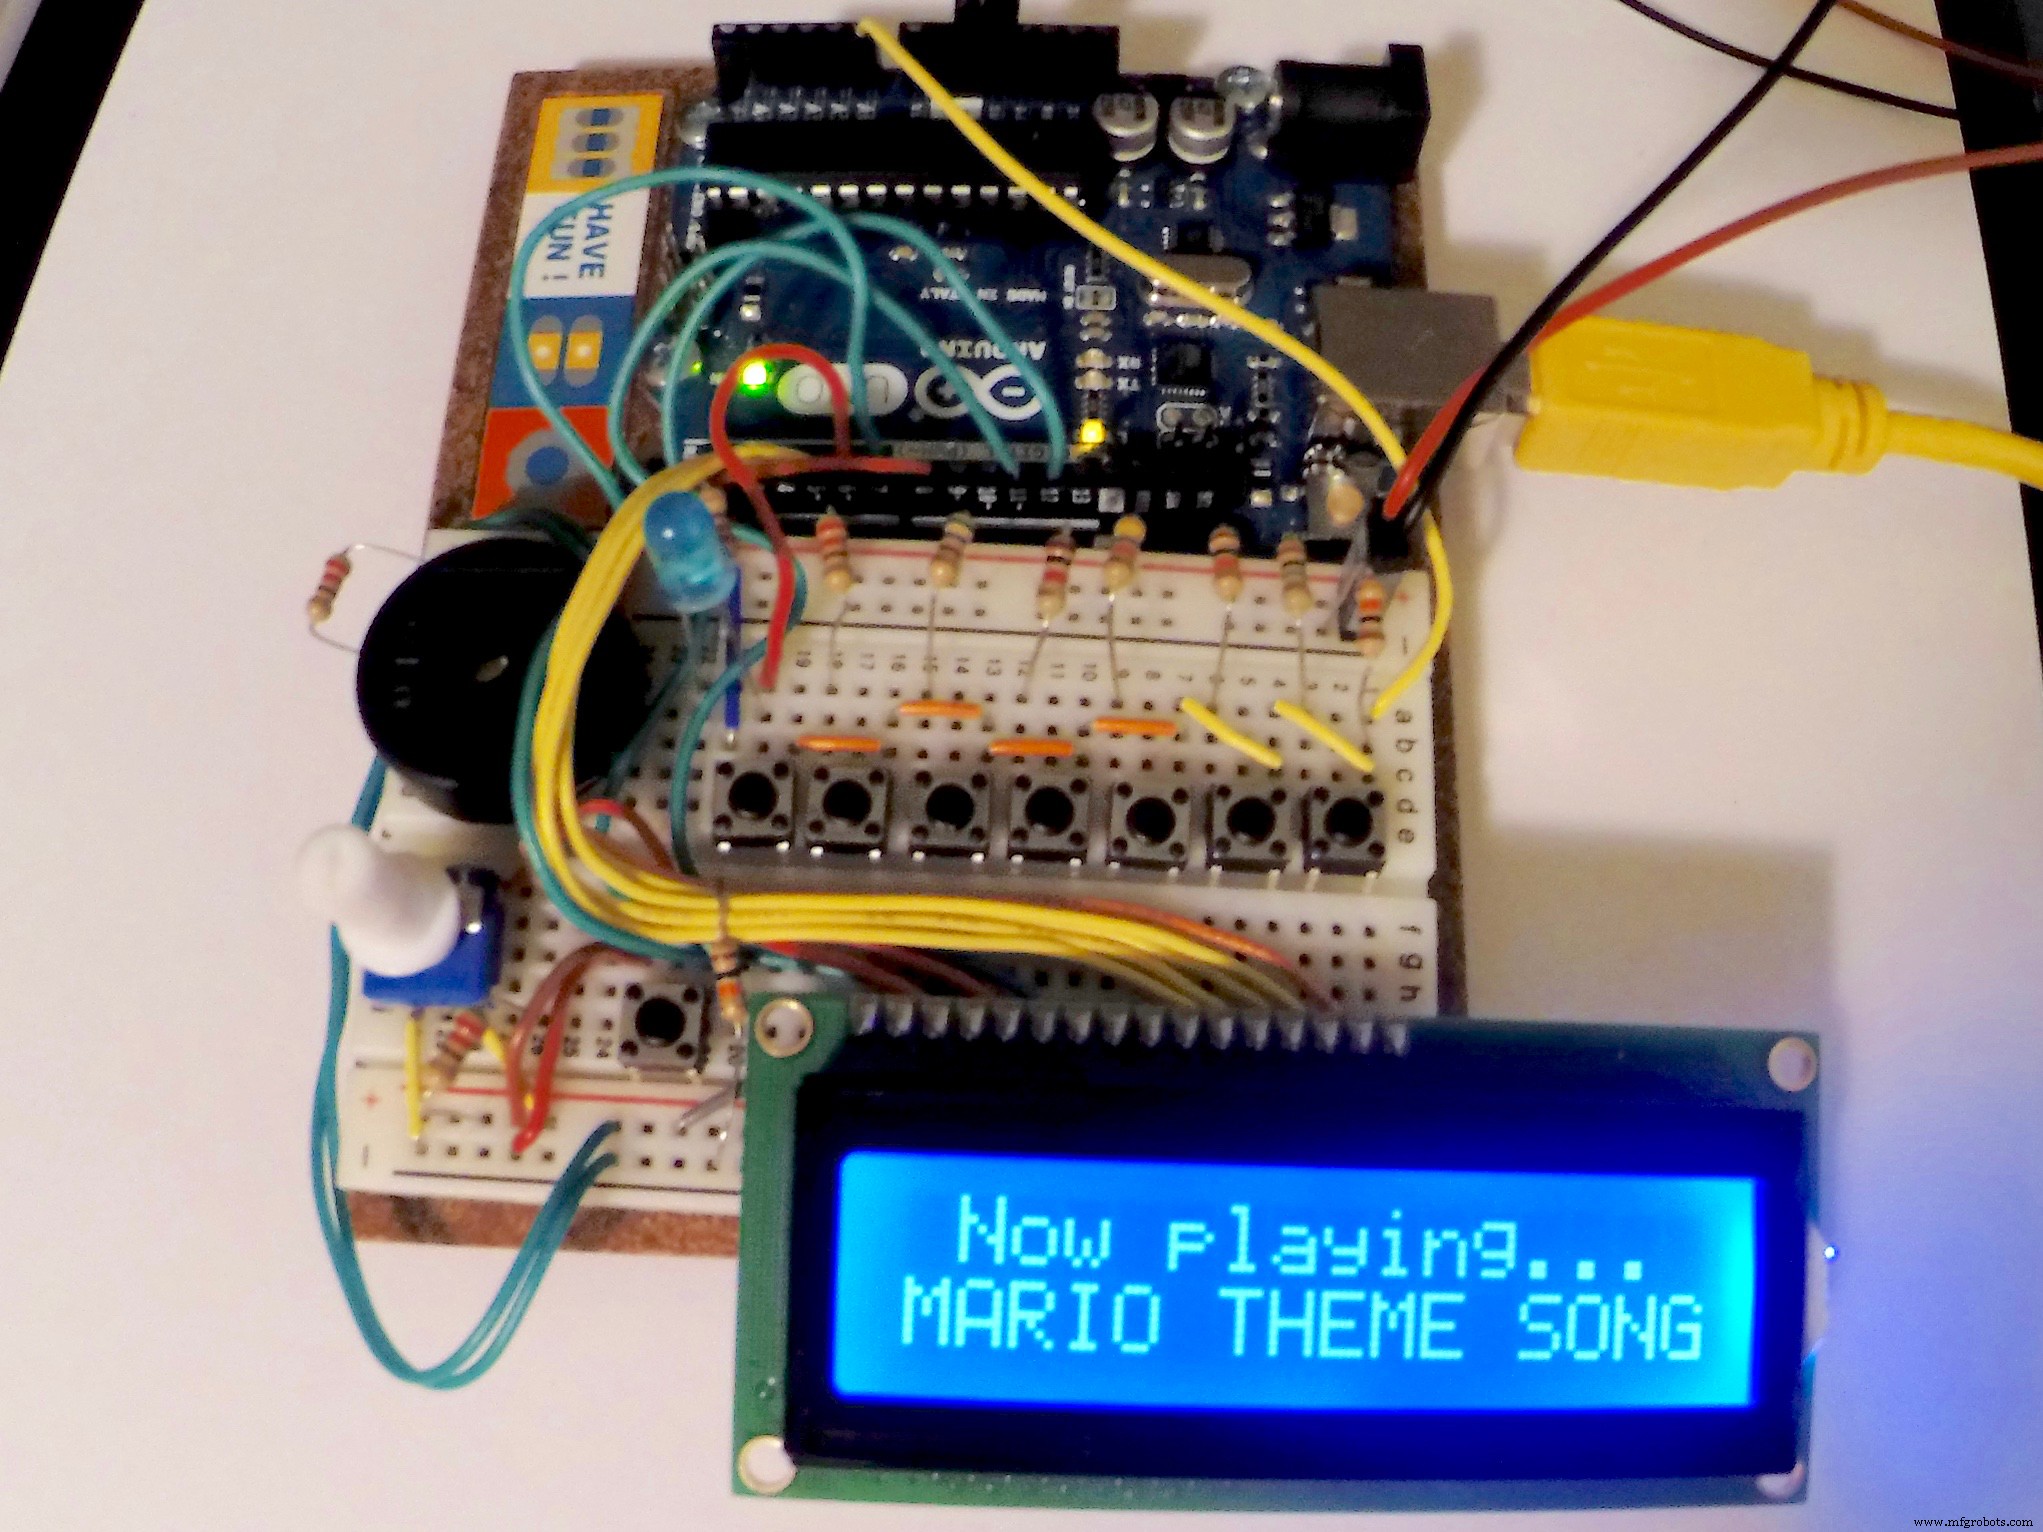
See it in action!How to set up the hardwareThe piano keys...
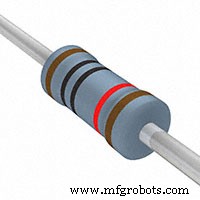
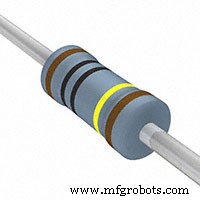
The piano key switches were connected using a resistor ladder. The resistors are placed in sequential order, connecting each switch to power. For my project, I chose to use (in ohms) 1M, 10k, 4.7K, 1K, 560, and 220. The first piano switch (on the left) is connected to power, and also to the next switch in the circuit. The second switch is connected to the smallest resistor, and each switch after that connects to the next largest resistor in the series. The last switch grounds the connection via a 10k ohm resistor and also connects all 7 switches to the "analog in" pin A0 on the Arduino. The main sketch defines which music note frequencies are associated with each piano key. For this project, I used C4, D4, E4, F4, G4, A4, & B4, with C4 being the leftmost switch. Change the frequency values, or add additional switches to fully customize your own project!
The LCD screen...
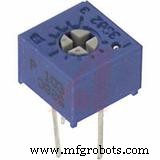
Connect the LCD pins according to the circuit diagram below. Connect LCD pin 3 to the Potentiometer for contrast control of the screen. The outside pins of the Potentiometer are connected to power and ground to complete this circuit. LCD pin 15 is connected to power via a 220 ohm resistor. If any of these pins change on your own project, update the code accordingly.
The menu switch...
Connect the menu switch to power, and ground it through a 10K ohm resistor. This switch should also be connected to pin 7 on the Arduino so you can control it via coding.
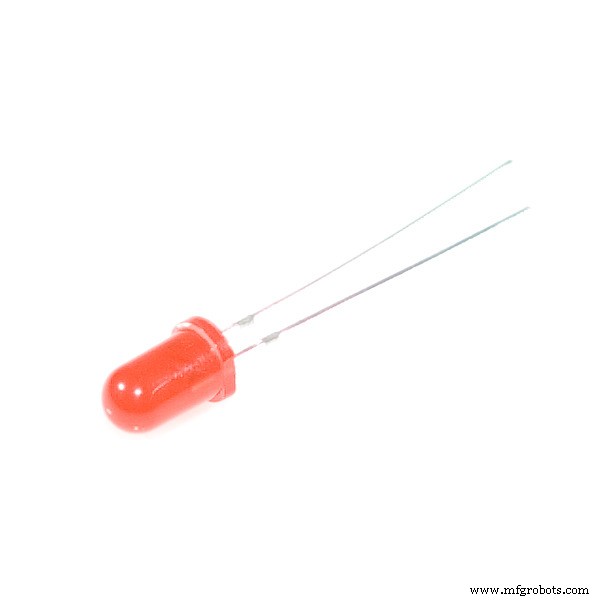
The LED...
The LED is used to indicated when you're in "menu mode", and the piano keys have been disabled. The LED light turns on once the menu switch is pressed. Connect the anode (positive) of the LED to pin 6 of the Arduino, and ground the LED through a 220 ohm resistor.
The Piezo buzzer...
To integrate the Piezo Buzzer, simply connect one end to the Arduino pin 8, and the other side to ground via a 220 ohm resistor. The "tone" function in the code will look for this pin in order to play the note called.
The set up...
- The sketch begins by importing the "LiquidCrystal.h" and "pitches.h" libraries so we can reference various items from them later on in the code
- Next, the code is set up by defining a name for the menu switch, determining which pins are inputs vs. outputs, and setting the frequency values for each of the 7 piano keys
- A new tab was created for each individual song in an effort to keep my code somewhat organized and easier to understand, and to expand on later. If you'd like to delete or add more songs, just make sure to change the code in the main "Electronic Keyboard" sketch as well.
The main loop...
- The keyboard begins with the LED turned off, and all of the piano keys active
- Once the loop detects that the menu button has been pushed, it will disable the piano keys and turn the LED on to indicate you are in "menu mode"
Accessing the menu...
- Push the menu button to cycle through the present songs, and push any of the piano keys to start playing the song displayed on the LCD screen
- The LCD screen will show which song is currently playing, then return to the same point in the menu once the song has finished playing. From there, you can either replay or continue in the list of available songs.
- Double-clicking the menu button will restart the menu from the beginning
- To return to using the piano keys, cycle through the remainder of songs in the menu. Once the LCD screen in blank, and the LED is off, the piano keys will work again.
Code
- Electronic Keyboard
- Song1
- Song2
- Song3
- Song4
- Song5
- pitches.h
Electronic KeyboardArduino
The main code// LCD Screen, Switch & LED Setup
#include <LiquidCrystal.h>
#include "pitches.h"
LiquidCrystal lcd(12, 11, 5, 4, 3, 2);
const int LCDswitchPin = 7; // define menu/LCD switch name
int LCDswitchState = 0; // set menu/LCD switch state to off/low
int prevLCDswitchState = 0;
int blueLED = 6;
int LCDswitchCounter = 0; // counter for the number of menu button presses
// (this code counts the menu button pushes, displays them on your computer,
// and starts from zero after ending "menu mode". currently has no other effect
// on this sketch, but is a good starting point for expanding on the project with
// new features later
// Music Note Keys - Set frequency values
int notes[] = {262, 294, 330, 349, 392, 440, 494}; // Set notes C, D, E, F, G, A, B
//////////////////////////////////////////////
void setup() {
Serial.begin(9600);
lcd.begin(16, 2);
pinMode(LCDswitchPin, INPUT);
pinMode(blueLED, OUTPUT);
digitalWrite(blueLED, LOW); // LED stays off while piano keys are on
} // end setup
//////////////////////////////////////////////
void loop() {
LCDswitchState = digitalRead(LCDswitchPin);
int keyVal = analogRead(A0);
Serial.println(keyVal);
lcd.noDisplay();
digitalWrite(blueLED, LOW); // Turn LED back off every time main loop starts
// ************** START "LCDstart" WHEN MENU BUTTON IS PUSHED ***********
if (LCDswitchState == HIGH) {
digitalWrite(blueLED, HIGH); // Turn LED on to show piano keys are disabled and device is in "menu mode"
lcd.display();
lcd.clear();
LCDstart();
}
// ***********************************************************************
////// KEYBOARD NOTES & FREQUENCY STATEMENTS //////
// Use the resistor ladder you created to change the voltage of each piano key button
// 220 ohm = C5 // 560 ohm = D5 // 1K ohm = E5 // etc...
if(keyVal == 1023) {
tone(8, notes[0]); // C
} // end if
else if(keyVal >= 990 & keyVal <=1010) {
tone(8, notes[1]); // D
} // end else if
else if(keyVal >= 960 && keyVal <= 980) {
tone(8, notes[2]); // E
} // end else if
else if(keyVal >= 900 && keyVal <= 945) {
tone(8, notes[3]); // F
} // end else if
else if(keyVal >= 650 && keyVal <= 710) {
tone(8, notes[4]); // G
} // end else if
else if(keyVal >= 500 && keyVal <= 550) {
tone(8, notes[5]); // A
} // end else if
else if(keyVal >= 5 && keyVal <= 10) {
tone(8, notes[6]); // B
} // end else if
else if(keyVal <= 1) { // if no switch is pressed, do not play tone
noTone(8);
} // end else if
} //end frequency tone loop
/////////////////////////////////////////////////////
void LCDstart() {
int keyVal = analogRead(A0);
LCDswitchState = digitalRead(LCDswitchPin); // check state of menu button
while (LCDswitchState == LOW) { // continue loop while menu button isn't pressed
LCDswitchState = digitalRead(LCDswitchPin); // check state of menu button every time loop starts
//************* START SONG 1 TITLE LOOP ********************
if (LCDswitchState == HIGH) { // if menu button is pressed, then...
LCDswitchCounter++; // set button count to 1
Serial.print("number of button pushes: ");
Serial.println(LCDswitchCounter);
delay(300); // min. time until counts adds 1 more
Song1title();
lcd.clear();
break;
}
//************* ELSE SHOW MENU ****************
else { // if menu button is not pressed, then...
LCDswitchCounter=0; // set menu button count to 0
lcd.clear();
lcd.setCursor(0, 0);
lcd.print("WHICH SONG WOULD");
lcd.setCursor(0, 1);
lcd.print("YOU LIKE TO PLAY");
delay(50); // return to main
}
} // end while
} // end LCDstart loop
// ************* SONG 1 LOOP STARTS HERE **************
void Song1title() {
int keyVal = analogRead(A0);
LCDswitchState = digitalRead(LCDswitchPin); // check state of menu button again
while (LCDswitchState == LOW) { // continue loop while menu button isn't pressed
LCDswitchState = digitalRead(LCDswitchPin); // check state of menu button again
//************* START SONG 2 TITLE LOOP ********************
if (LCDswitchState == HIGH) { // if menu button is pressed, then...
LCDswitchCounter++; // set button count to 2
Serial.print("number of button pushes: ");
Serial.println(LCDswitchCounter);
delay(300); // min. time until counts adds 1 more
Song2title();
lcd.clear();
break;
}
else { // if menu button is not pressed
int keyVal = analogRead(A0);
Serial.println(keyVal);
if(keyVal >= 2) {
digitalWrite(blueLED, LOW);
Song1();
break;
} // end if
lcd.clear();
lcd.setCursor(0, 0);
lcd.print("SUPER MARIO BROS");
lcd.setCursor(0, 1);
lcd.print(" THEME SONG");
delay(50);
}
} // end while song 1 -> 2
} // end Song1title loop
// ************* SONG 2 LOOP STARTS HERE **************
void Song2title() {
int keyVal = analogRead(A0);
LCDswitchState = digitalRead(LCDswitchPin); // check state of menu button again
while (LCDswitchState == LOW) { // continue loop while menu button isn't pressed
LCDswitchState = digitalRead(LCDswitchPin); // check state of menu button again
//************* START SONG 3 TITLE LOOP ********************
if (LCDswitchState == HIGH) { // if menu button is pressed, then...
LCDswitchCounter++; // set button count to 3
Serial.print("number of button pushes: ");
Serial.println(LCDswitchCounter);
delay(300); // min. time until counts adds 1 more
Song3title();
lcd.clear();
break;
}
else { // if menu button is not pressed
int keyVal = analogRead(A0);
Serial.println(keyVal);
if(keyVal >= 2) {
digitalWrite(blueLED, LOW);
Song2();
break;
} // end if
lcd.clear();
lcd.setCursor(0, 0);
lcd.print("SUPER MARIO BROS");
lcd.setCursor(0, 1);
lcd.print(" UNDERWORLD");
delay(50);
}
} // end while song 2 -> 3
} // end Song2title loop
// ************* SONG 3 LOOP STARTS HERE **************
void Song3title() {
int keyVal = analogRead(A0);
LCDswitchState = digitalRead(LCDswitchPin); // check state of menu button again
while (LCDswitchState == LOW) { // continue loop while menu button isn't pressed
LCDswitchState = digitalRead(LCDswitchPin); // check state of menu button again
//************* START SONG 4 TITLE LOOP ********************
if (LCDswitchState == HIGH) { // if menu button is pressed, then...
LCDswitchCounter++; // set button count to 4
Serial.print("number of button pushes: ");
Serial.println(LCDswitchCounter);
delay(300); // min. time until counts adds 1 more
Song4title();
lcd.clear();
break;
}
else { // if menu button is not pressed
int keyVal = analogRead(A0);
Serial.println(keyVal);
if(keyVal >= 2) {
digitalWrite(blueLED, LOW);
Song3();
break;
} // end if
lcd.clear();
lcd.setCursor(0, 0);
lcd.print(" JEOPARDY");
lcd.setCursor(0, 1);
lcd.print(" THEME SONG");
delay(50);
}
} // end while song 3 -> 4
} // end Song3title loop
// ************* SONG 4 LOOP STARTS HERE **************
void Song4title() {
int keyVal = analogRead(A0);
LCDswitchState = digitalRead(LCDswitchPin); // check state of menu button again
while (LCDswitchState == LOW) { // continue loop while menu button isn't pressed
LCDswitchState = digitalRead(LCDswitchPin); // check state of menu button again
//************* START SONG 5 TITLE LOOP ********************
if (LCDswitchState == HIGH) { // if menu button is pressed, then...
LCDswitchCounter++; // set button count to 5
Serial.print("number of button pushes: ");
Serial.println(LCDswitchCounter);
delay(300); // min. time until counts adds 1 more
Song5title();
lcd.clear();
break;
}
else { // if menu button is not pressed
int keyVal = analogRead(A0);
Serial.println(keyVal);
if(keyVal >= 2) {
digitalWrite(blueLED, LOW);
Song4();
break;
} // end if
lcd.clear();
lcd.setCursor(0, 0);
lcd.print(" SONG 4");
lcd.setCursor(0, 1);
lcd.print(" TITLE HERE");
delay(50);
}
} // end while song 4 -> 5
} // end Song4title loop
// ************* SONG 5 LOOP STARTS HERE **************
void Song5title() {
int keyVal = analogRead(A0);
LCDswitchState = digitalRead(LCDswitchPin); // check state of menu button again
while (LCDswitchState == LOW) { // continue loop while menu button isn't pressed
LCDswitchState = digitalRead(LCDswitchPin); // check state of menu button again
//************* START SONG 4 TITLE LOOP ********************
if (LCDswitchState == HIGH) { // if menu button is pressed, then...
LCDswitchCounter=0; // set button count to 0
Serial.print("number of button pushes: ");
Serial.println(LCDswitchCounter);
delay(300); // min. time until counts adds 1 more
lcd.clear();
}
else { // if menu button is not pressed
int keyVal = analogRead(A0);
Serial.println(keyVal);
if(keyVal >= 2) {
digitalWrite(blueLED, LOW);
Song5();
break;
} // end if
lcd.clear();
lcd.setCursor(0, 0);
lcd.print(" SONG 5");
lcd.setCursor(0, 1);
lcd.print(" TITLE HERE");
delay(50);
}
} // end while song 4 -> 5
} // end Song5title loop
Song1Arduino
Code for the 1st song. Currently has the Mario Bros Theme Song loaded.//***************** SONG 1 NOTES HERE **************************
///////////////////////////////////////////////////////////////////////////////////////////////////////
///////// FULL TUTORIAL ON HOW TO CREATE THE MARIO SONGS CAN BE FOUND HERE: /////////////////////////
///////// http://www.linuxcircle.com/2013/03/31/playing-mario-bros-tune-with-arduino-and-piezo-buzzer/
///////////////////////////////////////////////////////////////////////////////////////////////////////
void Song1() {
lcd.clear();
// notes in the melody:
int melody[] = {
NOTE_E7, NOTE_E7, 0, NOTE_E7,
0, NOTE_C7, NOTE_E7, 0,
NOTE_G7, 0, 0, 0,
NOTE_G6, 0, 0, 0,
NOTE_C7, 0, 0, NOTE_G6,
0, 0, NOTE_E6, 0,
0, NOTE_A6, 0, NOTE_B6,
0, NOTE_AS6, NOTE_A6, 0,
NOTE_G6, NOTE_E7, NOTE_G7,
NOTE_A7, 0, NOTE_F7, NOTE_G7,
0, NOTE_E7, 0, NOTE_C7,
NOTE_D7, NOTE_B6, 0, 0,
NOTE_C7, 0, 0, NOTE_G6,
0, 0, NOTE_E6, 0,
0, NOTE_A6, 0, NOTE_B6,
0, NOTE_AS6, NOTE_A6, 0,
NOTE_G6, NOTE_E7, NOTE_G7,
NOTE_A7, 0, NOTE_F7, NOTE_G7,
0, NOTE_E7, 0, NOTE_C7,
NOTE_D7, NOTE_B6, 0, 0
};
// note durations: 4 = quarter note, 8 = eighth note, etc.:
int noteDurations[] = {
12, 12, 12, 12,
12, 12, 12, 12,
12, 12, 12, 12,
12, 12, 12, 12,
12, 12, 12, 12,
12, 12, 12, 12,
12, 12, 12, 12,
12, 12, 12, 12,
9, 9, 9,
12, 12, 12, 12,
12, 12, 12, 12,
12, 12, 12, 12,
12, 12, 12, 12,
12, 12, 12, 12,
12, 12, 12, 12,
12, 12, 12, 12,
9, 9, 9,
12, 12, 12, 12,
12, 12, 12, 12,
12, 12, 12, 12,
};
lcd.setCursor(1, 0);
lcd.print("Now playing...");
lcd.setCursor(0, 1);
lcd.print("MARIO THEME SONG");
int size = sizeof(melody) / sizeof(int);
for (int thisNote = 0; thisNote < size; thisNote++) {
// to calculate the note duration, take one second
// divided by the note type.
//e.g. quarter note = 1000 / 4, eighth note = 1000/8, etc.
int noteDuration = 1000 / noteDurations[thisNote];
tone(8, melody[thisNote], noteDuration);
// to distinguish the notes, set a minimum time between them.
// the note's duration + 30% seems to work well:
int pauseBetweenNotes = noteDuration * 1.30;
delay(pauseBetweenNotes);
// stop the tone playing:
tone(8, 0, noteDuration);
}
Song1title();
} // end Song1 loop
Song2Arduino
Code for the 2nd song. Currently has the Mario Bros Underworld Song loaded.//***************** SONG 2 NOTES HERE **************************
///////////////////////////////////////////////////////////////////////////////////////////////////////
///////// FULL TUTORIAL ON HOW TO CREATE THE MARIO SONGS CAN BE FOUND HERE: /////////////////////////
///////// http://www.linuxcircle.com/2013/03/31/playing-mario-bros-tune-with-arduino-and-piezo-buzzer/
///////////////////////////////////////////////////////////////////////////////////////////////////////
void Song2() {
lcd.clear();
// notes in the melody:
int melody[] = {
NOTE_C4, NOTE_C5, NOTE_A3, NOTE_A4,
NOTE_AS3, NOTE_AS4, 0,
0,
NOTE_C4, NOTE_C5, NOTE_A3, NOTE_A4,
NOTE_AS3, NOTE_AS4, 0,
0,
NOTE_F3, NOTE_F4, NOTE_D3, NOTE_D4,
NOTE_DS3, NOTE_DS4, 0,
0,
NOTE_F3, NOTE_F4, NOTE_D3, NOTE_D4,
NOTE_DS3, NOTE_DS4, 0,
0, NOTE_DS4, NOTE_CS4, NOTE_D4,
NOTE_CS4, NOTE_DS4,
NOTE_DS4, NOTE_GS3,
NOTE_G3, NOTE_CS4,
NOTE_C4, NOTE_FS4, NOTE_F4, NOTE_E3, NOTE_AS4, NOTE_A4,
NOTE_GS4, NOTE_DS4, NOTE_B3,
NOTE_AS3, NOTE_A3, NOTE_GS3,
0, 0, 0
};
// note durations: 4 = quarter note, 8 = eighth note, etc.:
int noteDurations[] = {
12, 12, 12, 12,
12, 12, 6,
3,
12, 12, 12, 12,
12, 12, 6,
3,
12, 12, 12, 12,
12, 12, 6,
3,
12, 12, 12, 12,
12, 12, 6,
6, 18, 18, 18,
6, 6,
6, 6,
6, 6,
18, 18, 18, 18, 18, 18,
10, 10, 10,
10, 10, 10,
3, 3, 3
};
lcd.setCursor(1, 0);
lcd.print("Now playing...");
lcd.setCursor(0, 1);
lcd.print("MARIO UNDERWORLD");
int size = sizeof(melody) / sizeof(int);
for (int thisNote = 0; thisNote < size; thisNote++) {
// to calculate the note duration, take one second
// divided by the note type.
//e.g. quarter note = 1000 / 4, eighth note = 1000/8, etc.
int noteDuration = 1000 / noteDurations[thisNote];
tone(8, melody[thisNote], noteDuration);
// to distinguish the notes, set a minimum time between them.
// the note's duration + 30% seems to work well:
int pauseBetweenNotes = noteDuration * 1.30;
delay(pauseBetweenNotes);
// stop the tone playing:
tone(8, 0, noteDuration);
}
Song2title();
} // end Song2 loop
Song3Arduino
Code for the 3rd song. Currently has the Jeopardy Theme Song loaded.//***************** SONG 3 NOTES HERE **************************
void Song3() {
lcd.clear();
// notes in the melody:
int melody[] = {
NOTE_C2, NOTE_F3, NOTE_C3, NOTE_A2, NOTE_A2,
NOTE_C3, NOTE_F3, NOTE_C3,
NOTE_C3, NOTE_F3, NOTE_C3, NOTE_F3,
NOTE_AS3, NOTE_G3, NOTE_F3, NOTE_E3, NOTE_D3, NOTE_CS3,
NOTE_C2, NOTE_F3, NOTE_C3, NOTE_A2, NOTE_A2, // repeat line 1 and 2
NOTE_C3, NOTE_F3, NOTE_C3,
NOTE_AS3, 0, NOTE_G3, NOTE_F3,
NOTE_E3, NOTE_D3, NOTE_CS3, NOTE_C3};
// note durations: 4 = quarter note, 8 = eighth note, etc.:
int noteDurations[] = {
4, 4, 4, 8, 8,
4, 4, 2,
4, 4, 4, 4,
3, 8, 8, 8, 8, 8,
4, 4, 4, 8, 8, // repeat line 1 and 2
4, 4, 2,
4, 8, 8, 4, 4,
4, 4, 4, 4,
0};
lcd.setCursor(1, 0);
lcd.print("Now playing...");
lcd.setCursor(0, 1);
lcd.print(" JEOPARDY");
for (int thisNote = 0; noteDurations[thisNote] != 0; thisNote++) {
// to calculate the note duration, take one second
// divided by the note type.
//e.g. quarter note = 1000 / 4, eighth note = 1000/8, etc.
int noteDuration = 2000/noteDurations[thisNote];
tone(8, melody[thisNote],noteDuration * 0.9);
// to distinguish the notes, set a minimum time between them.
// the note's duration + 30% seems to work well:
//int pauseBetweenNotes = noteDuration * 1.30;
//delay(pauseBetweenNotes);
delay(noteDuration);
}
Song3title();
} // end Song3 loop
Song4Arduino
Code for the 4th song. Currently has a short, generic melody loaded.//***************** SONG 4 NOTES HERE **************************
void Song4() {
lcd.clear();
// notes in the melody:
int melody[] = {
NOTE_C4, NOTE_G3, NOTE_G3, NOTE_A3, NOTE_G3, 0, NOTE_B3, NOTE_C4
};
// note durations: 4 = quarter note, 8 = eighth note, etc.:
int noteDurations[] = {
4, 8, 8, 4, 4, 4, 4, 4
};
lcd.setCursor(1, 0);
lcd.print("Now playing...");
lcd.setCursor(0, 1);
lcd.print(" SONG 4 TITLE");
int thisNote = 0;
// to calculate the note duration, take one second
// divided by the note type.
//e.g. quarter note = 1000 / 4, eighth note = 1000/8, etc.
for (int thisNote = 0; thisNote < 8; thisNote++) {
// to calculate the note duration, take one second
// divided by the note type.
//e.g. quarter note = 1000 / 4, eighth note = 1000/8, etc.
int noteDuration = 1000 / noteDurations[thisNote];
tone(8, melody[thisNote], noteDuration);
// to distinguish the notes, set a minimum time between them.
// the note's duration + 30% seems to work well:
int pauseBetweenNotes = noteDuration * 1.30;
delay(pauseBetweenNotes);
noTone(8); // stop the tone playing:
} // end for
Song4title();
} // end Song4 loop
Song5Arduino
Code for the 5th song. Currently has a short, generic melody loaded.//***************** SONG 5 NOTES HERE **************************
void Song5() {
lcd.clear();
// notes in the melody:
int melody[] = {
NOTE_C4, NOTE_G3, NOTE_G3, NOTE_A3, NOTE_G3, 0, NOTE_B3, NOTE_C4
};
// note durations: 4 = quarter note, 8 = eighth note, etc.:
int noteDurations[] = {
4, 8, 8, 4, 4, 4, 4, 4
};
lcd.setCursor(1, 0);
lcd.print("Now playing...");
lcd.setCursor(0, 1);
lcd.print(" SONG 5 TITLE");
int thisNote = 0;
// to calculate the note duration, take one second
// divided by the note type.
//e.g. quarter note = 1000 / 4, eighth note = 1000/8, etc.
for (int thisNote = 0; thisNote < 8; thisNote++) {
// to calculate the note duration, take one second
// divided by the note type.
//e.g. quarter note = 1000 / 4, eighth note = 1000/8, etc.
int noteDuration = 1000 / noteDurations[thisNote];
tone(8, melody[thisNote], noteDuration);
// to distinguish the notes, set a minimum time between them.
// the note's duration + 30% seems to work well:
int pauseBetweenNotes = noteDuration * 1.30;
delay(pauseBetweenNotes);
noTone(8); // stop the tone playing:
} // end for
Song5title();
} // end Song5 loop
pitches.hArduino
Library of music notes for songs. Save in the same folder as your other keyboard/song sketches.//************************************************* //** DEFINE MUSIC NOTES //************************************************* #define NOTE_B0 31 #define NOTE_C1 33 #define NOTE_CS1 35 #define NOTE_D1 37 #define NOTE_DS1 39 #define NOTE_E1 41 #define NOTE_F1 44 #define NOTE_FS1 46 #define NOTE_G1 49 #define NOTE_GS1 52 #define NOTE_A1 55 #define NOTE_AS1 58 #define NOTE_B1 62 #define NOTE_C2 65 #define NOTE_CS2 69 #define NOTE_D2 73 #define NOTE_DS2 78 #define NOTE_E2 82 #define NOTE_F2 87 #define NOTE_FS2 93 #define NOTE_G2 98 #define NOTE_GS2 104 #define NOTE_A2 110 #define NOTE_AS2 117 #define NOTE_B2 123 #define NOTE_C3 131 #define NOTE_CS3 139 #define NOTE_D3 147 #define NOTE_DS3 156 #define NOTE_E3 165 #define NOTE_F3 175 #define NOTE_FS3 185 #define NOTE_G3 196 #define NOTE_GS3 208 #define NOTE_A3 220 #define NOTE_AS3 233 #define NOTE_B3 247 #define NOTE_C4 262 #define NOTE_CS4 277 #define NOTE_D4 294 #define NOTE_DS4 311 #define NOTE_E4 330 #define NOTE_F4 349 #define NOTE_FS4 370 #define NOTE_G4 392 #define NOTE_GS4 415 #define NOTE_A4 440 #define NOTE_AS4 466 #define NOTE_B4 494 #define NOTE_C5 523 #define NOTE_CS5 554 #define NOTE_D5 587 #define NOTE_DS5 622 #define NOTE_E5 659 #define NOTE_F5 698 #define NOTE_FS5 740 #define NOTE_G5 784 #define NOTE_GS5 831 #define NOTE_A5 880 #define NOTE_AS5 932 #define NOTE_B5 988 #define NOTE_C6 1047 #define NOTE_CS6 1109 #define NOTE_D6 1175 #define NOTE_DS6 1245 #define NOTE_E6 1319 #define NOTE_F6 1397 #define NOTE_FS6 1480 #define NOTE_G6 1568 #define NOTE_GS6 1661 #define NOTE_A6 1760 #define NOTE_AS6 1865 #define NOTE_B6 1976 #define NOTE_C7 2093 #define NOTE_CS7 2217 #define NOTE_D7 2349 #define NOTE_DS7 2489 #define NOTE_E7 2637 #define NOTE_F7 2794 #define NOTE_FS7 2960 #define NOTE_G7 3136 #define NOTE_GS7 3322 #define NOTE_A7 3520 #define NOTE_AS7 3729 #define NOTE_B7 3951 #define NOTE_C8 4186 #define NOTE_CS8 4435 #define NOTE_D8 4699 #define NOTE_DS8 4978
Schematics
Manufacturing process
- Getting Started with TJBot: Build, Configure, and Voice‑Control Your Own AI Robot
- Build an Italian Word Clock with Arduino Nano, NeoPixel, LCD, and RTC
- Build a Reliable Sigfox kWh Meter with Arduino MKR Fox 1200
- Bluetooth-Enabled Temperature Monitor with Arduino Nano
- Touch‑Free Gesture Lock: Secure Access with APDS‑9960 and Arduino
- Arduino Nano Companion Kit – Essential Components & Tools for DIY Electronics
- USB MIDI Adapter Kit for Arduino Micro / Leonardo – Complete Parts List
- Build a Credit‑Card‑Sized Arduboy Clone with Arduino Nano & I2C OLED
- DIY Automated Electronic Component Tester – Simple, Accurate, and Reliable
- Build a Stunning POV Cylinder with Arduino Due – Step‑by‑Step Guide