


Mastering Arduino Analog Inputs: A Step‑by‑Step Video Guide
Welcome to the third Arduino Tutorial from our Arduino Tutorial Series. In this tutorial we will learn how the Arduino Analog Inputs pins work and make few examples using a potentiometer and a photocell. This is a Step by Step Video Tutorial which is easy to be followed. Also, below the video you can find what Parts do we need for this tutorial and the Source Codes of the Examples in the video. Components needed for this Arduino Tutorial
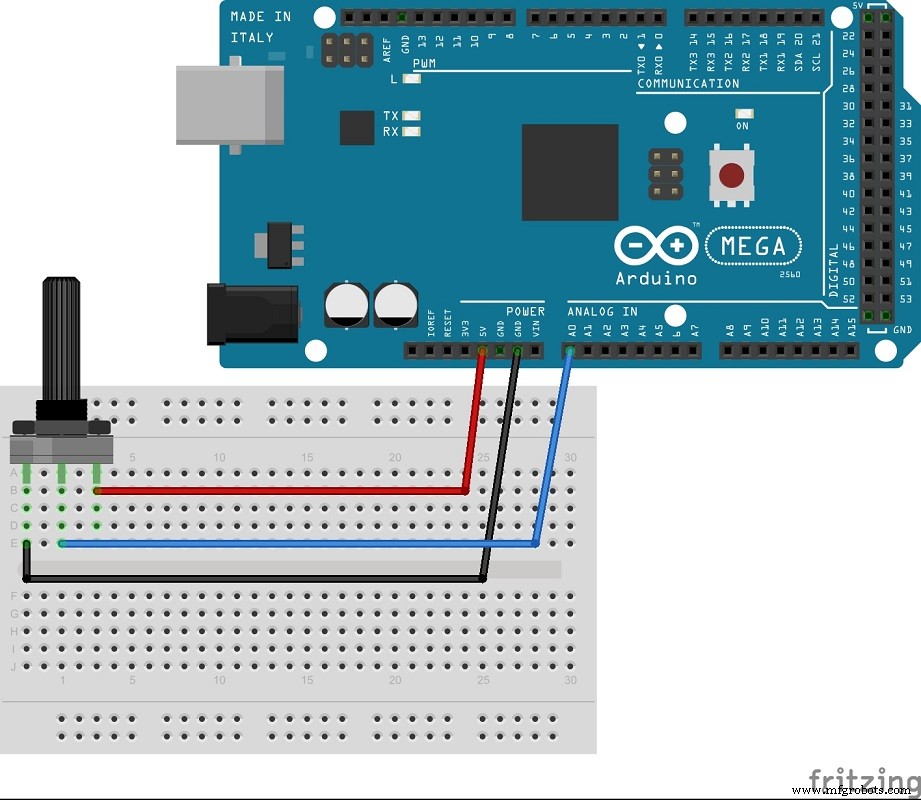
Circuit schematic of the first example. Using the potentiometer value as analog input
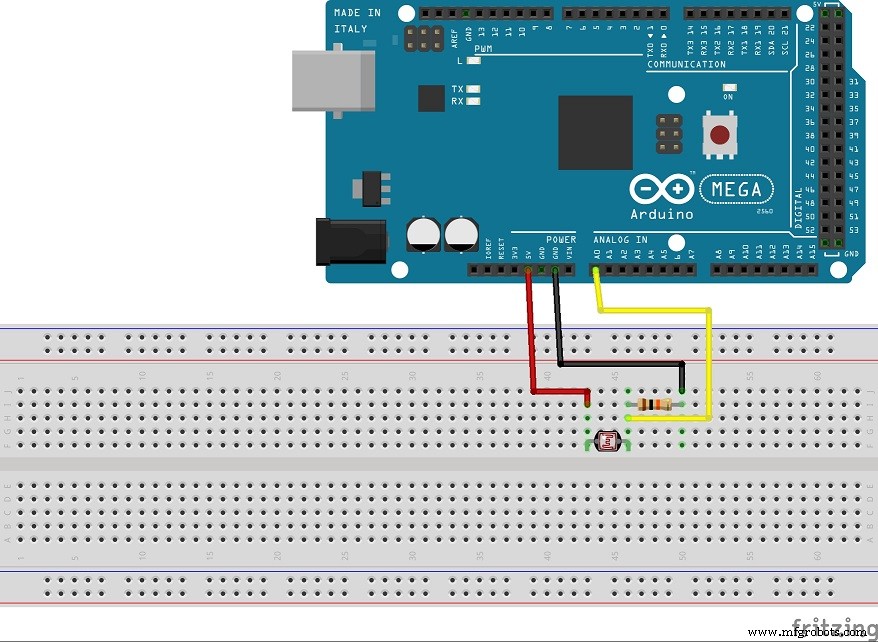
Circuit schematic of the second example. Using the photocell as a voltage divider and it’s variable value as analog input
Source Code of the first and the second example
void setup() {
Serial.begin(9600);
}

void loop() {
int sensorValue = analogRead(A0);
Serial.println(sensorValue);Code language: Arduino (arduino)
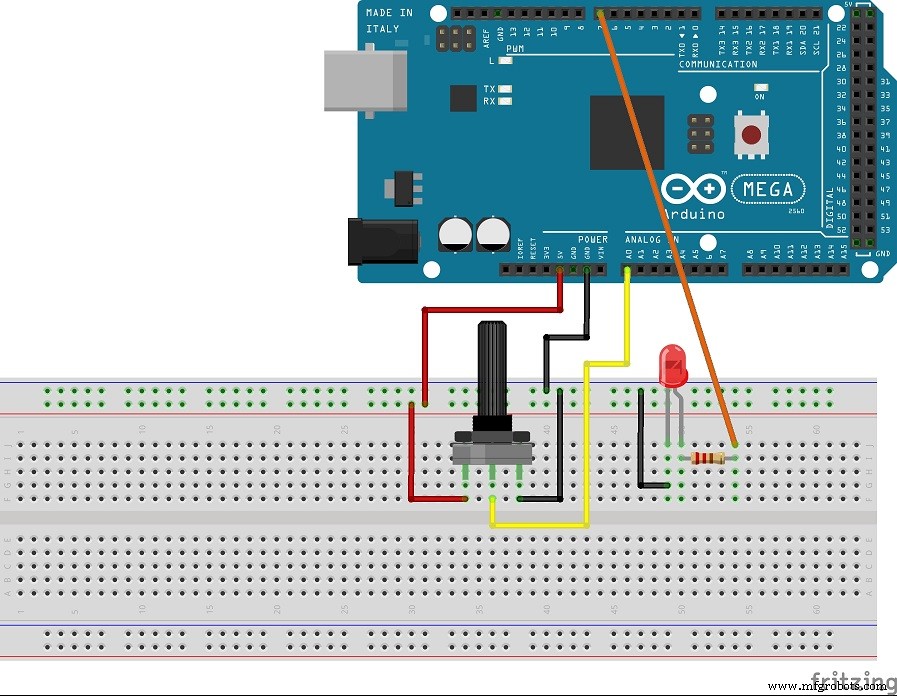
Circuit schematic of the third example. Using the potentiometer to control the LED brightness via PWM
Source Code of the third example
int led = 7;

void setup() {
Serial.begin(9600);
pinMode(led, OUTPUT);
}

void loop() {
int sensorValue = analogRead(A0);
int newValeu = map(sensorValue, 0, 1023, 0, 255);
analogWrite(led, newValeu);
}Code language: Arduino (arduino)
Manufacturing process
- Create a Secure Arduino RFID Lock – Step‑by‑Step Guide
- Arduino Nano Fingerprint Sensor Project – Step‑by‑Step Tutorial
- Build a Mini Piano with Arduino UNO – Step-by-Step Tutorial
- Master Arduino Multithreading with Protothreading: A Step‑by‑Step Tutorial
- Master Arduino Control with MATLAB GUI: Step-by-Step Tutorial
- Master Arduino & MATLAB Integration: Step‑by‑Step Serial Communication Tutorial
- Arduino Tutorial 06: Connecting Arduino to Processing via Serial Communication
- Master Serial Communication with Arduino – Step-by-Step Video Guide
- Master DC & Servo Motor Control with Arduino – Step-by-Step Tutorial
- Arduino Beginner Tutorial 01: Get Started with Your First Project