


Quickly Label 3D Printed Parts with Engraver Filler – A Proven, Easy Method
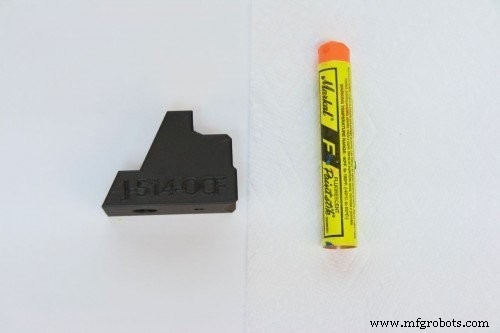
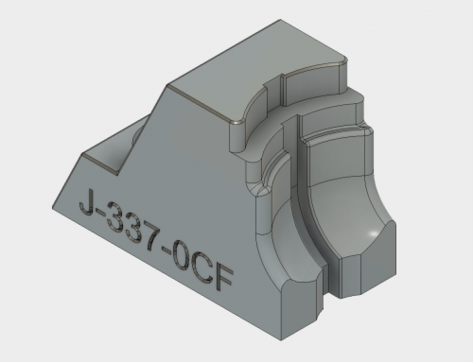
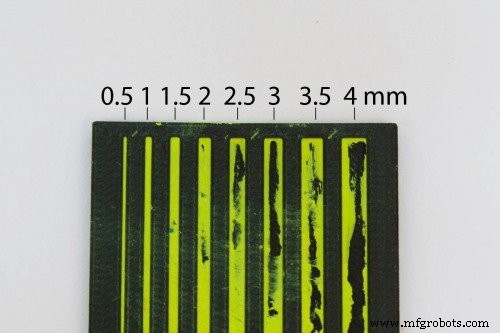
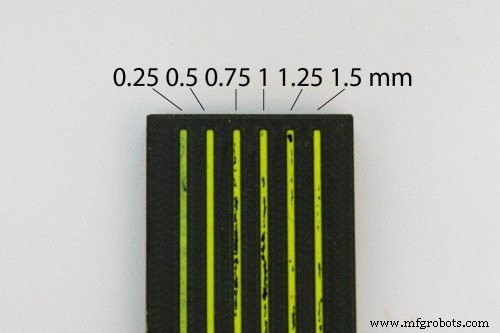
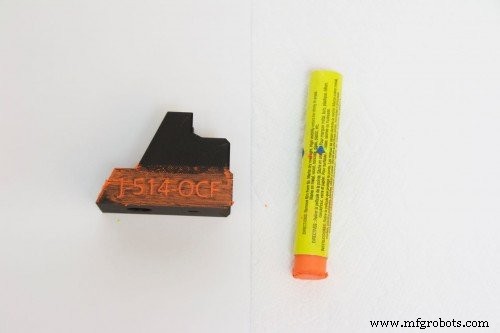
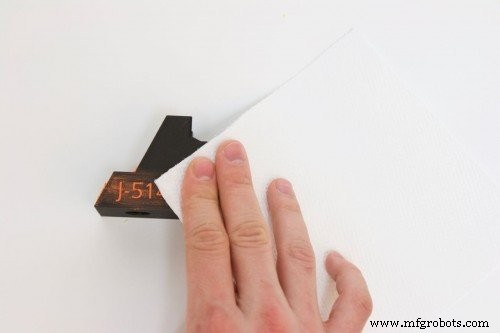
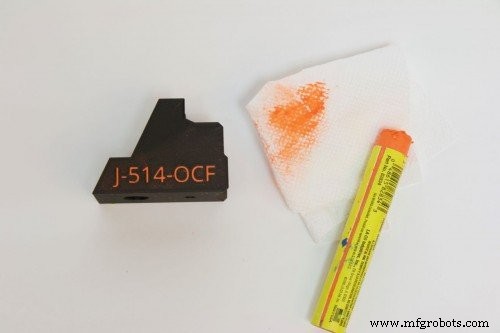
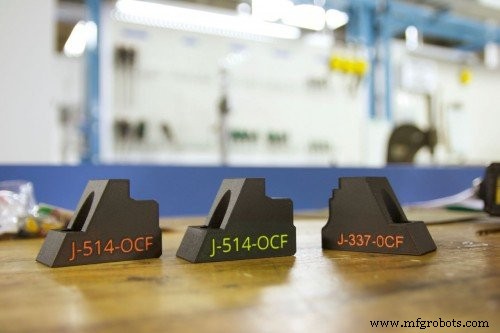
In the manufacturing world, clear labeling of tooling and fixtures is essential for quick identification and efficient workflow. While painting or dyeing 3D‑printed parts can alter their look, adding legible lettering or highlighted trim often requires more time. A simple, industry‑tested trick uses engraver filler to color etched or engraved text and shapes in seconds. Below, we walk through each step to help you finish your parts with a professional, eye‑catching label. Engraver filler is a wax‑based substance that fills etchings to provide color and contrast. A common example is the bright logos on bowling balls. For tooling, we recommend a fluorescent variant because it stands out against most colors and materials. While the filler we used is marketed for bowling balls, it performs equally well on a wide range of 3D‑printed polymers. The key to a successful label is the engraving itself. Use your CAD program to cut the desired text or icon into the part model as a negative space. The filler will only occupy these recessed areas. Pay careful attention to the depth and width of the cuts: Cuts that are too wide risk the filler rubbing off; cuts that are too deep may require multiple filler applications. Our tests show that 0.5–1 mm widths strike the right balance, especially when using neon or fluorescent fillers that remain visible even in thin sections. When printing, place engravings on the top or side surfaces to avoid support material on the bottom. If bottom engraving is unavoidable, add a chamfer to the edges so the feature can be printed without support. Take a clean, dry surface and rub the filler stick lightly across the entire part. This initial pass ensures the filler touches the engraving corners. Then, focus on the engraved area, brushing the filler in a back‑and‑forth motion so the wax slides into the recesses. Using a paper towel (or a damp one for stubborn residue), wipe the surface. The filler will remain only within the cavities, leaving the surrounding area pristine. This step is quick and eliminates any bulk material that might otherwise obscure the label. After the filler has set, inspect the label for even coverage. The result is a clean, durable mark that enhances both functionality and aesthetics. This method is ideal for quick production runs, prototyping, or any situation where time and clarity are priorities. Engraver filler is best for short‑term use or low‑wear applications. Its waxy nature can wear down with repeated friction, and it is temperature‑sensitive (typically -45 °C to 60 °C). For high‑temperature environments or parts that endure heavy handling, consider alternative labeling methods such as laser etching or thermographic ink. We learned this technique from a valued customer and are excited to share it with the community. If you have insights or want to explore advanced printing solutions, reach out to us. Order a sample part today to experience the difference for yourself.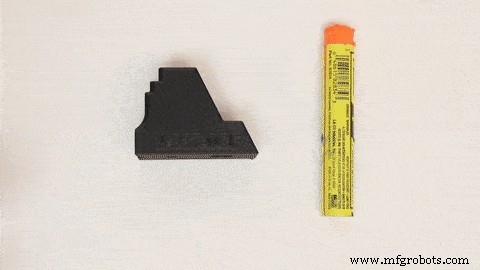
1. Choose the Right Engraver Filler
2. Design the Engraving in CAD
3. Print the Part
4. Apply the Engraver Filler
5. Remove Excess Filler
6. Inspect and Use Your Part
7. Practical Tips and Limitations
3D printing
- Five Key Considerations for Safely Cleaning SLS 3D Prints
- Achieve Stunning Color Results on Your Next FDM Print
- Mastering Post‑Processing for SLA Prints: From Cleaning to a Professional Finish
- In‑House Production: The Fuse 1 Builds Its Own Parts
- Metal 3D Printing Applications: Prototyping & Tooling – Part 1
- Mastering Isotropic Fiber 3D Printing: Build Ultra‑Strong Parts with the Mark Two
- Optimizing 3D Printed Part Strength with Efficient Fiber Routing – Part 1
- CNC vs. 3D Printing: Choosing the Right Production Method
- Maximize Automation ROI with AI: The Playbook (Part 2)
- Revolutionizing Part Consolidation with Additive Manufacturing