


HC-12 Serial Communication Module: Setup, Features & Remote Data Transfer
Do you need a communication module to transfer and receive information remotely? Have you tried the HC-12? It’s a great serial data module you can easily configure and use.
Today’s article looks at the HC-12, its properties, settings, and how to use it.
What is HC-12?
The HC-12 is a 100mW wireless multi-channel embedded communication module you can use to transmit and receive serial data. It has 100 channels and can transmit up to 1000 meters.
HC-12 Technical Properties
- The HC-12 has an operating frequency of 433.4 to 473.0 MHz.
- Second, it has a supply voltage of 3.2V to 5.5VDC
- Third, it has a serial baud rate of 1.2kpbs to 115.2kpbs.
- Fourth, it has a transmitting power of -1dBm to 20dBm and a
- Receiving sensitivity of -117dBm to -100dBm
- Finally, its operating temperature ranges from -40℃ to +85℃.
How to Communicate the HC-12 Module with Arduino
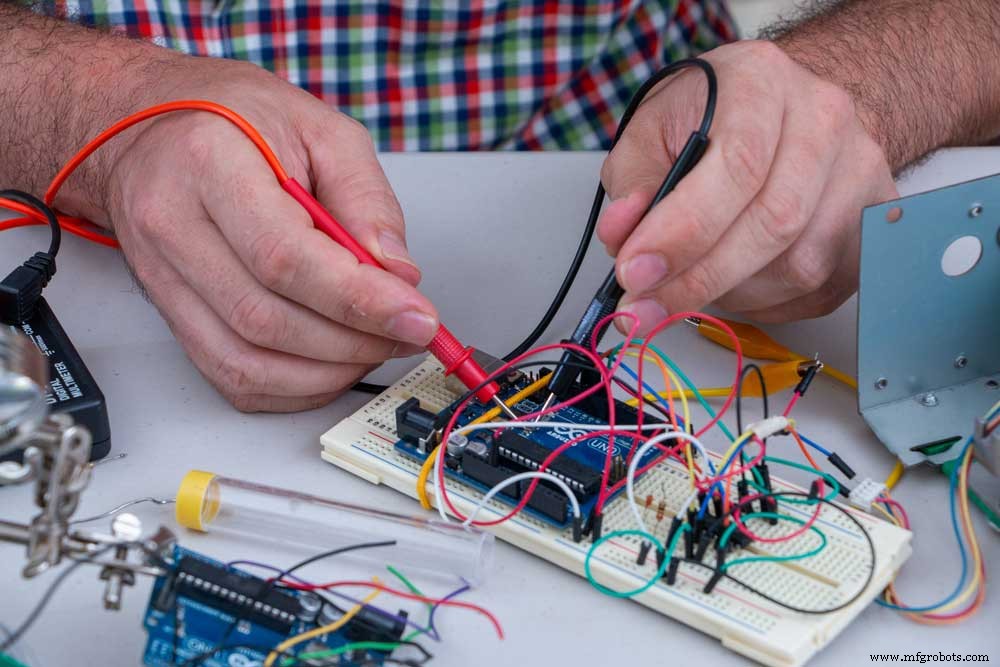
Fig 1: Working Hands-on Arduino Project
Here’s how to set it up.
I’d recommend using an external power source and a decoupling capacitor to stabilize the power.
- First, connect the transmitter and receiver to two different Arduino boards.
- You can opt to connect the Arduino boards to two separate computers. Alternatively, connect both boards to the same computer and upload the Arduino codes separately.
- Next, configure the boards so that what you type in the serial monitor sends data from the HC-12 serial module.
- Also, you can send AT commands and configure module parameters using the same code. All you’ll do is ground the “set” pin and set it to a low logic level.
Settings of the HC-12 Radio Module
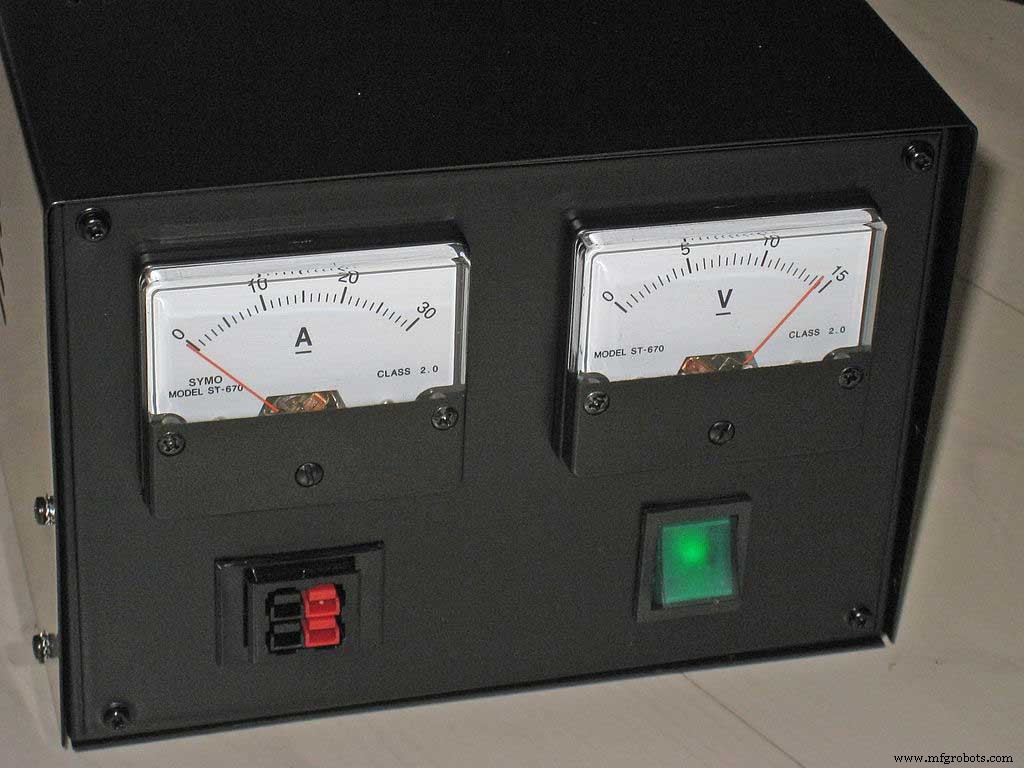
Fig 2: A DC Power Source
Setting the Baud Rate
The HC-12 radio module automatically sets the baud rate or rate of information transfer across a communication channel.
Here, look at the baud rates you can set to enable communication with the HC-12 radio module.
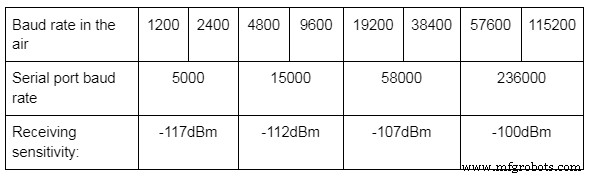
A high reception sensitivity benefits you as you’ll pay lower data rates. A reduction of 6 dBm reduces the sensitivity to half the previous value.
Hence ensure that the receiving and transmitting modules have the same baud rate per the following setting.
- AT + Bx with x = 1200, 2400, 4800, 9600, etc.
Setting the Radio Mode
The HC-12 radio module has four modes: FU1, FU2, FU3, and FU4. The FU3 is the default mode.
First, here’s how to set the radio modes.
- AT + FUx with X = 1, 2, 3,or 4.
Additionally, here’s a look at the features of the four radio modes.
FU1
The FU1 has an idle current of 3.6mA, a transmission delay of 15-25ms, and full power operating range of 100-meters.
FU2
It has an idle current of 80uA, a transmission delay of 500ms, and full power operating range of 100 meters.
FU3
The FU3 has an idle current of 16 mA and a transmission delay of 4-80 ms. Also, it has a full-power operating range of 600 to 1000 meters for the 9600 and 2400 baud, respectively.
FU4
The FU4 mode has an idle current rating of 16mA and a transmission delay of 1000 ms. Additionally, it has 1800 meters operating range at full power and a 1200 baud.
Setting the Transmitting Power
The HC-12 radio module has eight power levels numbered from 1 to 8.

Level 8 is the default transmitting power level, and here’s how to set the rest.
- AT + Px with x = 1, 2, 3, 4, 5, 6, 7, 8.
Setting the Channel
The HC-12 module has 100 channels separated by a 400 kHz frequency shift. For example, channel 1 uses 433.4 MHz, while channel 100 uses 473.0 MHz.
Here’s how to set the channels.
- AT + Cx with x = 001, 002, 003, … 100.
Setting the Data Format
You can set the bits transmitted per byte in a serial data transfer. Anything apart from 8 is exotic and followed by parity or non-parity bit. If you send a parity bit, you then have the option to check for odd or even parity. In conclusion, the module then transmits 1, 1.5, or 2 stop bits.
Here’s how to set the data format.
- AT + Uxyz, where:
- X is the number of bits, which is 8.
- Y is the E (even parity check), O (odd parity check), and N (no parity check).
- Z is the number of stop bits, e.g., 1 stop bit, etc.
For example, the default data format is 8N1.
Other Settings
- AT + DEFAULT resets all settings.
- AT + UPDATE allows uploading new firmware.
- AT + SLEEP needs 23uA to put the module in sleep mode.
Querying the HC-12 Module
You can also query the HC-12 module as shown below.
- AT + V shows the firmware version.
- AT + Rx where
x = X means all parameters have been queried.
X = B, C, F, or P for baud rate, channel, mode, or transmitting power.
Using the Sleep Mode
The sleep mode is suitable for HC-12 modules that periodically send data and remain dormant the other times. For example, modules transmitting a weather station’s data.
Range Test
For the range test, you can operate with two Arduino Nano boards. In this case, you attach a receiver to one of the boards. Next, you’ll connect an LED to pin 6 of the receiver Arduino Nano.
After configuring, please send a message from the transmitter and move the receiver further until it fails to get the signal. That is its range.
Improving the Range
You can improve the data range by upgrading your hardware by attaching a bigger capacitor to the power supply. Also, you can use better antennae.
Conclusion
The HC-12 module is a great communication module you can use in your project. And, as we’ve seen, it has an extended range communication capability, with some reaching 1.8 km.
Finally, contact us with any comments, suggestions, or gray areas that need clarification.
Industrial Technology
- Gesture‑Controlled Robot Powered by Raspberry Pi
- Morse Code Communication with Laser Module – Dual‑Side Arduino Project
- AI-Powered Maze-Solving Robot Using Arduino and Bluetooth
- Build a Morse Code Transmitter with Arduino – Easy DIY Guide
- Build Reliable Long‑Range Arduino Networks with the HC‑12 Module
- Master Serial Communication with Arduino – Step-by-Step Video Guide
- Leveraging DevOps to Overcome Embedded Software Challenges
- Arduino Serial Communication: Mastering UART Basics and Troubleshooting
- Precise Ultrasonic Distance Sensing with Arduino – Step‑by‑Step Guide
- Connect Node-RED to PLCnext Controllers with the New REST API Connector