


Smart Parking Counter: Real‑Time Vehicle Tracking with Arduino, Processing, and PHP
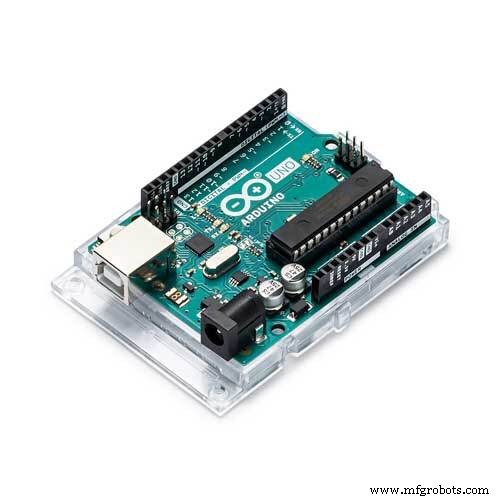
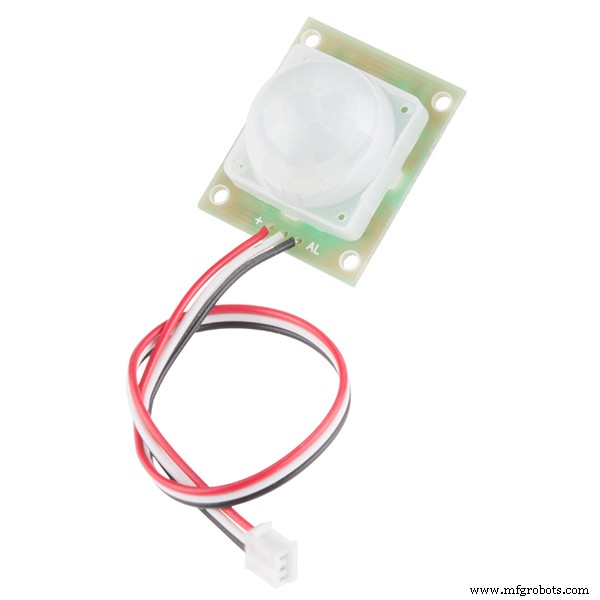
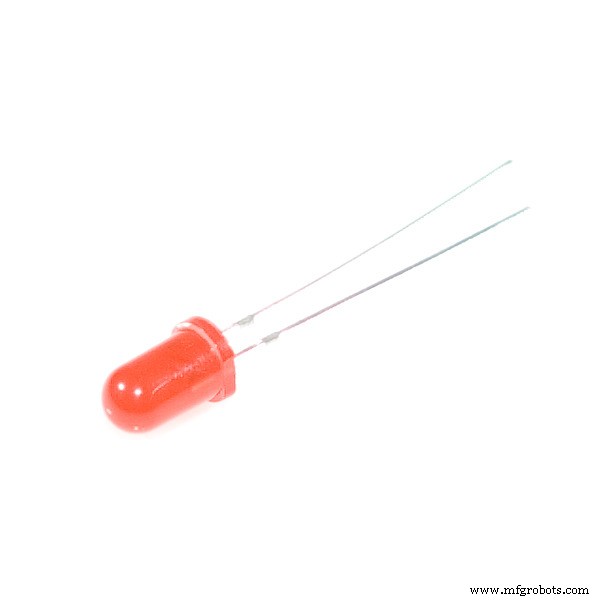
Components and supplies
 |
| × | 1 | |||
 |
| × | 2 | |||
 |
| × | 1 | |||
 |
| × | 1 |
Apps and online services
 |
| |||
 |
| |||
| ||||
|
About this project
IntroductionThis project demonstrates how you can use Arduino to count the number of cars that come in and out of a mall using two sensors, send the data to the cloud using Processing & PHP, and later view the number of available slots in the parking lot. You do not need an Ethernet or Wifi shield for this project!
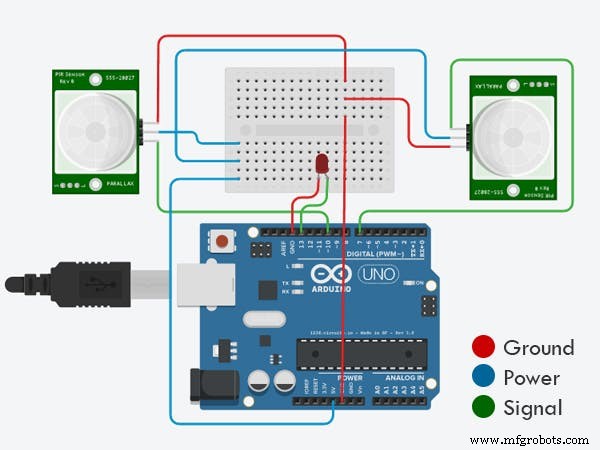
How it worksThe sensors need to be placed in the entry and exit point of the parking lot for this to work as intended. Basically, you increment the count every time a car comes in and decrement when it goes out. The LED in the system simply indicates that the vehicle is properly counted as it lights on every time a car passes through the sensor.
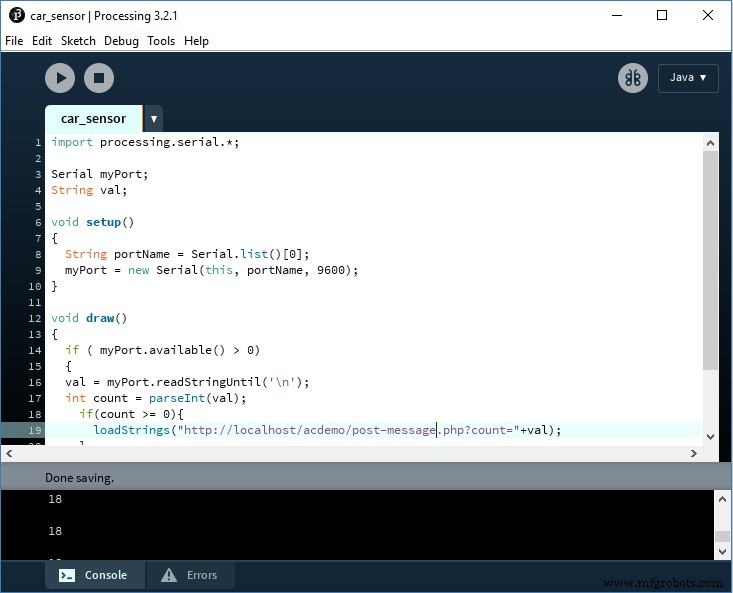
ProcessingProcessing is an open source language/development tool for writing programs in other computers. Useful when you want those other computers to "talk" with an Arduino, for instance to display or save some data collected by the Arduino.
For this project, we used Processing to receive the data (count of cars) sent by Arduino via serial port. Download and install the Processing IDE to your computer. You can see in the attached Processing sketch a very simple and straight-forward lines of code. Here, we call the PHP file using the method loadStrings().
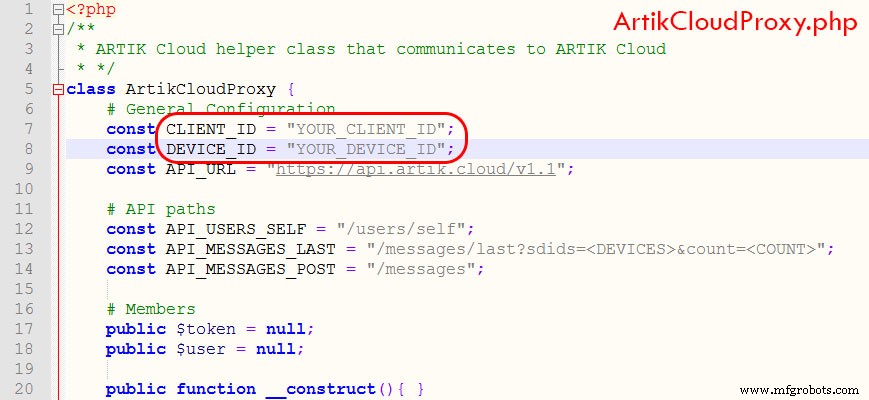
The PHP file post-message.php is the same file in the tutorial found here. We downloaded the entire zip file from the Github page and edited a few lines of code in the original file so that we can use it without having to login to our Samsung account. For this to work, you will need to follow the instructions here about changing the port of your WAMP or XAMP server and installing the CA certificate for ARTIK Cloud. Alternatively, you can use your remote or hosted server with installed SSL certificate.
Copy the files to a folder, say, acdemo so that it can be accessed using the URL http://localhost:8000/acdemo/post-message.php or https://www.yourwebsite.com/acdemo/post-message.php
There are only two files in the PHP SDK that you need to edit: ArtikCloudProxy.php and post-message.php. You can view your client & device ID here.
In the post-message.php file, you need to get your access token and device ID. The easiest way to get the token is by following the steps here. Note that the only data that we're sending to the cloud is the number of cars that enters and exits the mall. We created a device in the Artik Cloud and named it Car Counter with a field called count which holds this value.
Now that everything is setup, it's time to get it going! Follow the simple steps below:
Artik Cloud- 1. Login to your Artik Cloud account and go to Applications > New Application
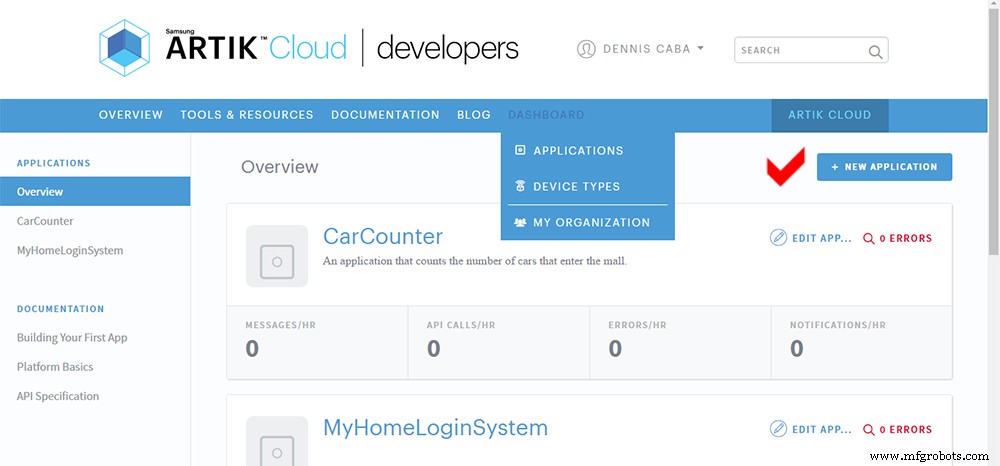
- 2. Enter the necessary details for your application in the next screen.
- 3. Once you finish creating your application, if will be displayed in your dashboard. Click the application name and look for Show Client ID & Secret. You need these codes for the PHP files.
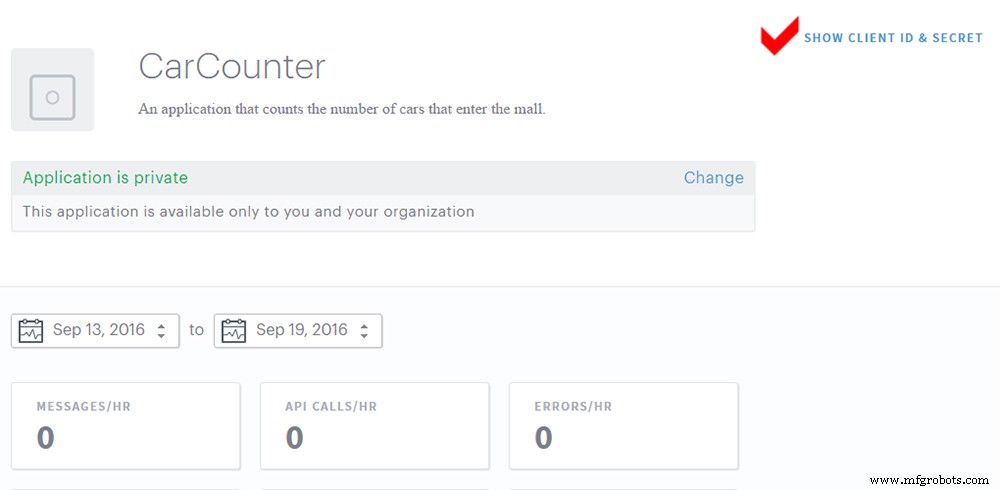
- 4. From the side menu, select your application and click Permissions. Add Car Counter from the list of device types and check Read & Write permissions.

- 1. Upload the sketch to your Arduino UNO. If this is your first time to use Arduino, follow these steps to understand how to do this procedure.
- 2. Run the Processing sketch in the Processing IDE. Make sure that your WAMP server is on at this point if you're using your local computer instead of a hosted server.
- 3. If you have successfully connected the parts for this system based on the connection diagram above, pass through the PIR sensor to see if it works.
- 4. Login to your Artik Cloud account to see if the data is being sent properly.
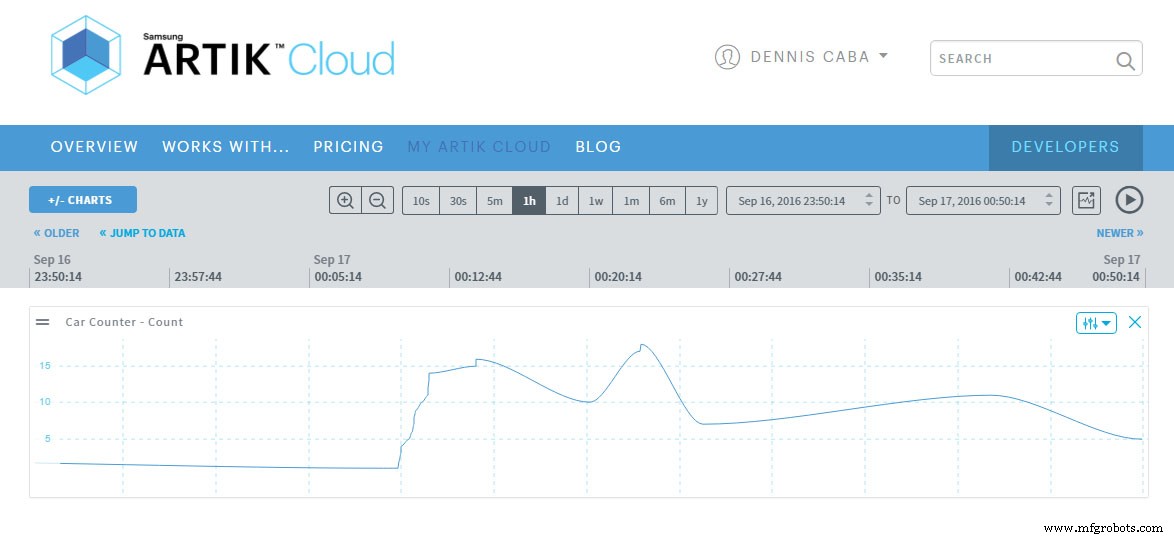
- 1. Open the link below to see if the data is being properly sent to Artik Cloud. If nothing goes wrong, this will display a Json file. If you don't see a Json file, you may not have installed the SSL certificate as described above. Try to go back and make sure to follow the directions properly.
http://localhost:8000/acdemo/post-message.php?count=10
Based on the above data of car count, you can create an app for a mall so that shoppers can view the number of available slots in the parking space before going to the mall. You can also add another light indicator that turns on when the parking is full or not.
Code
- Arduino Code
- Processing Sketch
- post-message.php
- ArtikCloudProxy.php
Arduino CodeArduino
This is the code that display the car count to the serial and turns the LED on to indicate that a car passes through the PIR sensor.int pirPinIN = 7;
int pirPinOUT = 10;
int led = 13;
static long counter = 0;
void setup()
{
pinMode(pirPinIN, INPUT);
pinMode(pirPinOUT, INPUT);
pinMode(led, OUTPUT);
digitalWrite(led, LOW);
Serial.begin(9600);
}
void loop()
{
long now = millis();
if (digitalRead(pirPinIN) == HIGH)
{
counter++;
Serial.println(counter);
digitalWrite(led, HIGH);
delay(500);
digitalWrite(led, LOW);
}
if (digitalRead(pirPinOUT) == HIGH)
{
counter--;
Serial.println(counter);
digitalWrite(led, HIGH);
delay(500);
digitalWrite(led, LOW);
}
}
Processing SketchJava
This Processing sketch reads the incoming values on the analog ports and then uses Serial Communication functions to output the values.import processing.serial.*;
Serial myPort; // Create object from Serial class
String val; // Data received from the serial port
void setup()
{
// I know that the first port in the serial list on my mac
// is Serial.list()[0].
// On Windows machines, this generally opens COM1.
// Open whatever port is the one you're using.
String portName = Serial.list()[0]; //change the 0 to a 1 or 2 etc. to match your port
myPort = new Serial(this, portName, 9600);
}
void draw()
{
if ( myPort.available() > 0)
{ // If data is available,
val = myPort.readStringUntil('\n'); // read it and store it in val
int count = parseInt(val);
if(count >= 0){
loadStrings("http://localhost:8000/acdemo/post-message.php?count="+val);
}
}
println(val); //print it out in the console
}
post-message.phpPHP
This code GETs the value passed by the Processing sketch and POST the count to the cloud.<?php
$count = filter_input(INPUT_GET, 'count', FILTER_SANITIZE_NUMBER_INT);
require('ArtikCloudProxy.php');
$proxy = new ArtikCloudProxy();
$proxy->setAccessToken("YOUR_ACCESS_TOKEN");
$data ='{"count":'.$count.'}';
$payload = array("data"=>$data,"sdid"=>"YOUR_DEVICE_ID","type"=>"message");
$payload = json_encode($payload, JSON_HEX_QUOT | JSON_HEX_TAG);
$response = $proxy->sendMessage($payload);
header('Content-Type: application/json');
echo json_encode($response);
ArtikCloudProxy.phpPHP
This is the ArtikCloudProxy class necessary for connecting to Artik cloud. Save it to the same folder as post-message.php somewhere accessible to the web. Make the necessary changes to the configuration.<?php
/**
* ARTIK Cloud helper class that communicates to ARTIK Cloud
* */
class ArtikCloudProxy {
# General Configuration
const CLIENT_ID = "YOUR_CLIENT_ID";
const DEVICE_ID = "YOUR_DEVICE_ID";
const API_URL = "https://api.artik.cloud/v1.1";
# API paths
const API_USERS_SELF = "/users/self";
const API_MESSAGES_LAST = "/messages/last?sdids=<DEVICES>&count=<COUNT>";
const API_MESSAGES_POST = "/messages";
# Members
public $token = null;
public $user = null;
public function __construct(){ }
/**
* Sets the access token and looks for the user profile information
*/
public function setAccessToken($someToken){
$this->token = $someToken;
$this->user = $this->getUsersSelf();
}
/**
* API call GET
*/
public function getCall($url){
$ch = curl_init();
curl_setopt($ch, CURLOPT_URL, $url);
curl_setopt($ch, CURLOPT_HTTPGET, true);
curl_setopt($ch, CURLOPT_RETURNTRANSFER, true);
curl_setopt($ch, CURLOPT_HEADER, false);
curl_setopt($ch, CURLOPT_HTTPHEADER, array('Content-Type: application/json', 'Authorization:bearer '.$this->token));
$json = curl_exec($ch);
$status = curl_getinfo($ch, CURLINFO_HTTP_CODE);
curl_close($ch);
if($status == 200){
$response = json_decode($json);
}
else{
var_dump($json);
$response = $json;
}
return $response;
}
/**
* API call POST
*/
public function postCall($url, $payload){
$ch = curl_init();
curl_setopt($ch, CURLOPT_URL, $url);
curl_setopt($ch, CURLOPT_POST, true);
curl_setopt($ch, CURLOPT_POSTFIELDS, (String) $payload);
curl_setopt($ch, CURLOPT_RETURNTRANSFER, true);
curl_setopt($ch, CURLOPT_HEADER, false);
curl_setopt($ch, CURLOPT_HTTPHEADER, array('Content-Type: application/json', 'Authorization: bearer '.$this->token));
$json = curl_exec($ch);
$status = curl_getinfo($ch, CURLINFO_HTTP_CODE);
curl_close($ch);
if($status == 200){
$response = json_decode($json);
}
else{
var_dump($json);
$response = $json;
}
return $response;
}
/**
* GET /users/self API
*/
public function getUsersSelf(){
return $this->getCall(ArtikCloudProxy::API_URL . ArtikCloudProxy::API_USERS_SELF);
}
/**
* POST /message API
*/
public function sendMessage($payload){
return $this->postCall(ArtikCloudProxy::API_URL . ArtikCloudProxy::API_MESSAGES_POST, $payload);
}
/**
* GET /historical/normalized/messages/last API
*/
public function getMessagesLast($deviceCommaSeparatedList, $countByDevice){
$apiPath = ArtikCloudProxy::API_MESSAGES_LAST;
$apiPath = str_replace("<DEVICES>", $deviceCommaSeparatedList, $apiPath);
$apiPath = str_replace("<COUNT>", $countByDevice, $apiPath);
return $this->getCall(ArtikCloudProxy::API_URL.$apiPath);
}
}
Schematics
Diagram for connecting the 2 PIR sensors and the LED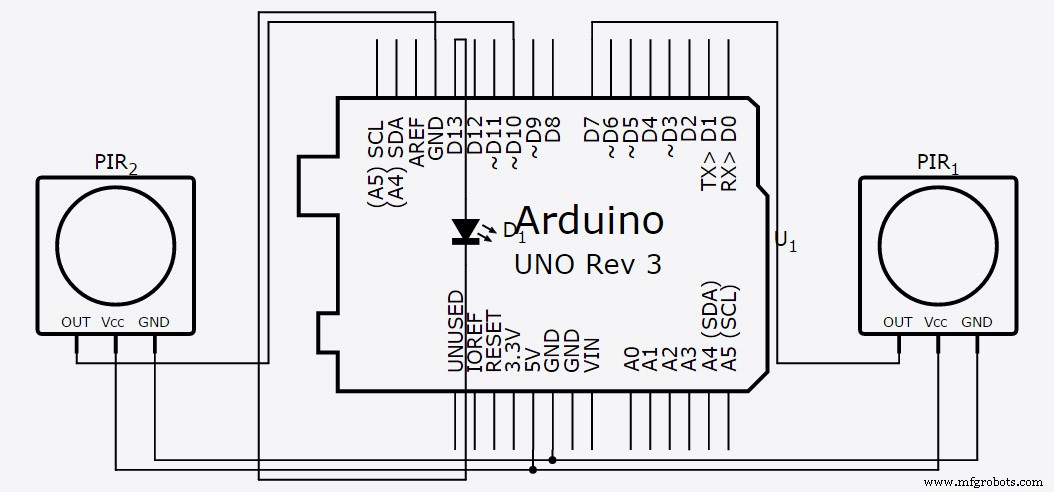
Manufacturing process
- Build an Ultrasonic Levitation Device with Arduino – Step‑by‑Step Guide
- Find Me: Smart Item Locator with Arduino and Bluetooth
- Real-Time Distance Measurement with Arduino Sonar & Processing Visualization
- Build a PHP‑Based Web Interface to Control Your Arduino Uno
- Build a Custom Arduino Joystick Steering Wheel for Gaming
- PhoneLocator: Securely Locate Your Phone Anywhere
- Build a Morse Code Transmitter with Arduino – Easy DIY Guide
- Arduino 4WD RC Car – Complete Parts List & Build Guide
- Building an IoT Device with ESP8266‑01 and Arduino Nano: A Complete Guide
- Arduino Tutorial 06: Connecting Arduino to Processing via Serial Communication