


Valentine's Day Gift: DIY Days‑Together Counter
Components and supplies
 |
| × | 1 | |||
| × | 1 | ||||
 |
| × | 1 | |||
 |
| × | 1 | |||
 |
| × | 1 | |||
 |
| × | 1 |
About this project

Back in 2017, September I think, I was just starting my second year at university and I met an amazing girl. I moved into accommodation with her and her friends and we ended up sharing a floor of the house together, just me and her. So we got talking and became best mates and after a couple of months, we started to date each other. The day we started to date was 10.12.2017 (UK DATE).
Day; 10th
Month; 12th
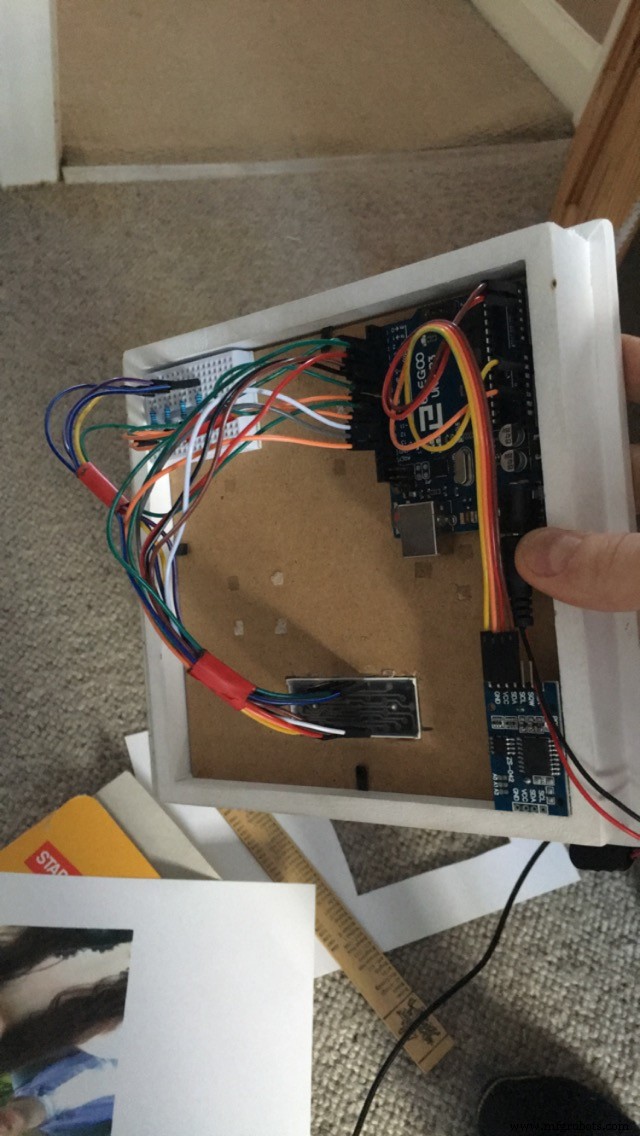
Anyways, almost a year goes by and I'm trying to figure out what to do for our anniversary and an idea pops into my head. I figured it might be nice to make her something doing something I was studying (electronics) so I decided on a counting system that counts the number of days we started dating and to put it into a photo frame and have a picture of myself and her together.
You may have come across this thread and are in need of an idea for your anniversary, or maybe you're just having a browse, either way it's a fun project to do and I'll be inputting everything here to show you how to make it yourself.
The only difficult part about this project is the code. I've made a sample template that when you compile and upload it, it will display mine and my girlfriends date, but I have added comments into the code so that you can edit in your own date
Anyways, enjoy!
Code
- DaysCounter.ino
DaysCounter.inoC/C++
for this you will need to download arduino IDERTC library zip file,
seven segment zip file
save both of the libraries into the librarys folder where the arduino ide is installed.
from there open up arduino ide and click on 'sketch'
'include libraries'
'add zip libraries'
follow the code below
TO ADJUST TIME - on line 7 in the brackets it reads (2017, 12 , 9, 0, 0, 0,) you need to change the first 3 numbers
i.e 2017, 12, 9 ----> 2014, 4, 6,
what ever date you got together, enter it there.
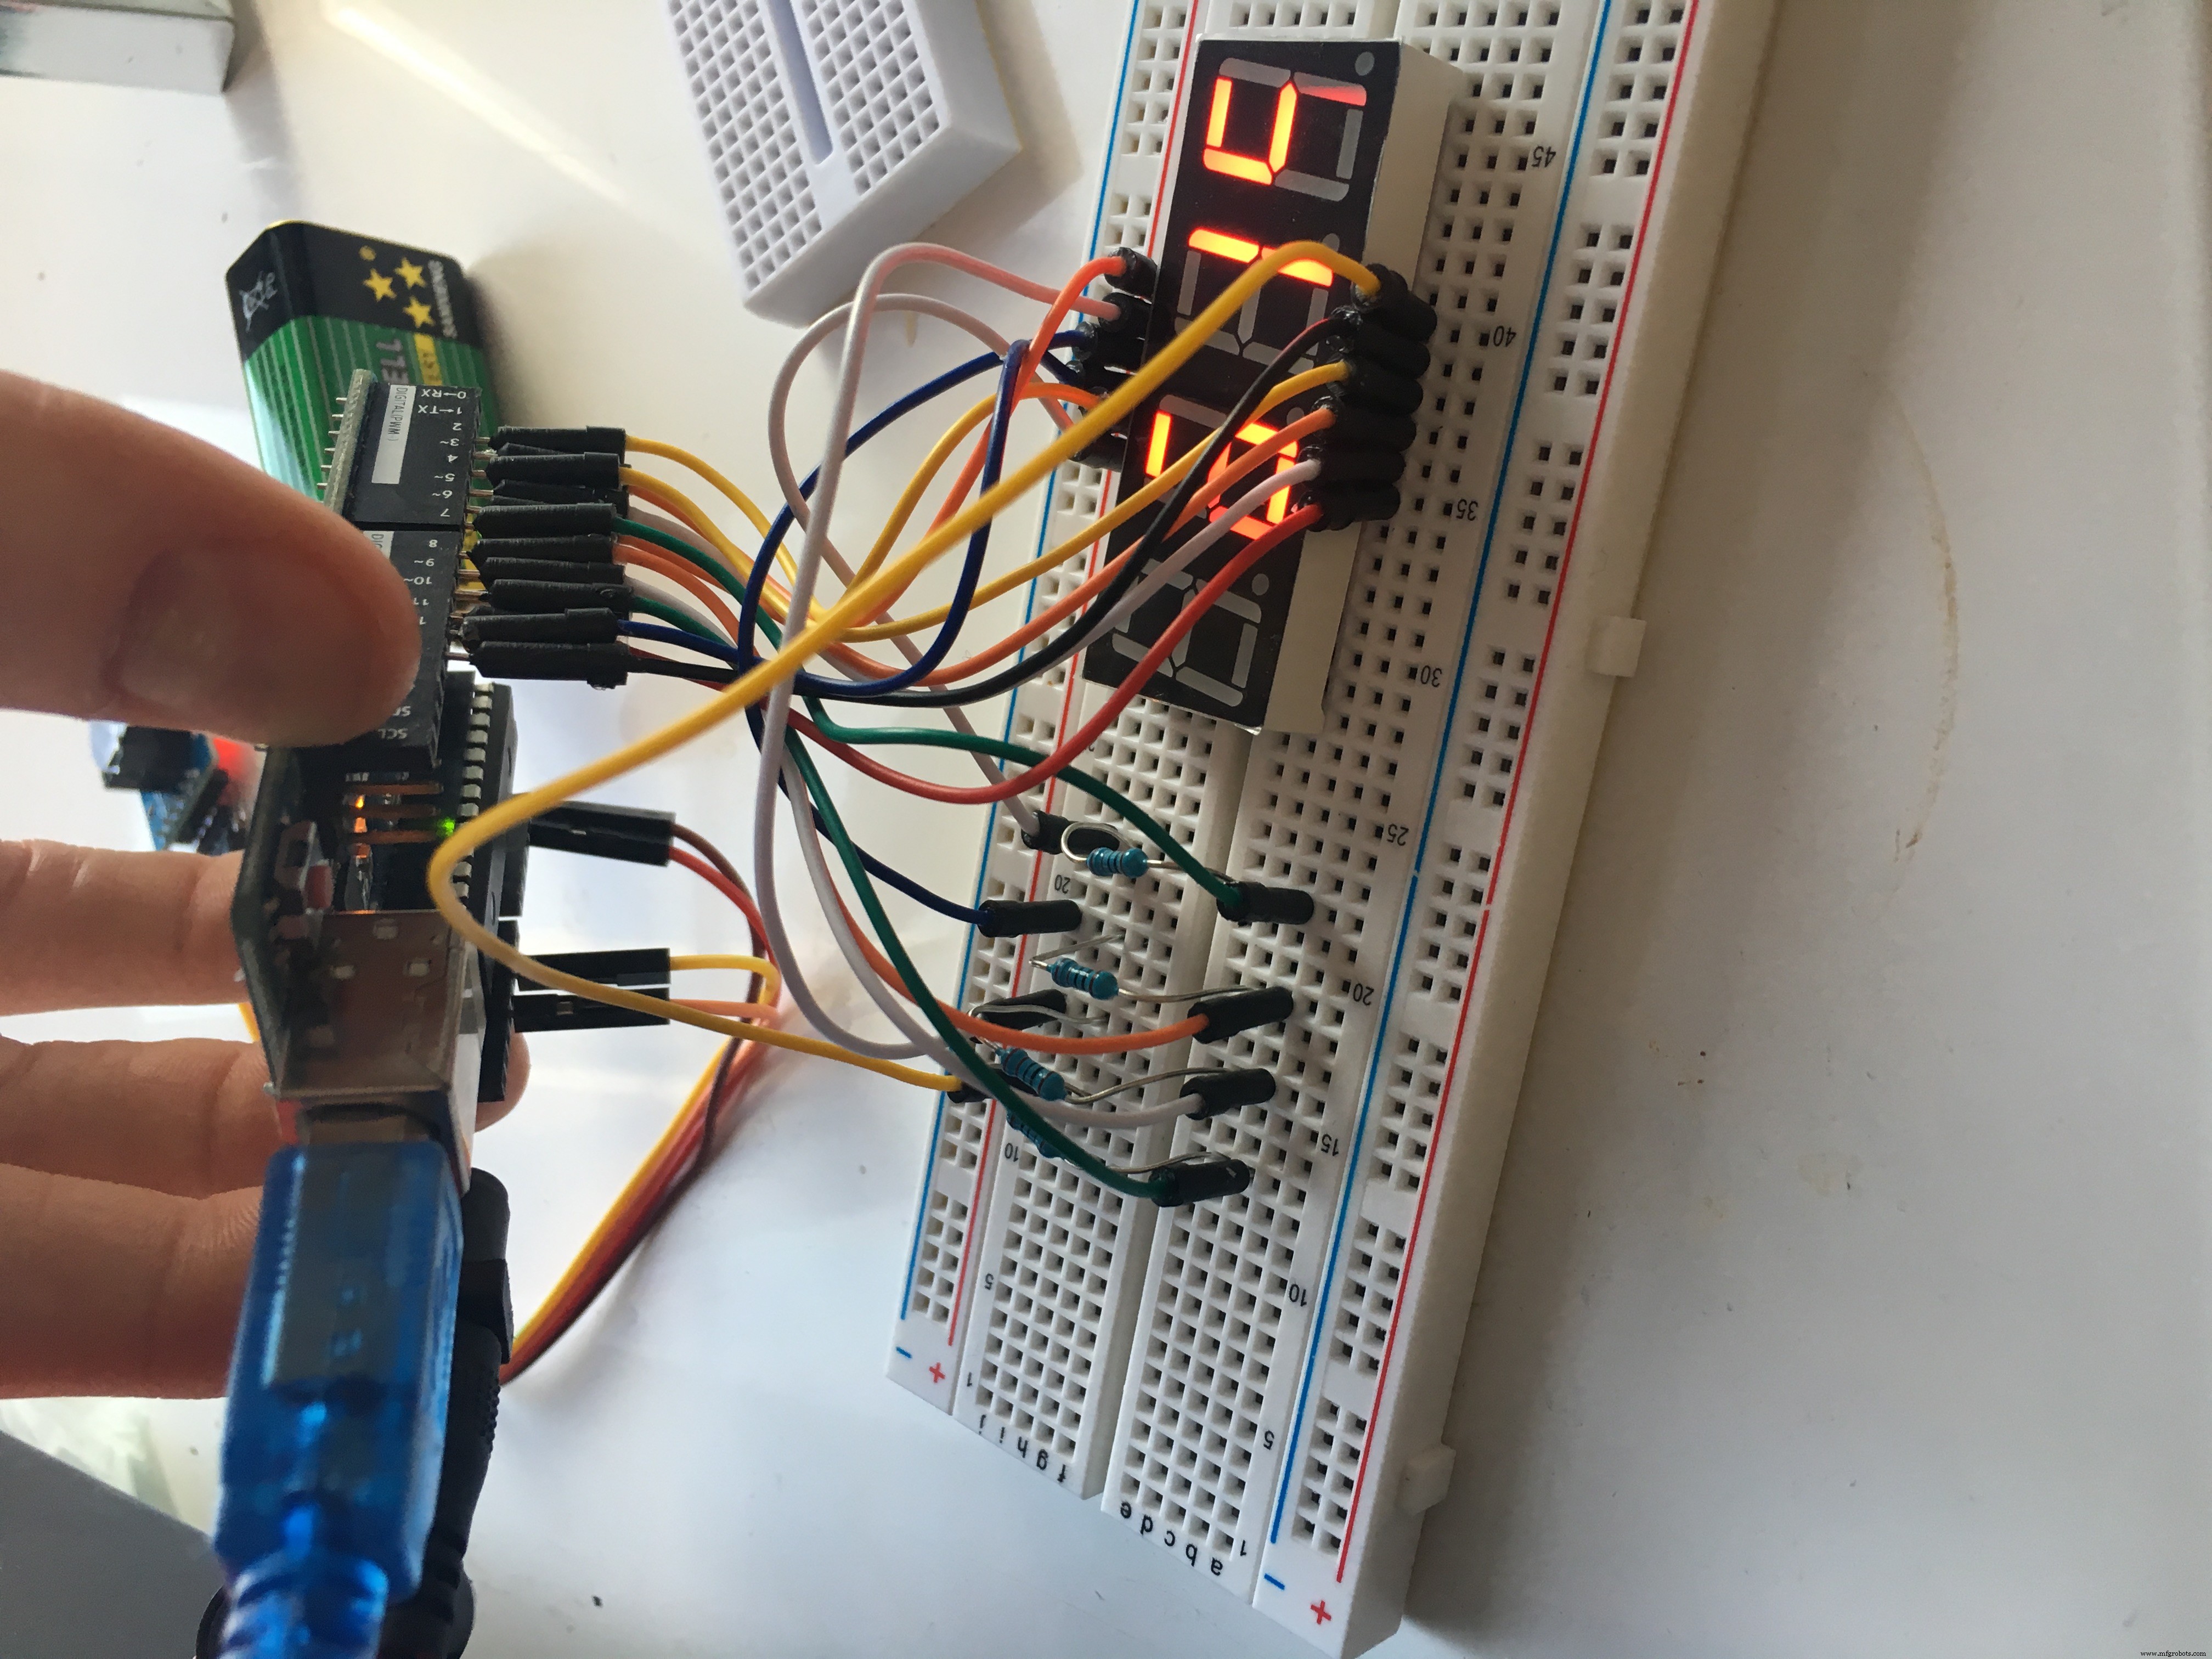
then compile and select upload and if everything has gone to plan and you've followed the steps correctly it should display the amount of days you have been together
#include <RTClib.h>
#include <SevSeg.h>

SevSeg sevseg; //Instantiate a seven segment controller object
RTC_DS3231 rtc;

DateTime dtBegin (2017, 12, 9, 0, 0, 0); //!!!! adjust time here!!!!!
TimeSpan tsPassed;

void showInfo(const DateTime& dt) {
  Serial.print("NOW:");

  Serial.print(dt.year(), DEC);
  Serial.print('/');
  Serial.print(dt.month(), DEC);
  Serial.print('/');
  Serial.print(dt.day(), DEC);
  Serial.print(' ');
  Serial.print(dt.hour(), DEC);
  Serial.print(':');
  Serial.print(dt.minute(), DEC);
  Serial.print(':');
  Serial.print(dt.second(), DEC);

  Serial.print("\tPASSED:");
  Serial.print(tsPassed.days(), DEC);
  Serial.print(' ');
  Serial.print(tsPassed.hours(), DEC);
  Serial.print(':');
  Serial.print(tsPassed.minutes(), DEC);
  Serial.print(':');
  Serial.print(tsPassed.seconds(), DEC);

  Serial.println("");
}

//=========================================
//
//=========================================
void delayWithUpdate(uint32_t parDelay){
  uint32_t started=millis();
  while (millis()< started+parDelay){
    sevseg.refreshDisplay();
  }
}
//=========================
//=========================
void setup(){
  Serial.begin(9600);
  Serial.println(__TIME__);

  if (! rtc.begin()) {
        Serial.println("Couldn't find RTC");
        //===Device will be frozen here.
        //?????????May be some error LED blinking would be good to use??????
        while (1);
  }

  delay(1000);

  //!!!!! TO ADJUST A TIME:
  //1) uncomment a line below (under those comments)
  //2), upload the code again
  //3) COMMENT line back
  //4). uploand ONE MORE TIME


rtc.adjust(DateTime(F(__DATE__), F(__TIME__)));   //line to adjust time


  byte numDigits = 4;
  byte digitPins[] = {7, 8, 9, 10};
  //SEG:  A B C D E F G .
  //PIN:  11  7 4 2 1 10  5 3
  //ARDU: 2 3 4 5 11  12  13  6
  //byte segmentPins[] = {2, 3, 4, 5, 11, 12, 13, 6};
  byte segmentPins[] = {2, 3, 4, 5, 11, 12, 13, 6};
  bool resistorsOnSegments = false; // 'false' means resistors are on digit pins
  byte hardwareConfig = COMMON_CATHODE; // See README.md for options
  bool updateWithDelays = false; // Default 'false' is Recommended
  bool leadingZeros = false; // Use 'true' if you'd like to keep the leading zeros
  bool disableDecPoint = true; // Use 'true' if your decimal point doesn't exist or isn't connected

  sevseg.begin(hardwareConfig, numDigits, digitPins, segmentPins, resistorsOnSegments,
  updateWithDelays, leadingZeros, disableDecPoint);
  sevseg.setBrightness(100);


  sevseg.setNumber(1234, 1);
  delayWithUpdate(1000);


  sevseg.setNumber(8888, 1);
  delayWithUpdate(1000);

}
//=========================
//=========================
void loop(){
  sevseg.refreshDisplay();

  DateTime now = rtc.now();

  tsPassed = now-dtBegin;

  static uint32_t nextReportMillis=0;
  static uint16_t prevDaysPassed=0;

  if (tsPassed.days() != prevDaysPassed){
    prevDaysPassed=tsPassed.days();
    sevseg.setNumber(prevDaysPassed, 0);
  }


  sevseg.refreshDisplay();

  if (millis()>nextReportMillis){
    //===PRINT SOME INFO HERE
    showInfo(now);
    nextReportMillis=millis()+5000;
  }

}
Schematics
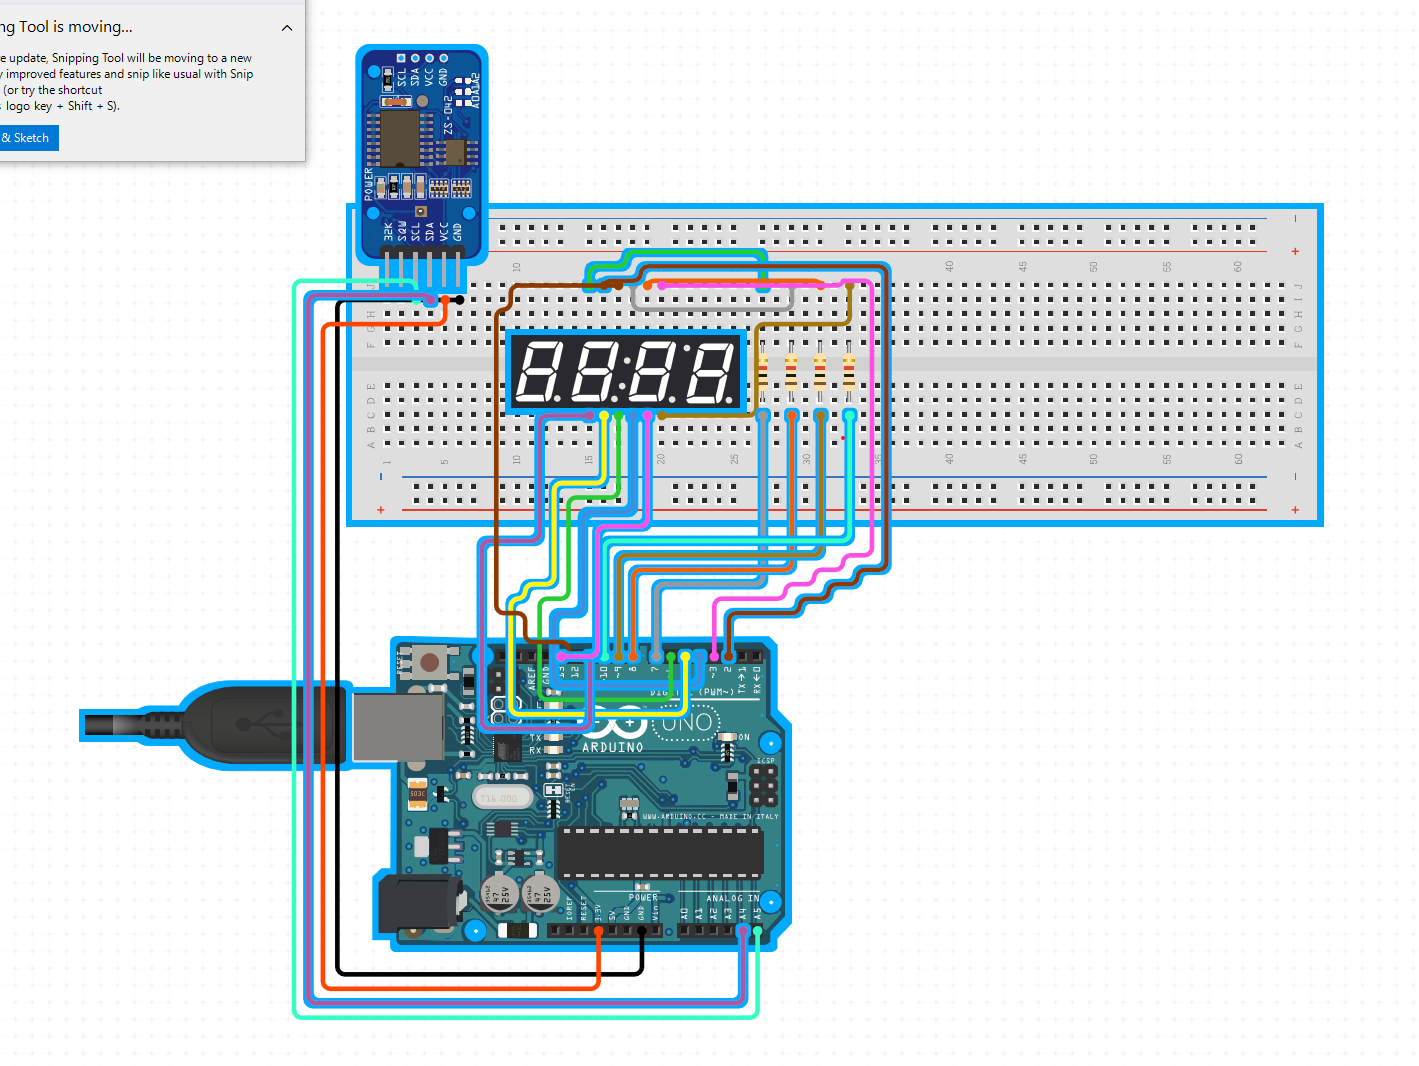
https://www.circuito.io/app?components=512,11021]copy and paste the link.
click add components
type;
RTC (add);
7 segment display 20mm (choose generic, don't choose sparkfun);
follow the diagram and attach each pin using the jumper cables
Manufacturing process
- Build an Arduino Iron Man: Components, Sensors, and Step‑by‑Step Guide
- Find Me: Smart Item Locator with Arduino and Bluetooth
- DIY Arduino Humidifier Controller with Relay – Safe High‑Voltage Setup
- Smart Parking Counter: Real‑Time Vehicle Tracking with Arduino, Processing, and PHP
- High‑Speed Arduino RPM Counter Using a Novel Algorithm
- Build a Custom Arduino Joystick Steering Wheel for Gaming
- Arduino 101: Build a Pedometer with DHT11 Sensor & LCD Display
- Build an Arduino RGB Color Mixer – Step‑by‑Step Tutorial
- PhoneLocator: Securely Locate Your Phone Anywhere
- Arduino LED Bar Graph Controlled by Potentiometer