Celebrate with Light & Sound: DIY Birthday Arduino Project
Components and supplies
Speaker: 0.25W, 8 ohms
You may need to solder wires on, and mine is half a watt
×
1
Breadboard (generic)
×
1
Arduino UNO
×
1
Jumper wires (generic)
×
1
LED (generic)
1 red, 1 blue, 1 white. (feel free to choose your own colors)
×
3
Necessary tools and machines
Soldering iron (generic)
If needed
Apps and online services
Arduino IDE
About this project
Introduction
After attempting and failing to make an LED bar graph distance visualizer, I decided to make easier projects. After looking around the Arduino Project Hub for inspiration, I got an idea to make this.
Step 1:
Gather all materials. If needed, solder jumper wires to the speaker.
Step 2:
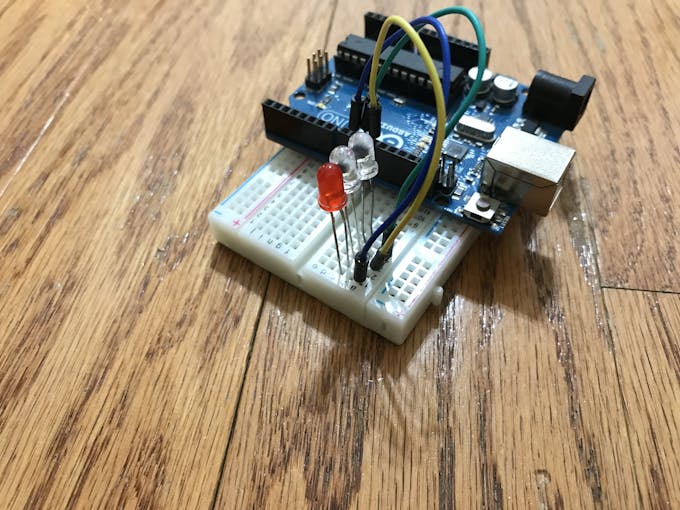
Attach the 3 LEDs to the breadboard. They should be close to each other.
Step 3:
Use jumper wires to wire the anode (positive segment/longer segment) to the Arduino pins as follows:
RED: pin 9
BLUE: pin 10
WHITE: pin 11
Step 4:
Connect the cathode (negative segment/smaller segment) to 3 220 Ohm resistors. Connect those to the negative lane of the breadboard. Wire the negative lane of the breadboard to the GND pin of the Arduino.
Step 5:
Connect the speaker to the Arduino and breadboard: The negative wire goes to the negative lane on the breadboard, and the positive wire goes to pin 3 on the Arduino.
Code
Happy Birthday Lights + Sounds
pitches.h
Happy Birthday Lights + SoundsC/C++
Program that tells the speakers to play specific tones and tells the lights to turn on at different timings.