


Smart Plug: 120V Arduino‑Based Smart Outlet with Real‑Time Clock
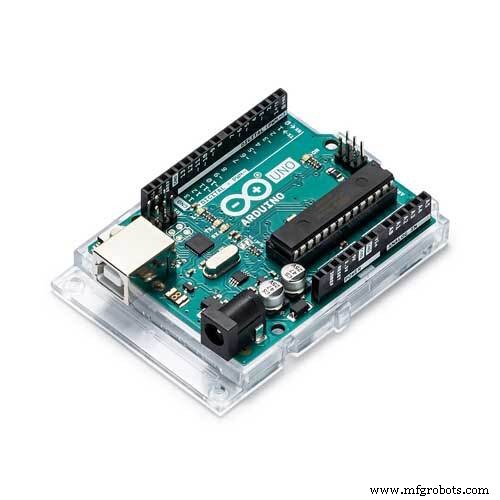
Components and supplies
 |
| × | 1 | |||
 |
| × | 1 | |||
 |
| × | 1 | |||
 |
| × | 1 | |||
 |
| × | 1 | |||
| × | 1 | ||||
| × | 1 | ||||
| × | 1 |
Apps and online services
 |
|
About this project
This project is basically what it sounds like - a smart outlet. This smart outlet can apply to any device that has a plug FOR 120V only! (Targeted mainly at lamps using low amps.) This outlet is an outlet controlled by a 1-channel relay. This project also uses an RTC (real time clock) to determine what time it is and, based on the 24 hr clock, it will either turn on or off (depending on the time) because it actually has predetermined times to turn on and then to turn off. Also, another thing is that this will have a plug coming out of it that has to be plugged into a wall socket!
Link to the library: http://www.rinkydinkelectronics.com/library.php?id=73
IMPORTANT SAFETY INFORMATION!! PLEASE READ!
1) Use a Grounded Cord and Interrupt the Hot Wire
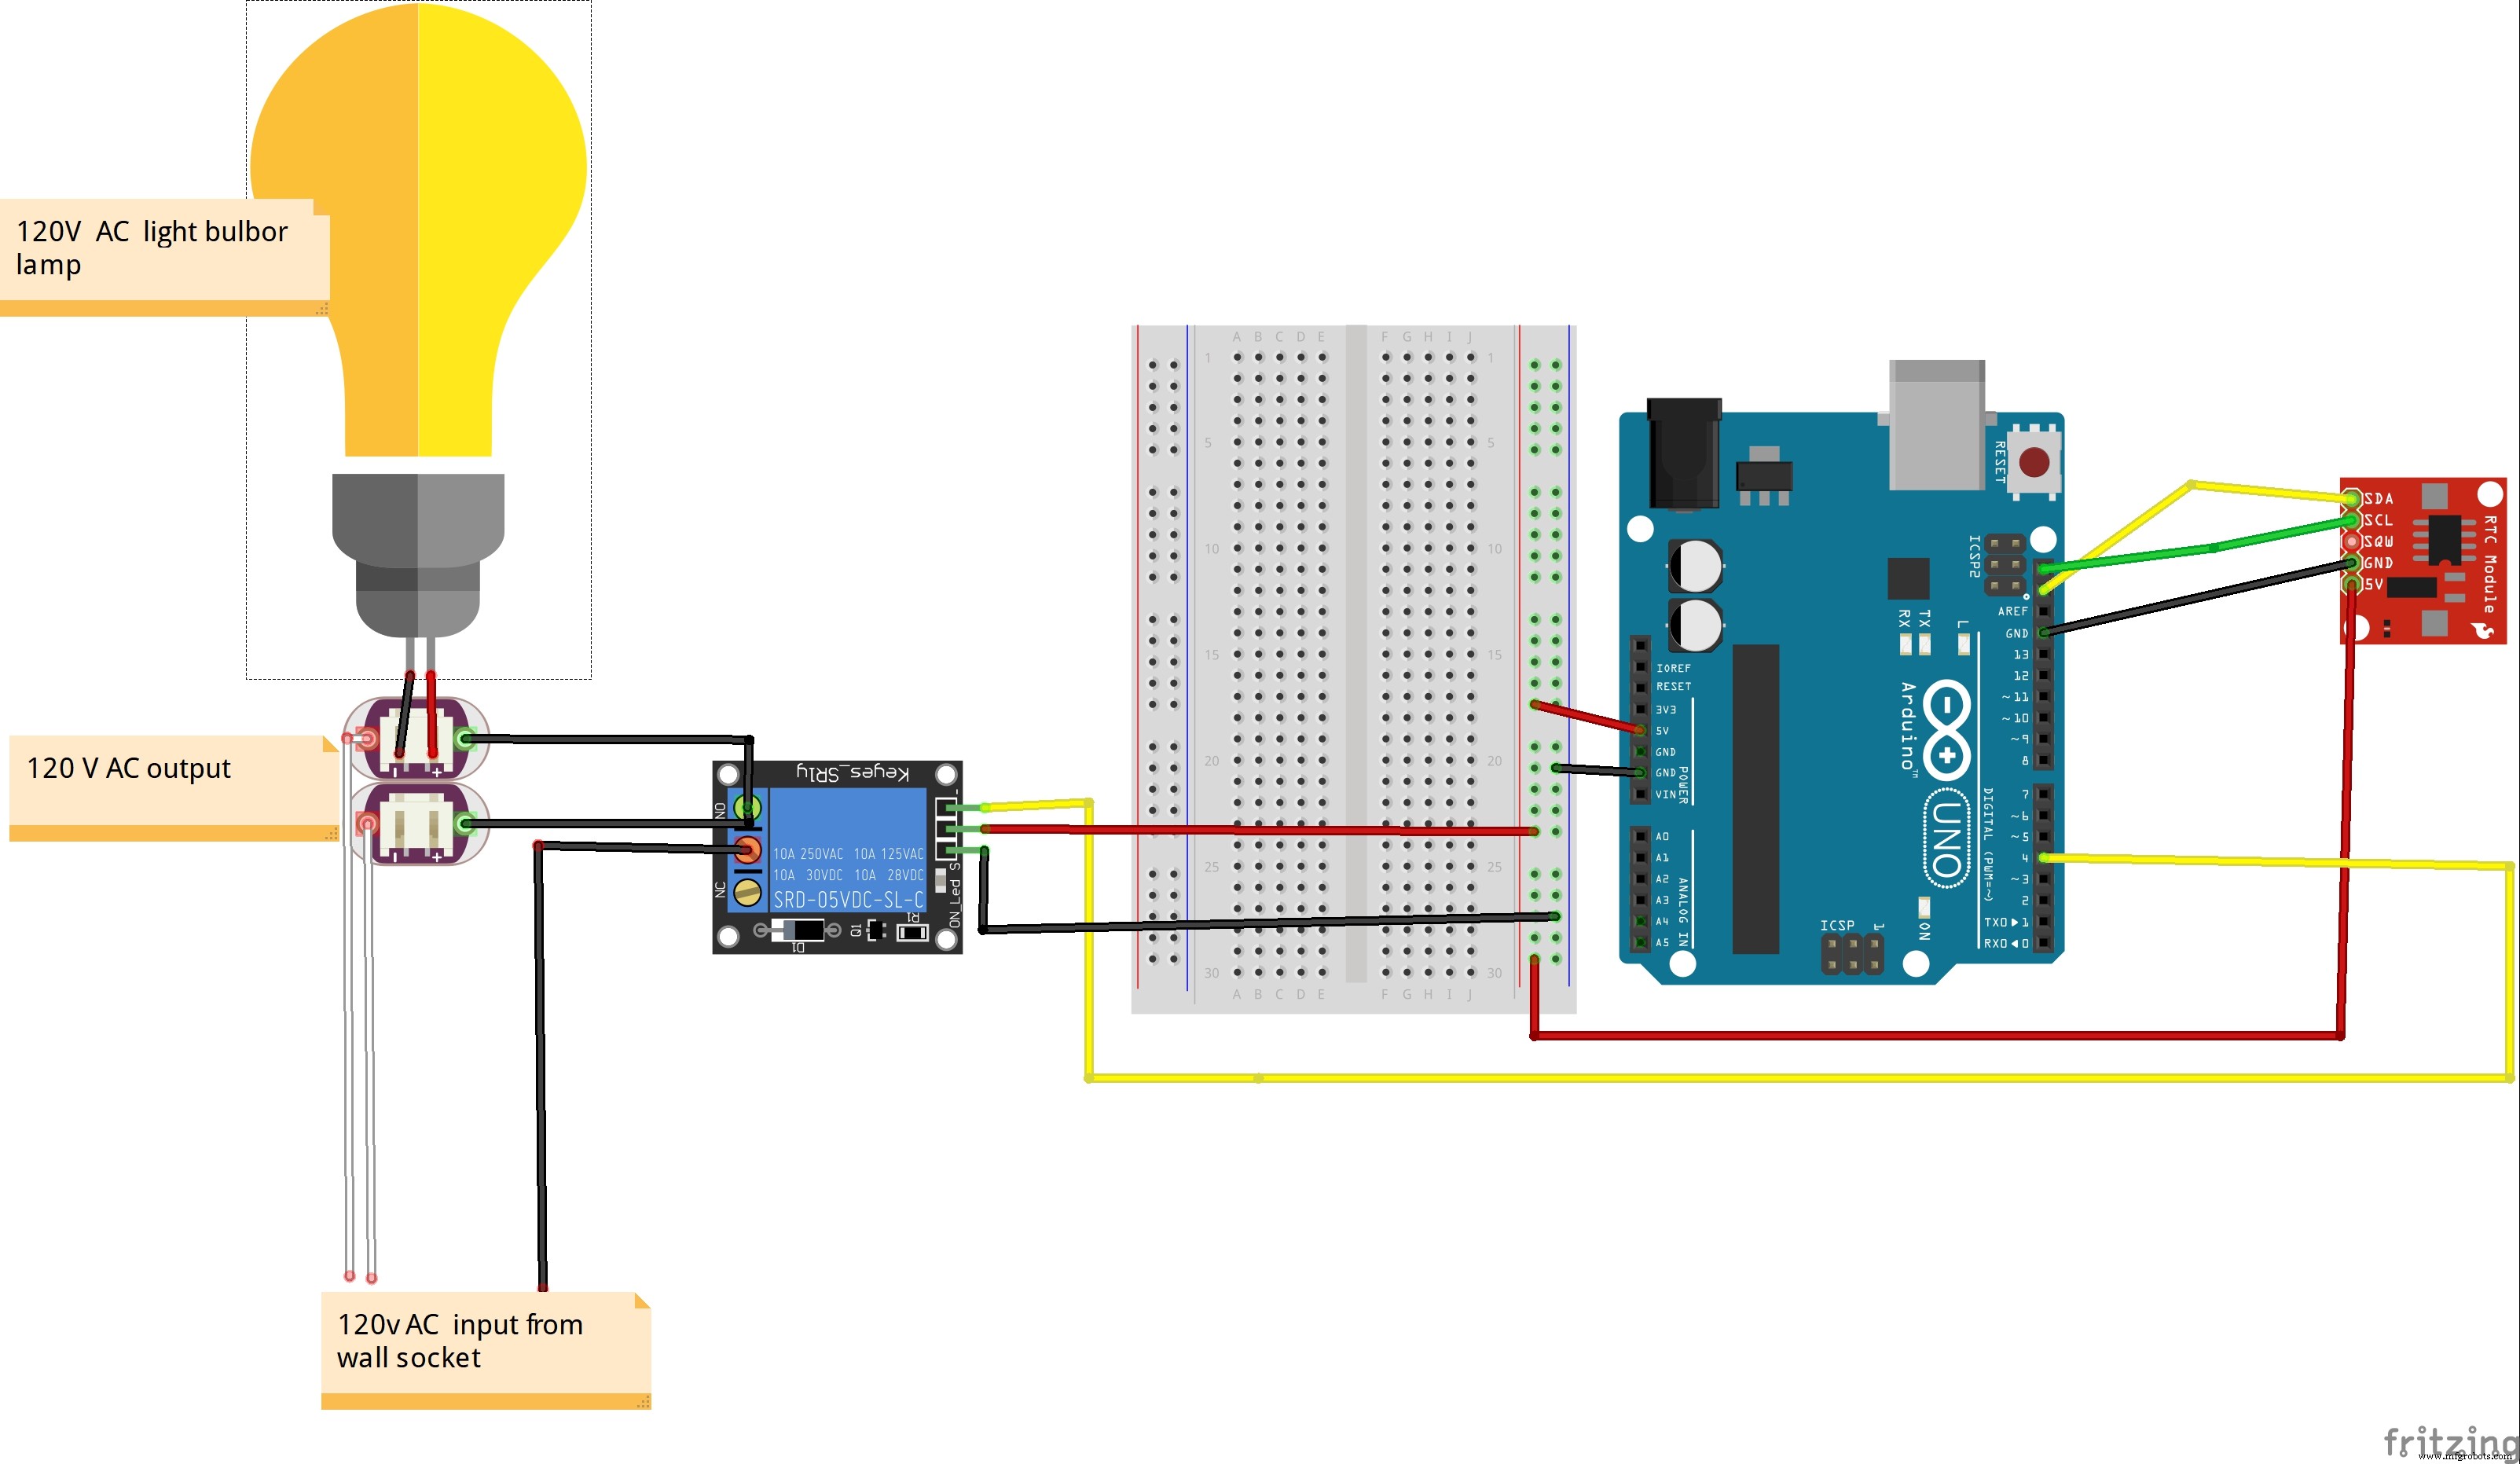
As can be seen in the pictures below, a 3-prong plug is used. The hot (black) wire from the line is connected to the common terminal of the relay module. The normally open (NO) output of the relay is then connected to the brass screw of the outlet. The white wire (neutral) connects to the silver screw and the green (ground) connects to the green screw of the outlet.
2) Use a Relay Module
A single-channel relay module from Elegoo was used to switch the hot wire. This module is identical to the Keyes SR1y module (http://www.techydiy.org/keyes-sr1y-relay-module) and contains a flyback diode connected to the control input (for back EMF), a transistor to control the relay coil and a series resistor to limit the current into the transistor. As the relay is only rated up to 10A, either limit the load connected to the outlet, or use a fuse in line with the hot wire. If possible, a single channel relay with an optocoupler would provide additional isolation for the Arduino.
3) Physical Separation
Make sure to mount the relay module in the plastic housing away from the high voltage wires ensuring that the solder side of the relay module faces the plastic housing so that low voltage wiring does not inadvertently come into contact with high voltage wiring if the unit is subjected to shock or vibration.
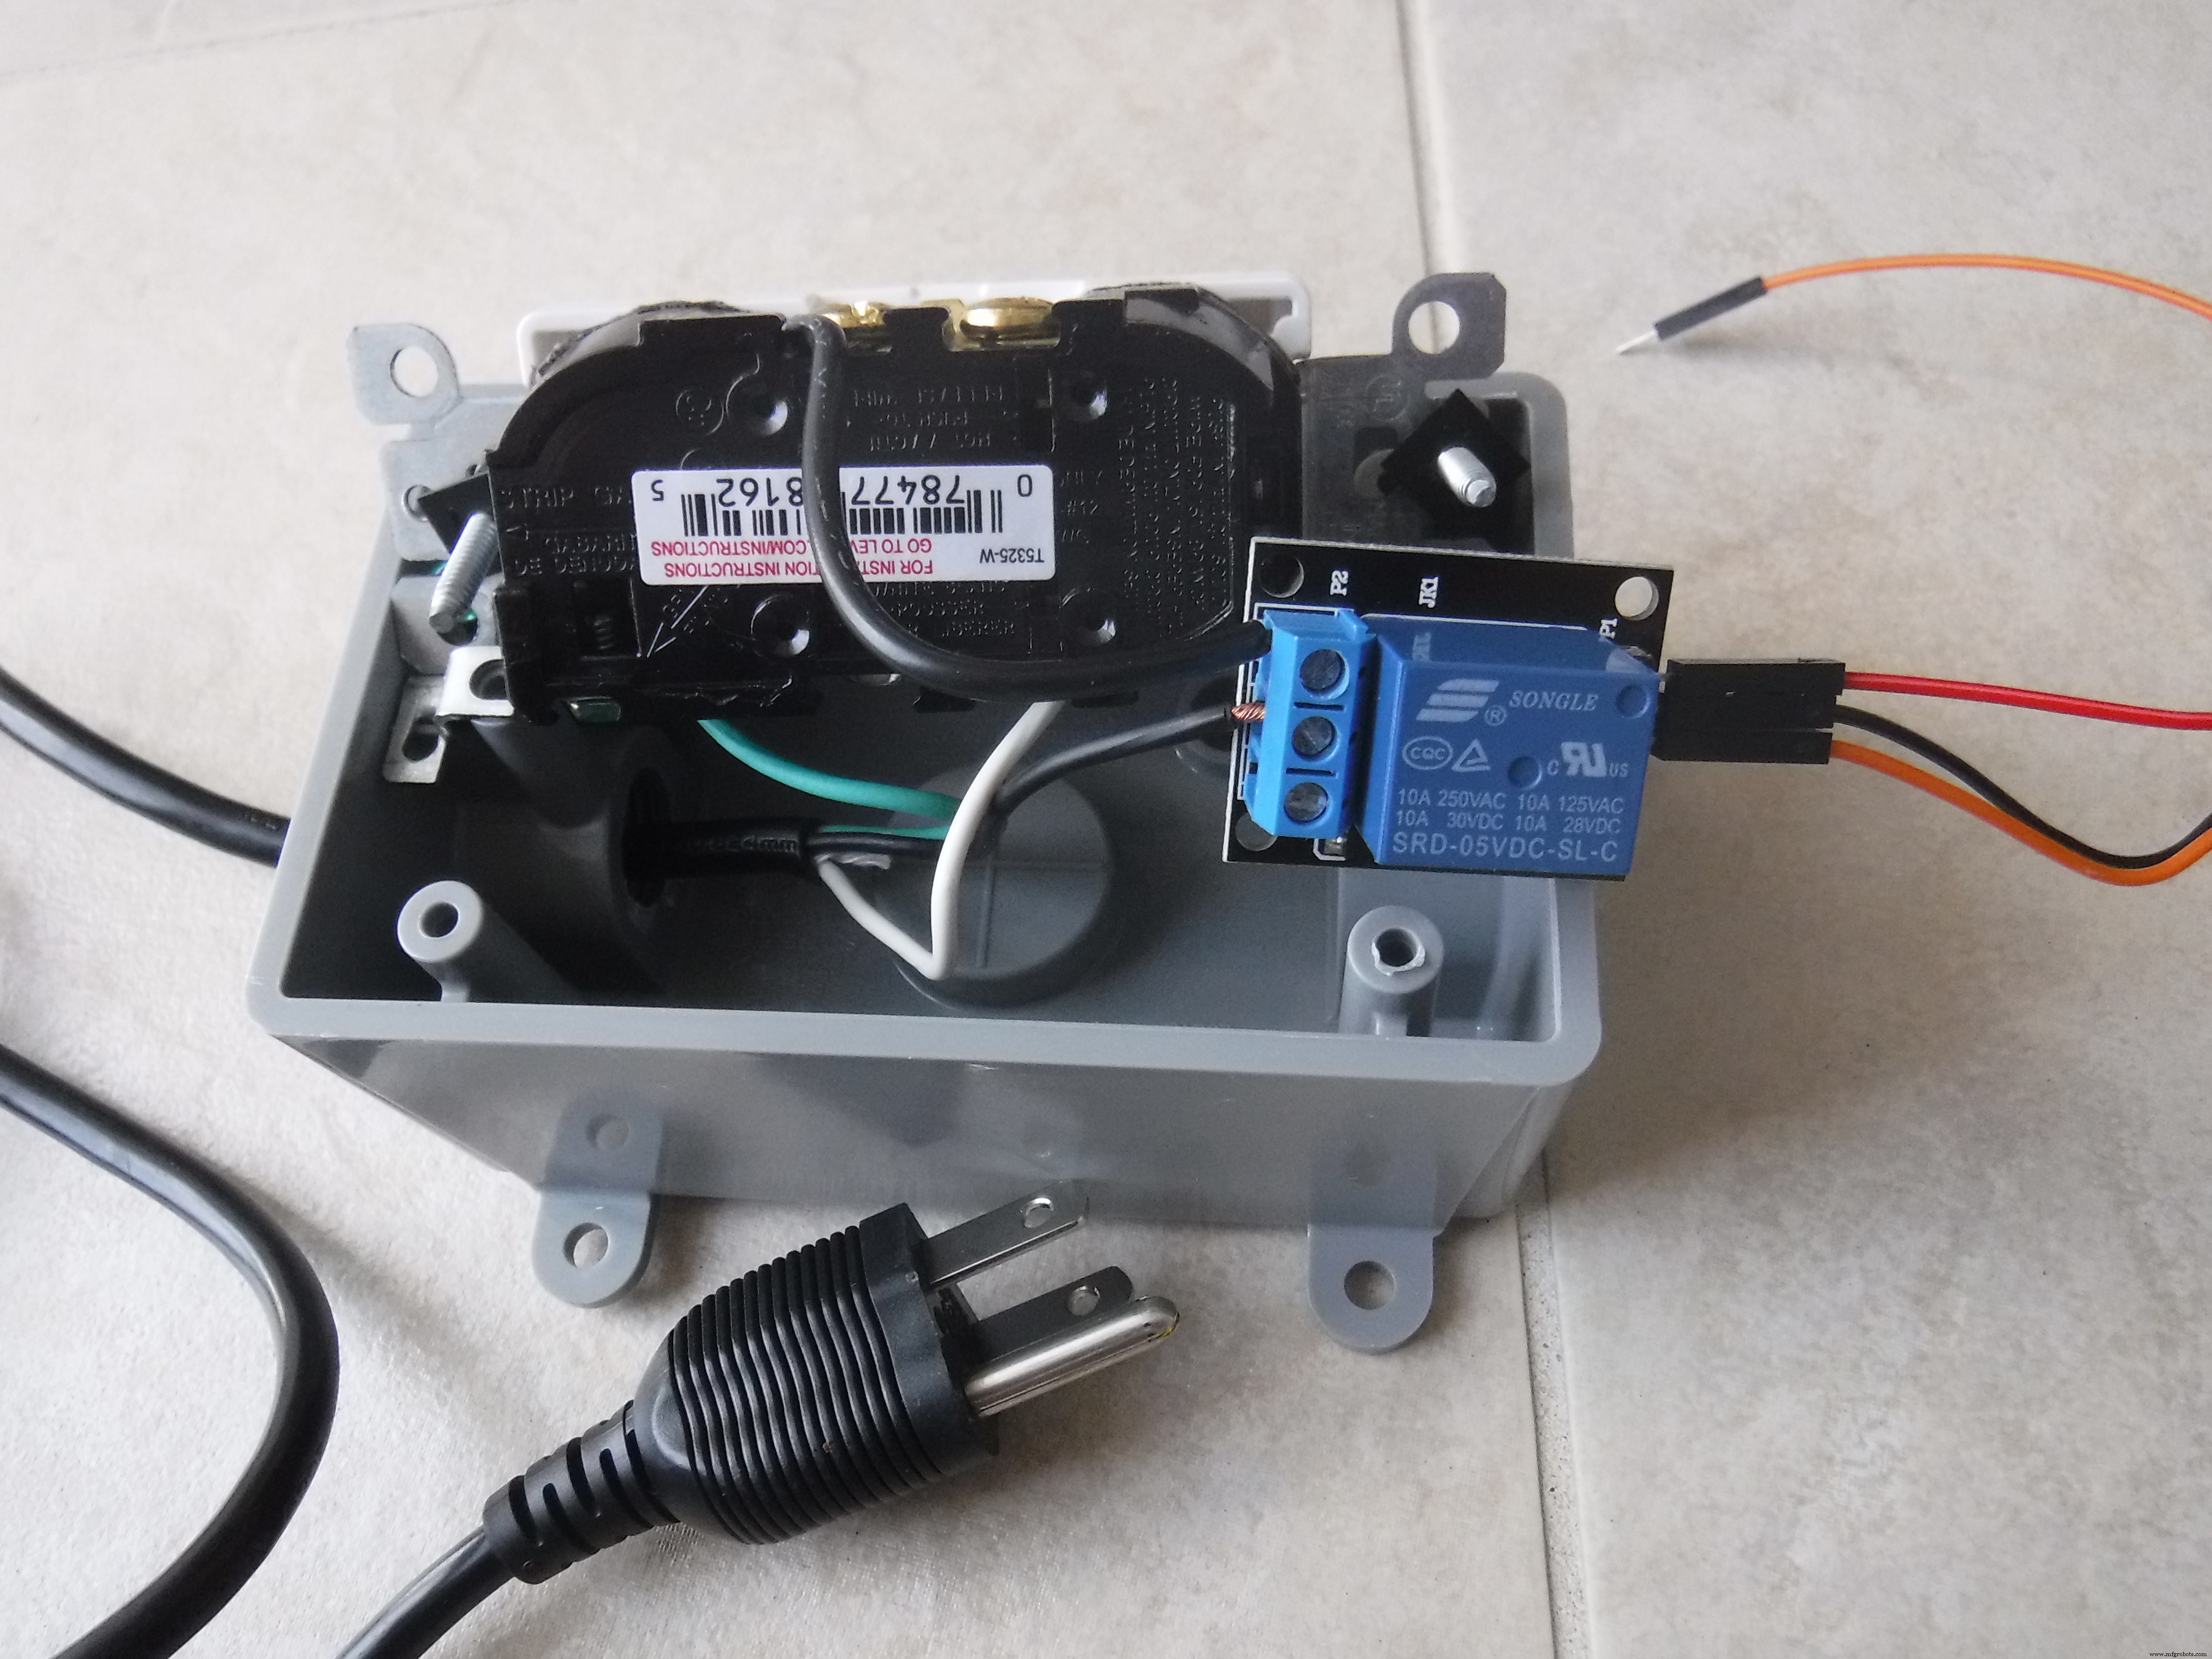
Image of the wiring on the inside of the smart plug (yours should look like this).
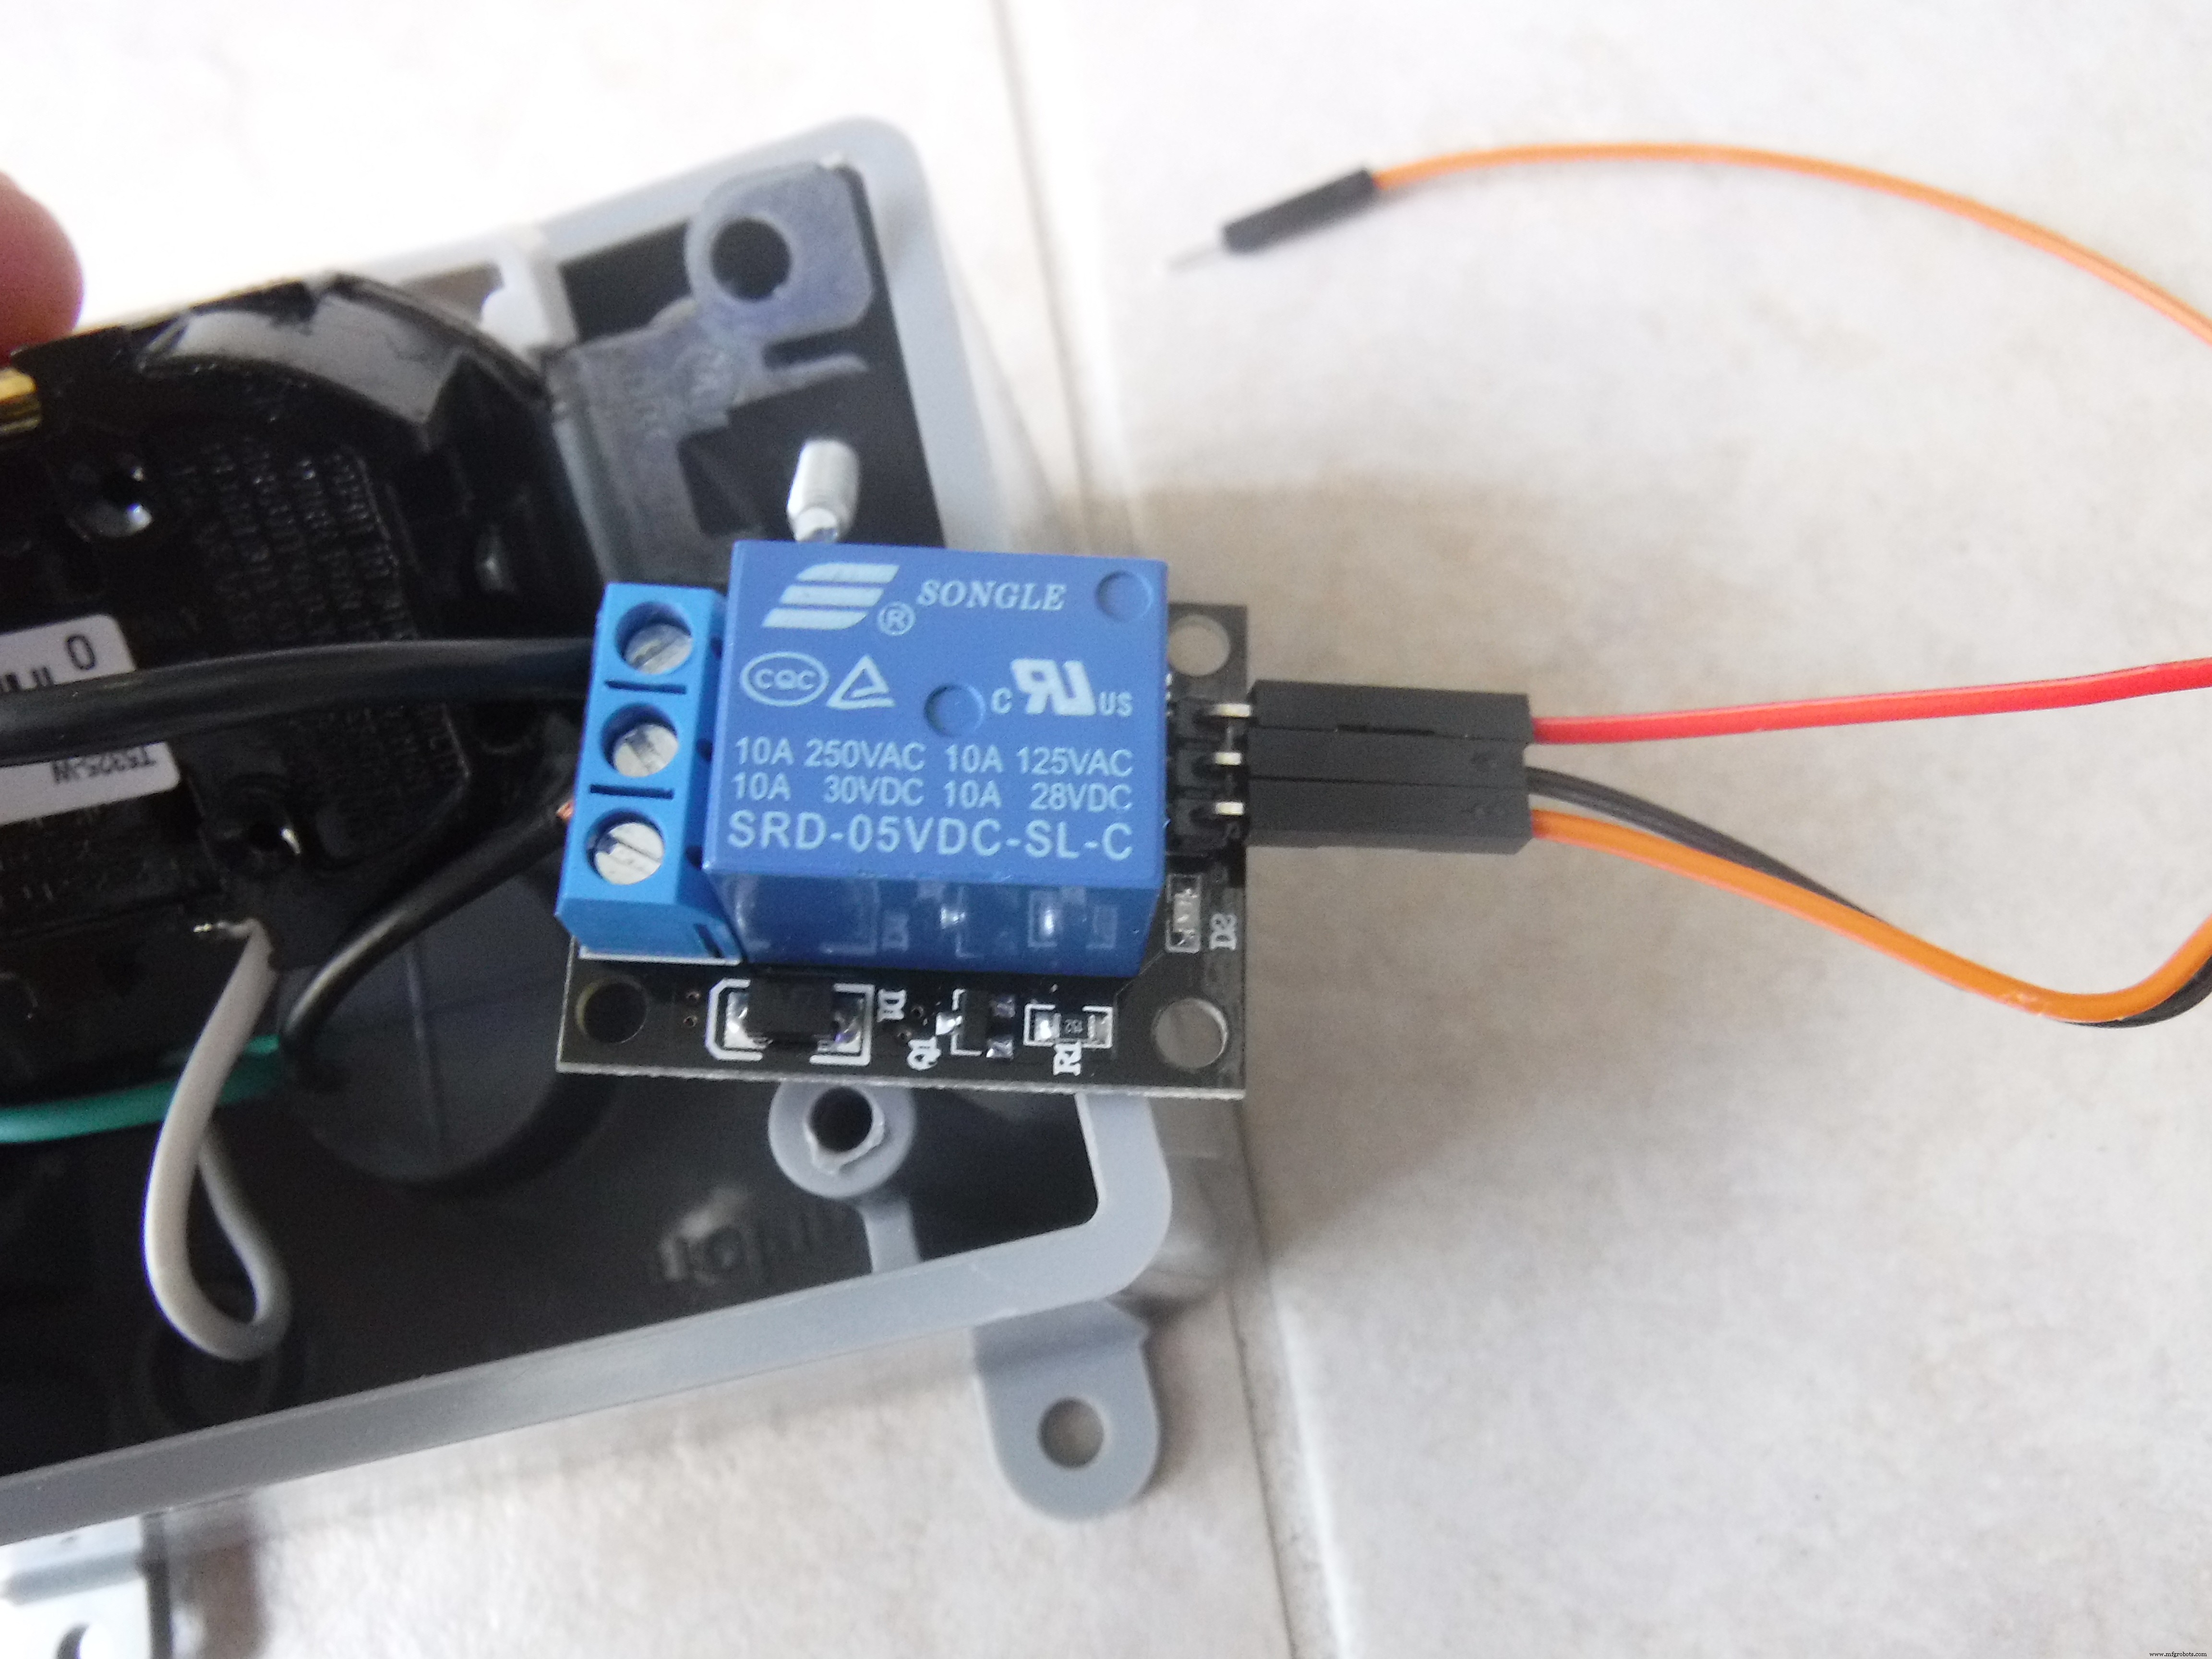
Close-up image of the relay module.
Code
- The code
The codeArduino
this is the code you need to run this complicated piece of smart tech.#include <DS3231.h>
int Relay = 4;
DS3231 rtc(SDA, SCL);
Time t;
const int OnHour = 07;
const int OnMin = 15;
const int OffHour = 07;
const int OffMin = 20;
void setup() {
Serial.begin(115200);
rtc.begin();
pinMode(Relay, OUTPUT);
digitalWrite(Relay, LOW);
//rtc.setTime(21,10,00);//set your time and date by uncomenting these lines
//rtc.setDate(26,6,2018);
}
void loop() {
t = rtc.getTime();
Serial.print(t.hour);
Serial.print(" hour(s), ");
Serial.print(t.min);
Serial.print(" minute(s)");
Serial.println(" ");
delay (1000);
if(t.hour == OnHour && t.min == OnMin){
digitalWrite(Relay,HIGH);
Serial.println("LIGHT ON");
}
else if(t.hour == OffHour && t.min == OffMin){
digitalWrite(Relay,LOW);
Serial.println("LIGHT OFF");
}
}
Custom parts and enclosures
This is the box that you will house your outlet and electrical for the socket and the relay.
Schematics
Manufacturing process
- Arduino Digital Dice Project: Build Your Own LCD-based Random Number Generator
- Portable Range Detector – Arduino Nano DIY Kit with HC‑SR04, 18650 Power, and 3D‑Printed Enclosure
- Autonomous Face‑Tracking Robot Car with Arduino Nano & OpenCV
- Copper Electroplating Project: Build a Smart System with Arduino UNO
- NeoPixel Matrix Pong on Arduino Nano: Build a Neon Pong Game
- Create Stunning Light Sequences with Arduino Shift Register
- Arduino Tennis Game – Build a Virtual Racquet Experience with NeoPixel, Sensors, and Bluetooth
- Blind Stick Navigator – An Arduino-Based Assistive Device for Visually Impaired
- Build a Voice‑Controlled Arduino Car with BLE – DIY Guide
- Smart Alzheimer’s Companion: Arduino-Based Alert System