


Build a Remote Text‑Messaging Button with Sigfox & Twilio
Components and supplies
 |
| × | 1 |
Apps and online services
 |
| |||
 |
|
About this project
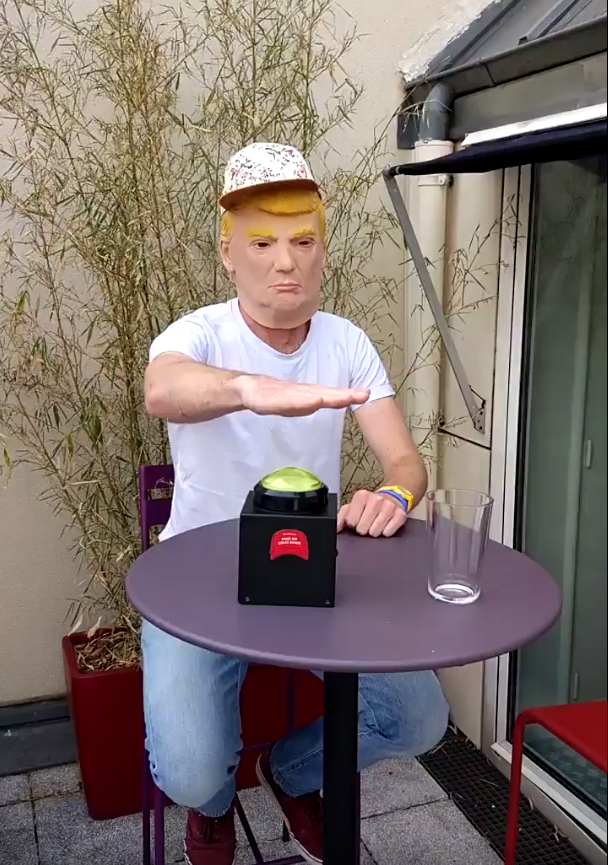
IntroductionWe have all heard about the button used by Trump to order a Diet Coke right? (http://time.com/4758059/donald-trump-coke-nuclear-button/)
Well we thought we could build a better version using Sigfox network. All you need is a bulky button, an Arduino MKRFox1200 board and a Twilio account to send the text message.
What is Sigfox?
Sigfox provides a global, simple and energy-efficient network for the Internet of Things. Sigfox network is currently available or being rolled-out in 32 countries. The network complements existing high-bandwidth systems by providing economical, low-power, two-way transmission of small quantities of data over long distances. Sigfox technology is supported by hundreds of hardware and solution partners.
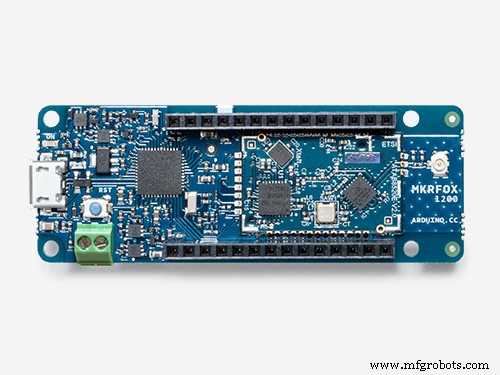
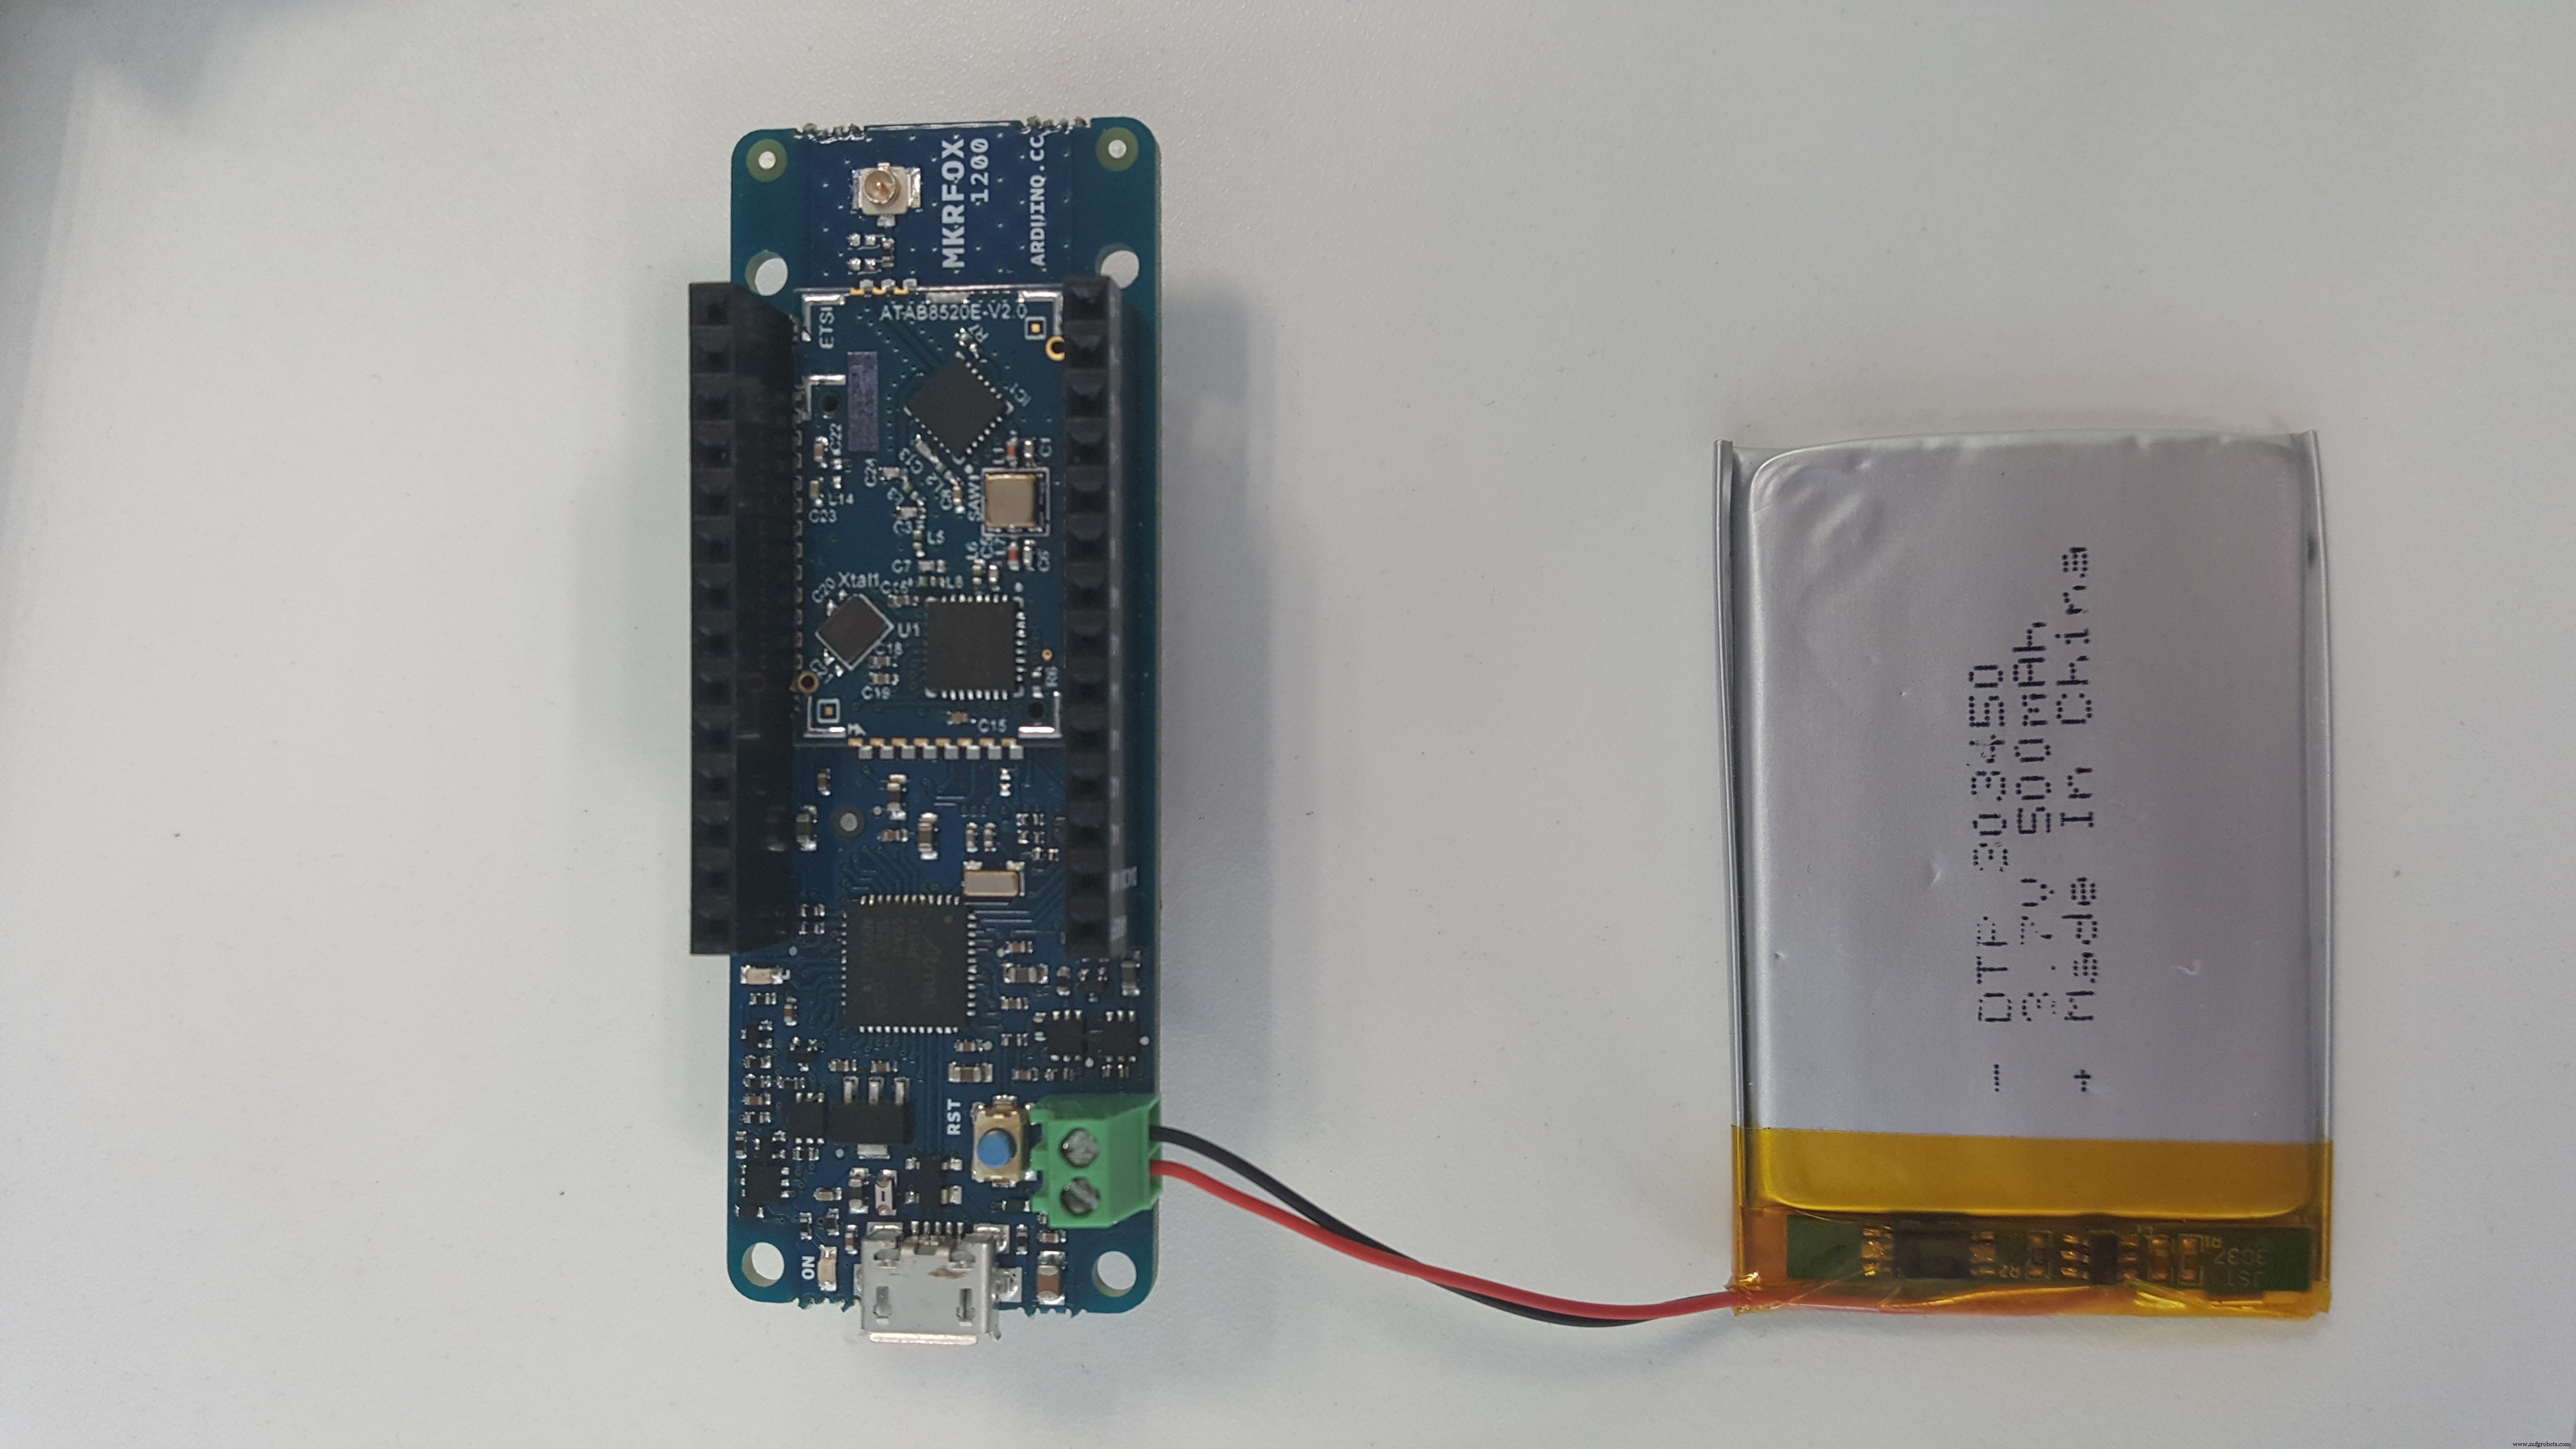
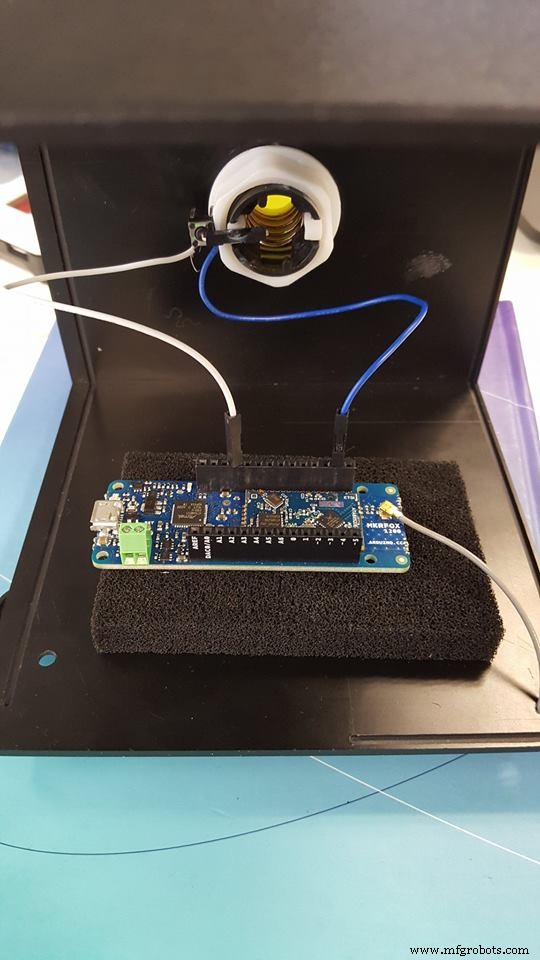
1. Hardware requirements- Arduino MKRFox1200
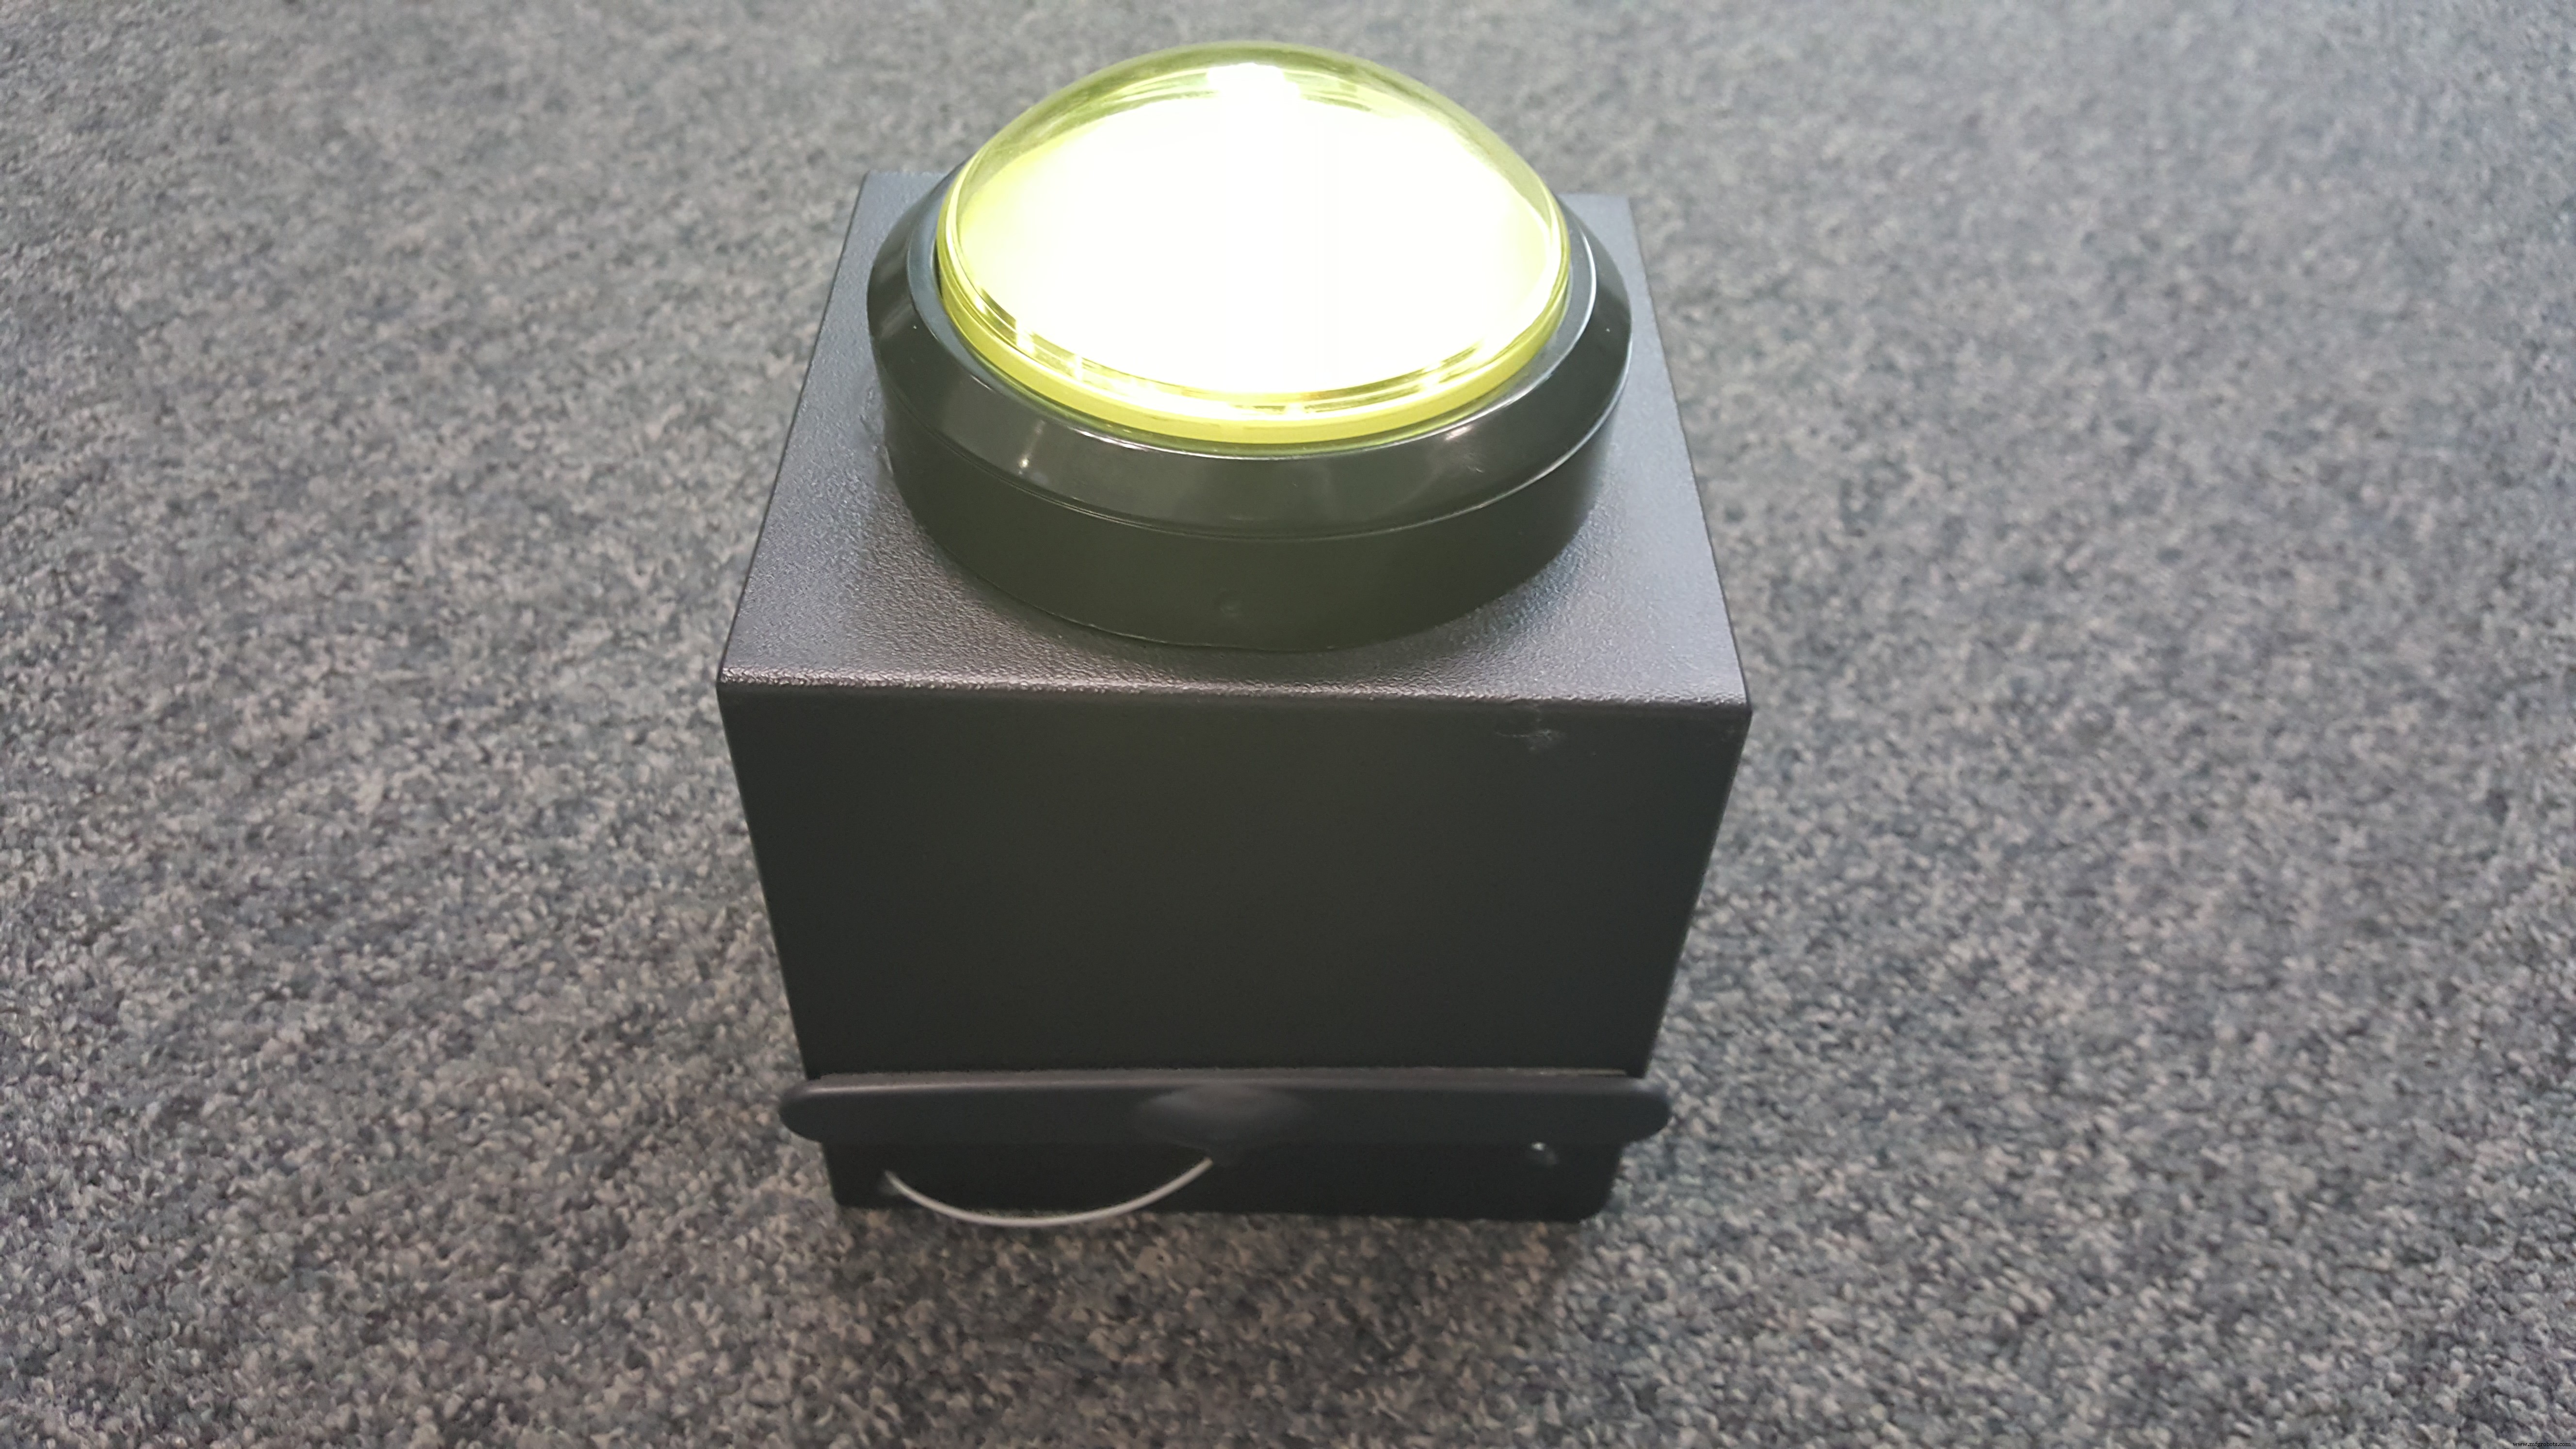
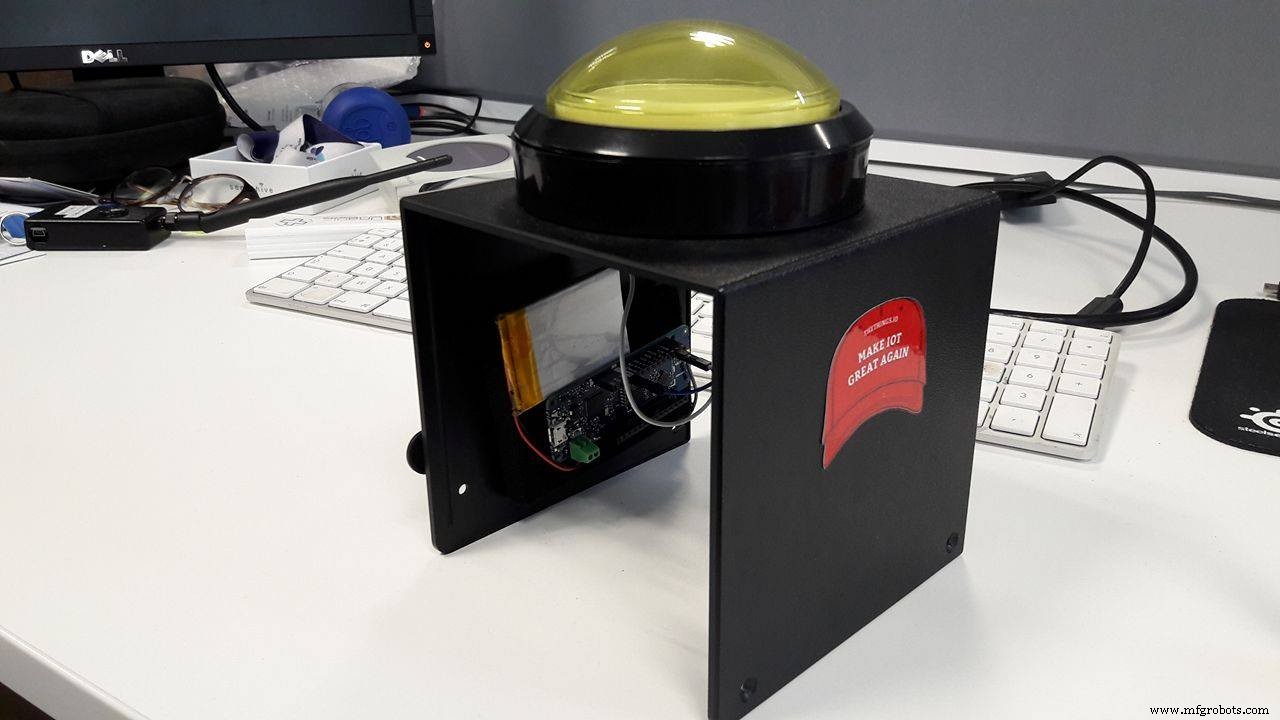
- A big button
- LiPo battery or 2xAA/AAA batteries
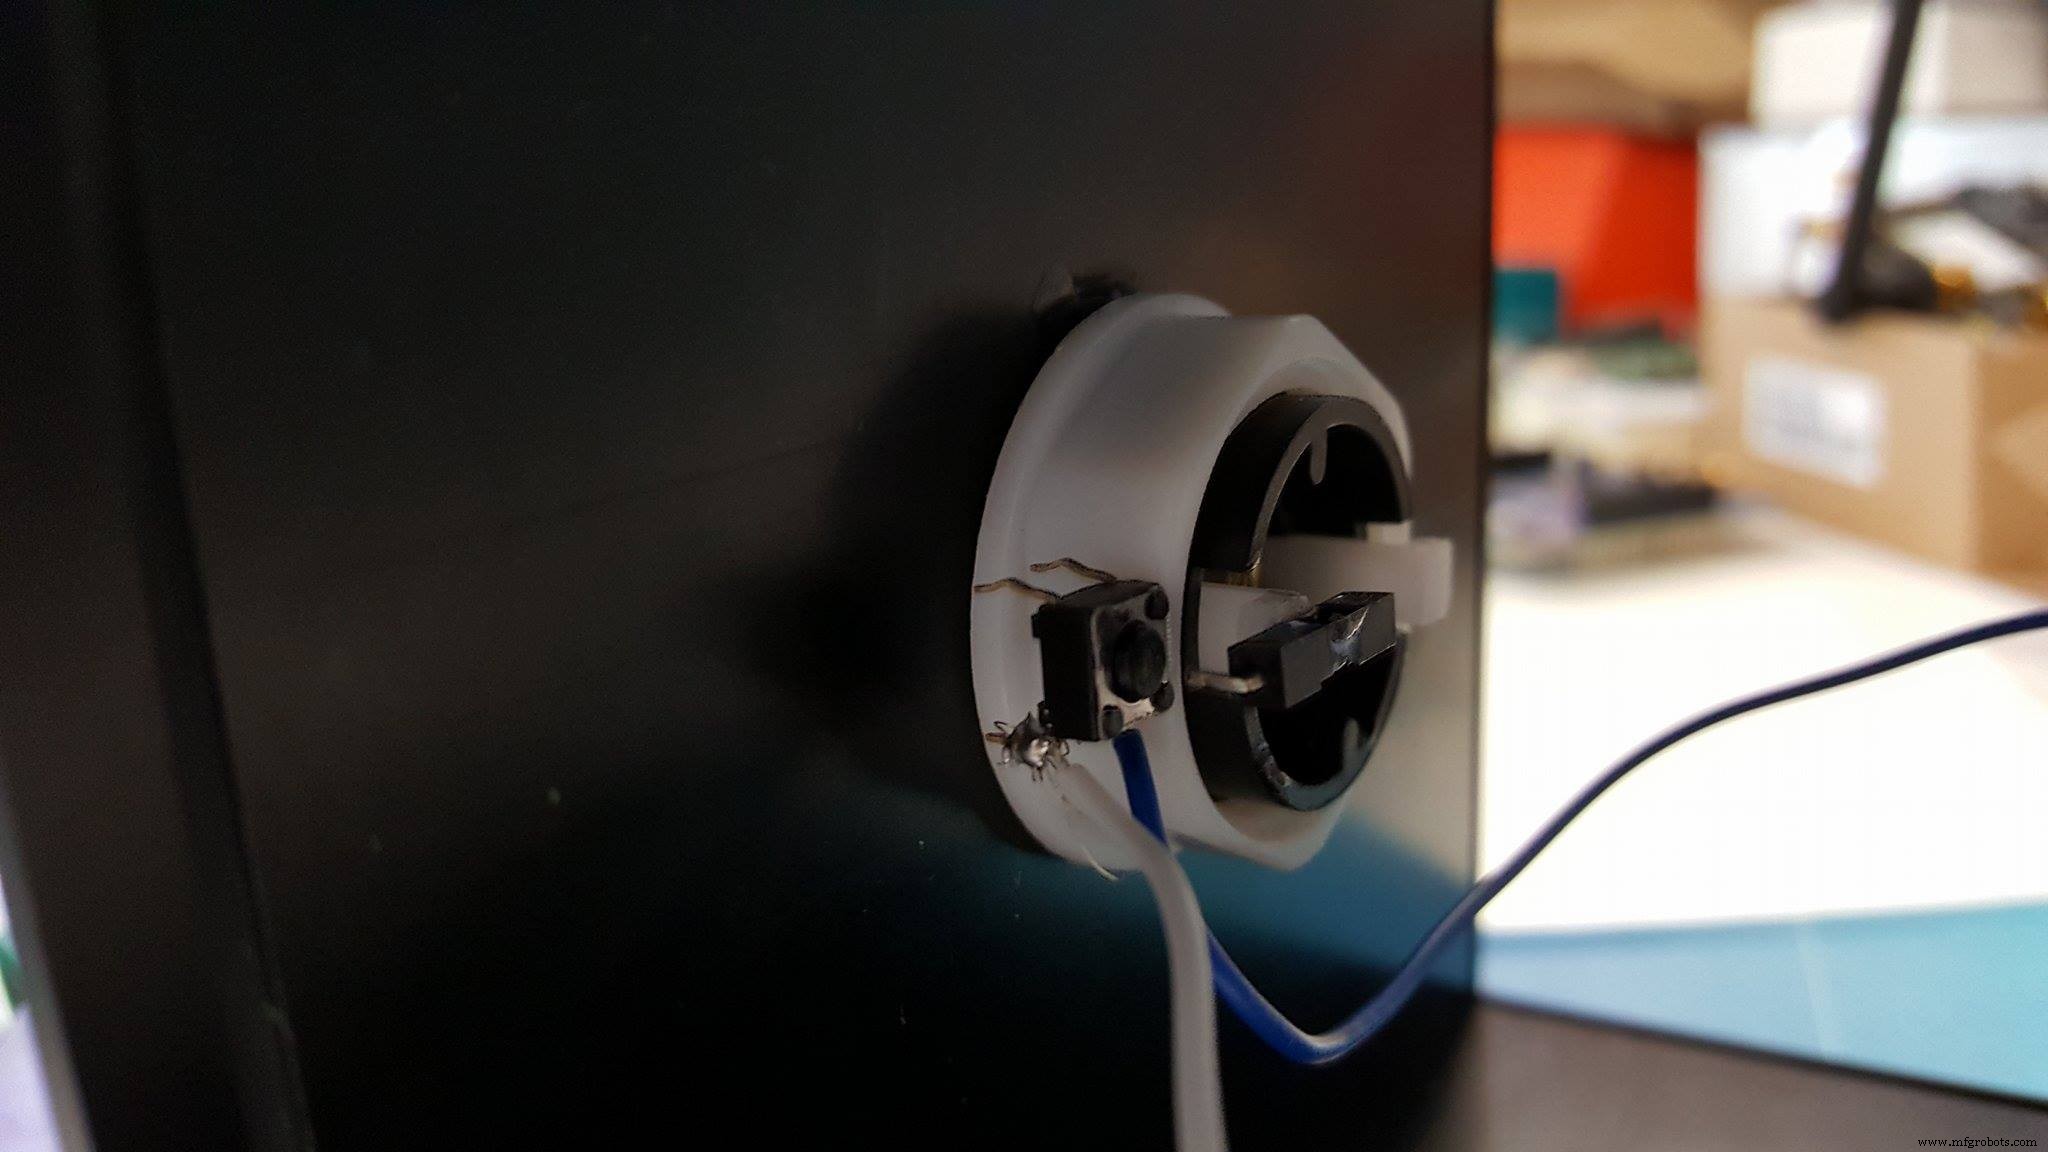
- A pushbutton switch
- thethings.io sticker
- And of course a Trump mask
We are using a pushbutton switch connected to pins 7 and GND of the Arduino. In normal state, the switch is closed. When pushing the button it opens the switch. The switch state can easily be reversed in the Arduino code.


You can retrieve the Arduino code on GitHub: https://github.com/aureleq/TrumpButton
We use the low power library to put the board in deep sleep. An interrupt is used to wake-up the board and send a Sigfox message:
// attach switch pin and enable the interrupt on voltage rising event
 pinMode(SWITCH_PIN, INPUT_PULLUP);
 LowPower.attachInterruptWakeup(SWITCH_PIN, buttonPressed, RISING); // switch is closed by default, open when pushing the button
void loop()
{
 // Sleep until an event is recognized
 LowPower.sleep();
 // if we get here it means that an event was received
 Serial.println("Button pushed!");
 delay(100);
 sendString(payload);
}
- Sign up for free here
- Add a new number in the "Verified Caller IDs" (phone number to receive the notification)
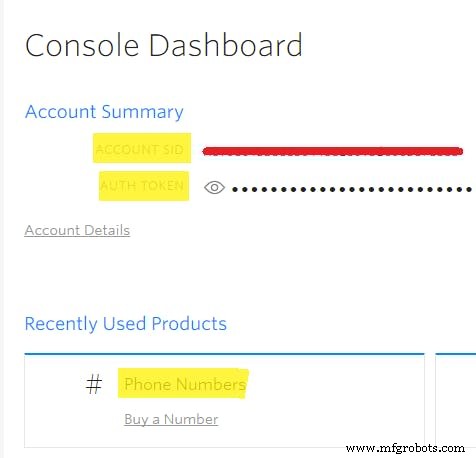
- Take note of your generated Twilio Phone Number, ACCOUNT SID and Auth TOKEN:
- Connect to your Sigfox backend account. If you haven't registered your Arduino board, you can activate it here: https://backend.sigfox.com/activate/
- Select the Device Type of your Arduino device. Link to the Device Type is available under the Information category.
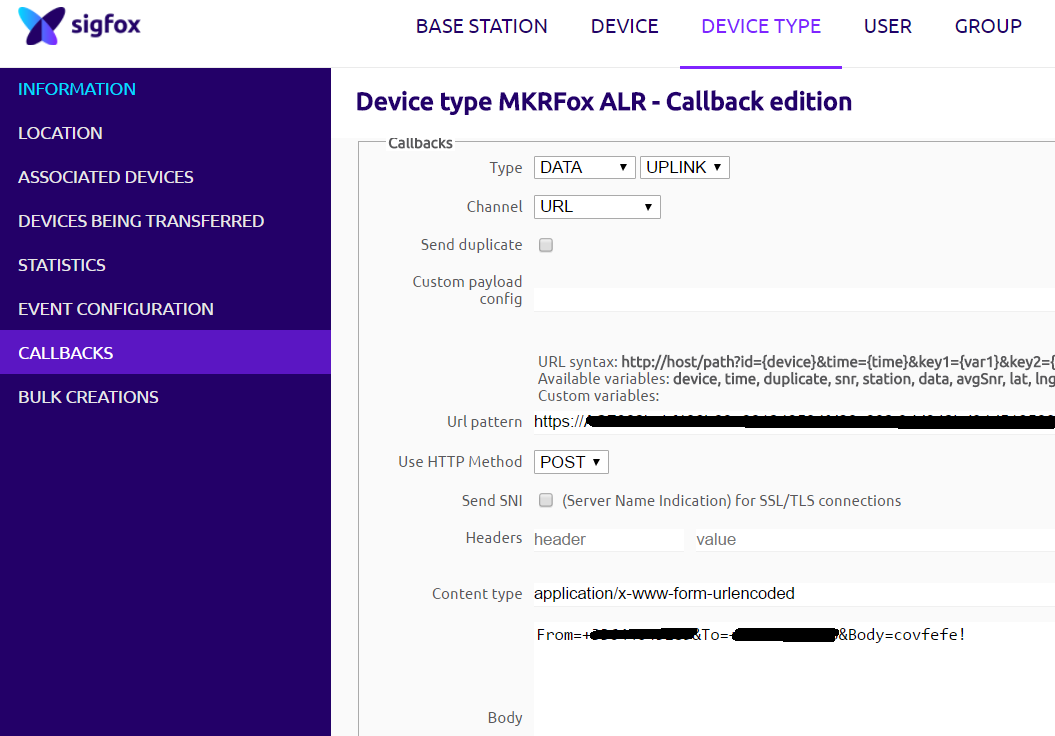
Create a new custom callback with the following parameters:
- Type:
DATA UPLINK
- Channel:
URL
- URL pattern:
https://[AccountSID]:[AuthToken]]@api.twilio.com/2010-04-01/Accounts/[AccountSID]/Messages.json
- Use HTTP Method:
POST
- Content-Type:
application/x-www-form-urlencoded
- Body:
From=[YourTwilioPhonenumber]]&To=[PhoneNumber]&Body=covfefe!
The text message covfefe! will be sent every time the button is pushed.
5. ValidationPush firmly the button and wait for the butler to bring you a drink!
Code
- Arduino source code
Arduino source codeArduino
/*
 * @aureleq
 *
 * Description: Sends a Sigfox message when pushing a button
 * Button needs to be wired between GND and pin 7 by default
 * Interrupts are being used to enable low power mode.
 * As board with be in sleeping mode most of the time, a board reset needs to be performed to upload a new sketch (double tap on reset button)
*/

#include <SigFox.h>
#include <ArduinoLowPower.h>

const uint8_t SWITCH_PIN = 7;
const String payload = "COKE NOW!";
const uint8_t debug = false;

void setup() {

  if (debug == true) {
    Serial.begin(9600);
    while (!Serial) {};
  }

  if (!SigFox.begin()) {
    Serial.println("Shield error or not present!");
    return;
  }
  // Enable debug led and disable automatic deep sleep
  // Comment this line when shipping your project :)
  //SigFox.debug();

  Serial.println("Sigfox shield detected");
  String ID = SigFox.ID();
  Serial.println("ID  = " + ID);
  delay(100);

  // Send the module to the deepest sleep
  SigFox.end();

  // attach switch pin and enable the interrupt on voltage rising event
  pinMode(SWITCH_PIN, INPUT_PULLUP);
  LowPower.attachInterruptWakeup(SWITCH_PIN, buttonPressed, RISING); // switch is closed by default, open when pushing the button

}

void loop()
{
  // Sleep until an event is recognized
  LowPower.sleep();

  // if we get here it means that an event was received
  Serial.println("Button pushed!");
  delay(100);
  sendString(payload);
}

void sendString(String str) {
  // Start the module
  SigFox.begin();
  // Wait at least 30mS after first configuration (100mS before)
  delay(100);
  // Clears all pending interrupts
  SigFox.status();
  delay(1);

  SigFox.beginPacket();
  SigFox.print(str);

  int ret = SigFox.endPacket();  // send buffer to SIGFOX network
  if (ret > 0) {
    Serial.println("No transmission");
  } else {
    Serial.println("Transmission ok");
  }

  Serial.println(SigFox.status(SIGFOX));
  Serial.println(SigFox.status(ATMEL));
  SigFox.end();
}


void buttonPressed() {
}
Github
https://github.com/aureleq/TrumpButtonManufacturing process
- Capture Water Droplets in Action Using Arduino Nano – DIY High-Speed Photography
- Giftduino: The Ultimate Arduino Gift Set for Hobbyists and Educators
- Create a Custom Punchable Keyboard Button with Arduino: A Step-by-Step Guide
- Build a SmartThings‑Enabled IR Bridge with Arduino UNO & ThingShield
- Arduino MKR FOX 1200 Sigfox Weather Station – Low‑Power IoT Solution
- Build Your Own RC Monster Truck: The Badland Brawler Powered by Arduino
- WALTER: An Arduino‑Powered Photovore Insect Robot
- Control Your Robot with Brainwaves: A Comprehensive Arduino Project
- Custom Arduino HID CNC Pendant – DIY, Cost‑Effective Control
- Ultrasonic Smart Glasses: Enhancing Mobility for the Visually Impaired