


Custom Arduino HID CNC Pendant – DIY, Cost‑Effective Control
Components and supplies
 |
| × | 1 | |||
| × | 1 |
About this project
Last article update:
2018-07-31: added the CAD files
2018-07-24: added the schematic and programming section
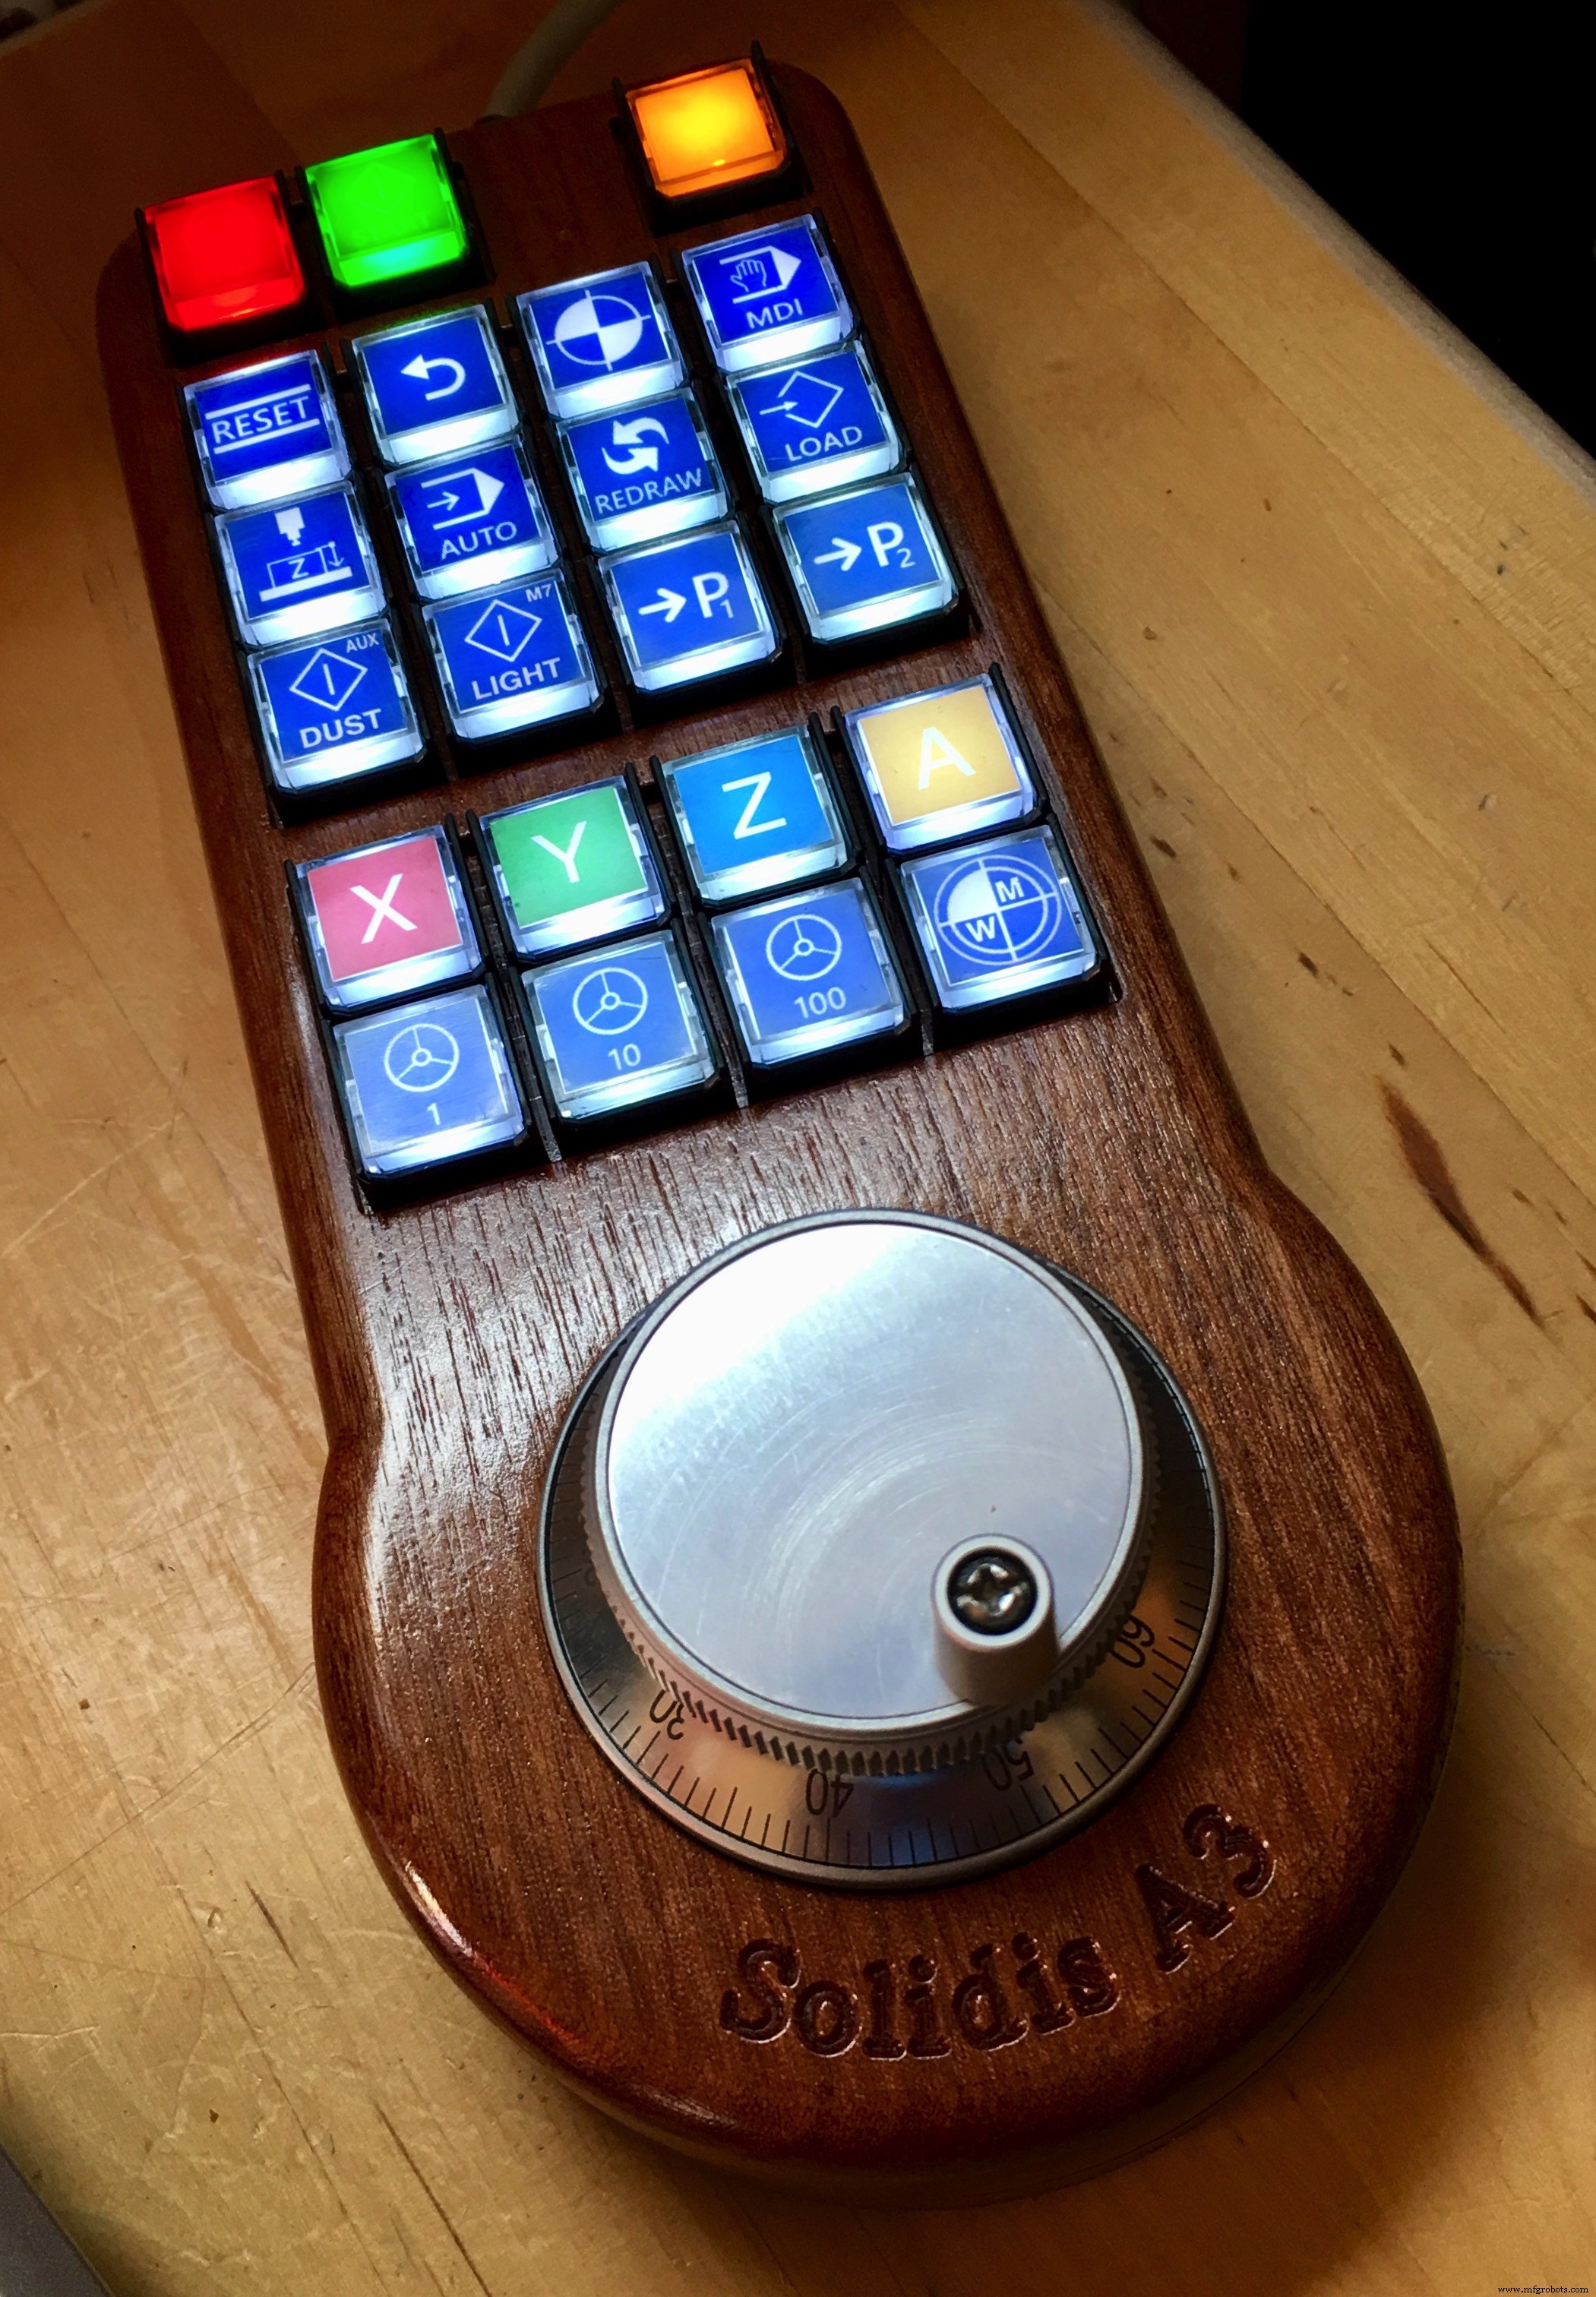
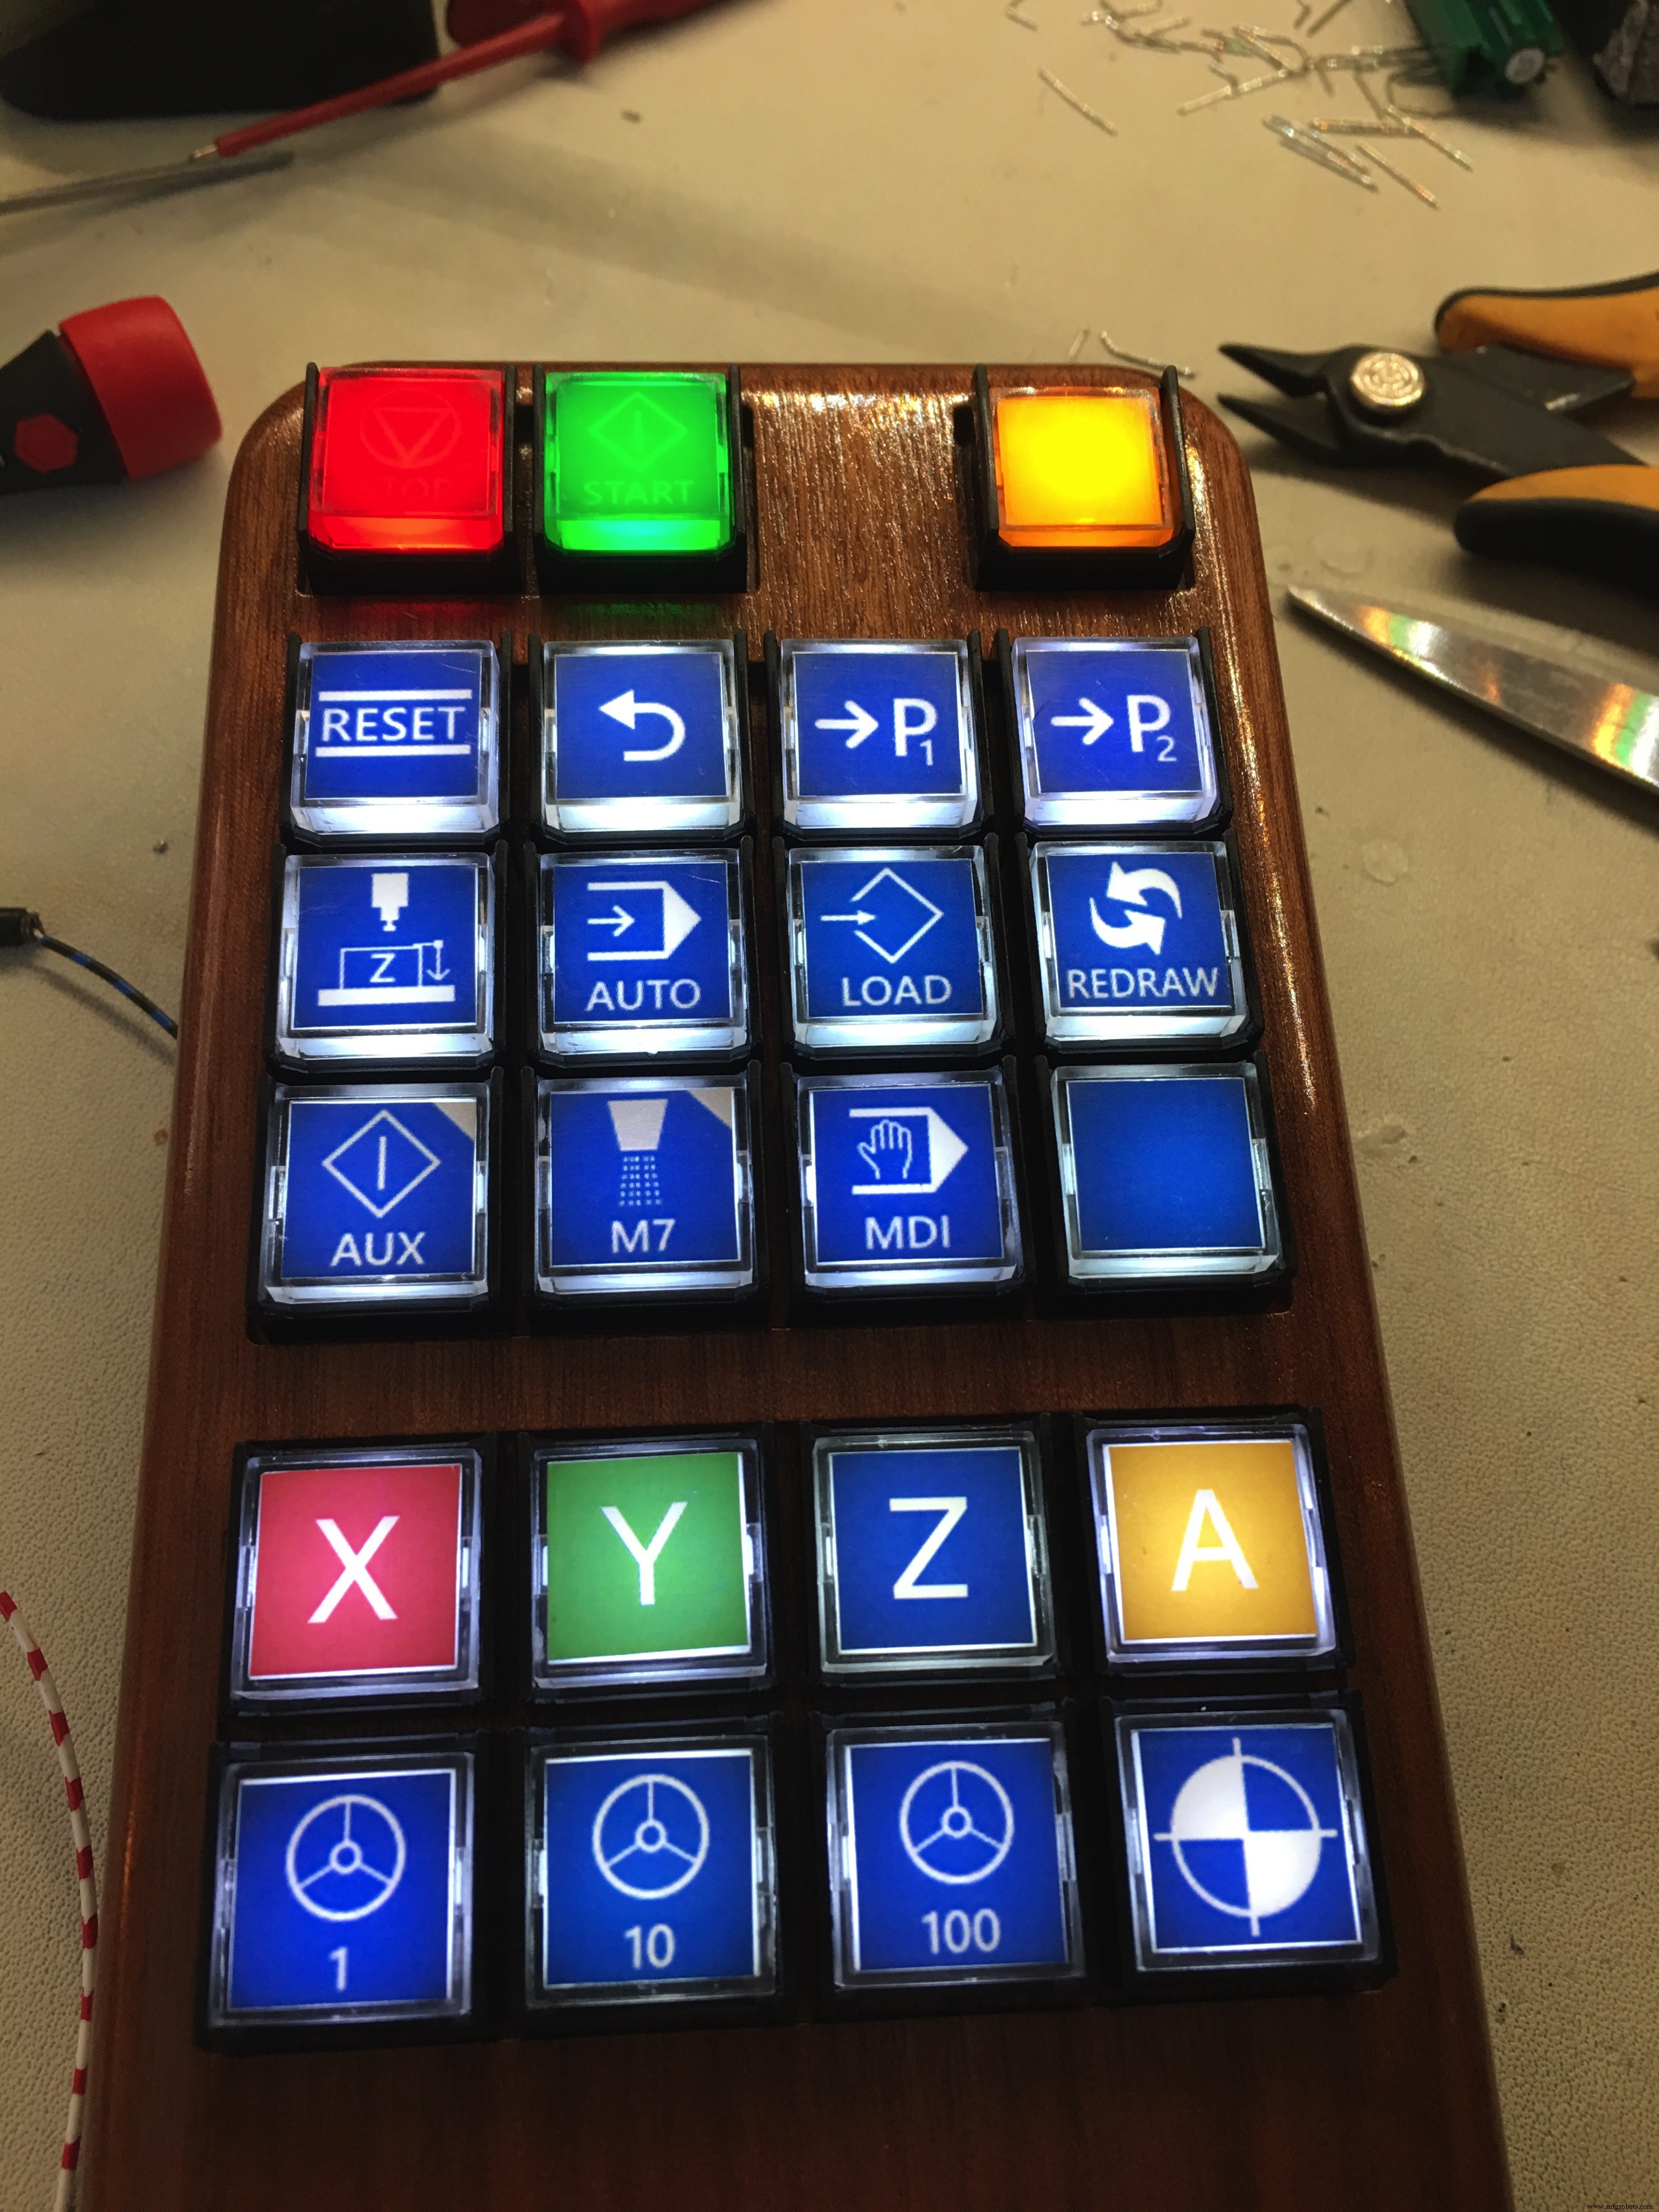
You can buy a pendant for your CNC machine, but I built my wooden CNC machine so why not make my own pendant?
Besides that, a regular pendant for my controller board would cost 100 euros and have only 2 buttons and a handwheel.
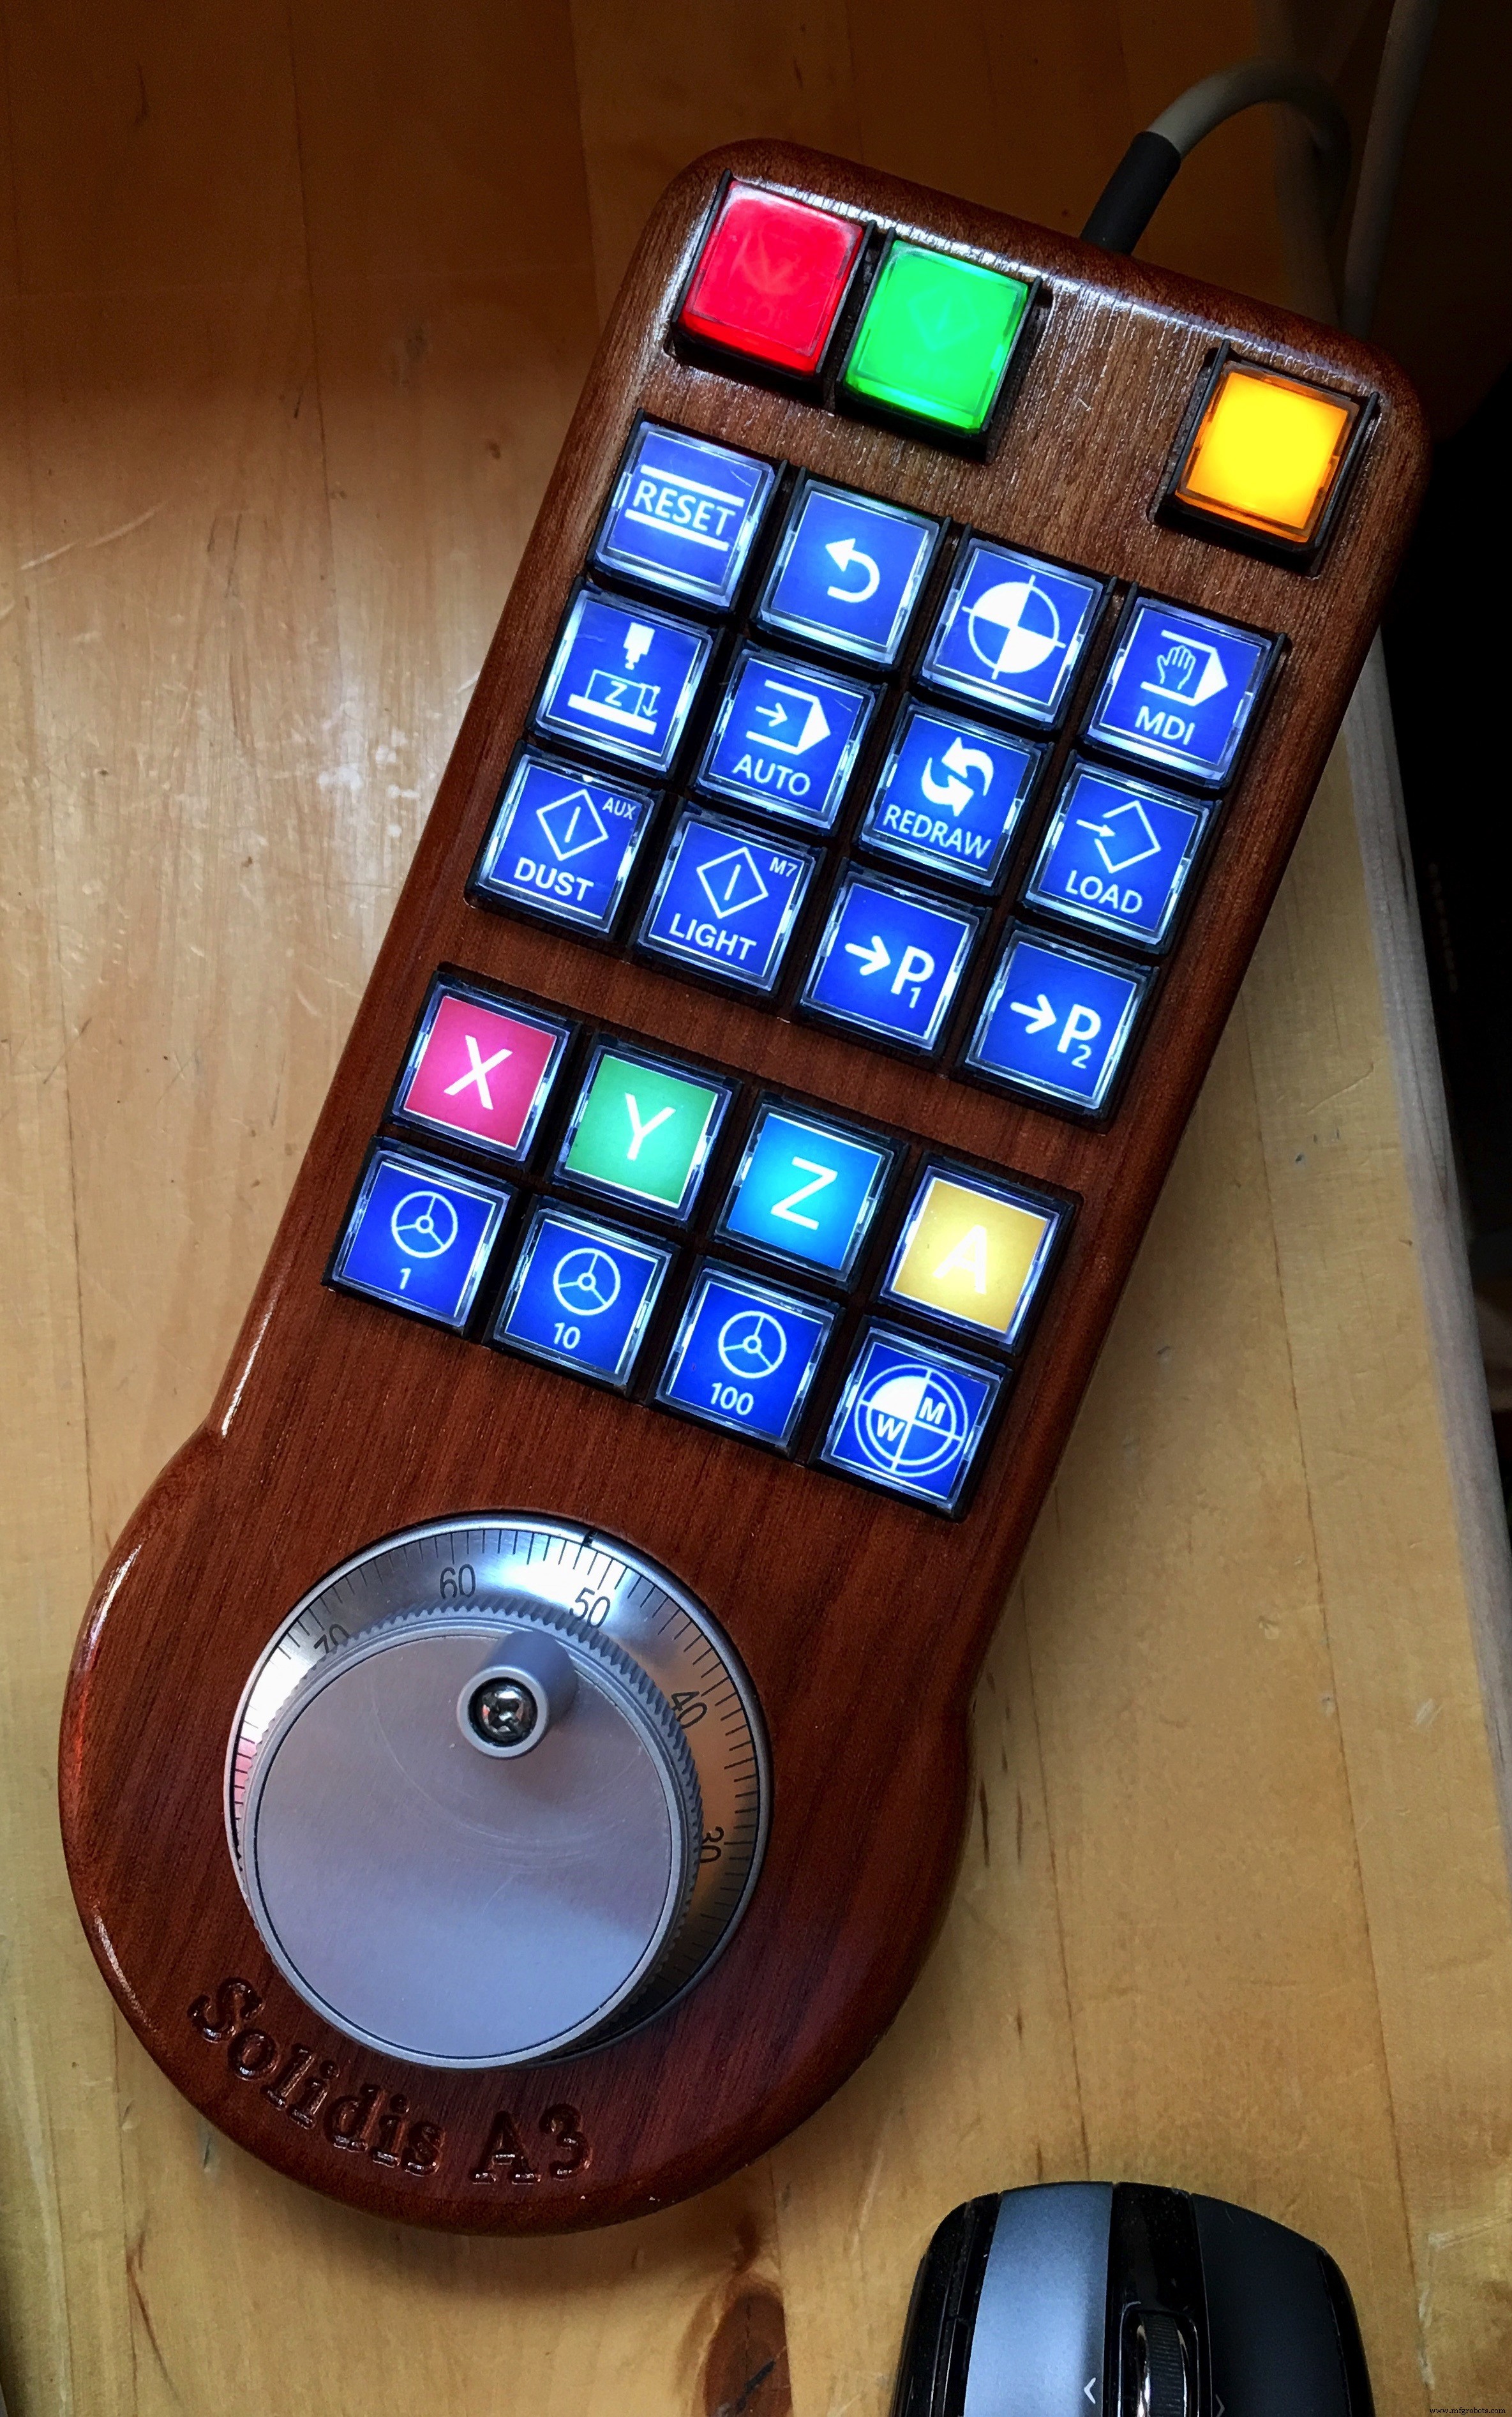
My pendant has 23 buttons with up to 6 functions per button and a handwheel.
One comment could be, "it's large and heavy!" But in practice, it unexpectedly proved to be very handy to have a pendant which stays put when turning the handwheel...
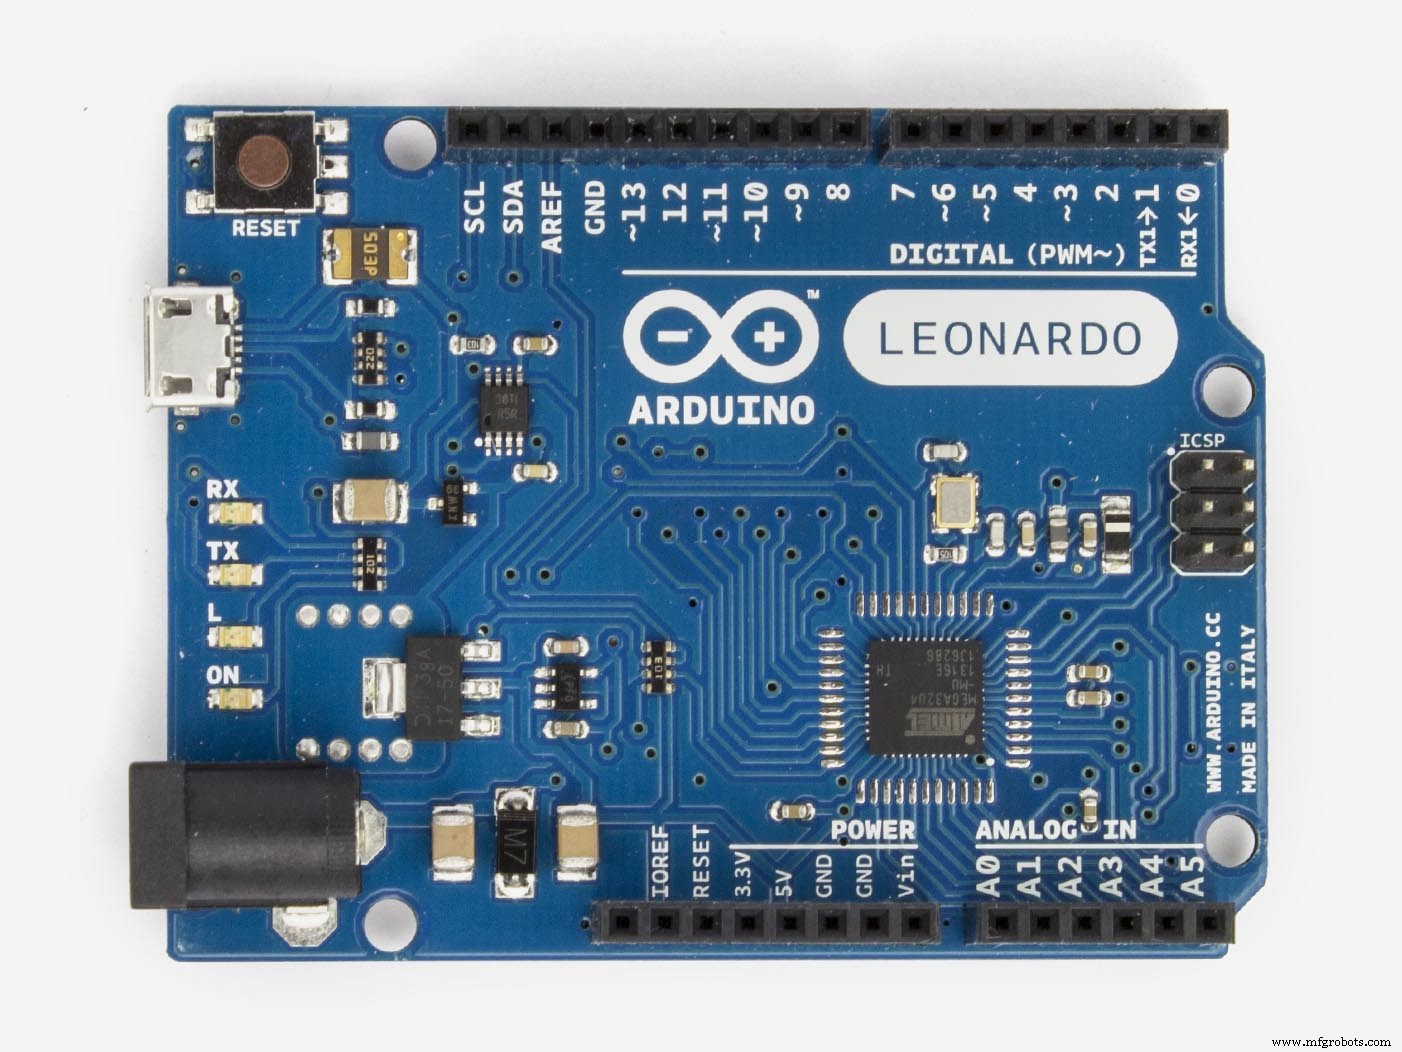
The beauty of the Arduino with a 32u4 chip (not all model have this chip) is the ability to emulate a keyboard and/or mouse. When you connect the Leonardo to a pc, it 'sees' a keyboard. Great!
So when you program the Arduino, add some switches to it and connect it to a PC or Mac, you can sent (multiple) keystrokes/mouse movements to the computer bij pressing a button. As I mentioned, 23 buttons/6 functions per button = many options..
It all depends on the use of the right library for the Arduino sketch! After hours of searching I finally found a great library which I included on this page: Clickbutton.
With this library, you get these possibilities for each (momentary!) button:
- Single click
- Double click
- Triple ckick
- Single click and hold
- Double click and hold
- Triple click and hold
Also you get debounce functionality in the Clickbutton library which is important.
you can adjust the timings for each button but standard timing are >= 250ms to recognise a click and >= 1000ms to recognise a button hold.
Just an excerpt from my sketch for the 3 function X axis button (key 13):
if (button[13].clicks != 0)
{
switch (button[13].clicks)
{
case 1: // Single click
// Handwheel on X
shortcut_HANDWHEEL_X();
break;
case 2: // Double click
// Zero X
shortcut_ZERO_X();
break;
case 3: // Triple click
break;
case -1: // Single Click and Hold
// USER MACRO 18: X-axis: goto work zero position G0 X0.0000
press_ESC();
goto_MAIN_MENU();
user_MACRO_18();
break;
case -2: // Double Click and Hold
break;
case -3: // Triple Click and Hold
break;
}
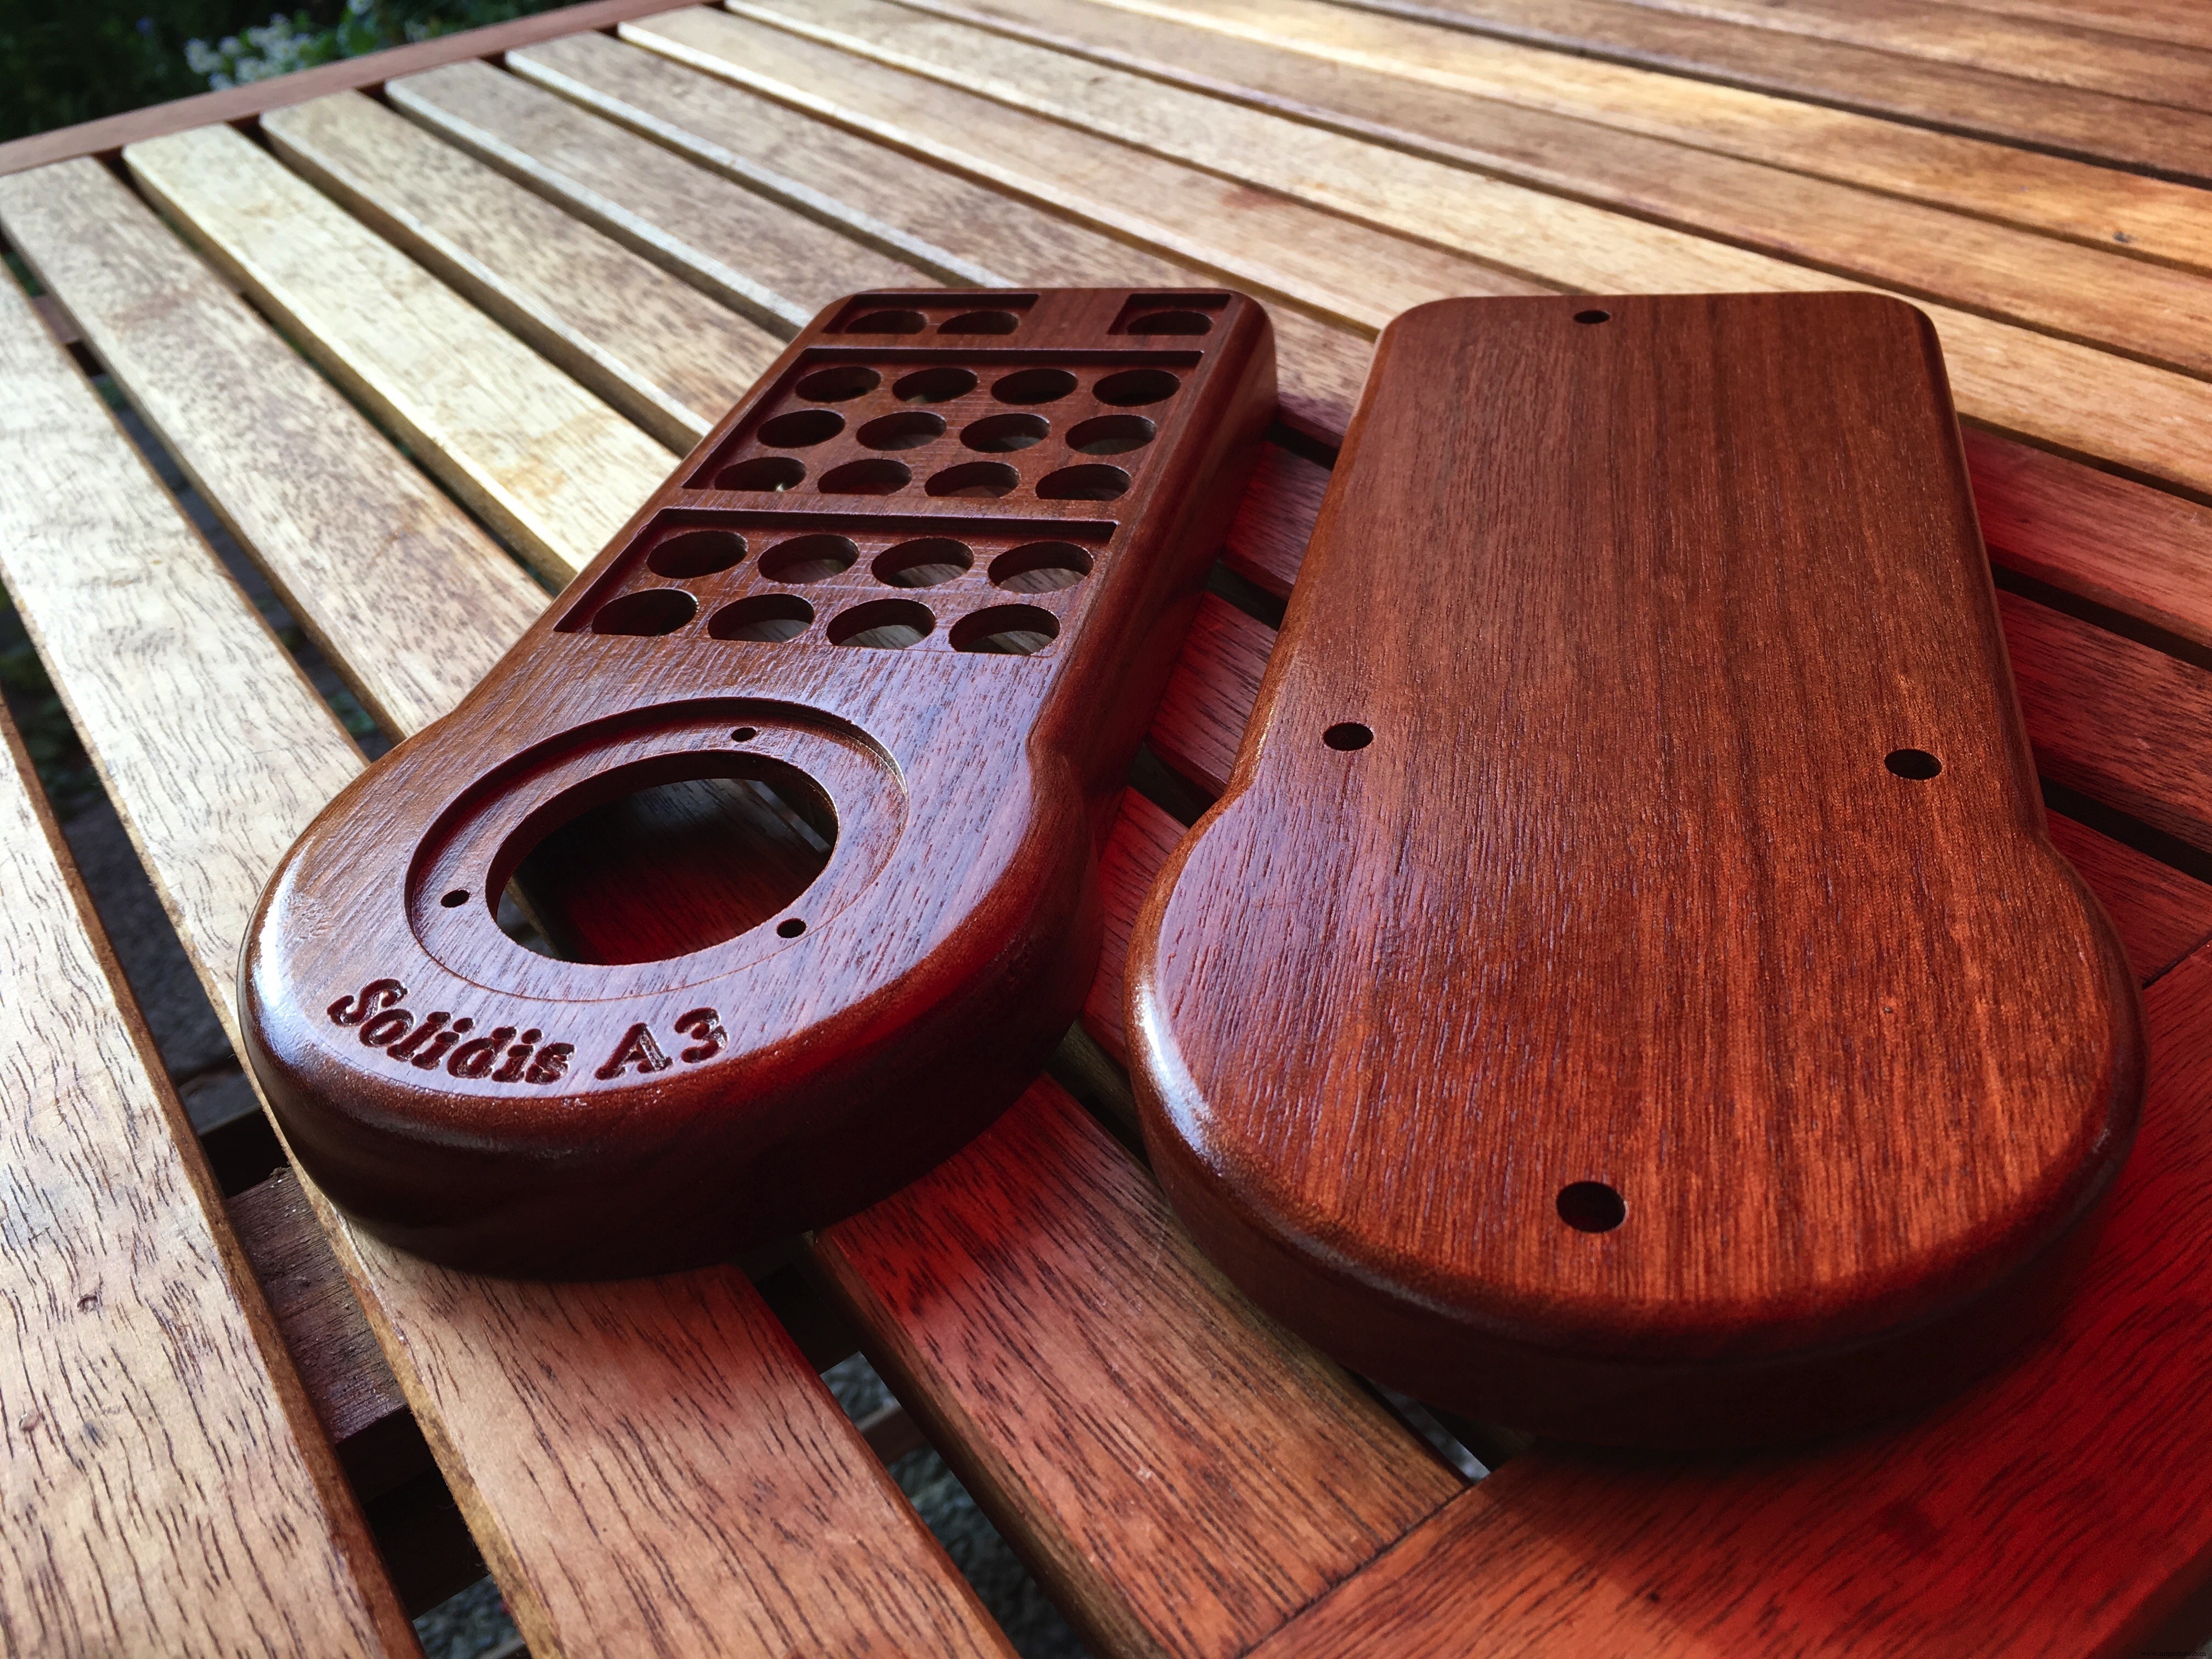
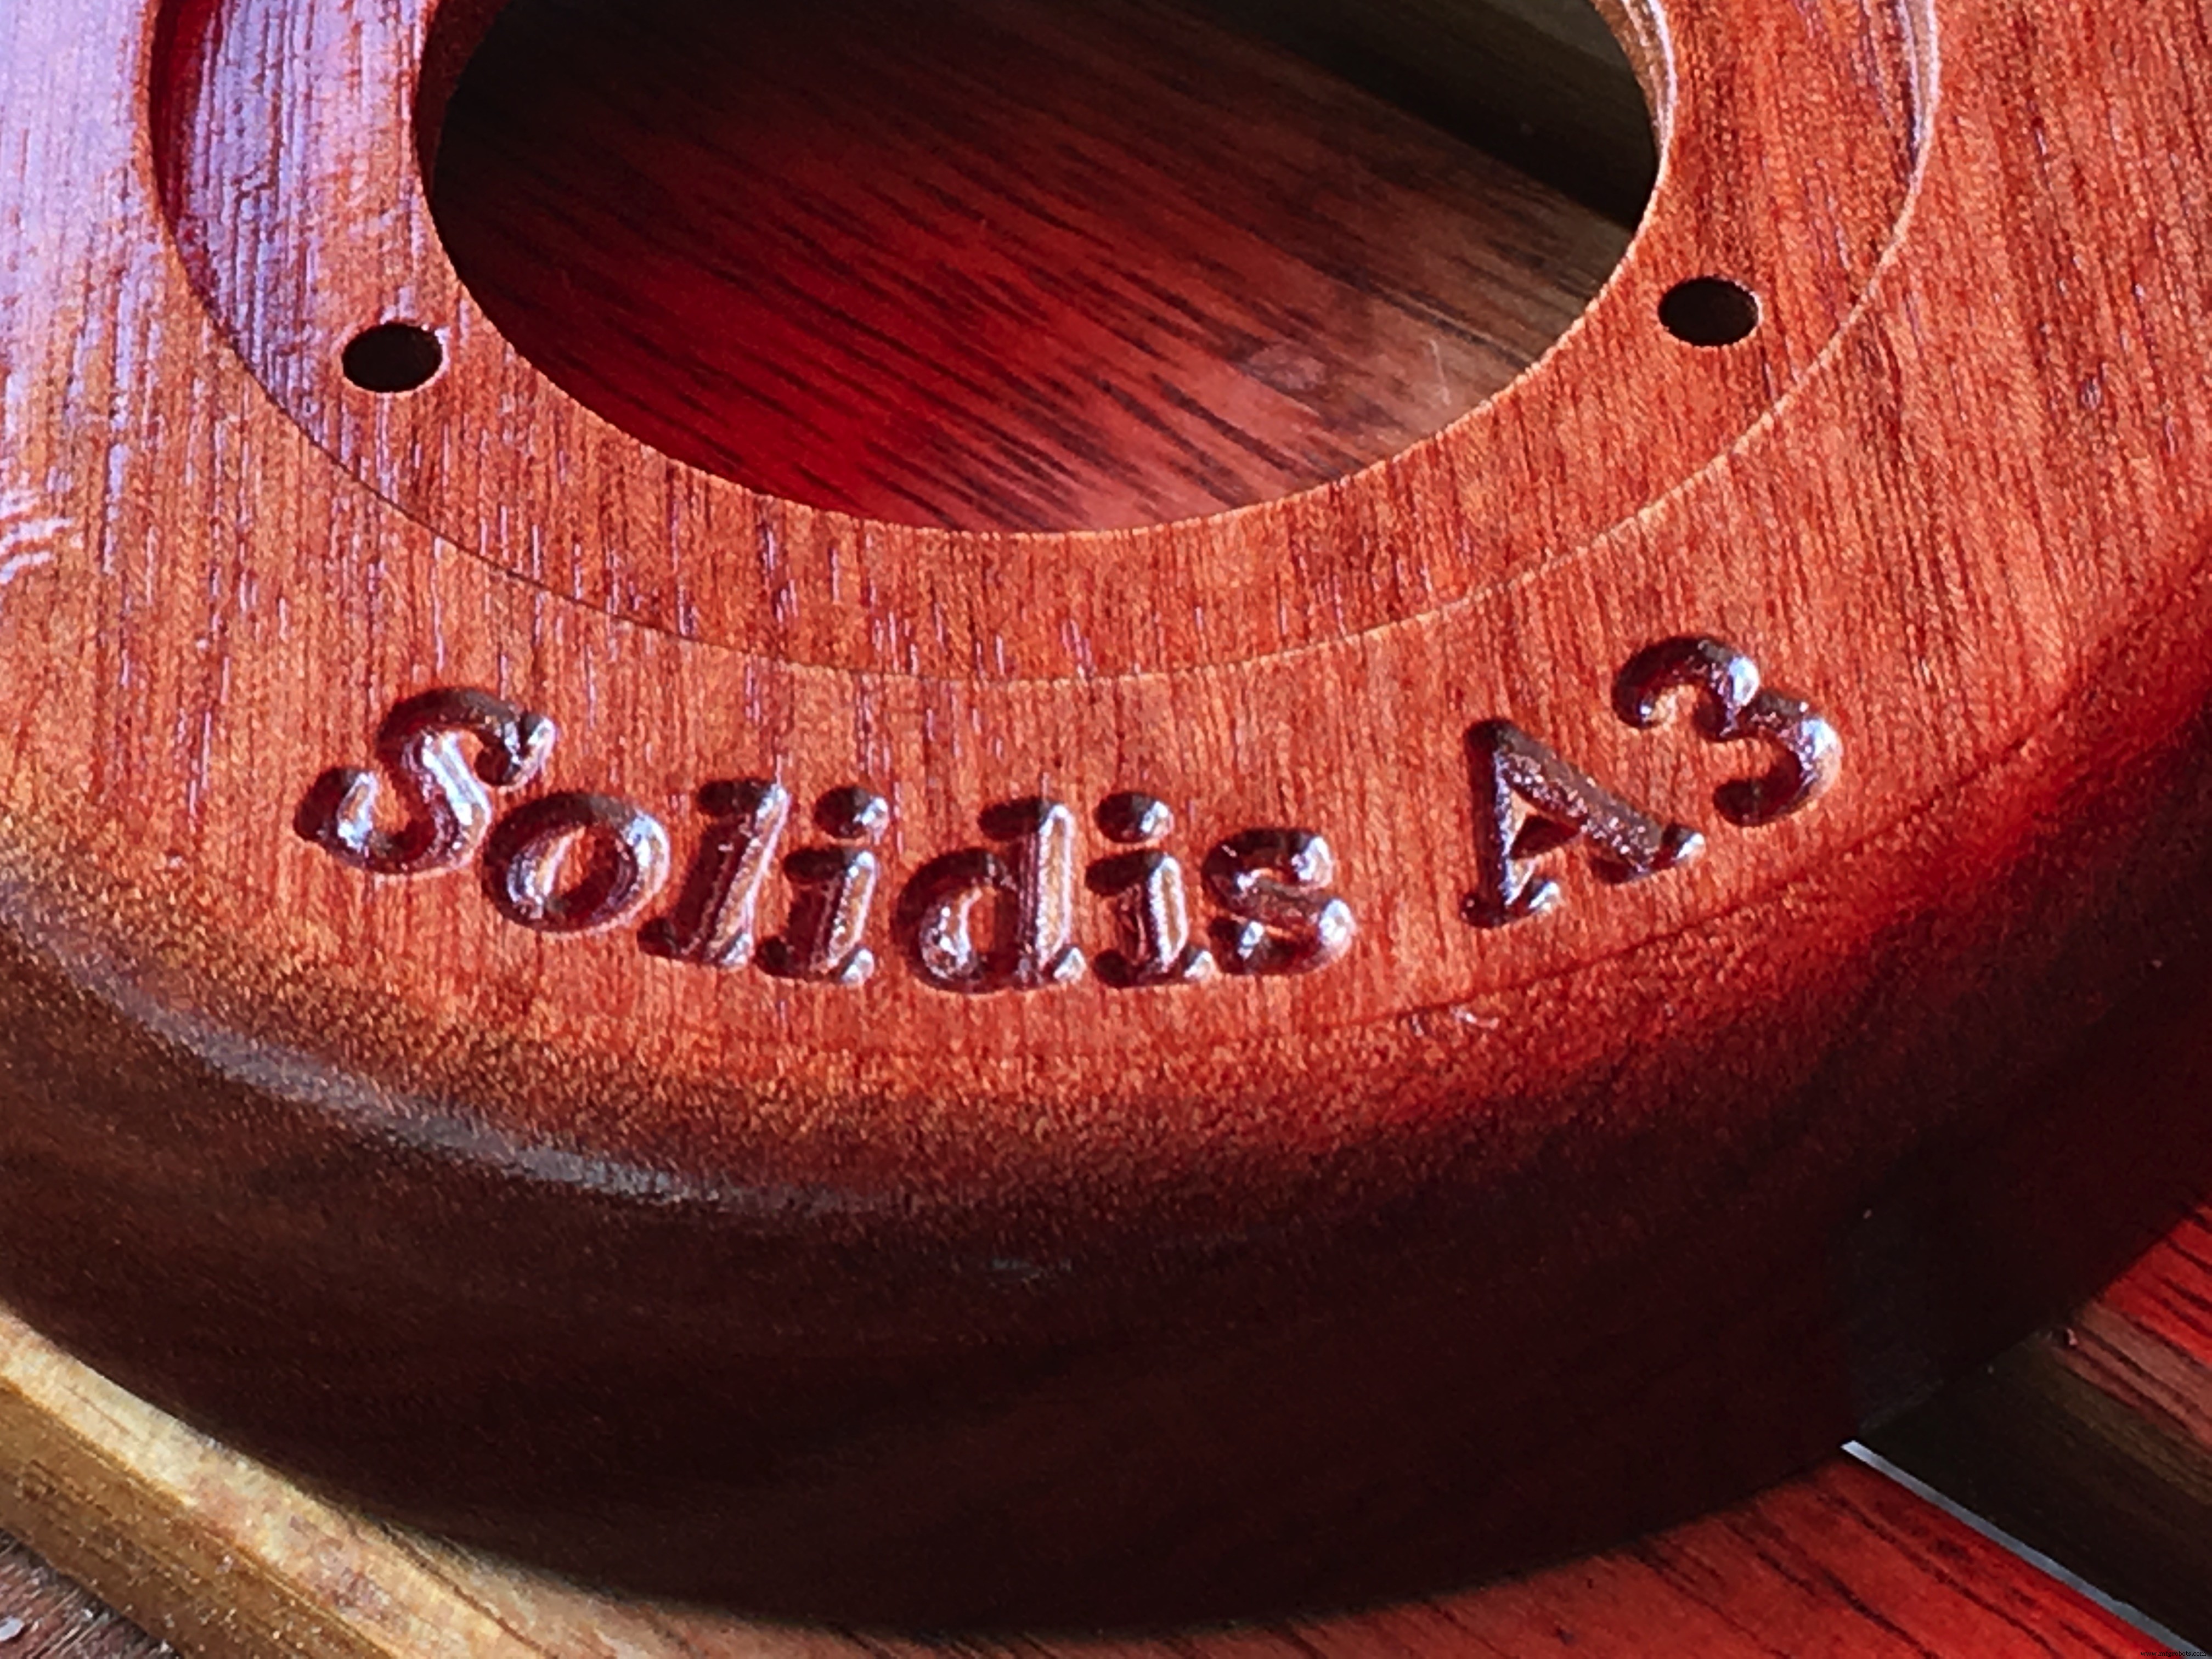
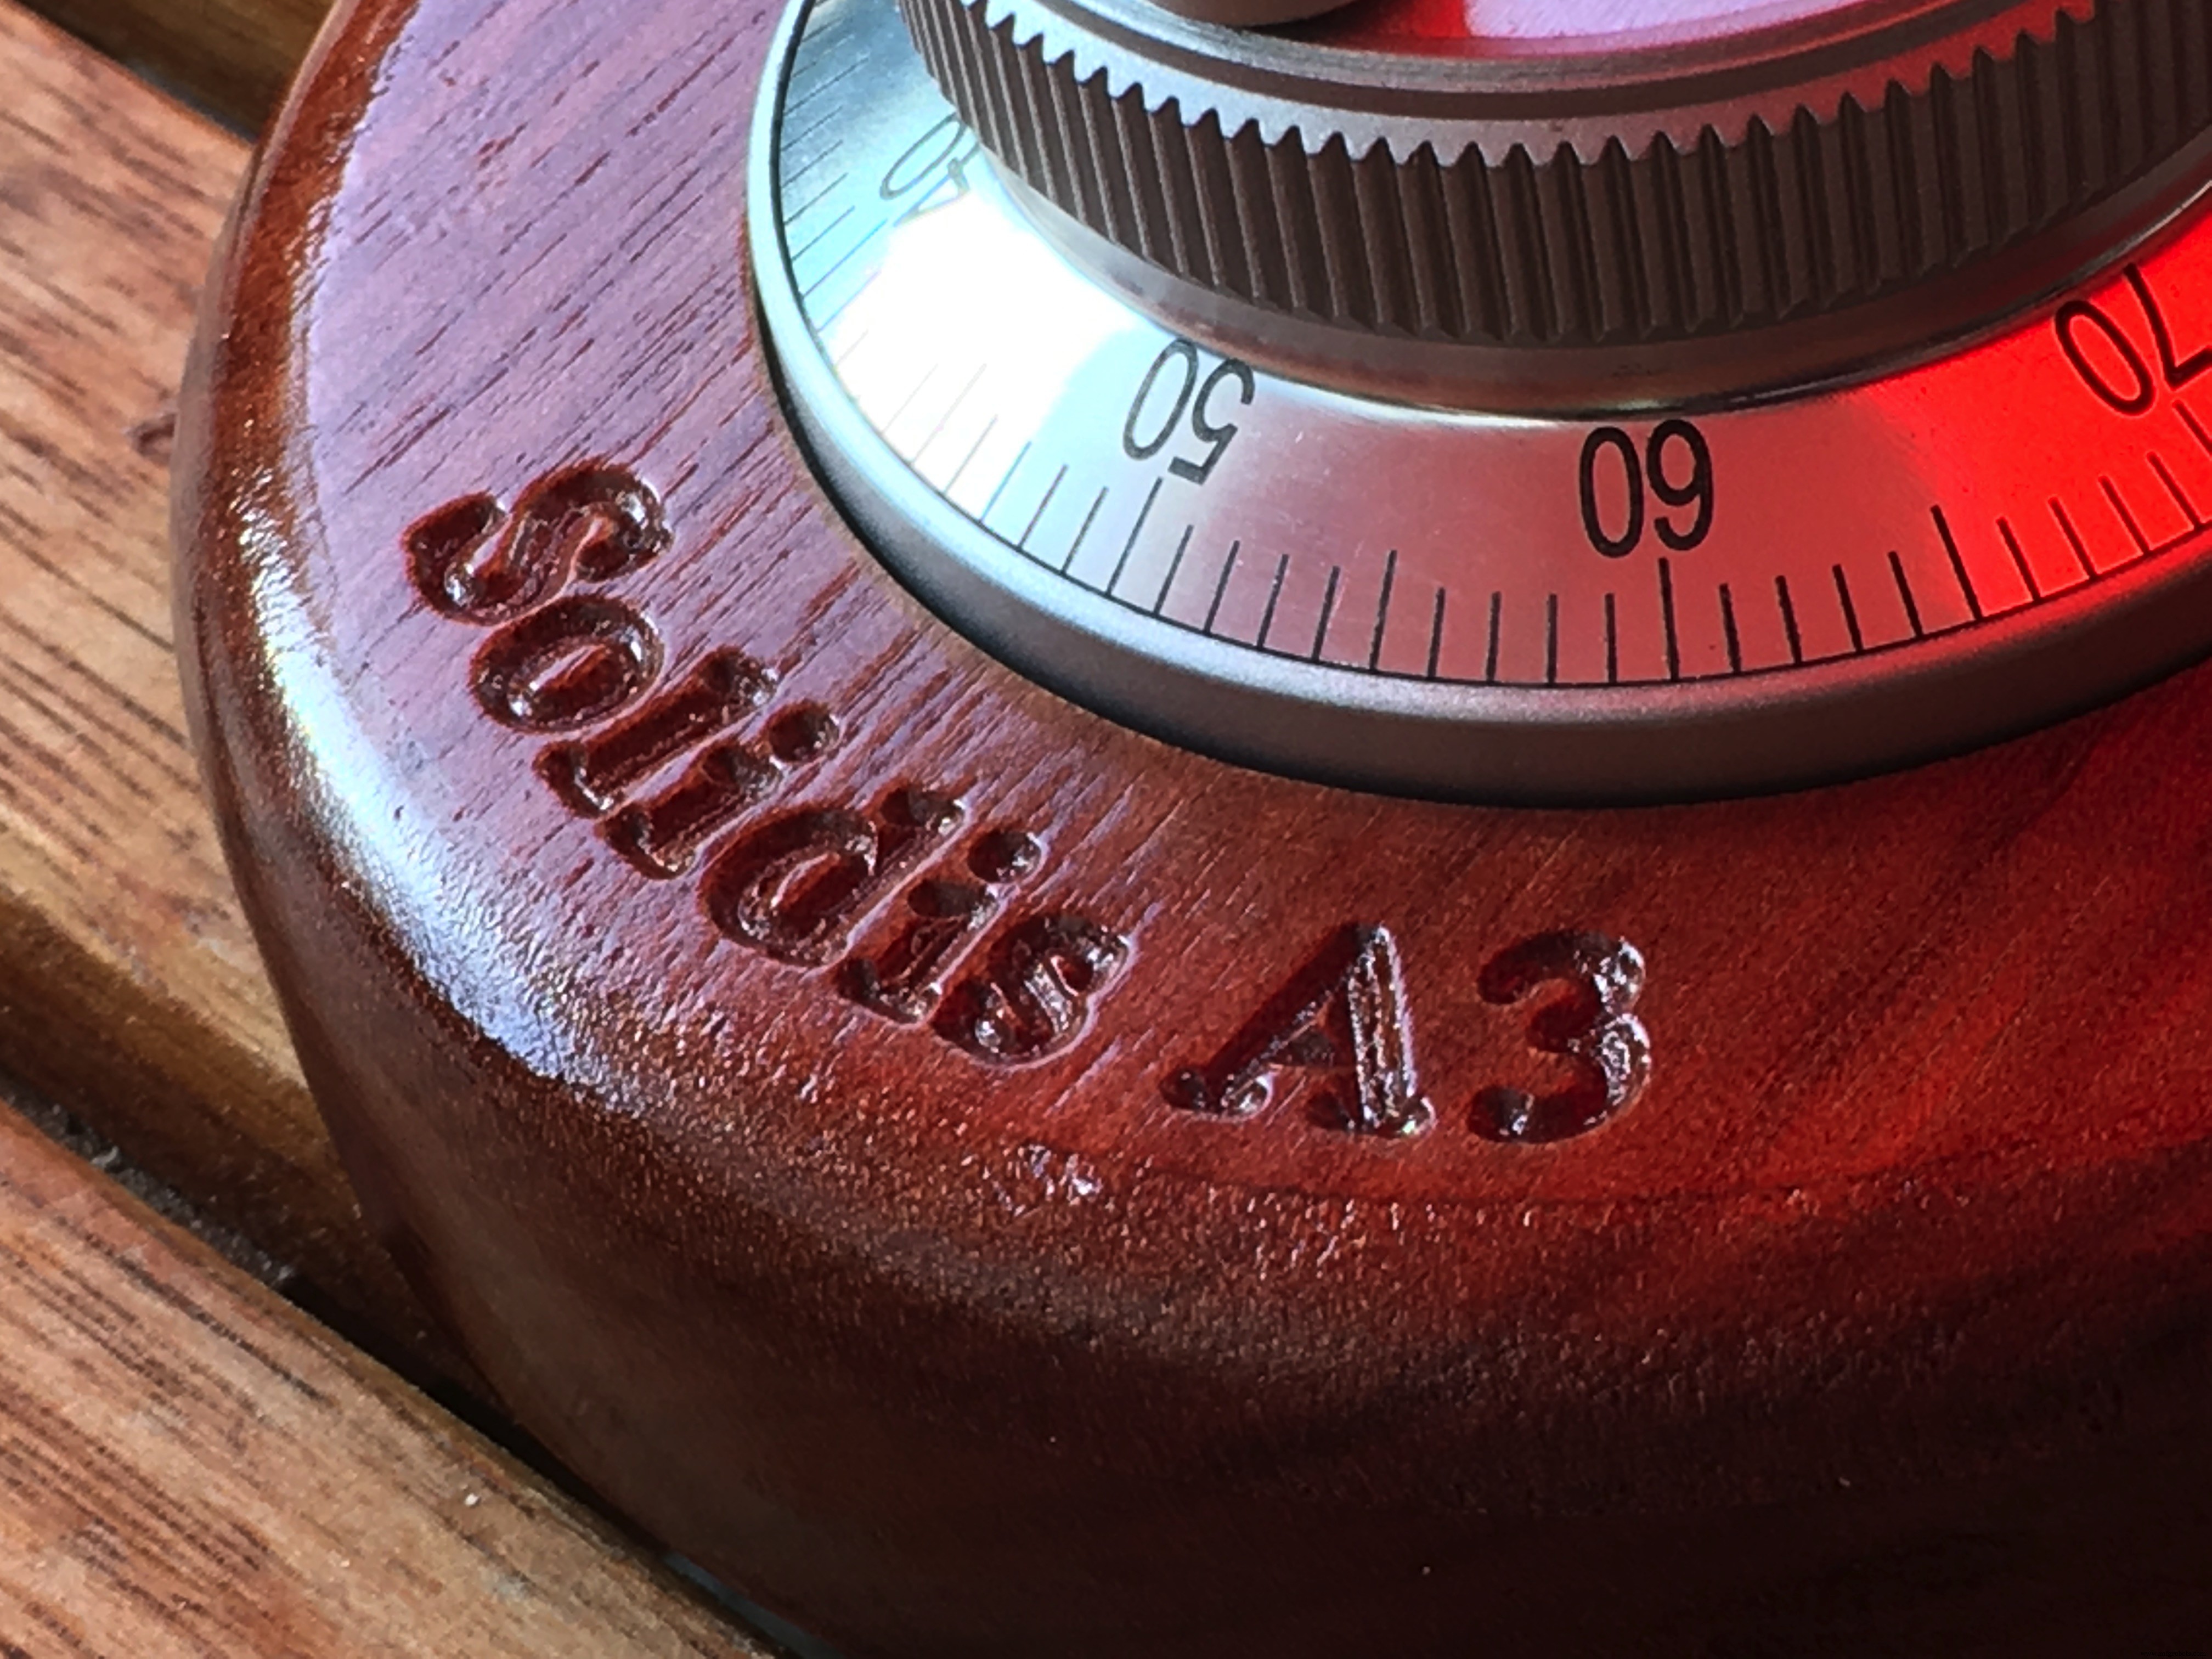
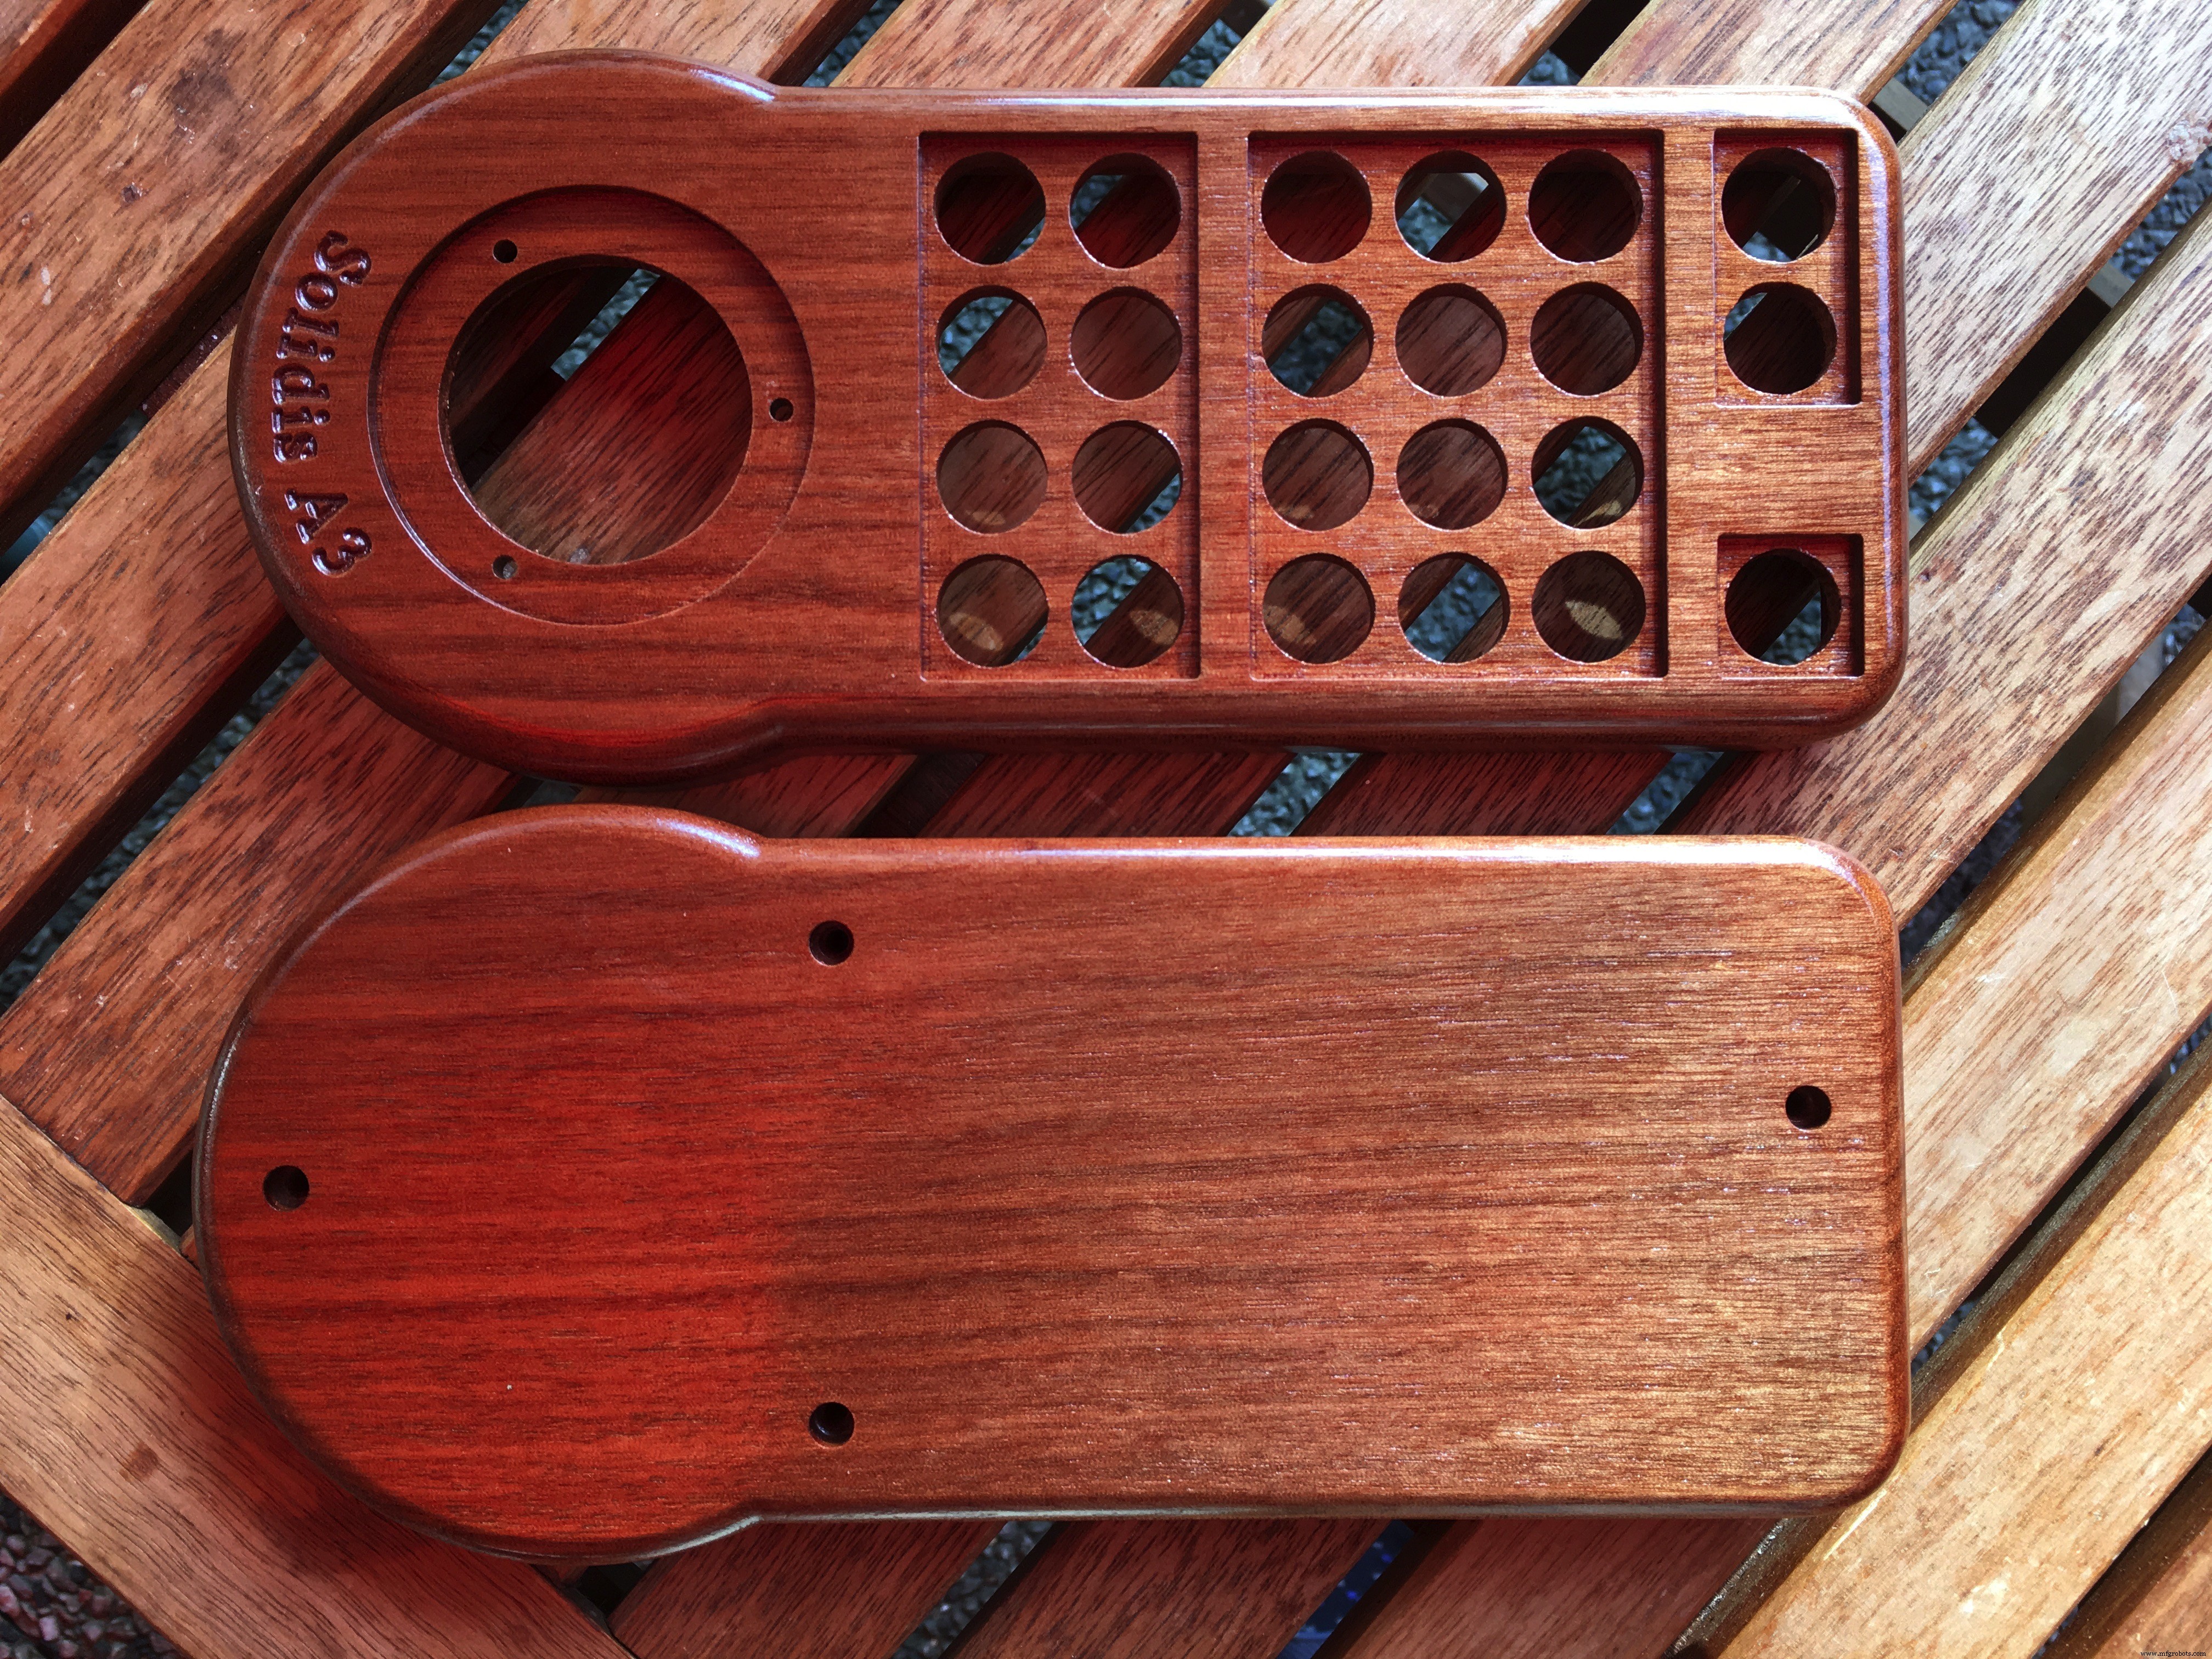
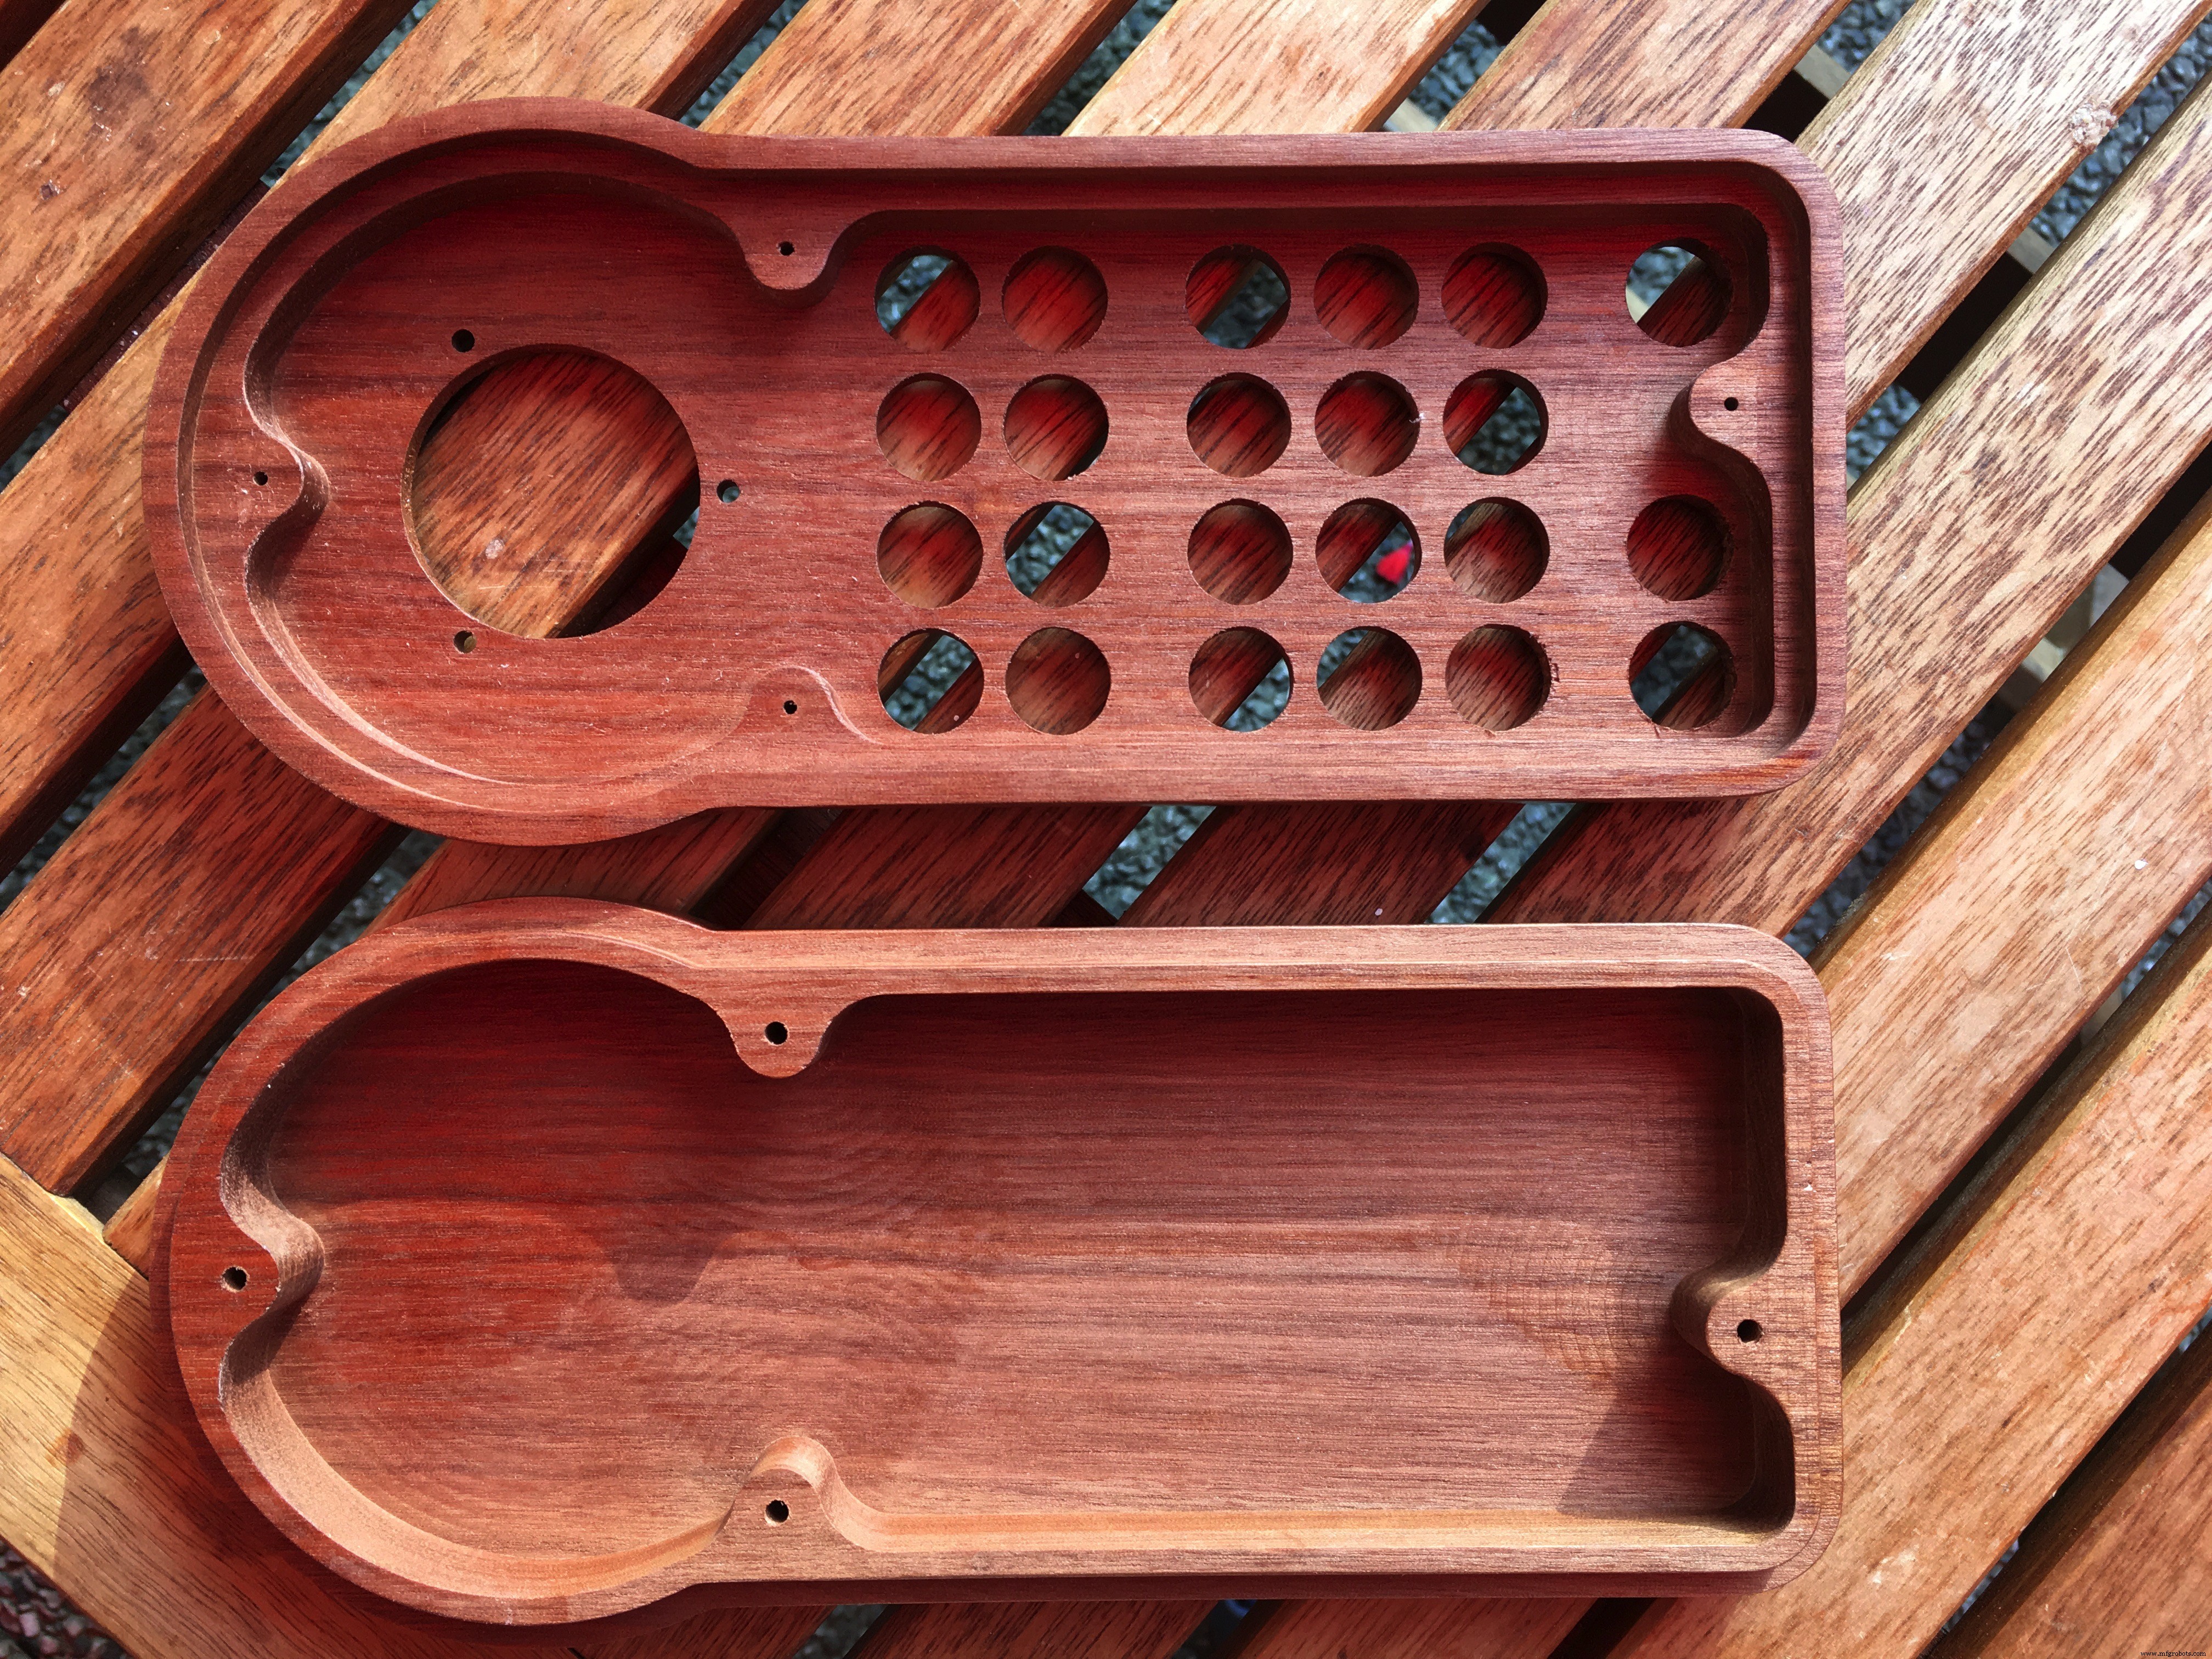
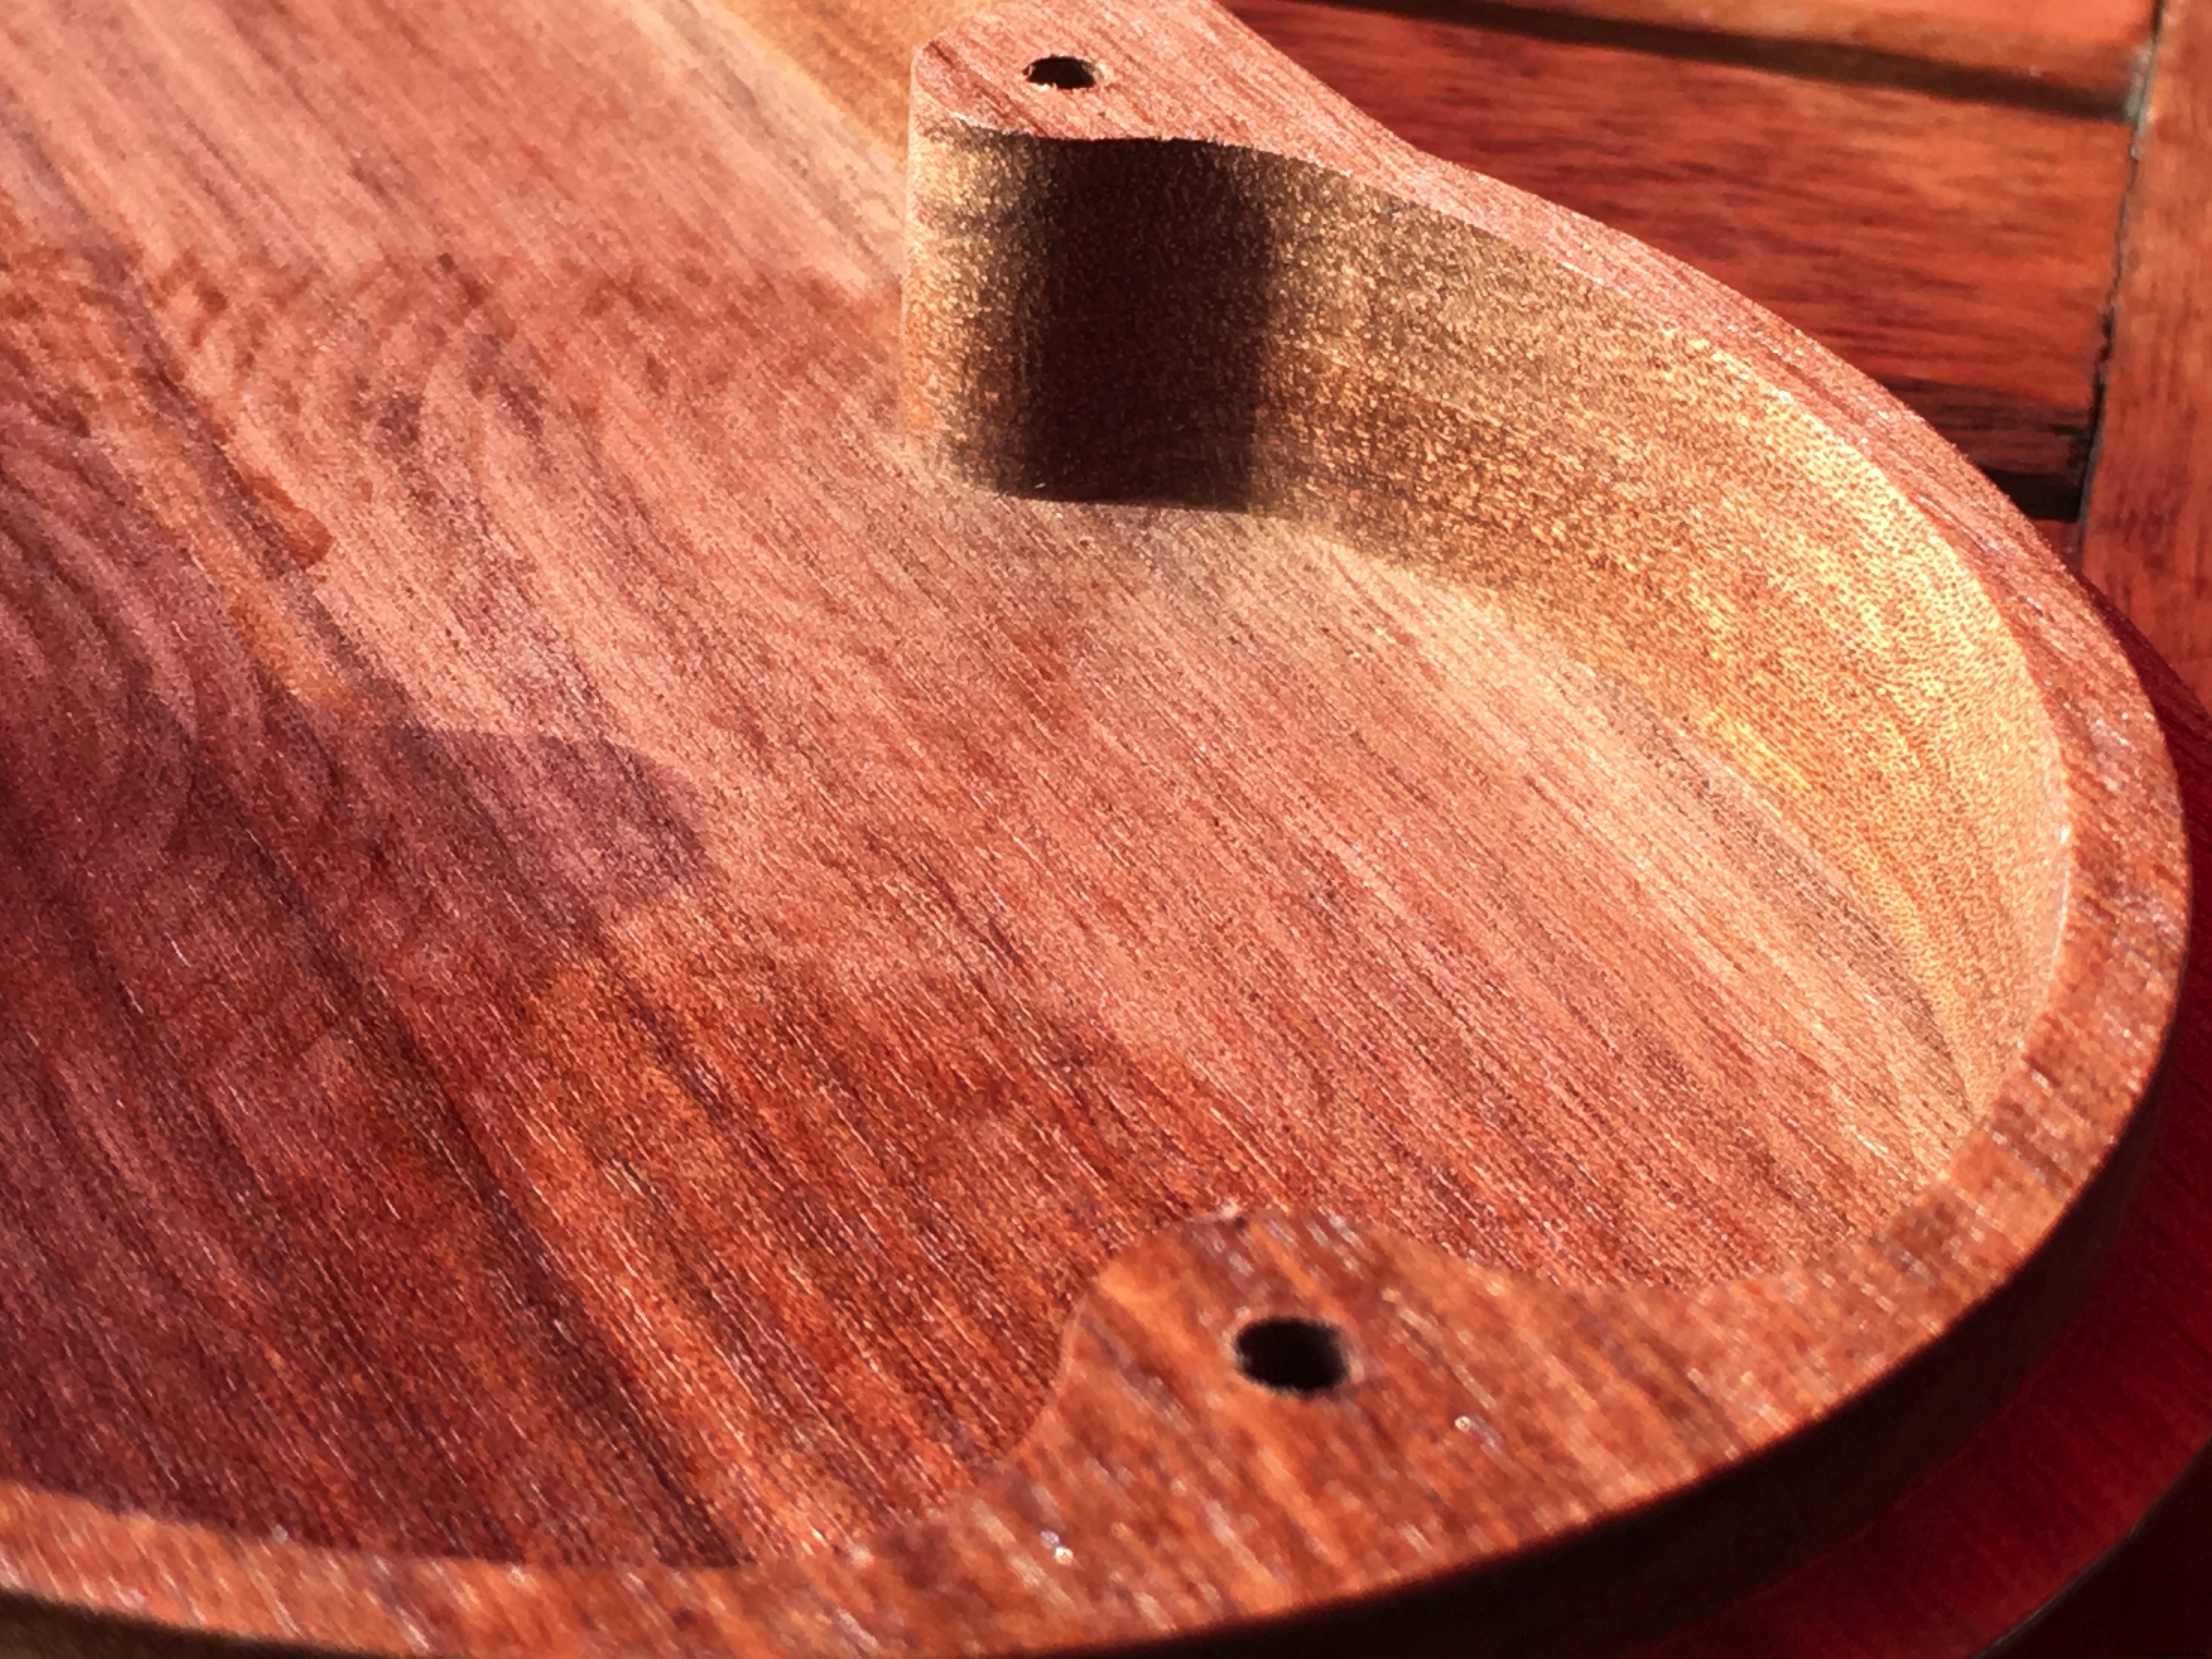
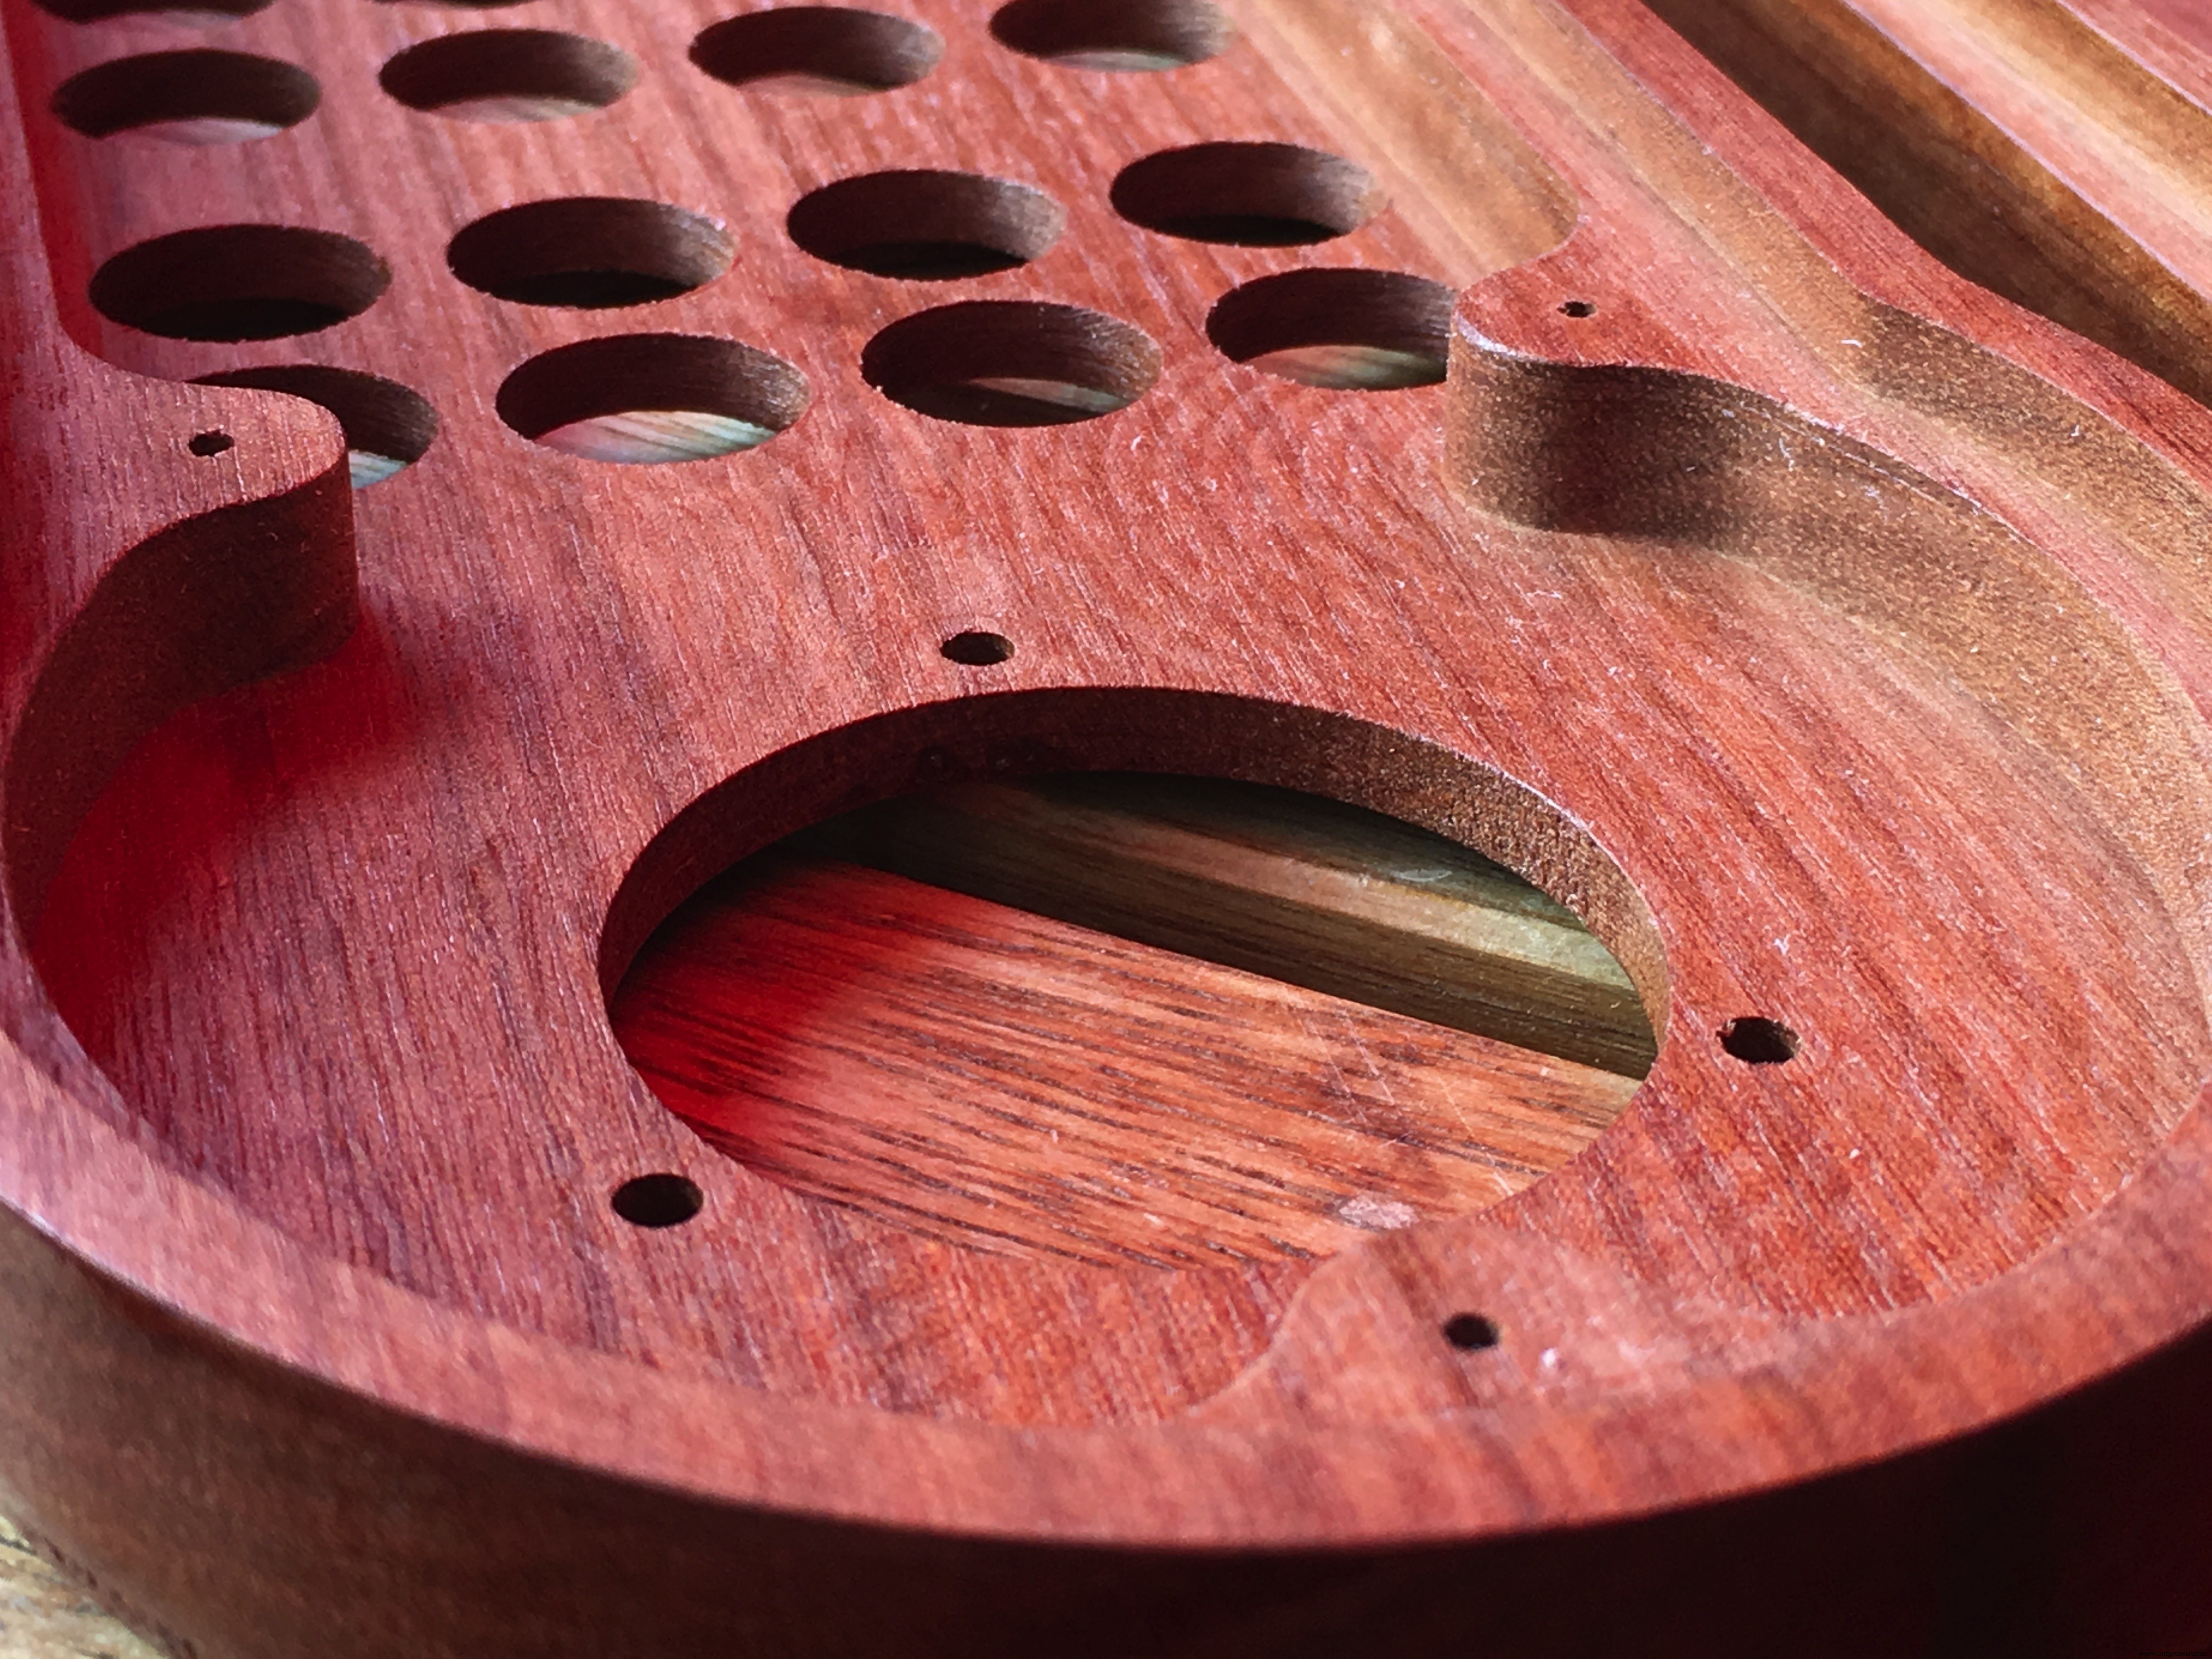
}I chose to use mahogany wood for the pendant enclosure. I love to work with wood and the look and feel is wonderful. Also this way I could make a truly custom case which is not always possible with a ready made ABS type case you can buy for 20-50 euros.
The drawing was made with the Vectric Cut2D software. I'm glad I invested in this software package because it made the CNC learning curve a lot less steep and more fun. It also helps you to design double sided jobs very easily.
After sanding a little, the wood got many layers of clear varnish.
Feedrate in this video:
2400mm/min (~ 94"/min) of 40mm/sec. (~ 1.57") with a cut of 3mm (1/8") at the time
The SwitchesThe switches are great. They are the momentary type, except for the switch which I use to turn on/off the LEDs. You can put a label behind the clear top cover and if you want, you can lit the switch with the build-in LED.
I used a 1KΩ resistor per switch, using 2mA at 5Volts.
Here is a video with dutch audio, only to let you hear the sound the switches make. My comments are not important. I did say that the switches are a bit loud but at least you know when you pushed them ;)
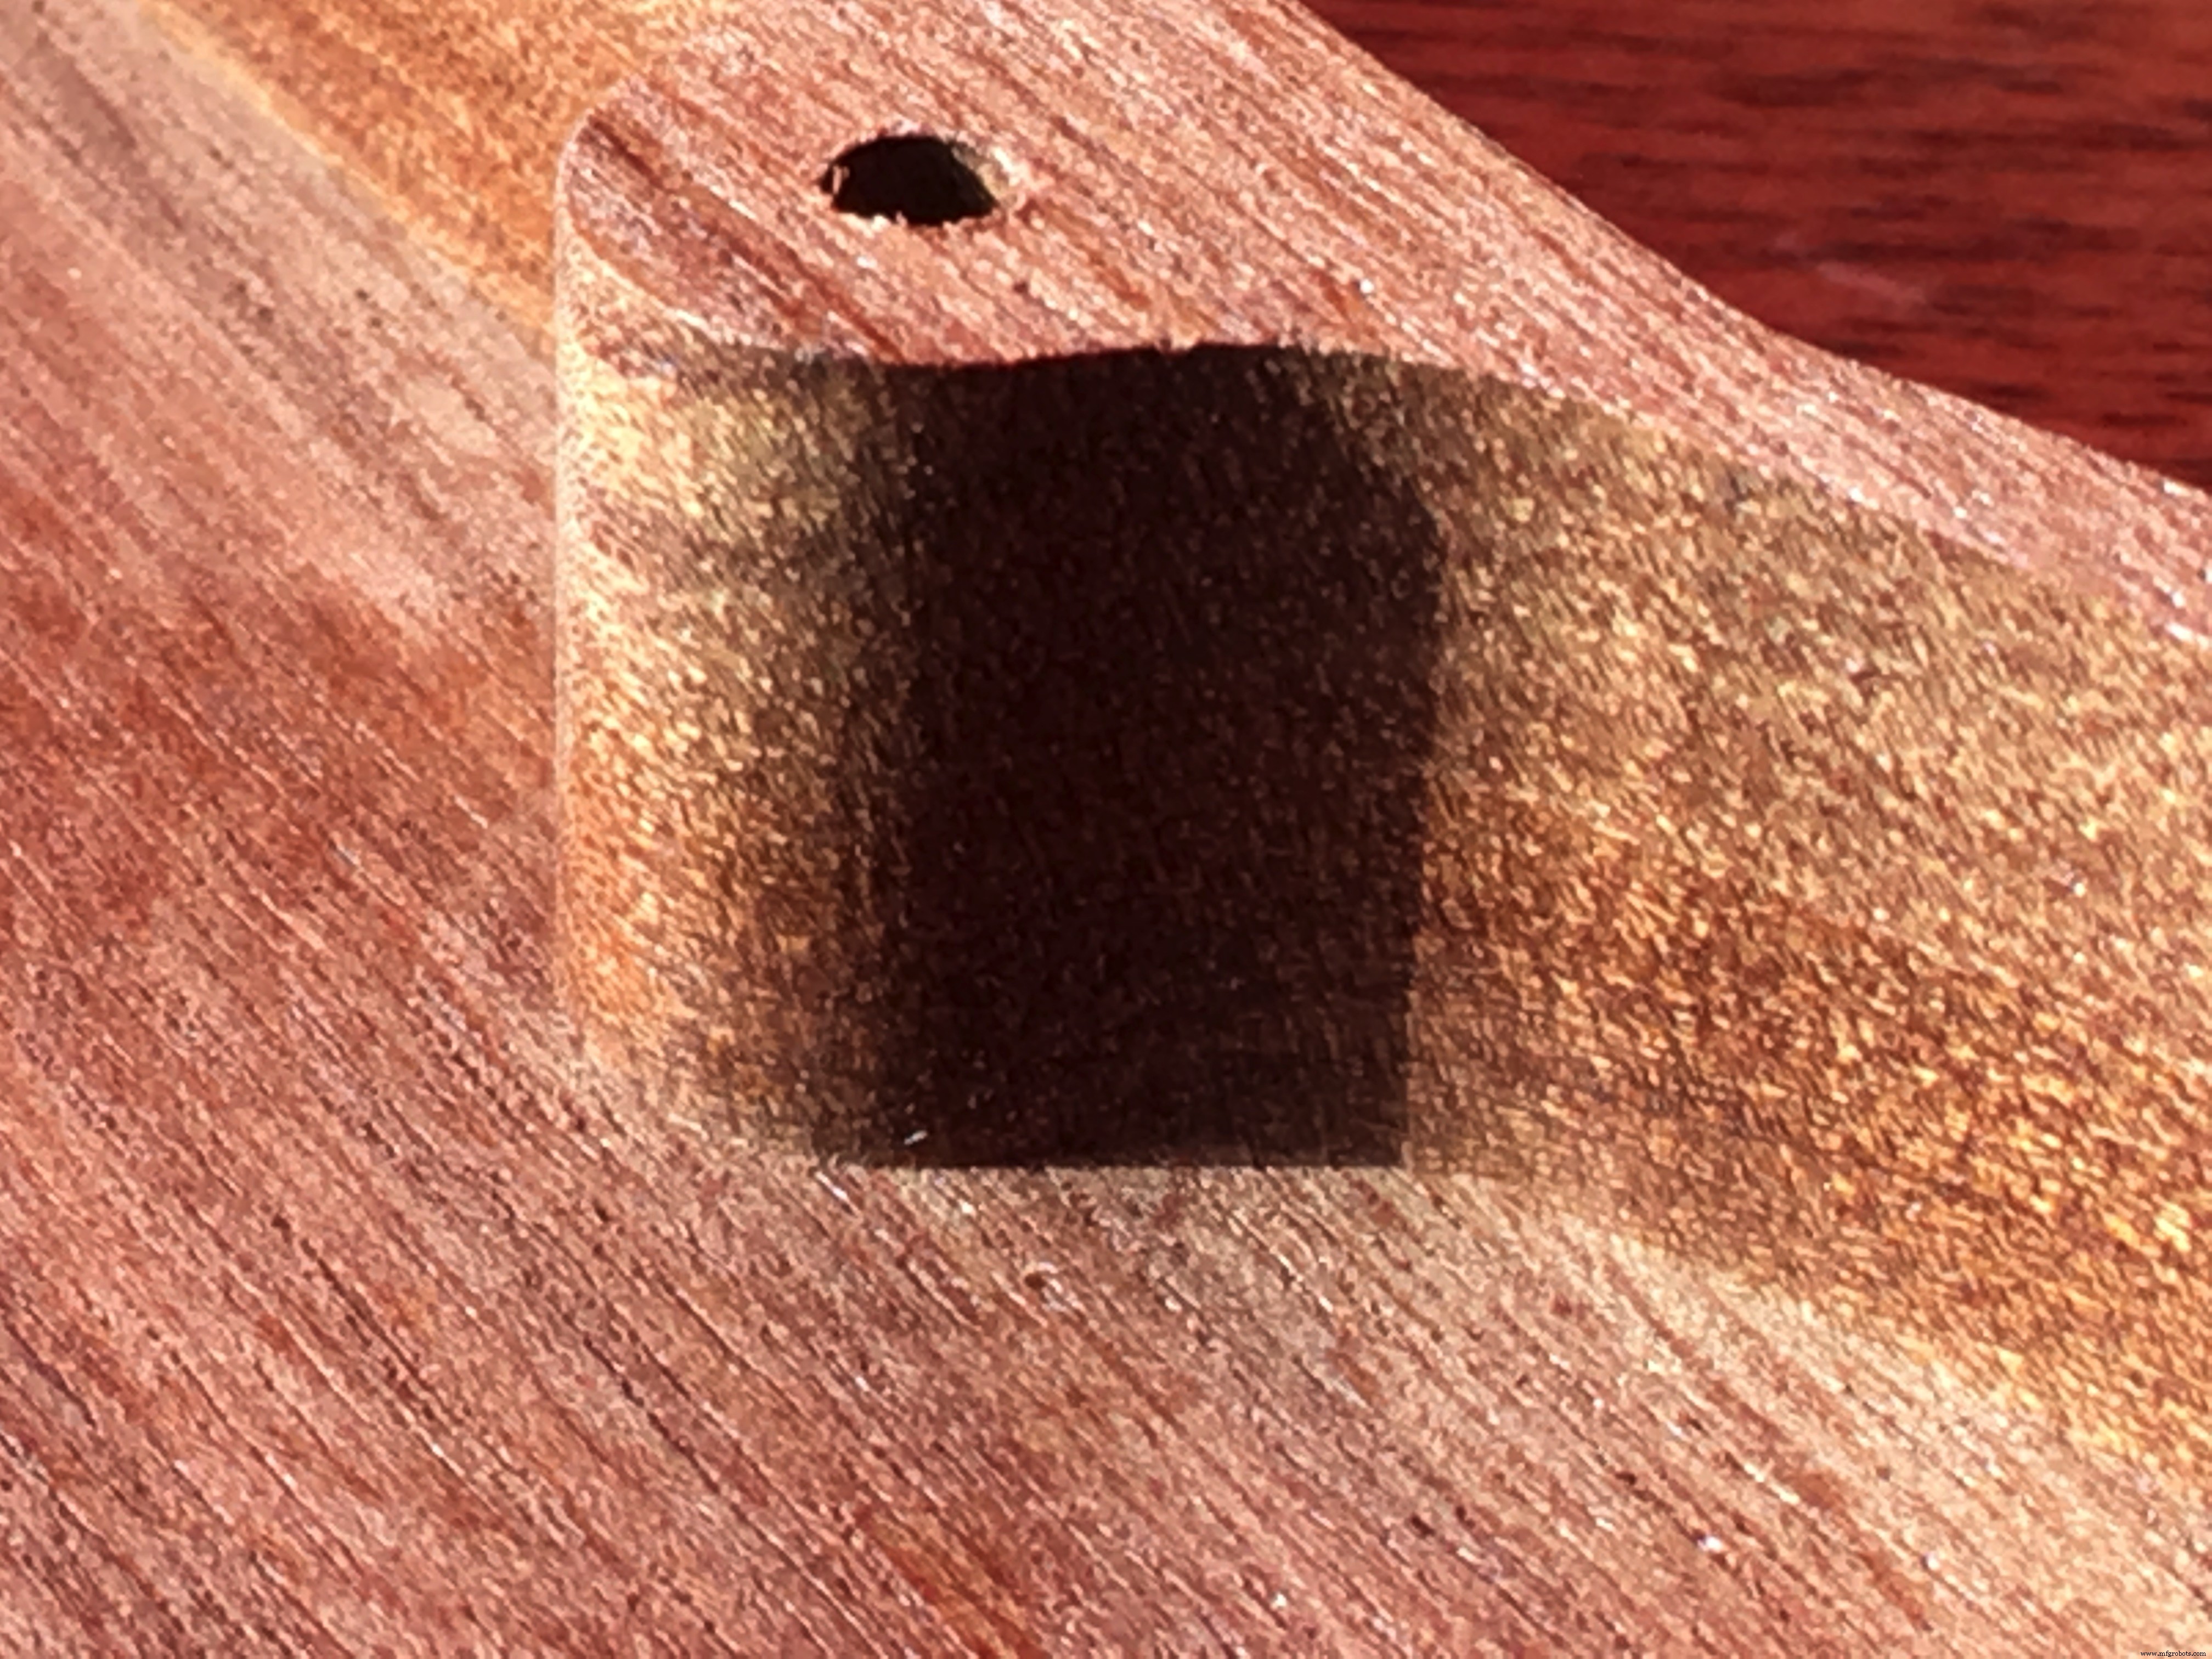
One downside of using these switches is that they need a rather high or 'thick' enclosure. The wood thickness was 21mm (0.82" or 53/64") for the top AND bottom part. after machining, the total thickness of the pendant is 36,5 mm (14,37 or 14 3/8 inch)
Connecting the switches is so easy... I use the Arduino build in pull-up resistors so all you have to do is connect one side of all the swiches to ground and the other side to the Arduino inputs.
The Switch LabelsFor labeling the switches I used a high quality Poly-Vinyl sticker for my color laserprinter. (Also available for inkjet printers). Printing on regular paper was no option because you do see the structure of the paper very good when lit.
Then I took off the transparent caps from the switches and put the labels on the piece of plastic underneath it.
The icons are the same as used in the Eding CNC software which is included with the hardware when you buy it. I just copied the JPEG icons from the software directory and I changed some in a graphics program to customise them for my need.
The HandwheelWell this one is a standard 60mm 100PPR 6 Terminal Eletronic CNC Hand Wheel
So 100 pulses per rotation, in most CNC software you can edit this value.
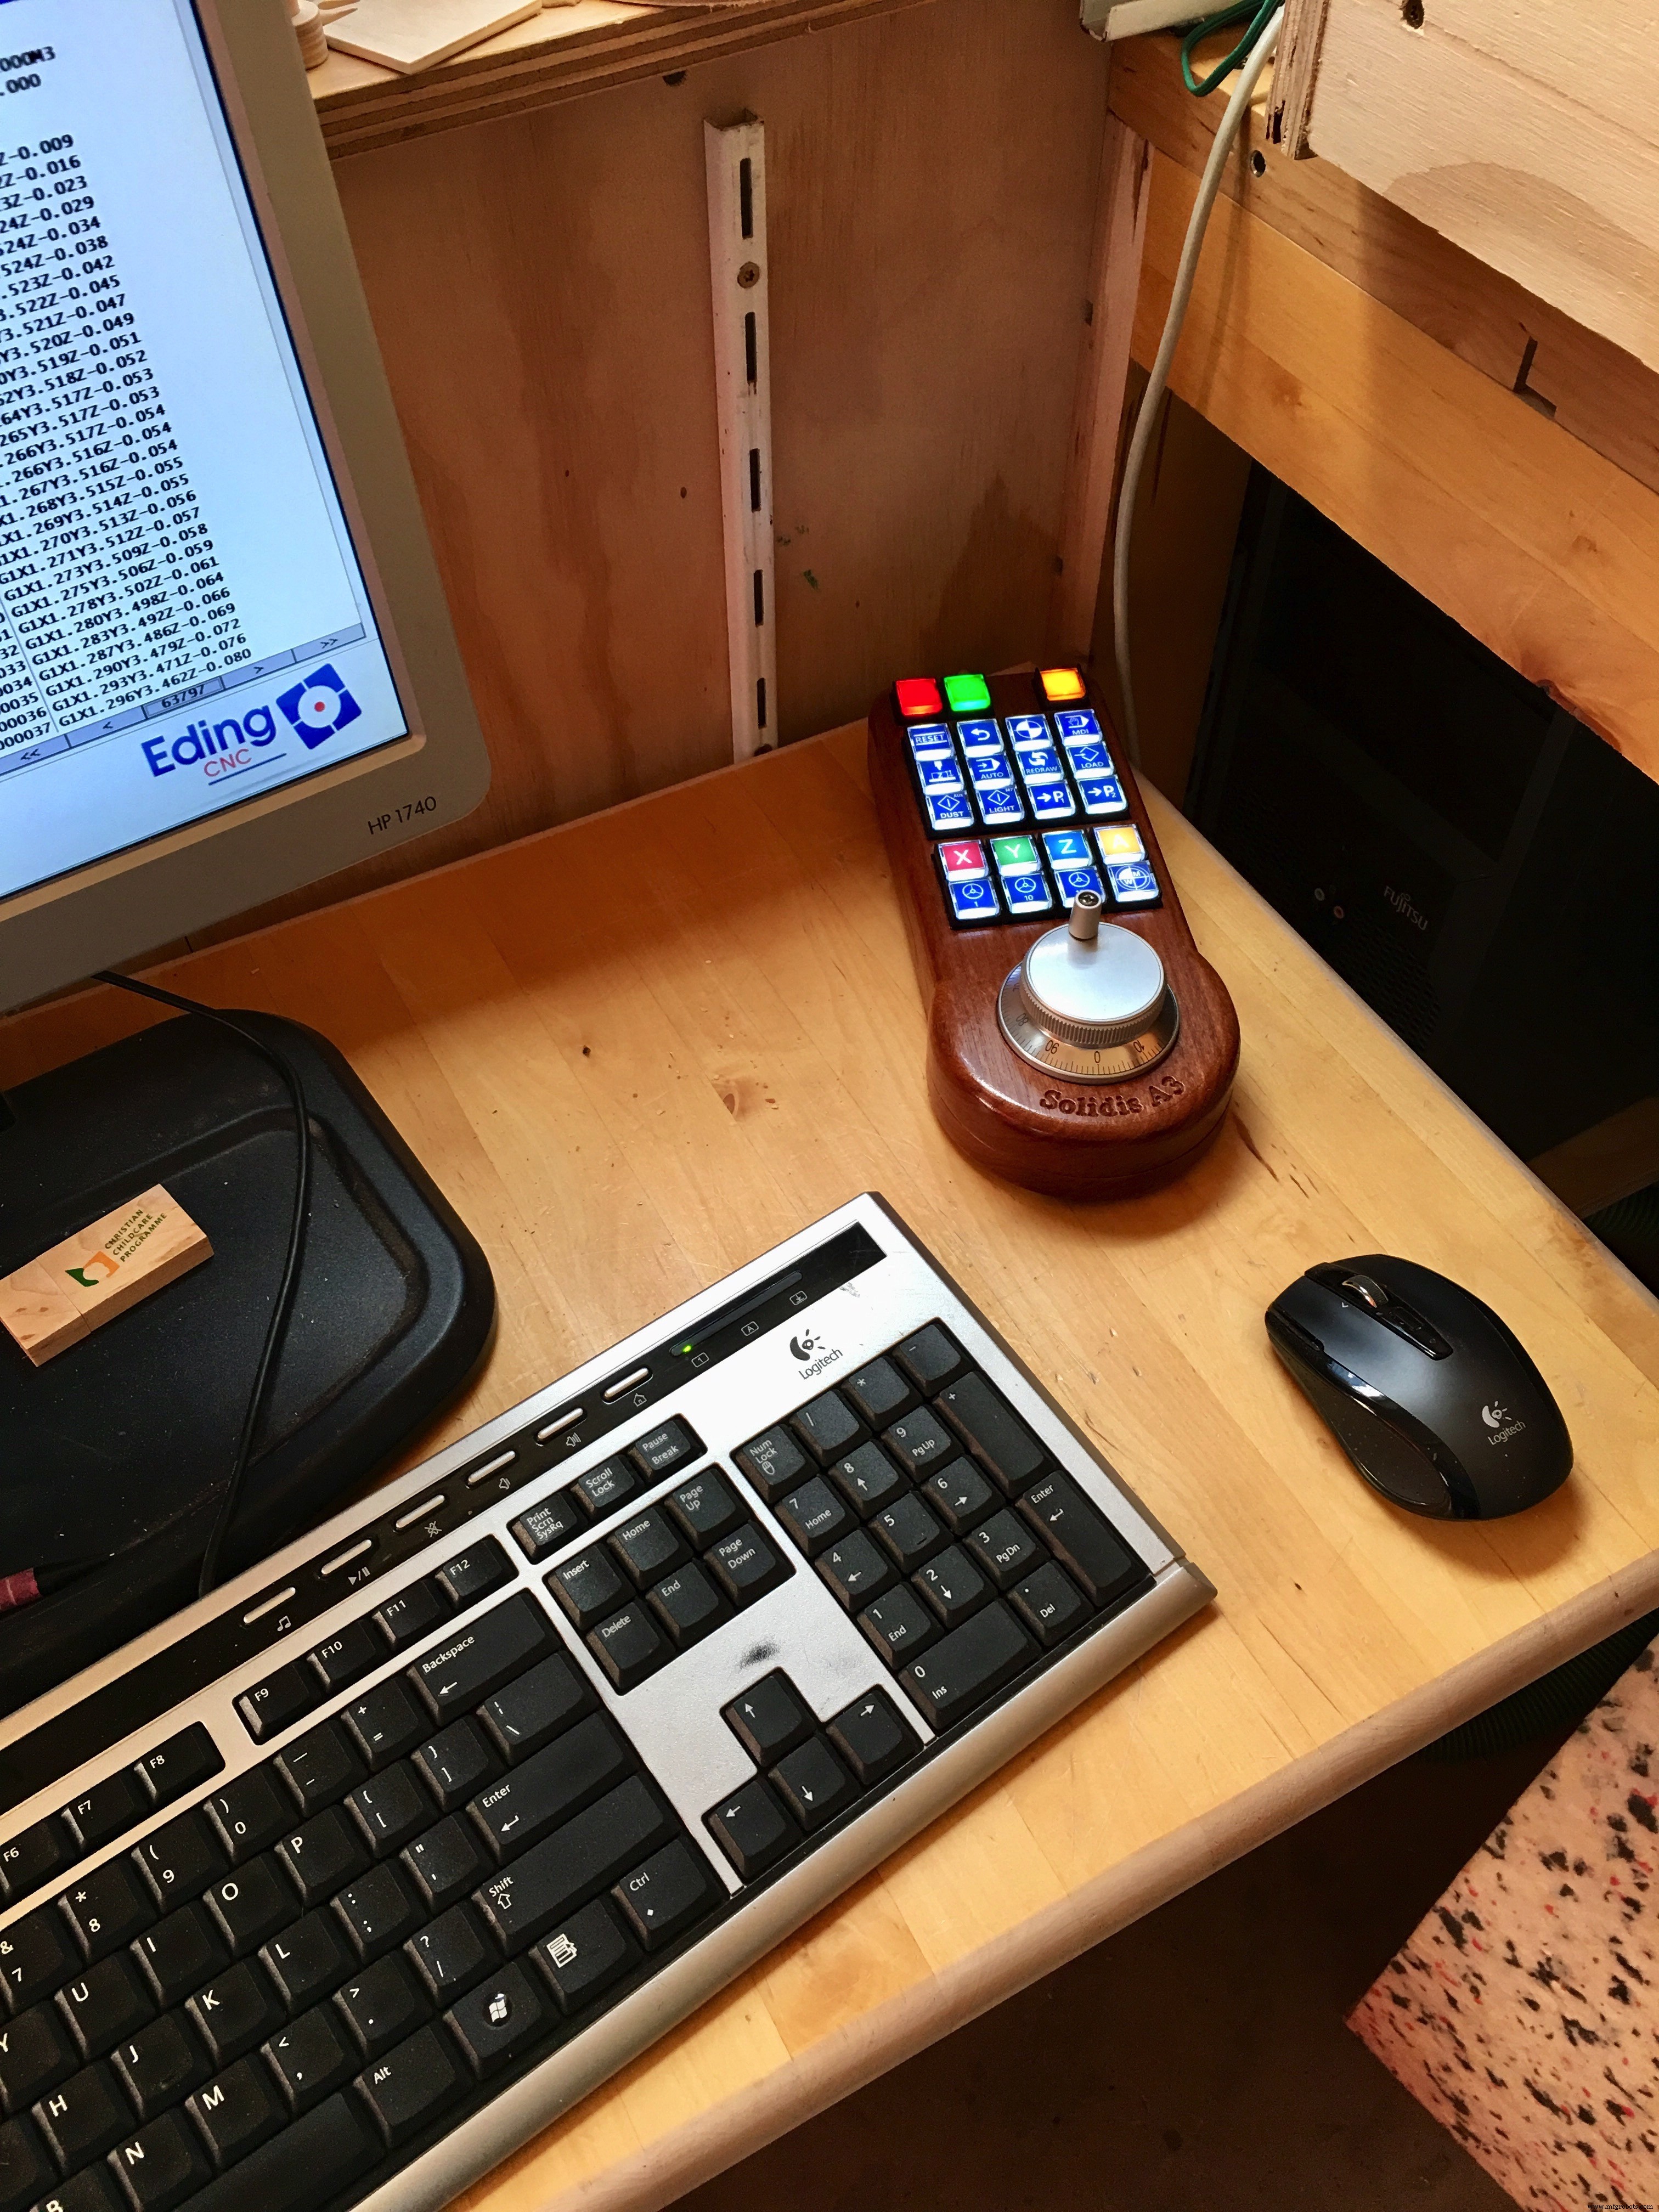
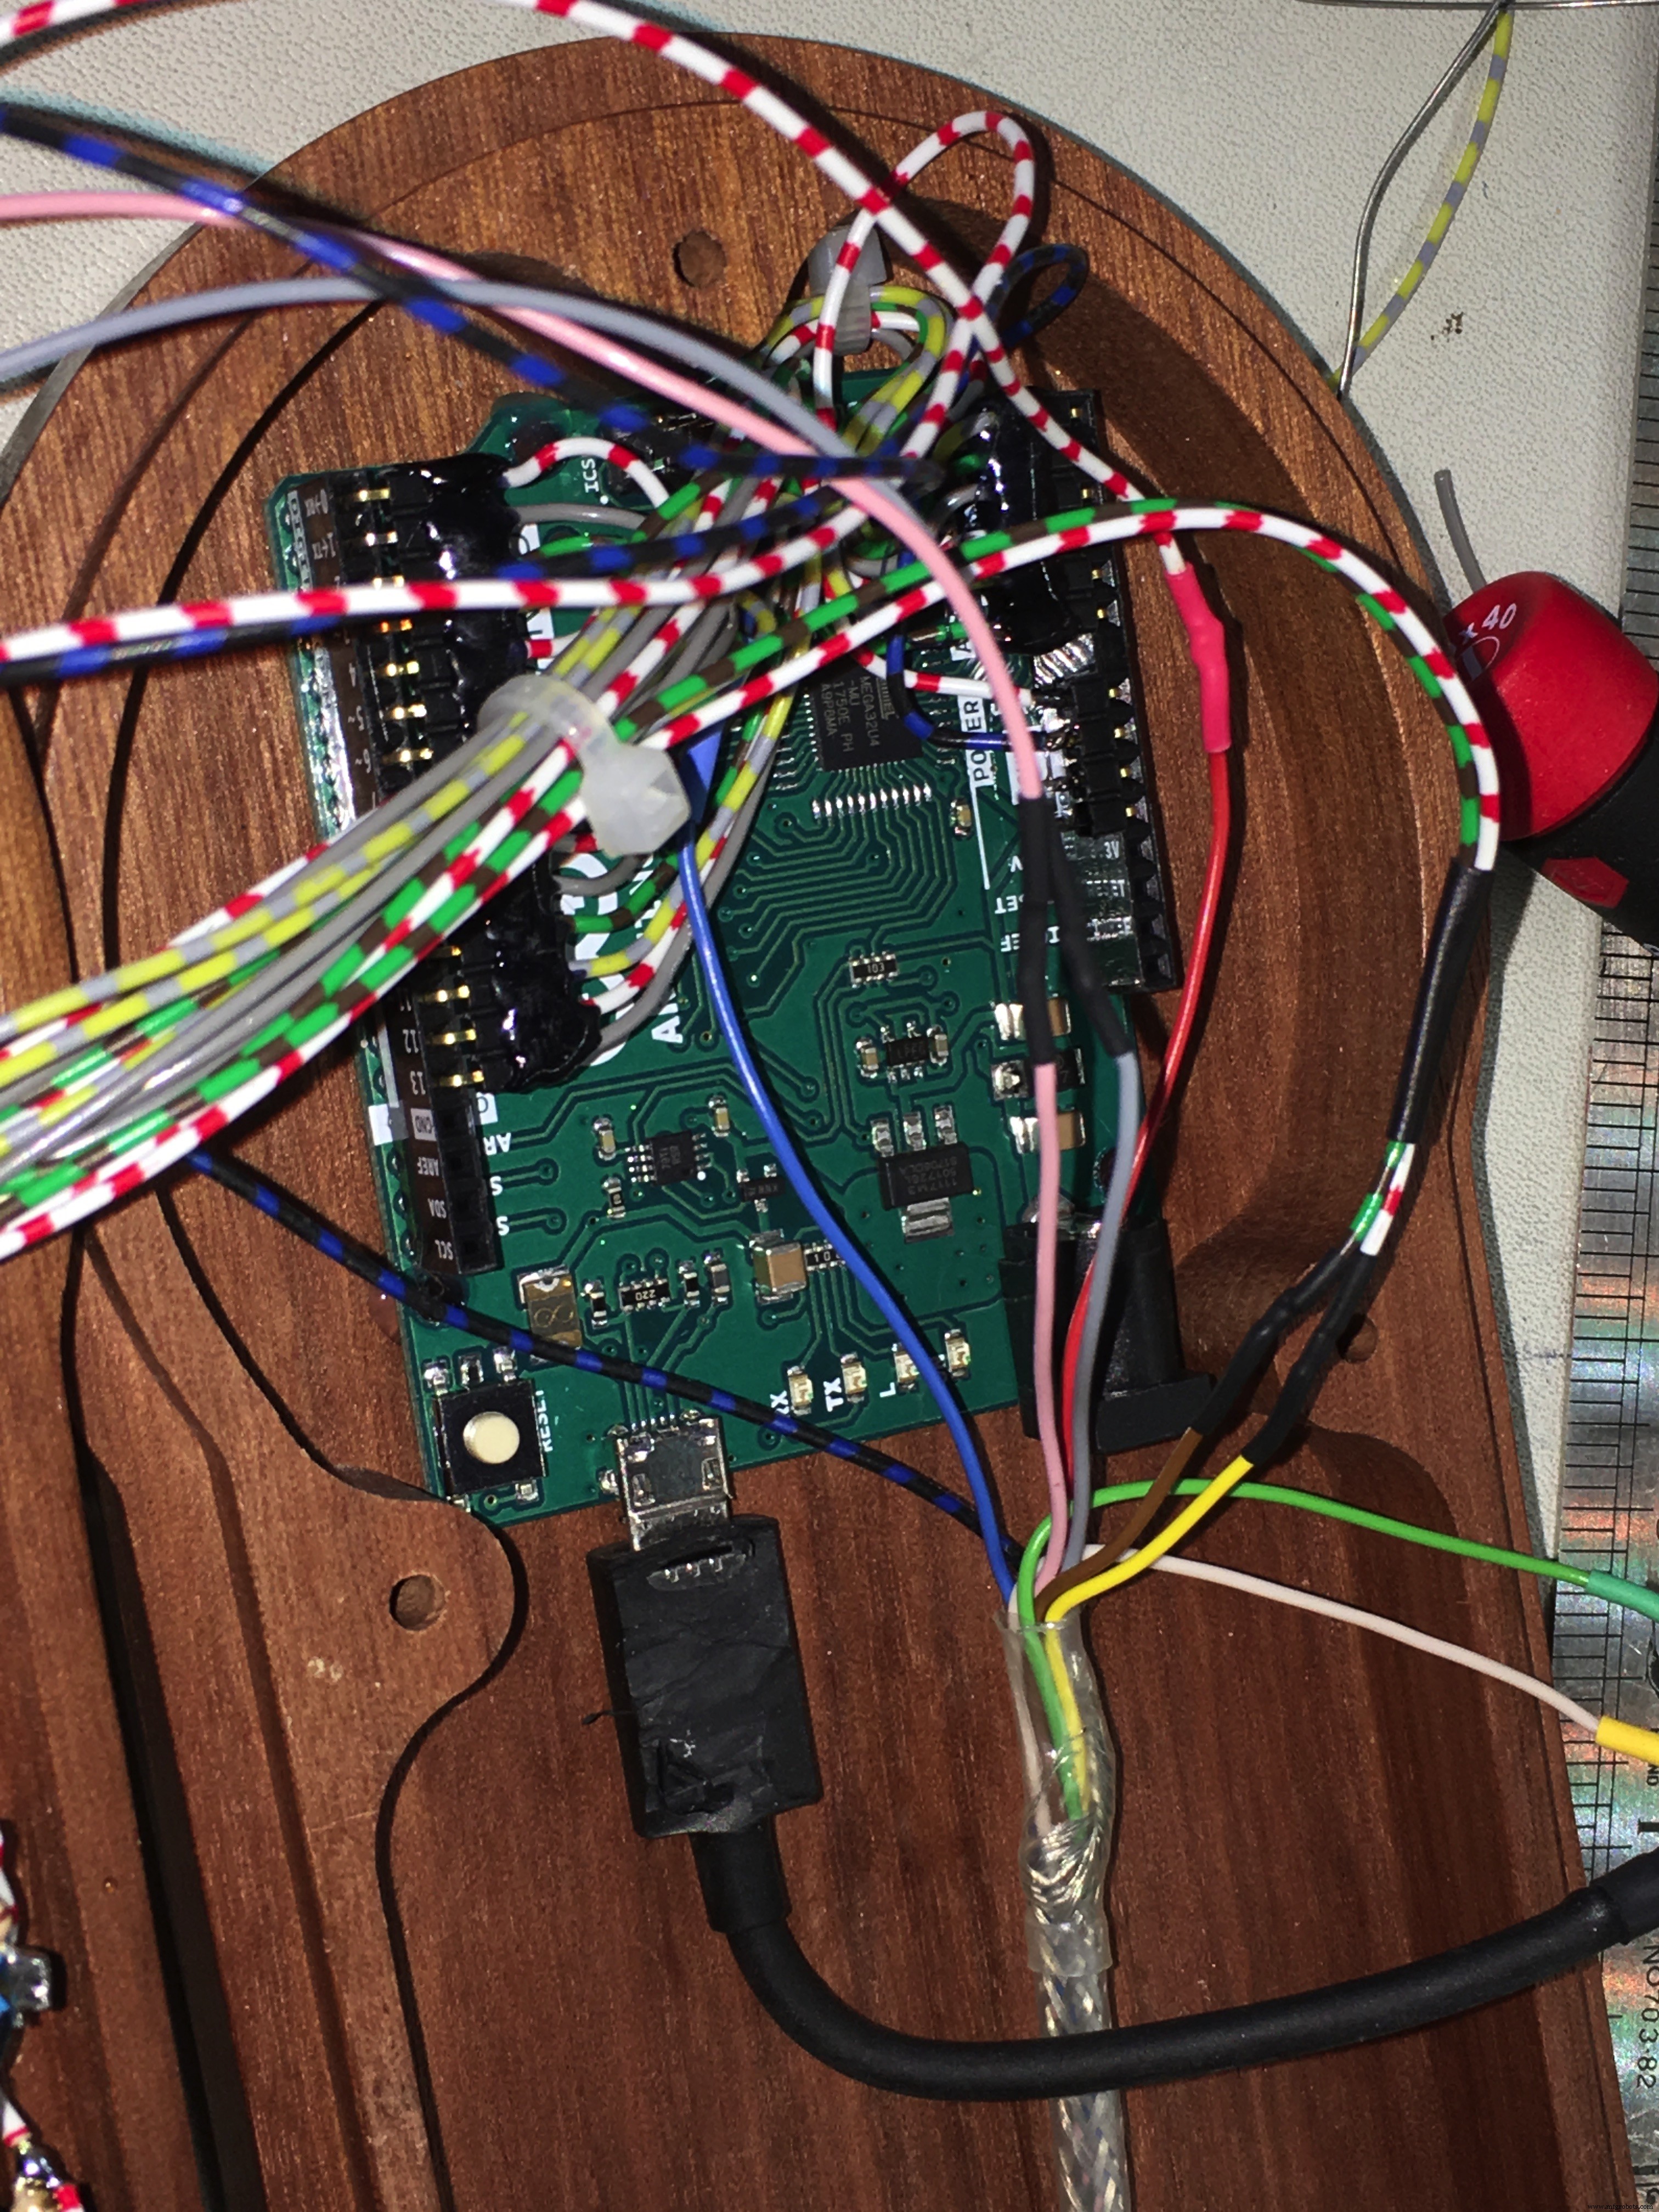
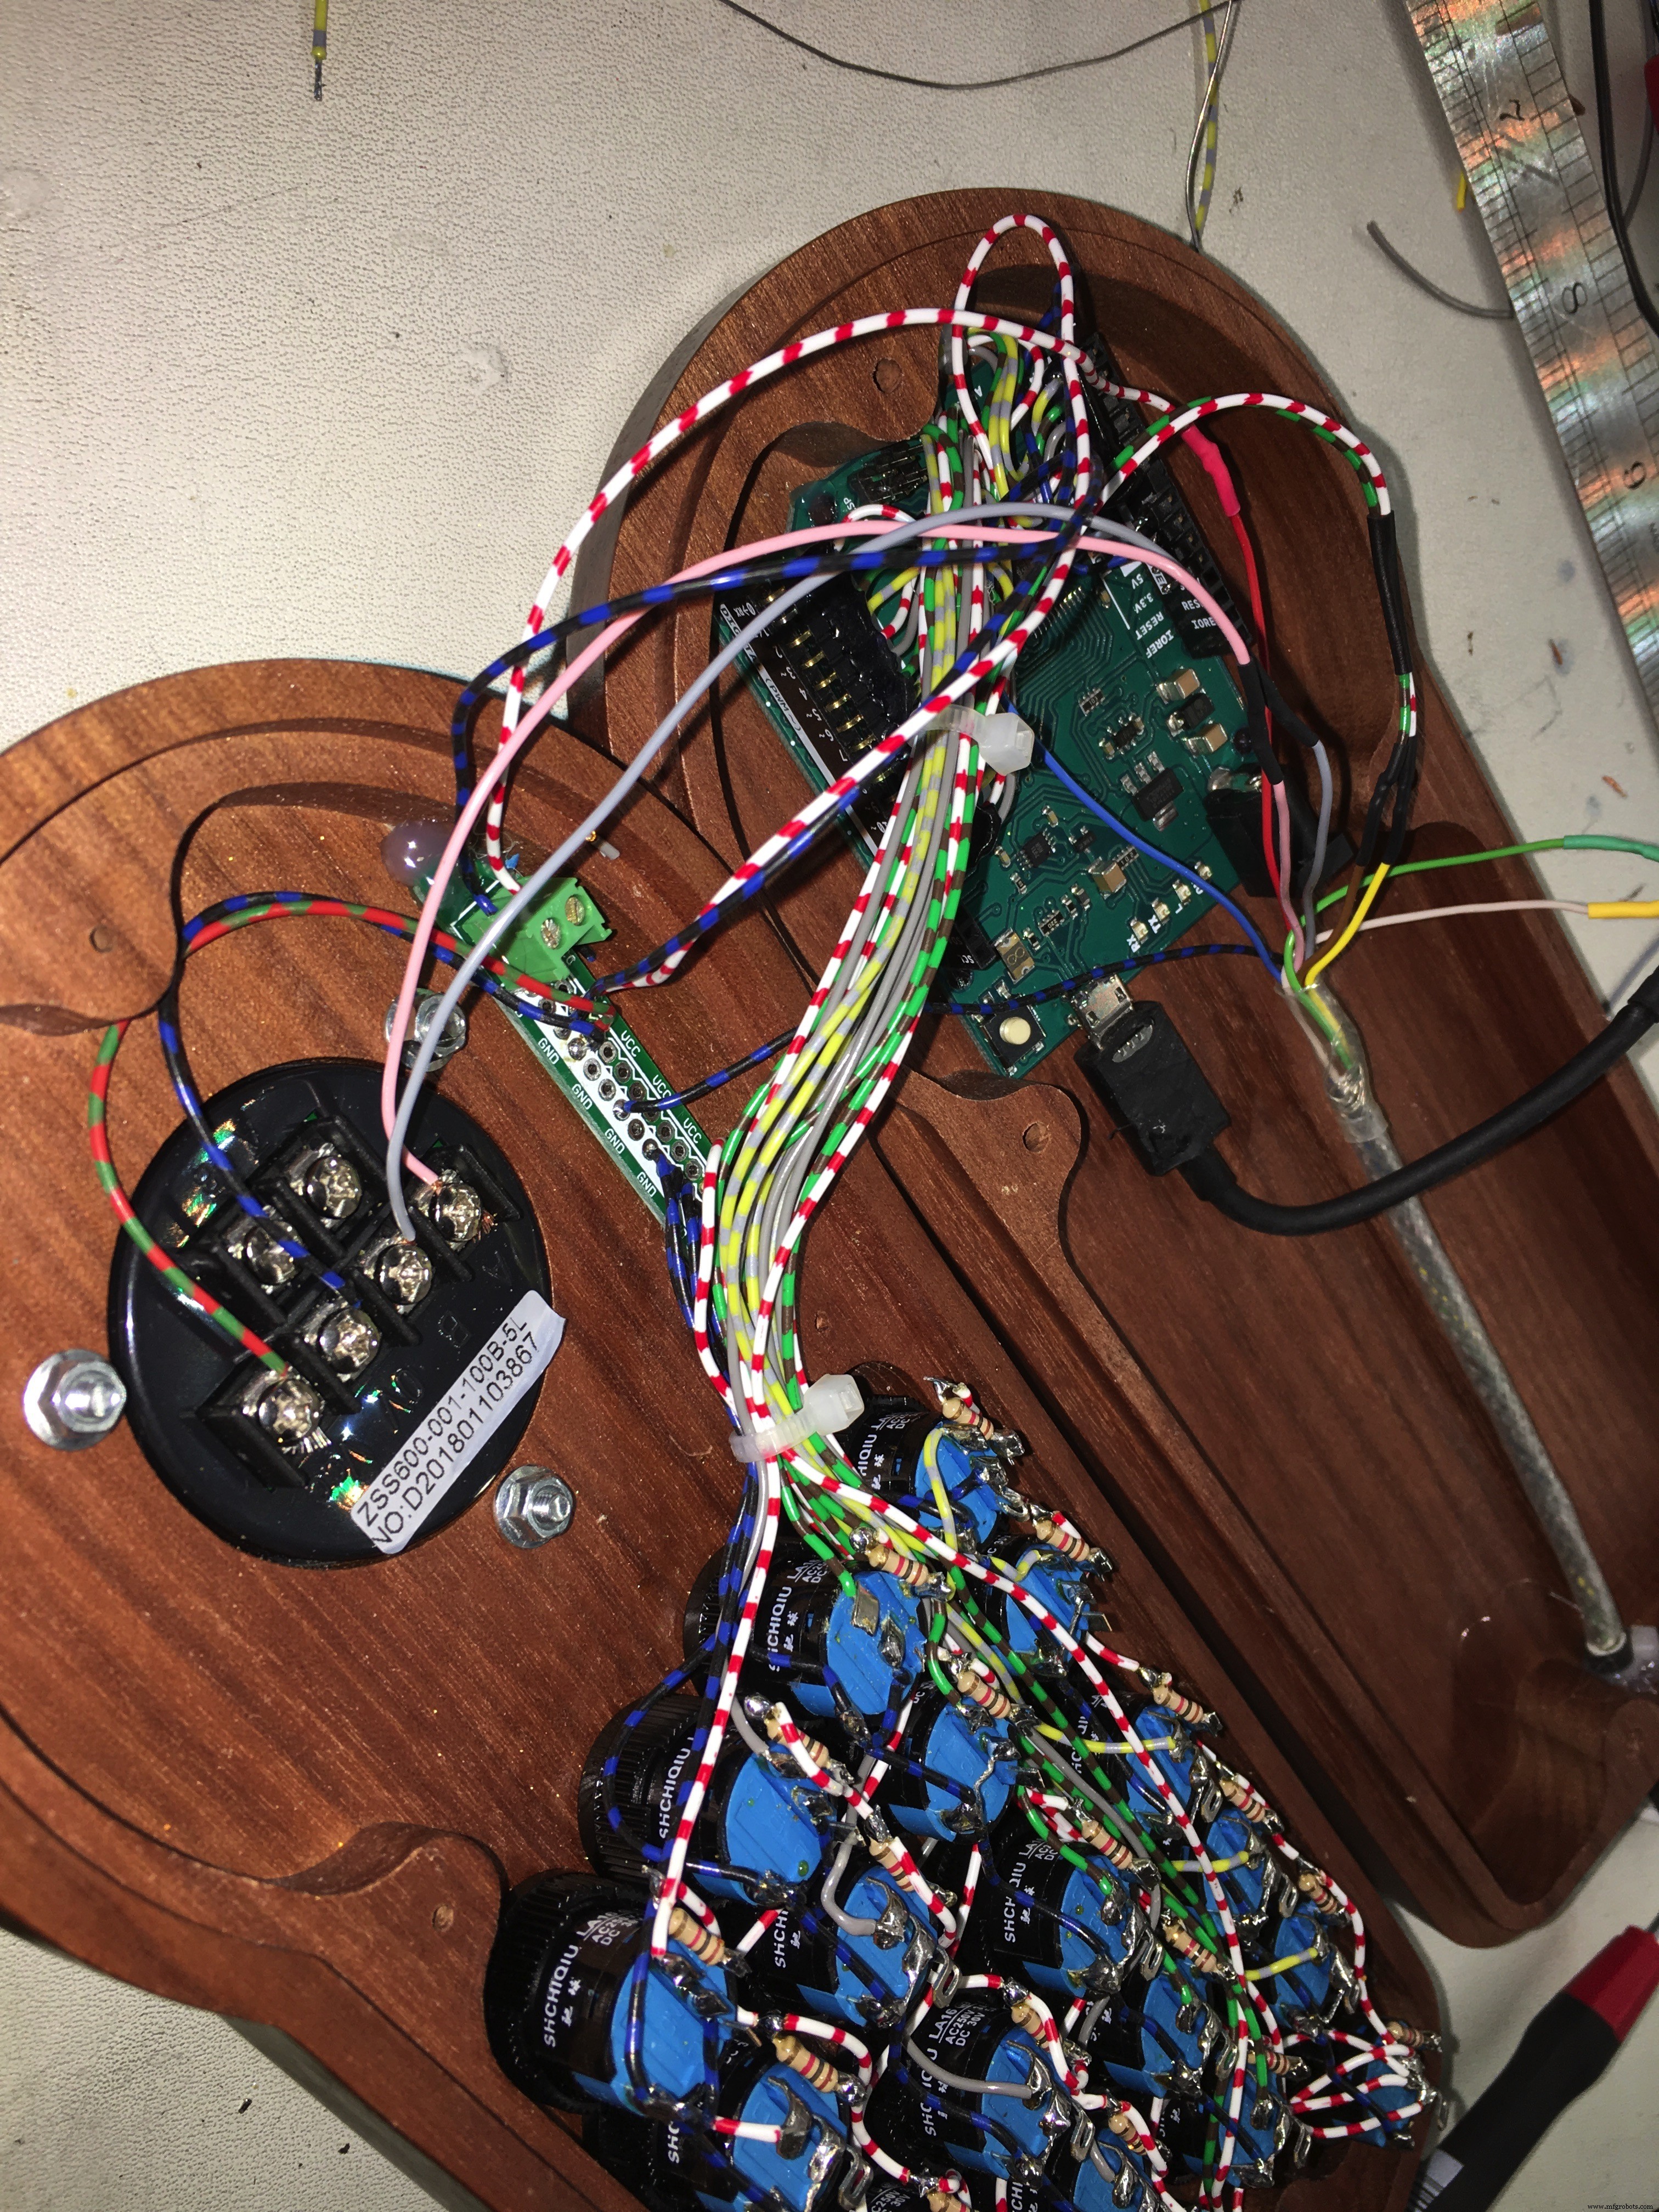
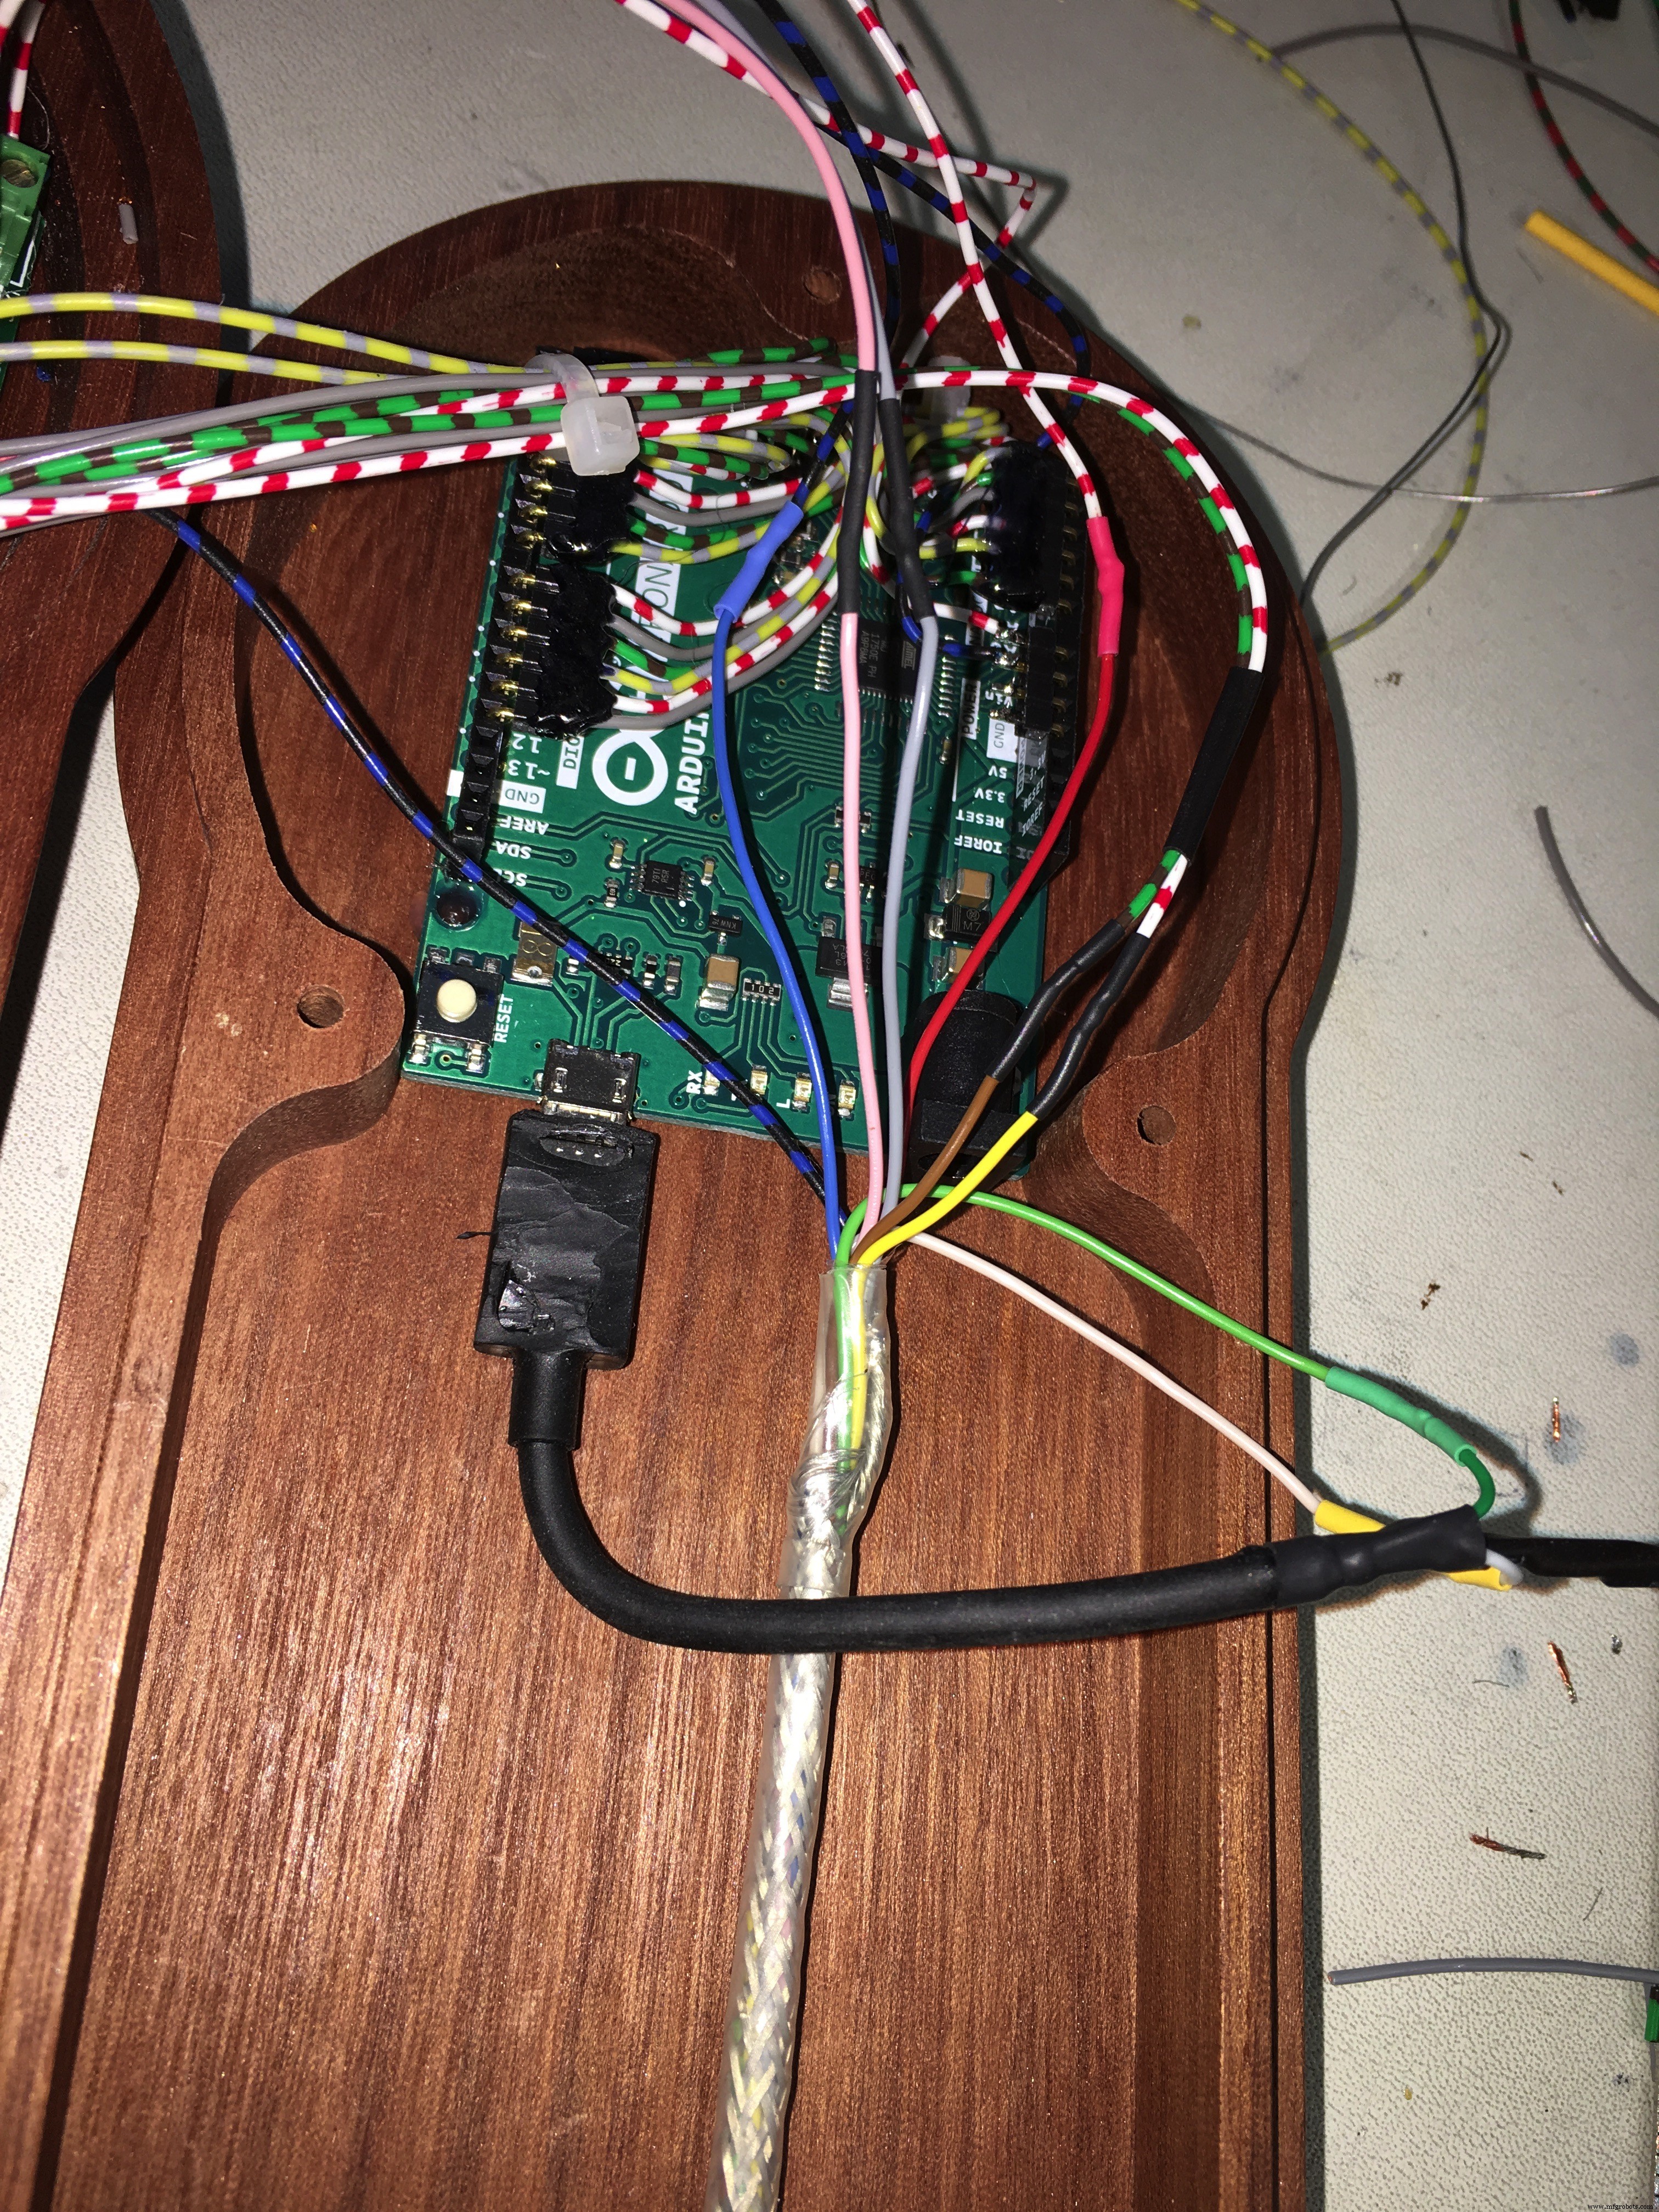
The ElectronicsAs an HID (Human Interface Device), I used an Arduino Leonardo microcontroller.
This microcontroller board has been discontinued but I could buy it at several online shop. As an alternative you can use the Arduino Micro which uses the same 32u4 chip.
This way I could mimic keyboard strokes and control many functions of the CNC machining software, in my case Eding CNC.
The Arduino Leonardo has 23 input pins so more than enough. As said, you can assign 6 functions per button.
Total power consumption is 150mA with the key LEDs on.
Programming the Arduino microcontrollerTo program the Arduino, you need to leave the pendant connected to the CNC power supply and upload the new sketch using the Arduino IDE software. (See the note below) So you use of course the same USB plug which is used for emulating the keyboard.
If you want to use another pc (laptop) for programming, simply put the USB plug into the other PC and program the Arduino, again leaving the pendant connected and powered bij the CNC power supply
Have fun making your own pendant!
Code
- CNC Pendant code
CNC Pendant codeArduino
/*
   This sketch is to use a Leanardo as a HID for in this case
   an Eding CNC Pendant

   The beauty of using a Leonardo is that you are so flexible!
   I have 20 keys on my Pendant but per key you can use 6 different
   functions. Way too much but I do use on some keys 3 functions.
   Very convienient and easy to use and manage.
*/

#include "ClickButton.h"
#include "Keyboard.h"
long int aux1_delay = 0;

// Nr. of buttons in the array
const int buttons = 20;

// the Button
// buttonPin0 is a dummy because I want to start with '1' instead of '0'
const int buttonPin0 = 0;
// these are actually used
const int buttonPin1 = 0;
const int buttonPin2 = 1;
const int buttonPin3 = 2;
const int buttonPin4 = 3;
const int buttonPin5 = 4;
const int buttonPin6 = 5;
const int buttonPin7 = 6;
const int buttonPin8 = 7;
const int buttonPin9 = 8;
const int buttonPin10 = 9;
const int buttonPin11 = 10;
const int buttonPin12 = 11;
const int buttonPin13 = 12;
const int buttonPin14 = 13;
const int buttonPin15 = A0;
const int buttonPin16 = A1;
const int buttonPin17 = A2;
const int buttonPin18 = A3;
const int buttonPin19 = A4;
const int buttonPin20 = A5;

// Instantiate ClickButton objects in an array
ClickButton button[21] =
{
  // dummy
  ClickButton (buttonPin0, LOW, CLICKBTN_PULLUP),
  // used instances of Clickbutton
  ClickButton (buttonPin1, LOW, CLICKBTN_PULLUP),
  ClickButton (buttonPin2, LOW, CLICKBTN_PULLUP),
  ClickButton (buttonPin3, LOW, CLICKBTN_PULLUP),
  ClickButton (buttonPin4, LOW, CLICKBTN_PULLUP),
  ClickButton (buttonPin5, LOW, CLICKBTN_PULLUP),
  ClickButton (buttonPin6, LOW, CLICKBTN_PULLUP),
  ClickButton (buttonPin7, LOW, CLICKBTN_PULLUP),
  ClickButton (buttonPin8, LOW, CLICKBTN_PULLUP),
  ClickButton (buttonPin9, LOW, CLICKBTN_PULLUP),
  ClickButton (buttonPin10, LOW, CLICKBTN_PULLUP),
  ClickButton (buttonPin11, LOW, CLICKBTN_PULLUP),
  ClickButton (buttonPin12, LOW, CLICKBTN_PULLUP),
  ClickButton (buttonPin13, LOW, CLICKBTN_PULLUP),
  ClickButton (buttonPin14, LOW, CLICKBTN_PULLUP),
  ClickButton (buttonPin15, LOW, CLICKBTN_PULLUP),
  ClickButton (buttonPin16, LOW, CLICKBTN_PULLUP),
  ClickButton (buttonPin17, LOW, CLICKBTN_PULLUP),
  ClickButton (buttonPin18, LOW, CLICKBTN_PULLUP),
  ClickButton (buttonPin19, LOW, CLICKBTN_PULLUP),
  ClickButton (buttonPin20, LOW, CLICKBTN_PULLUP),
};


void setup()
{
  // Setup button timers (all in milliseconds / ms)
  for (int i = 1; i <= buttons; i++)
  {
    button[i].debounceTime   = 20;   // Debounce timer in ms
    button[i].multiclickTime = 250;  // Time limit for multi clicks
    button[i].longClickTime  = 1000; // Time until long clicks register
  }
}


void loop()
{
  // Update state of all the buttons in the array
  // NOTE: not started at '0' but '1'
  for (int i = 1; i <= buttons; i++)
  {
    // Update state of all buitton
    button[i].Update();
  }


  // execute button presses
  if (button[1].clicks != 0)
  {
    switch (button[1].clicks)
    {
      case 1: // Single click
        // press the RESET button (F1)
        press_RESET();
        break;
      case 2: // Double click
        press_ESC();
        break;
      case 3: // Triple click
        break;
      case -1: // Single Click and Hold
        // TURN DRIVERS OFF
        press_ESC(); // get out of handwheel mode
        goto_MACHINE_IO_MENU();
        press_F2();
        goto_MAIN_MENU();
        break;
      case -2: // Double Click and Hold
        break;
      case -3: // Triple Click and Hold
        break;
    }
  }

  if (button[2].clicks != 0)
  {
    switch (button[2].clicks)
    {
      case 1: // Single click
        // goto MAIN menu
        press_ESC(); // get out of handwheel mode
        goto_MAIN_MENU();
        break;
      case 2: // Double click
        break;
      case 3: // Triple click
        break;
      case -1: // Single Click and Hold
        break;
      case -2: // Double Click and Hold
        break;
      case -3: // Triple Click and Hold
        break;
    }
  }

  if (button[3].clicks != 0)
  {
    switch (button[3].clicks)
    {
      case 1: // Single click
        break;
      case 2: // Double click
        break;
      case 3: // Triple click
        break;
      case -1: // Single Click and Hold
        // HOME all axes
        press_ESC(); // get out of handwheel mode
        goto_MAIN_MENU();
        shortcut_HOME_ALL();
        break;
      case -2: // Double Click and Hold
        break;
      case -3: // Triple Click and Hold
        break;
    }
  }

  if (button[4].clicks != 0)
  {
    switch (button[4].clicks)
    {
      case 1: // Single click
        // TOGGLE MDI
        shortcut_TOGGLE_MDI();
        break;
      case 2: // Double click
        break;
      case 3: // Triple click
        break;
      case -1: // Single Click and Hold
        break;
      case -2: // Double Click and Hold
        break;
      case -3: // Triple Click and Hold
        break;
    }
  }

  if (button[5].clicks != 0)
  {
    switch (button[5].clicks)
    {
      case 1: // Single click
        // USER MACRO 1: SET Z HEIGHT
        press_ESC(); // get out of handwheel mode
        goto_AUTO_MENU();
        user_MACRO_1(); // SET Z HEIGHT
        break;
      case 2: // Double click
        break;
      case 3: // Triple click
        break;
      case -1: // Single Click and Hold
        break;
      case -2: // Double Click and Hold
        break;
      case -3: // Triple Click and Hold
        break;
    }
  }

  if (button[6].clicks != 0)
  {
    switch (button[6].clicks)
    {
      case 1: // Single click
        // goto AUTO menu
        press_ESC(); // get out of handwheel mode
        goto_AUTO_MENU();
        break;
      case 2: // Double click
        break;
      case 3: // Triple click
        break;
      case -1: // Single Click and Hold
        break;
      case -2: // Double Click and Hold
        break;
      case -3: // Triple Click and Hold
        break;
    }
  }

  if (button[7].clicks != 0)
  {
    switch (button[7].clicks)
    {
      case 1: // Single click
        // REDRAW GRAPHICS SCREEN
        press_ESC(); // get out of handwheel mode
        goto_AUTO_MENU();
        press_F3(); // redraw
        break;
      case 2: // Double click
        break;
      case 3: // Triple click
        break;
      case -1: // Single Click and Hold
        break;
      case -2: // Double Click and Hold
        break;
      case -3: // Triple Click and Hold
        break;
    }
  }

  if (button[8].clicks != 0)
  {
    switch (button[8].clicks)
    {
      case 1: // Single click
        // LOAD FILE
        press_ESC(); // get out of handwheel mode
        goto_AUTO_MENU();
        press_F2(); // load a file
        break;
      case 2: // Double click
        break;
      case 3: // Triple click
        break;
      case -1: // Single Click and Hold
        break;
      case -2: // Double Click and Hold
        break;
      case -3: // Triple Click and Hold
        break;
    }
  }

  if (button[9].clicks != 0)
  {
    switch (button[9].clicks)
    {
      case 1: // Single click
        // AUX1 TOGGLE (VACUUM CLEANER)
        // prevent switching to soon so only after
        // a delay of 1000ms
        if ( millis() - aux1_delay > 1000 )
        {
          // toggle AUX1 on or off
          shortcut_TOGGLE_AUX1();
          // start delay timer aux1
          aux1_delay = millis();
        }
        break;
      case 2: // Double click
        break;
      case 3: // Triple click
        break;
      case -1: // Single Click and Hold
        break;
      case -2: // Double Click and Hold
        break;
      case -3: // Triple Click and Hold
        break;
    }
  }

  if (button[10].clicks != 0)
  {
    switch (button[10].clicks)
    {
      case 1: // Single click
        // MIST TOGGLE (light)
        shortcut_TOGGLE_MIST();
        break;
      case 2: // Double click
        break;
      case 3: // Triple click
        break;
      case -1: // Single Click and Hold
        break;
      case -2: // Double Click and Hold
        break;
      case -3: // Triple Click and Hold
        break;
    }
  }

  if (button[11].clicks != 0)
  {
    switch (button[11].clicks)
    {
      case 1: // Single click
        // Goto P1 (g28) - USER MENU OPTIE 16
        press_ESC();
        user_MACRO_16();
        break;
      case 2: // Double click
        break;
      case 3: // Triple click
        break;
      case -1: // Single Click and Hold
        break;
      case -2: // Double Click and Hold
        break;
      case -3: // Triple Click and Hold
        break;
    }
  }

  if (button[12].clicks != 0)
  {
    switch (button[12].clicks)
    {
      case 1: // Single click
        // Goto P2 (g30) - USER MENU OPTIE 17
        press_ESC();
        user_MACRO_17();
        break;
      case 2: // Double click
        break;
      case 3: // Triple click
        break;
      case -1: // Single Click and Hold
        break;
      case -2: // Double Click and Hold
        break;
      case -3: // Triple Click and Hold
        break;
    }
  }

  if (button[13].clicks != 0)
  {
    switch (button[13].clicks)
    {
      case 1: // Single click
        // Handwheel on X
        shortcut_HANDWHEEL_X();
        break;
      case 2: // Double click
        // Zero X
        shortcut_ZERO_X();
        break;
      case 3: // Triple click
        break;
      case -1: // Single Click and Hold
        // USER MACRO 18: X-axis: goto work zero position G0 X0.0000
        press_ESC();
        goto_MAIN_MENU();
        user_MACRO_18();
        break;
      case -2: // Double Click and Hold
        break;
      case -3: // Triple Click and Hold
        break;
    }
  }

  if (button[14].clicks != 0)
  {
    switch (button[14].clicks)
    {
      case 1: // Single click
        // Handwheel on Y
        shortcut_HANDWHEEL_Y();
        break;
      case 2: // Double click
        // Zero Y
        shortcut_ZERO_Y();
        break;
      case 3: // Triple click
        break;
      case -1: // Single Click and Hold
        // USER MACRO 19: Y-axis: goto work zero position G0 Y0.0000
        press_ESC();
        goto_MAIN_MENU();
        user_MACRO_19();
        break;
      case -2: // Double Click and Hold
        break;
      case -3: // Triple Click and Hold
        break;
    }
  }

  if (button[15].clicks != 0)
  {
    switch (button[15].clicks)
    {
      case 1: // Single click
        // Handwheel on Z
        shortcut_HANDWHEEL_Z();
        break;
      case 2: // Double click
        // Zero Z
        shortcut_ZERO_Z();
        break;
      case 3: // Triple click
        break;
      case -1: // Single Click and Hold
        // USER MACRO 20: Z-axis-goto MACHINE up position G53 G0 Z29.0000
        press_ESC();
        goto_MAIN_MENU();
        user_MACRO_20();
        break;
      case -2: // Double Click and Hold
        break;
      case -3: // Triple Click and Hold
        break;
    }
  }

  // A axis
  if (button[16].clicks != 0)
  {
    switch (button[16].clicks)
    {
      case 1: // Single click
        break;
      case 2: // Double click
        break;
      case 3: // Triple click
        break;
      case -1: // Single Click and Hold
        break;
      case -2: // Double Click and Hold
        break;
      case -3: // Triple Click and Hold
        break;
    }
  }

  if (button[17].clicks != 0)
  {
    switch (button[17].clicks)
    {
      case 1: // Single click
        // Handwheel speed 1x
        shortcut_HANDWHEEL_X1();
        break;
      case 2: // Double click
        break;
      case 3: // Triple click
        break;
      case -1: // Single Click and Hold
        break;
      case -2: // Double Click and Hold
        break;
      case -3: // Triple Click and Hold
        break;
    }
  }

  if (button[18].clicks != 0)
  {
    switch (button[18].clicks)
    {
      case 1: // Single click
        // Handwheel speed 10x
        shortcut_HANDWHEEL_X10();
        break;
      case 2: // Double click
        break;
      case 3: // Triple click
        break;
      case -1: // Single Click and Hold
        break;
      case -2: // Double Click and Hold
        break;
      case -3: // Triple Click and Hold
        break;
    }
  }

  if (button[19].clicks != 0)
  {
    switch (button[19].clicks)
    {
      case 1: // Single click
        // Handwheel speed 100x
        shortcut_HANDWHEEL_X100();
        break;
      case 2: // Double click
        break;
      case 3: // Triple click
        break;
      case -1: // Single Click and Hold
        break;
      case -2: // Double Click and Hold
        break;
      case -3: // Triple Click and Hold
        break;
    }
  }
  if (button[20].clicks != 0)
  {
    switch (button[20].clicks)
    {
      case 1: // Single click
        shortcut_TOGGLE_MACHINE_COORDINATES();
        break;
      case 2: // Double click
        break;
      case 3: // Triple click
        break;
      case -1: // Single Click and Hold
        break;
      case -2: // Double Click and Hold
        break;
      case -3: // Triple Click and Hold
        break;
    }
  }
}


/*
  Aduino website notes on using a Leonardo as HID:

  The keyboard functions enable a Leonardo, Micro,
  or Due to send keystrokes to an attached computer.

  Note: Not every possible ASCII character,
  particularly the non-printing ones, can be sent with the Keyboard library.
  The library supports the use of modifier keys.
  Modifier keys change the behavior of another key when
  pressed simultaneously.
  See here for additional information on supported keys and their use.

  Keyboard.begin()
  Keyboard.end()
  Keyboard.press()
  Keyboard.print()
  Keyboard.println()
  Keyboard.release()
  Keyboard.releaseAll()
  Keyboard.write()


  Reference   Language | Libraries | Comparison | Changes

  Keyboard Modifiers

  The Keyboard.write() and Keyboard.press()
  and Keyboard.release() commands don’t work with every possible ASCII character,
  only those that correspond to a key on the keyboard.
    For example, backspace works, but many of the other
    non-printable characters produce unpredictable results.
    For capital letters (and other keys), what’s sent is shift plus the character
    (i.e. the equivalent of pressing both of those keys on the keyboard).

  A modifier key is a special key on a computer keyboard that modifies
  the normal action of another key when the two are pressed in combination.

  For more on ASCII values and the characters or functions they represent,
  see asciitable.com

  For multiple key presses use Keyboard.press()

  The Leonardo's definitions for modifier keys are listed below:

  Key  Hexadecimal value Decimal value
  KEY_LEFT_CTRL     0x80  128
  KEY_LEFT_SHIFT    0x81  129
  KEY_LEFT_ALT      0x82  130
  KEY_LEFT_GUI      0x83  131
  KEY_RIGHT_CTRL    0x84  132
  KEY_RIGHT_SHIFT   0x85  133
  KEY_RIGHT_ALT     0x86  134
  KEY_RIGHT_GUI     0x87  135
  KEY_UP_ARROW      0xDA  218
  KEY_DOWN_ARROW    0xD9  217
  KEY_LEFT_ARROW    0xD8  216
  KEY_RIGHT_ARROW   0xD7  215
  KEY_BACKSPACE     0xB2  178
  KEY_TAB           0xB3  179
  KEY_RETURN        0xB0  176
  KEY_ESC           0xB1  177
  KEY_INSERT        0xD1  209
  KEY_DELETE        0xD4  212
  KEY_PAGE_UP       0xD3  211
  KEY_PAGE_DOWN     0xD6  214
  KEY_HOME          0xD2  210
  KEY_END           0xD5  213
  KEY_CAPS_LOCK     0xC1  193
  KEY_F1            0xC2  194
  KEY_F2            0xC3  195
  KEY_F3            0xC4  196
  KEY_F4            0xC5  197
  KEY_F5            0xC6  198
  KEY_F6            0xC7  199
  KEY_F7            0xC8  200
  KEY_F8            0xC9  201
  KEY_F9            0xCA  202
  KEY_F10           0xCB  203
  KEY_F11           0xCC  204
  KEY_F12           0xCD  205

*/

void press_RESET()
{
  Keyboard.begin();
  Keyboard.press(KEY_F1);
  delay(100);
  Keyboard.releaseAll();
}

void press_ESC()
{
  Keyboard.begin();
  Keyboard.press(KEY_ESC);
  delay(100);
  Keyboard.releaseAll();
}

void press_F2()
{
  Keyboard.begin();
  Keyboard.press(KEY_F2);
  delay(100);
  Keyboard.releaseAll();
}
void press_F3()
{
  Keyboard.begin();
  Keyboard.press(KEY_F3);
  delay(100);
  Keyboard.releaseAll();
}
void press_F4()
{
  Keyboard.begin();
  Keyboard.press(KEY_F4);
  delay(100);
  Keyboard.releaseAll();
}
void press_F5()
{
  Keyboard.begin();
  Keyboard.press(KEY_F5);
  delay(100);
  Keyboard.releaseAll();
}
void press_F6()
{
  Keyboard.begin();
  Keyboard.press(KEY_F6);
  delay(100);
  Keyboard.releaseAll();
}
void press_F7()
{
  Keyboard.begin();
  Keyboard.press(KEY_F7);
  delay(100);
  Keyboard.releaseAll();
}
void press_F8()
{
  Keyboard.begin();
  Keyboard.press(KEY_F8);
  delay(100);
  Keyboard.releaseAll();
}
void press_F9()
{
  Keyboard.begin();
  Keyboard.press(KEY_F9);
  delay(100);
  Keyboard.releaseAll();
}
void press_F10()
{
  Keyboard.begin();
  Keyboard.press(KEY_F10);
  delay(100);
  Keyboard.releaseAll();
}
void press_F11()
{
  Keyboard.begin();
  Keyboard.press(KEY_F11);
  delay(100);
  Keyboard.releaseAll();
}
void press_F12()
{
  Keyboard.begin();
  Keyboard.press(KEY_F12);
  delay(100);
  Keyboard.releaseAll();
}


void goto_MAIN_MENU()
{
  Keyboard.begin();
  Keyboard.press(KEY_LEFT_ALT);
  Keyboard.press(KEY_F1);
  delay(100);
  Keyboard.releaseAll();
}
void goto_HOME_MENU()
{
  Keyboard.begin();
  Keyboard.press(KEY_LEFT_ALT);
  Keyboard.press(KEY_F2);
  delay(100);
  Keyboard.releaseAll();
}
void goto_ZERO_MENU()
{
  Keyboard.begin();
  Keyboard.press(KEY_LEFT_ALT);
  Keyboard.press(KEY_F3);
  delay(100);
  Keyboard.releaseAll();
}
void goto_AUTO_MENU()
{
  Keyboard.begin();
  Keyboard.press(KEY_LEFT_ALT);
  Keyboard.press(KEY_F4);
  delay(100);
  Keyboard.releaseAll();
}
void goto_MACHINE_IO_MENU()
{
  Keyboard.begin();
  Keyboard.press(KEY_LEFT_ALT);
  Keyboard.press(KEY_F7);
  delay(100);
  Keyboard.releaseAll();
}
void goto_GRAPHICS_MENU()
{
  Keyboard.begin();
  Keyboard.press(KEY_LEFT_ALT);
  Keyboard.press(KEY_F8);
  delay(100);
  Keyboard.releaseAll();
}
void goto_JOG_MENU()
{
  Keyboard.begin();
  Keyboard.press(KEY_LEFT_ALT);
  Keyboard.press(KEY_F9);
  delay(100);
  Keyboard.releaseAll();
}
void goto_JOG_PAD()
{
  Keyboard.begin();
  Keyboard.press(KEY_LEFT_ALT);
  Keyboard.press(KEY_F10);
  delay(100);
  Keyboard.releaseAll();
}
void goto_USER1_MENU()
{
  Keyboard.begin();
  Keyboard.press(KEY_LEFT_ALT);
  Keyboard.press(KEY_F11);
  delay(100);
  Keyboard.releaseAll();
}
void goto_USER2_MENU()
{
  Keyboard.begin();
  Keyboard.press(KEY_LEFT_ALT);
  Keyboard.press(KEY_F12);
  delay(100);
  Keyboard.releaseAll();
}


void shortcut_HOME_ALL()
{
  Keyboard.begin();
  Keyboard.press(KEY_LEFT_CTRL);
  Keyboard.press('h');
  delay(100);
  Keyboard.releaseAll();
}

void shortcut_ZERO_X()
{
  Keyboard.begin();
  Keyboard.press(KEY_LEFT_CTRL);
  Keyboard.press('1');
  delay(100);
  Keyboard.releaseAll();
}

void shortcut_ZERO_Y()
{
  Keyboard.begin();
  Keyboard.press(KEY_LEFT_CTRL);
  Keyboard.press('2');
  delay(100);
  Keyboard.releaseAll();
}

void shortcut_ZERO_Z()
{
  Keyboard.begin();
  Keyboard.press(KEY_LEFT_CTRL);
  Keyboard.press('3');
  delay(100);
  Keyboard.releaseAll();
}

void shortcut_HANDWHEEL_X()
{
  Keyboard.begin();
  Keyboard.press(KEY_LEFT_CTRL);
  Keyboard.press(KEY_LEFT_SHIFT);
  Keyboard.press('x');
  delay(100);
  Keyboard.releaseAll();
}

void shortcut_HANDWHEEL_Y()
{
  Keyboard.begin();
  Keyboard.press(KEY_LEFT_CTRL);
  Keyboard.press(KEY_LEFT_SHIFT);
  Keyboard.press('y');
  delay(100);
  Keyboard.releaseAll();
}

void shortcut_HANDWHEEL_Z()
{
  Keyboard.begin();
  Keyboard.press(KEY_LEFT_CTRL);
  Keyboard.press(KEY_LEFT_SHIFT);
  Keyboard.press('z');
  delay(100);
  Keyboard.releaseAll();
}

void shortcut_HANDWHEEL_X1()
{
  Keyboard.begin();
  Keyboard.press(KEY_LEFT_CTRL);
  Keyboard.press('n');
  delay(100);
  Keyboard.releaseAll();
}

void shortcut_HANDWHEEL_X10()
{
  Keyboard.begin();
  Keyboard.press(KEY_LEFT_CTRL);
  Keyboard.press('o');
  delay(100);
  Keyboard.releaseAll();
}

void shortcut_HANDWHEEL_X100()
{
  Keyboard.begin();
  Keyboard.press(KEY_LEFT_CTRL);
  Keyboard.press('p');
  delay(100);
  Keyboard.releaseAll();
}

void shortcut_TOGGLE_MDI()
{
  Keyboard.begin();
  Keyboard.press(KEY_LEFT_CTRL);
  Keyboard.press(KEY_F6);
  delay(100);
  Keyboard.releaseAll();
}

void shortcut_TOGGLE_MACHINE_COORDINATES()
{
  Keyboard.begin();
  // TOGGLE MACHINE/WORK COORDINATES
  Keyboard.press(KEY_LEFT_CTRL);
  Keyboard.press('w');
  delay(100);
  Keyboard.releaseAll();

}
void shortcut_TOGGLE_AUX1()
{
  Keyboard.begin();
  Keyboard.press(KEY_LEFT_CTRL);
  Keyboard.press('m');
  delay(100);
  Keyboard.releaseAll();
}
void shortcut_TOGGLE_MIST()
{
  Keyboard.begin();
  Keyboard.press(KEY_LEFT_CTRL);
  Keyboard.press('l');
  delay(100);
  Keyboard.releaseAll();
}
void shortcut_TOGGLE_FLOOD()
{
  Keyboard.begin();
  Keyboard.press(KEY_LEFT_CTRL);
  Keyboard.press('k');
  delay(100);
  Keyboard.releaseAll();
}


void user_MACRO_1()
{
  Keyboard.begin();
  Keyboard.press(KEY_LEFT_ALT);
  Keyboard.press('1');
  delay(100);
  Keyboard.releaseAll();
}
void user_MACRO_2()
{
  Keyboard.begin();
  Keyboard.press(KEY_LEFT_ALT);
  Keyboard.press('2');
  delay(100);
  Keyboard.releaseAll();
}
void user_MACRO_3()
{
  Keyboard.begin();
  Keyboard.press(KEY_LEFT_ALT);
  Keyboard.press('3');
  delay(100);
  Keyboard.releaseAll();
}
void user_MACRO_4()
{
  Keyboard.begin();
  Keyboard.press(KEY_LEFT_ALT);
  Keyboard.press('4');
  delay(100);
  Keyboard.releaseAll();
}
void user_MACRO_5()
{
  Keyboard.begin();
  Keyboard.press(KEY_LEFT_ALT);
  Keyboard.press('5');
  delay(100);
  Keyboard.releaseAll();
...

This file has been truncated, please download it to see its full contents.
Custom parts and enclosures
This is the most important library you need to get the most functions per buttonclickbutton_hq5qeT4toX.zipcnc_pendant_SenmxC8UCj.zipSchematics
A not so good schematic but it will do the job...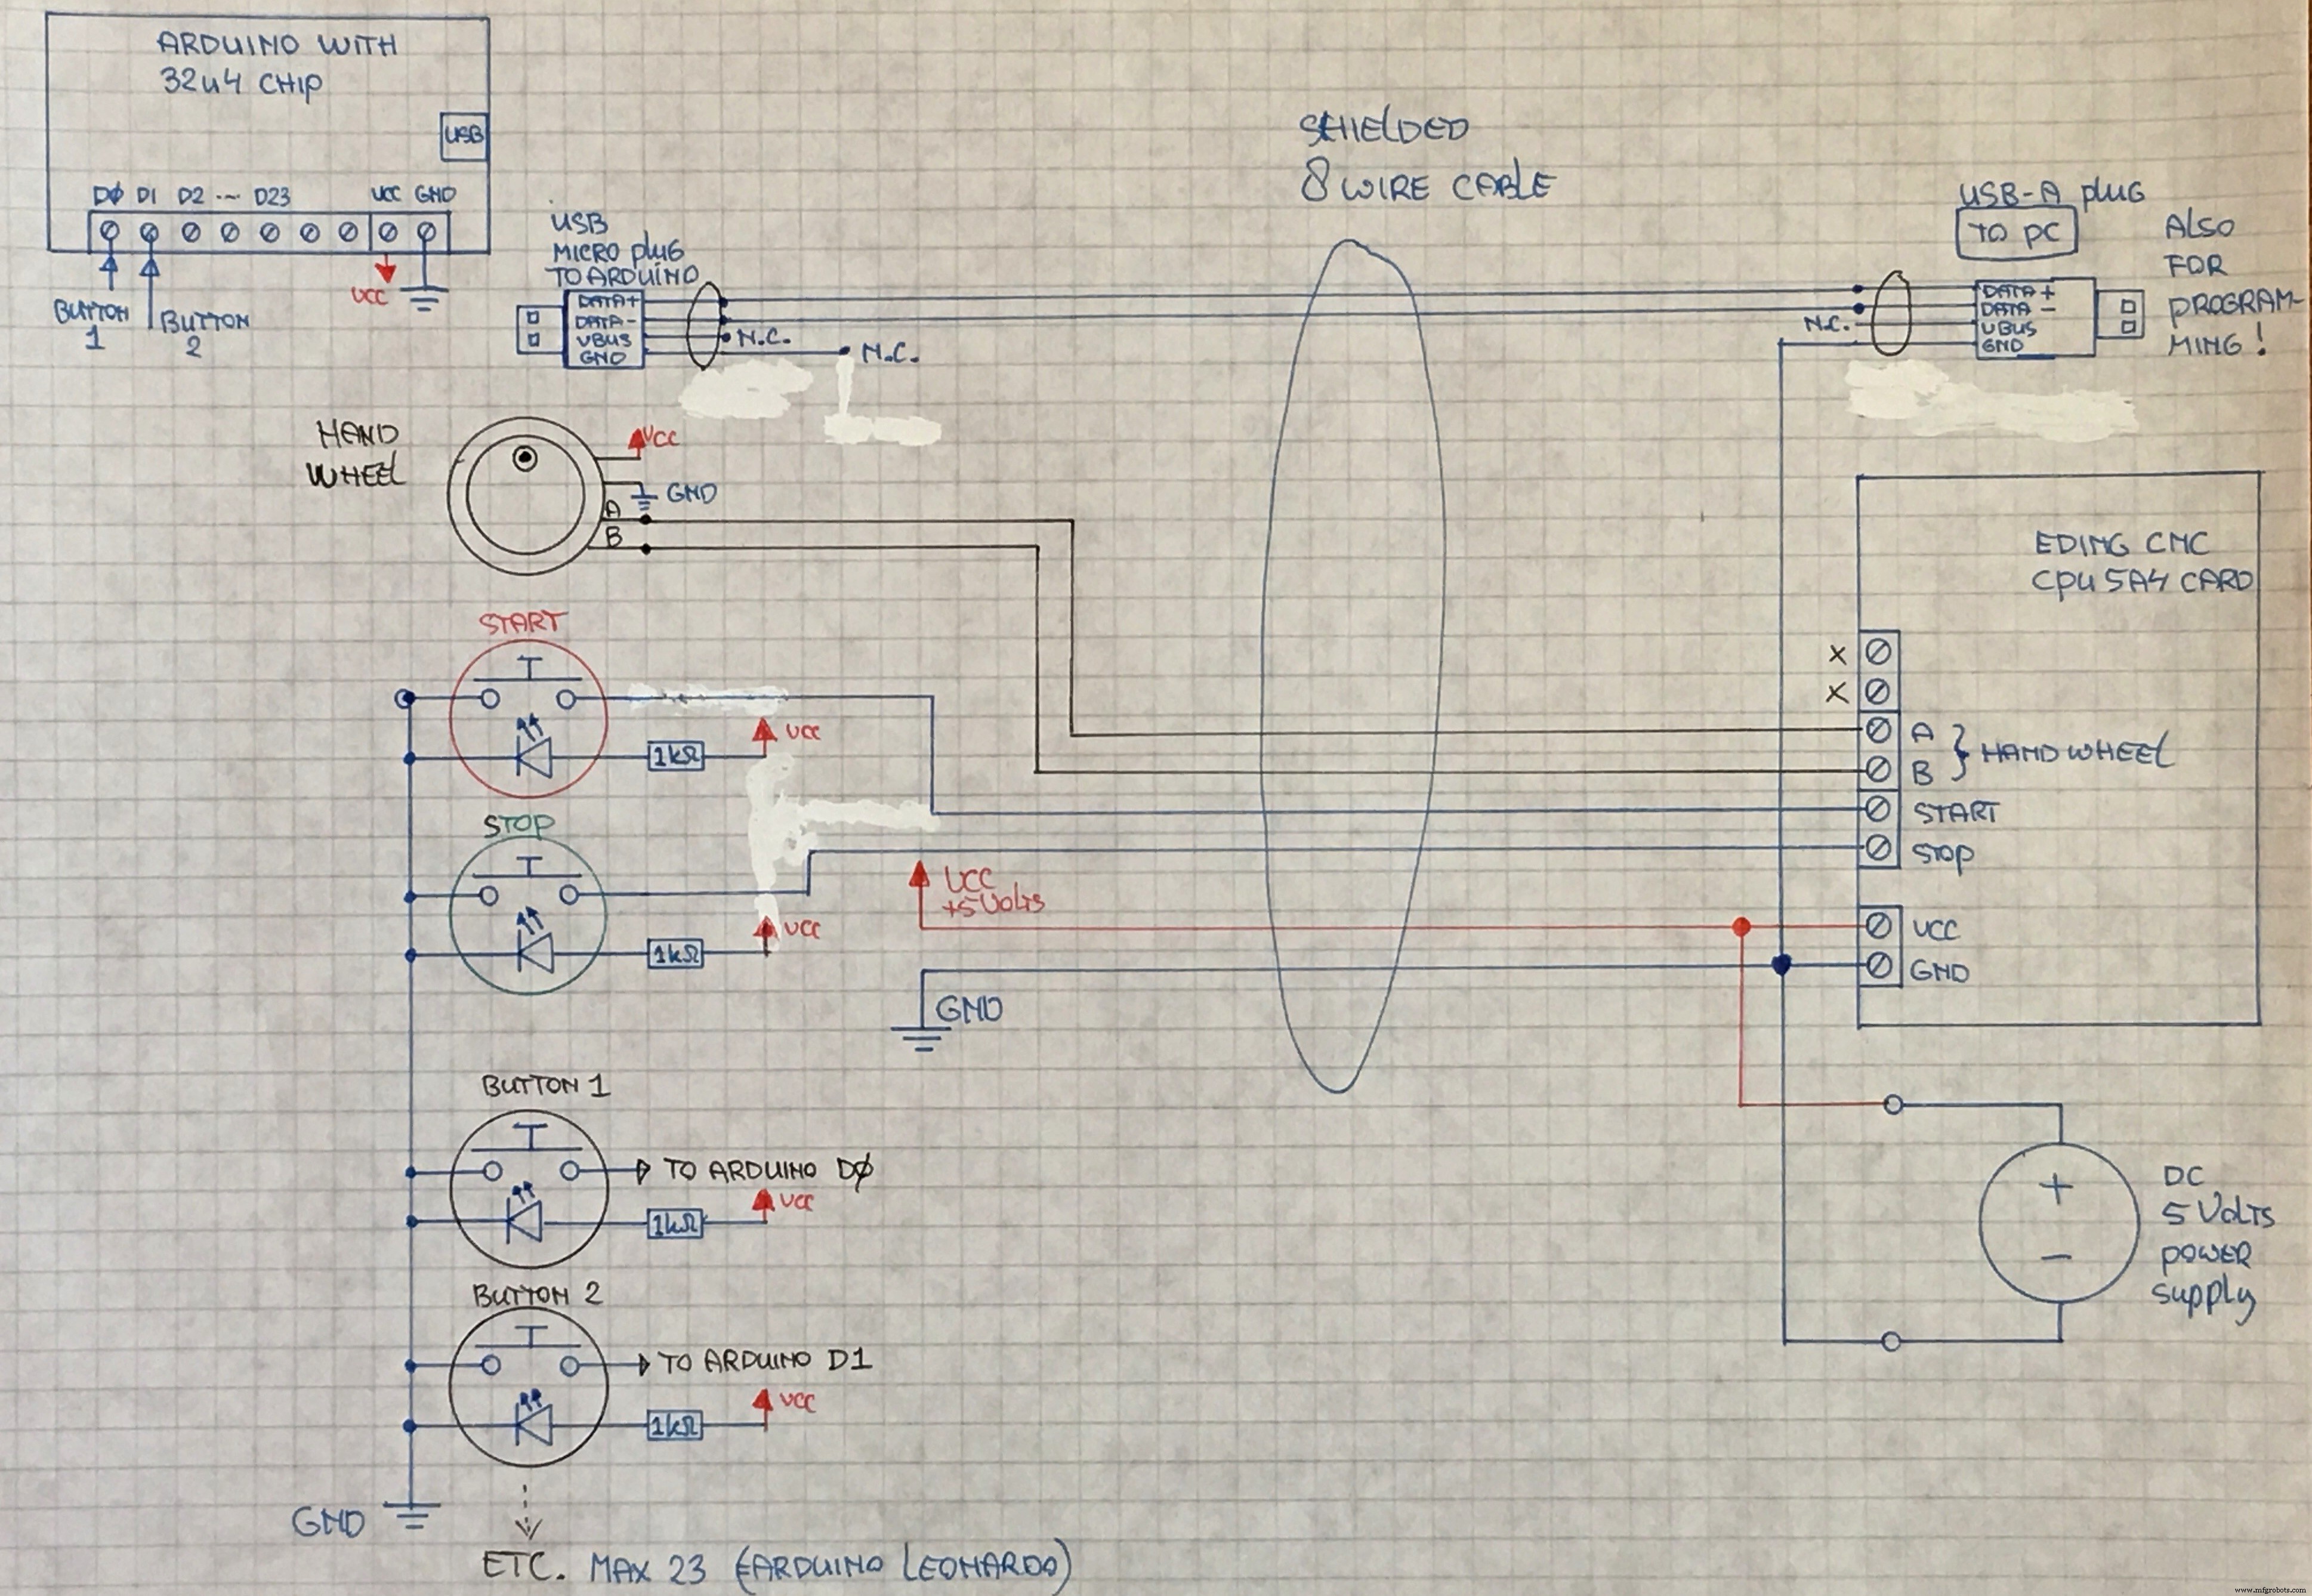
Manufacturing process
- Control LED Brightness with PWM via Push‑Button on Arduino Mega
- Create a Custom Punchable Keyboard Button with Arduino: A Step-by-Step Guide
- Build a Fully Functional CNC Machine with Arduino Nano R3
- DIY 3-Axis CNC VMC: Build a Precision Milling Machine
- Build a Remote Text‑Messaging Button with Sigfox & Twilio
- Build a Compact CNC Machine with Arduino UNO
- Build an Arduino-Powered CNC Plotter: Step-by-Step Drawing Machine DIY
- Master GRBL: Step‑by‑Step Guide to Setting Up and Controlling Your Arduino‑Powered CNC Machine
- Build a Reliable Arduino CNC Foam Cutting Machine – DIY Tutorial
- Osai USA’s OPENwiTP: A Wireless Teach Pendant for Efficient CNC Control