


Build Your Own Anemometer – Affordable Wind Speed Sensor for Projects
Components and supplies
| × | 1 | ||||
 |
| × | 1 | |||
|
| × | 1 |
About this project
OverviewAnemometer or a wind speed measuring device is a common weather station instrument.
The other day, I was discussing an IoT project with a talented student group. We were running through a bunch of sensors that they can use in their project. In the list we had a wind speed sensor device, however the cost online was near about $80! Too much for a college project. So, in the document we didn’t mention which sensor to buy, instead I mentioned “Custom”.
And here’s my Custom Anemometer 🙂 It is based on a simple principle that I first used in Class 7 to build a generator from a DC Motor.
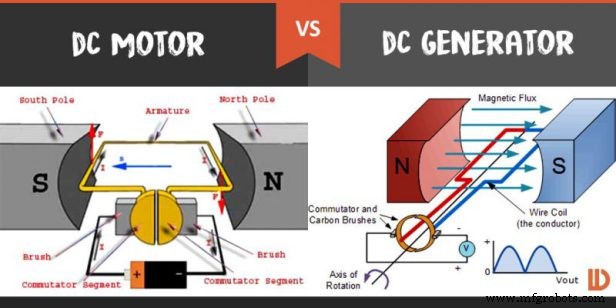
DC motor converts electrical energy into mechanical energy whereas DC generator converts mechanical energy into an electrical energy. Thus, if electrical energy can turn a DC motor, mechanical energy should generate electricity.
I need to capture wind energy to turn my dc motor and that should generate electricity which I can check using an Arduino, translate to a scale and use.
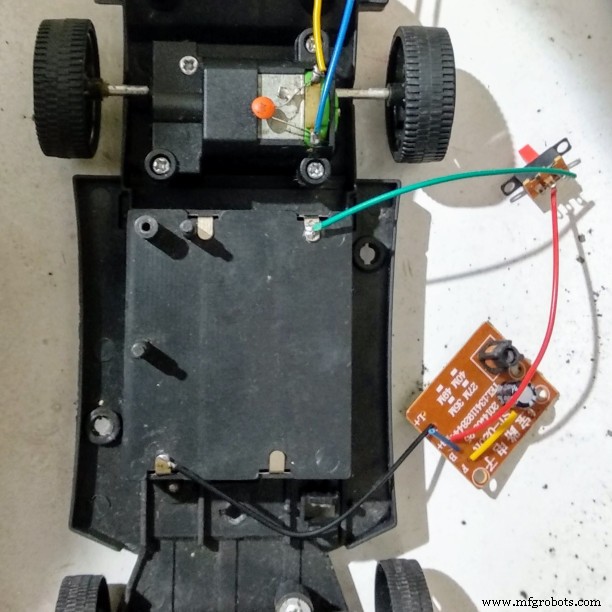
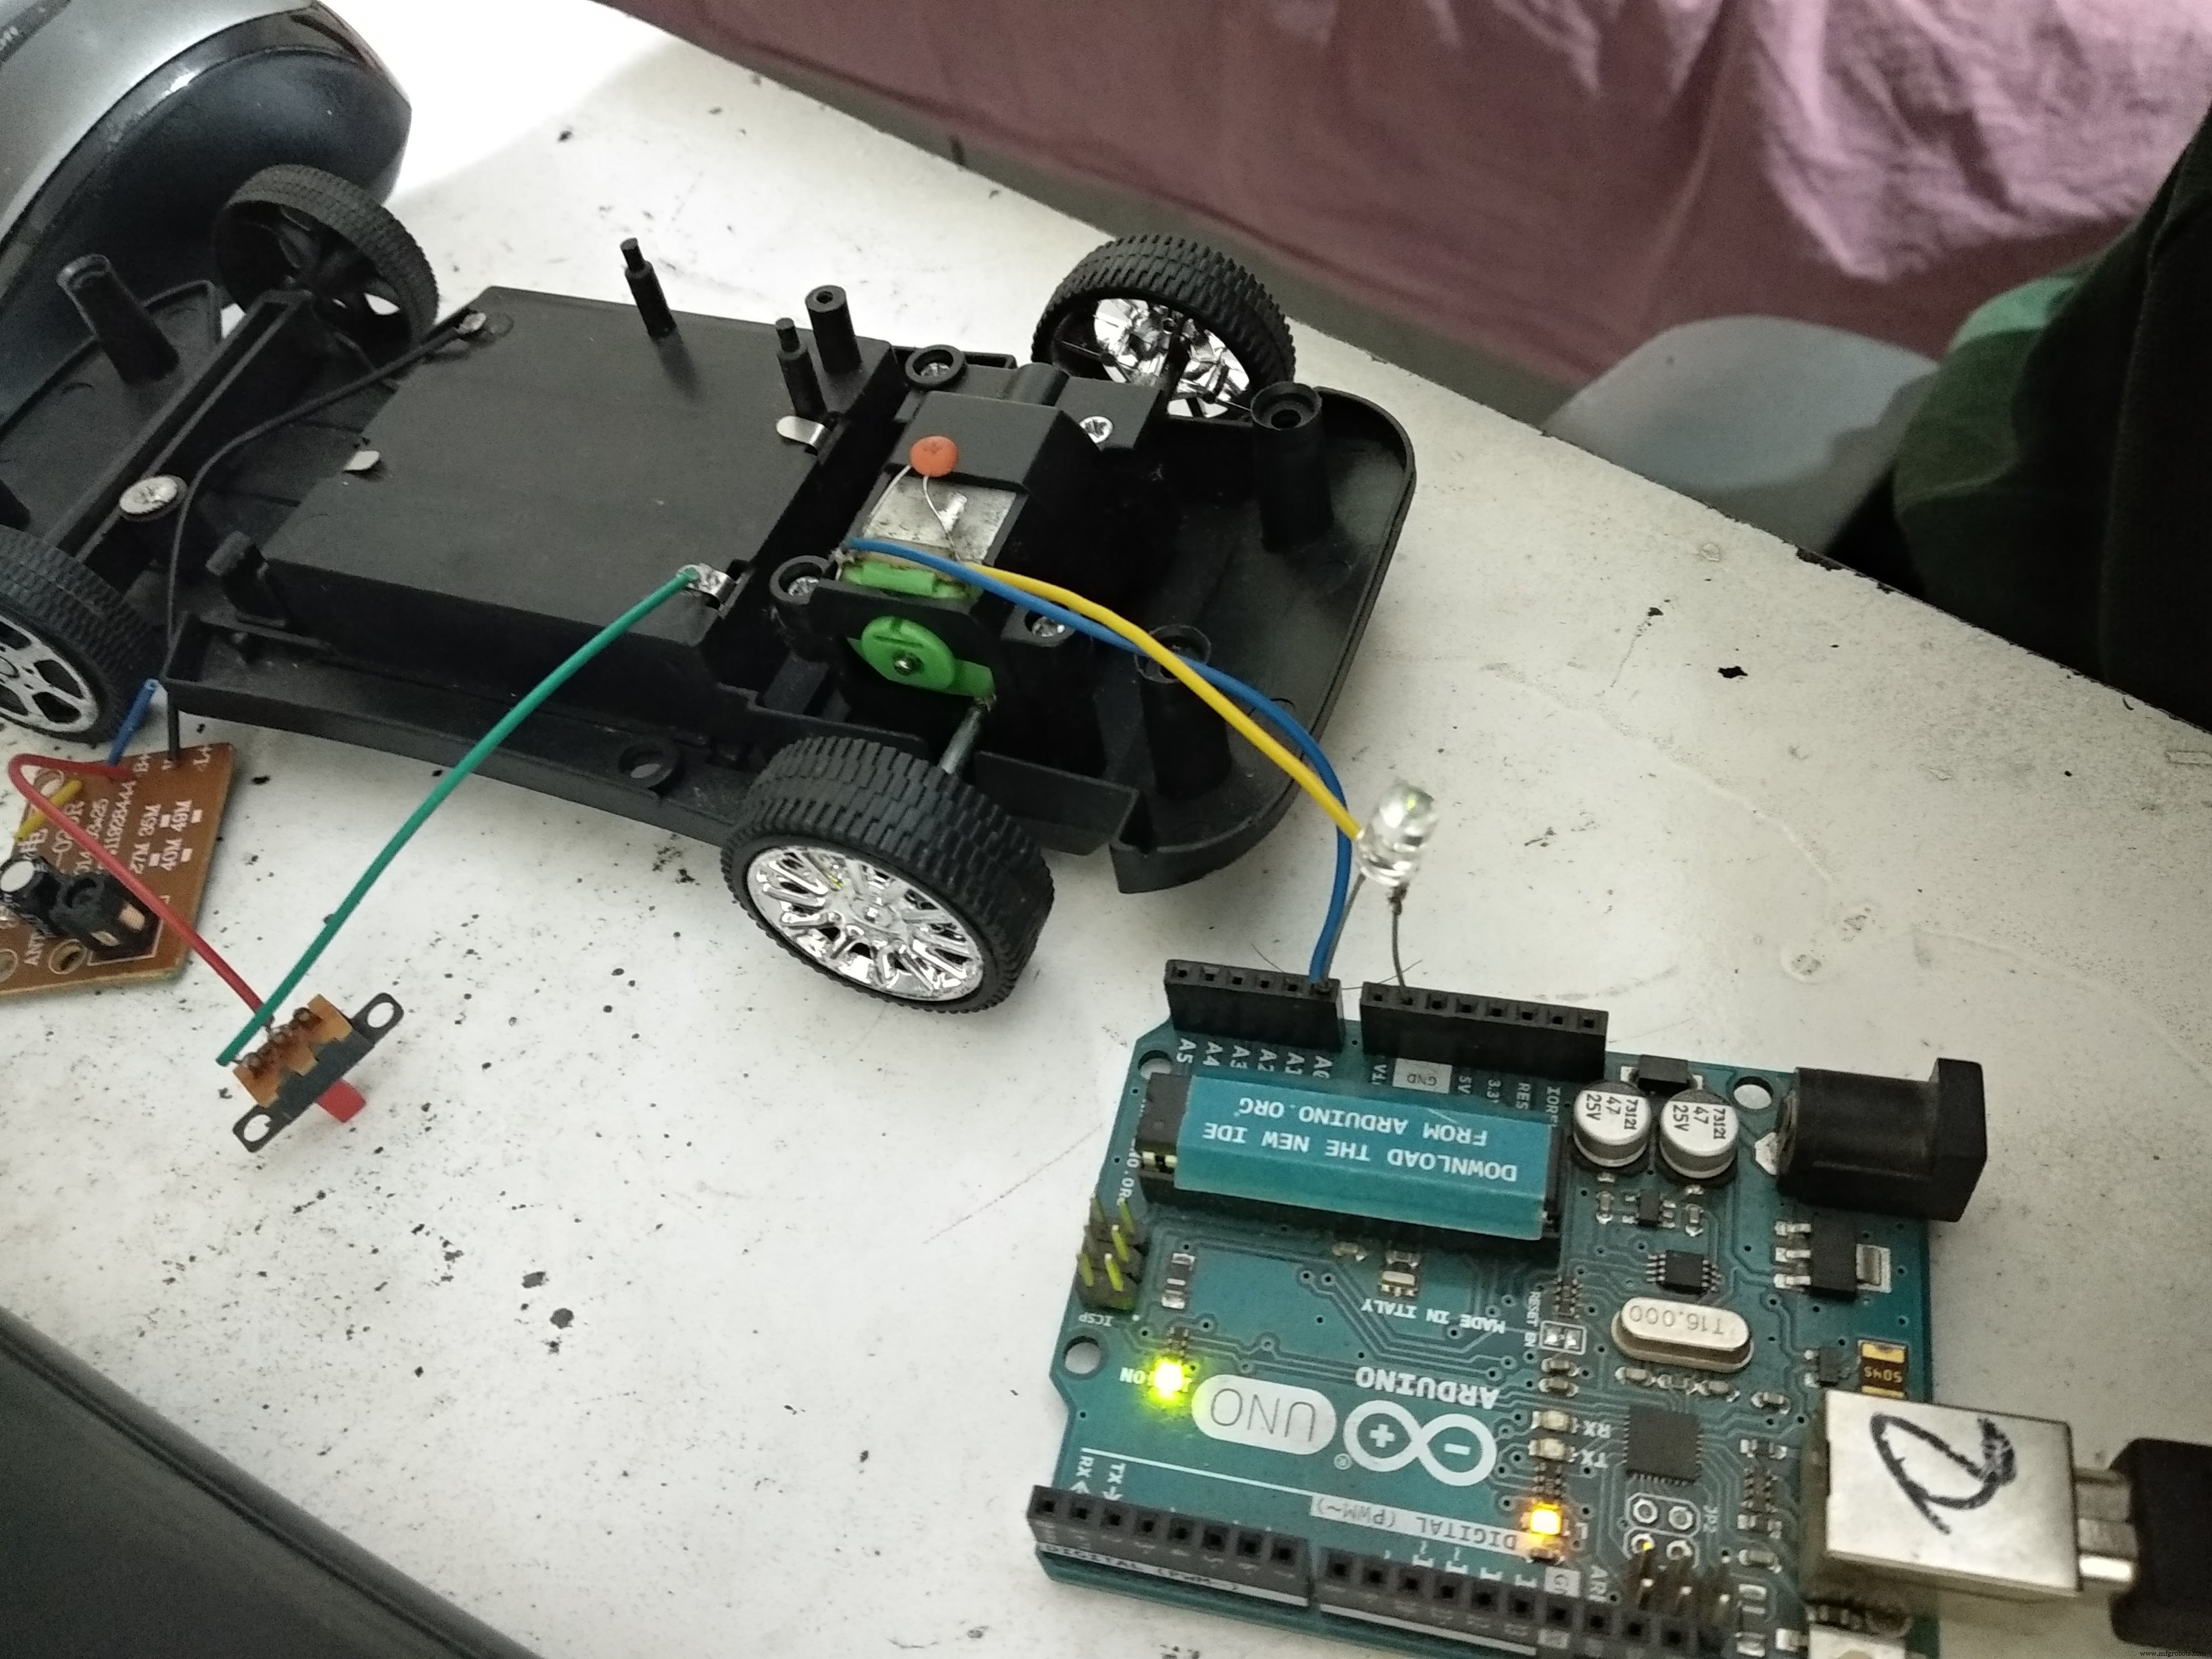
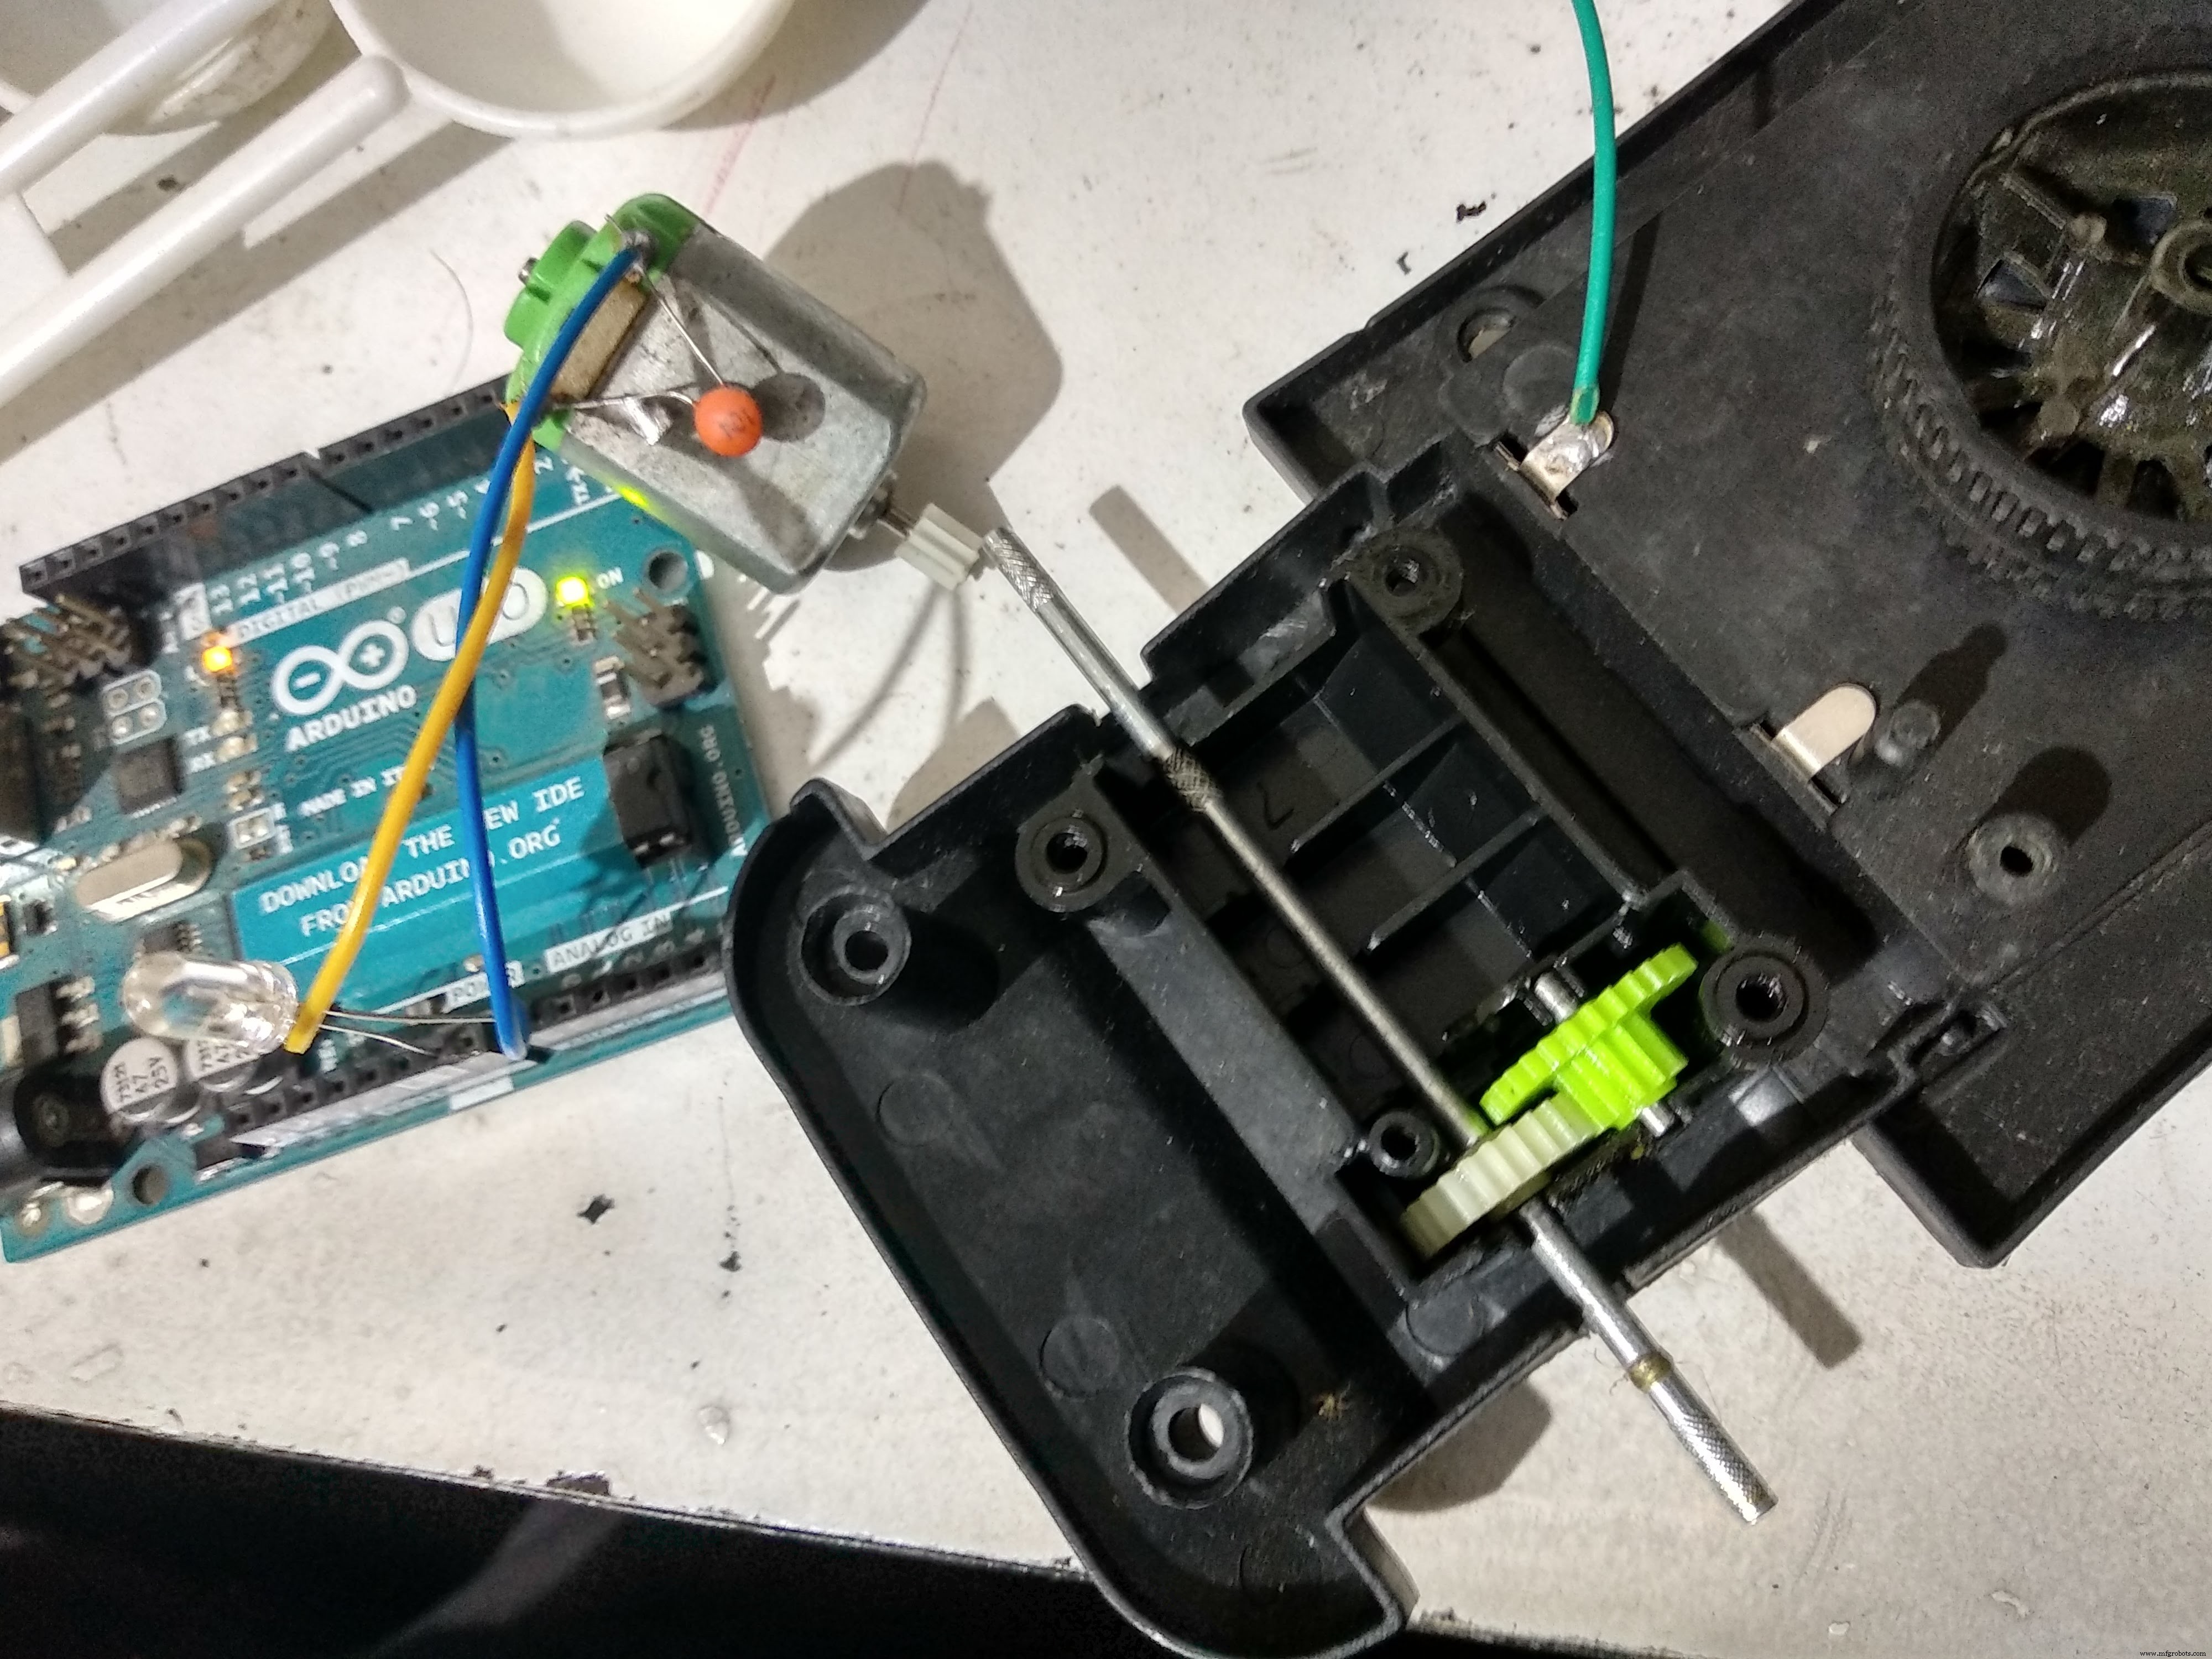
I took a RC car from my kid to get a DC motor and connected an LED to the two wires of DC motor and spun the motor shaft. LED lights up!

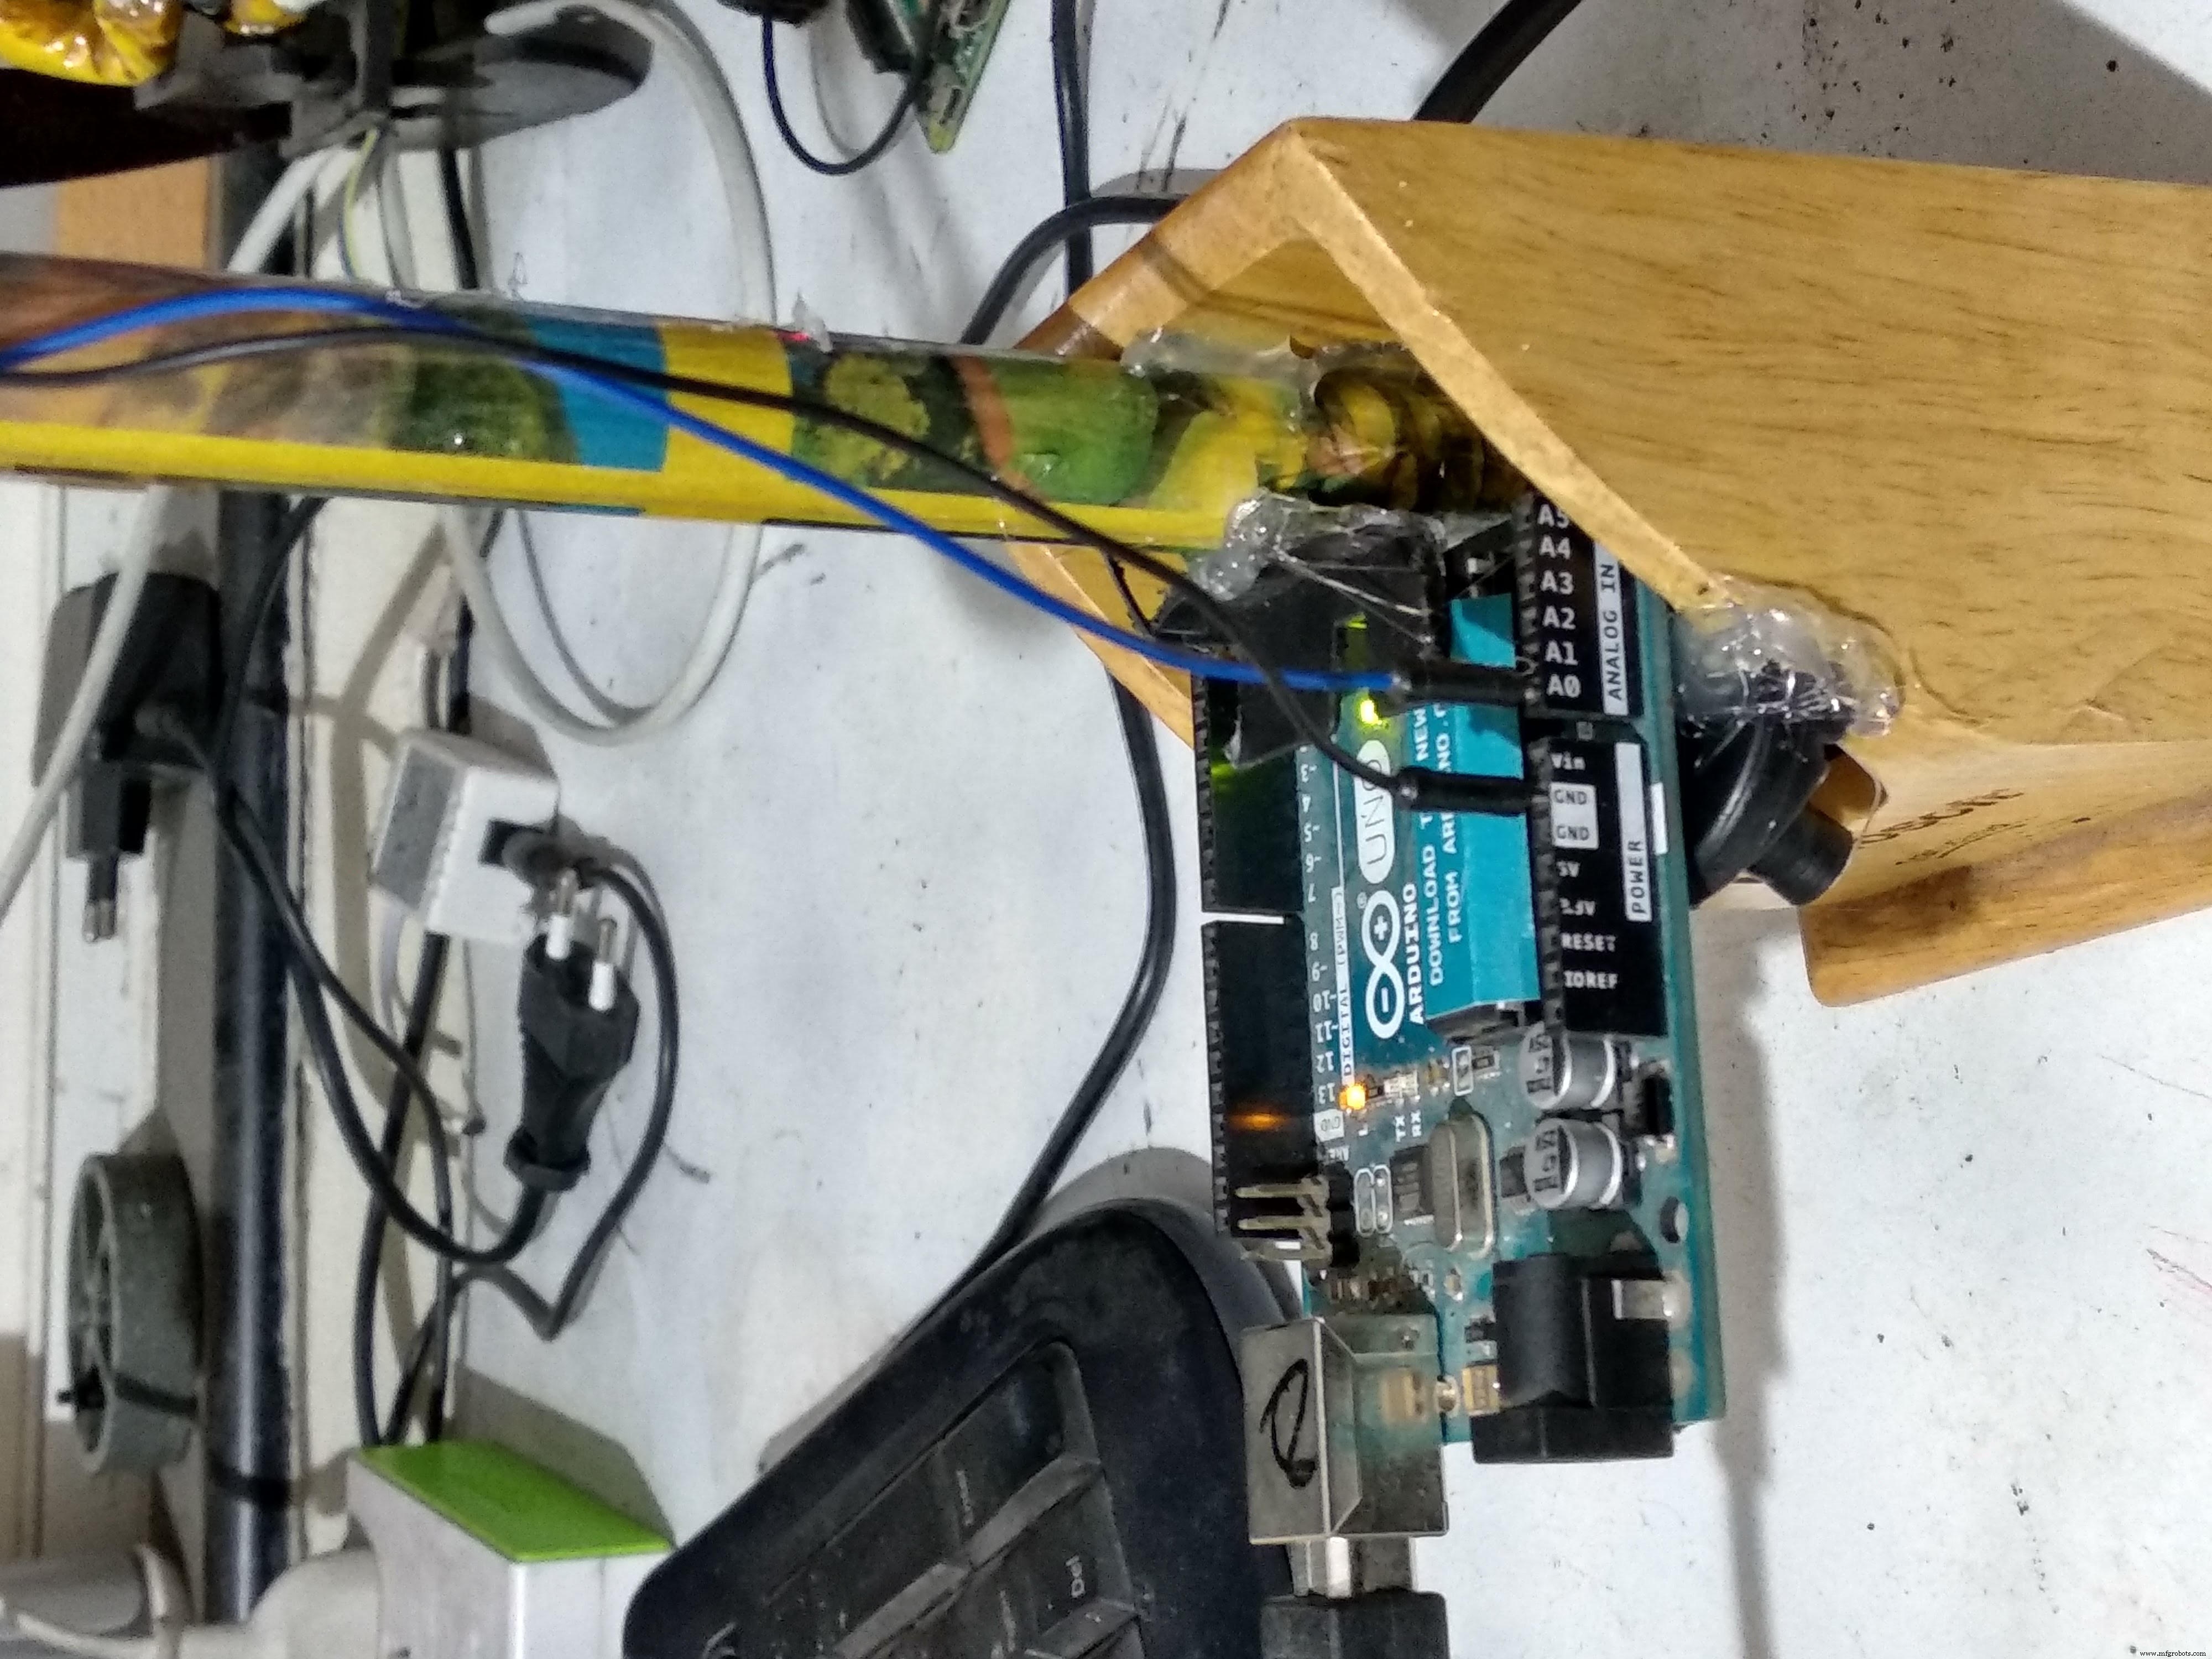
Then I connected the +ve pin of DC motor to analog 0 port on Arduino and DC ground to arduino ground.
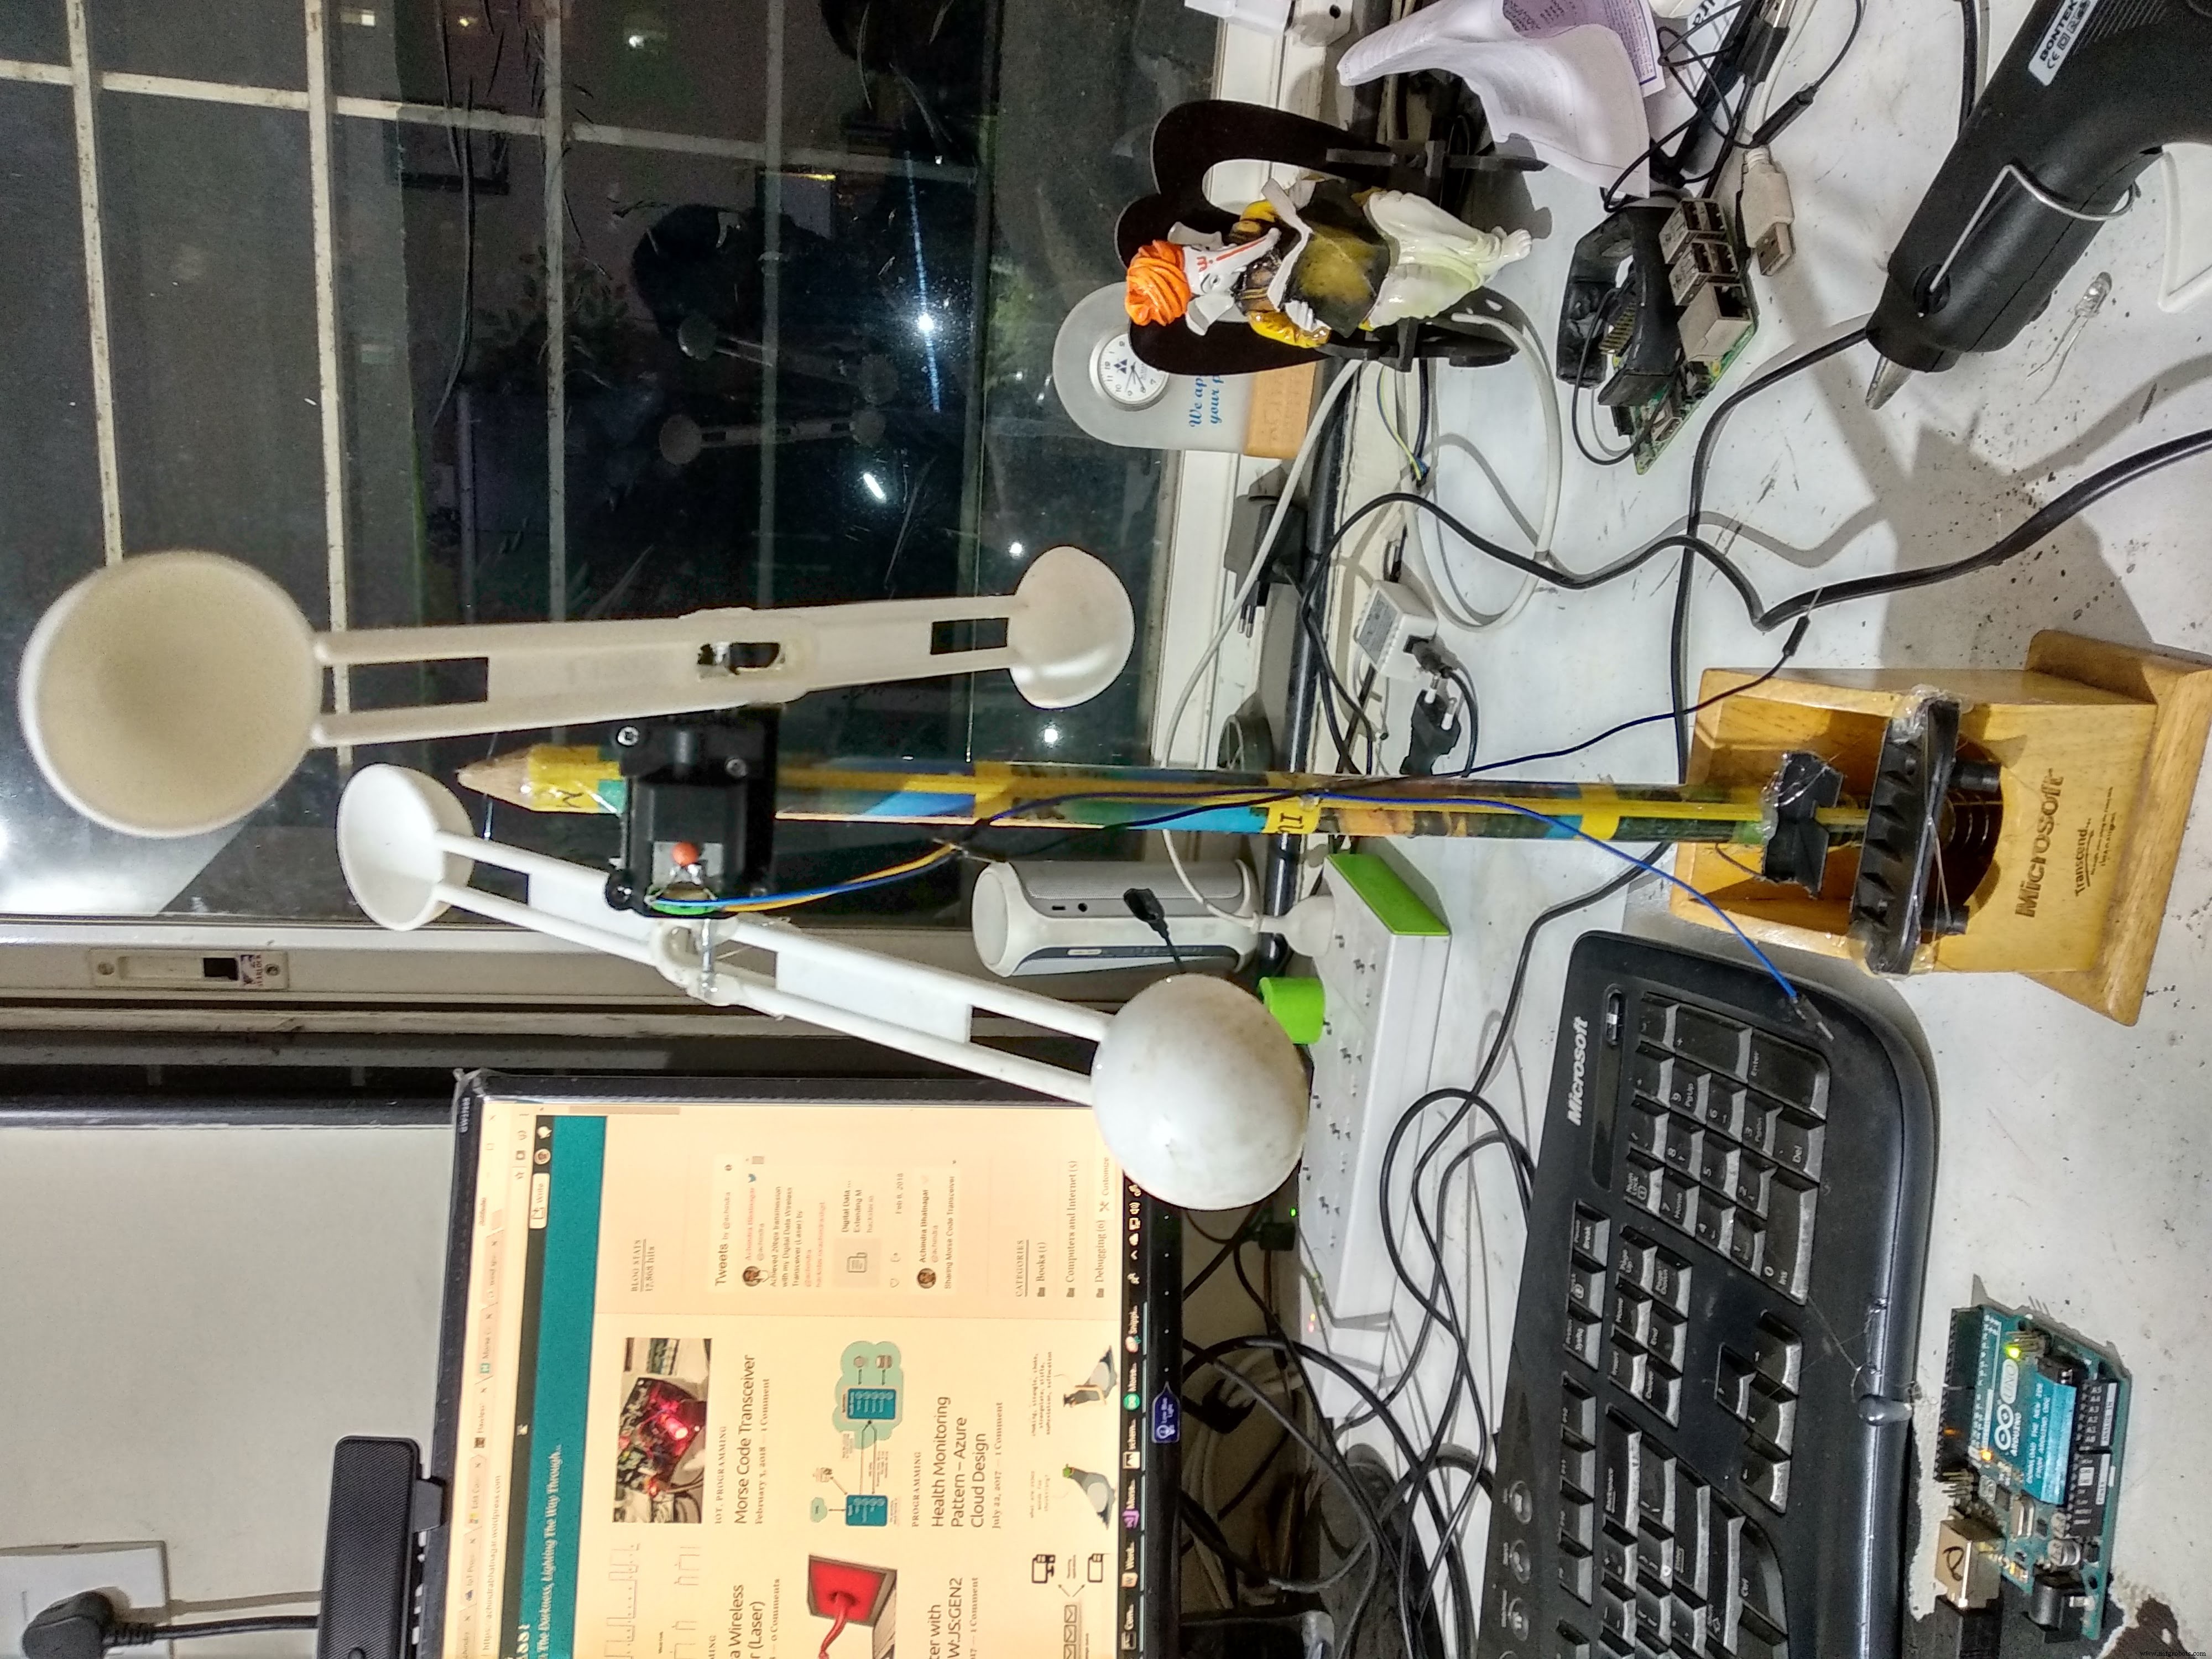
Now that I have a basic proof of concept. I started working on the final product. Following pictures capture various stages.
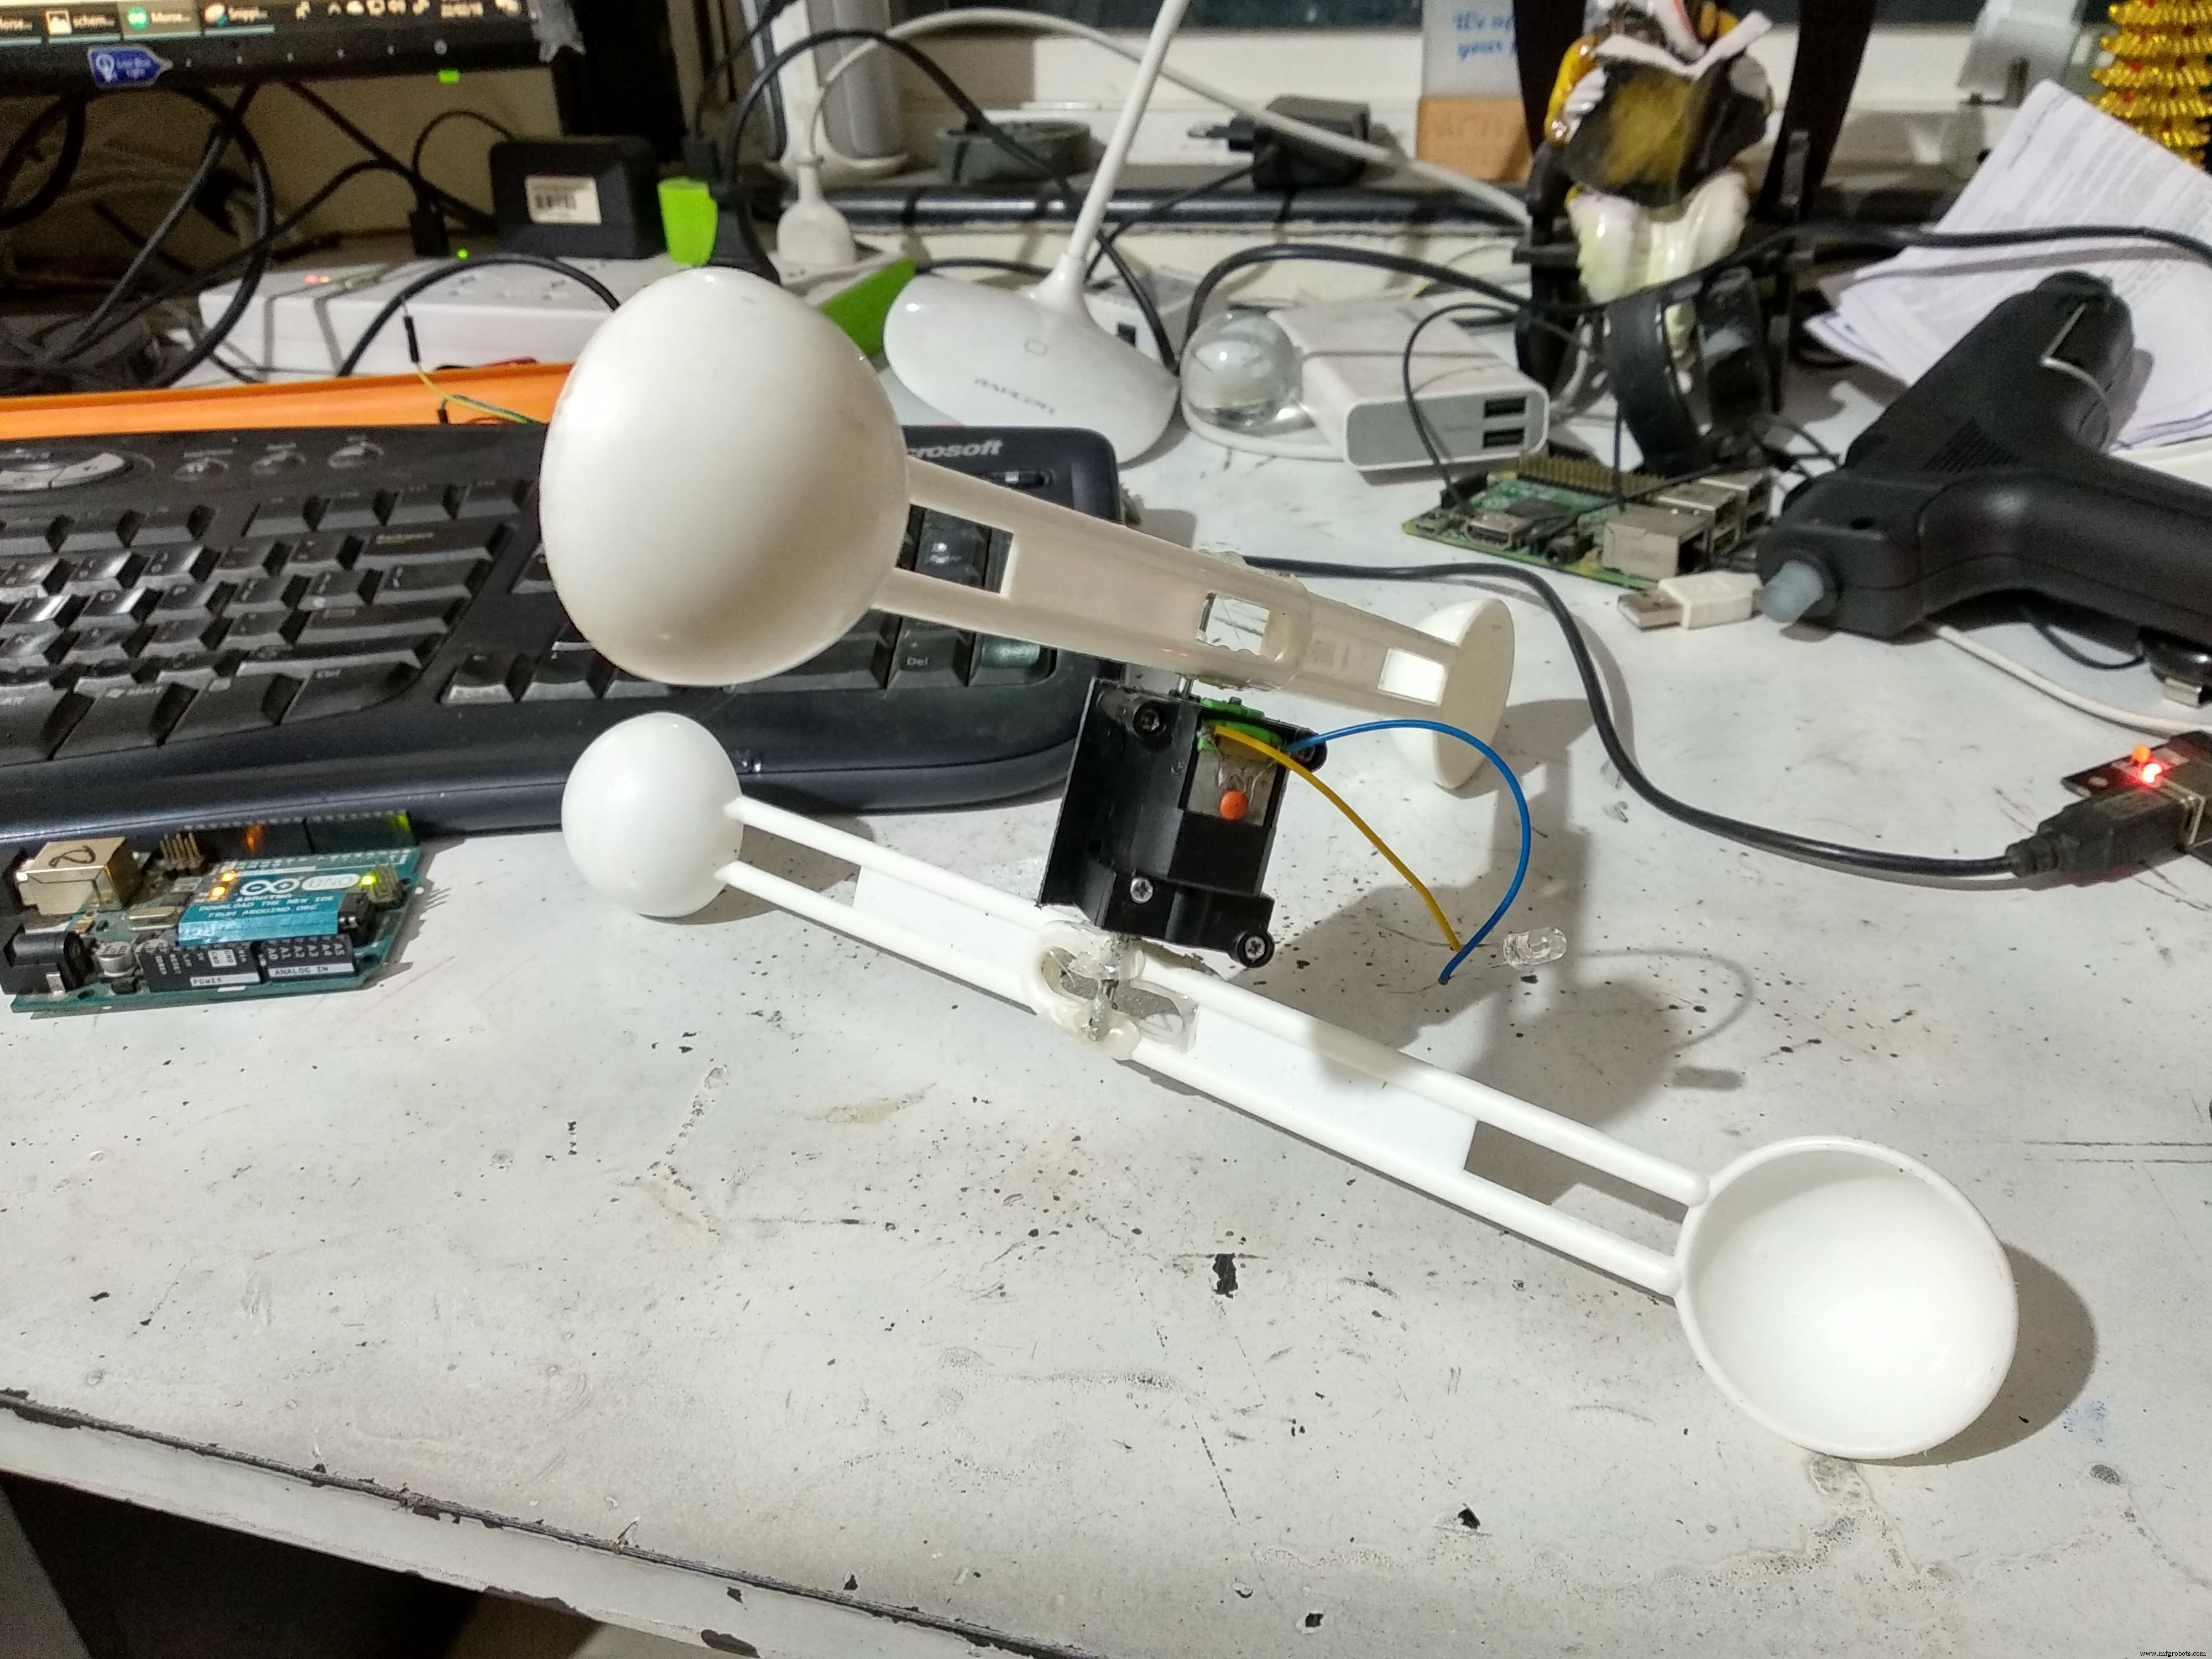
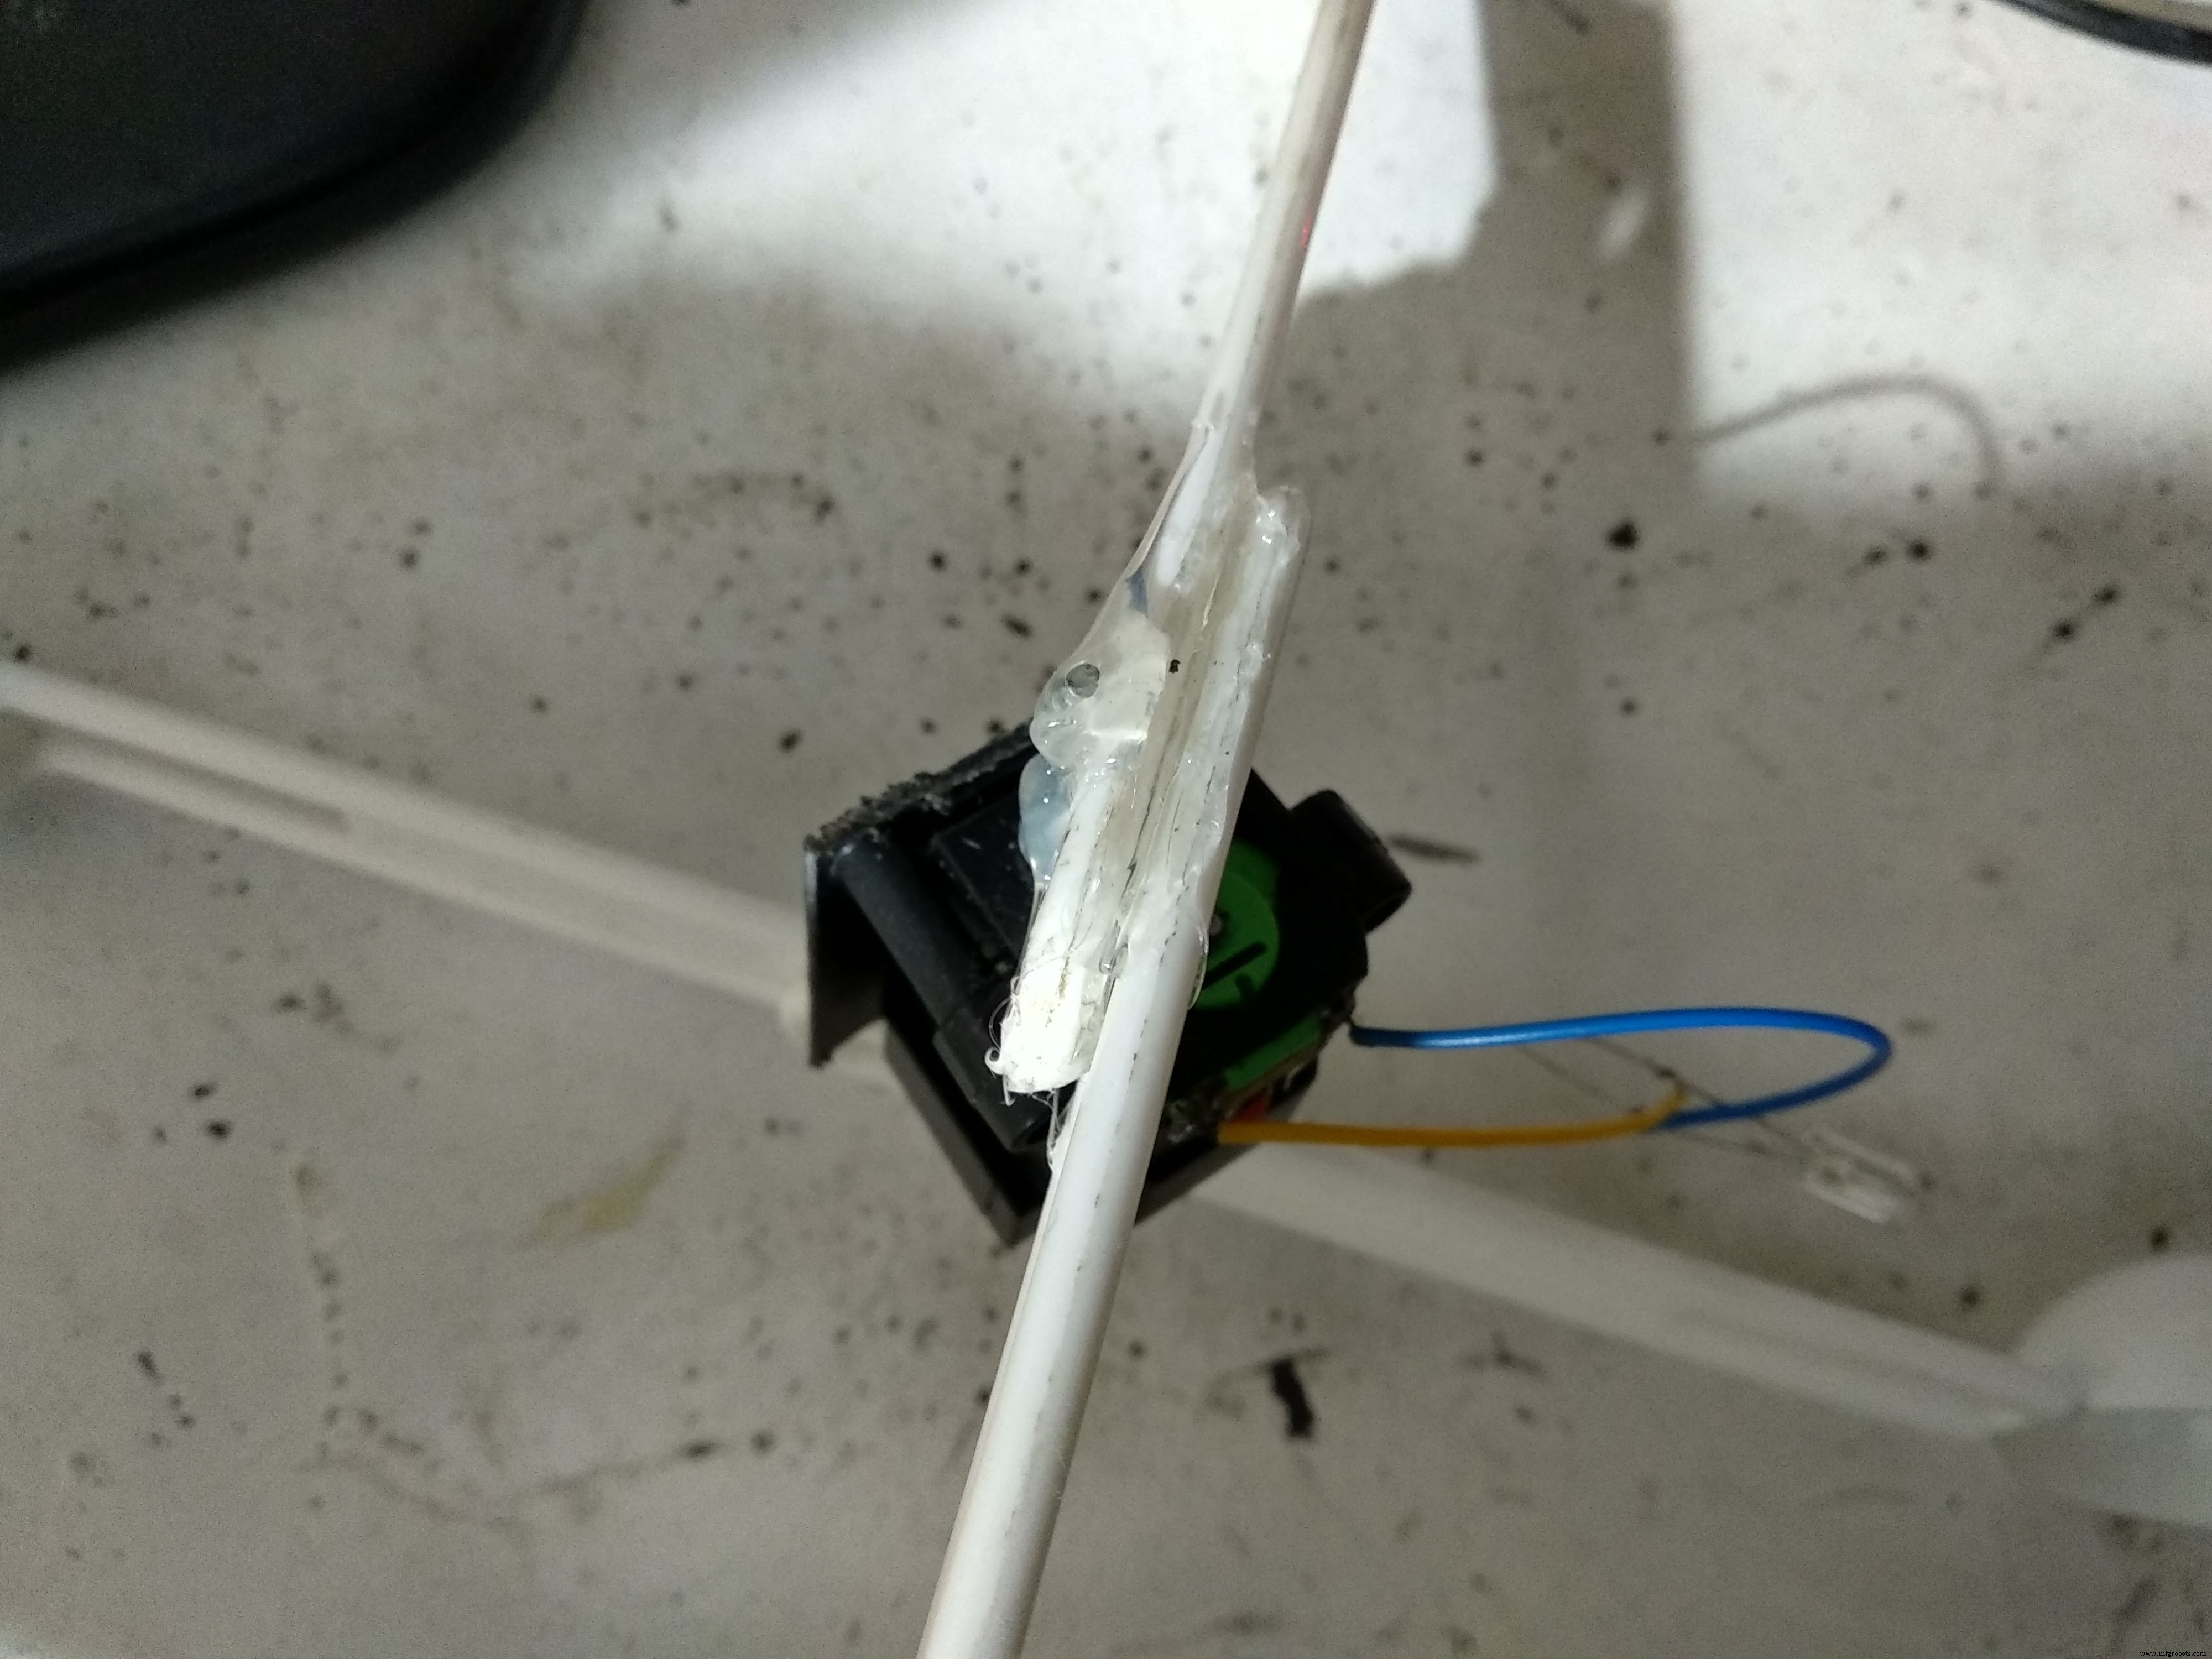
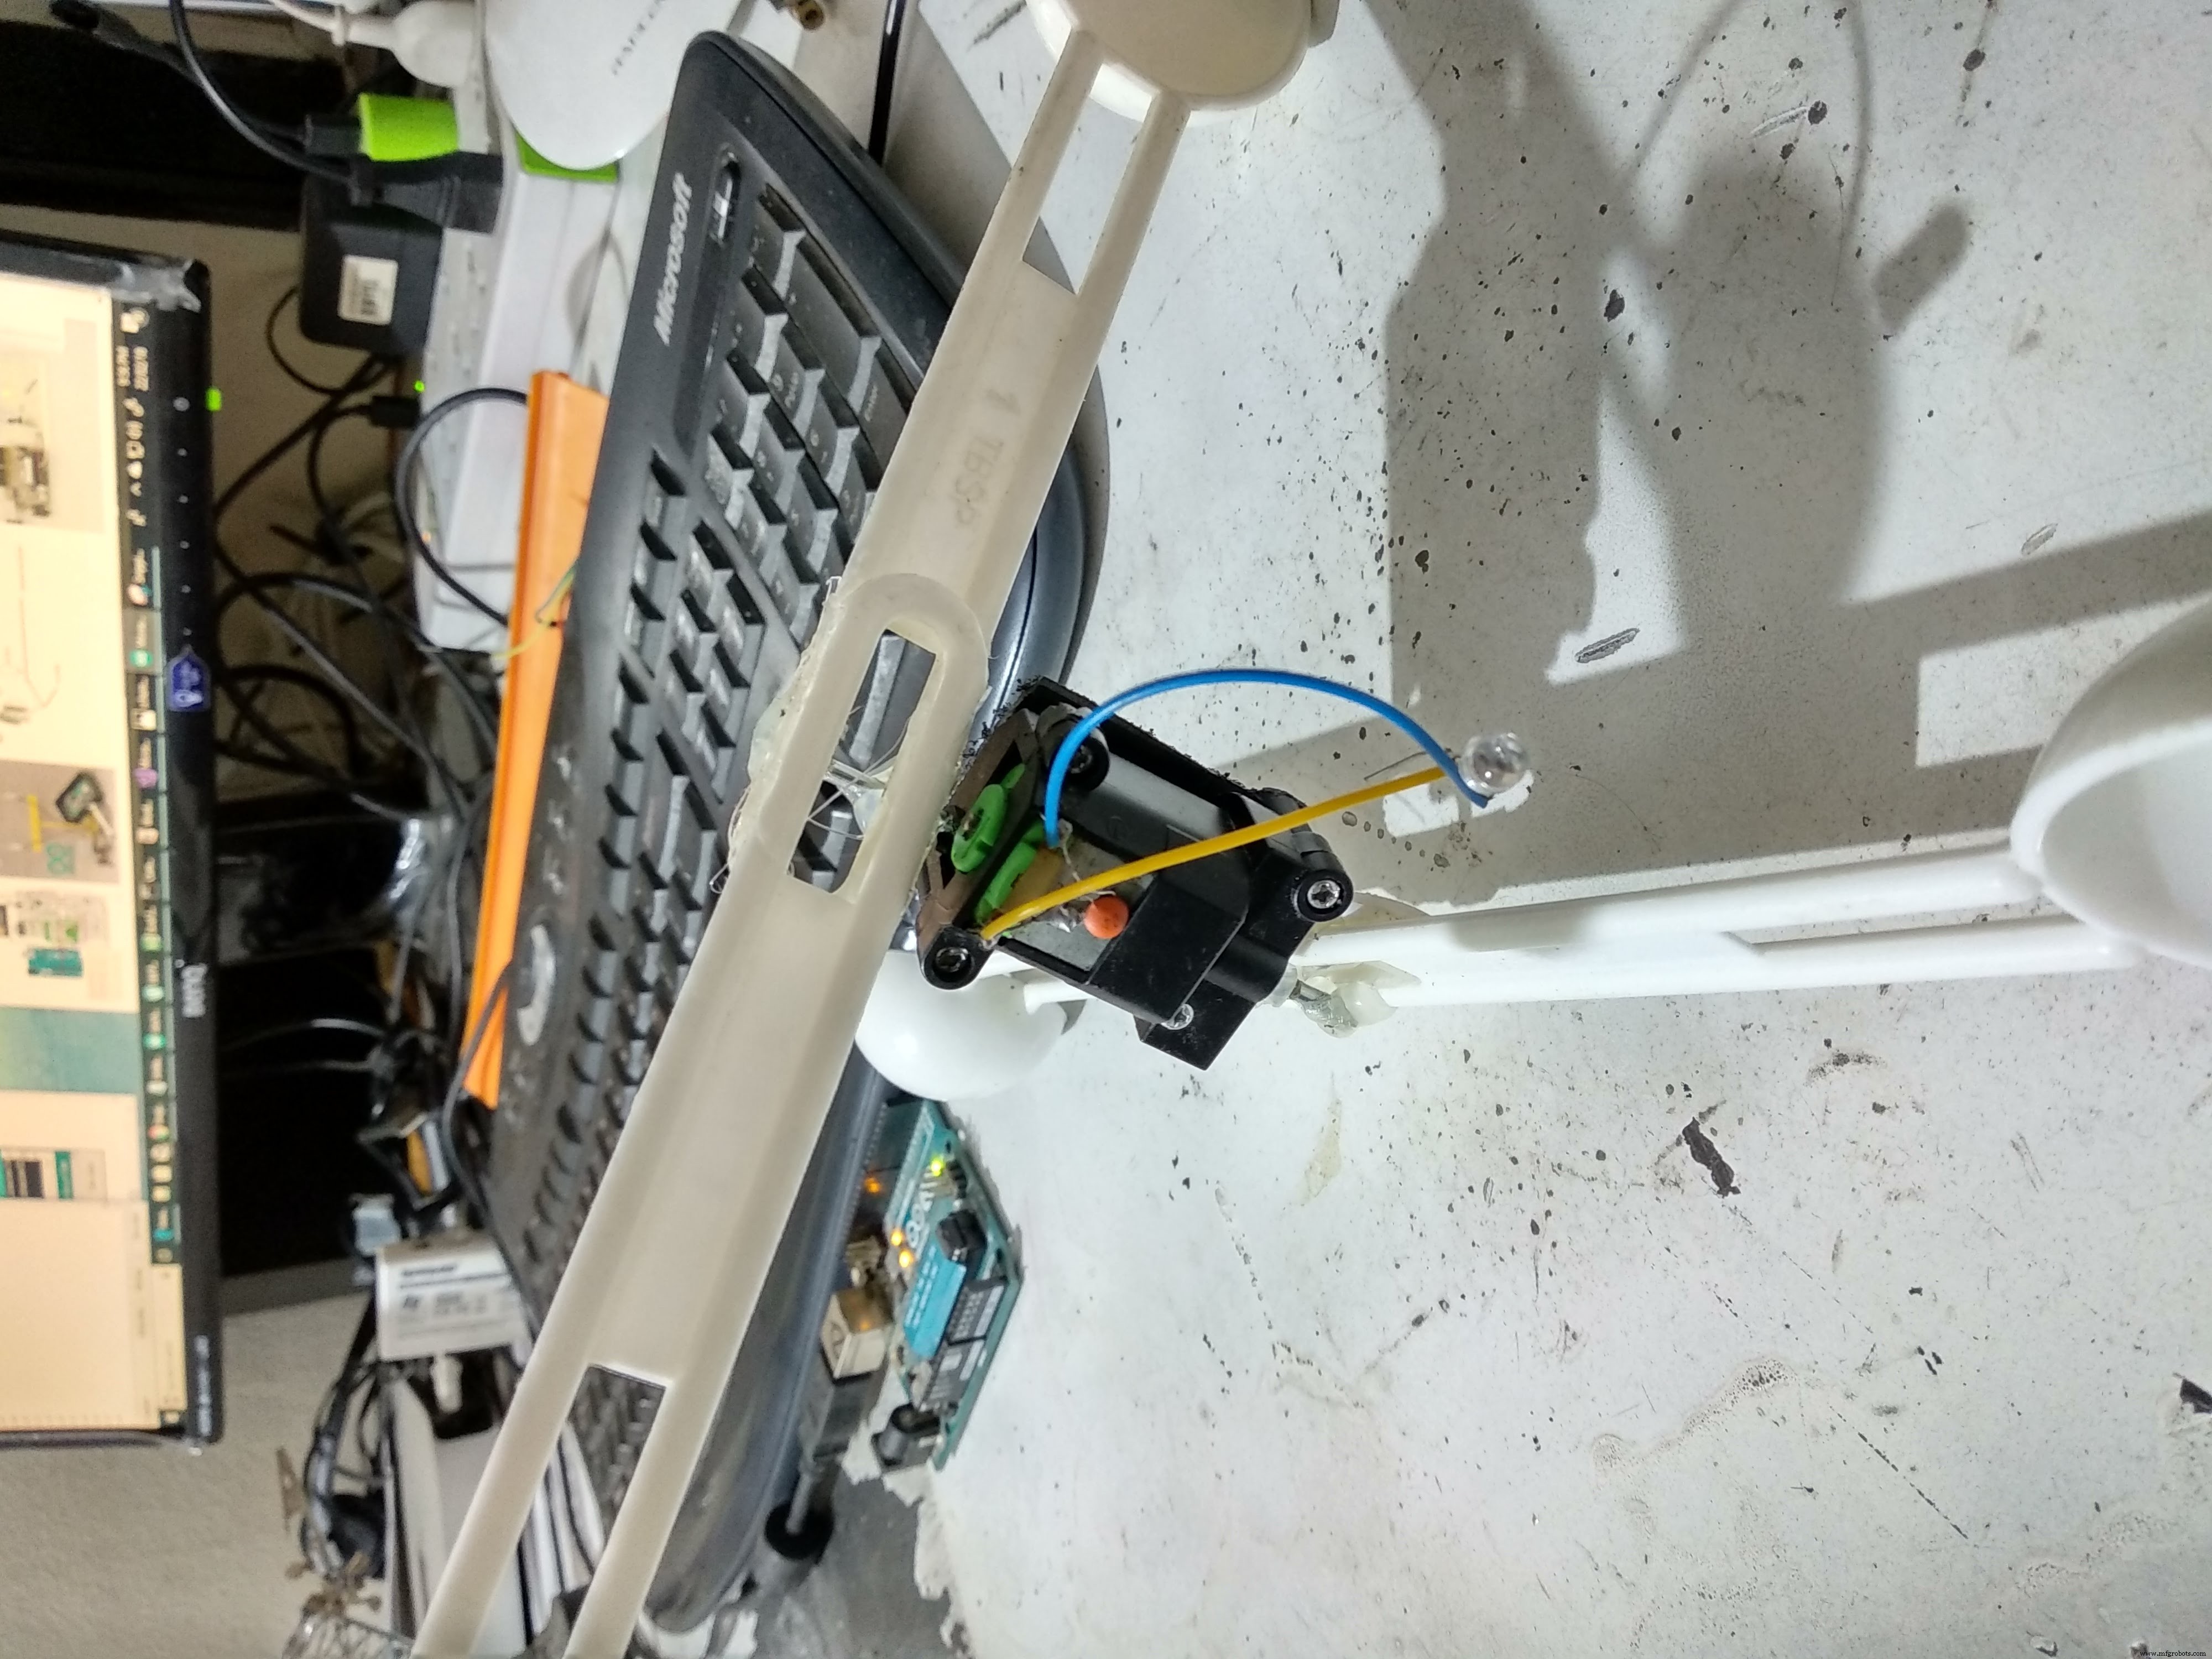
I took 4 identical plastic scoop spoons from my Wife and pasted two together. Then I pasted this twin spoons perpendicular to each other on the two ends of the motor shaft. This formed the core assembly of my anemometer.
Next, I mounted this assembly on a long pencil and fixed it on a small pencil stand. I made arrangements to mount my Arduino board on this stand. I also added an LED on PWM pin 9 or Arduino so I can light it up on wind spin.
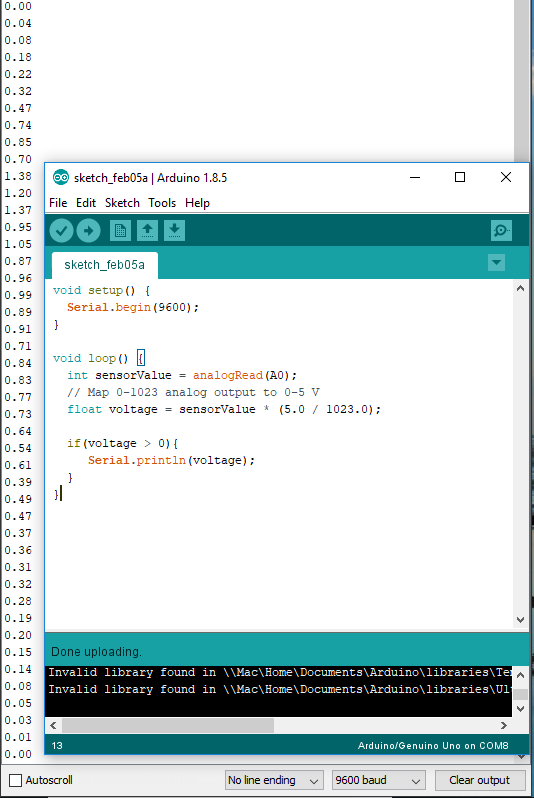
I wrote the following Arduino code to read analog data from A0 and plot it on a graph. I printed sensor value to serial console and launched Arduino's graph plotter to see results.
Arduino Codeint ledPin = 9;
void setup() {
Serial.begin(9600);
}
void loop() {
int sensorValue = analogRead(A0);
//Map 0-1023 to discrete 0-50-100...250 values for LED
analogWrite(ledPin, sensorValue * (51.0 / 1023.0) * 50);
if(sensorValue > 0){
Serial.println(sensorValue);
Serial.print(" ");
}
}
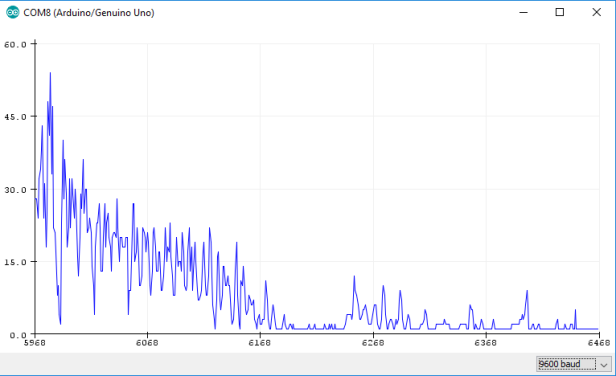
And here’s the final result!
It does not end here. A few more things:
- Since a 5v motor uses powerful magnets, it requires stronger wind to make it move. Need to use a smaller and lighter motor, like the one used in a Drone. Should have permanent magnets inside.
- A low RPM motor would generate higher voltage at low spin rates. Hence it is desirable. However, with the use of larger gears in the fan shaft that drives the motor shaft, we can make DC motor spin faster at lower wind speeds.
- A low voltage DC motor, like 3v motor would be safe, since the max voltage produced would not reach 5v at its highest speed and hence it won't hurt the Arduino board.
Code
- Anemometer
AnemometerArduino
This code reads wind speed data on analog port 0 and lights up an LEDint ledPin = 9;
void setup() {
Serial.begin(9600);
}
void loop() {
int sensorValue = analogRead(A0);
//Map 0-1023 to discrete 0-50-100...250 values for LED
analogWrite(ledPin, sensorValue * (51.0 / 1023.0) * 50);
if(sensorValue > 0){
Serial.println(sensorValue);
Serial.print(" ");
}
}
Schematics
windspeed_vjCOz66xkI.fzzManufacturing process
- Speedometer: From Mechanical Gauges to Digital Displays
- Build Your Own DIY Homework Writing Machine at Home
- DIY Guitar Speed Pick & Stomp Pedal – Build Your Own 3D‑Printed Motorized Pick
- DIY Hand‑Gesture Controlled Arduino Robot Arm – Step‑by‑Step Build
- Selecting the Optimal Motor Cable for Variable Speed Drives (VSDs)
- 555 Timer PWM DC Motor Speed Controller – Build & PCB Design Guide
- Advanced DC Motor Speed Control: Voltage, Rheostatic, and Flux Techniques
- Factors Influencing Hydraulic Motor Speed: A Comprehensive Guide
- Control Hydraulic Motor Speed with PWM & Remote Control: A Practical Guide
- Key Factors Determining Hydraulic Motor Speed