


Arduino Web-Controlled Light Bulb: Step-by-Step Guide
Components and supplies
 |
| × | 1 | |||
 |
| × | 1 | |||
 |
| × | 1 | |||
| × | 1 |
About this project
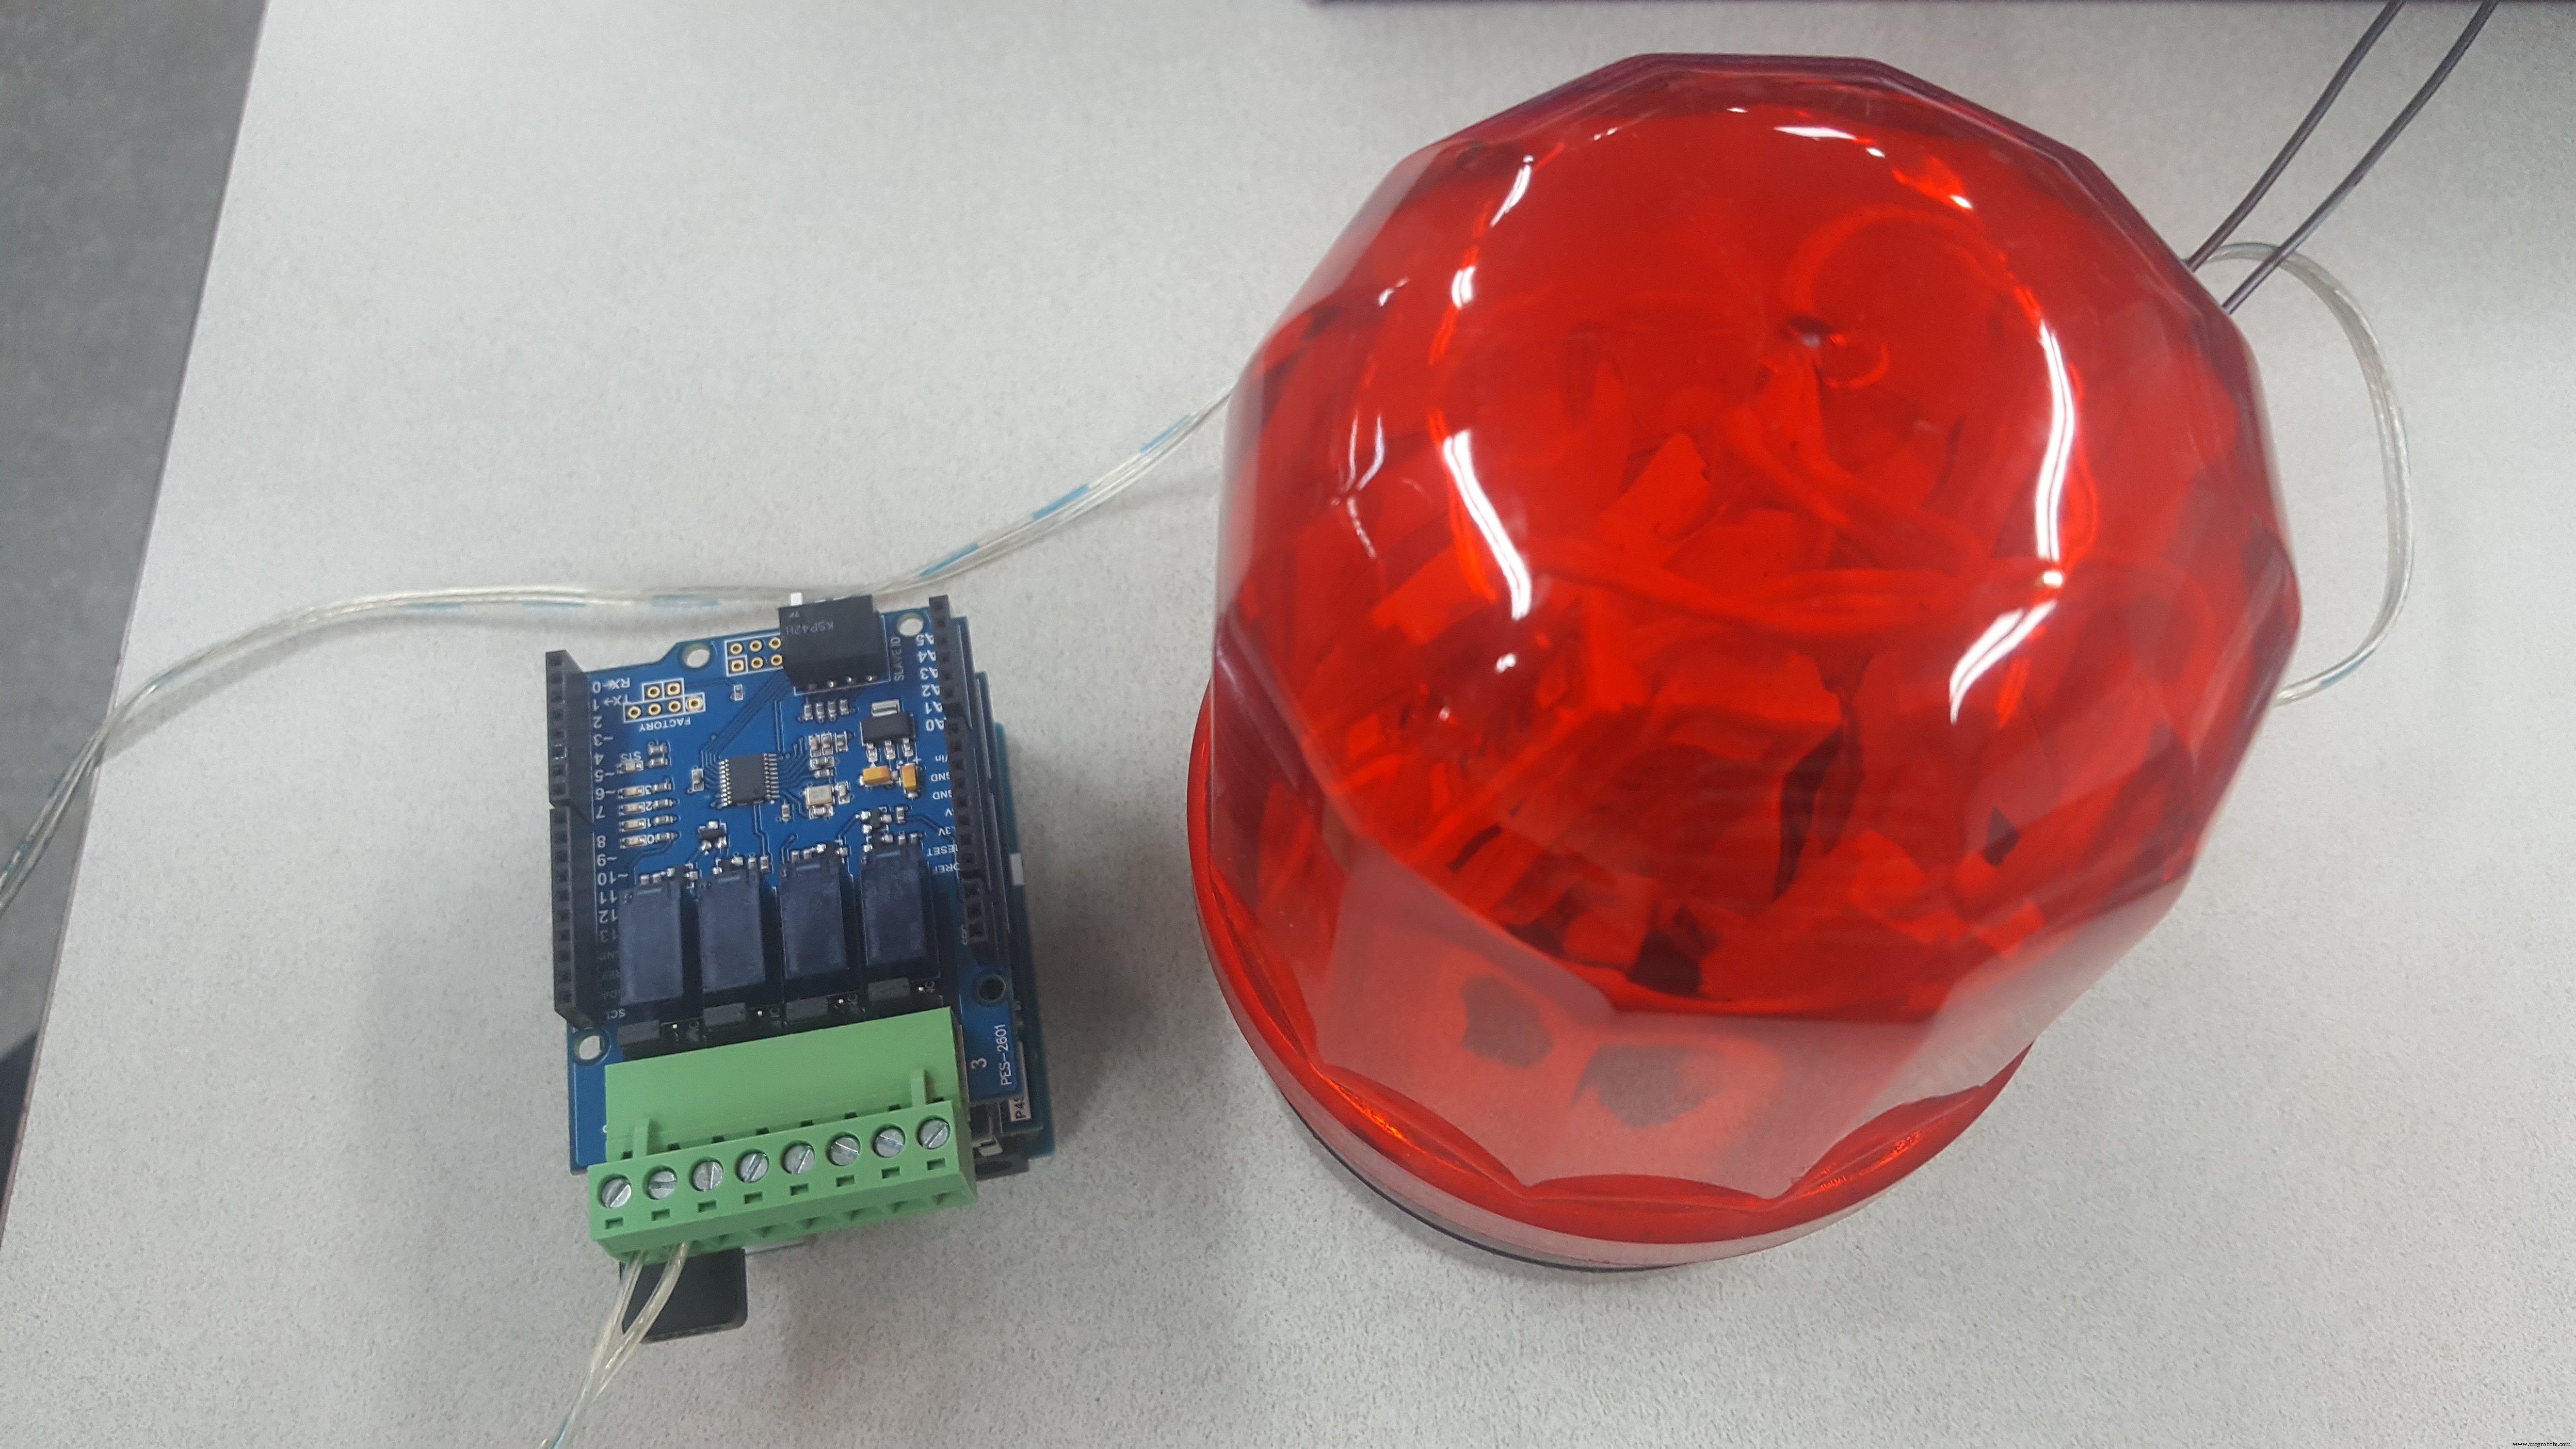
Controlling via web has become a norm these days. In this simple project, I will show you how to make an application that controls light bulb via web.
Surely it's not something new, but what you may see is that the web-based controlling stuff could only take a few steps to do it yourself. Anyone with some knowledge about web programming can make the web-based applications to control/monitor devices.
You can see the demo here:
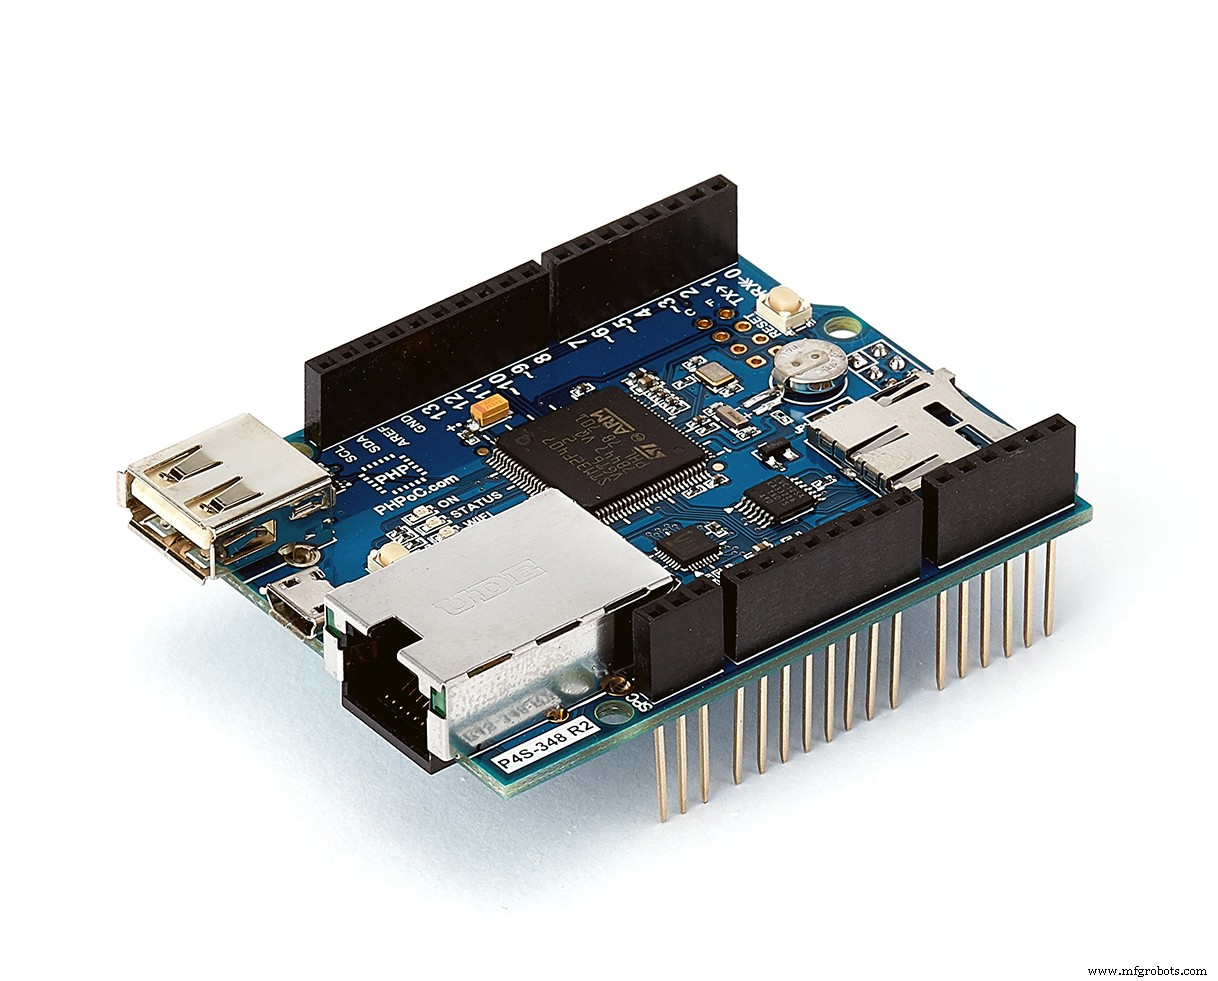
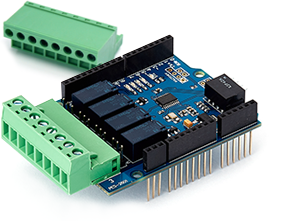
Hardware componentFirst is to set up hardware. Here, I use an Arduino Uno board, a PHPoC WiFi Shield and a PHPoC Arduino Relay Board.
Next, it comes to the "Web-based" part. Combining with PHPoC Shield, Arduino board became a Web server/WebSocket server. So, basically we need:
+ Client side code: provide a Web-based User Interface to control the light bulb. The UI should allow users to send the control command to Web server (Arduino board). The UI also displays the status of the light bulb sent in the response from the server. This Web page source code needs to be uploaded to the shield. Upon receiving HTTP request from Web browser (Web client), the shield (Web server) will send the interpreted Web files to Web browser.
+ Server side code: control the light bulb based on the data sent by Web browser. The code is run on Arduino board, and the flow is nothing than looping, check if there is any request from Web client in order to set the relay to turn on/off the light bulb, and then send the light bulb status to Web browser.
In this project, I made an SVG element to display the light bulb and a button to send the control command from Web. The Web browser and Web server communicate with each other via WebSocket. WebSocket connection suits real-time applications.
The more effort you spend on making the UI, the better it may look. But don't worry, there are tons of sharing resources available on the Internet, so you may find some cool free source code for UI instead of doing all the programming stuff by yourself.
Thanks for reading :D.
Learn more about relay in this tutorial
Code
- remote_led.php
- remoteLed.ino
remote_led.phpPHP
Client side code. To be uploaded to PHPoC Shield<html>
<head>
<title>
<? echo system("uname -i") ?>
</title>
<meta content="initial-scale=0.7, maximum-scale=1.0, minimum-scale=0.5, width=device-width, user-scalable=yes" name="viewport">
<style>
body {
text-align: center;
font-family: verdana, Helvetica, Arial, sans-serif, gulim;
background: #C2CCD0;
}
h2 {
font-size: 16px;
line-height: 25px;
}
body.active {
background: #E2ECF1;
}
#on {
opacity: 0;
}
.active #on {
opacity: 1;
}
.light-bulb {
width: 250px;
height: 400px;
margin-top: 100px
}
.container {
margin: auto;
width: 250px;
}
.switches {
width: 150px;
height: 65px;
background-color: #38434A;
font-size: 24px;
margin: auto;
border-radius: 10px;
color: white;
cursor: pointer;
letter-spacing: 0.2px;
line-height: 65px;
text-align: center;
user-select: none;
transition: none;
}
</style>
</head>
<body>
<div class="container">
<div class="light-bulb">
<svg version="1.1" xmlns="http://www.w3.org/2000/svg" xmlns:xlink="http://www.w3.org/1999/xlink" x="0px" y="0px" viewBox="0 0 275.3 413.3" enable-background="new 0 0 275.3 413.3" xml:space="preserve">
<g>
<path fill="#E2ECF1" d="M137.7,13.7C67.2,13.7,10,70.9,10,141.4c0,58.3,72.8,118.2,79.9,162.3h47.8h47.8
c7.1-44,79.9-103.9,79.9-162.3C265.3,70.9,208.2,13.7,137.7,13.7z" />
</g>
<g id="on">
<path fill="#FFDB55" d="M137.7,13.7C67.2,13.7,10,70.9,10,141.4c0,58.3,72.8,118.2,79.9,162.3h47.8h47.8
c7.1-44,79.9-103.9,79.9-162.3C265.3,70.9,208.2,13.7,137.7,13.7z" />
</g>
<g>
<path fill="#F1F2F2" stroke="#38434A" stroke-width="19.1022" stroke-miterlimit="10" d="M168.5,375.5h-61.7c-8.9,0-16-7.2-16-16
v-55.8h93.8v55.8C184.6,368.3,177.4,375.5,168.5,375.5z" />
<path fill="#F1F2F2" stroke="#38434A" stroke-width="19.1022" stroke-miterlimit="10" d="M151.2,401.5h-27.1c-3.9,0-7-3.2-7-7v-19
h41.1v19C158.2,398.4,155.1,401.5,151.2,401.5z" />
<line fill="none" stroke="#38434A" stroke-width="19.1022" stroke-miterlimit="10" x1="184.6" y1="339.6" x2="90.8" y2="339.6" />
<path fill="none" stroke="#38434A" stroke-width="19.1022" stroke-miterlimit="10" d="M137.7,13.7C67.2,13.7,10,70.9,10,141.4
c0,58.3,72.8,118.2,79.9,162.3h47.8h47.8c7.1-44,79.9-103.9,79.9-162.3C265.3,70.9,208.2,13.7,137.7,13.7z" />
</g>
<g>
<path fill="#FFDB55" stroke="#FFFFFF" stroke-width="21.0124" stroke-linecap="round" stroke-miterlimit="10" d="M207.1,89.5
c-12.3-16.1-28.4-29.1-46.9-37.8" />
<path fill="#FFDB55" stroke="#FFFFFF" stroke-width="21.0124" stroke-linecap="round" stroke-miterlimit="10" d="M225,121.4
c-0.8-2.2-1.8-4.4-2.7-6.5" />
</g>
</svg>
</div>
<div class="switches">
Switch
</div>
</div>
<br>
<h2 id="ws_state"></h2>
</body>
<script>
var is_on;
var ws;
var button = document.querySelector('.switches');
var ws_state = document.getElementById("ws_state");
function init() {
button.addEventListener("click", toogleLed);
connect();
is_on = 0;
}
function connect() {
if (ws == null) {
var ws_host_addr = "<? echo _SERVER("HTTP_HOST") ?>";
if ((navigator.platform.indexOf("Win") != -1) && (ws_host_addr.charAt(0) == "[")) {
// network resource identifier to UNC path name conversion
ws_host_addr = ws_host_addr.replace(/[\[\]]/g, '');
ws_host_addr = ws_host_addr.replace(/:/g, "-");
ws_host_addr += ".ipv6-literal.net";
}
ws = new WebSocket("ws://" + ws_host_addr + "/remote_led", "text.phpoc");
ws_state.innerHTML = "Connecting. Please wait!";
ws.onopen = ws_onopen;
ws.onclose = ws_onclose;
ws.onmessage = ws_onmessage;
} else
ws.close();
}
function ws_onopen() {
ws_state.style.display = "none";
display_lightbulb();
}
function ws_onclose() {
button.style.backgroundColor = "#C2C2C2";
ws_state.style.display = "";
ws_state.innerHTML = "<span style='color: gray'>Can not connect to Arduino Board. <br> Please check again and reload this page!</span>";
ws.onopen = null;
ws.onclose = null;
ws.onmessage = null;
ws = null;
is_on = 0;
display_lightbulb();
}
function ws_onmessage(e_msg) {
e_msg = e_msg || window.event; // MessageEvent
is_on = parseInt(e_msg.data);
display_lightbulb();
}
function toogleLed() {
if (is_on)
ws.send("0");
else
ws.send("1");
}
function display_lightbulb() {
document.body.className = (is_on) ? "active" : "";
}
window.onload = init;
</script>
</html>
remoteLed.inoArduino
Server side code that handles I/O control based on WebSocket data sent from web browser#include <Phpoc.h>
#include <PhpocExpansion.h>
#define ON '1'
#define OFF '0'
byte expansionId = 1;
ExpansionRelayOutput relay(expansionId, 0);
PhpocServer server(80);
void setup() {
Serial.begin(9600);
while(!Serial)
;
// initialize PHPoC [WiFi] Shield:
Phpoc.begin(PF_LOG_SPI | PF_LOG_NET);
//Phpoc.begin();
// start WebSocket server
server.beginWebSocket("remote_led");
// print IP address of PHPoC [WiFi] Shield to serial monitor:
Serial.print("WebSocket server address : ");
Serial.println(Phpoc.localIP());
Expansion.begin();
// get name and print it to serial
Serial.println(relay.getName());
}
void loop() {
// wait for a new client:
PhpocClient client = server.available();
if (client) {
if (client.available() > 0) {
// read a byte incoming from the client:
char thisChar = client.read();
switch(thisChar)
{
case OFF:
Serial.println("Turn LED OFF");
relay.off();
server.write(OFF);
break;
case ON:
Serial.println("Turn LED ON");
relay.on();
server.write(ON);
break;
}
}
}
}
Manufacturing process
- From Fire to Filament: The Evolution and Production of the Modern Light Bulb
- Arduino Power Control Center: N-FET, P-FET, Relay & RTC Kit
- DIY Arduino Humidifier Controller with Relay – Safe High‑Voltage Setup
- Arduino UNO & WiFi Shield: Real-Time Temperature Display on the Web via Serial
- Intel Curie-Based Motion-Activated Lighting System
- Seamless Smart Phone Control of Home Lighting Systems
- Arduino Web-Driven XY Plotter with Stepper Motor Controller
- Building an Arduino LIDAR System with VL6180X and Servo Motor
- Arduino UNO Web-Enabled Servo Control with PHPoC WiFi Shield
- Remote Control of a 6‑DOF Arduino Robot Arm via Web Interface