Arduino LCD Thermostat: Simple & Reliable Temperature Control
Components and supplies
DHT11 Temperature & Humidity Sensor (4 pins)
×
1
Jumper wires (generic)
×
1
Arduino UNO
×
1
16x2 LCD
×
1
Necessary tools and machines
3D Printer (generic)
Optional
Apps and online services
Arduino IDE
About this project
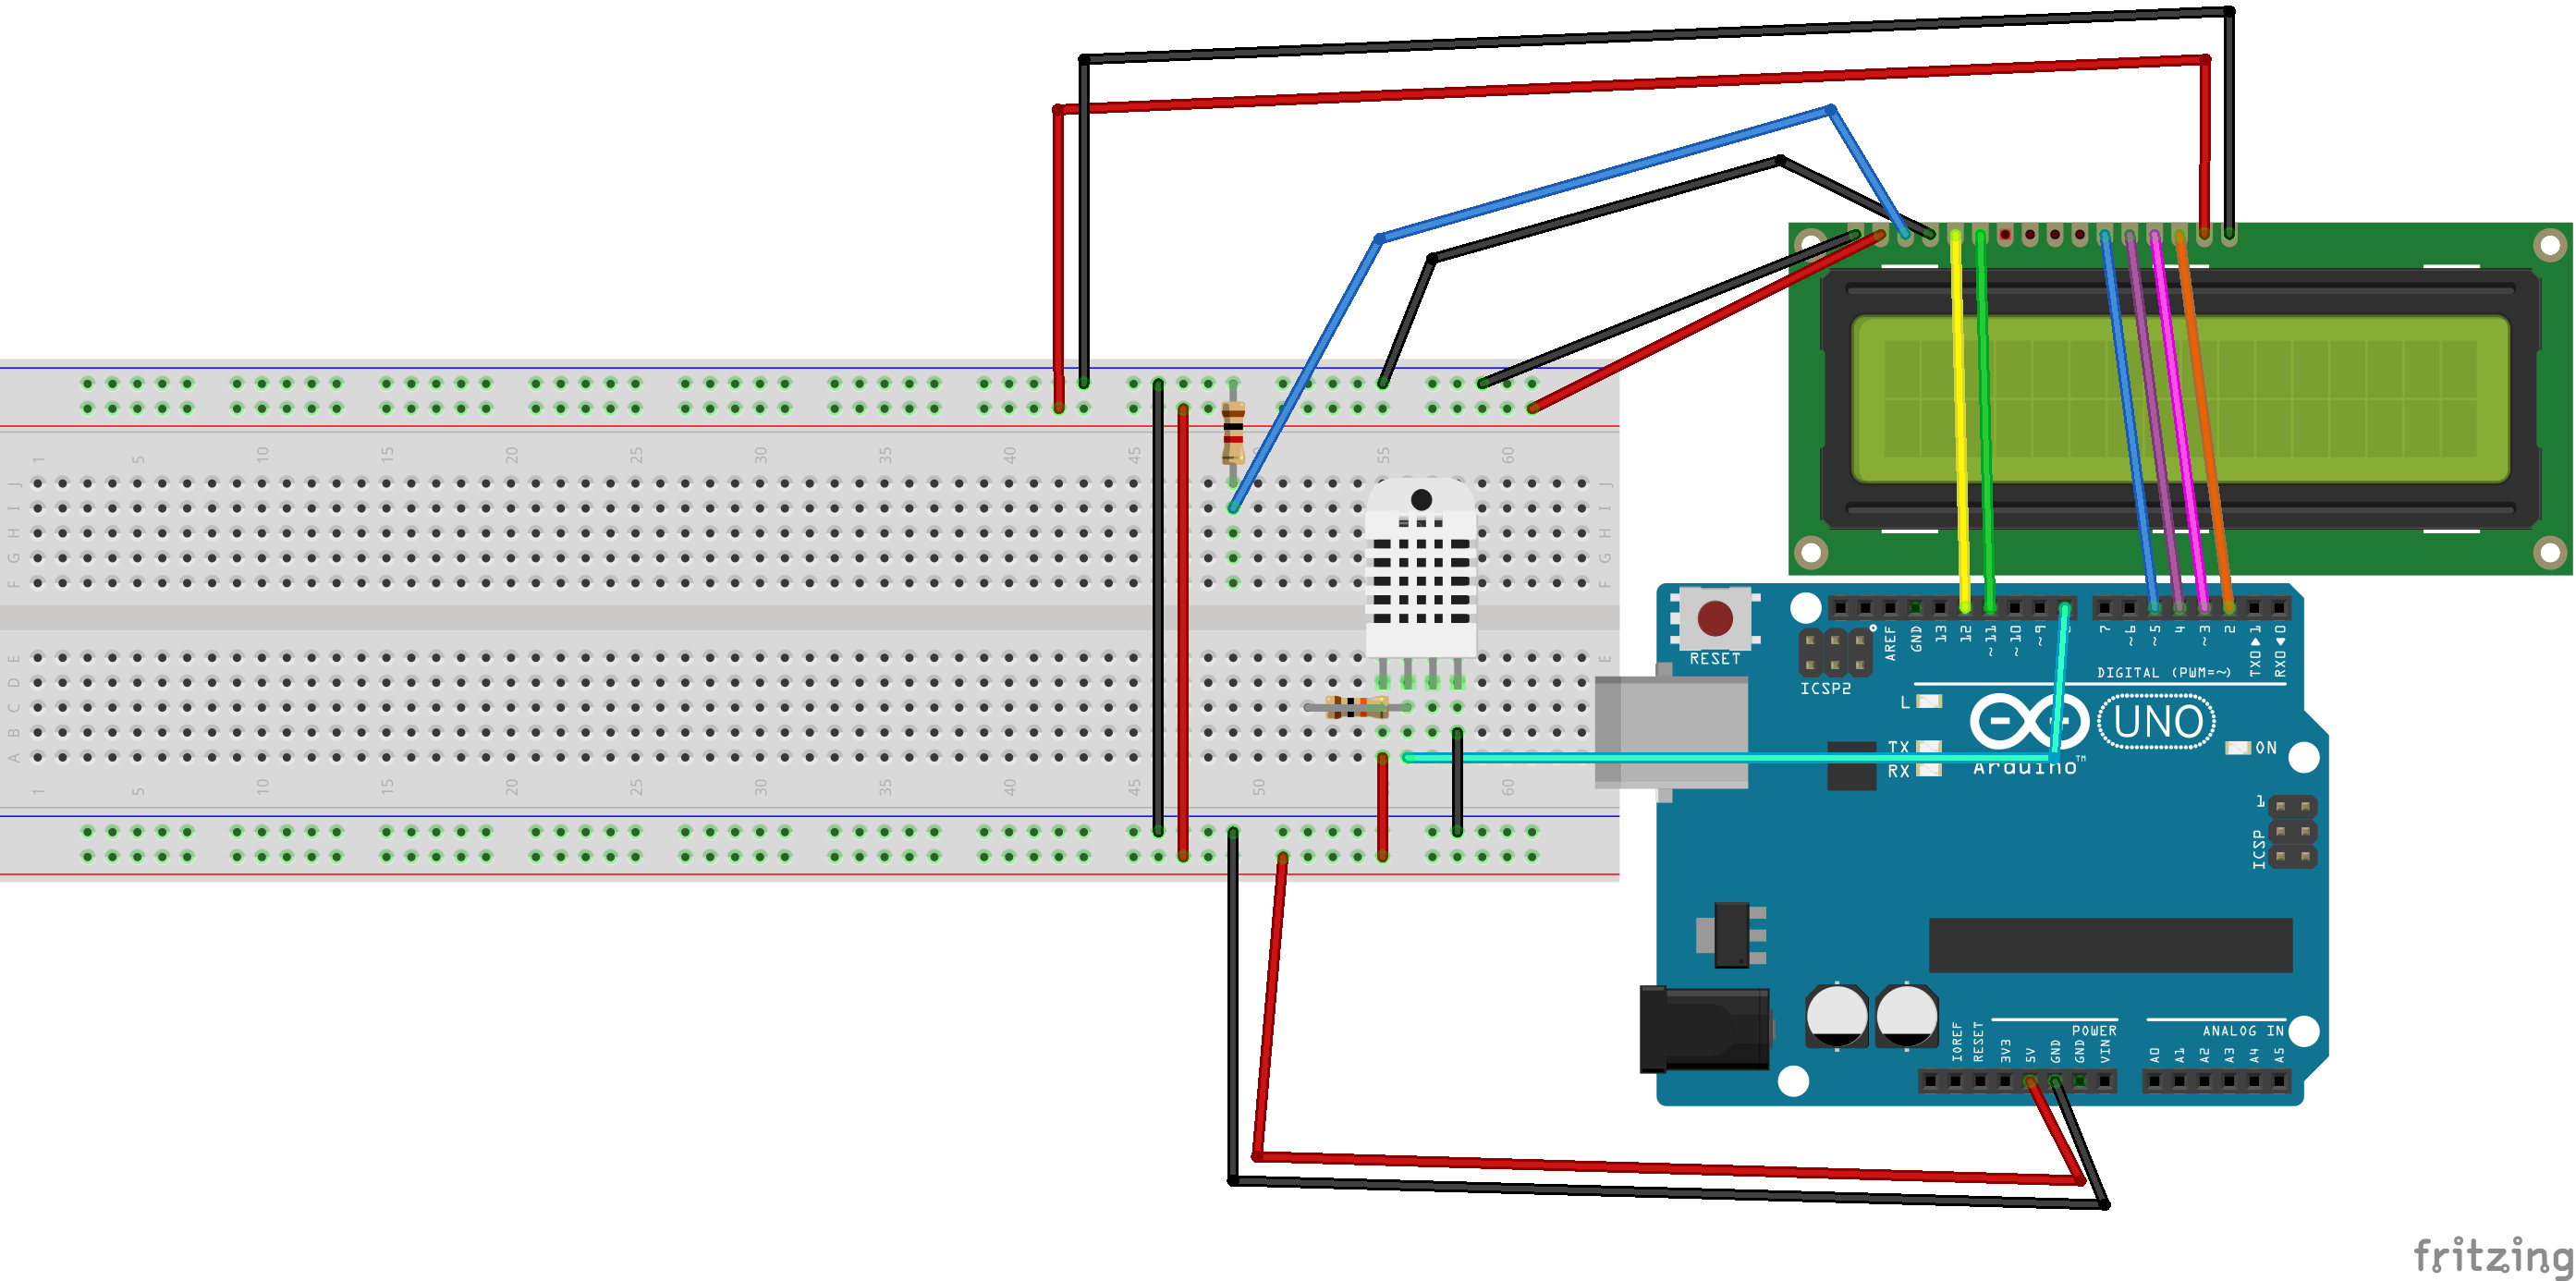
To make this simple project first attach the DHT sensor to the Arduino by connecting the pins as follows:
DHT VCC -> 5v
DHT Data -> Arduino 8
DHT GND -> Arduino GND
10k resistor -> across DHT VCC and DHT Data.
Then attach the LCD according to the schematic. Copy and paste the code into the Arduino IDE and upload it. If you are confused with any of this watch the video below or leave a comment. Once done it should look like this:
Thanks!
The video:
Code
Arduino Code
Arduino CodeC/C++
Just copy and paste.
#include "DHT.h"
#include "LiquidCrystal.h"

#define DHTPIN 9
#define DHTTYPE DHT11

DHT dht(DHTPIN, DHTTYPE);

LiquidCrystal lcd(12, 11, 5, 4, 3, 2);

void setup() {
  // put your setup code here, to run once:
dht.begin();
lcd.begin(16,2);
lcd.print("The current temp");
lcd.setCursor(0,1);
lcd.print("is: ");
float f = dht.readTemperature(true);
lcd.setCursor(5,1);
lcd.print(f);
lcd.print(" F");
}

void loop() {
delay(1000*60*5);
// put your main code here, to run repeatedly:
float f = dht.readTemperature(true);
lcd.setCursor(5,1);
lcd.print(f);
lcd.print(" F");
}