


Implementing HTTP Connectivity for IIoT Edge Devices: A Raspberry Pi DHT-12 Tutorial
 Editor’s Note: The Industrial Internet of Things (IIoT) delivers deep insight into industrial operations, boosting the efficiency of connected machines and systems. Large‑scale IIoT solutions rely on layered architectures to collect data from diverse sensors, transport it securely to the cloud, and execute the analytics that turn raw data into actionable intelligence. In Industrial Internet Application Development, the authors dissect the IIoT architecture and outline strategies to satisfy these demanding requirements.
Adapted from Industrial Internet Application Development, by Alena Traukina, Jayant Thomas, Prashant Tyagi, Kishore Reddipalli.
Chapter 3. IIoT Edge Development (Continued)
By Alena Traukina, Jayant Thomas, Prashant Tyagi, Kishore Reddipalli
Application‑level protocols – HTTP
Below is a hands‑on example that demonstrates how to transmit data from a DHT‑12 temperature and humidity sensor to a remote server using a Raspberry Pi hub and the HTTP protocol.
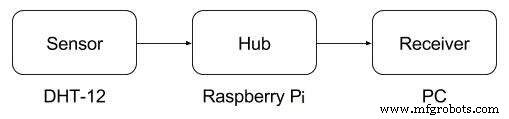
Data flow from a DHT‑12 sensor to a receiver
HTTP remains the most widely adopted protocol on the web, underpinning virtually every website and mobile application you use. The table below summarizes its key characteristics to help you determine if it fits your IIoT scenario.
| Key | Value |
|---|---|
| Open source | Yes |
| OSI layer | Application |
| Data types | Text, HTML, script, style, font, JSON, XML, stream, binary |
| Limitations | Not suitable for large binary payloads |
| Possible operations | Send/receive data |
| Latency | Low |
| Usage | On‑demand requests |
| Security | Yes (TLS/SSL) |
| Compression | Yes (e.g., gzip) |
To build the example application you’ll need the following software and hardware components.
Required software:
- Node.js 6+
- request package
- rpi-dht-sensor package
- Docker
Required hardware:
- Raspberry Pi 3 Model B
- 2 A/5 V power adapter
- 8 GB+ microSD card + SD adapter
- DHT‑12 temperature & humidity sensor
- Breadboard and dupont cables
- Ethernet cable for wired connectivity
Assembling the Device
Connect the DHT‑12 sensor to the Raspberry Pi using a breadboard, following the wiring diagram below.
Preparing an SD Card
- Download the latest Raspbian Lite image from Raspberry Pi OS.
- Insert the SD card into your computer and flash the image with Etcher (https://www.balena.io/etcher/).
- Enable SSH by creating an empty file named
sshin the/bootpartition:cd /Volumes/boot
touch ssh - To enable Wi‑Fi, create
wpa_supplicant.confin/bootwith the following content:network={ ssid="YOUR_SSID" psk="YOUR_WIFI_PASSWORD" } - Insert the SD card back into the Raspberry Pi and power it on.
After the Pi boots, you can log in via SSH (default credentials: pi/raspberry) and start configuring the sensor application.
Setting Up the Node.js Project
- Create a project directory:
mkdir -p ~/sensor - In
~/sensor/package.json, add the following configuration:{ "name": "sensor", "version": "1.0.0", "description": "", "main": "index.js", "scripts": { "start": "node index.js", "test": "echo \"Error: no test specified\" && exit 1" }, "author": "", "license": "ISC", "dependencies": { "request": "^2.81.0", "rpi-dht-sensor": "^0.1.1" } } - In
~/sensor/index.js, paste the following code, replacingREMOTE-SERVER-ADDRESS.comwith your server’s URL:var rpiDhtSensor = require('rpi-dht-sensor'); var request = require('request'); var receiver = 'https://REMOTE-SERVER-ADDRESS.com:8080'; var dht = new rpiDhtSensor.DHT11(2); function read() { var readout = dht.read(); var data = { temperature: readout.temperature.toFixed(2), humidity: readout.humidity.toFixed(2) }; console.log(data); data.device = 'raspberry'; request.post({url: receiver, form: data}, function(err) { if(err) console.log('Failed to send to ' + receiver); }); setTimeout(read, 1000); } read(); - Optional: create a Dockerfile for containerized deployment:
FROM hypriot/rpi-node:boron-onbuild
Run npm install in the project directory, then start the application with npm start. The sensor will begin sending temperature and humidity readings to the specified HTTP endpoint every second.
For a complete end‑to‑end solution—including cloud ingestion, analytics, and dashboards—refer to the broader IIoT architecture guidelines in the original text.
Internet of Things Technology
- Industrial‑Grade Connectivity Architecture for the IoT
- IoT Edge Computing: Bridging Devices and Cloud for Real‑Time Insights
- Connectivity by Design: Unlocking Unified Data for Digital Twins and Real‑Time Decision‑Making
- Prototyping IIoT Edge Devices: A Practical Guide
- Enhancing IIoT Edge Development with WebSockets: Secure, Real‑Time Connectivity
- IIoT Edge Development with Modbus: Building a Secure Sensor Data Flow on Raspberry Pi
- Leveraging OPC UA for Robust IIoT Edge Development
- IXrouter: Seamless Edge‑to‑Cloud Connectivity for Industrial IoT
- 3 Keys to Successful Industrial IoT Deployment
- Future Outlook: Advancing Industrial IoT for Production Excellence