



Set Cura as the Default App for STL Files – Step‑by‑Step Guide
For 3D designers who rely on STL files, Ultimaker Cura provides a clean, user‑friendly interface and powerful slicing tools. If you want every STL file to open automatically in Cura instead of other editors such as Meshmixer or ChiTuBox, this guide shows you how.
- Right‑click the STL file.
- Select “Open with” → “Choose another app”.
- Choose “Ultimaker Cura” and check “Always use this app to open .stl files.”
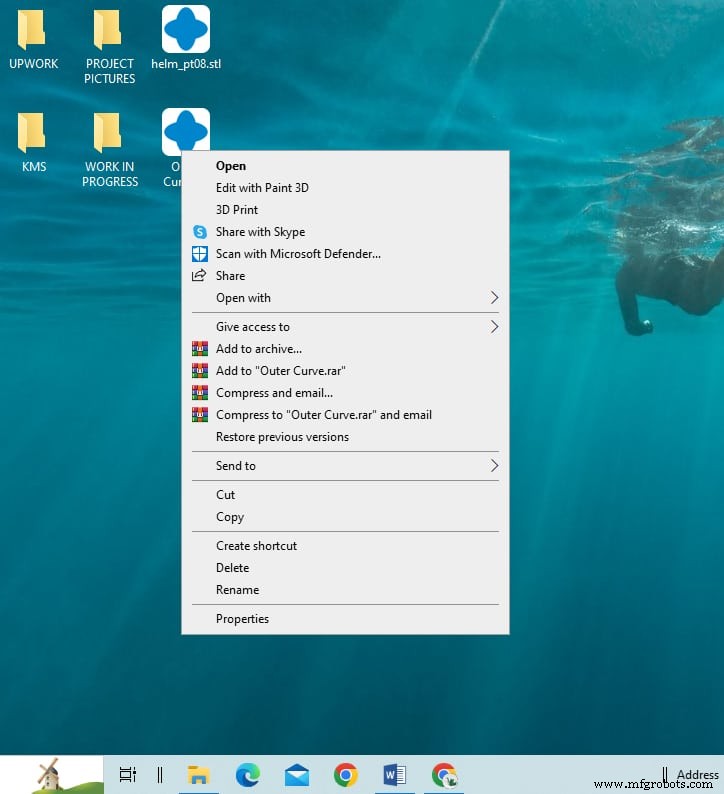
Step 1: Right‑click the STL File
Locate the file you downloaded from Thingiverse or created in TinkerCAD, then right‑click it.
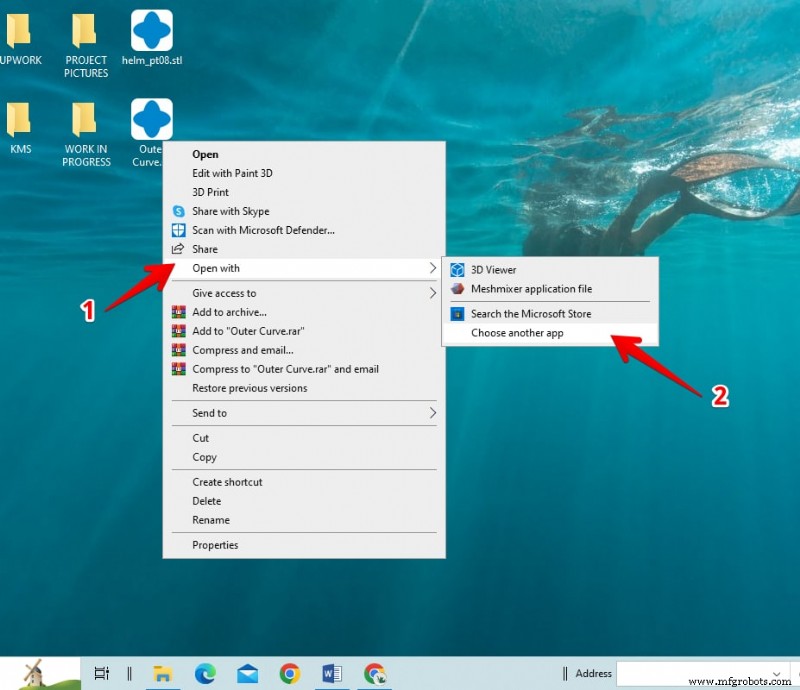
Step 2: Select “Open with” → “Choose another app”
From the context menu, choose “Open with” and, if Cura is not listed, click “Choose another app”.
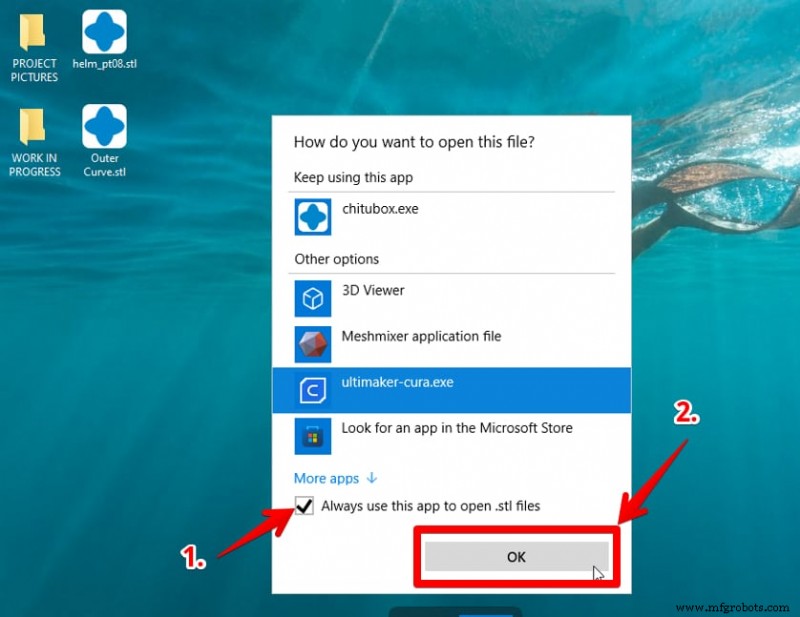
Step 3: Choose “Ultimaker Cura” and enable default
Select “Ultimaker Cura” from the list.

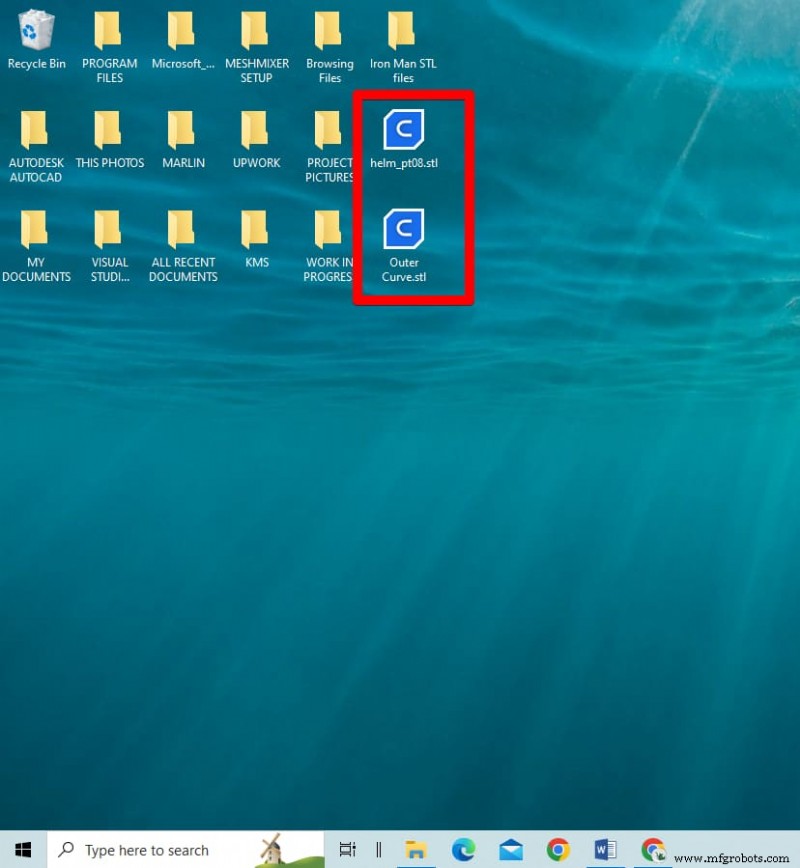
Check the box “Always use this app to open .stl files” and click “OK”. Your STL files will now display the Cura icon and open in Cura by default.
Set Cura as the Default App via Windows Settings
Alternatively, you can change the default program for .stl files directly in Windows settings.
- Search “Default apps” in the Windows start menu and open it.
- Click “Choose default apps by file type”.
- Locate the “.stl” entry under the “Name” column.
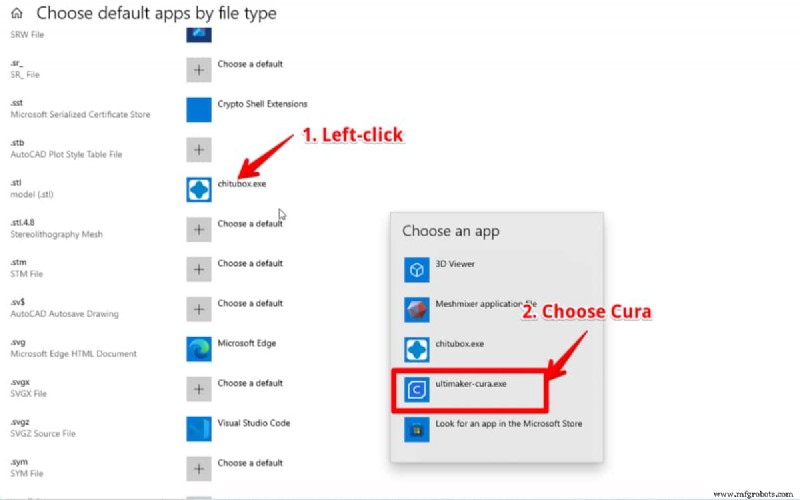
- Click the current default app icon and select “Ultimaker Cura”.
Step 1: Open Default Apps Settings
Type “Default apps” into the Windows search bar, then click the matching result.
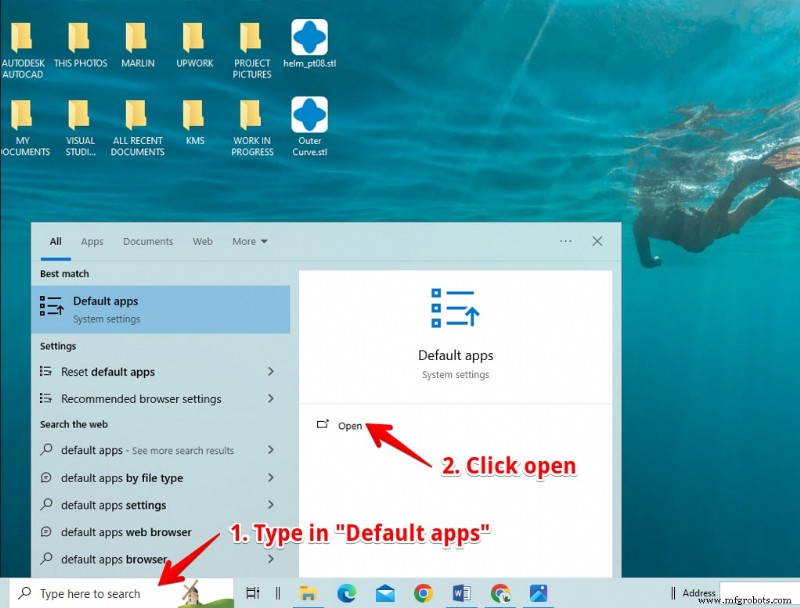
Step 2: Choose Default Apps by File Type
In the Default Apps page, select “Choose default apps by file type”.

Step 3: Find the .stl File Type
Scroll through the list until you find the “.stl” entry; the current default (e.g., ChiTuBox) will appear next to it.
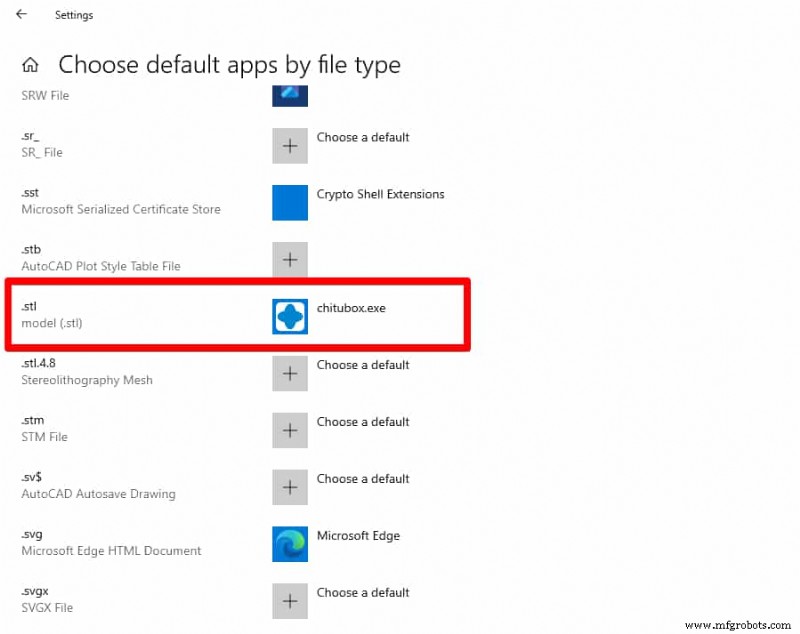
Step 4: Change the Default to Cura
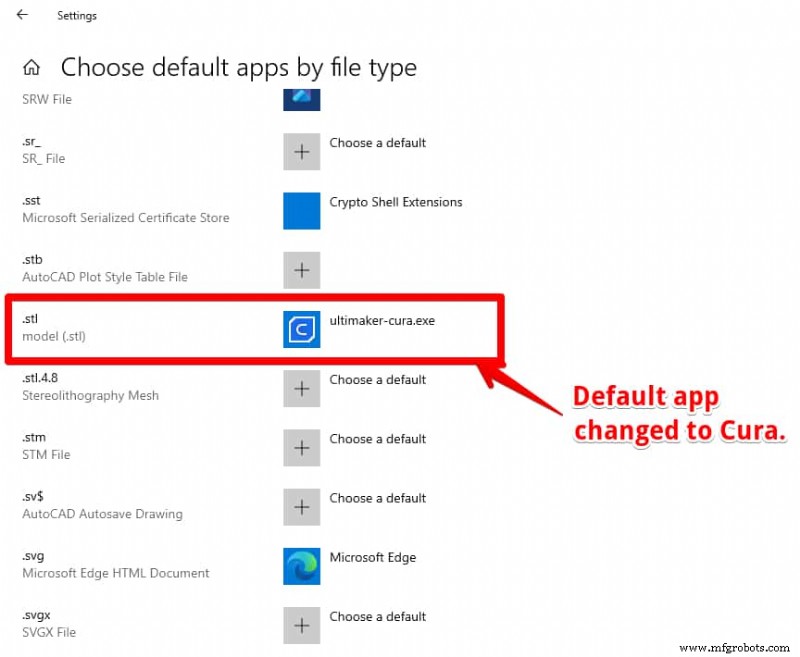
Click the icon next to “.stl”, choose “Ultimaker Cura” from the picker, and the change will be applied.

Author
Michael Dwamena is the founder of 3D Printerly, a platform that demystifies 3D printing for both hobbyists and professionals. With ownership of over 20 filament and resin printers and a decade of hands‑on experience, Michael has authored more than 900 articles that guide millions through the evolving world of additive manufacturing.
Michael Dwamena
3D printing
- 9 Fortune 500 Companies Leading the Industrial 3D Printing Revolution
- Expert Guide: 10 Essential Steps to Safely Remove Supports from 3D Prints
- Design for Manufacturing: A Strategic Blueprint for Cost Efficiency and Quality
- Mastering Material Jetting 3D Printing: Fundamentals & Applications
- Expert Guide to Choosing 3D Printing Materials for SLS, MJF, FDM, SLA & DLS™
- 5 Ways MES Software Enhances Efficiency in Additive Manufacturing Production
- CREO vs. SolidWorks: A Clear, Expert Comparison of Leading CAD Tools
- Labman Automation: Pioneering Bespoke Robotic Solutions Across Industries
- Application Spotlight: 3D Printing Revolutionizes Bearing Design and Production
- Industrial 3D Printing in 2018: 6 Key Trends Shaping the Future