Build a Basic Calculator with Arduino UNO – Easy Project
Components and supplies
About this project
One day, my math teacher asked me as I was talking about arduino : "Can you do math with it?".I replied "I don't know", and that got me thinking about how to make that happen. Then, I kinda figured it out how to do it and i wanna share now.
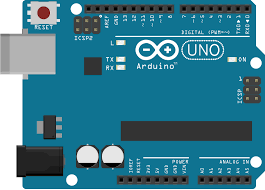
So here it is! A very simple way of doing math with arduino. For my project, I used arduino UNO, but I belive it works with any of them.
The step-by-step is very simple:
- Connect the board with the computer
- Write a calculation that is valid (See the code for more instructions)
I plan to make a better calculator, but for now it's just that : a way of doing basic math. If you want the "better" calculator, please let me know.
Stay tuned to see a better "calculator"! Hope to see you soon!
Code
CODE FOR CALCULATORArduino
You enter the numbers and the signal togheter, like "2+3", or 8*2, and it gives the result/* Serial arduino calculator
in this project, you can make basic
arithmetic with the help of arduino,
almost like a very rustic calculator.
It accepts two numbers and a signal, and
makes the operation, witch can be of +, -, * or /.
E.G. : send "2+3" (Without quotes and with no
space separing the info), and arduino answers 5.
Digit "7-3" and arduino te responde com 4.
Criado por João Paulo Rodrigues Poltronieri
This code is on public domain
*/
// first of all, create variables to store
// the information sent to arduino
lng number1; // first number of the calculation,
// sent through the Serial monitor
// If you take a look, it's a long varible, so
// we're able to use big numbers
long number2; // second number sent through the SM
char calSignal; // create a char variable to store
// the calcuation signal.
long result; // result of the calculation
void setup() {
Serial.begin(9600); // begins serial communications
Serial.println("Send me a calculation");
Serial.println("E.G. : 2+3");
Serial.println();
// prints this to test serial communication, and
// prints a line space
}
void loop() {
while(Serial.available() > 0) {
// while there are dada being sent to arduino,
number1 = Serial.parseInt();
// number1 will be the first number
// Note the use of "Serial.parseInt, so,
// in case you use 23, it stores in
// number1 the number 23
// if we used Serial.read(), it would
// only store 2
calSignal = Serial.read(); // calSignal will be the first
// info after the first number
number2 = Serial.parseInt(); // stores the second
// number in number2
resolucao(); // Custom function to solve the calculations
Serial.println("Resultado = ");
Serial.println(result);
// Prints the result of the calculation
Serial.println(); // jumps a line
Serial.println("Outra conta, por favor"); // prints
Serial.println(); // jumps a line
}
}
void resolucao() { // Custom function that
// solves the calculations
switch (calSignal) {
// Here we use "switch...case" to save some space on
// the sketch. It's, basicaly, a function that verifies
// various "if" statements.
// Here, it verifies what's the value held by
// calSigna. Basicaly, it verifies the "signal"
// of the calculation
case '+' : // if calSignal is '+'
result = number1 + number2; // sums the numbers
// and makes result hold the value of the calculation
break; // break to exit the "case"
case '+' : // if calSignal is '+'
result = number1 - number2; // subtracts the numbers
// and makes result hold the value of the calculation
break; // break to exit the "case"
case '+' : // if calSignal is '+'
result = number1 * number2; // multiplies the numbers
// and makes result hold the value of the calculation
break; // break to exit the "case"
case '/' : // se calSignal for '/'
result = number1 / number2; // divides the numbers
// and makes result hold the value of the calculation
// PS: in case the division isn't exact, the result
// will be the nearest integrer
break; // break to exit the "case"
default : // If it's not any of these...
Serial.println("CONTA INVÁVIDA");
// Creates an "error"
Serial.println();
resultado = 0;
}
}
Schematics
Basicaly, just the board is needed, actually