


Build a Simple Nixie Tube Clock Using Arduino – Step‑by‑Step Guide
Components and supplies
 |
| × | 1 | |||
 |
| × | 1 |
About this project
After long day working, finally I got successful making Nixie clock with Arduino and opto-isolation chip, no need Nixie driver which is difficult to purchase.Watch the video for full instruction:
Part list to make project:
1. Arduino UNO https://amzn.to/2P58O7s
2. Nixie tube 6 pcs https://amzn.to/3aHyJvX
3. Opto coupler chip TLP627
4. DC step-up module from 12VDC to 390VDC https://amzn.to/30kpdK9
5. Breadboard https://amzn.to/2uCrnsW
6. Real-time clock module DS3231 https://amzn.to/2SIyEzI
Buy electronic component on utsource.net
Step 1. Circuit design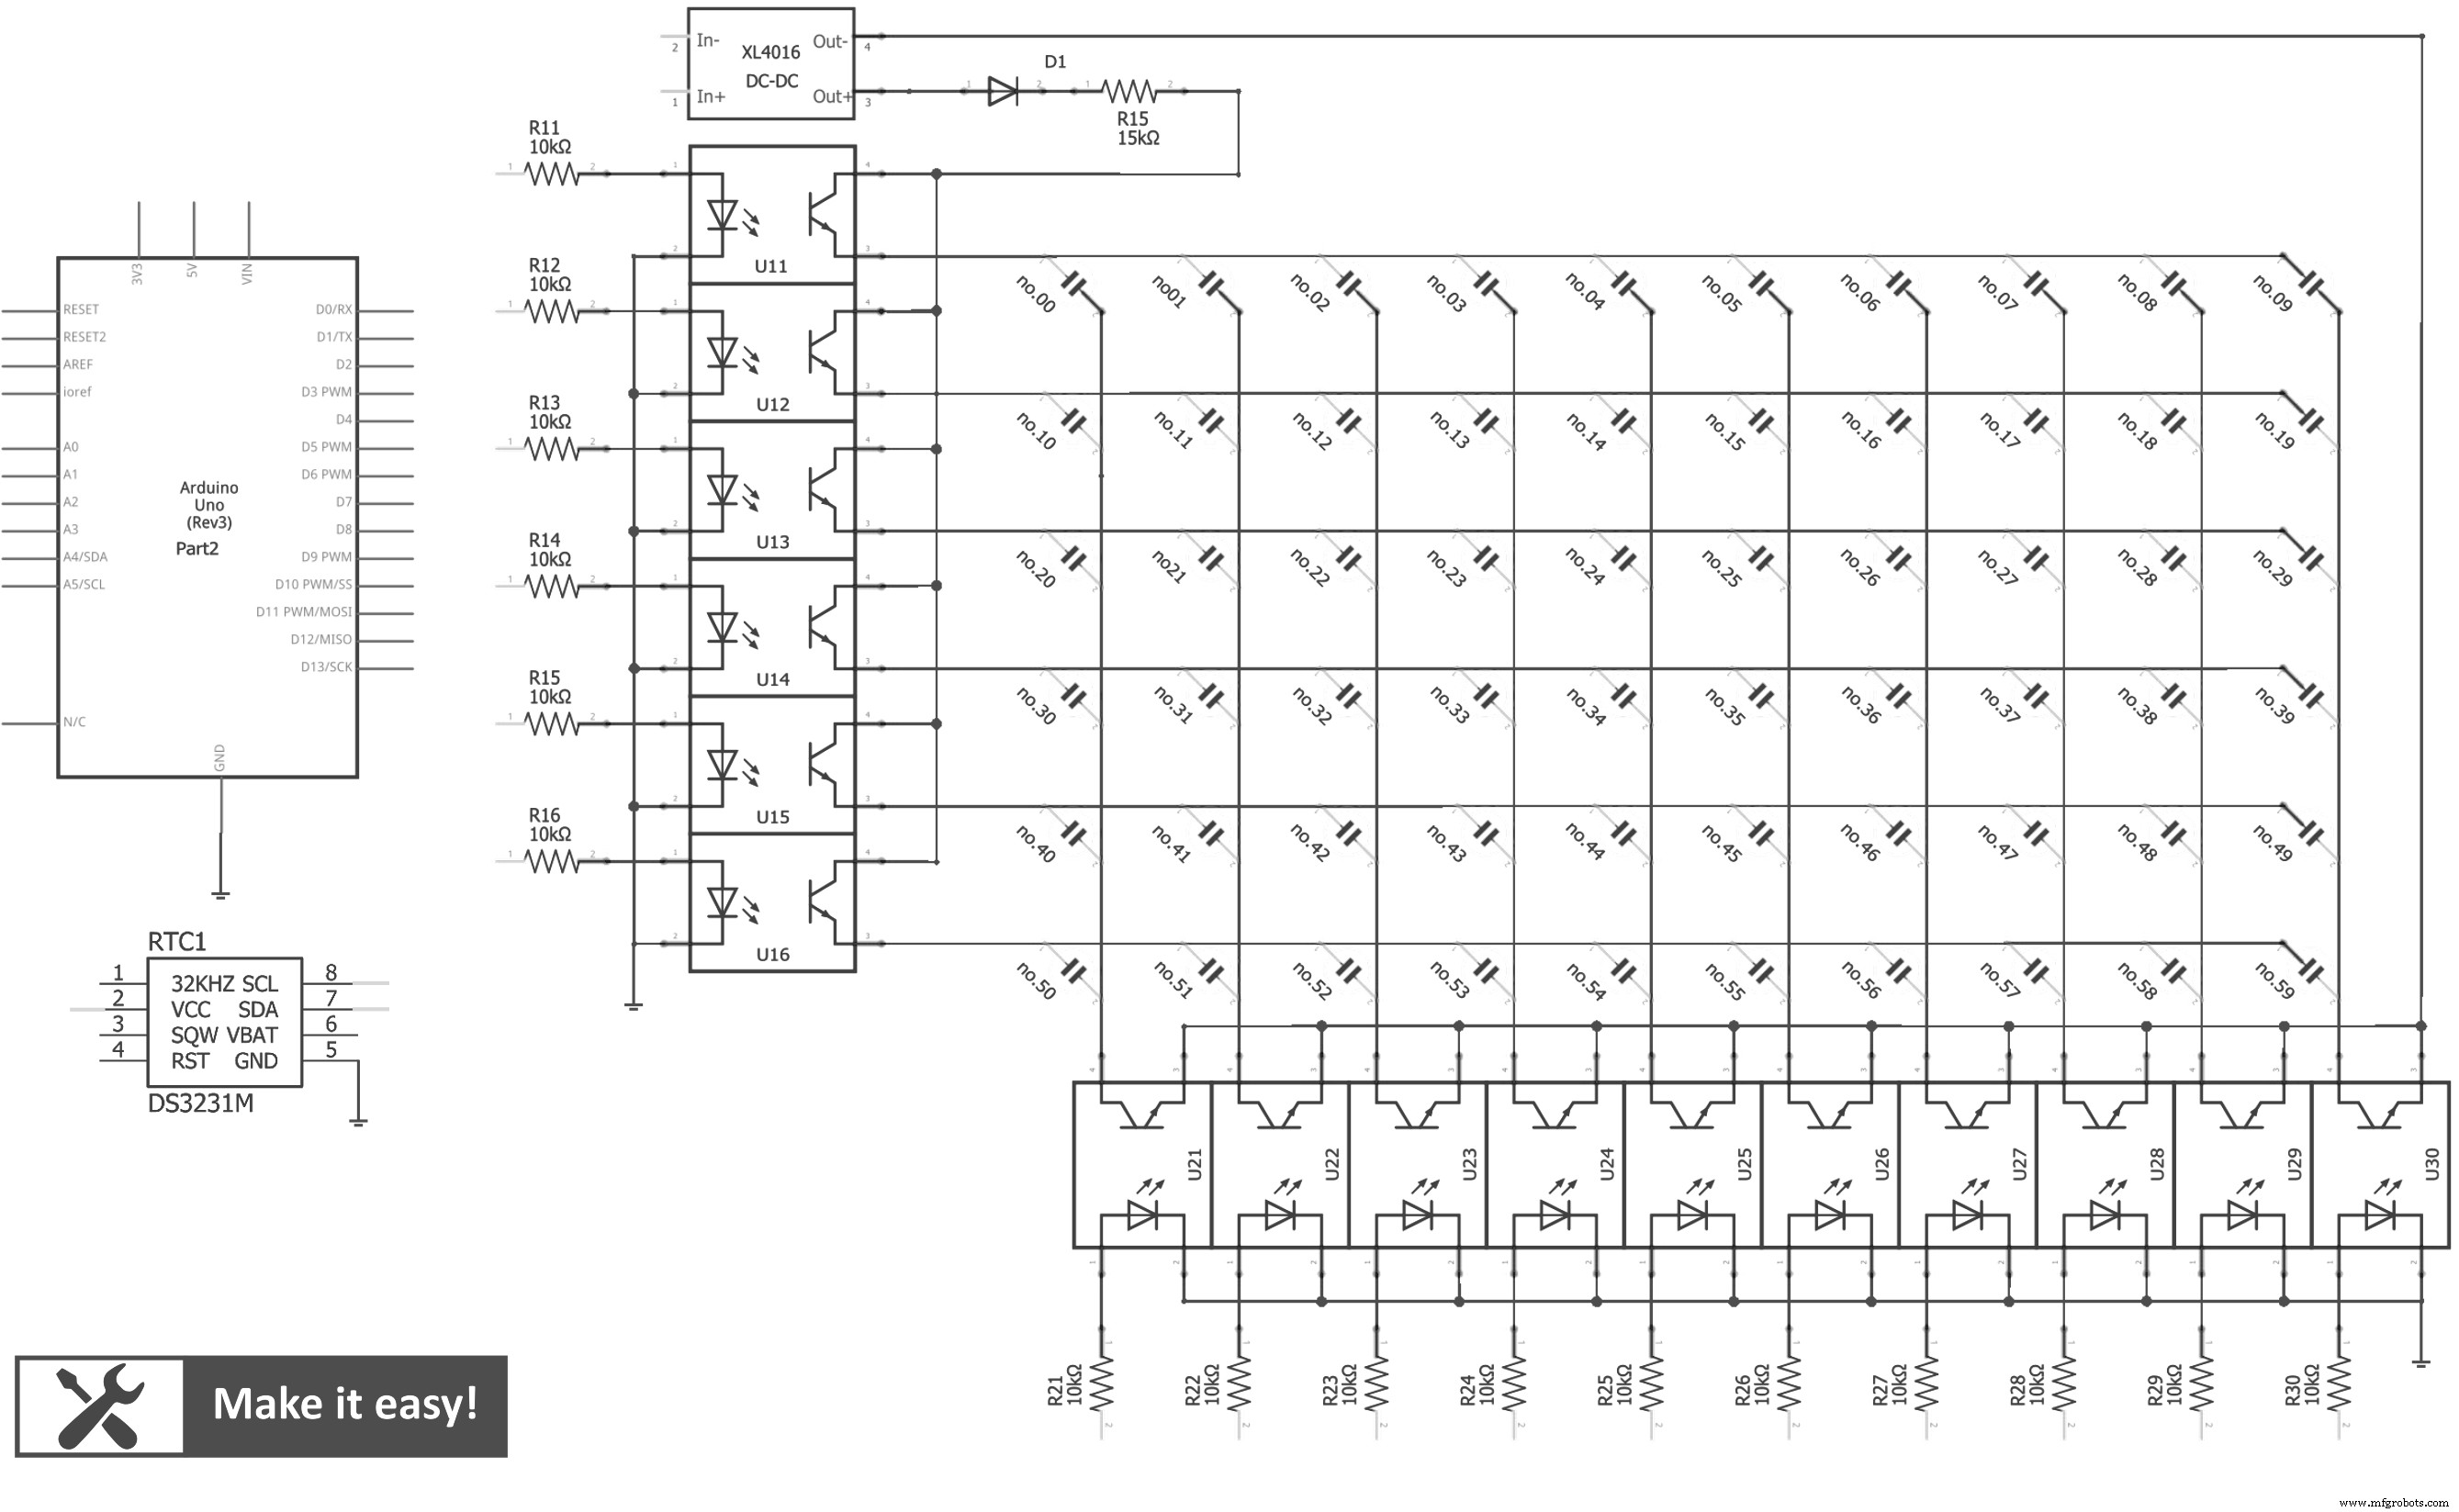
The circuit uses opto-isolation chip to control Nixie tube (using 150VDC) by Arduino (using 5VDC). By matrix connection, so we need only 16 outputs from Arduino to control 60 lights of 6 nixie tube.The real-time clock module DS3231 is used to keep the time (even turn off power), it is communicated with Arduino by I2C network. Arduino will read real-time, then turn on/off nixie lights by sequence in high frequency to make human eyes view 6 numbers as permanent
Step 2. Arduino code//Youtube channel: engineer2you
#include <Wire.h>
#include "DS3231.h"
RTClib RTC;
DS3231 Clock;
int hour;
int minute;
int second;
const int nixie_0 = 2;
const int nixie_1 = 3;
const int nixie_2 = 4;
const int nixie_3 = 5;
const int nixie_4 = 6;
const int nixie_5 = 7;
const int nixie_6 = 8;
const int nixie_7 = 9;
const int nixie_8 = 10;
const int nixie_9 = 11;
const int row_1 = 0;
const int row_2 = 1;
const int row_3 = 14;
const int row_4 = 15;
const int row_5 = 16;
const int row_6 = 17;
const int time_on = 2;
void setup() {
pinMode(nixie_0, OUTPUT);
pinMode(nixie_1, OUTPUT);
pinMode(nixie_2, OUTPUT);
pinMode(nixie_3, OUTPUT);
pinMode(nixie_4, OUTPUT);
pinMode(nixie_5, OUTPUT);
pinMode(nixie_6, OUTPUT);
pinMode(nixie_7, OUTPUT);
pinMode(nixie_8, OUTPUT);
pinMode(nixie_9, OUTPUT);
pinMode(row_1, OUTPUT);
pinMode(row_2, OUTPUT);
pinMode(row_3, OUTPUT);
pinMode(row_4, OUTPUT);
pinMode(row_5, OUTPUT);
pinMode(row_6, OUTPUT);
//Serial.begin(9600); //should NOT use seiral println, it will effect to output pin D0 & D1
Wire.begin();
}
void loop() {
//-------------------get clock value---------------------------
DateTime now = RTC.now();
hour = now.hour();
minute = now.minute();
second = now.second();
//-------------------show clock number ----------------------
int j; //second number from right
int k; //first number from right
j = second/10;
k = second%10;
//-----------show first number of second
off_all();
on_number(0,k+2);
delay(time_on);
//-----------show second number of second
off_all();
on_number(1,j+2);
delay(time_on);
j = minute/10;
k = minute%10;
//-----------show first number of minute
off_all();
on_number(14,k+2);
delay(time_on);
//-----------show second number of minute
off_all();
on_number(15,j+2);
delay(time_on);
j = hour/10;
k = hour%10;
//-----------show first number of hour
off_all();
on_number(16,k+2);
delay(time_on);
//-----------show second number of hour
off_all();
on_number(17,j+2);
delay(time_on);
}
void on_number(int row, int nixie){
digitalWrite(row, HIGH);
digitalWrite(nixie, HIGH);
}
void off_all(){
digitalWrite(row_1, LOW);
digitalWrite(row_2, LOW);
digitalWrite(row_3, LOW);
digitalWrite(row_4, LOW);
digitalWrite(row_5, LOW);
digitalWrite(row_6, LOW);
digitalWrite(nixie_0, LOW);
digitalWrite(nixie_1, LOW);
digitalWrite(nixie_2, LOW);
digitalWrite(nixie_3, LOW);
digitalWrite(nixie_4, LOW);
digitalWrite(nixie_5, LOW);
digitalWrite(nixie_6, LOW);
digitalWrite(nixie_7, LOW);
digitalWrite(nixie_8, LOW);
digitalWrite(nixie_9, LOW);
delayMicroseconds(400); //to prevent "ghost" effect to other tube
}Basically, the code will get real-time from module DS3231 and show to 6 nixie tube via opto-isolation chip.
Step 3. Build the circuit
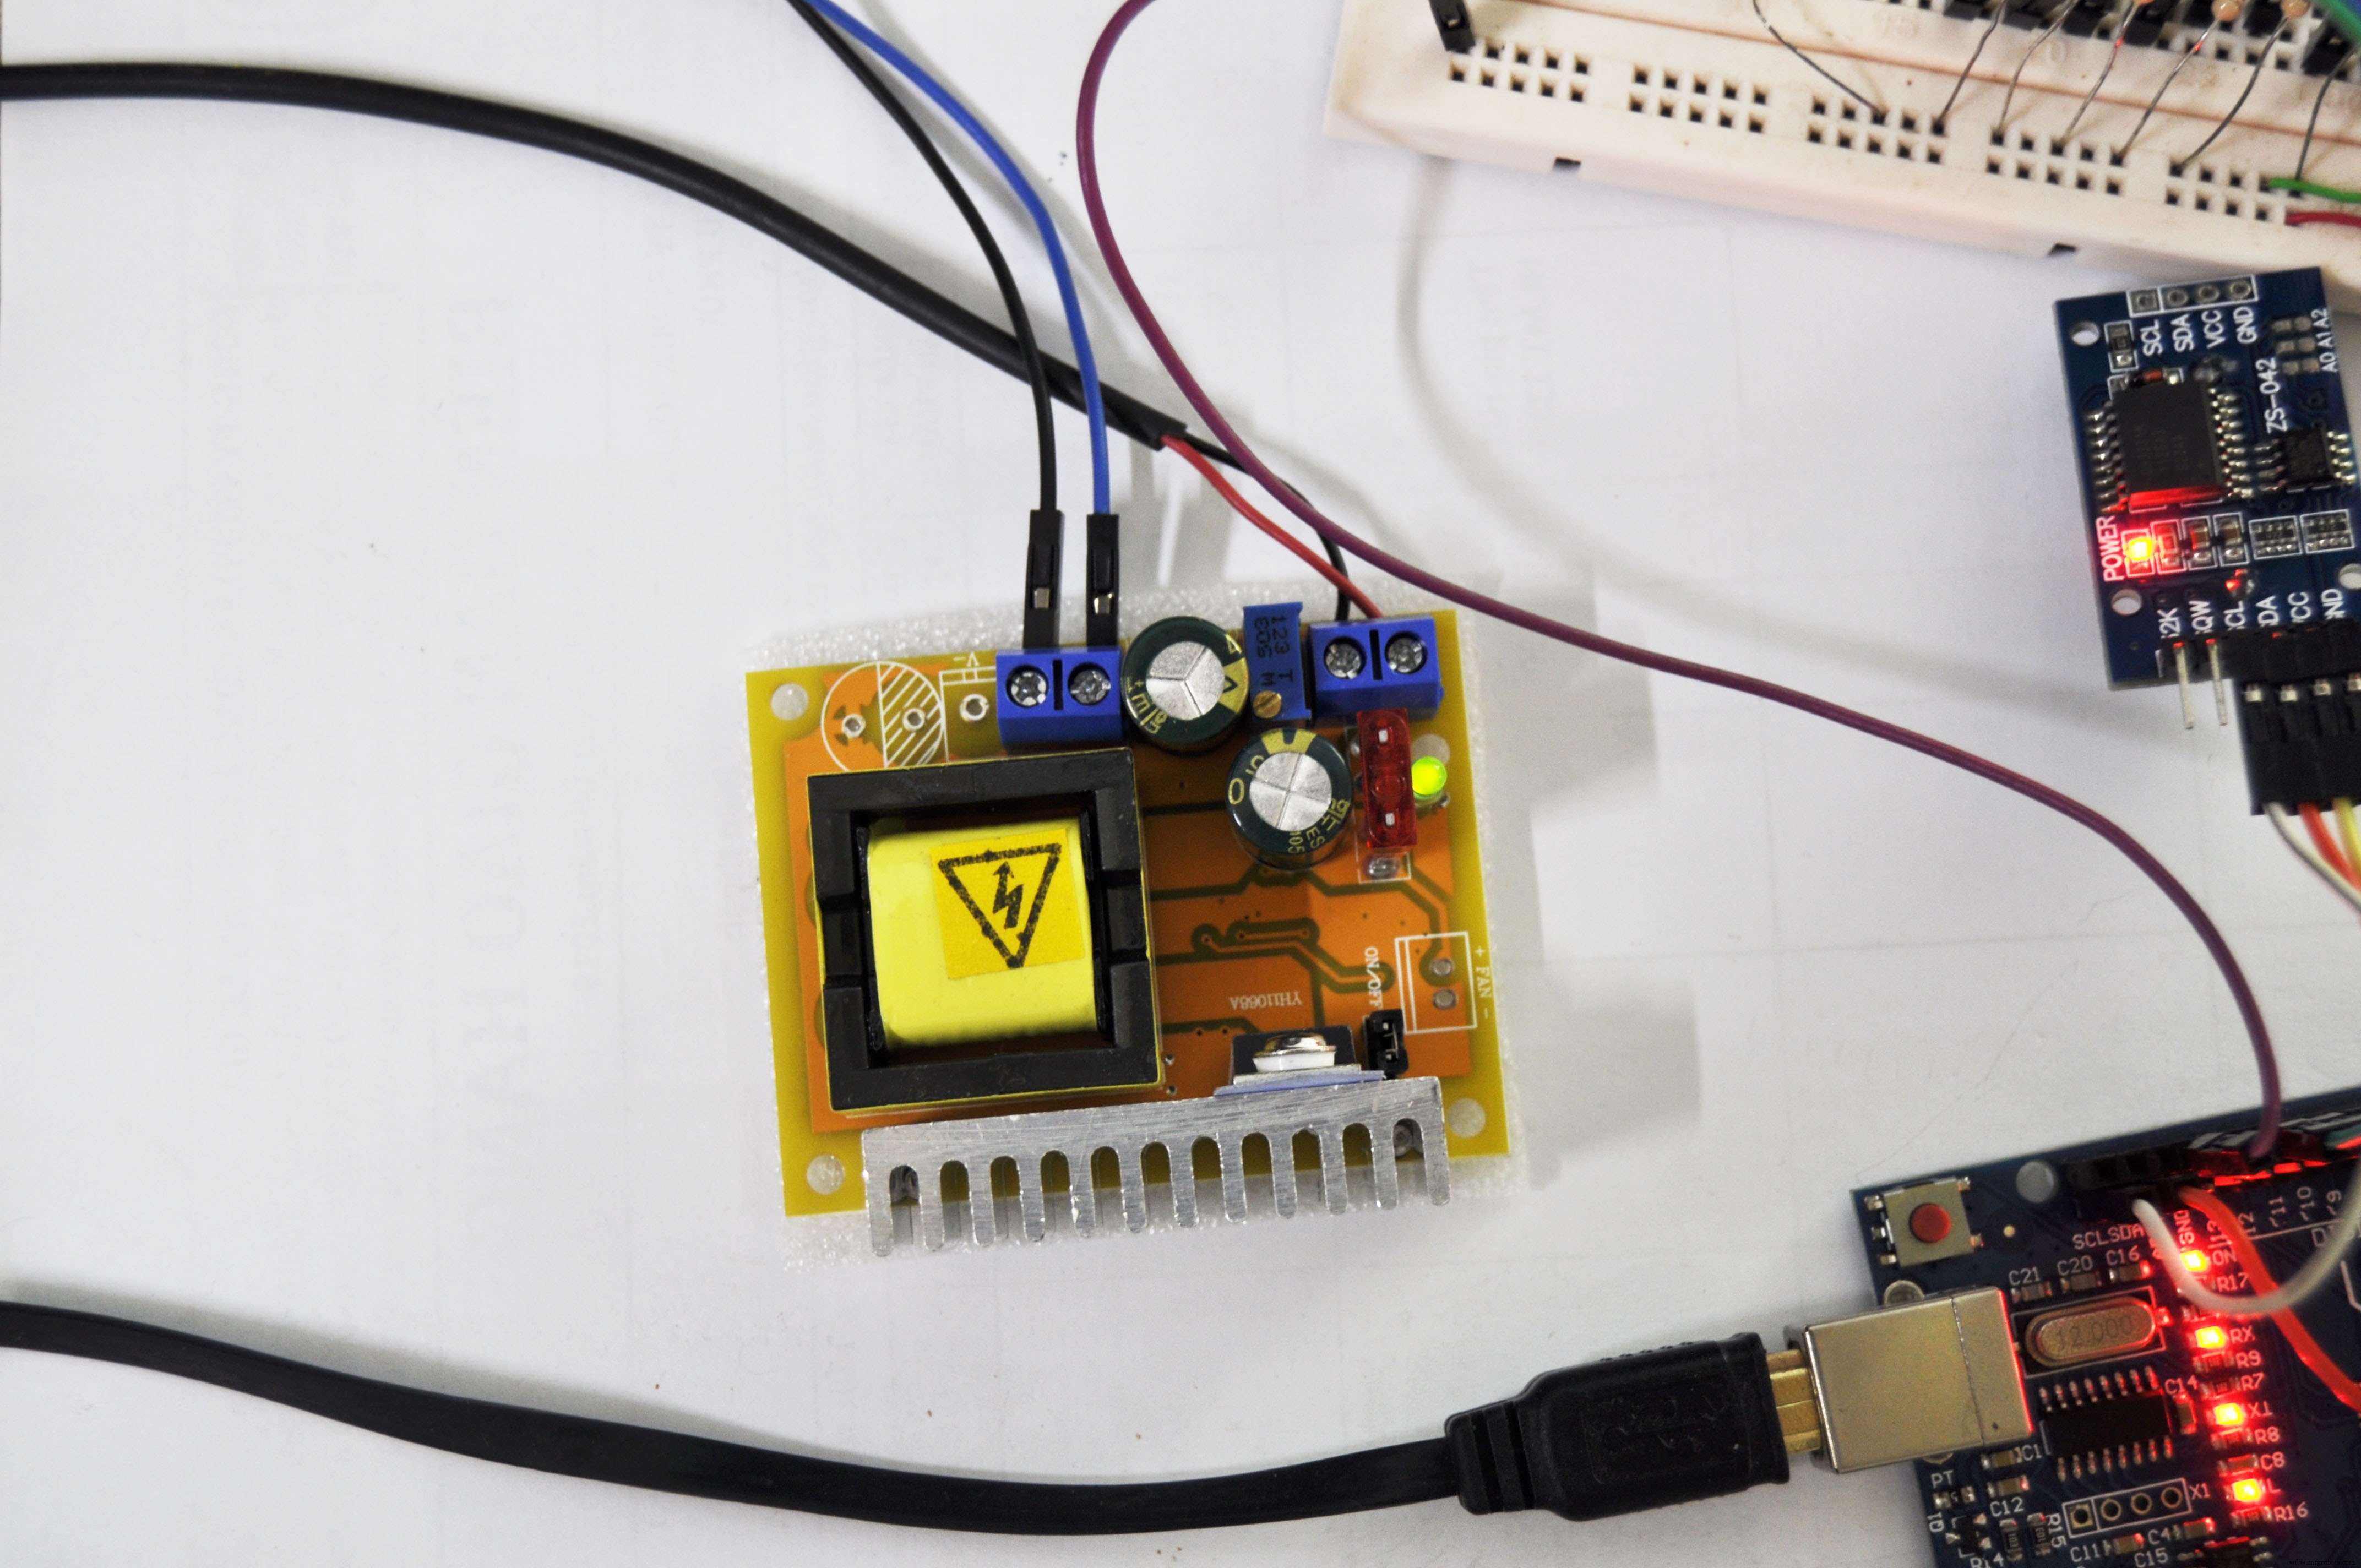
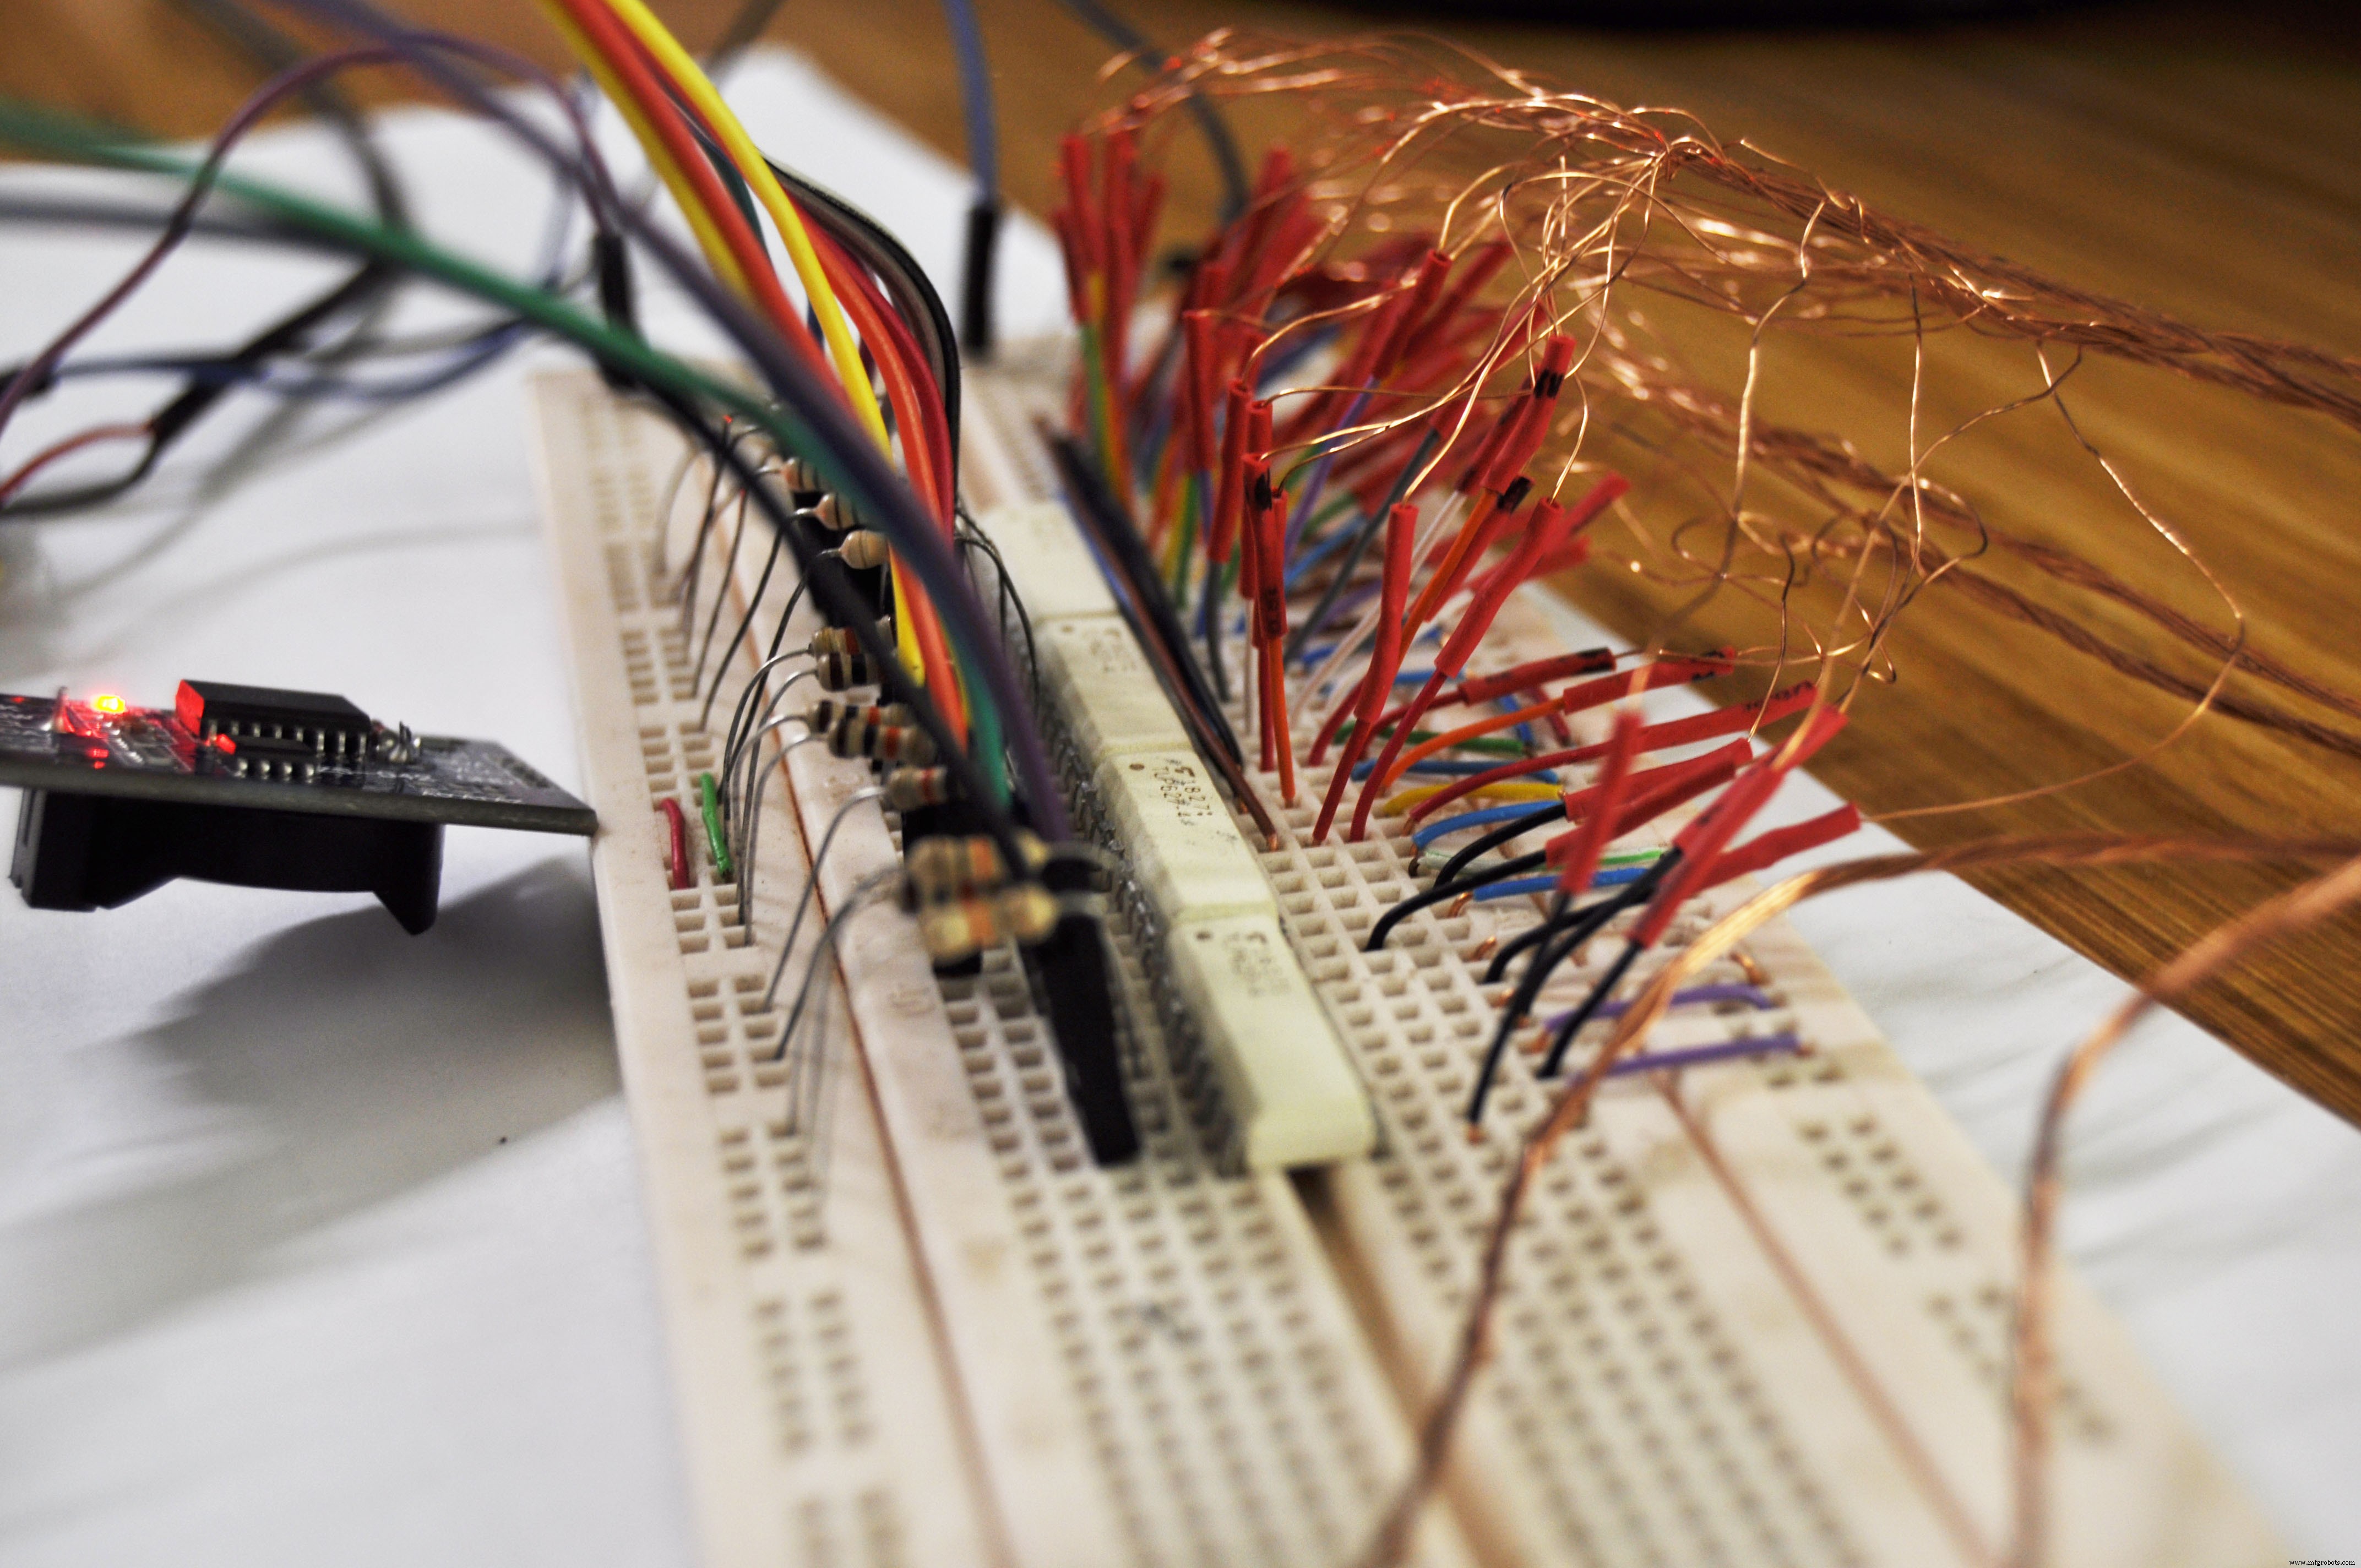
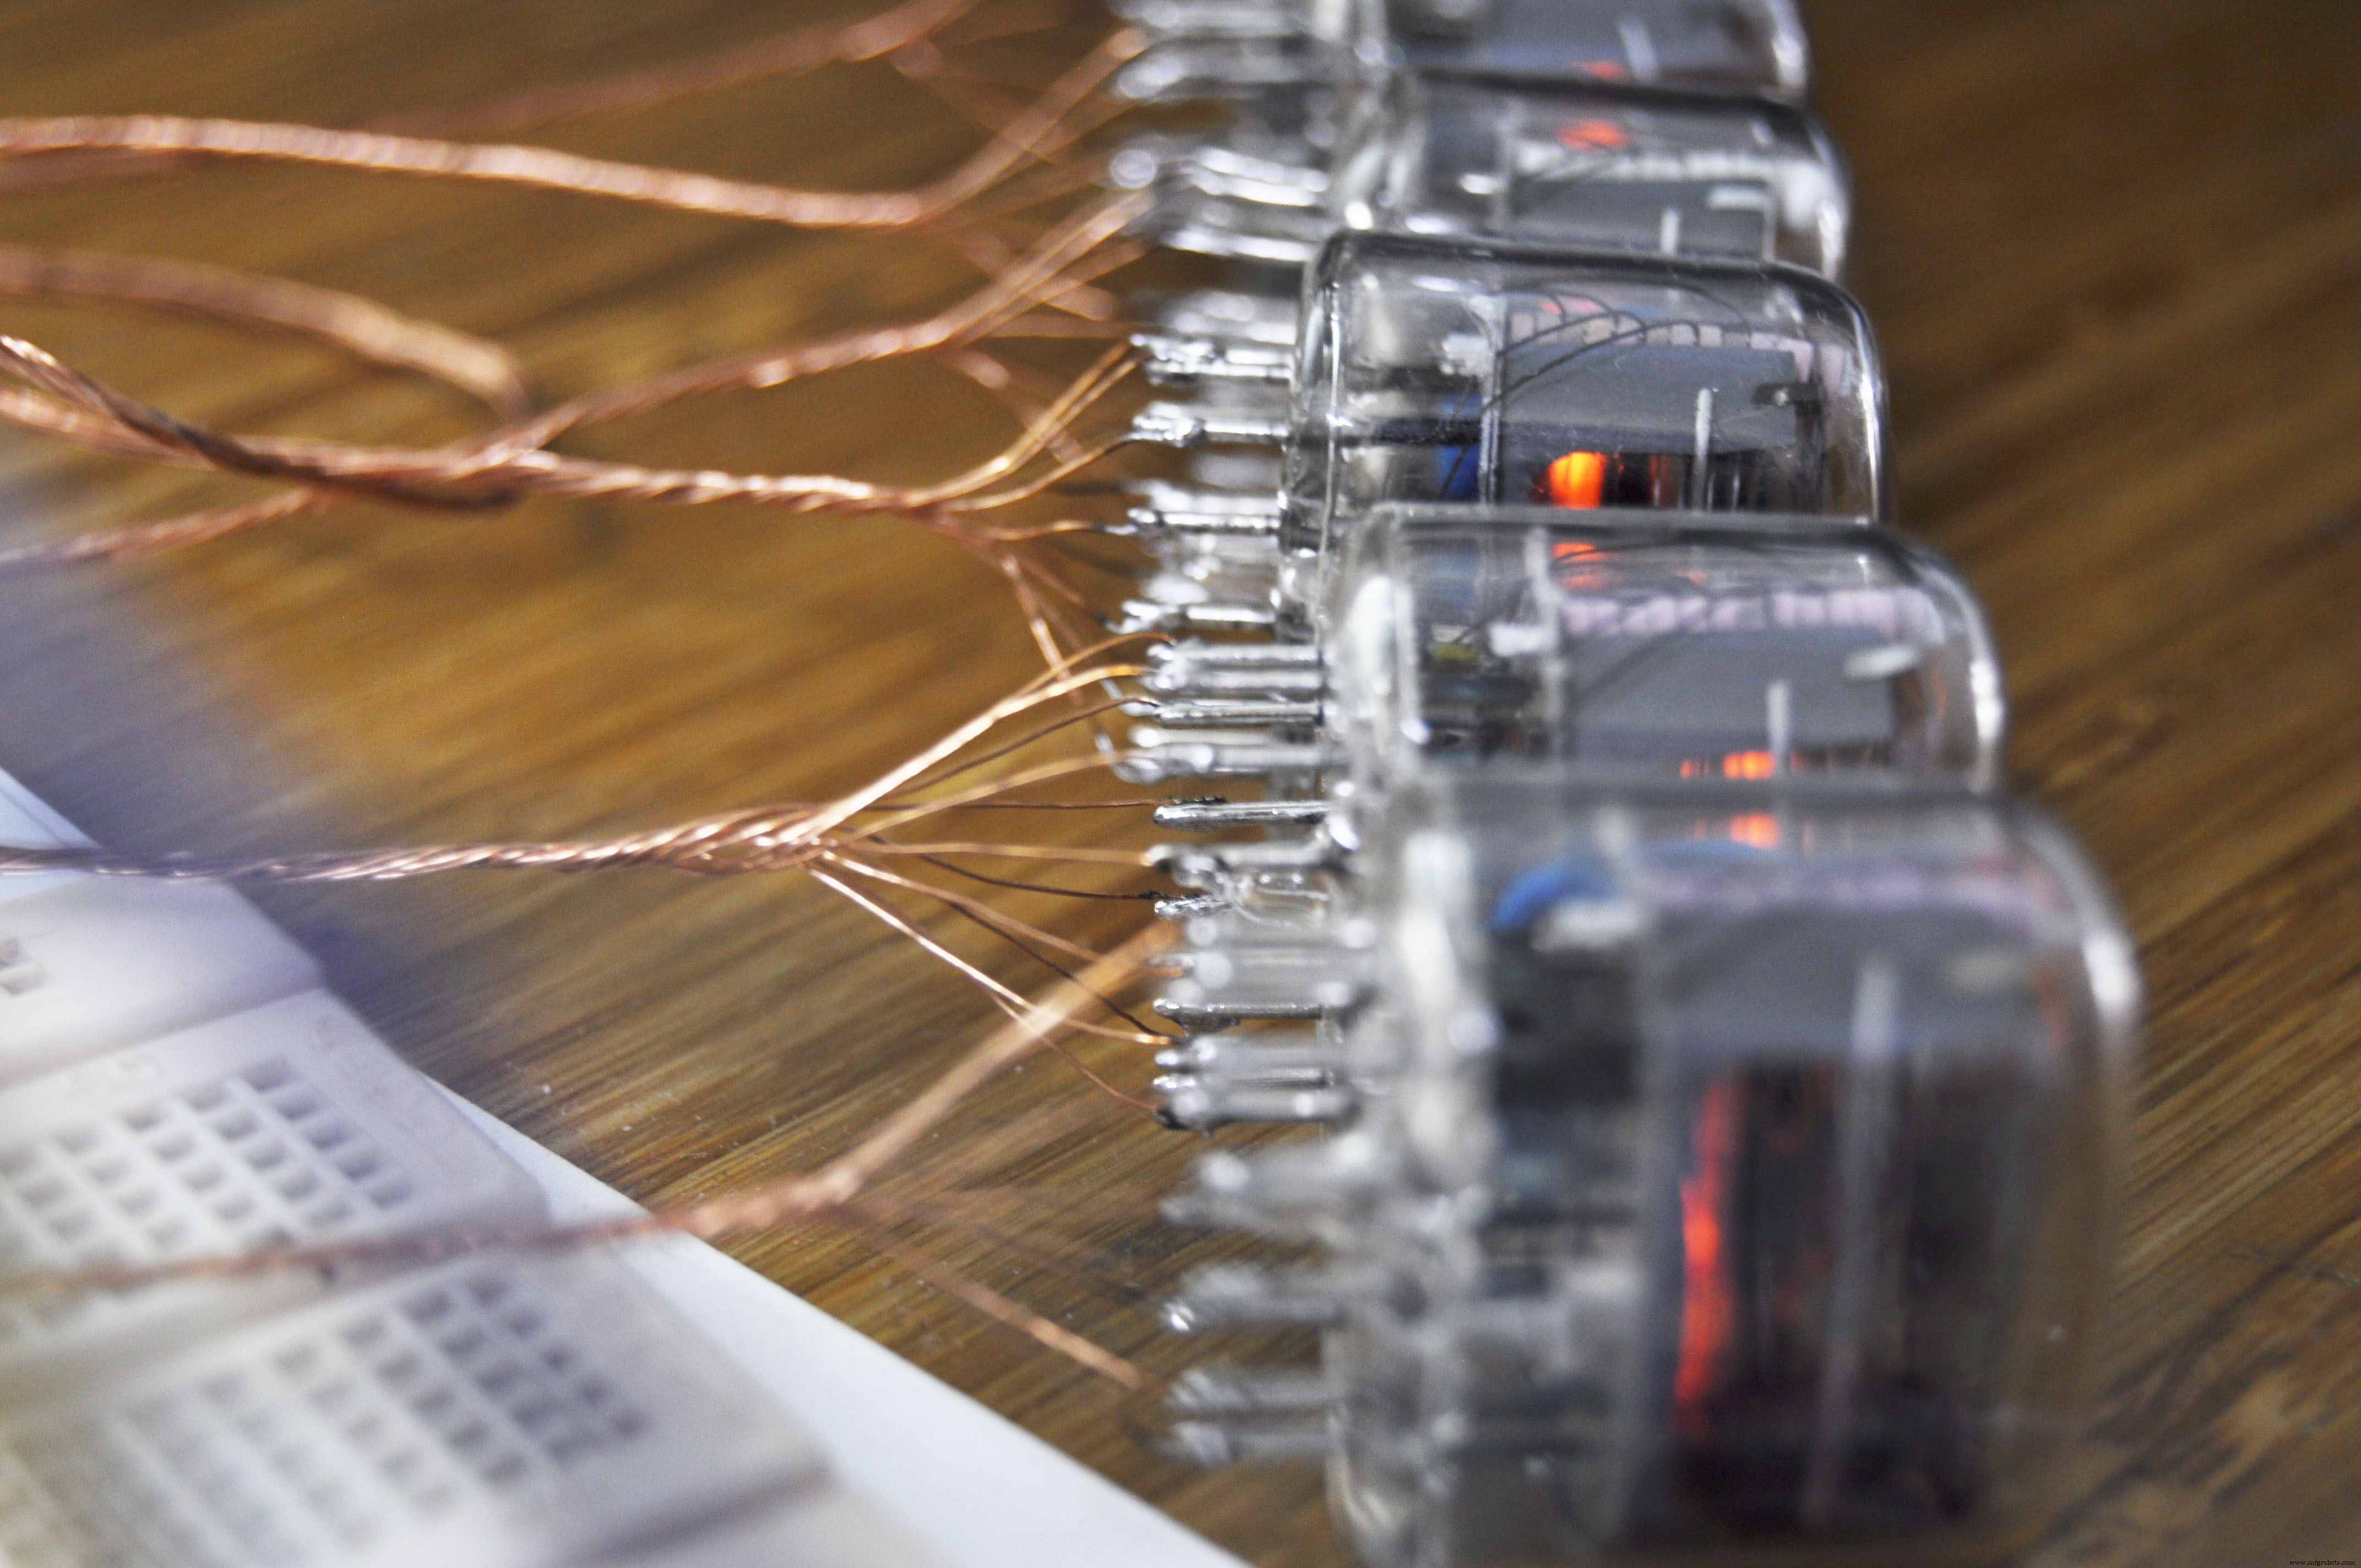
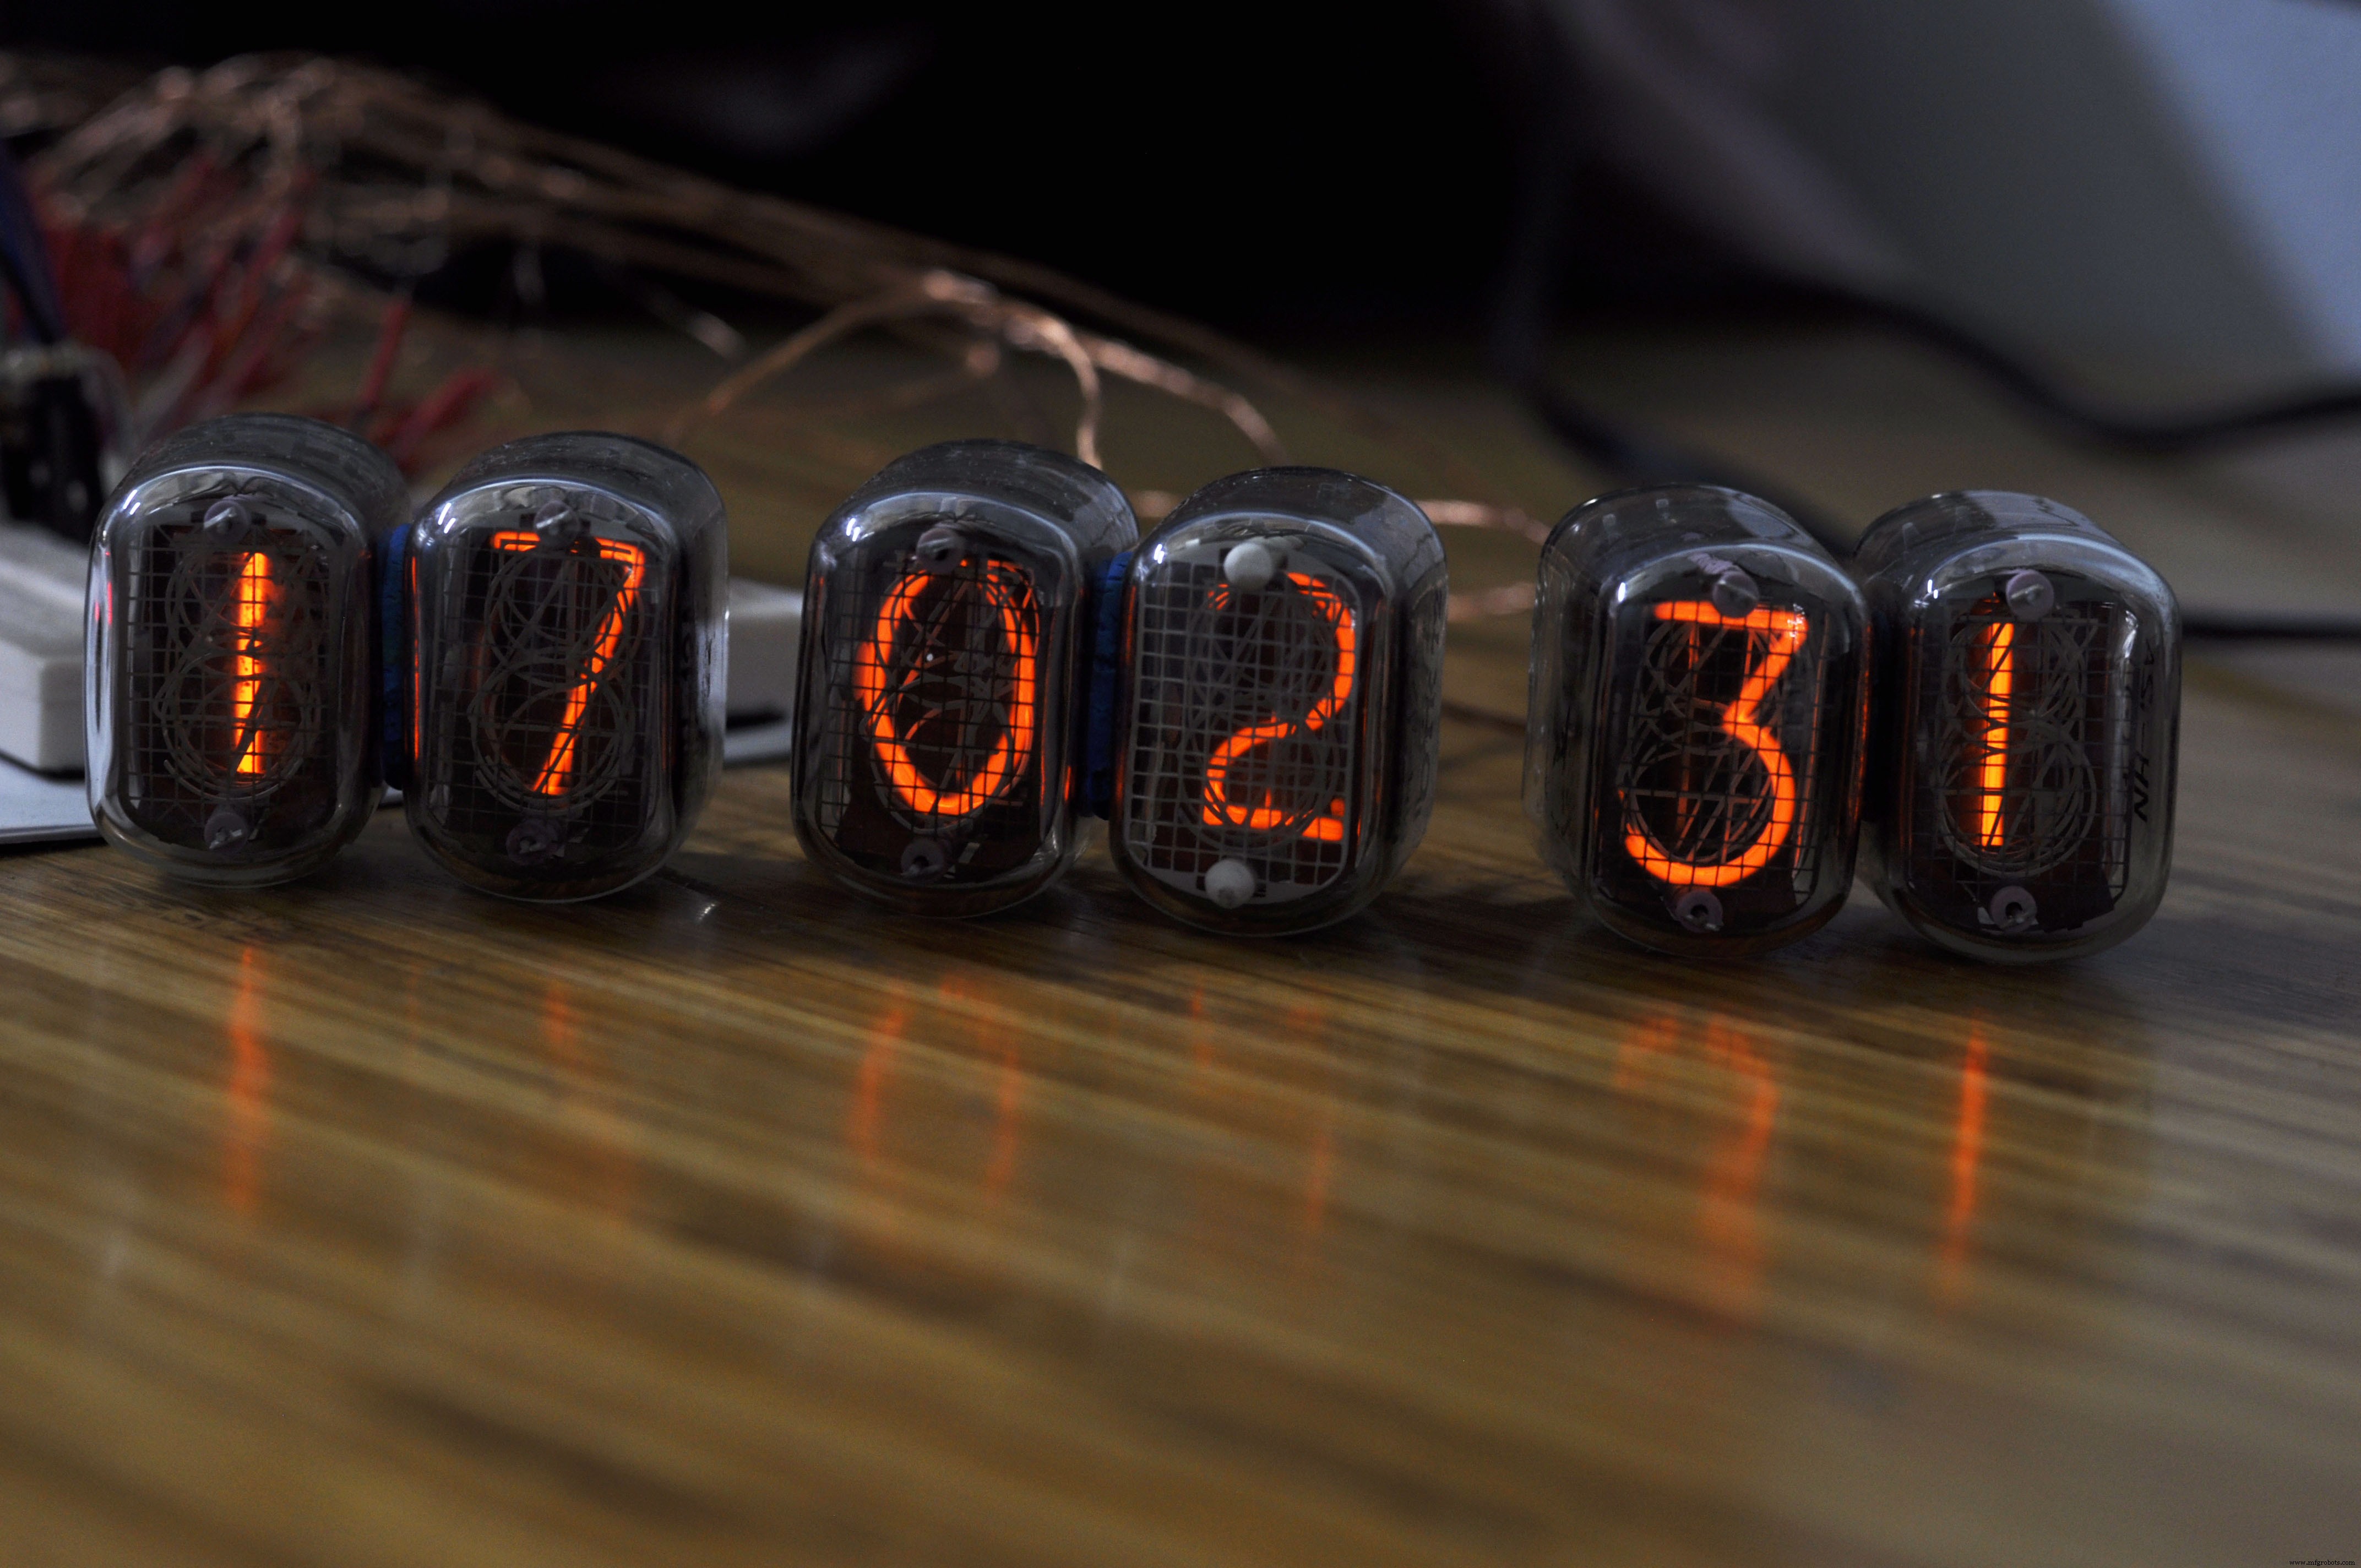
This is just experiment, so I made everything in breadboard. Fortunately, it works at first time, no any problem
In next step, I will try to make nixie clock in MDF case with good decoration, so I can put it in my room.
Code
- Code snippet #1
Code snippet #1Plain text
//Youtube channel: engineer2you
#include <Wire.h>
#include "DS3231.h"
RTClib RTC;
DS3231 Clock;
int hour;
int minute;
int second;
const int nixie_0 = 2;
const int nixie_1 = 3;
const int nixie_2 = 4;
const int nixie_3 = 5;
const int nixie_4 = 6;
const int nixie_5 = 7;
const int nixie_6 = 8;
const int nixie_7 = 9;
const int nixie_8 = 10;
const int nixie_9 = 11;
const int row_1 = 0;
const int row_2 = 1;
const int row_3 = 14;
const int row_4 = 15;
const int row_5 = 16;
const int row_6 = 17;
const int time_on = 2;
void setup() {
  pinMode(nixie_0, OUTPUT);
  pinMode(nixie_1, OUTPUT);
  pinMode(nixie_2, OUTPUT);
  pinMode(nixie_3, OUTPUT);
  pinMode(nixie_4, OUTPUT);
  pinMode(nixie_5, OUTPUT);
  pinMode(nixie_6, OUTPUT);
  pinMode(nixie_7, OUTPUT);
  pinMode(nixie_8, OUTPUT);
  pinMode(nixie_9, OUTPUT);
  pinMode(row_1, OUTPUT);
  pinMode(row_2, OUTPUT);
  pinMode(row_3, OUTPUT);
  pinMode(row_4, OUTPUT);
  pinMode(row_5, OUTPUT);
  pinMode(row_6, OUTPUT);
  //Serial.begin(9600); //should NOT use seiral println, it will effect to output pin D0 & D1
  Wire.begin();
}
void loop() {
    //-------------------get clock value---------------------------
    DateTime now = RTC.now();
    hour = now.hour();
    minute = now.minute();
    second = now.second();
    //-------------------show clock number ----------------------
    int j; //second number from right
    int k; //first number from right
      j = second/10;
      k = second%10;
      //-----------show first number of second
      off_all();
      on_number(0,k+2);
      delay(time_on);
      //-----------show second number of second
      off_all();
      on_number(1,j+2);
      delay(time_on);

      j = minute/10;
      k = minute%10;
      //-----------show first number of minute
      off_all();
      on_number(14,k+2);
      delay(time_on);
      //-----------show second number of minute
      off_all();
      on_number(15,j+2);
      delay(time_on);
      j = hour/10;
      k = hour%10;
      //-----------show first number of hour
      off_all();
      on_number(16,k+2);
      delay(time_on);
      //-----------show second number of hour
      off_all();
      on_number(17,j+2);
      delay(time_on);
}
void on_number(int row, int nixie){
  digitalWrite(row, HIGH);
  digitalWrite(nixie, HIGH);
}
void off_all(){
  digitalWrite(row_1, LOW);
  digitalWrite(row_2, LOW);
  digitalWrite(row_3, LOW);
  digitalWrite(row_4, LOW);
  digitalWrite(row_5, LOW);
  digitalWrite(row_6, LOW);
  digitalWrite(nixie_0, LOW);
  digitalWrite(nixie_1, LOW);
  digitalWrite(nixie_2, LOW);
  digitalWrite(nixie_3, LOW);
  digitalWrite(nixie_4, LOW);
  digitalWrite(nixie_5, LOW);
  digitalWrite(nixie_6, LOW);
  digitalWrite(nixie_7, LOW);
  digitalWrite(nixie_8, LOW);
  digitalWrite(nixie_9, LOW);
  delayMicroseconds(400);  //to prevent "ghost" effect to other tube
}
Manufacturing process
- Build a Retro Numitron Clock with Arduino: Simple, Reliable, and Energy‑Efficient
- Build an Arduino Real‑Time Clock for Islamic Prayer Times
- Build a Custom LED Master Clock with Alarm – Viewable from 12 Meters
- Arduino Temperature Monitor & Real-Time Clock Using a 3.2” TFT Display
- Build a Sleek Nixie Tube Clock in a Custom MDF Wood Enclosure Using Arduino
- Real-Time Arduino Weather Clock: OLED Display for Time, Date & Temperature
- Nixie Tube Clock Shield NCS314 for Arduino UNO/MEGA – IN‑14/IN‑12 Compatibility
- Build a 7‑Segment Clock with Arduino Nano, DS3231 RTC, and LDR Auto‑Brightness
- Build an IR Sensor Project with Arduino UNO – Simple Guide
- Build a Reliable Alarm Clock with DS1302 RTC and Arduino UNO