


Arduino Nano Magnet Levitation Project: Parts & Wiring Guide
Components and supplies
 |
| × | 1 | |||
| × | 1 | ||||
| × | 1 | ||||
 |
| × | 1 | |||
 |
| × | 1 | |||
 |
| × | 1 | |||
| × | 1 | ||||
 |
| × | 1 | |||
 |
| × | 2 | |||
 |
| × | 1 |
Apps and online services
 |
|
About this project
Levitator with Arduino.
You can 3D print the body or not.
https://www.thingiverse.com/thing:1392023
- Easy to print and mount (Just some glue, no screws).
- Just install the firmware(Levitator.ino) in the arduino board.
- Do not need a computer, just the 12V power supply, after install the firmware.
- Use the switches to adjust the permanent magnet position.
- Use the arduino serial monitor to see the correct value for you.
- You can hard code the correct value in your toy.
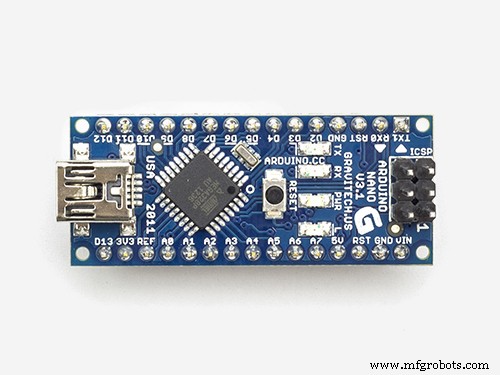
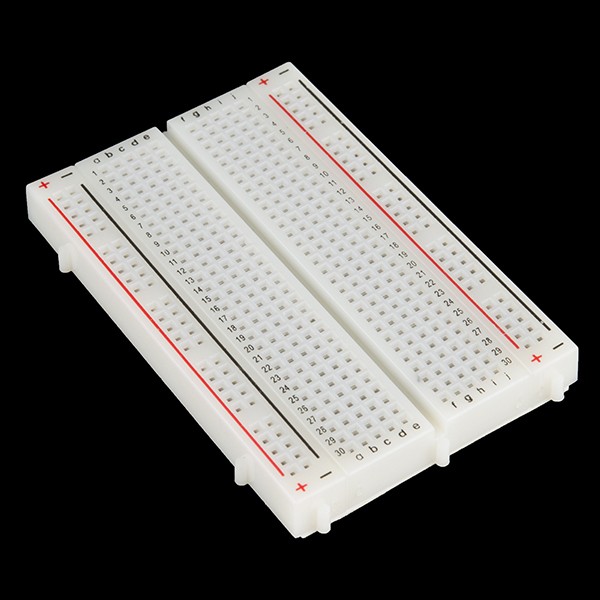
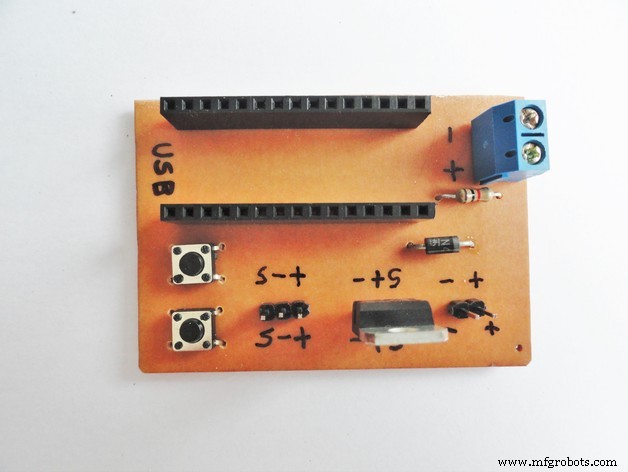
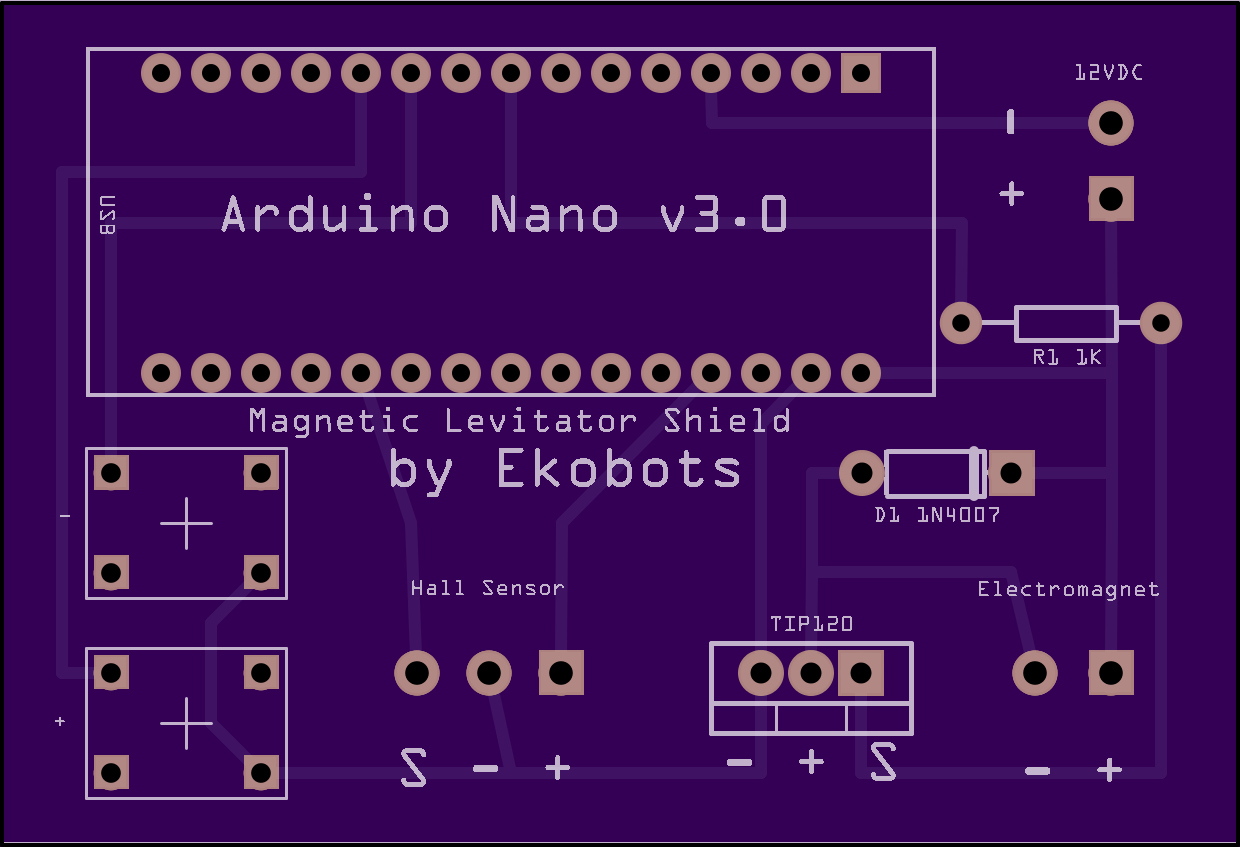
You can use a protoboard or make your board (Arduino Nano).
http://www.thingiverse.com/thing:1392530
Or just buy one:
https://oshpark.com/shared_projects/kxH3Ak1b
Attention:
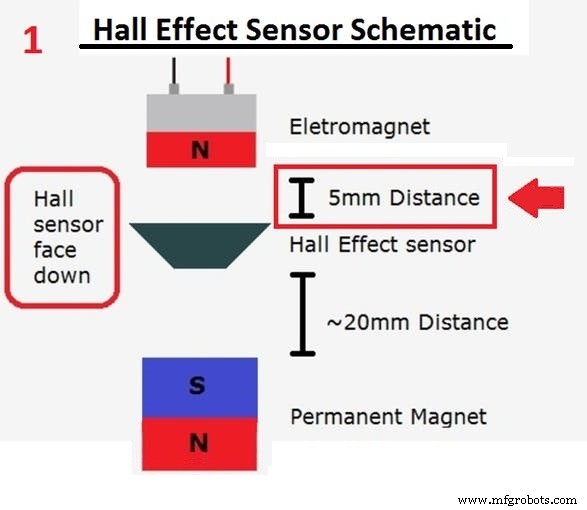
- Put the hall sensor in the bottom of the tip(top_sensor.stl) see the images;
- To work correct, the hall effect sensor must be at least 5mm of distance from electromagnetic;
- You can use other linear hall sensor (do not use hall sensor switch);
- Use neodymium permanent magnets (it will not work with common magnets);
- Heavy objects are more stable;
See my makes in the Thingiverse for more details and tips.
Levitator 3D Printed:
https://www.thingiverse.com/make:201394
Shield for Arduino Nano:
https://www.thingiverse.com/make:201420
That is easy.
Code
- Levitator.ino
- Levitator_PID.ino
Levitator.inoArduino
Code for Magnet Levitation toy with Arduino.Easy(No PID)
//=========================================================|
//     Ekobots Innovation Ltda - www.ekobots.com.br        |
//        Juan Sirgado y Antico - www.jsya.com.br          |
//---------------------------------------------------------|
//        Program Magnetic Levitator - 2016/02/06          |
//               All rights reserved 2016                  |
//=========================================================|
int anaPin = 1;   // Arduino Analogic Pin 1;
int digPin = 5;   // Arduino Digital  Pin 5;
int subPin = 7;   // Arduino Digital  Pin 7;
int addPin = 8;   // Arduino Digital  Pin 8;
//
int     anaVal = 0;   // Analogic Read(Hall Sensor) Value;
boolean digVal = 0;   // Digital Write(Electromagnet) Value;
//
int levVal = 228;   // Levitation Poit Value;
int dlyVal = 250;   // Delay Value Micro Seconds;
//---------------------------------------------------------|
void setup()
{
   // Levitator initialization Begin;
   Serial.begin(57600);
   Serial.println("Levitator by JSyA");
   Serial.println("Starting...");
   // Digital Pins Work Mode Setup;
   pinMode(digPin, OUTPUT);
   pinMode(subPin, INPUT_PULLUP);
   pinMode(addPin, INPUT_PULLUP);
   // Levitator initialization End;
   Serial.println("Started.");
}
//---------------------------------------------------------|
void loop()
{
   // Hall Sensor Read (Magnetic Field Intensity);
   anaVal = analogRead(anaPin);
   // Increase The Value Of Levitation Point;
   if (digitalRead(addPin) == LOW)
   {
      levVal++;
      value_log();
      delay(250);
   }
   // Decrease The Value Of Levitation Point;
   if (digitalRead(subPin) == LOW)
   {
      levVal--;
      value_log();
      delay(250);
   }
   // Check the Levitation Point;
   if (anaVal < levVal)
   {
      digVal = LOW;
   }
   else // if (anaVal > levVal)
   {
      digVal = HIGH;
   }
   //
   // Turn ON/OFF The Electromagnet;
   // With Base on Sensor Value and the Levitation Point;
   digitalWrite(digPin, digVal);
   delayMicroseconds(dlyVal);
}
//---------------------------------------------------------|
void value_log()
// Analogic/Digital/Levitation Values Print;
{
   // Show the Hall Sensor Value;
   Serial.print("anaVal=[");
   Serial.print(anaVal);
   Serial.print("]-");
   // Show the Electromagnet state On=1/Off=0;
   Serial.print("digVal=[");
   Serial.print(digVal);
   Serial.print("]-");
   // Show the Levitation Point Value;
   Serial.print("levVal=[");
   Serial.print(levVal);
   Serial.println("];");
}
//=========================================================|
Levitator_PID.inoArduino
Code for Magnet Levitation toy with Arduino.Hard(PID version)
//=========================================================|
//     Ekobots Innovation Ltda - www.ekobots.com.br        |
//        Juan Sirgado y Antico - www.jsya.com.br          |
//---------------------------------------------------------|
//      Program Magnetic Levitator PID - 2016/10/06        |
//               All rights reserved 2016                  |
//=========================================================|
int anaPin = 1;   // Arduino Analogic Pin 1
int digPin = 5;   // Arduino Digital  Pin 5
int subPin = 7;   // Arduino Digital  Pin 7
int addPin = 8;   // Arduino Digital  Pin 8
//
int anaVal = 0;   // Analogic Valie
int digVal = 0;   // Digital Value
//
int levVal = 262; // Levitation Value
int dlyVal = 10;  // Delay Value
//
float timVal = 0; // Time Value
//---------------------------------------------------------|
// PID Values
float setpoint = 0;
float measured_value = 0;
float output = 0;
float integral = 0;
float derivative = 0;
float error = 0;
float previous_error = 0;
float dt = 0.1;
float Kp = 1.0;
float Ki = 0.1;
float Kd = 0.01;
//---------------------------------------------------------|
void setup()
{
   // Levitator initialization Begin;
   Serial.begin(57600);
   Serial.println("Levitator by JSyA");
   Serial.println("Starting...");
   // Digital Pins Work Mode Setup;
   pinMode(digPin, OUTPUT);
   pinMode(addPin, INPUT_PULLUP);
   pinMode(subPin, INPUT_PULLUP);
   //
   timVal = millis();
   setpoint = levVal;
   // Levitator initialization End;
   Serial.println("Started.");
}
//---------------------------------------------------------|
void loop() // PID
{
   // Hall Sensor Read (Magnetic Field Intensity);
   anaVal = analogRead(anaPin);
   // PID calculations
   measured_value = anaVal;
   error = setpoint - measured_value;
   integral = integral + error * dt;
   derivative = (error - previous_error) / dt;
   output = (-Kp * error) + (-Ki * integral) + (-Kd * derivative);
   previous_error = error;
   // Final value setup
   digVal += output;
   // Check the value for levitation point;
   if (digVal < 0) digVal=0;
   if (digVal > 255) digVal=255;
   // Increase/Decrease the value for Electromagnet;
   // With Base on Sensor Value and the Levitation Point;
   analogWrite(digPin, digVal);
   // Show log values for debug;
//   if((millis()-timVal) > 500)
//   {
//      value_log();
//      timVal = millis();
//   }
   // Increase The Value Of Levitation Point;
   if (digitalRead(addPin) == LOW)
   {
      setpoint++;
      value_log();
      delay(250);
   }
   if (digitalRead(subPin) == LOW)
   {
      setpoint--;
      value_log();
      delay(250);
   }
   // Time between electromagnet state changes;
   delayMicroseconds(dlyVal);
}
//---------------------------------------------------------|
void value_log()
// Analogic/Digital/Levitation Values Print;
{
   // Show the Hall Sensor Value;
   Serial.print("anaVal=[");
   Serial.print(anaVal);
   Serial.print("]-");
   // Show the Electromagnet state On=1/Off=0;
   Serial.print("digVal=[");
   Serial.print(digVal);
   Serial.print("]-");
   // Show the Levitation Point Value;
   Serial.print("setpoint=[");
   Serial.print(setpoint);
   Serial.println("];");
}
//=========================================================|
Schematics
Fritzing IDE
Otto DIY+ Arduino Bluetooth Robot – Easy 3D‑Print Build Kit
DIY Low-Cost Laser Rangefinder for Arduino – Quick, Reliable & Affordable
Manufacturing process
- Build a Retro Numitron Clock with Arduino: Simple, Reliable, and Energy‑Efficient
- Build a Smart Piggy Bank: Control a Coin Acceptor with Arduino Nano
- Control an LED via Bluetooth with Arduino – Simple DIY Guide
- Accurate Solar Radiation Measurement Using Arduino UNO and Ethernet Shield
- Arduino‑Powered HID UPS: Upgrade Your Dummy Power Supply to USB‑Compatible Backup
- Build a Portable RFID Door Lock with Arduino – Step-by-Step Guide
- Build an IR Sensor Project with Arduino UNO – Simple Guide
- Build an ESP8266 Telegram Bot: IoT Control Made Easy
- Efficiently Program ATtiny85 Using Arduino Uno: A Cost‑Effective Multi‑Sensor Solution
- Arduino Relay Tutorial: Safely Control High‑Voltage Devices