


DIY Arduino LCD Project: Assemble with Resistors, Pushbutton, and 16x2 Display
Components and supplies
 |
| × | 2 | |||
 |
| × | 1 | |||
 |
| × | 1 | |||
 |
| × | 1 | |||
 |
| × | 1 | |||
 |
| × | 1 |
About this project
BackgroundI was part of a bigger project but there was a delay. So I decided to do something with my old Arduino kit. I never used the LCD screen before. So, I soldered the pins into the screen (I learnt soldering for the first time).
Initially I copied the code from an online manual and uploaded it. It only displayed text, moving right and left. This was when I was introduced to the LiquidCrystal library. I wrote a code which made the number "0" bounce around the screen, it was pretty fun. That was when I thought of making something a bit more complex, a game. I googled for lcd games on arduino and found only 3 games, 2 of which worked for me. The code for these games were way too complex for me to understand, so I decided to create an easy game.
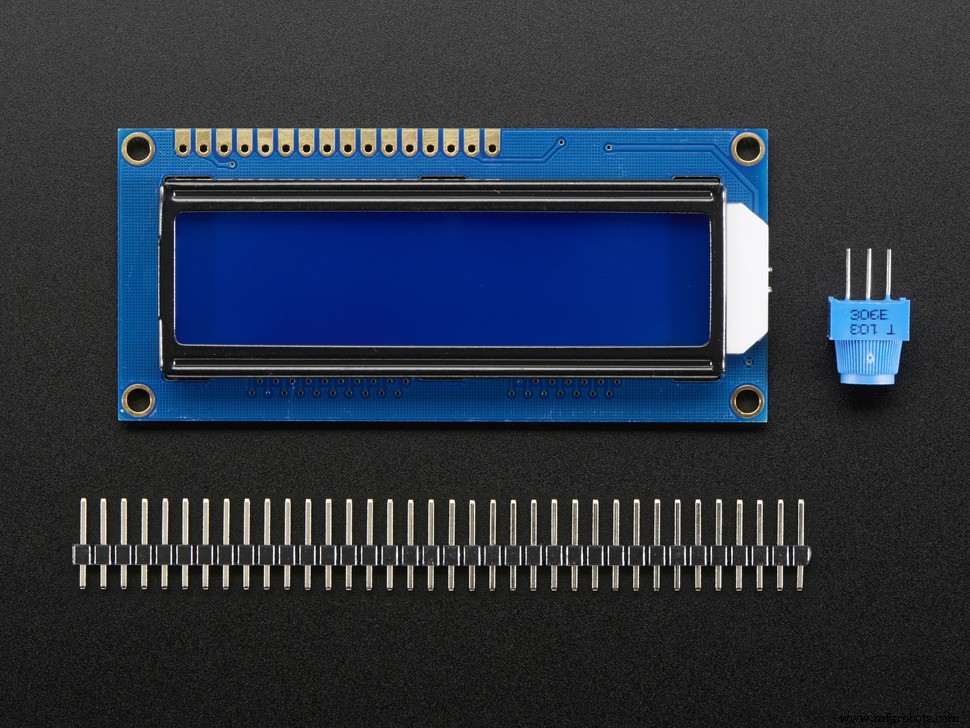
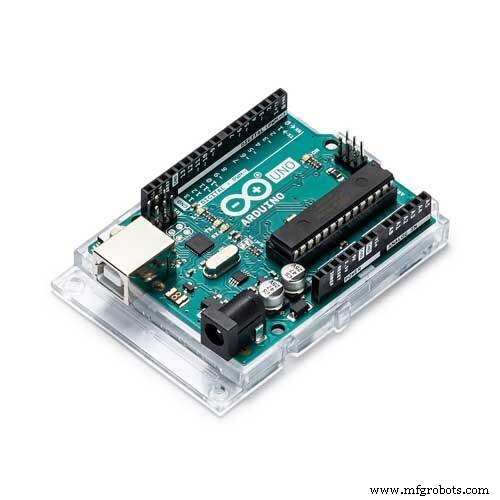
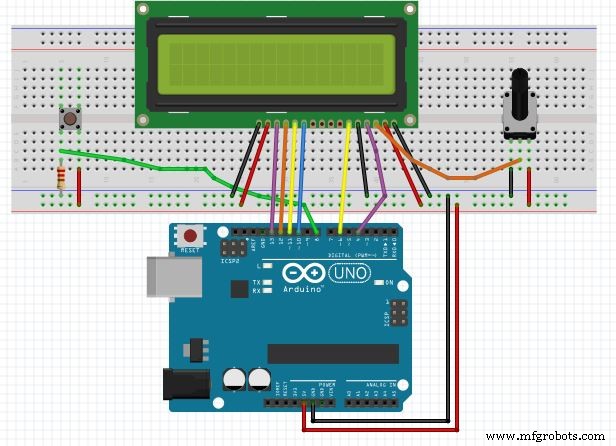
Setting upConnect the lcd pins to the arduino with wires as shown in the schematic below.
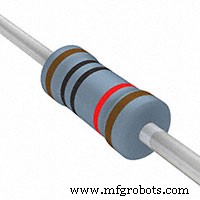
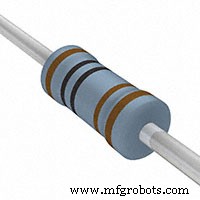
I used a 10k potentiometer to adjust the contrast and adjusted it for the contrast I wanted. I measured the resistance between the pins with a multimeter and used appropriate resistors (1k and 10k ohms in series) for the VO pin of the LCD.
Place a push button on the breadboard and connect the input wire to pin 8 on the arduino. Upload the code to your arduino and you are ready to go.
Note: Use the button resistor in pull-down mode, as shown in the schematic.
Playing the gameIn this game, you are a football player with the ball at your legs. You will have defenders approaching you, and you should simply dodge them.
After the intro, hit the button when asked to. When the defender comes close enough, hit the button to jump. The next defender will approach with a higher speed, and this continues for 10 defenders.
PS: I initially used "0" as the control, and "1" as the obstacle. As the 2018 FIFA World Cup is going on and being a Messi fan myself, I decided to change the theme.
I made the glyphs for the player and defender using an online generator, the link provided here: https://omerk.github.io/lcdchargen/
Code
- lcd_1.ino
lcd_1.inoArduino
/*
    Dodge the defs!!
    Created by : Shreyas R P
    Created on: 21-06-2018
    E-mail ID : shreyasrp888@gmail.com
    A simple game for 16x2 LCD with a button.
    If you make any improvements or changes to the game, please add your    credits below the line:
    Enjoy :)
    Copyright (C) 2018  Shreyas R P

    This program is free software: you can redistribute it and/or modify
    it under the terms of the GNU General Public License as published by
    the Free Software Foundation, either version 3 of the License, or
    (at your option) any later version.

    This program is distributed in the hope that it will be useful,
    but WITHOUT ANY WARRANTY; without even the implied warranty of
    MERCHANTABILITY or FITNESS FOR A PARTICULAR PURPOSE.  See the
    GNU General Public License for more details.

    You should have received a copy of the GNU General Public License
    along with this program.  If not, see <https://www.gnu.org/licenses/>.
    ---------------------------------------------------------------------------------------------
 */
#include <LiquidCrystal.h>

const int btn = 8;  //button input pin

//texts to display
char* introText[]={"Dodge the defs!!","Created on:", "Hit the button..."};

//variable declarations
int game=0;
int buttonPress = 0;
int buttonState=0;
int obstaclePos;
int obsDelay;
int score=0;
unsigned long lastDebounceTime = 0;  // the last time the output pin was toggled
unsigned long debounceDelay = 50;
int lastButtonState=LOW;

//GRAPHICS
byte runnin1[8] = {
  0b01100,
  0b01100,
  0b00000,
  0b11100,
  0b01110,
  0b01100,
  0b11110,
  0b00011
};
byte runnin2[8]={
  0b00110,
  0b00110,
  0b00000,
  0b00111,
  0b01110,
  0b00110,
  0b01110,
  0b00101
};
byte jump[8]={
  0b00100,
  0b01100,
  0b11100,
  0b01110,
  0b01100,
  0b11111,
  0b00000,
  0b00001
};
byte def1[8] = {
  0b00100,
  0b00110,
  0b00111,
  0b01110,
  0b00110,
  0b01111,
  0b01000,
  0b00000
};
byte def2[8]={
  0b00100,
  0b00110,
  0b00111,
  0b01110,
  0b00110,
  0b00110,
  0b00110,
  0b00010
};
byte slide[8]={
  0b00000,
  0b00000,
  0b00011,
  0b00011,
  0b00000,
  0b01111,
  0b11111,
  0b00000
};


LiquidCrystal lcd(4,6,10,11,12,13);
void setup() {

  Serial.begin(9600);
  pinMode(btn,INPUT);
  lcd.begin(16,2);
  lcd.createChar(0,runnin1);
  lcd.createChar(1,runnin2);
  lcd.createChar(2,jump);
  lcd.createChar(3,def1);
  lcd.createChar(4,def2);
  lcd.createChar(5,slide);
  buttonState=digitalRead(btn);
}

void loop()
{

    intro();
    while(game==1)
      ballActive();
    endGame();
}

 void intro()
 {
        score=0;
        lcd.clear();
        lcd.print(introText[0]);   //Instead of declaring introText, you can directly print the text with " ... "
        lcd.setCursor(7,1);
        lcd.print("By SRP888");
        delay(2000);
        lcd.clear();
        lcd.print(introText[1]);
        lcd.setCursor(0,1);
        lcd.print("21-06-2018");
        delay(2000);
        lcd.clear();
        while(button()!=1)            //wait for the user to hit the button, display the text until that.
        {
         lcd.setCursor(0,0);
         lcd.print(introText[2]);
         delay(100);
        }
        if(button()==1)
          game=1;
 }

 void reset()
 {
      if(obstaclePos%2==0)            //Changing the display of the player from one pose to another to show he is running, smartly using obstaclePos.
      {
          lcd.clear();
          lcd.setCursor(0,1);
          lcd.write(byte(0));
      }
      else
      {
          lcd.clear();
          lcd.setCursor(0,1);
          lcd.write(1);
      }
 }

 void ballActive()
 {
  obsDelay=200;   //initial delay for the defender
  obstaclePos=15;  //since it is a 16x2 lcd, and index starts from 0.
  while(game==1)
  {
       reset();
       if(button()==1)      //if button is pressed.
        {
          lcd.clear();
          lcd.setCursor(0,0);
          lcd.write(2);            //print the player jumping
          obstacle(obstaclePos);   //print the defender
          delay(400);              //This is to prevent the display disappearing fast, and going unnoticed.
          lcd.clear();
          lcd.setCursor(0,1);
          lcd.write(1);            //print the player back on ground
          obstacle(obstaclePos);   //print the defender

        }
        else
        {
          if(obstaclePos!=0)        //if the defender has not approached the player, then continue.
          {
              reset();
              obstacle(obstaclePos);
          }
          else if(obstaclePos==0)   //if the defender is at 0 position,i.e. he has approached the player when he is on ground, then end the game.
          {
             game=0;
             break;
          }
        }
        obstaclePos--;               //brings the defender closer to the player
        if(obstaclePos<0)            //if the player successfully dodged then,
        {
          obsDelay=obsDelay-20;       //decrease the delay (increase speed),
          obstaclePos=15;             //bring the defender to starting position,
          score++;                    //and increase the score by 1.
        }
        if(obsDelay==0)               //if 10 players have been dodged (because 200/20=10), then end the game
            game=0;

        delay(obsDelay);
    }
  }
int button()
{
     int reading = digitalRead(btn);
     // If the switch changed, due to noise or pressing:
     if (reading != lastButtonState) {
       // reset the debouncing timer
       lastDebounceTime = millis();
     }

     if ((millis() - lastDebounceTime) > debounceDelay) {
       buttonState = reading;
       if (buttonState == HIGH) {
           lastButtonState = reading;
           return 1;
         }
       }
     lastButtonState = reading;
}
void obstacle(int i)
{
          if(obstaclePos%2==0&& obstaclePos>2)   //if defender is far away from the player, then show him running
          {
              lcd.setCursor(i,1);
              lcd.write(3);
          }
          else if(obstaclePos%2!=0&& obstaclePos>2)
          {
              lcd.setCursor(i,1);
              lcd.write(4);
          }
          else                                 //if he is 2 steps close to the player, then show him sliding
          {
              lcd.setCursor(i,1);
              lcd.write(5);
          }
}
void endGame()
{
    if(score==10)
    {
        lcd.clear();
        lcd.print("Congratulations!");
        lcd.setCursor(0,1);
        lcd.print("You beat 'em all");
        delay(3000);
    }
    else if(score<3)
    {
        lcd.clear();
        lcd.print("You suck");
        lcd.setCursor(0,1);
        lcd.print("Score: ");
        lcd.print(score);
        delay(3000);
    }
    else if(score<6)
    {
        lcd.clear();
        lcd.print("Not bad!");
        lcd.setCursor(0,1);
        lcd.print("Score: ");
        lcd.print(score);
        delay(3000);
    }
    else
    {
        lcd.clear();
        lcd.print("Great!");
        lcd.setCursor(0,1);
        lcd.print("Score: ");
        lcd.print(score);
        delay(3000);
    }
}
Schematics
Manufacturing process
- The Tetrode Tube: Design, Function, and Impact on Amplifier Performance
- Primal Display: Build a Raspberry Pi LCD Temperature Monitor
- Drone Pi: A Dual‑Mode Multiwii & Raspberry Pi Quadcopter for Smartphone and Remote Control
- Strategic Data Sourcing: The Key to Resilient Supply Chains
- Proven Steps for Rapid, Affordable Industrial Touch Screen Repair
- How to Display Images on a 1.17‑inch TFT LCD with Arduino UNO
- Display BMP Images from SD Card on Arduino 2.4″ TFT LCD Shield
- Arduino Temperature Sensor Project: Read, Convert, and Display Fahrenheit
- ArduTester Millennium: The Ultimate Arduino UNO & Mega 2560 Starter Kit
- Arduino TFT LCD Touch Screen Tutorial – Step‑by‑Step Guide