


How to Display Images on a 1.17‑inch TFT LCD with Arduino UNO
Components and supplies
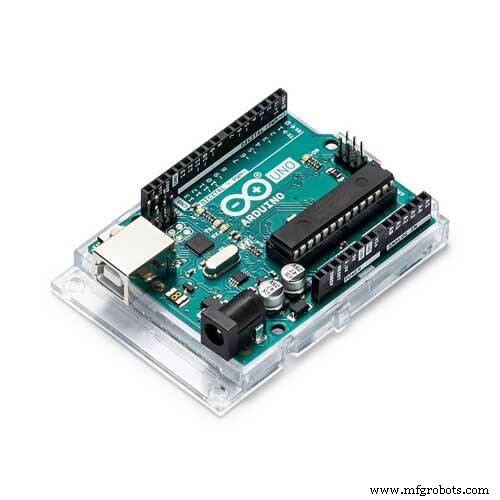 |
| × | 1 | |||
| × | 1 | ||||
| × | 1 |
Apps and online services
 |
|
About this project
In this article, I will show you how to get an image on a TFT screen with Arduino!
Read the tutorial below or watch the youtube video.
Wiring Diagram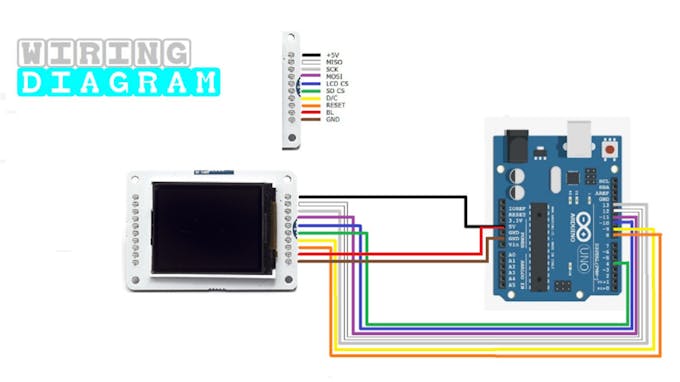
- 5V (LCD)
- 5V Arduino MISO (LCD)
- Pin 12 Arduino SCK (LCD)
- Pin 13 Arduino MOSI (LCD)
- Pin 11 Arduino LCD CS (LCD)
- Pin 10 Arduino SD CS (LCD)
- Pin 4 Arduino D/C (LCD)
- Pin 9 Arduino RESET (LCD)
- Pin 8 Arduino BL (LCD)
- 5V Arduino GND (LCD)
- GND Arduino
Keep the following in mind:
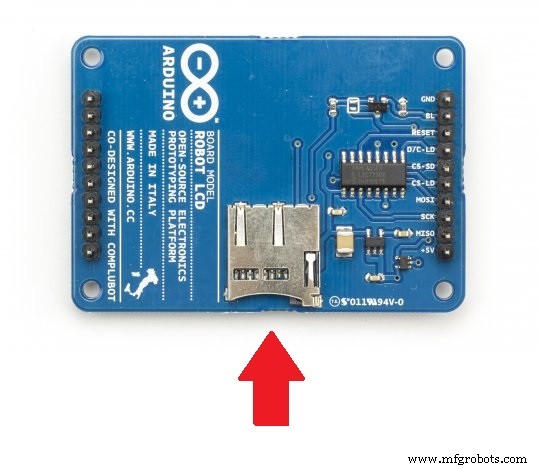
- The image must be a .bmp file
- Don't make the image larger as 160 x 128 pixels
- Make sure the image has arduino.bmp as filename and must be placed in the root domain of your SD card!
- The Arduino & TFT screen has to be voltage-free when assembling the SD card.
Copy the Arduino code below & upload it to your Arduino.
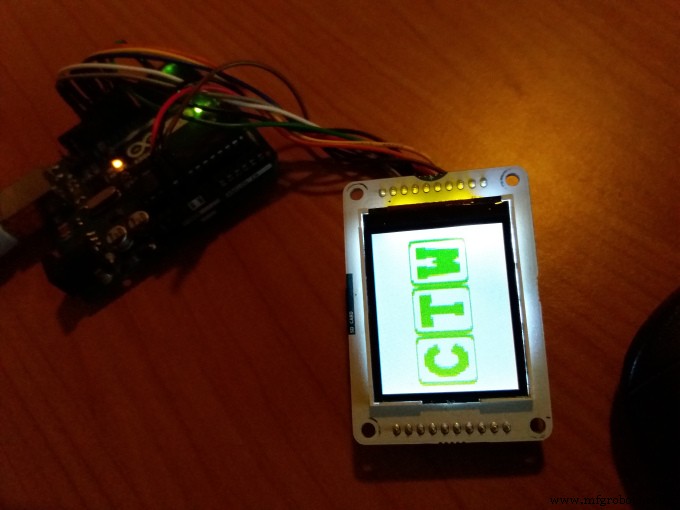
End resultOpen the serial monitor in your Arduino program. Your .bmp image is now displayed on the TFT screen. Or watch the video for the result.
Code
- Displaying an image on a LCD TFT screen with Arduino UNO sketch
Displaying an image on a LCD TFT screen with Arduino UNO sketchArduino
// CreaTechWeb : Displaying an image on a TFT screen with arduino

// https://createchweb.com/displaying-an-image-on-a-tft-screen-with-arduino/

// include the necessary libraries
#include <SPI.h>
#include <SD.h>
#include <TFT.h>  // Arduino LCD library

// pin definition for the Uno
#define sd_cs  4
#define lcd_cs 10
#define dc     9
#define rst    8

// pin definition for the Leonardo
//#define sd_cs  8
//#define lcd_cs 7
//#define dc     0
//#define rst    1

TFT TFTscreen = TFT(lcd_cs, dc, rst);

// this variable represents the image to be drawn on screen
PImage logo;


void setup() {
  // initialize the GLCD and show a message
  // asking the user to open the serial line
  TFTscreen.begin();
  TFTscreen.background(255, 255, 255);

  TFTscreen.stroke(0, 0, 255);
  TFTscreen.println();
  TFTscreen.println(F("Arduino TFT Bitmap Example"));
  TFTscreen.stroke(0, 0, 0);
  TFTscreen.println(F("Open serial monitor"));
  TFTscreen.println(F("to run the sketch"));

  // initialize the serial port: it will be used to
  // print some diagnostic info
  Serial.begin(9600);
  while (!Serial) {
    // wait for serial port to connect. Needed for native USB port only
  }

  // clear the GLCD screen before starting
  TFTscreen.background(255, 255, 255);

  // try to access the SD card. If that fails (e.g.
  // no card present), the setup process will stop.
  Serial.print(F("Initializing SD card..."));
  if (!SD.begin(sd_cs)) {
    Serial.println(F("failed!"));
    return;
  }
  Serial.println(F("OK!"));

  // initialize and clear the GLCD screen
  TFTscreen.begin();
  TFTscreen.background(255, 255, 255);

  // now that the SD card can be access, try to load the
  // image file.
  logo = TFTscreen.loadImage("arduino.bmp");
  if (!logo.isValid()) {
    Serial.println(F("error while loading arduino.bmp"));
  }
}

void loop() {
  // don't do anything if the image wasn't loaded correctly.
  if (logo.isValid() == false) {
    return;
  }

  Serial.println(F("drawing image"));

  // get a random location where to draw the image.
  // To avoid the image to be draw outside the screen,
  // take into account the image size.
  int x = random(TFTscreen.width() - logo.width());
  int y = random(TFTscreen.height() - logo.height());

  // draw the image to the screen
  TFTscreen.image(logo, x, y);

  // wait a little bit before drawing again
  delay(1500);
}
Build a Voice‑Controlled Robot with Arduino Nano
Create Smart Match‑Making Sunglasses with Arduino 101 and tinyTILE BLE
Manufacturing process
- Arduino Nano Flight Simulator 2020 Control Panel – LCD & CDI Display
- Build an Arduino Real‑Time Clock for Islamic Prayer Times
- Mastering an 8×8 LED Matrix with Arduino Uno: A Step‑by‑Step Guide
- Real-Time Soil Moisture Monitoring with LCD Display – Arduino DIY Kit
- Build an IR Sensor Project with Arduino UNO – Simple Guide
- Build a Reliable Alarm Clock with DS1302 RTC and Arduino UNO
- Build an Arduino LCD Thermometer Using LM35/36 Temperature Sensor
- 25 kHz 4‑Pin PWM Fan Control Using Arduino Uno – Build, Code & Test
- Efficiently Program ATtiny85 Using Arduino Uno: A Cost‑Effective Multi‑Sensor Solution
- Arduino TFT LCD Touch Screen Tutorial – Step‑by‑Step Guide