


Build and Program 8x8 & 16x16 WS2812 RGB LED Matrix Animations with Arduino and Excel
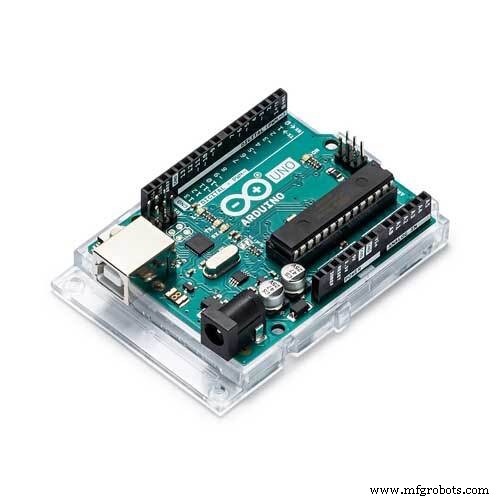
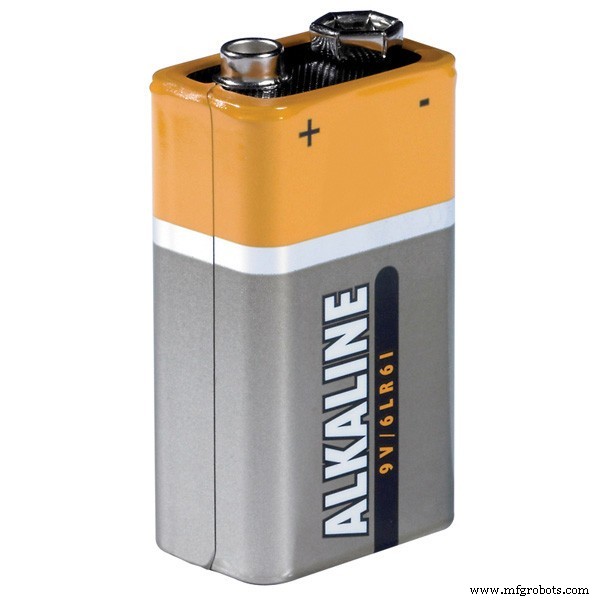
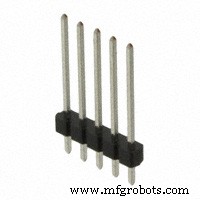
Components and Supplies
 |
| × | 1 | |||
| × | 1 | ||||
 |
| × | 3 | |||
 |
| × | 1 | |||
 |
| × | 1 | |||
 |
| × | 1 |
Necessary Tools and Machines
 |
| |||
 |
|
About This Project
When I first purchased a WS2812 8x8 RGB LED matrix, I expected to address it as a traditional XY coordinate system. Instead, the 64 LEDs are daisy‑chained into eight rows of eight. I discovered that Kevin Darrah’s Excel utility, originally designed for a 16×16 matrix, could be adapted to control an 8×8 array. By modifying both the spreadsheet and the accompanying Arduino sketch, I created a versatile tool that lets you program LED animations without external libraries.
The updated Excel workbook, LED_Utility.xlsm, now supports:
- Individual RGB assignment for each LED.
- Dynamic property changes via VBA scripting.
- XY relocation to simulate motion.
- Built‑in palettes for quick color selection.
- Dual support for 8×8 and 16×16 matrices.
Below you’ll find step‑by‑step instructions for building the hardware, configuring the Excel utility, and uploading the Arduino sketch. Each project builds on the last, introducing concepts such as loops, conditionals, and modular functions.
Assemble the Hardware
Attach the 8×8 matrix to an Arduino UNO using a 5‑pin header:
- Attach DIN to pin 8 on the Arduino.
- Connect +5V to the 5V pin.
- Ground to the GND pin.

For this setup, the coordinate (0,0) refers to the top‑left corner of the matrix.
Excel Utility Overview
Open LED_Utility.xlsm – it contains three sheets:
- Eight – 8×8 matrix interface.
- Sixteen – 16×16 matrix interface.
- ColMap – a handy reference of common RGB codes.
The workbook is set to read‑only by default to protect your work. Use File → Save As after generating code to preserve your design.
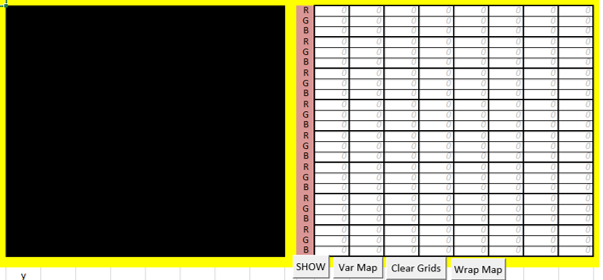
Key features on the Eight sheet:
- Show – displays RGB values for the selected cells (0–255).
- Var Map – accepts numeric or variable inputs but shows no output.
- Wrap Map – adds a modulus function to handle coordinate overflow and supports variables for later use.
- Clear – empties both input grids.
Each button generates a block of C++ code that you copy into the Arduino sketch. The code is formatted for the custom mapLEDXY() function, which converts XY coordinates into the appropriate LED index.
Arduino Sketch
The core sketch (LED_Arduino.ino) contains the following elements:
// Pin definition
#define WS2812_pin 8
// Total LED count
#define numberOfLEDs 64
// RGB buffer (3 bytes per LED)
byte RGB[192];

// Forward declarations
void RGB_update(int LED, byte RED, byte GREEN, byte BLUE);
void mapLEDXY(int x, int y, byte RED, byte GREEN, byte BLUE);
void clearLEDs();
The mapLEDXY() routine maps a coordinate pair to the linear array, accounting for the zig‑zag wiring pattern common to WS2812 matrices.
After copying your generated code into the loop() function, upload the sketch. The matrix will respond instantly to the instructions.
Project 1 – Static Red Square
Create a 3×3 red square at coordinates (2,2) to (4,4). In Excel, set the corresponding cells to 255 for red and 0 for green/blue. Copy the generated code into line 40 of the sketch:
mapLEDXY(2,2,255,0,0);mapLEDXY(2,3,255,0,0);mapLEDXY(2,4,255,0,0);
mapLEDXY(3,2,255,0,0);mapLEDXY(3,3,255,0,0);mapLEDXY(3,4,255,0,0);
mapLEDXY(4,2,255,0,0);mapLEDXY(4,3,255,0,0);mapLEDXY(4,4,255,0,0);
Upload and watch the square light up. Experiment by clearing the grid, changing colors, or adding a border.
Project 2 – Dual‑Color Squares
Duplicate the sketch as Colour_Sq.ino and modify the Excel sheet to create a second, larger square. Use the Show button to generate code and paste it into the sketch. Add a simple delay and clearLEDs() to toggle between the two shapes.
Project 3 – Growing Square
In the Grow.ino sketch, design a smaller inner square and surround it with a border of your choice. Remove the inner square’s values, generate the outer code, and paste both blocks into the sketch. The result is an animated square that expands and contracts.
Project 4 – Spiral Animation
For complex patterns, encapsulate each frame in a separate function and call them from loop(). The sample Spiral.ino uses five helper functions to build a 5‑layer spiral. This modular approach keeps the main loop concise and makes future edits straightforward.
Project 5 – Variable Brightness Loop
Introduce a for loop to animate brightness:
for (int r=0; r<256; r++) {
  mapLEDXY(3,3,r,0,0);mapLEDXY(3,4,r,0,0);
  mapLEDXY(4,3,r,0,0);mapLEDXY(4,4,r,0,0);
  RGB_update(-1,0,0,0); delay(50);
}
for (int r=255; r>=0; r--) {
  mapLEDXY(3,3,r,0,0);mapLEDXY(3,4,r,0,0);
  mapLEDXY(4,3,r,0,0);mapLEDXY(4,4,r,0,0);
  RGB_update(-1,0,0,0); delay(50);
}
The square fades up and down automatically.
Project 6 – Fading Border
Combine for loops with a shared g variable to fade a surrounding border:
for (int g=0; g<256; g++) {
  b=g;
  mapLEDXY(...); // border cells
  RGB_update(-1,0,0,0); delay(50);
}
for (int g=255; g>=0; g--) {
  b=g;
  mapLEDXY(...); // border cells
  RGB_update(-1,0,0,0); delay(50);
}
Here the blue channel tracks green to create a smooth fade.
Project 7 – Color Transition
Use an if statement to change mid‑border cells from green to yellow once a threshold is reached:
for (int r=0; r<256; r++) {
  g=r;
  if (g>64) { g=65; l=r; }
  mapLEDXY(...); // cells
  RGB_update(-1,0,0,0); delay(50);
}
Experiment with different thresholds for varied effects.
Project 8 – Moving Arrow
Generate a moving arrow by parameterizing the X coordinate:
for (int x=0; x<8; x++) {
  mapLEDXY((x+0)%8,3,0,255,255);
  mapLEDXY((x+1)%8,1,255,128,128);
  mapLEDXY((x+1)%8,3,0,255,255);
  mapLEDXY((x+1)%8,5,255,128,128);
  mapLEDXY((x+2)%8,2,255,128,128);
  mapLEDXY((x+2)%8,3,0,255,255);
  mapLEDXY((x+2)%8,4,255,128,128);
  mapLEDXY((x+3)%8,3,255,128,128);
  RGB_update(-1,0,0,0); delay(100);
}
Use the Wrap Map feature in the spreadsheet to handle coordinate overflow.
16×16 Matrix Usage
All the concepts above transfer directly to a 16×16 matrix. Replace LED_Arduino.ino with LED_Arduino16.ino and switch to the Sixteen sheet in the workbook. The only adjustment needed is the numberOfLEDs definition and the RGBlocation calculation in mapLEDXY().
Extensions & Tips
While this guide focuses on 8×8 and 16×16 arrays, the same methodology applies to other sizes (e.g., 8×32). For each new size, update the numberOfLEDs constant and modify the index calculation to match the matrix’s wiring pattern. Keep the workbook in read‑only mode to avoid accidental loss of custom code. Consider using a smaller board, such as an Arduino Nano, if power consumption is a concern.
Manufacturing process
- Arduino Nano Flight Simulator 2020 Control Panel – LCD & CDI Display
- Build and Program 8x8 & 16x16 WS2812 RGB LED Matrix Animations with Arduino and Excel
- Arduino RGB LED Color Mixer – Beginner‑Friendly DIY Project
- Mastering an 8×8 LED Matrix with Arduino Uno: A Step‑by‑Step Guide
- Outdoor DMX-Enabled RGB LED Flood Lights – Affordable & High-Performance
- RGB LED Backlight with MSGEQ7 Audio Visualizer for TV and Desk
- Build an 8x8x8 RGB LED Cube with Arduino – DIY Guide
- Build Stunning Web-Driven LED Animations with Raspberry Pi & Arduino
- Smart Staircase RGB LED Lighting System – Motion-Activated & Easy to Install
- WS2812 vs WS2812B: Key Differences in Addressable RGB LED Strips