


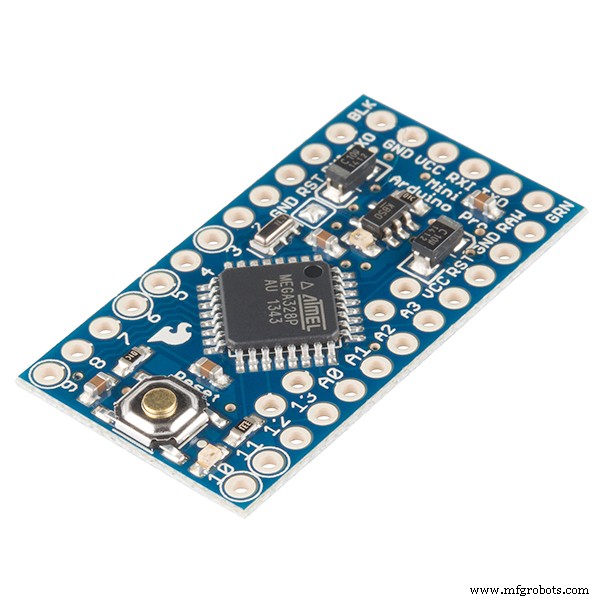
Turn an Old Phone into a Scavenger Hunt Clue System with SparkFun Arduino Pro Mini
Components and supplies
 |
| × | 1 | |||
| × | 1 | ||||
| × | 1 | ||||
 |
| × | 1 | |||
 |
| × | 1 | |||
| × | 1 | ||||
| × | 1 |
Necessary tools and machines
 |
| |||
|
About this project
Follow these instructions to transform an old telephone into a scavenger hunt clue system.
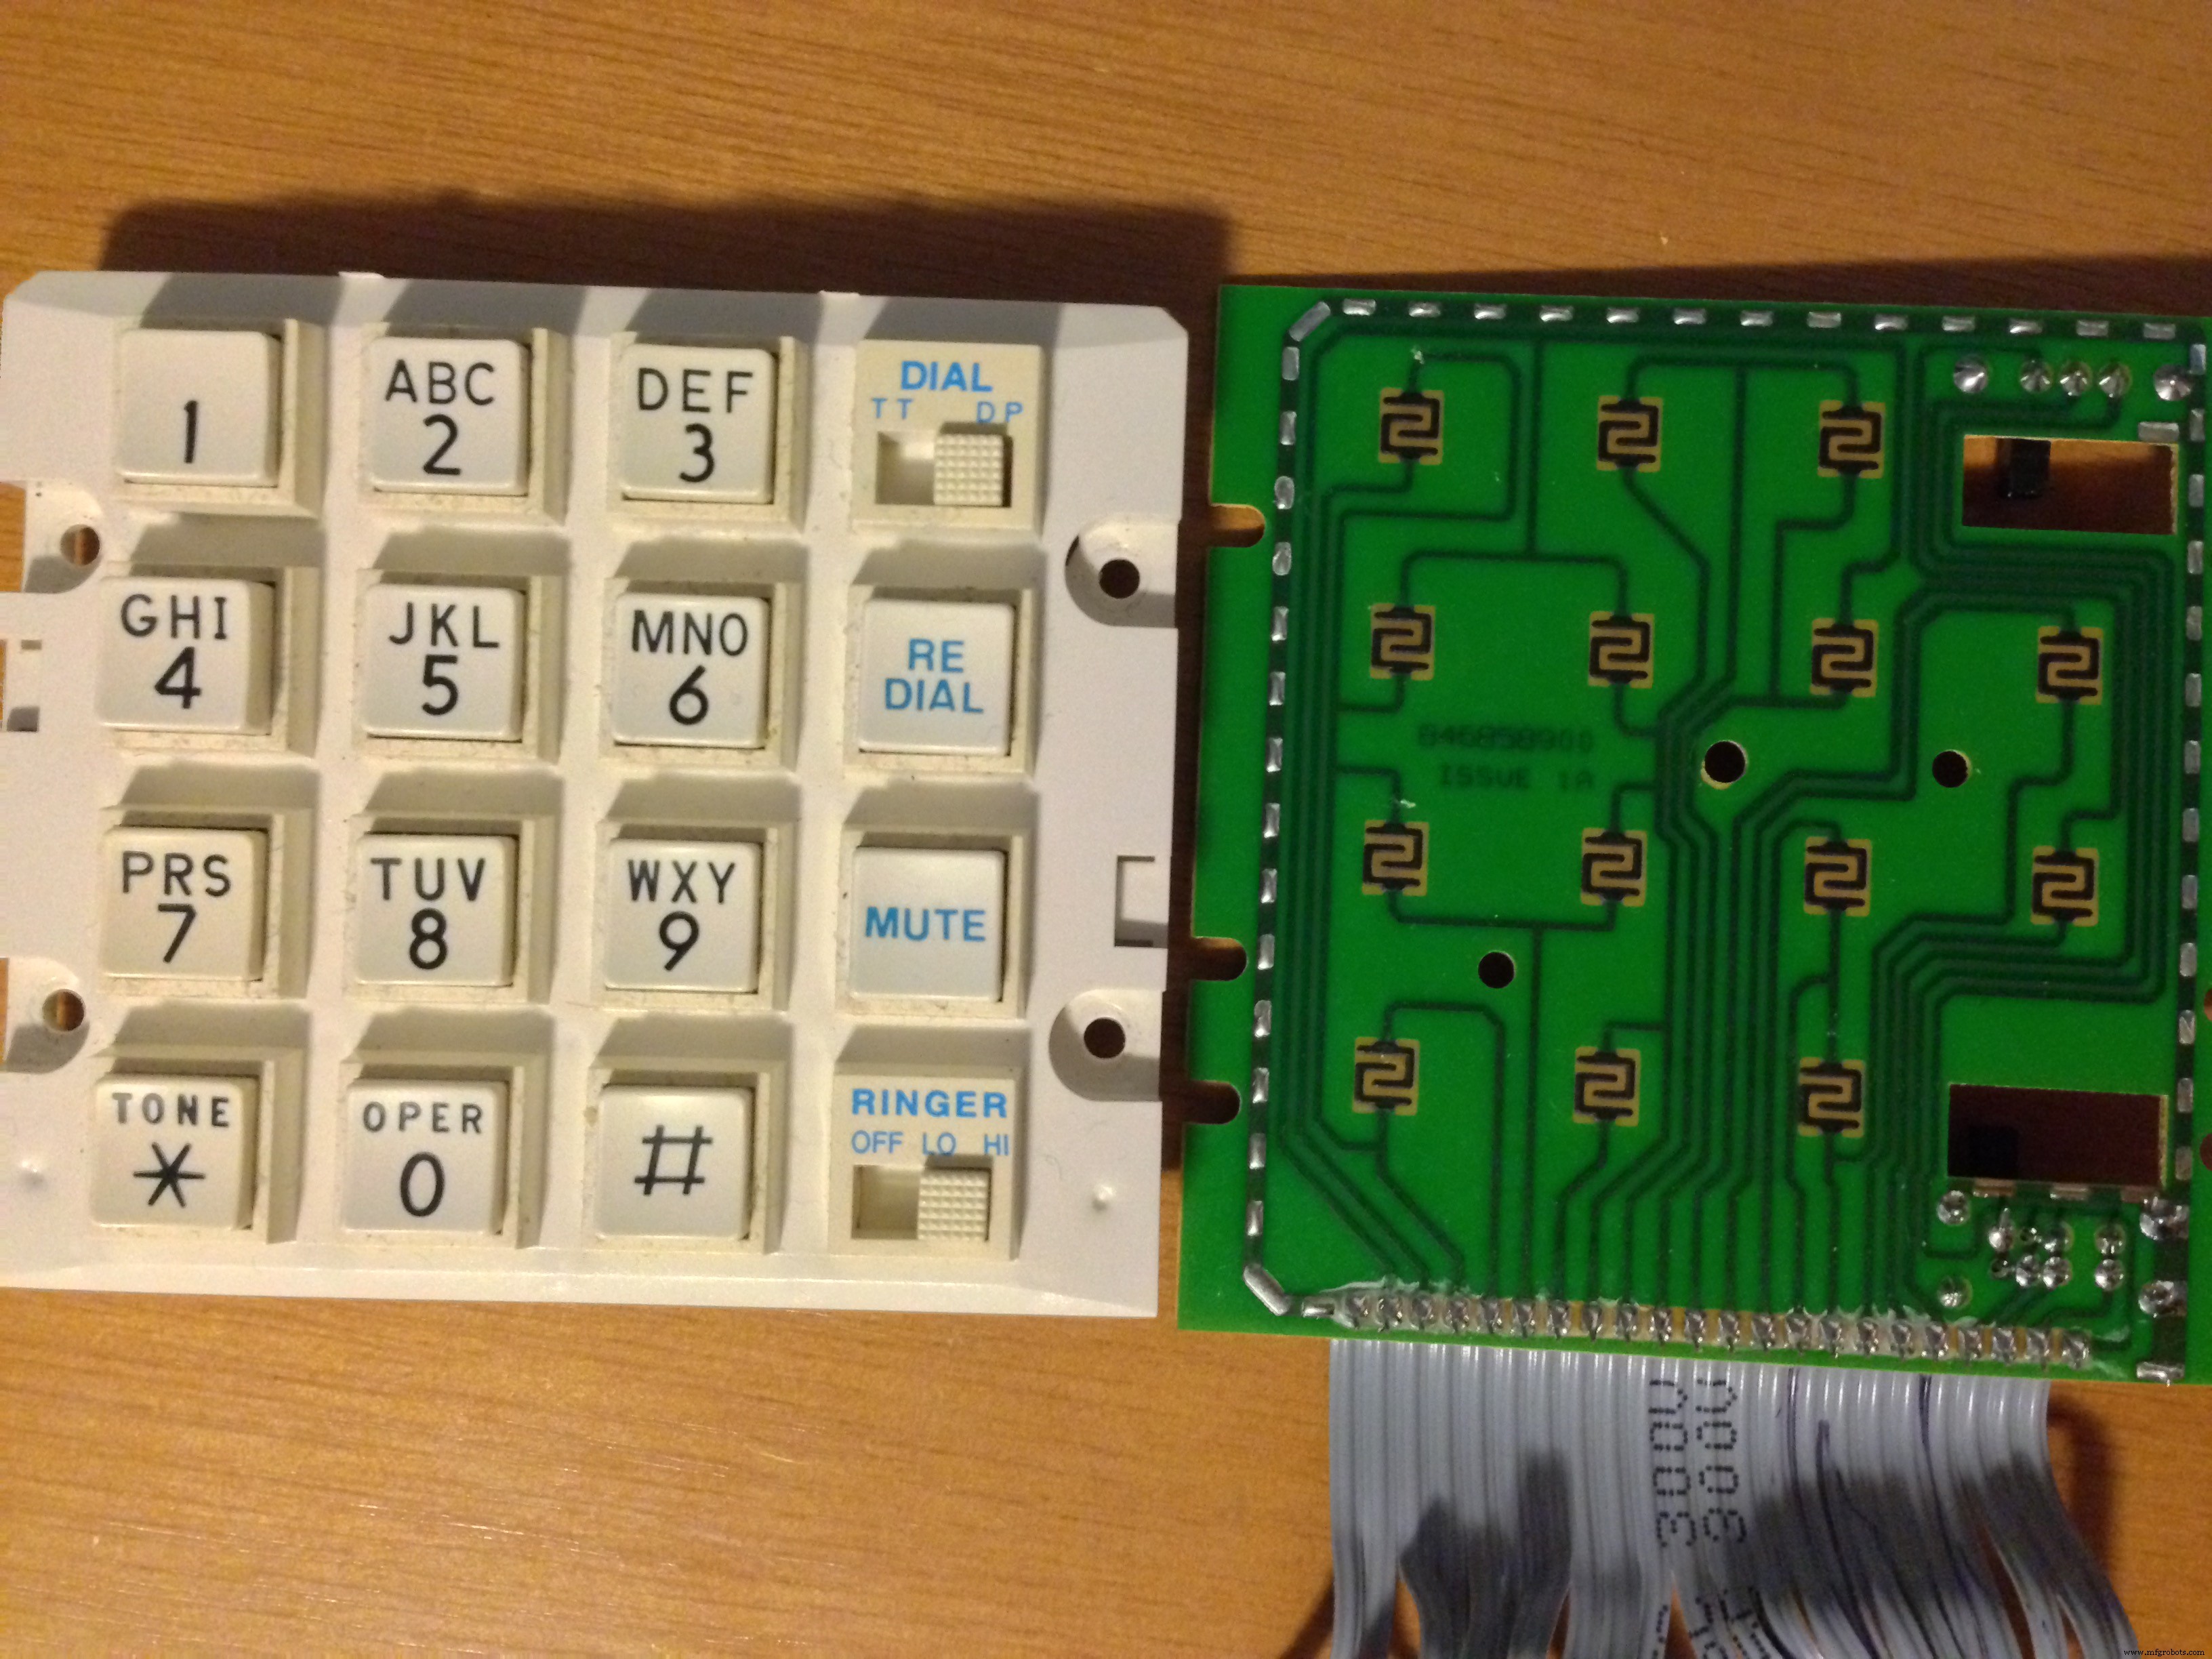
Step 1 - Keypad Rows and ColumnsTake apart the telephone and remove the keypad. Keypads use a system of rows and columns to detect key presses. This page gives good instructions for identifying buttons on a keypad and mapping them to the appropriate row and column using a multimeter with continuity. In my case, the keypad looks like this:
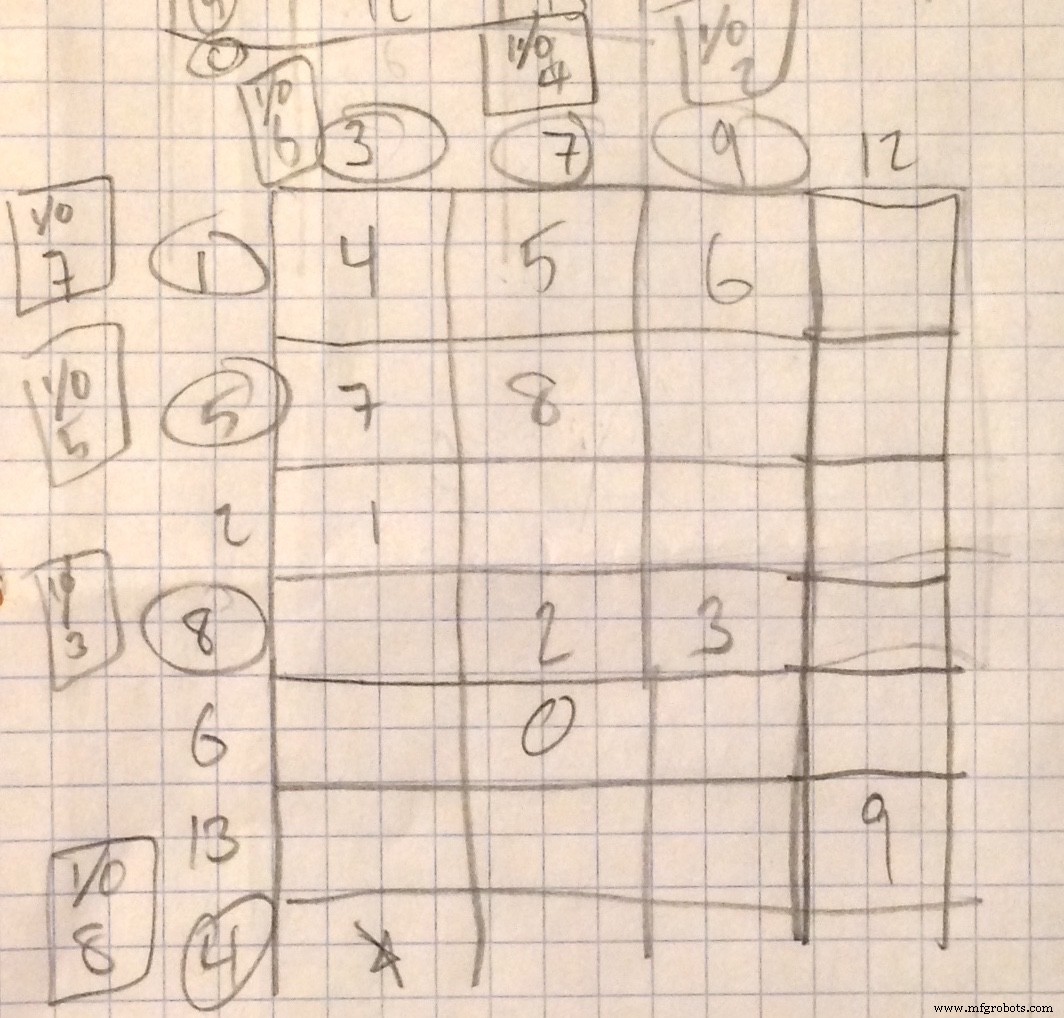
The circuit on your keypad (if visible) makes it very easy to identify which pins connect to each key. Unfortunately, my keypad's pins don't seem to form perfect rows and columns, so the second picture shows the matrix I created to help me divide the pins into rows and columns. The circled numbers represent the keypad pin numbers, the numbers in the matrix represent the keys, and the boxed numbers "I/O" represent the Arduino pins. Be sure to make note of the pin mapping, and then assign each of the keypad pins to an Arduino pin. My keypad is strange, as it seems to have more pins than necessary, but that's OK.
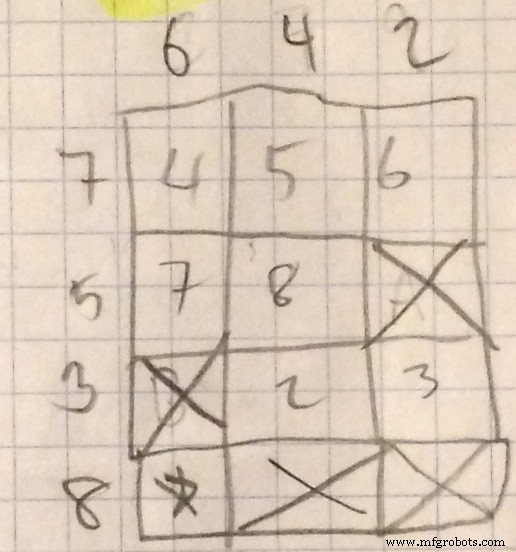
The third picture shows my final simplified matrix, only making use of the buttons I use. It almost looks like rows and columns at this point! In my code, I use placeholders A, B, C, and D to fill in the empty spots in the matrix. These keys don't exist on my keypad.
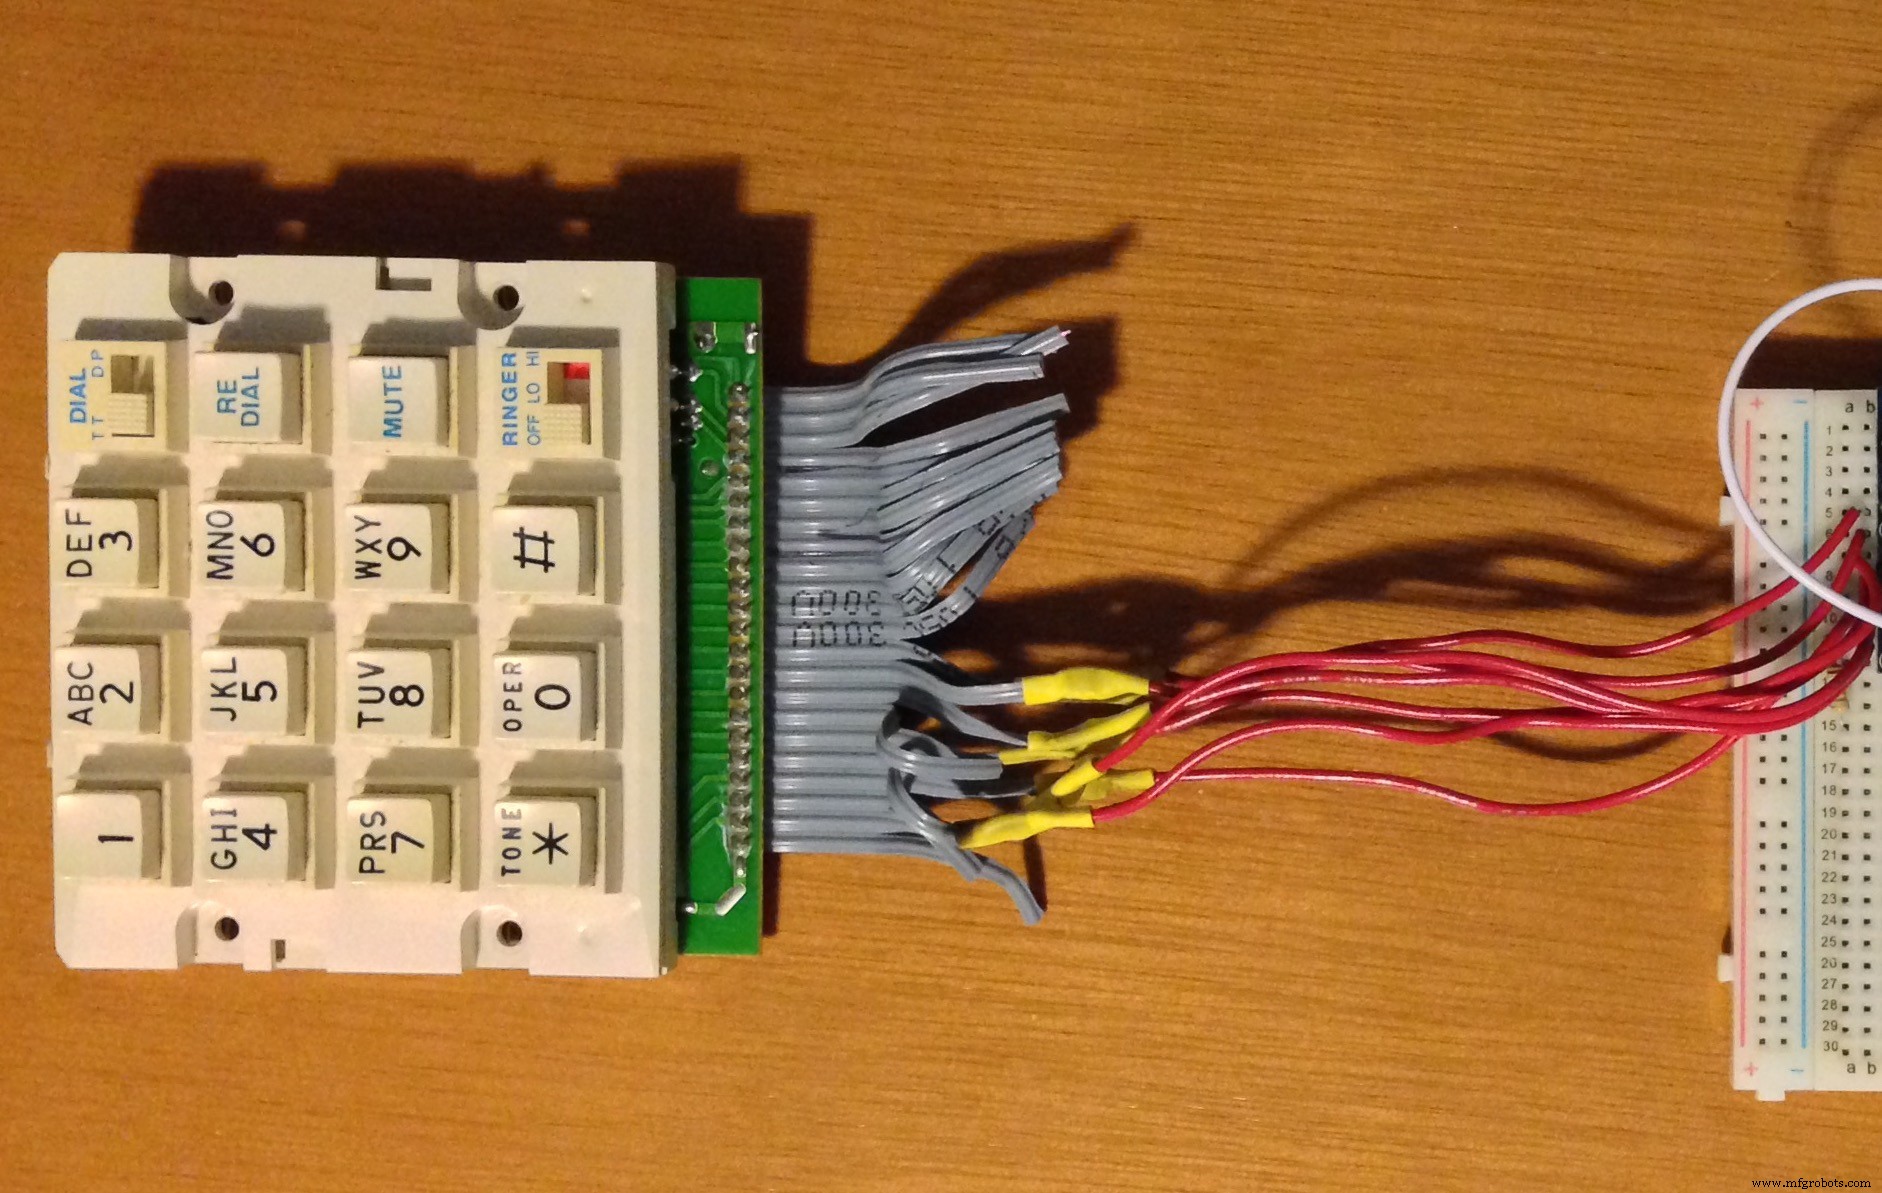
Step 2 - Solder extensions to the keypadTo make it easier to connect the keypad pins to the breadboard, solder extensions to the needed pins. In order to make this project, using each key on the keypad is not necessary, so the below picture only shows the pins I chose to use. I used a 4 digit passcode, so I only needed 5 keys (including * ).
In my project the voice in the clue is Peter from Natural Readers text to speech. Download the voice file. Next, prepare the morse code. There are many morse code audio generators online, but I used this one from SCPhillips.com. Download this file as well. Also, download this key press beep sound.
Audacity is a great tool for editing audio, and can be used to merge the morse code and voice files as well as shorten the beeps into a single beep.
Drag and drop these files into Audacity and adjust the clue file until it fits your needs. Also, shorten the keypad beeps by highlighting the unwanted portion and tapping delete.

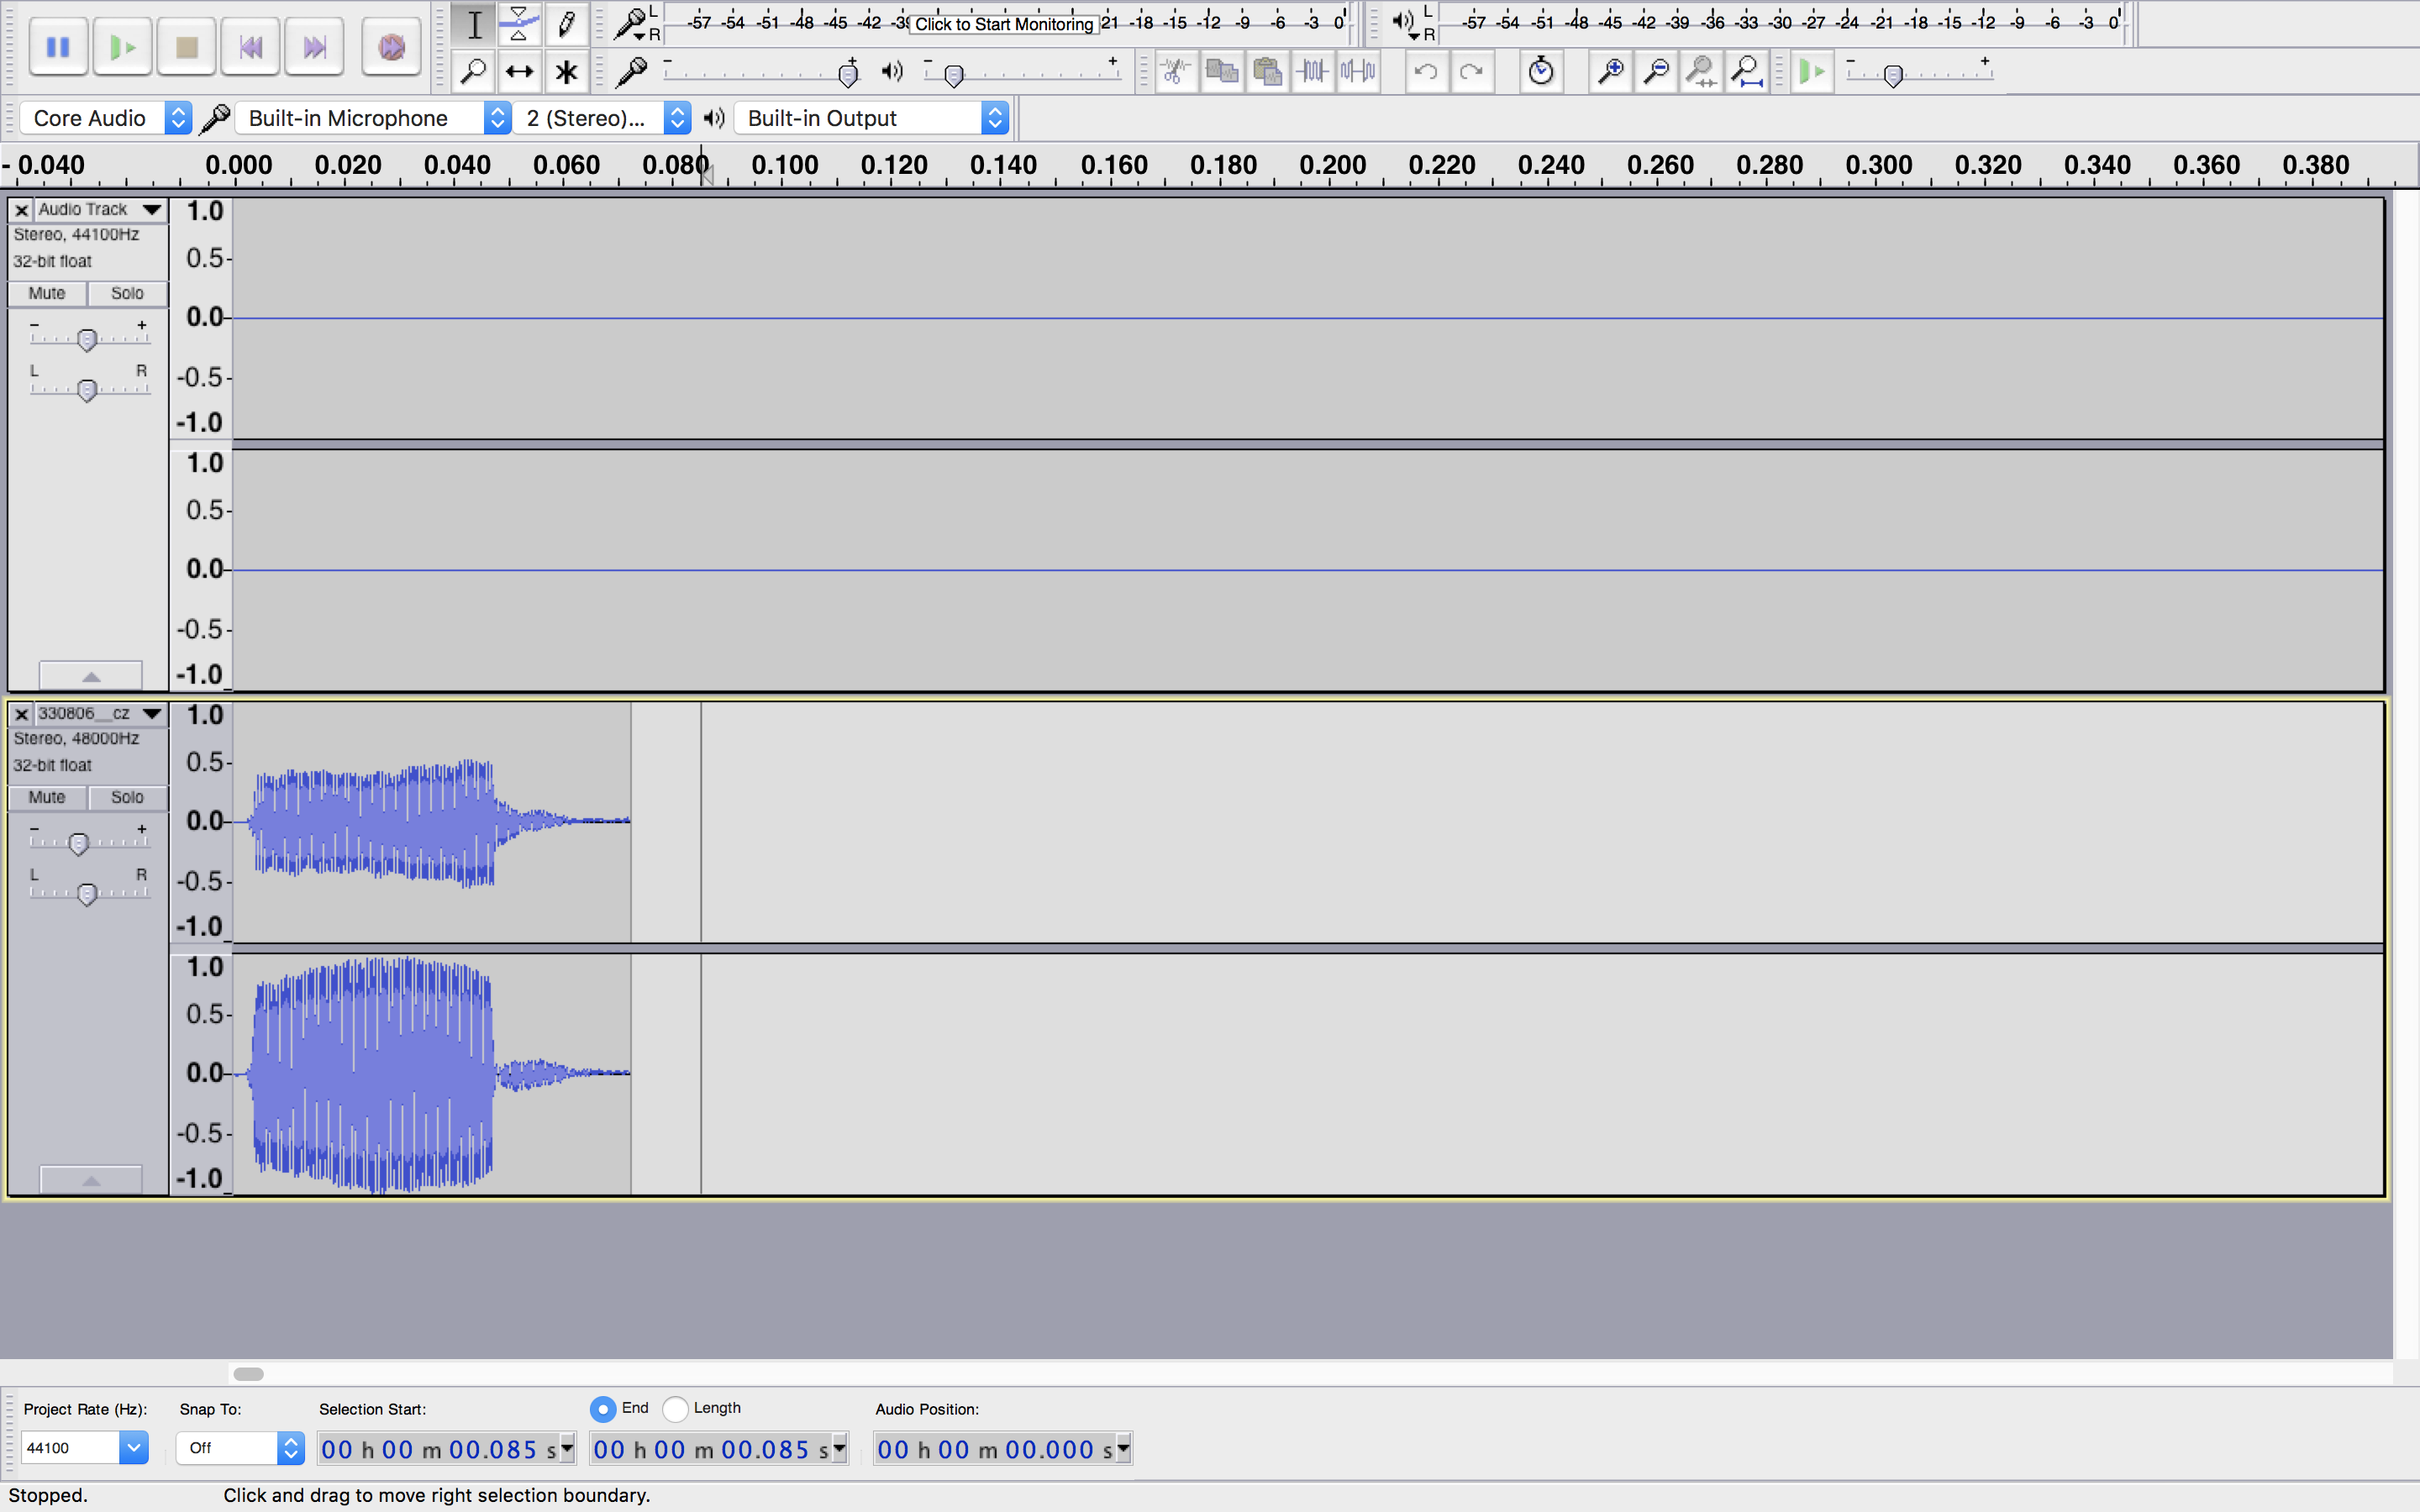
Save the Audacity file, then Export each track separately as MP3. If you have never used Audacity before, you may have to download the LAME MP3 encoder.
In order for the audio files to play on this specific MP3 player board, they must be named correctly and placed inside a folder on the SD card. Each MP3 must be named 001, 002, etc to correspond with trigger pins 1-9 on the MP3 board. Also, the files must be inside a folder named 01 on the SD card. Other MP3 trigger boards may be able to handle this easier.
Step 4 - Download libraries and prepare codeFor this project, the Keypad and Password Arduino libraries are needed. Download and install these libraries, and download the code for this project (below). Make the passcode whatever you'd like, and fill in the key matrix with your corresponding keys.
Step 5 - Hook up everythingGut the inside of the telephone and cram the new stuff inside! You may can squeeze a power bank in there.


Like this project? Check out my other projects here!
Code
- Phone Keypad Sketch
Phone Keypad SketchArduino
This example code was modified to work with a telephone keypad and MP3 trigger.#include <Password.h> //http://www.arduino.cc/playground/uploads/Code/Password.zip
#include <Keypad.h> //http://www.arduino.cc/playground/uploads/Code/Keypad.zip
Password password = Password( "7365" );
const byte ROWS = 4; // Four rows
const byte COLS = 3; // columns
// Define the Keymap
char keys[ROWS][COLS] = {
{'4','5','6'},
{'7','8','A'}, //"A" is a placeholder; no such button exists on my keypad
{'B','2','3'}, //"B" is a placeholder; no such button exists on my keyopad
{'*','C','D'} //"C" and "D" are placeholders; no such buttons exist on my keypad
};
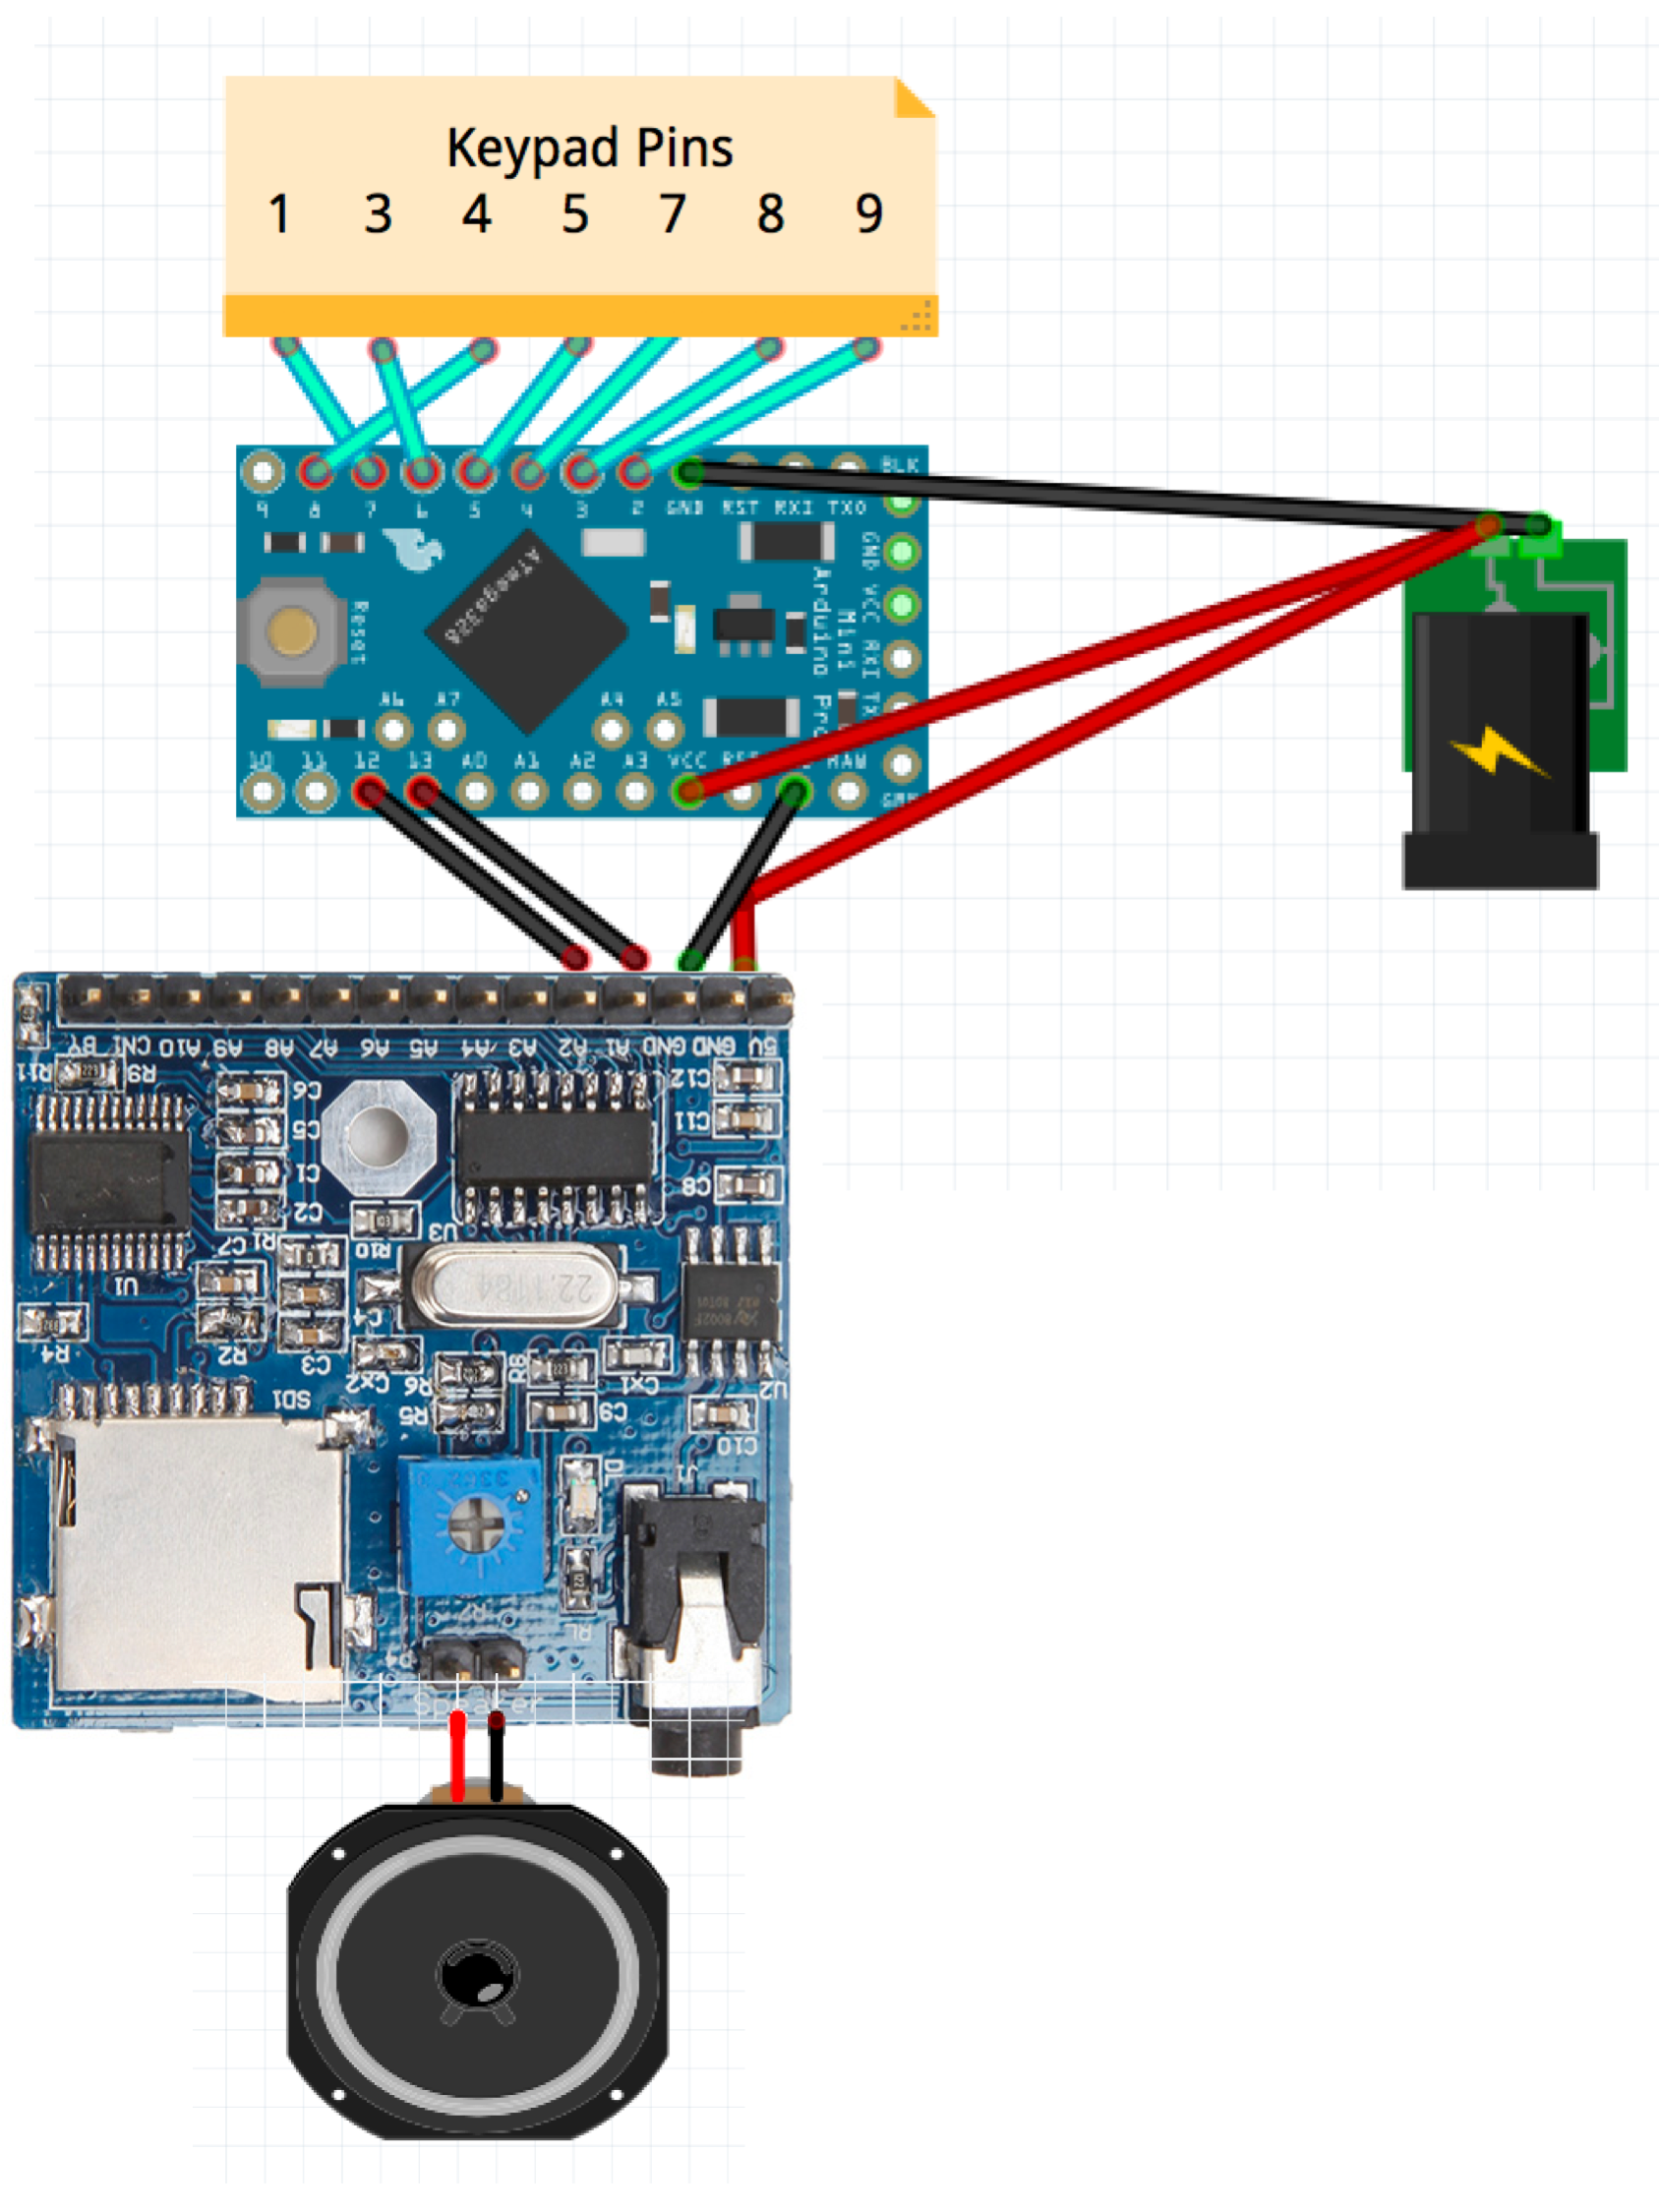
byte rowPins[ROWS] = { 7,5,3,8 };//Connect keypad rows to these Arduino pins.
byte colPins[COLS] = { 6,4,2 };// Connect keypad columns to these Arduino pins.
const int dial = 13; //Digital Arduino pin going to MP3 triggerboard.
const int morse = 12; //Digital Arduino pin going to MP3 trigger board.
// Create the Keypad
Keypad keypad = Keypad( makeKeymap(keys), rowPins, colPins, ROWS, COLS );
void setup(){
pinMode(dial, OUTPUT);
pinMode(morse, OUTPUT);
digitalWrite(dial, HIGH); //MP3 board triggers active low, so begin with HIGH.
digitalWrite(morse, HIGH); //MP3 board triggers active low, so begin with HIGH.
Serial.begin(9600);
keypad.addEventListener(keypadEvent); //add an event listener for this keypad
}
void loop(){
keypad.getKey();
}
//take care of some special events
void keypadEvent(KeypadEvent eKey){
switch (keypad.getState()){
case PRESSED:
Serial.print("Pressed: "); //For monitoring
Serial.println(eKey); //For monitoring
digitalWrite(dial, LOW); //Play the dial beep audio file; this occurs for each key press
delay(50);
digitalWrite(dial, HIGH);
switch (eKey){
case '*': checkPassword(); break; // * is the enter key
default: password.append(eKey);
}
}
}
void checkPassword(){
if (password.evaluate()){
Serial.println("Success"); //Monitoring
password.reset(); //Clear the key entries
digitalWrite(morse, LOW); //Play the clue audio file
delay(50);
digitalWrite(morse, HIGH);
}else{
Serial.println("Wrong"); //Monitoring
password.reset(); //Clear the key entries for the next passcode attempt
}
}
Schematics
Manufacturing process
- DIY Cloud Costume: LED Strip, Arduino Nano & SparkFun Parts
- 3D RGB Arduclock – Bluetooth LED Timepiece with Real‑Time Clock
- River Health Monitor: Arduino-Based Water Quality System
- Interactive Joystick Game with Arduino and LED Feedback
- Find Me: Smart Item Locator with Arduino and Bluetooth
- Arduino-Powered Little Rover: Build Your Own Autonomous Robot
- Build a Custom Arduino Joystick Steering Wheel for Gaming
- IoT4Car: Capture & Analyze Vehicle Telemetry with Arduino MKR1000
- Ultimate DIY Kegerator: Complete Components & Build Guide
- Arduino 4WD RC Car – Complete Parts List & Build Guide