


Bluetooth‑Enabled 8x8 LED Matrix with Scrolling Text – Arduino Project
Components and supplies
 |
| × | 1 | |||
 |
| × | 1 | |||
| × | 7 | ||||
| × | 1 | ||||
| × | 2 |
Necessary tools and machines
 |
|
Apps and online services
 |
| |||
|
About this project
After several attempts to make a scrolling text on the 8x8 matrix, I found the most complete manual on the Embedded Lab page : http://embedded-lab.com/blog/portable-bluetooth-enabled-scrolling-led-matrix-display-part-1/.
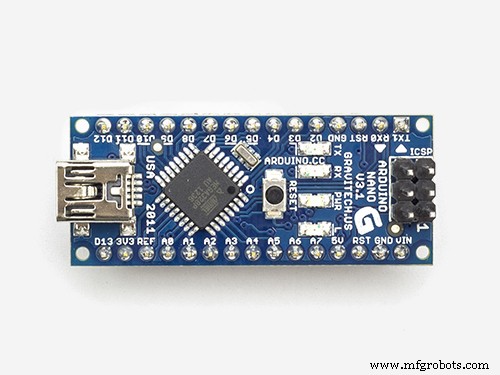
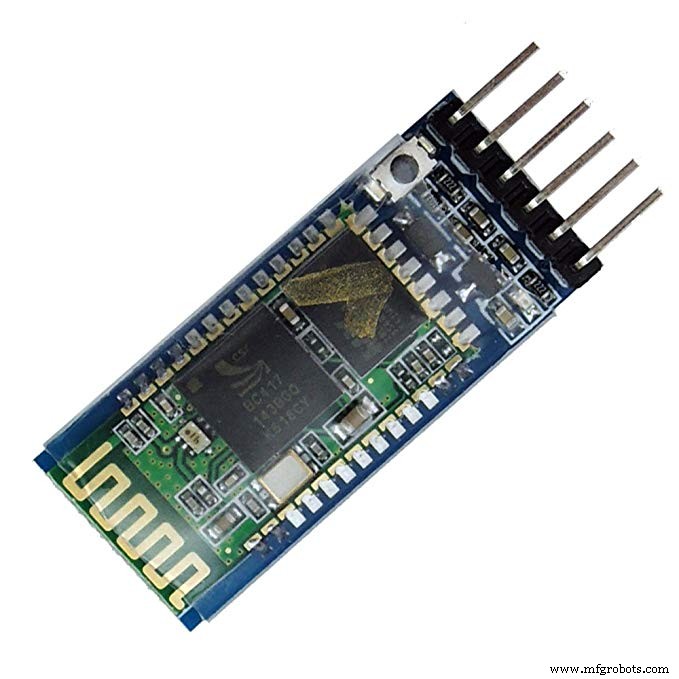
The device contains an Arduino nano, Bluetooth module for receiving data from the smartphone and 8x8 LED matrices driven by MAX7219.
Unlike there, I used ready-made 8x8 matrix modules with MAX7219 chip that can be purchase very cheap on Ebay or Alexpress. At the moment, I only had 7 modules, so I made a small modification of the code. An android application does not exist anymore on Google Play store, so you can download it from :
https://bluetooth-spp-pro.en.uptodown.com/android
. It can control the speed of the scrolling, brightness of leds, pause, erase text, and several predefined text buttons.
In the end, I put the whole device in a box, which I made from a PVC material that I put on it with a black wallpaper.
Arduino Libraries:
https://github.com/markruys/arduino-Max72xxPanel
https://github.com/adafruit/Adafruit-GFX-Library
Code
- code
codeArduino
/*
Here are the commands Arduino recognizes.
1. Any character stream must be sent enclosed inside parenthesis.
Example: Suppose if you want to display a message "Hello! How are you doing?"
You should send it like this: (Hello! How are you doing?)
When the Arduino receives the first character as '(', it understands that the upcoming characters are display data until ')'
is received. The message is displayed as scrolling from right to left.
2. Display intensity can be incremented or decremented by sending /+ or /- respectively. Every time the Arduino receives '/',
it understands it is a command. It supports 16 brightness levels.
3. Similarly, scrolling speed can be increased or decreased by sending /< or /> respectively.
4. /p is used to pause the scrolling message. Sending this command again resumes the scroll.
5. /e is used to erase the buffer and blank the display
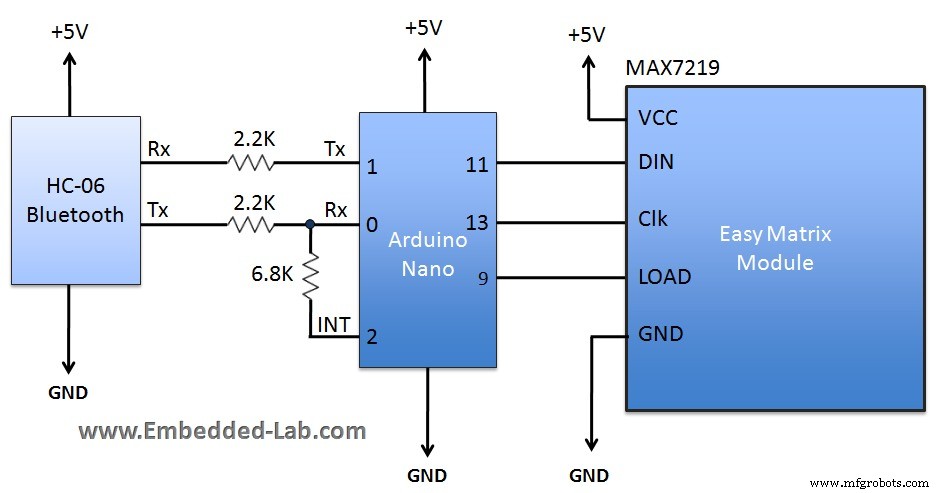
Connections:
Easy Matrix Arduino
VCC +5V
DIN MOSI (Pin 11)
LOAD pinCS defined in the program below
CLK SCK (Pin 13)
GND Gnd
The UART communication happens at 9600 baud.
Written by: Rajendra Bhatt
Contact: admin@embedded-lab.com
Easy Matrix product link: http://embedded-lab.com/blog/?p=9186
*/
#include <SPI.h>
#include <Adafruit_GFX.h>
#include <Max72xxPanel.h>
int pinCS = 10; // Attach CS to this pin, DIN to MOSI and CLK to SCK (cf http://arduino.cc/en/Reference/SPI )
int numberOfHorizontalDisplays = 7;
int numberOfVerticalDisplays = 1;
Max72xxPanel matrix = Max72xxPanel(pinCS, numberOfHorizontalDisplays, numberOfVerticalDisplays);
int scrollspeed = 100; // Default scrollspeed (milliseconds)
int spacer = 1; // Space between two characters
int width = 5 + spacer; // The font width is 5 pixels
boolean inChar = false, NewData = false, pause = false;
boolean dataAvailable = false;
char inputString[512];
int count = 0, BTvalue = 5;
void setup() {
matrix.setIntensity(1); // Use a value between 0 and 15 for brightness
// Adjust to your own needs
matrix.setPosition(0, 0, 0); // The first display is at <0, 7>
matrix.setPosition(1, 1, 0); // The second display is at <1, 0>
matrix.setPosition(2, 2, 0); // The third display is at <2, 0>
matrix.setPosition(3, 3, 0); // And the last display is at <3, 0>
matrix.setPosition(4, 4, 0); // The first display is at <0, 0>
matrix.setPosition(5, 5, 0); // The second display is at <1, 0>
matrix.setPosition(6, 6, 0); // The third display is at <2, 0>
// ...
// matrix.setRotation(0, 2); // The first display is position upside down
// matrix.setRotation(3, 2); // The same hold for the last display
matrix.fillScreen(0);
matrix.write();
Serial.begin(9600); // serial communication initialize
// Using interrupt 0 on digital pin 2.
pinMode(2, INPUT);
digitalWrite(2, LOW);
attachInterrupt(0, serialInterrupt, CHANGE);
}
void loop(){
if(dataAvailable){
display_data();
}
}
void display_data(){
for ( int i = 0 ; i < width * count + matrix.width() - 1 - spacer; i++ ) {
matrix.fillScreen(0);
int letter = i / width;
int x = (matrix.width() - 1) - i % width;
int y = (matrix.height() - 8) / 2; // center the text vertically
while ( x + width - spacer >= 0 && letter >= 0 ) {
if ( letter < count ) {
matrix.drawChar(x, y, inputString[letter], HIGH, LOW, 1);
}
letter--;
x -= width;
}
matrix.write(); // Send bitmap to display
if(!dataAvailable){
i = width * count + matrix.width() - 1 - spacer;
matrix.fillScreen(LOW);
matrix.write();
}
if(NewData){
i = 0;
matrix.fillScreen(LOW);
matrix.write();
NewData = false;
}
while(pause == true){
delay(0);
} // Pause here if pause command is received
delay(scrollspeed);
}
}
// Volatile, since it is modified in an ISR.
volatile boolean inService = false;
void serialInterrupt(){
if (inService) return;
// You was not in service. Now you are.
inService = true;
// Reenable interrupts, to allow Serial to work. We do this only if inService is false.
interrupts();
while(!Serial.available());
while (Serial.available()) {
char ch = Serial.read();
if(ch =='('){
count = 0;
inChar = true;
while(inChar){
if (Serial.available()) {
ch = Serial.read();
if(ch == ')'){
inChar = false;
dataAvailable = true;
} else{
inputString[count] = ch;
count++;
}
if(count > 0) {
NewData = true;
}
}
}
}
if(ch =='/'){ // Command mode
inChar = true;
while(inChar){
if (Serial.available()) {
ch = Serial.read();
// '/+' is for brightness increment
if(ch == '+'){
if(BTvalue < 15) {
BTvalue ++;
matrix.setIntensity(BTvalue);
}
break;
}
// '/-' is for brightness decrement
if(ch == '-'){
if(BTvalue > 0){
BTvalue --;
matrix.setIntensity(BTvalue);
}
break;
}
// '/>' is to slow down scroll
if(ch == '>'){
if(scrollspeed < 200) {
scrollspeed = scrollspeed + 20;
}
break;
}
// '/<' is to make scroll faster
if(ch == '<'){
if(scrollspeed > 10){
scrollspeed=scrollspeed-10;
}
break;
}
// '/e' is to erase display
if(ch == 'e'){
dataAvailable = false;
break;
}
// '/p' is to pause display
if(ch == 'p'){
if(pause == false){
pause = true;
}
else {
pause = false;
}
break;
}
else {
break; // Unrecognized command
}
}
}
} // if(ch == '!')
} // while(serial.available)
inService = false;
}
Schematics
Manufacturing process
- Build a 24×16 LED Pong Console with Arduino Nano & MAX7219
- Control an LED via Bluetooth with Arduino – Simple DIY Guide
- Voice-Activated Home Appliances: Bluetooth Control with Google Assistant
- Mastering an 8×8 LED Matrix with Arduino Uno: A Step‑by‑Step Guide
- Remote Car Control Using Arduino Uno & Bluetooth: A Step‑by‑Step Guide
- Arduino‑Powered Smart Coffee Maker with Bluetooth Control and Temperature Monitoring
- Build an RGB Matrix Audio Visualizer Using Arduino – Step‑by‑Step Guide
- Build a 48x8 Scrolling LED Matrix with Arduino – Step-by-Step Guide
- Build an IR Sensor Project with Arduino UNO – Simple Guide
- Master 8×8 LED Matrix with MAX7219: Scrolling Text & Android Bluetooth Control