


How to Apply PTFE (Teflon) Tape to Threads for a Leak‑Proof Seal
PTFE tape, commonly known as Teflon or threaded seal tape, is a thin, flexible film used to seal threaded connections in plumbing, HVAC, and gas systems. The tape’s polytetrafluoroethylene (PTFE) composition offers exceptional chemical resistance, a high temperature range, and a low coefficient of friction that allows threads to be tightened and released without seizing.
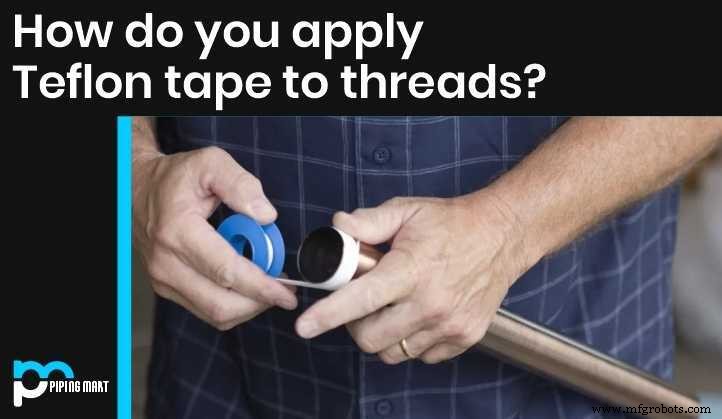
Commercially available in a range of widths (0.12–0.24 in) and wound on a spring‑spool, PTFE tape is typically applied by winding it around a pipe or fitting’s male thread 3–4 times before assembly. When properly installed, it serves as a deformable filler that distributes pressure evenly, preventing leaks while still permitting easy disassembly.
Industry standards such as MIL‑T‑27730A and ANSI/ASME A‑58092 specify a minimum thickness of 3.5 mils and 99 % PTFE purity, with the A‑58092 adding a base density of 1.2 g/cm³. These specifications ensure consistent sealing performance across critical applications.
Common Uses of PTFE Tape
PTFE tape is ideal for:
- Threaded water supply and drain lines
- Gas pipe connections
- Central heating and refrigeration piping
- HVAC fittings where a gasket is not present
- Certain expansion‑type seals in mechanical assemblies
Note that if a fitting employs a gasket or O‑ring, additional PTFE tape is unnecessary; the gasket provides the seal.
Step‑by‑Step Guide to Applying PTFE Tape
- Start on the right thread. Place your index finger on the tape spool and the other on the pipe’s threaded end. Begin wrapping the tape 1–2 turns before the thread’s head to avoid tape being pulled into the fitting.
- Wrap clockwise. PTFE tape should be wound in the same direction as the fitting is tightened. Wrapping counter‑clockwise will unroll as you screw the joint, rendering the seal ineffective.
- Maintain tension. Keep the tape taut and straight as you wind, ensuring it stays in contact with the threads without overlapping excessively.
- Apply 4–7 turns. This range provides sufficient coverage for most standard pipe diameters while preventing bulk that could cause the fitting to be over‑tightened.
- Finish clean. After the last wrap, use a clean rag to remove any loose fibers from the joint before screwing on the fitting.
- Screw on the fitting. Hand‑tighten the fitting and then use a wrench for an additional 1/4–1/2 turn. Avoid over‑tightening, which can damage the threads or the tape.
By following these steps, you’ll create a reliable, leak‑proof seal that lasts for years without compromising the integrity of the threaded connection.
Metal
- Step‑by‑Step Guide to Applying Fiberglass Cloth for Marine and Composite Projects
- Choosing the Right Coupling: A Practical Guide to Fit, Performance, and Compliance
- Expert Guide to Cleaning Burnt Aluminum: Safe, Eco‑Friendly Methods
- Master Naval Brass Welding: Techniques & Safety Tips
- Mastering Hydraulic Hose Fitting Identification: A Step‑by‑Step Approach
- Step-by-Step Guide to Repairing Your Hydro Pump
- How to Adjust Hydraulic Speed for Peak Performance
- How to Effectively Test a Hydraulic Pump for Optimal Performance
- Step-by-Step Guide to Cleaning a Hydraulic Pump for Optimal Performance
- Essential Guide to Maintaining Your Hydraulic Pump: Tips, Troubleshooting & Longevity