


Efficient ISD1700 Audio Recording Software & Arduino Setup Guide
Components and supplies
 |
| × | 1 | |||
 |
| × | 2 | |||
| × | 1 | ||||
 |
| × | 1 | |||
 |
| × | 2 | |||
 |
| × | 1 | |||
| × | 1 | ||||
 |
| × | 1 |
Apps and online services
| ||||
 |
|
About this project
In one of my recent projects I needed to add voicing the short text messages. Shields likeMP3-module with SD-card seemed to me excessive, and «teaching» Arduino to reproduce human speech would mean spending all the resources of microcontroller on this task only, which is an auxiliary one in fact. Also I would be running out of memory in any case.
Brief search revealed voice recording and playback chips of ISD1700 series, SPI-controlled, capable to store messages up to several minutes long.
Voice messages were prepared beforehand in form of separate files. The only question remained was the way to record those ones into IC memory. Programmers for ISD1700 are not widely spread and cost much higher than chips themselves do. There were some information on how to build one (https://laserwar.ru/sound_lasertag.html), but I’m a programmer rather than radio amateur, so I wanted to use standard hardware – Arduino board were excellent for that role.
After the datasheet («ISD1700Design Guide») had been studied I realized there was an analog input through which the files could be recorded. And for process automation I decided to write special software - ISD1700 Record Tool.
ISD1700 Record Tool allows you to record a set of audio files into ISD1700 via Arduino board. The software consists of two parts: a sketch for Arduino board (ISD1700.ino) and standalone Windows application (ISD1700.exe).
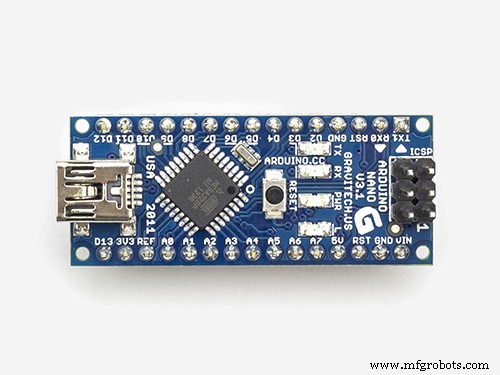
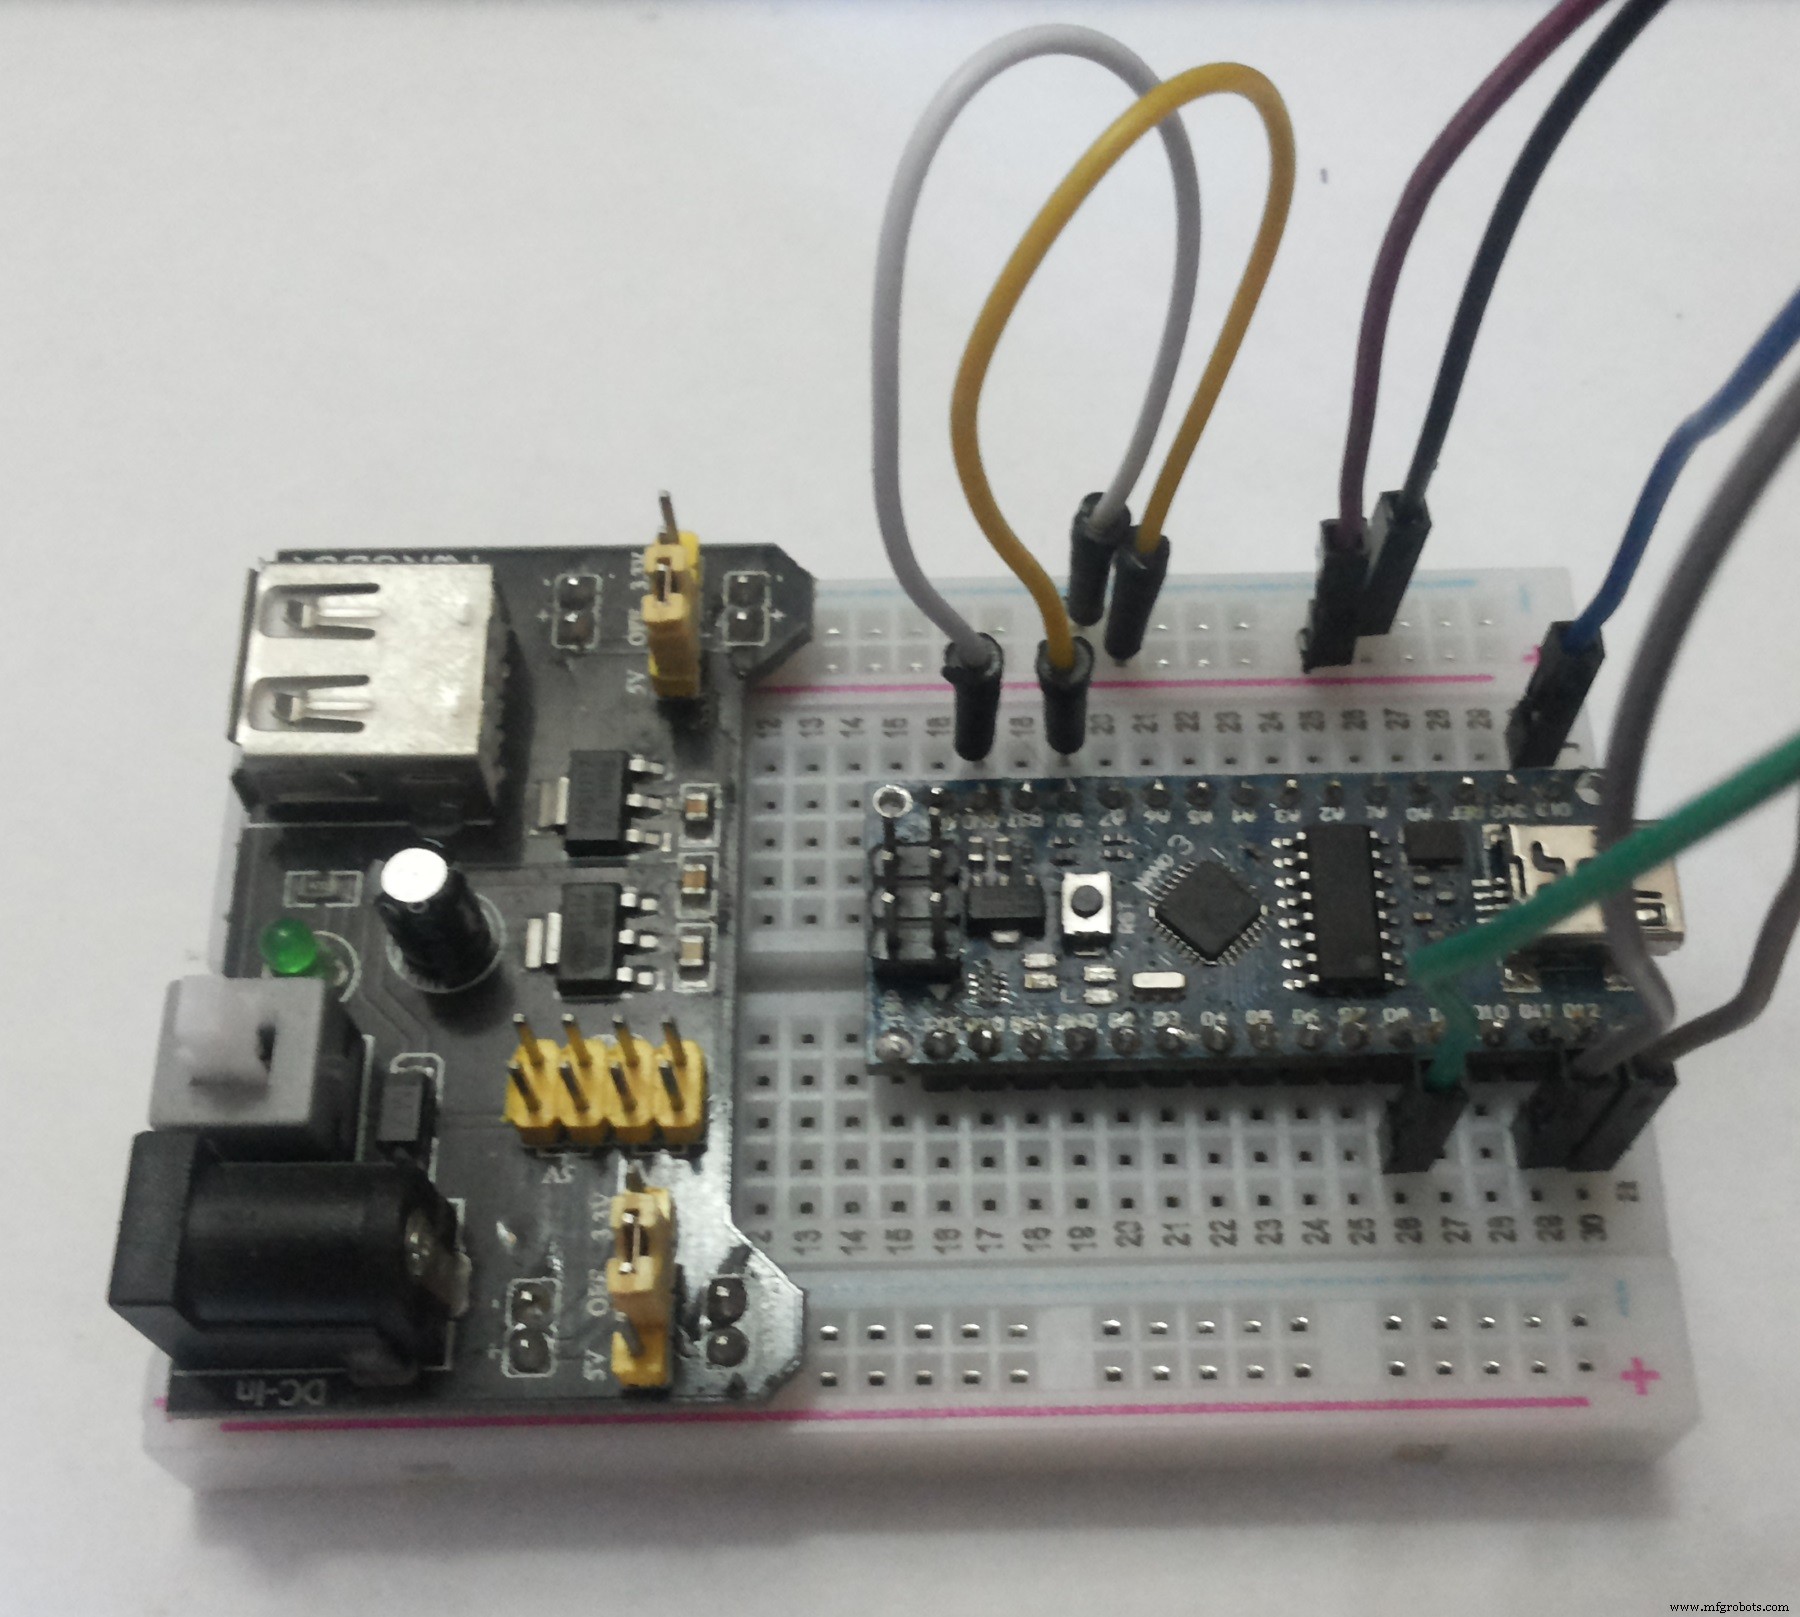
The sketch in ISD1700.ino is written forATMega328P-based ARUINO board (tested on Arduino Uno and Arduino Nano), but probably may also work on other boards.
List of supportedISD1700’s:
1) ISD1730;
2) ISD1740;
3) ISD1750;
4) ISD1760;
5) ISD1790;
6) ISD17120;
7) ISD17150;
8) ISD17180;
9) ISD17210;
10) ISD17240.
Windows application is based on BASS audio library, which supports the most widely used formats: MP3, WAV, OGG etc.
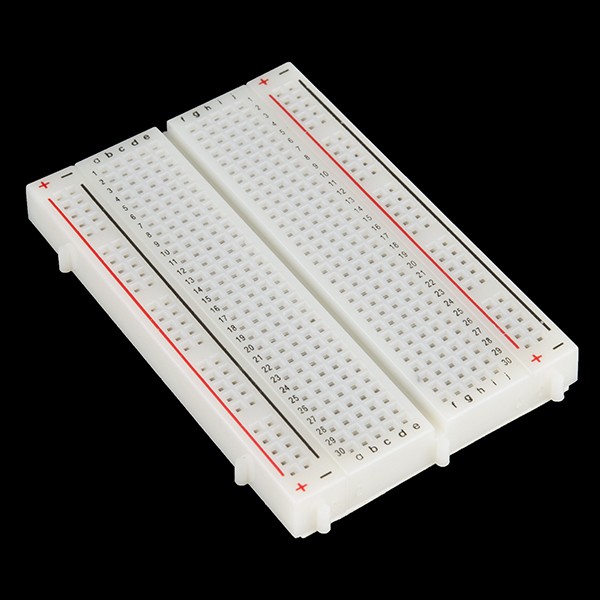
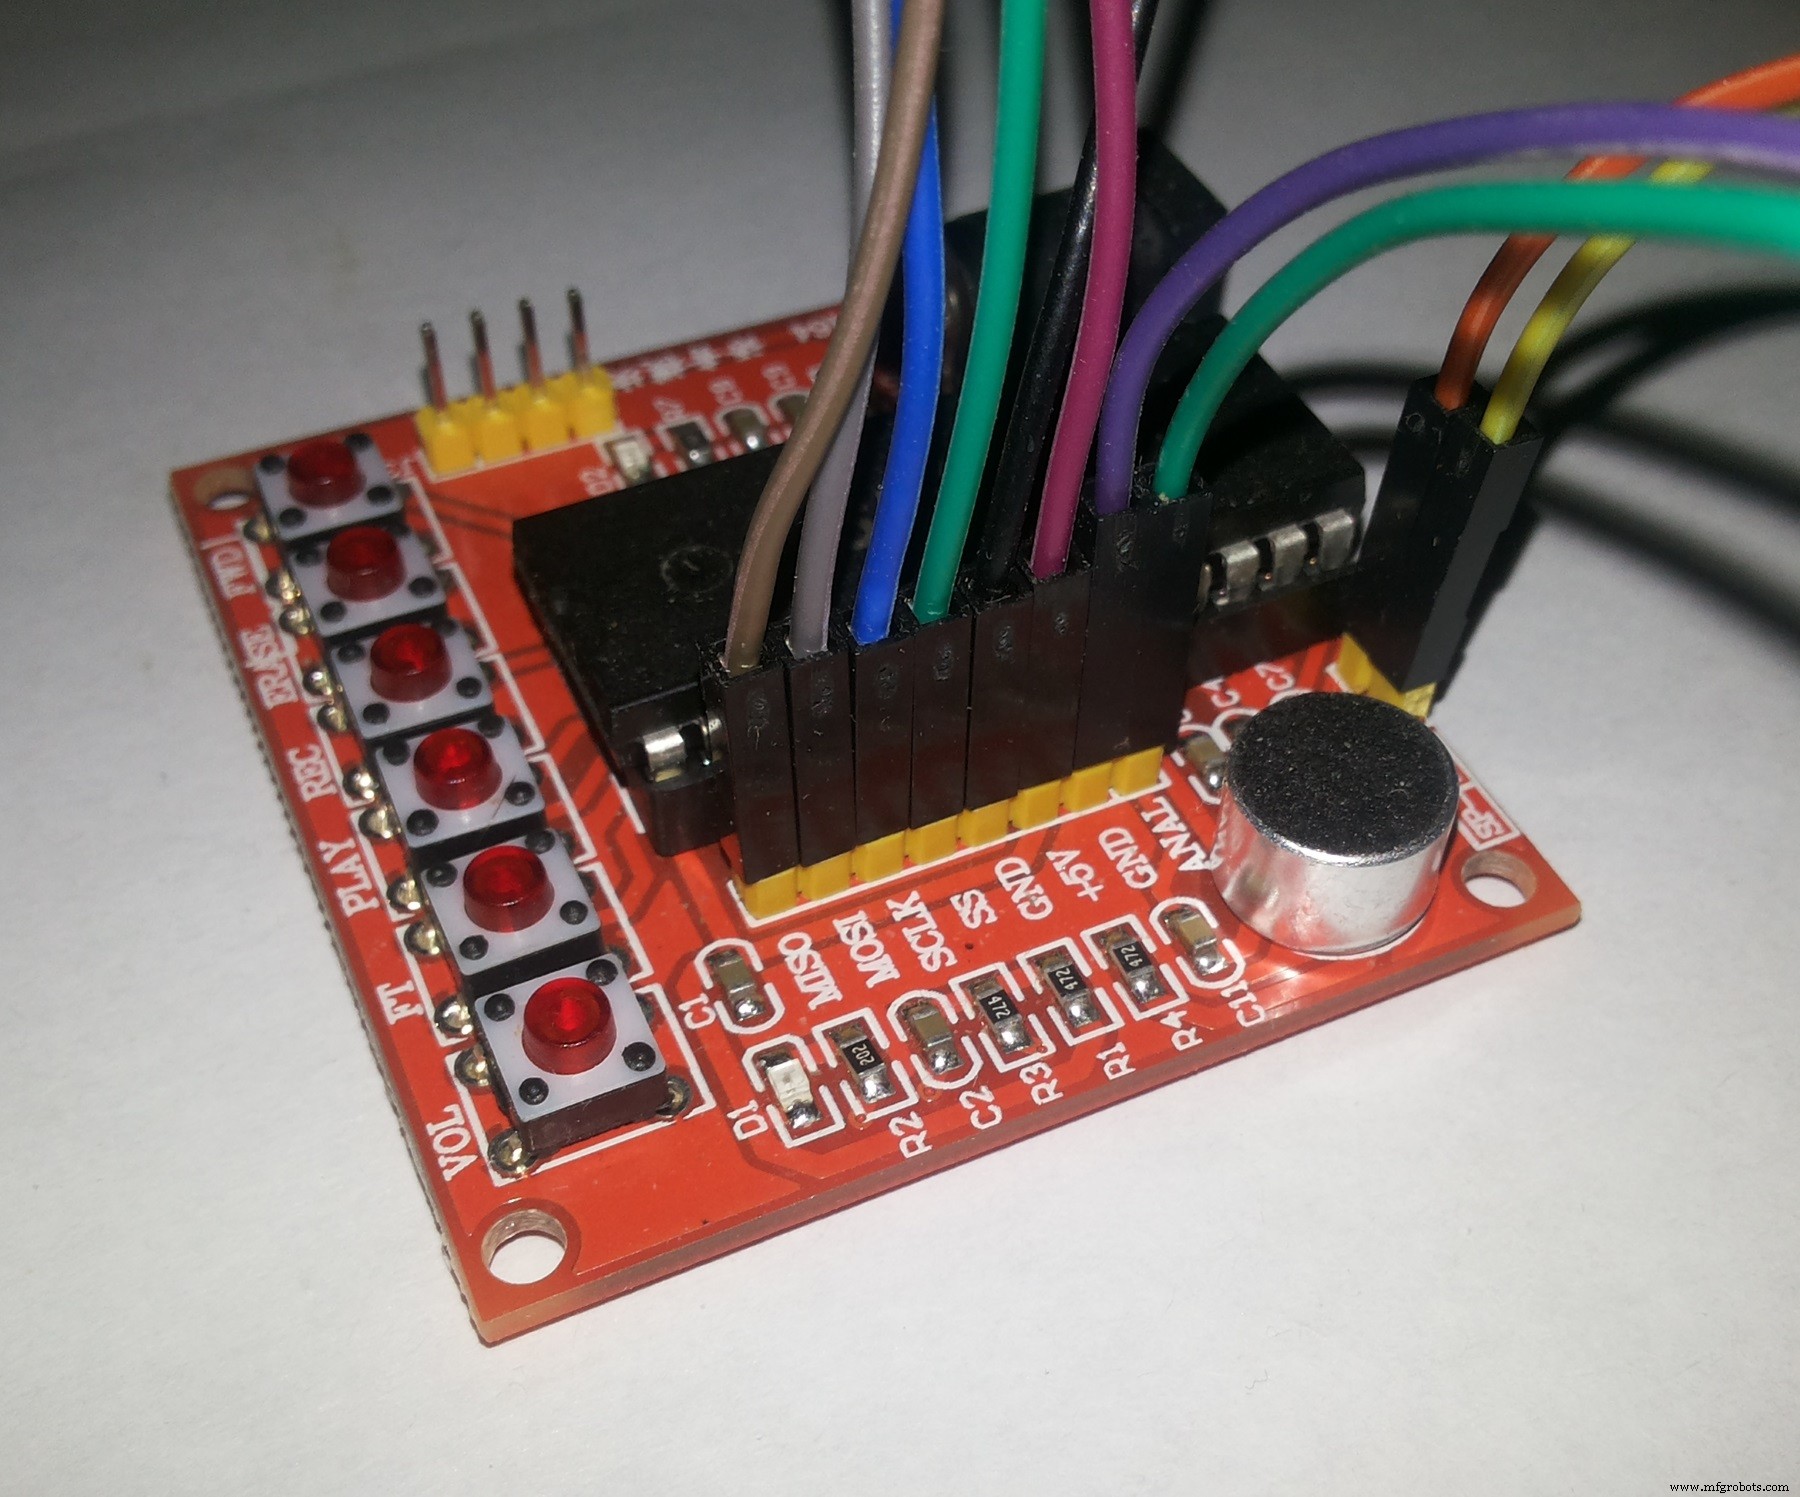
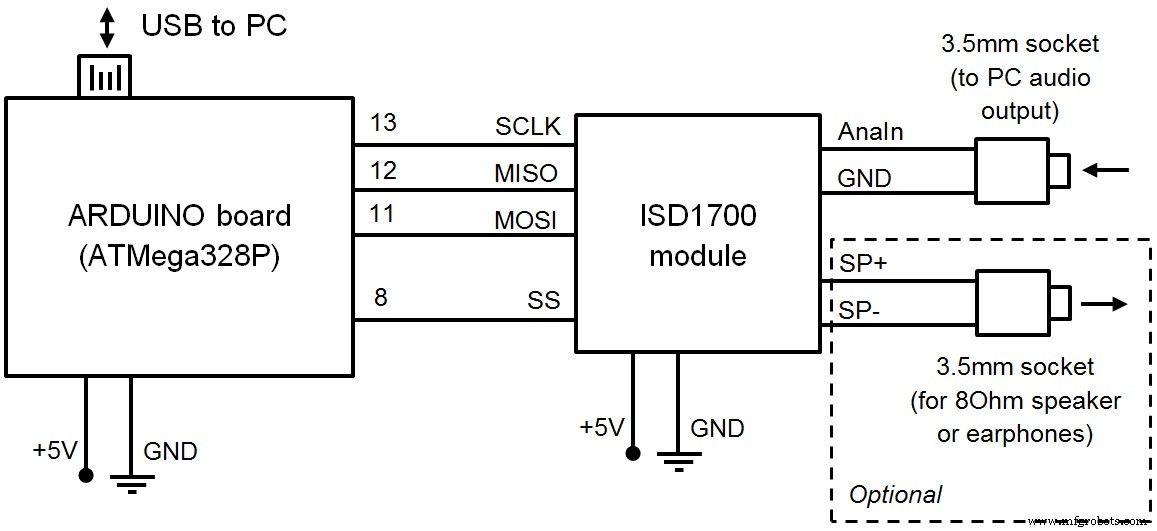
1. Hardware connectionDuring software development I was using ready-made recording module instead of separate ISD1700 IC. Before trying any other possible variants of connection I strongly recommend to read the original ISD1700 datasheet.
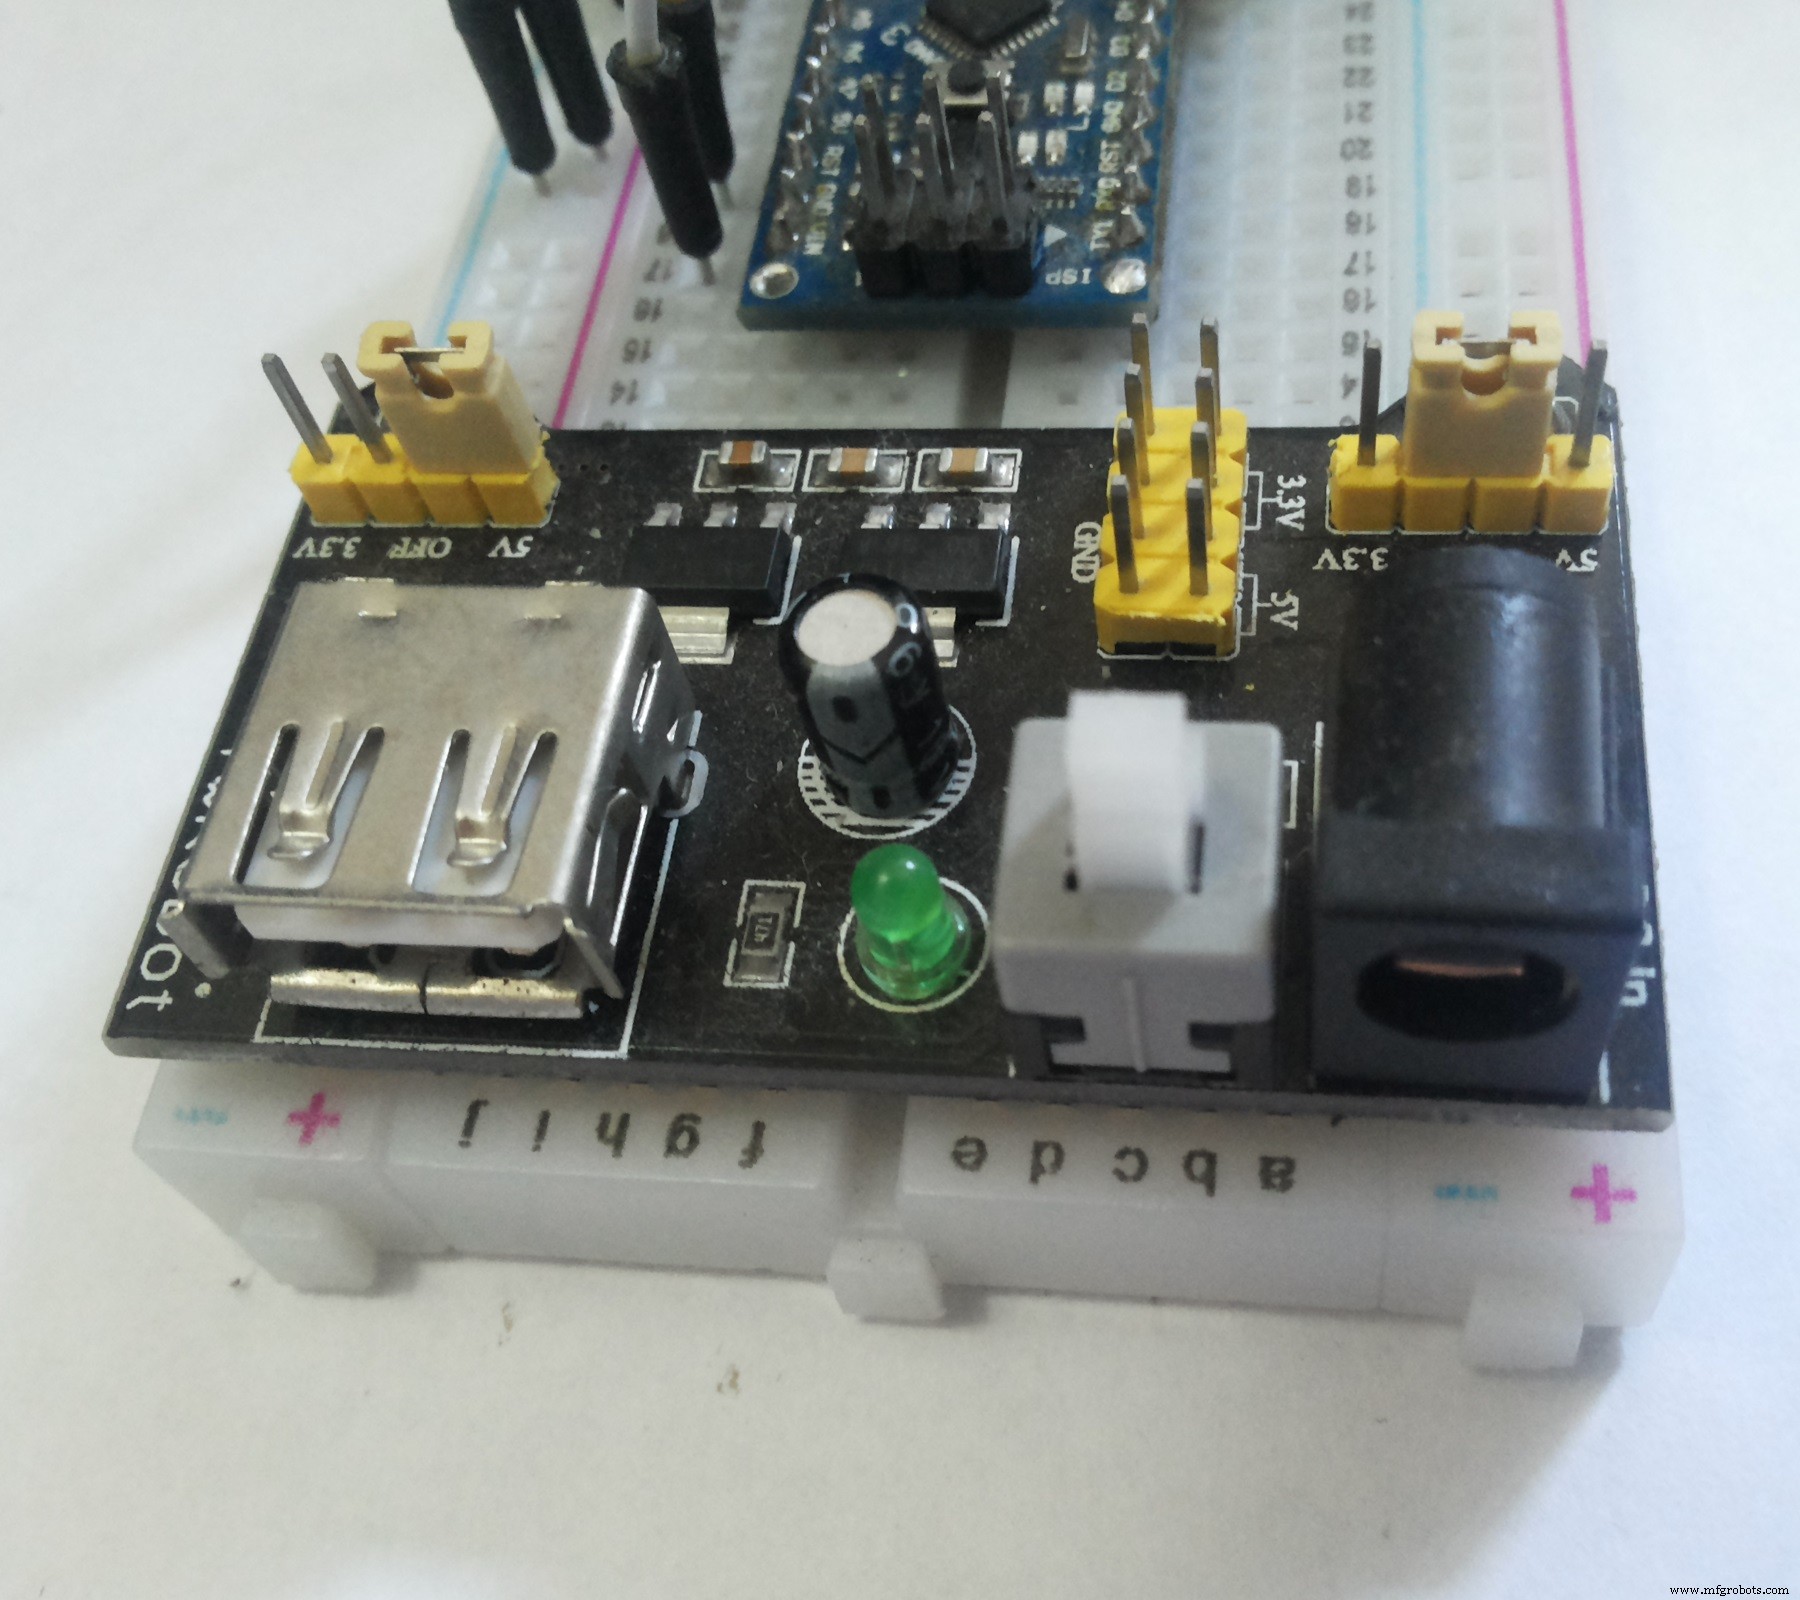
Fig. 1–5 show my hardware set. ARDUINO NANO is used in this case.
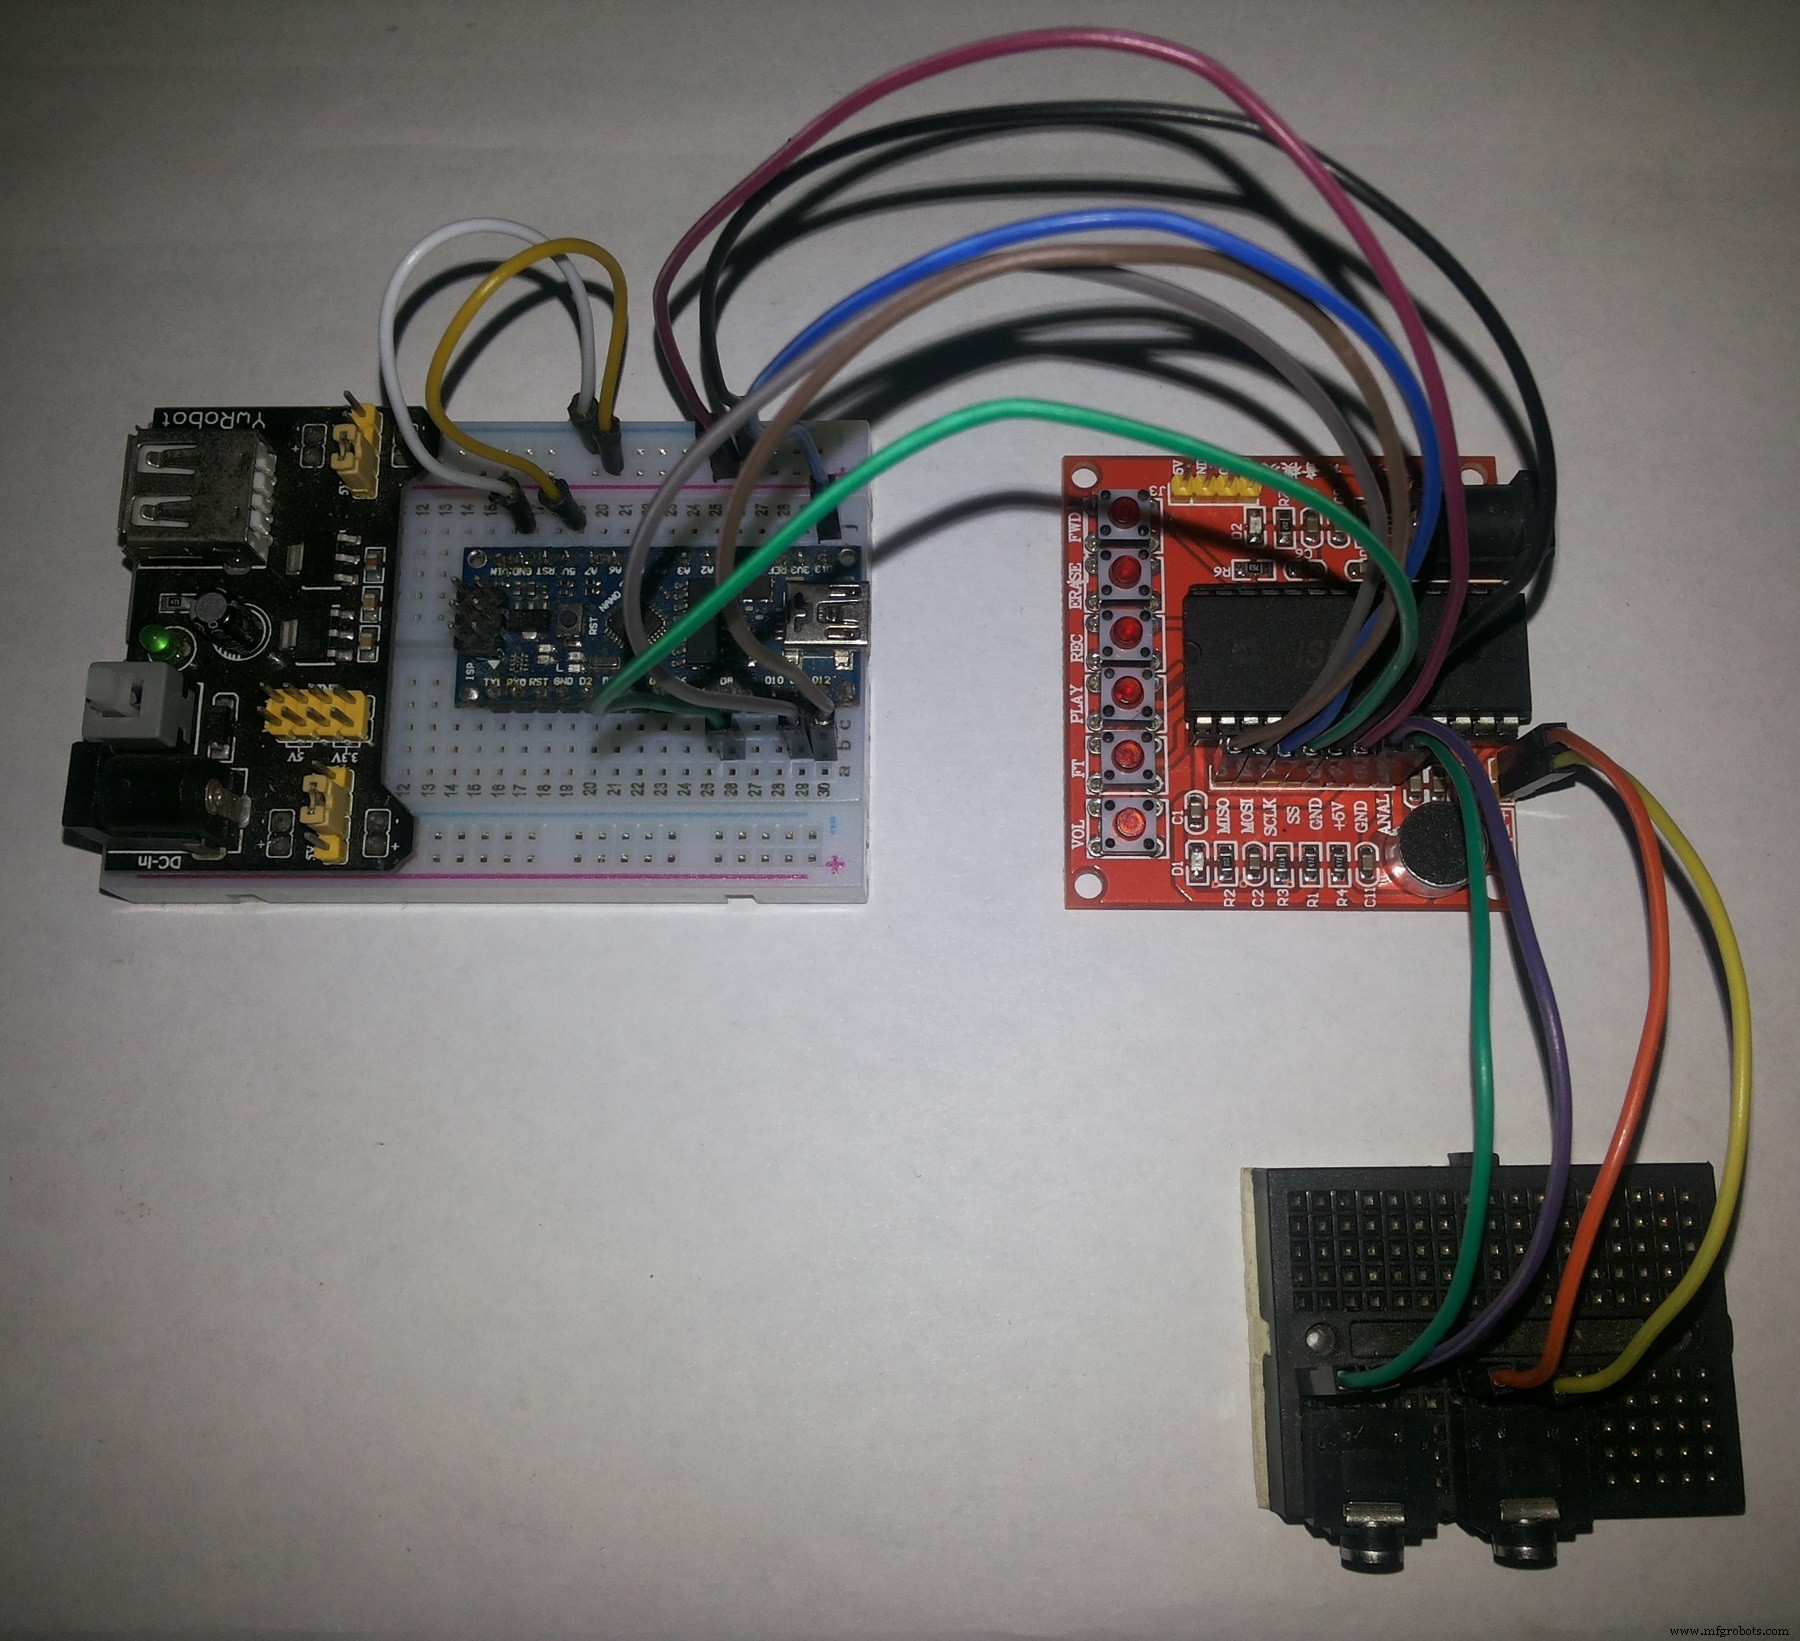
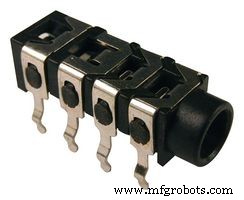
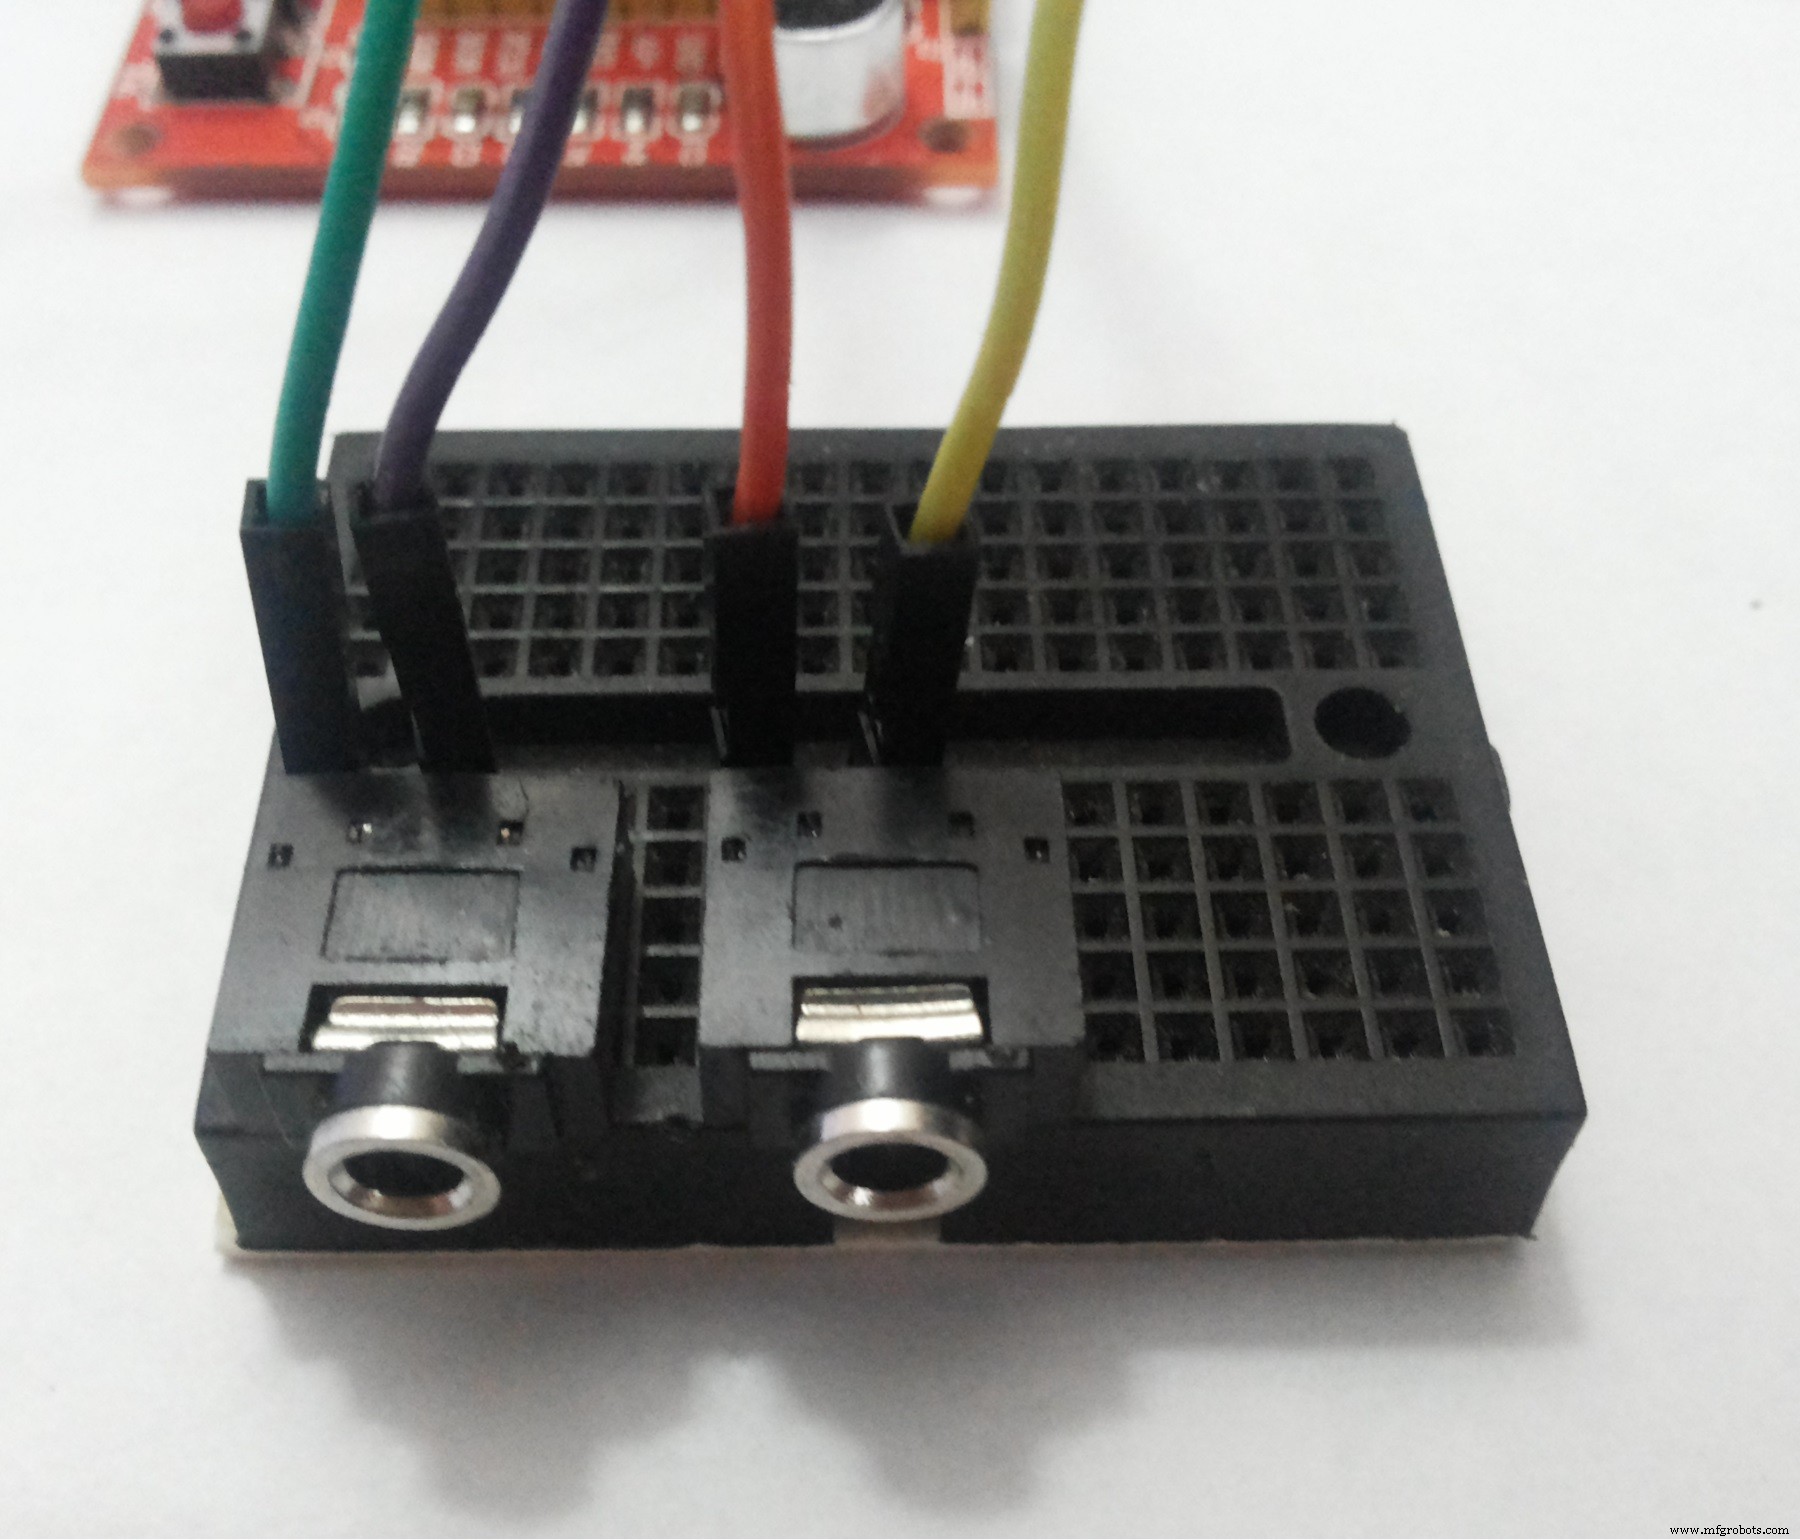
On a small breadboard I put two 3.5mm sockets (Fig. 2) for audio input (left) and earphones (right).
I recommend using an additional power supply unit rather than power all the components through the 5V-output of Arduino because I had many connection errors without external power source. However, this can be due to poor quality of wire connections or something else.
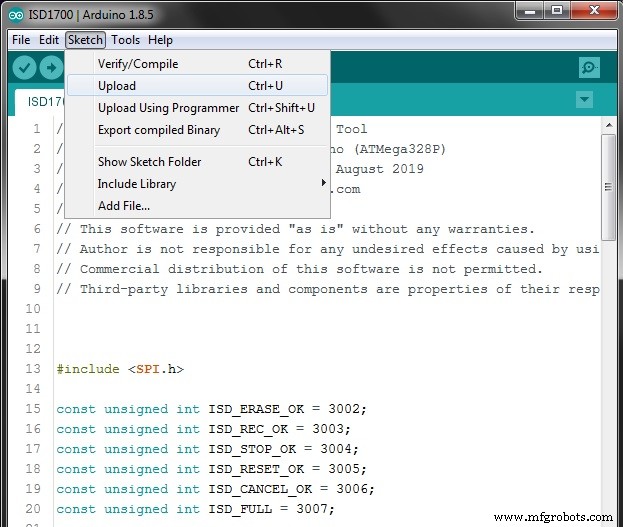
Connect Arduino board to your PC via USB, open ISD1700.ino in ADUINO IDE and upload the sketch as usual (Fig. 6).
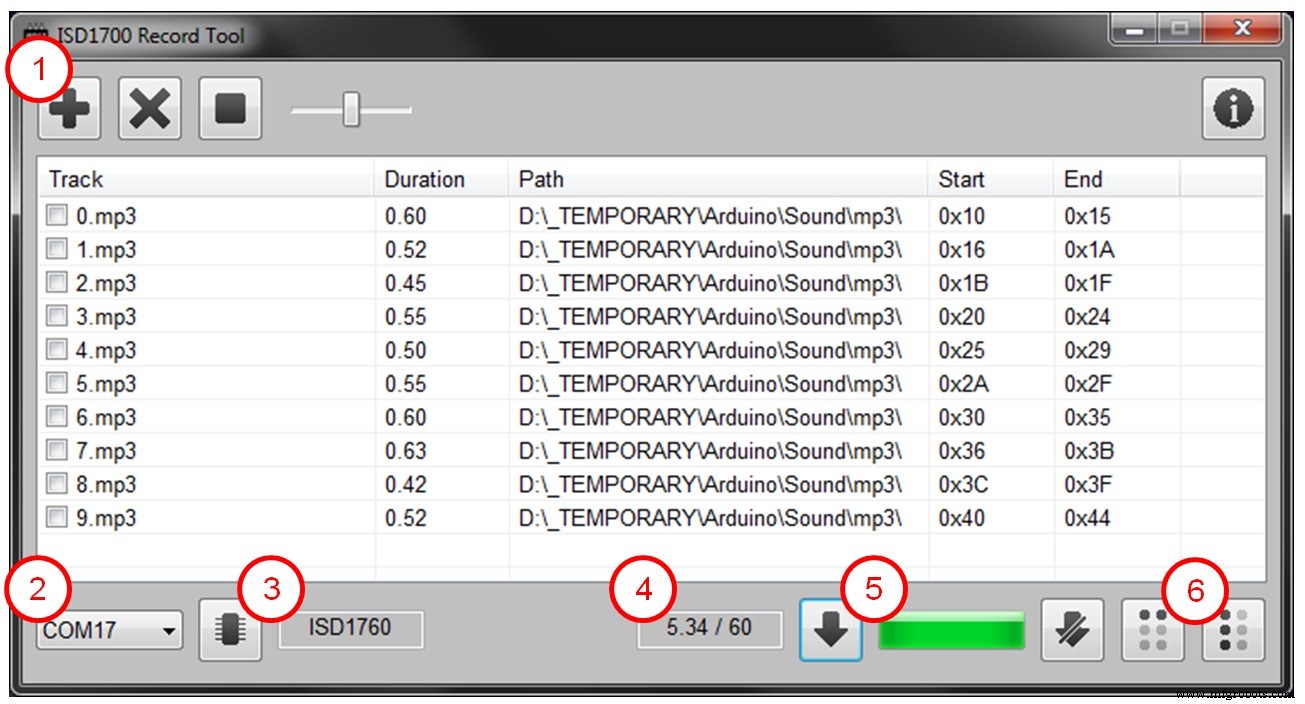
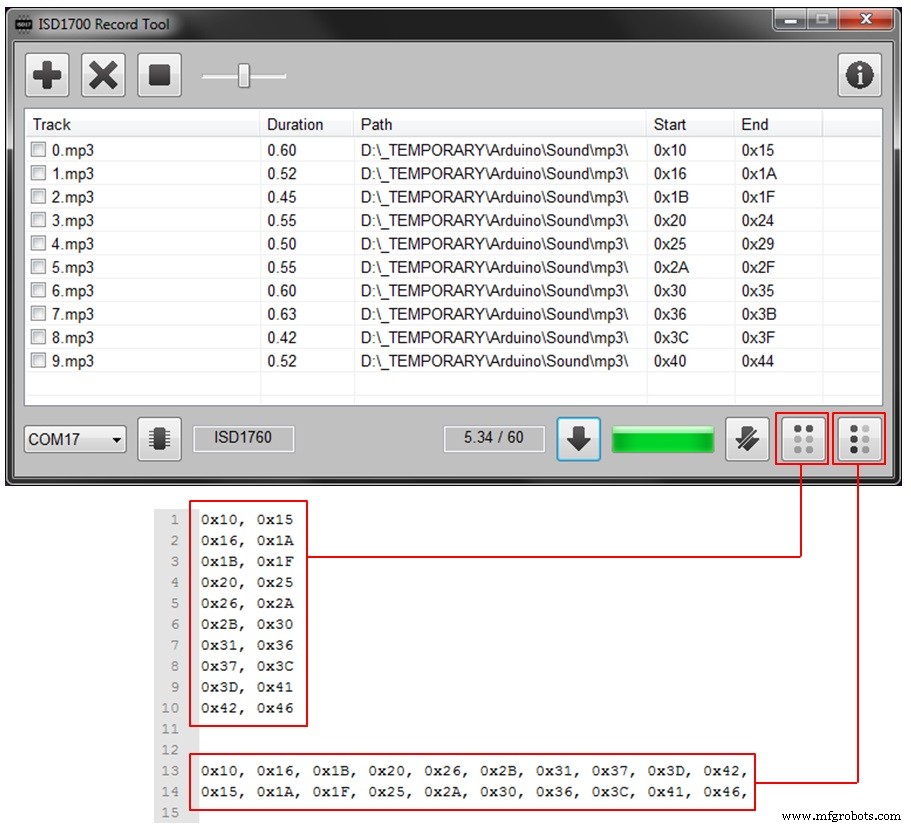
Run ISD1700.exe. The description of each control element is shown on Fig. 7.
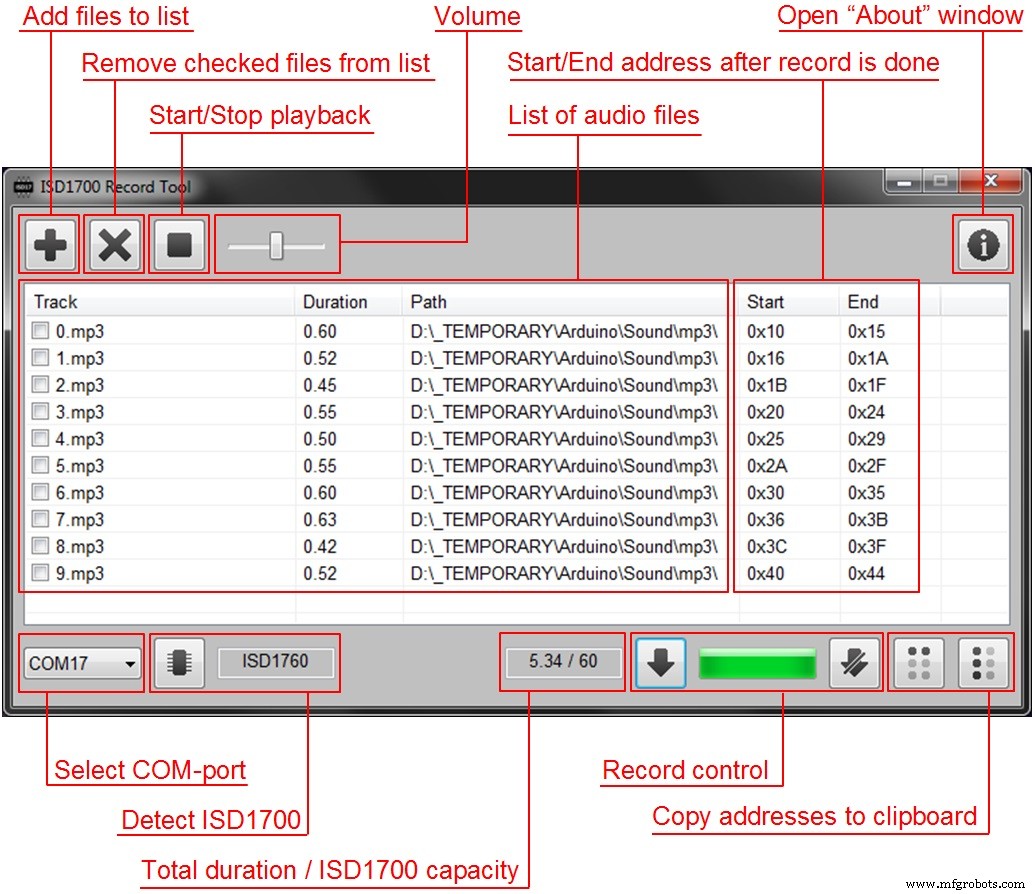
Fig. 8 shows typical operational sequence in Windows application.
Description:
1. Open audio files you want to record onto ISD1700. Sort them simply dragging by mouse, or delete undesired files (having checked them previously) if necessary. Also you can play each file and adjust volume level.
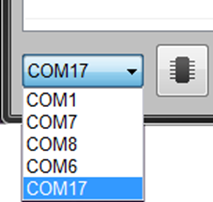
2. Select COM-port to which ARDUINO board is connected (Fig. 9).
3. Press “Detect ISD1700” button and make sure that the model of ISD1700 has been displayed in the box to the right.
4. Make sure that total duration of all audio files is less than ISD1700 capacity in seconds; otherwise you won’t be able to start recording.
5. Press “Start record” button. You can see progress on the bar. Press“Stop record” if necessary.
6. After process is done you can copy addresses of all tracks to clipboard.Fig. 10 shows the difference between two options.
Using the ISD1700 recording module makes it able to play audio files just after record process is done with the help of earphones and onboard buttons.
Code
- ISD1700 ARDUINO code
ISD1700 ARDUINO codeC/C++
// Arduino code for ISD1700 Record Tool
// Tested: Arduino Uno, Arduino Nano (ATMega328P)
// Copyright: Anton Tsaritsynskyy, August 2019
// E-mail: tsaritsynskyy.a.a@gmail.com
//
// This software is provided "as is" without any warranties.
// Author is not responsible for any undesired effects caused by using this software.
// Commercial distribution of this software is not permitted.
// Third-party libraries and components are properties of their respective developers.


#include <SPI.h>

const unsigned int ISD_ERASE_OK = 3002;
const unsigned int ISD_REC_OK = 3003;
const unsigned int ISD_STOP_OK = 3004;
const unsigned int ISD_RESET_OK = 3005;
const unsigned int ISD_CANCEL_OK = 3006;
const unsigned int ISD_FULL = 3007;

const byte ISD_SS_PIN = 8;

boolean isdIsUp = false;
boolean isdNotifyIfFull = true;

boolean isdPowerUp(void) {
  byte SR0B1 = 1;

  SPI.beginTransaction(SPISettings(1000000, LSBFIRST, SPI_MODE3));
  digitalWrite(ISD_SS_PIN, LOW);
  SR0B1 = SPI.transfer(0x01);
  SPI.transfer(0x00);
  digitalWrite(ISD_SS_PIN, HIGH);
  SPI.endTransaction();

  return (SR0B1 & 1) != 1;
}

boolean isdPowerDown(void) {
  SPI.beginTransaction(SPISettings(1000000, LSBFIRST, SPI_MODE3));
  digitalWrite(ISD_SS_PIN, LOW);
  SPI.transfer(0x07);
  SPI.transfer(0x00);
  digitalWrite(ISD_SS_PIN, HIGH);
  SPI.endTransaction();
}

boolean isdReset(void) {
  SPI.beginTransaction(SPISettings(1000000, LSBFIRST, SPI_MODE3));
  digitalWrite(ISD_SS_PIN, LOW);
  SPI.transfer(0x03);
  SPI.transfer(0x00);
  digitalWrite(ISD_SS_PIN, HIGH);
  SPI.endTransaction();

  delay(20);
}

void isdClrInt(void) {
  SPI.beginTransaction(SPISettings(1000000, LSBFIRST, SPI_MODE3));
  digitalWrite(ISD_SS_PIN, LOW);
  SPI.transfer(0x04);
  SPI.transfer(0x00);
  digitalWrite(ISD_SS_PIN, HIGH);
  SPI.endTransaction();
}

boolean isdIsReady(void) {
  byte SR1 = 0;

  SPI.beginTransaction(SPISettings(1000000, LSBFIRST, SPI_MODE3));
  digitalWrite(ISD_SS_PIN, LOW);
  SPI.transfer(0x05);
  SPI.transfer(0x00);
  SR1 = SPI.transfer(0x00);
  digitalWrite(ISD_SS_PIN, HIGH);
  SPI.endTransaction();

  return (~SR1 & 1) != 1;
}

void isdEnableAnaIn(void) {
  byte APC[2];

  SPI.beginTransaction(SPISettings(1000000, LSBFIRST, SPI_MODE3));
  digitalWrite(ISD_SS_PIN, LOW);
  SPI.transfer(0x44);
  SPI.transfer(0x00);
  APC[0] = SPI.transfer(0x00);
  APC[1] = SPI.transfer(0x00);
  digitalWrite(ISD_SS_PIN, HIGH);
  SPI.endTransaction();

  APC[0] &= ~B01010000;

  SPI.beginTransaction(SPISettings(1000000, LSBFIRST, SPI_MODE3));
  digitalWrite(ISD_SS_PIN, LOW);
  SPI.transfer(0x45);
  SPI.transfer(APC[0]);
  SPI.transfer(APC[1]);
  digitalWrite(ISD_SS_PIN, HIGH);
  SPI.endTransaction();
}

byte isdDeviceID(void) {
  byte ID;

  SPI.beginTransaction(SPISettings(1000000, LSBFIRST, SPI_MODE3));
  digitalWrite(ISD_SS_PIN, LOW);
  SPI.transfer(0x09);
  SPI.transfer(0x00);
  ID = SPI.transfer(0x00);
  digitalWrite(ISD_SS_PIN, HIGH);
  SPI.endTransaction();

  return ID;
}

boolean isdIsFull(void) {
  byte SR0B1 = 2;

  SPI.beginTransaction(SPISettings(1000000, LSBFIRST, SPI_MODE3));
  digitalWrite(ISD_SS_PIN, LOW);
  SR0B1 = SPI.transfer(0x05);
  SPI.transfer(0x00);
  SPI.transfer(0x00);
  digitalWrite(ISD_SS_PIN, HIGH);
  SPI.endTransaction();

  return (SR0B1 & 2) == 2;
}

void isdRec(void) {
  SPI.beginTransaction(SPISettings(1000000, LSBFIRST, SPI_MODE3));
  digitalWrite(ISD_SS_PIN, LOW);
  SPI.transfer(0x41);
  SPI.transfer(0x00);
  digitalWrite(ISD_SS_PIN, HIGH);
  SPI.endTransaction();

  delay(40);
}

void isdStop(void) {
  SPI.beginTransaction(SPISettings(1000000, LSBFIRST, SPI_MODE3));
  digitalWrite(ISD_SS_PIN, LOW);
  SPI.transfer(0x02);
  SPI.transfer(0x00);
  digitalWrite(ISD_SS_PIN, HIGH);
  SPI.endTransaction();

  delay(100);
}

void isdErase(void) {
  SPI.beginTransaction(SPISettings(1000000, LSBFIRST, SPI_MODE3));
  digitalWrite(ISD_SS_PIN, LOW);
  SPI.transfer(0x43);
  SPI.transfer(0x00);
  digitalWrite(ISD_SS_PIN, HIGH);
  SPI.endTransaction();

  while ( !isdIsReady() ) {}
}

unsigned int isdReadRecordPointer(void) {
  byte DB[2];

  SPI.beginTransaction(SPISettings(1000000, LSBFIRST, SPI_MODE3));
  digitalWrite(ISD_SS_PIN, LOW);
  SPI.transfer(0x08);
  SPI.transfer(0x00);
  DB[0] = SPI.transfer(0x00);
  DB[1] = SPI.transfer(0x00);
  digitalWrite(ISD_SS_PIN, HIGH);
  SPI.endTransaction();

  return (DB[1] << 8) | DB[0];
}

unsigned int isdInit(void) {
  while ( !isdPowerUp() ) {}
  delay(100);

  isdClrInt();
  while ( !isdIsReady() ) {}
  isdEnableAnaIn();

  return 3000+isdDeviceID();
}

void setup() {
  pinMode(ISD_SS_PIN, OUTPUT);
  digitalWrite(ISD_SS_PIN, HIGH);

  Serial.begin(9600);
  SPI.begin();
}

char cmd;

void loop() {
  if (Serial.available()) {
    cmd = Serial.read();

    switch (cmd) {
    case 'D':
      Serial.print( isdInit() );
      isdPowerDown();
      isdIsUp = false;
      break;
    case 'E':
      isdInit();
      isdErase();
      Serial.print(ISD_ERASE_OK);
      isdIsUp = true;
      isdNotifyIfFull = true;
      break;
    case 'R':
      isdRec();
      Serial.print(ISD_REC_OK);
      break;
    case 'S':
      isdStop();
      Serial.print( isdReadRecordPointer() );
      break;
    case 'X':
      isdReset();
      Serial.print(ISD_RESET_OK);
      isdIsUp = false;
      break;
    case 'C':
      if (isdIsUp) {
        isdStop();
        isdReset();
        Serial.print(ISD_CANCEL_OK);
        isdIsUp = false;
      }
      break;
    }
  }

  if (isdNotifyIfFull && isdIsUp) {
    if (isdIsFull()) {
      isdReset();
      isdIsUp = false;
      Serial.print(ISD_FULL);
      isdNotifyIfFull = false;
    }
  }
}
Schematics
Manufacturing process
- Build an Audio‑Reactive Desk Lamp with Arduino Nano
- Real‑Time Weather Monitoring with Arduino & ThingSpeak IoT
- Automatic Keyer for Radio Direction Finding – Precision, Ease, and Reliability
- Build a Ninja Dollar LCD Game with Arduino UNO
- Home Energy Saver: Smart, Reliable, and Easy to Install
- Ultrasonic Smart Glasses: Enhancing Mobility for the Visually Impaired
- DIY Open-Source Pulse Oximeter for COVID-19: Arduino Build
- Hexion Inc. Files for Chapter 11 Bankruptcy Amid Restructuring Efforts
- Top 25 Tree Management Software for Professional Arborists
- Master 3D Printing: A Complete Guide to Creating STL Models