


Build a Highly Sensitive, Low-Cost Seismometer with Arduino Nano – Easy DIY Earthquake Detector
Components and supplies
 |
| × | 1 | |||
| × | 1 | ||||
 |
| × | 2 | |||
 |
| × | 1 | |||
 |
| × | 1 | |||
| × | 1 |
Necessary tools and machines
 |
|
Apps and online services
 |
|
About this project
The seismometer is a device for the detection of earthquakes and measuring their strength. Basically these are very precise instruments and are relatively difficult for self-construction. Commercially available sensors are very expensive, and cheap electronic modules sensitive to shocks are not sufficiently sensitive to this purpose.
In the text and video that follow, you can see the creation of a device that is cheap and relatively easy for DIY, and yet it is comparable with expensive commercial devices of this type
Otherwise, the seismometer itself consists of two parts, a mechanical tremor detector, and an electronic part that turns these tremors into electrical signals, amplified them and converts them into digital signals, which we can then visually monitor on the PC data logging software.
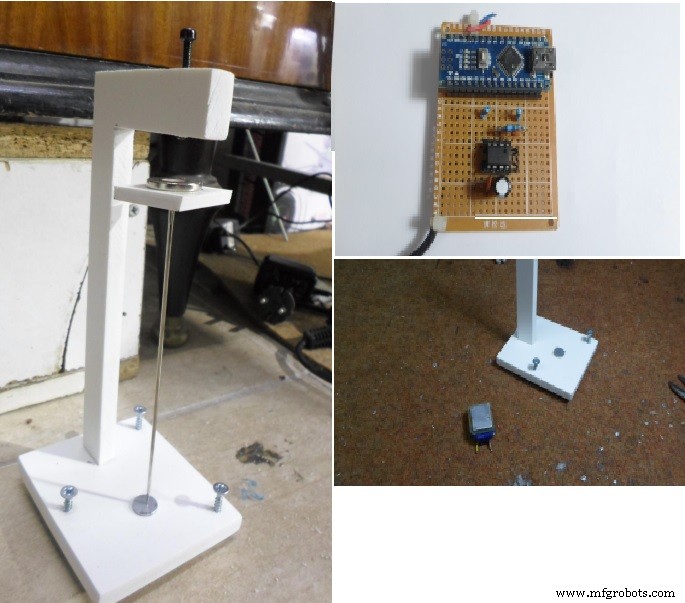
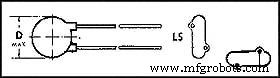
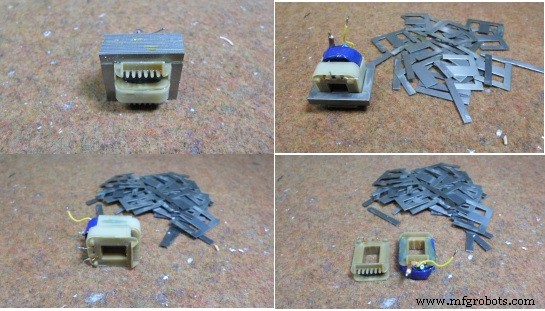
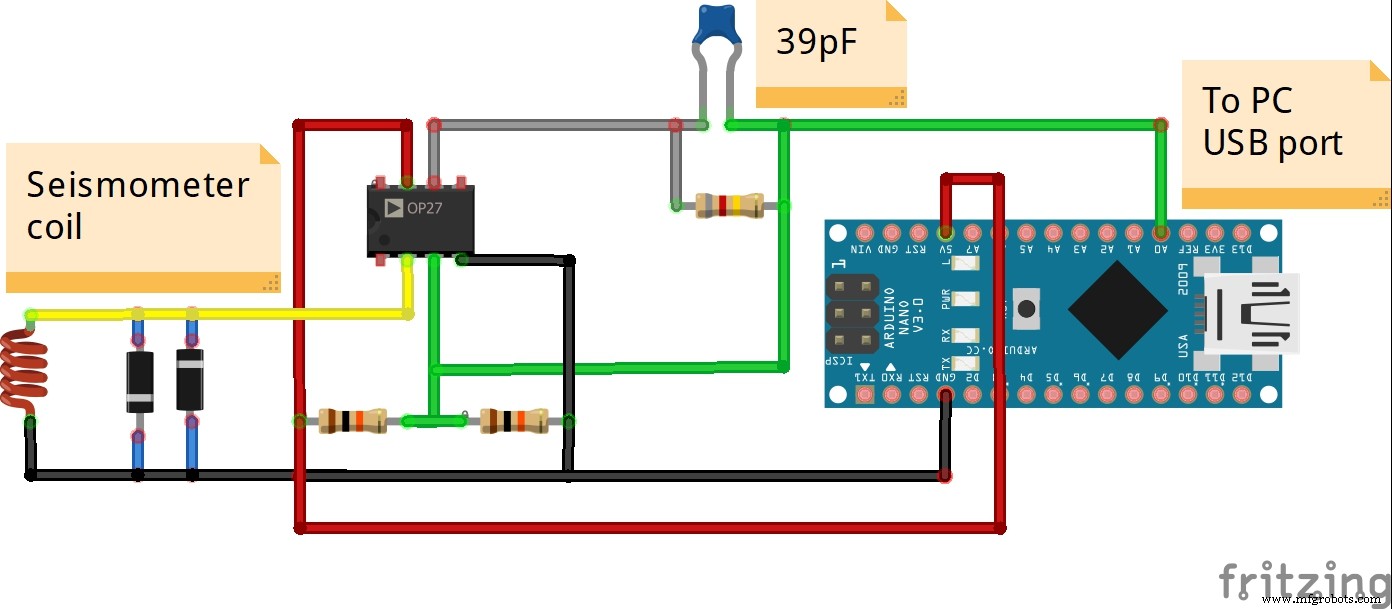
To convert the tremors into electrical signals, a permanent magnet is used as a movable part and a solenoid with many windings for turning the magnet moves into electrical signals. In this particular case I used the primary winding of a small mains transformer with a power of 1.8 W and a resistance of 1.2 kOhms. At This coil is a glued aluminum plate, which has the function to dump the oscillations of the moving magnet called the "Lentz effect".
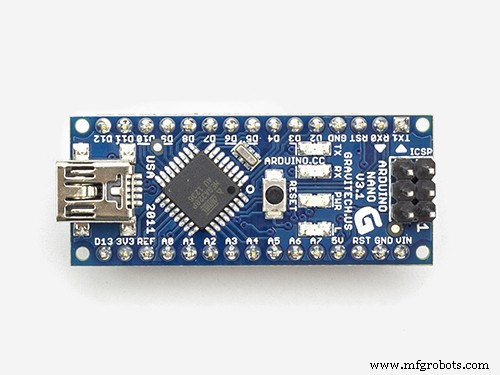
Тhe next module serves to amplify this signal and contains a low-noise operation amplifier(TL061, NE5534..) or instrumental operational amplifier(OP07, OP27, LT1677...), but it works well with the old good 741 with external power supply.Now this enhanced analog signal is taken at the A0 input of the Arduino microcontroller. In fact, the Arduino represents an analog to a digital converter. For test purposes we can use the arduino example for a / d converter called "AnalogInOutSerial", but of course, the best is the code called "NERdaq". NERdaq is a data acquisition system developed at New England Research to support slinky-based seismometers in schools. The daq is built around an arduino and streams 16-bit (oversampled) values to a usb port; the data are sampled at about 18.78 samples/second. Arduino codes are provided for unrestricted use, and are also available at https://code.google.com/archive/p/nerdaq/
The code contains several filters that have been developed specifically for this purpose.This processed signal through the serial protocol is carried to data logging softwer for storing data and visual representation.
The best free software for this purpose is "Amaseis" and the newest "JAmaseis" (Java Amaseis). These programs can be downloaded to the next links:
- http://harvey.binghamton.edu/~ajones/AmaSeis.html
- https://www.iris.edu/hq/jamaseis/
With the help of Jameseis, you can upload real-time data on the IRIS server. For example you can see realtime data from my seismometer on:
- http://geoserver.iris.edu/content/mpohr
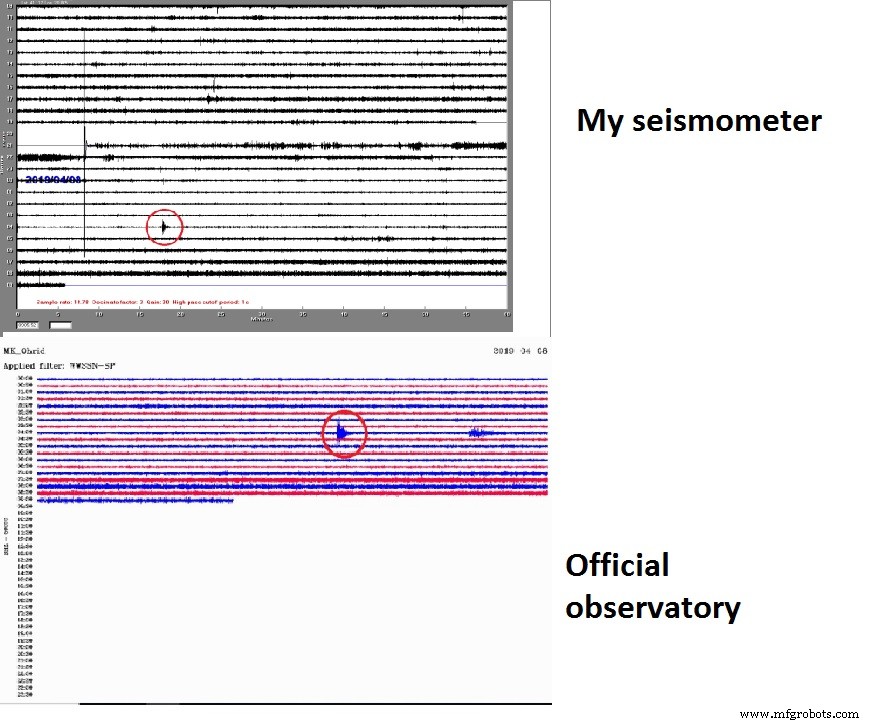
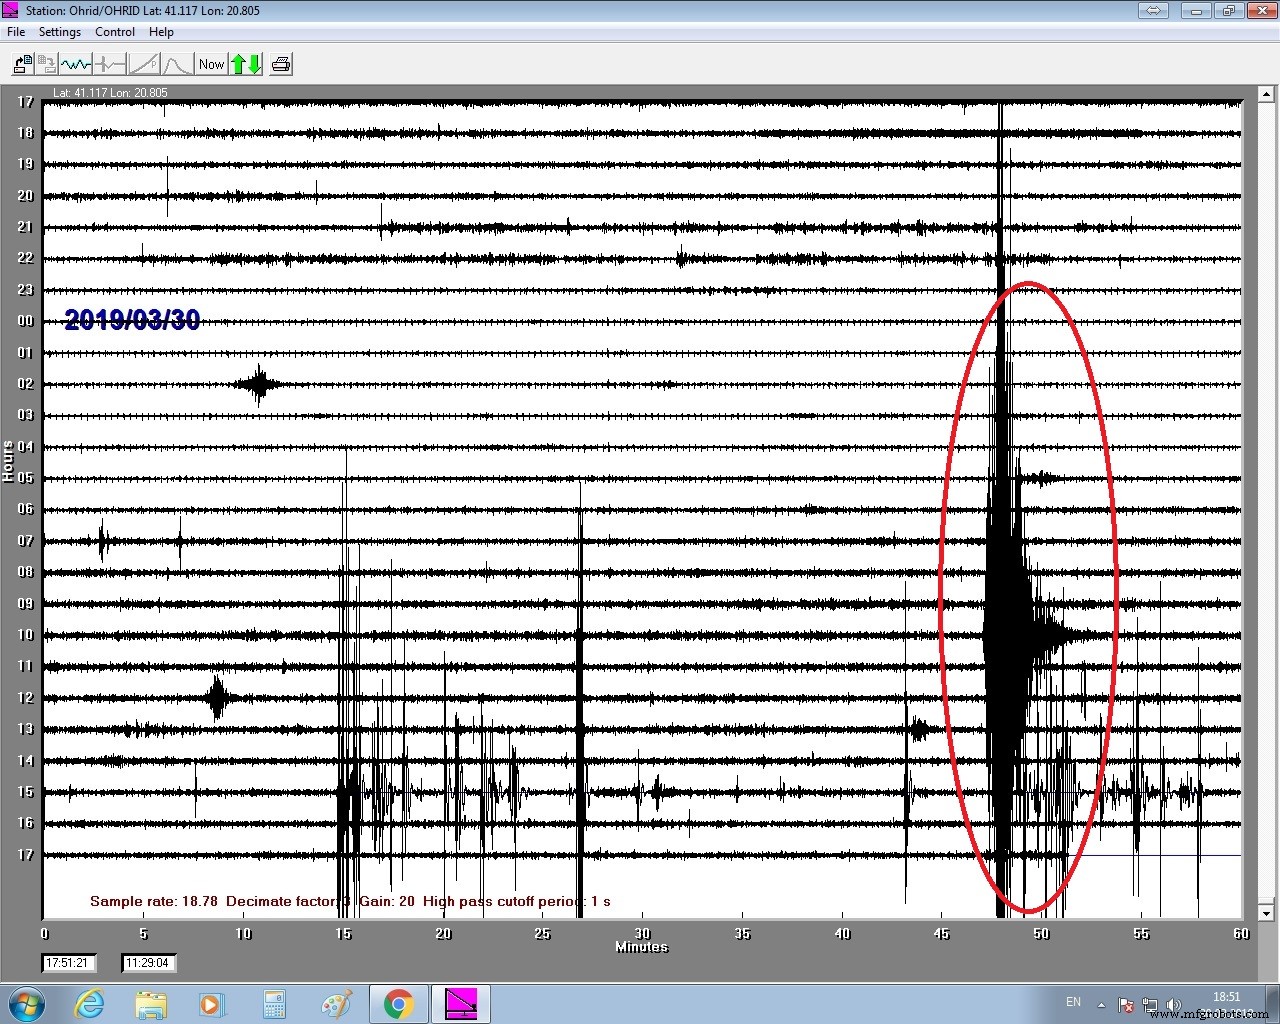
In the pictures below, you can make a comparison between my seismometer, and that of the official seismological observatory of my city.It's a very weak tremor and as you can see there is almost no difference between the two seismograms, which is a confirmation of the sensitivity and precision of this homemade cheap seismometer.
The following picture shows an earthquake in Greece with a magnitude of 5.2 Richter degrees registered on my seismometer at a distance of 220 kilometers from the epicenter.
The instrument is very sensitive to air currents, so it must be properly protected.
And finally, this is a completely new sensor design invented and patented by me, that is both very sensitive and simple to build.I projected it on the basis of previous experience in making such devices. On my video channel you can see my other pre-made homemade seismometers:
-DIY simle and cheap piezo seismometer
-10$ sensitive seismometer
-DIY Lehman seismometer
-DIY horizontal pendulum seismometer
-DIY AS1 seismometer
-TC1 vertical seismometer
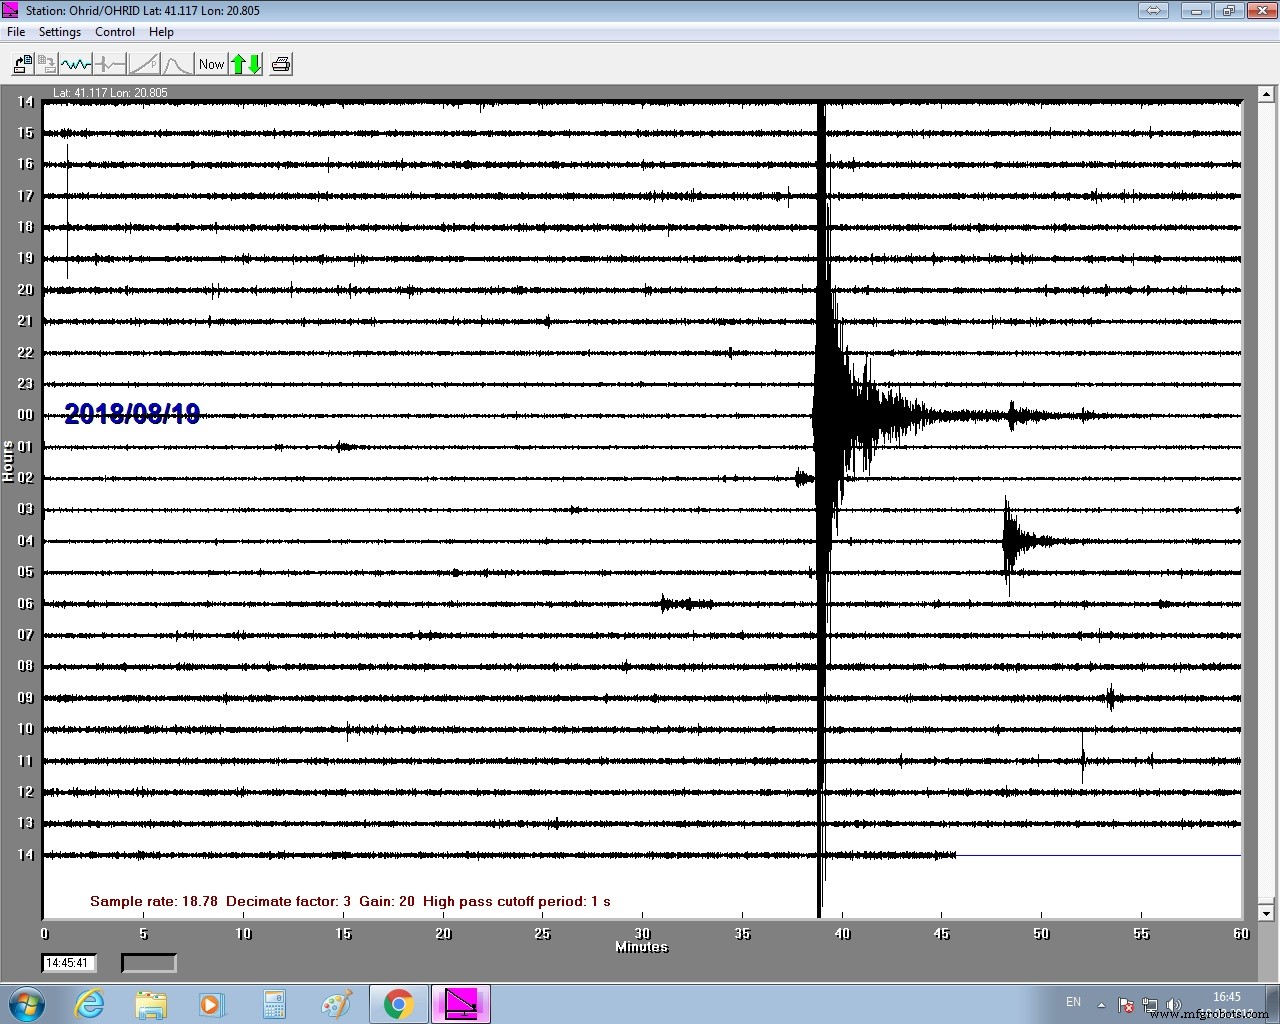
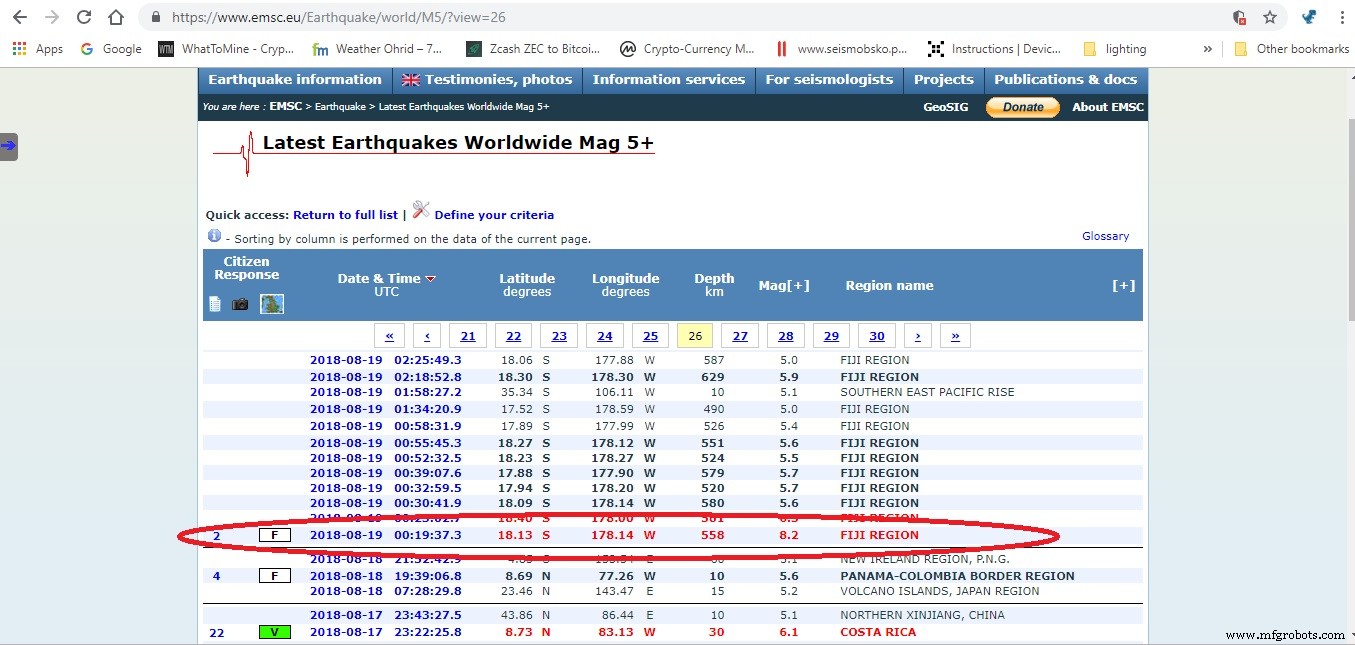
Above: Eartquake in FIJI region on 19.08.2018 , thousand miles away
Code
- code
codeArduino
No preview (download only).
Schematics
Manufacturing process
- Build an Italian Word Clock with Arduino Nano, NeoPixel, LCD, and RTC
- Build a Reliable Sigfox kWh Meter with Arduino MKR Fox 1200
- Bluetooth-Enabled Temperature Monitor with Arduino Nano
- Touch‑Free Gesture Lock: Secure Access with APDS‑9960 and Arduino
- Arduino Nano Companion Kit – Essential Components & Tools for DIY Electronics
- USB MIDI Adapter Kit for Arduino Micro / Leonardo – Complete Parts List
- Build a TV Output Cable for Arduino UNO with Just Two Resistors
- Smart Arduino-Driven Automatic Watering System
- Build a Polyphonic Avengers Theme Player with Arduino UNO
- DIY Micro Soldering Station: Build a Compact Arduino-Compatible Setup