


Install Python and PyCharm on Windows: Step‑by‑Step Guide
PyCharm, developed by JetBrains, is a cross‑platform IDE that equips developers with everything needed for efficient Python programming. In this guide you’ll learn how to install both Python and the free PyCharm Community Edition on a Windows machine.
Below is a detailed, easy‑to‑follow process.
Install Python on Windows
Follow these steps to download and install the latest Python release:
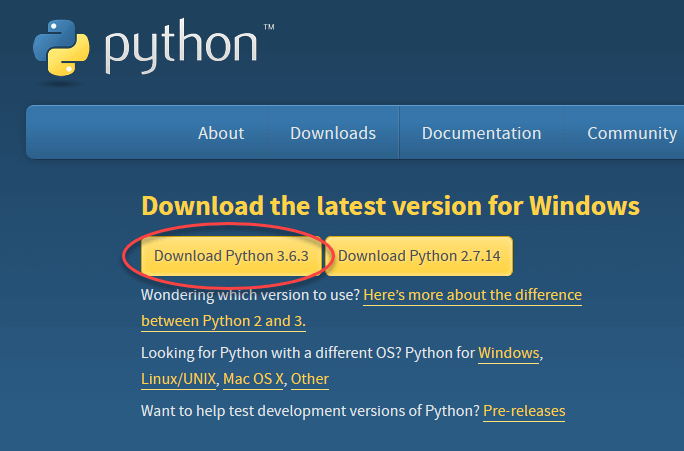
Step 1: Go to the official Python download page at https://www.python.org/downloads/ and select the version that best suits your needs. For illustration, we’ll use Python 3.6.3.
Step 2: After the download finishes, run the .exe installer. On the first screen, click Install Now.
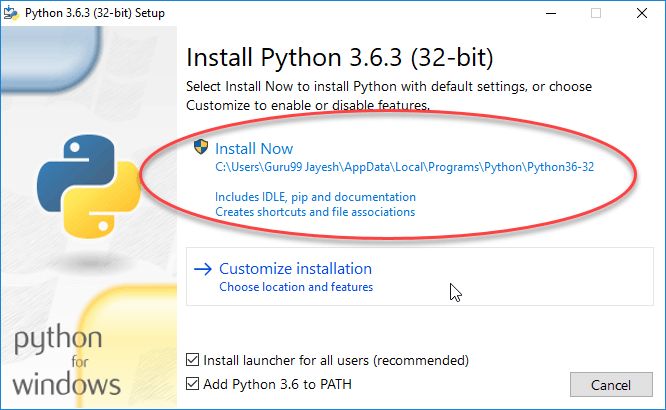
Step 3: Watch Python install. It will automatically add the executable to your system PATH.
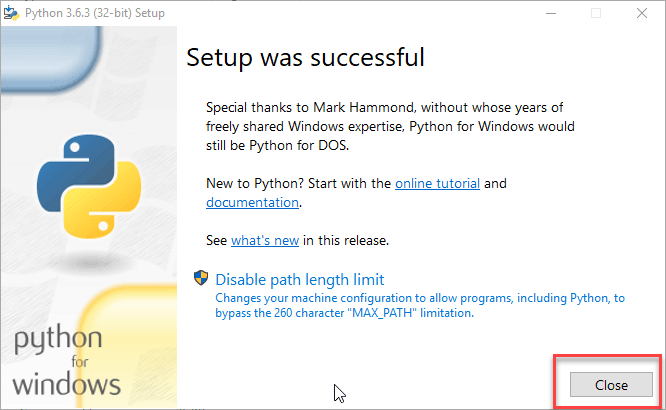
Step 4: When installation completes, a success screen will appear. Click Close to exit the installer.
Install PyCharm on Windows
Now let’s install the PyCharm Community Edition.
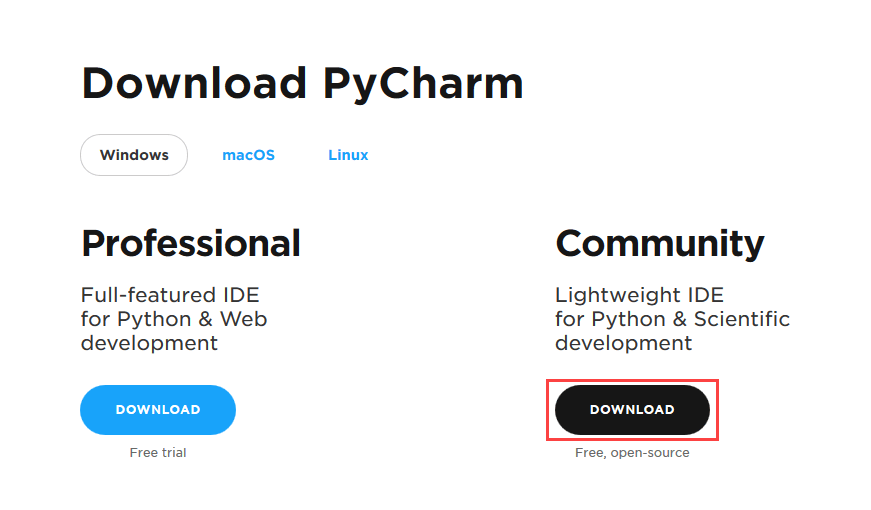
Step 1: Visit the JetBrains download page at https://www.jetbrains.com/pycharm/download/ and click the DOWNLOAD button under the Community section.
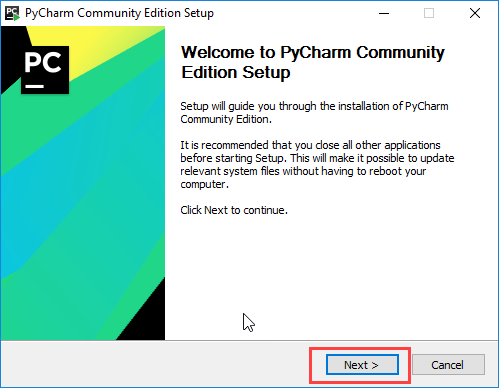
Step 2: Once the installer (.exe) is downloaded, launch it. The setup wizard will appear—click Next.
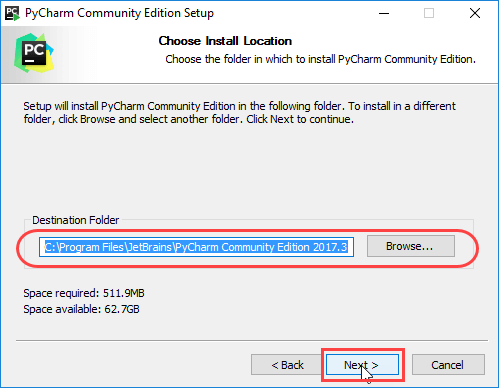
Step 3: If you wish, modify the installation path. Then click Next.
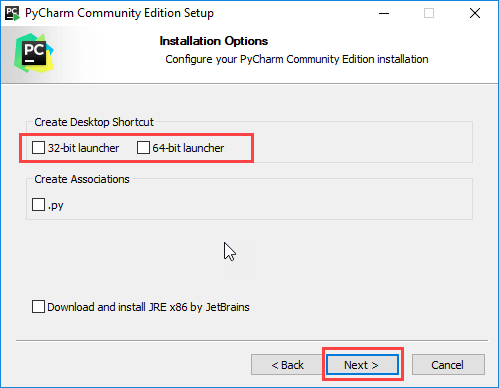
Step 4: Decide whether to create a desktop shortcut. Click Next when ready.
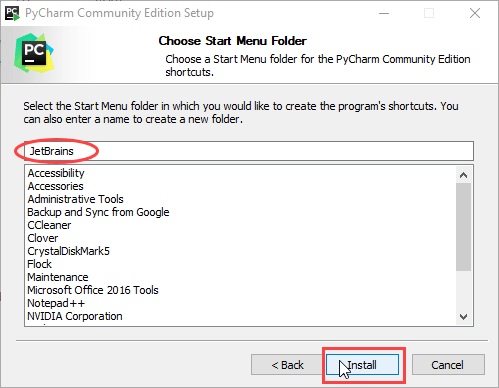
Step 5: Select the start menu folder (JetBrains is the default). Click Install to begin.
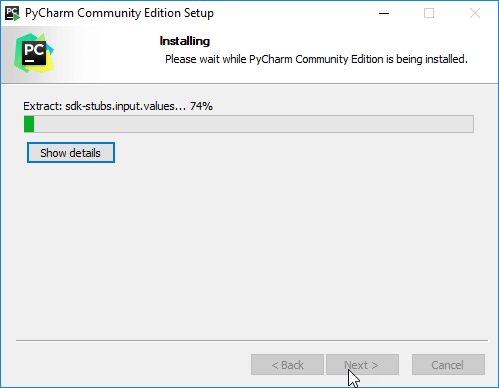
Step 6: Wait for the installation to finish. The progress bar will indicate completion.
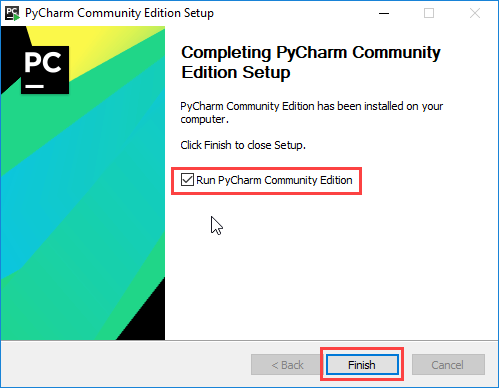
Step 7: A final screen will confirm that PyCharm is installed. If you wish to launch it immediately, check the Run PyCharm Community Edition box and click Finish.
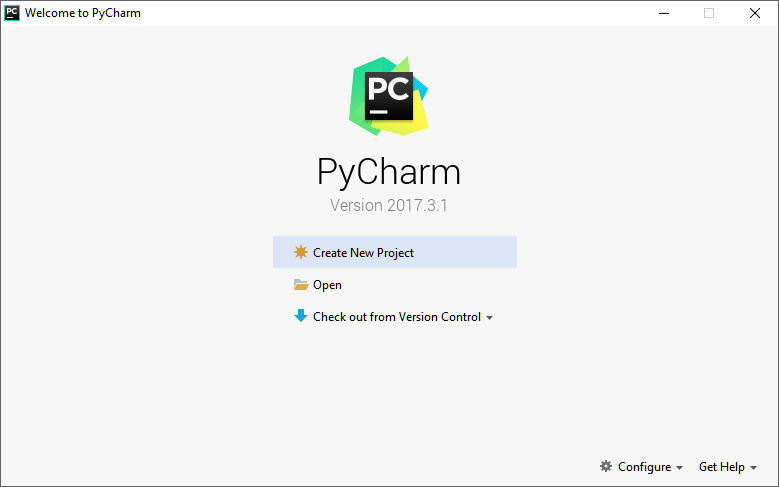
Step 8: After clicking Finish, you will see a welcome screen. From here you can create a new project or open an existing one.
Congratulations! You now have Python and PyCharm installed on your Windows system, ready for coding.
Python
- Getting Started with Python: Install, Run, and Write Your First Program
- Retrieve Current Date and Time in Python: A Practical Guide
- Installing Dev‑C++ on Windows: Step‑by‑Step Guide
- Installing Visual Studio 2019 Community Edition for C# Development on Windows
- How to Install GCC Compiler on Windows, macOS, and Linux: A Step‑by‑Step Guide
- How to Download and Install Java JDK 8 on Windows 10 (64‑Bit) – Step‑by‑Step Guide
- Step‑by‑Step Guide: Downloading and Installing Eclipse IDE for Java
- Python Print() Function: A Practical Guide with Examples
- Calculating Averages in Python: A Practical Guide
- Avoiding Common Pitfalls: Proper Exception Handling in Python